
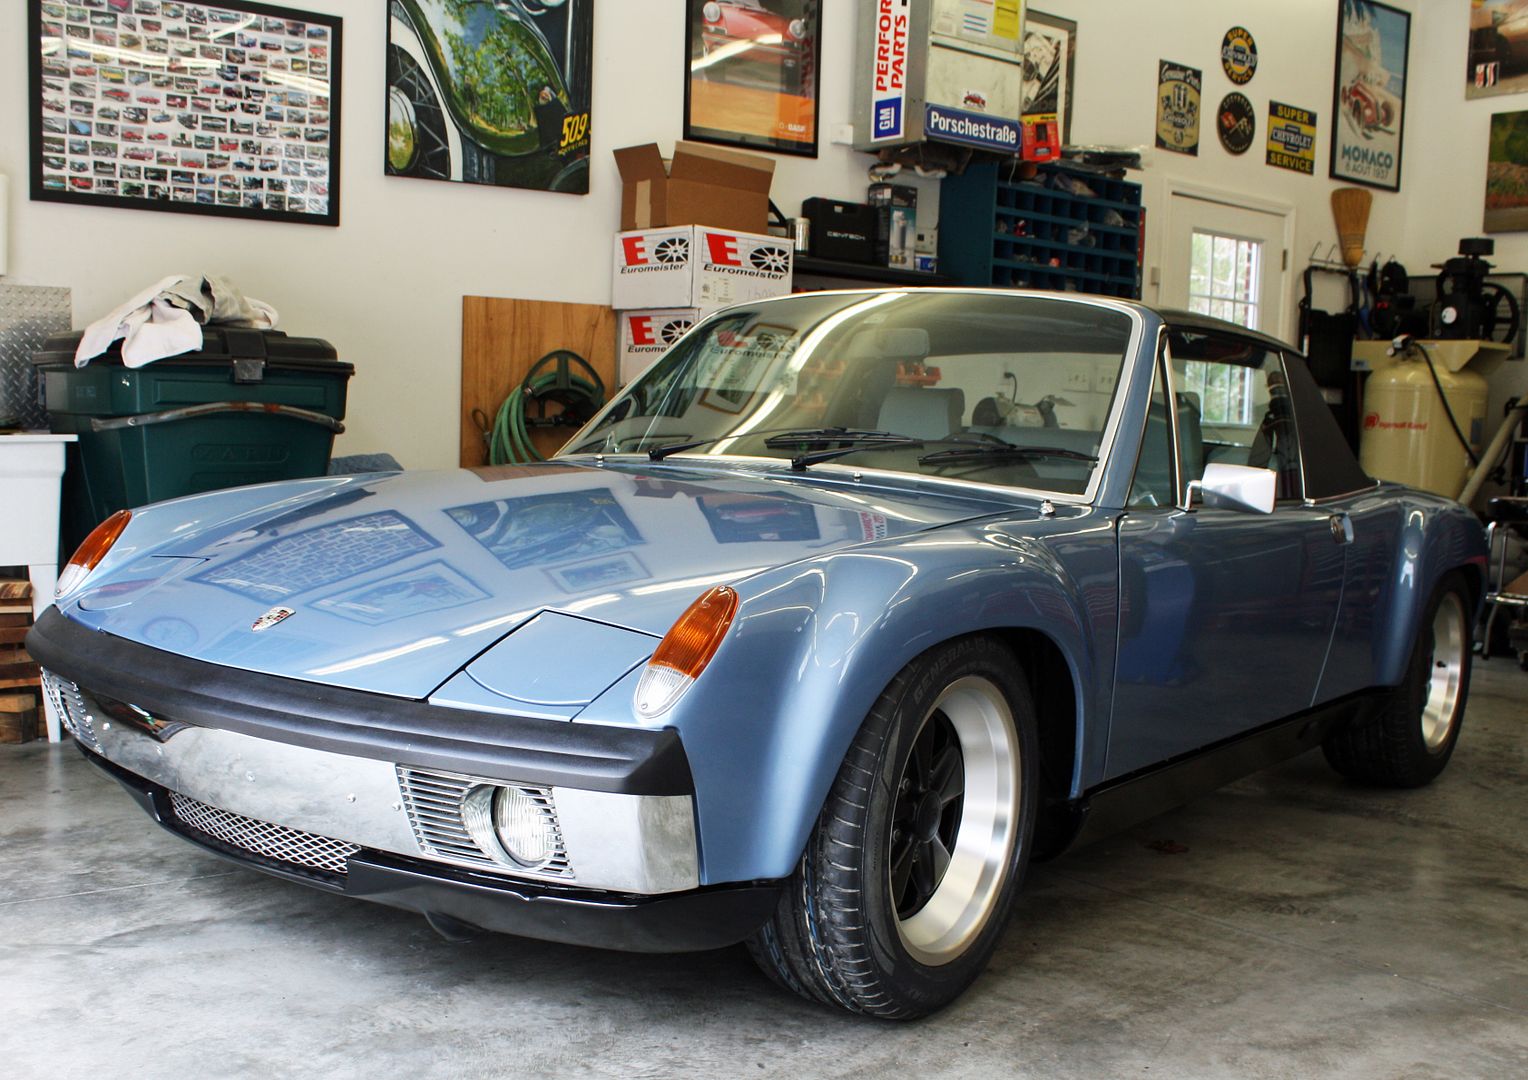
Projects on my new, to me, 1974 914-6
 12-14-2018, 10:51 PM
#136
Racer
Thread Starter

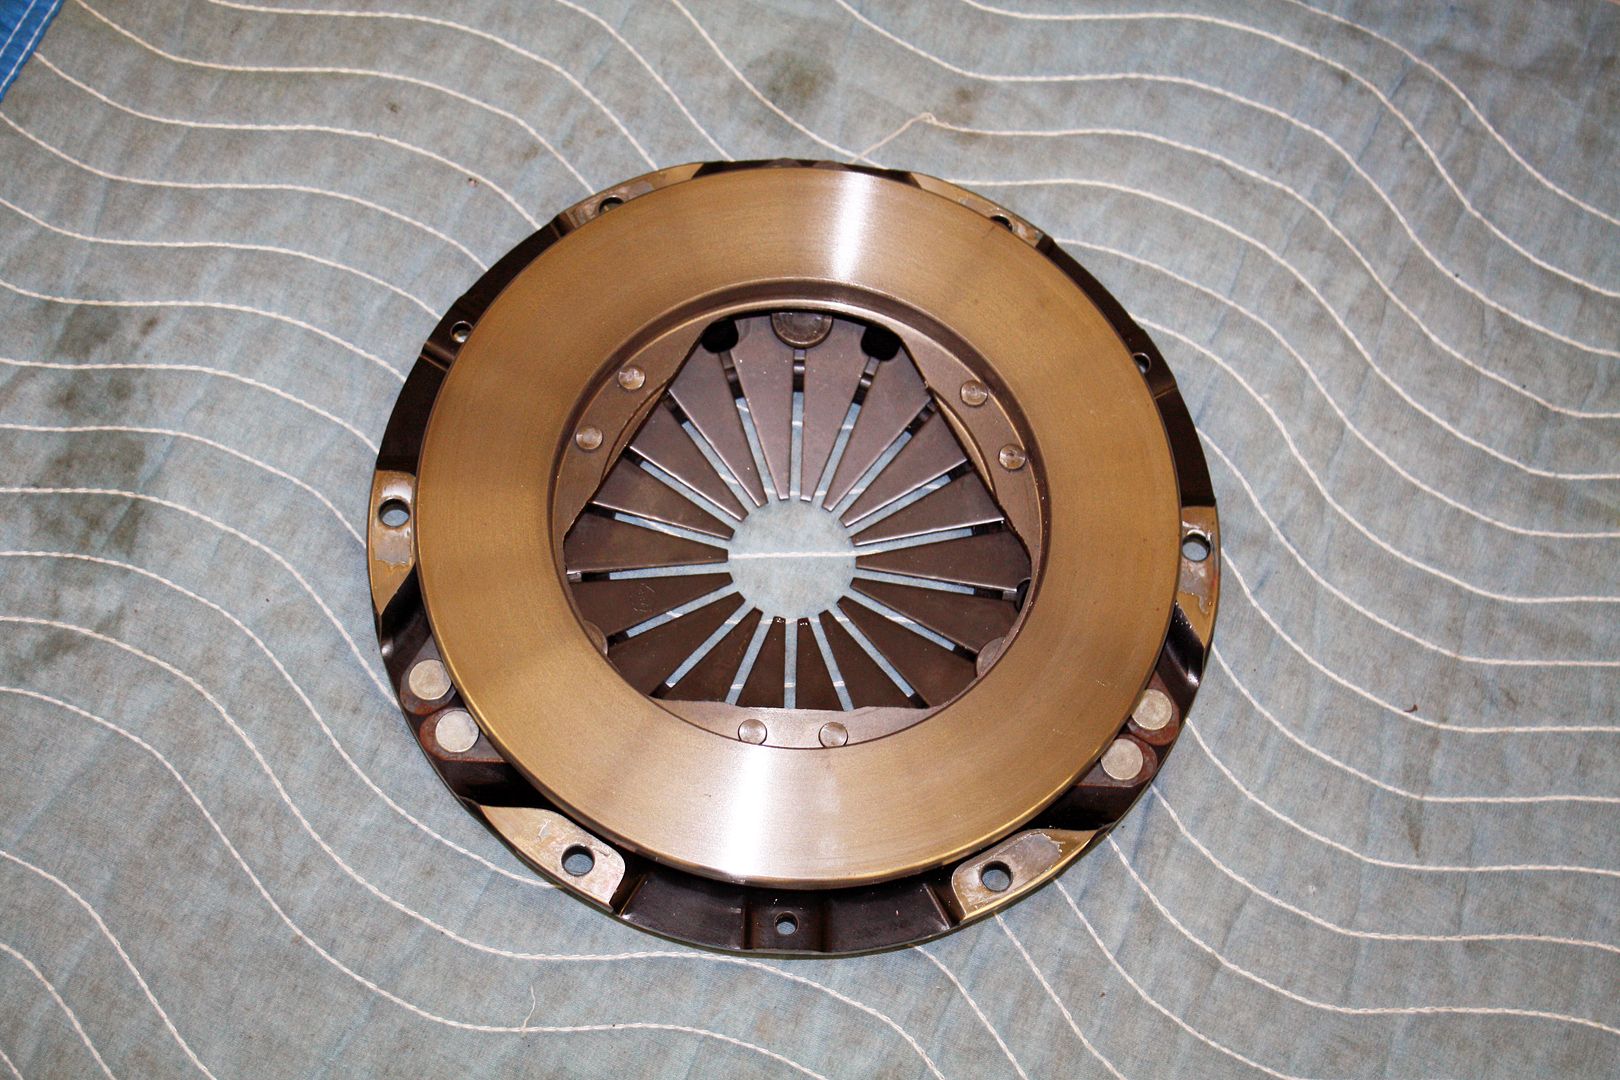
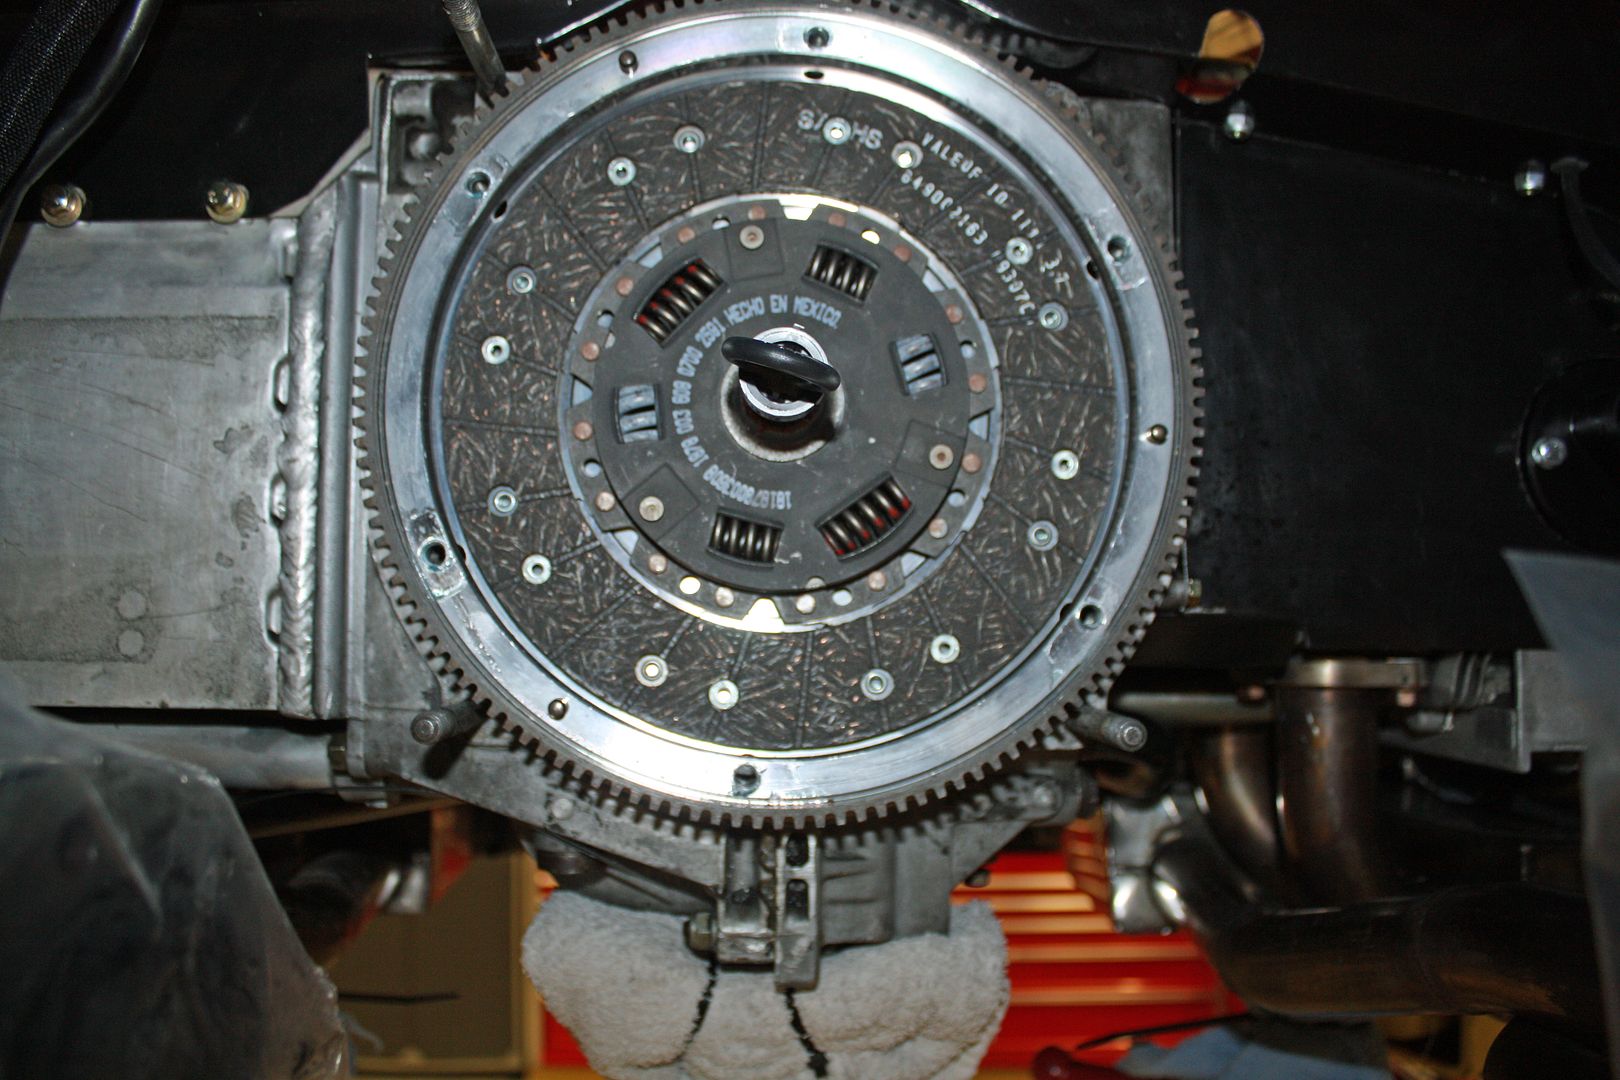
Another frustrating day. I removed the pressure plate and clutch as advised by Brett at Kennedy.
As any of you know who have a 911 engine in your 914, getting to the crank pulley bolt is difficult. Once I got the 19mm wrench on the bolt, I wedged a small board in between the wrench and the tin to hold it in place. Since the wrench is short, to increase leverage, I used a box end wrench over the open end of the wrench. I climbed into the trunk and was able to get a good pull on it but the motor did not budge, even with the plugs out. I had the plugs in when I did the valve adjustment and the effort wasn't terrible, albeit with a longer wrench. With the plugs out, it should have moved.
I called Brett at Kennedy to let him know what had happened. He wanted photos. I got out my inspection camera. It has a feature I had never used. You can take photos or videos with it. I snapped a bunch of photos and sent them to Brett.
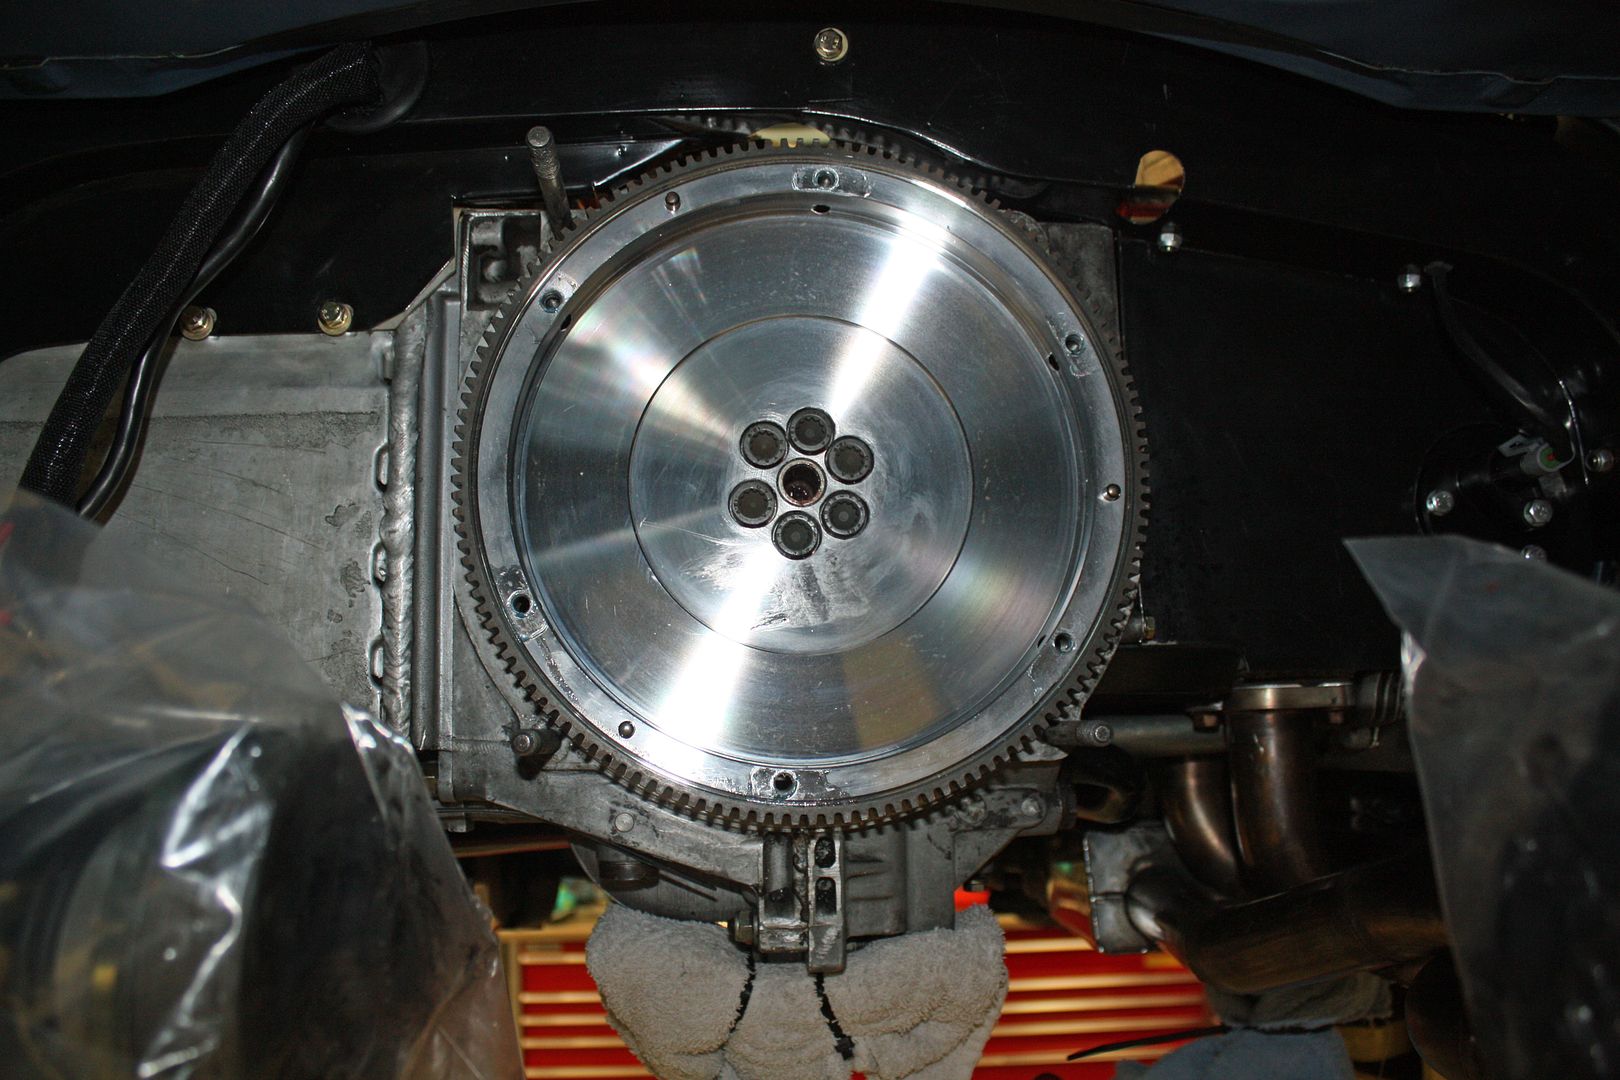
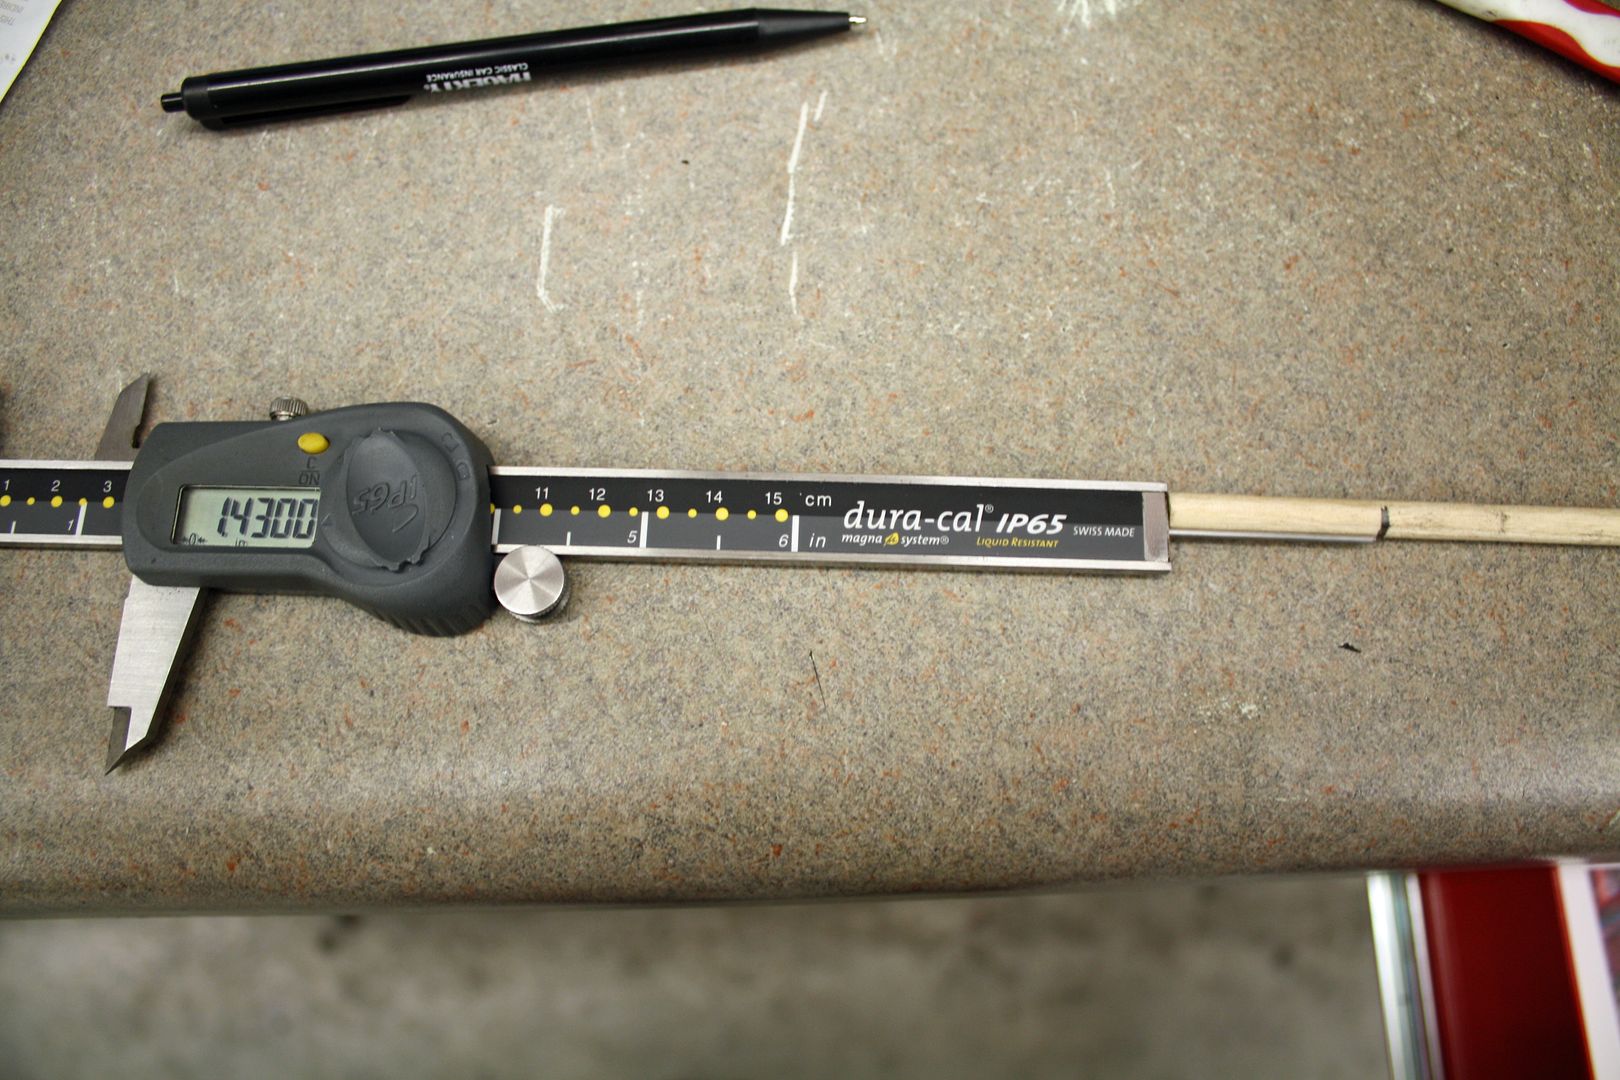
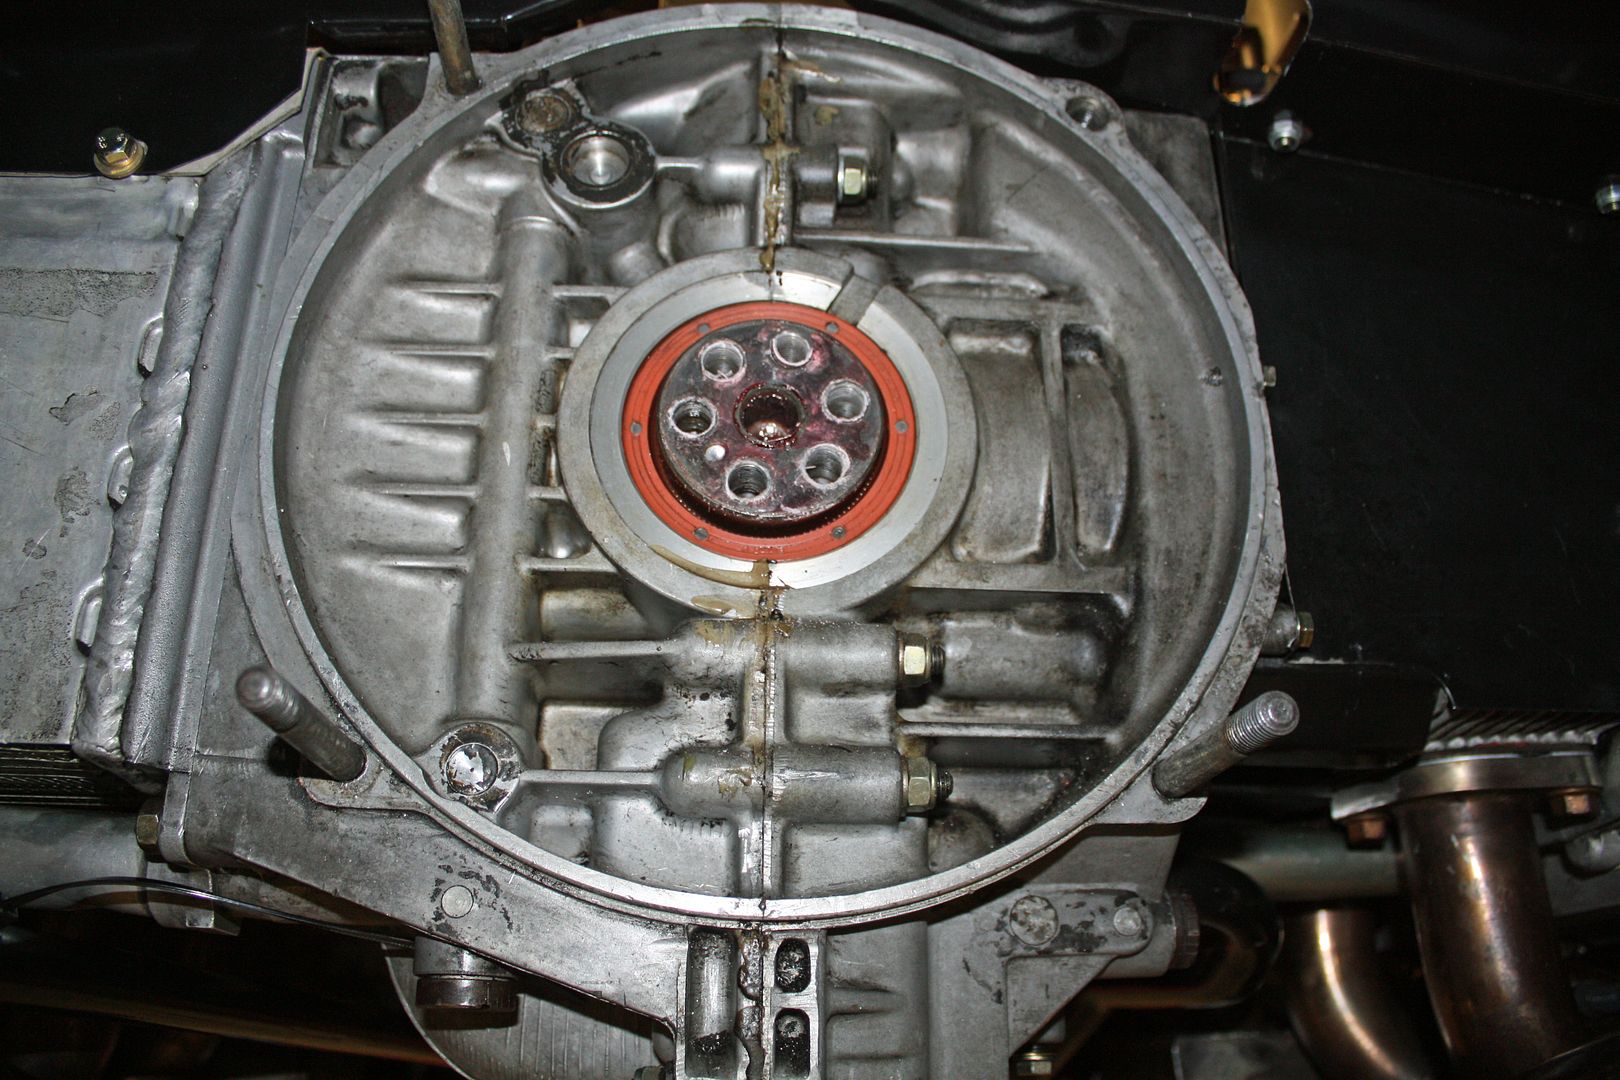
After looking at the photos, he could not see a clearance issue. He then asked me to measure the depth from the ring gear to the surface where the starter is mounted. It should be exactly 1.43" Since I did not have a lot of room to get a ruler in that hole and be able to read it, I took a piece of dowel and marked 1.43" on it. I then stuck the dowel into the hole. That mark came out exactly to the surface so the ring gear was in the correct position. This also means the crank is in the correct position. He has seen the crank protrude a bit causing everything else to be off.
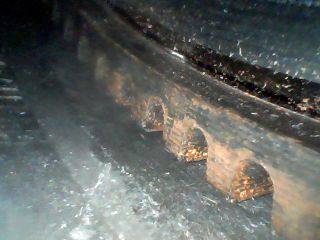
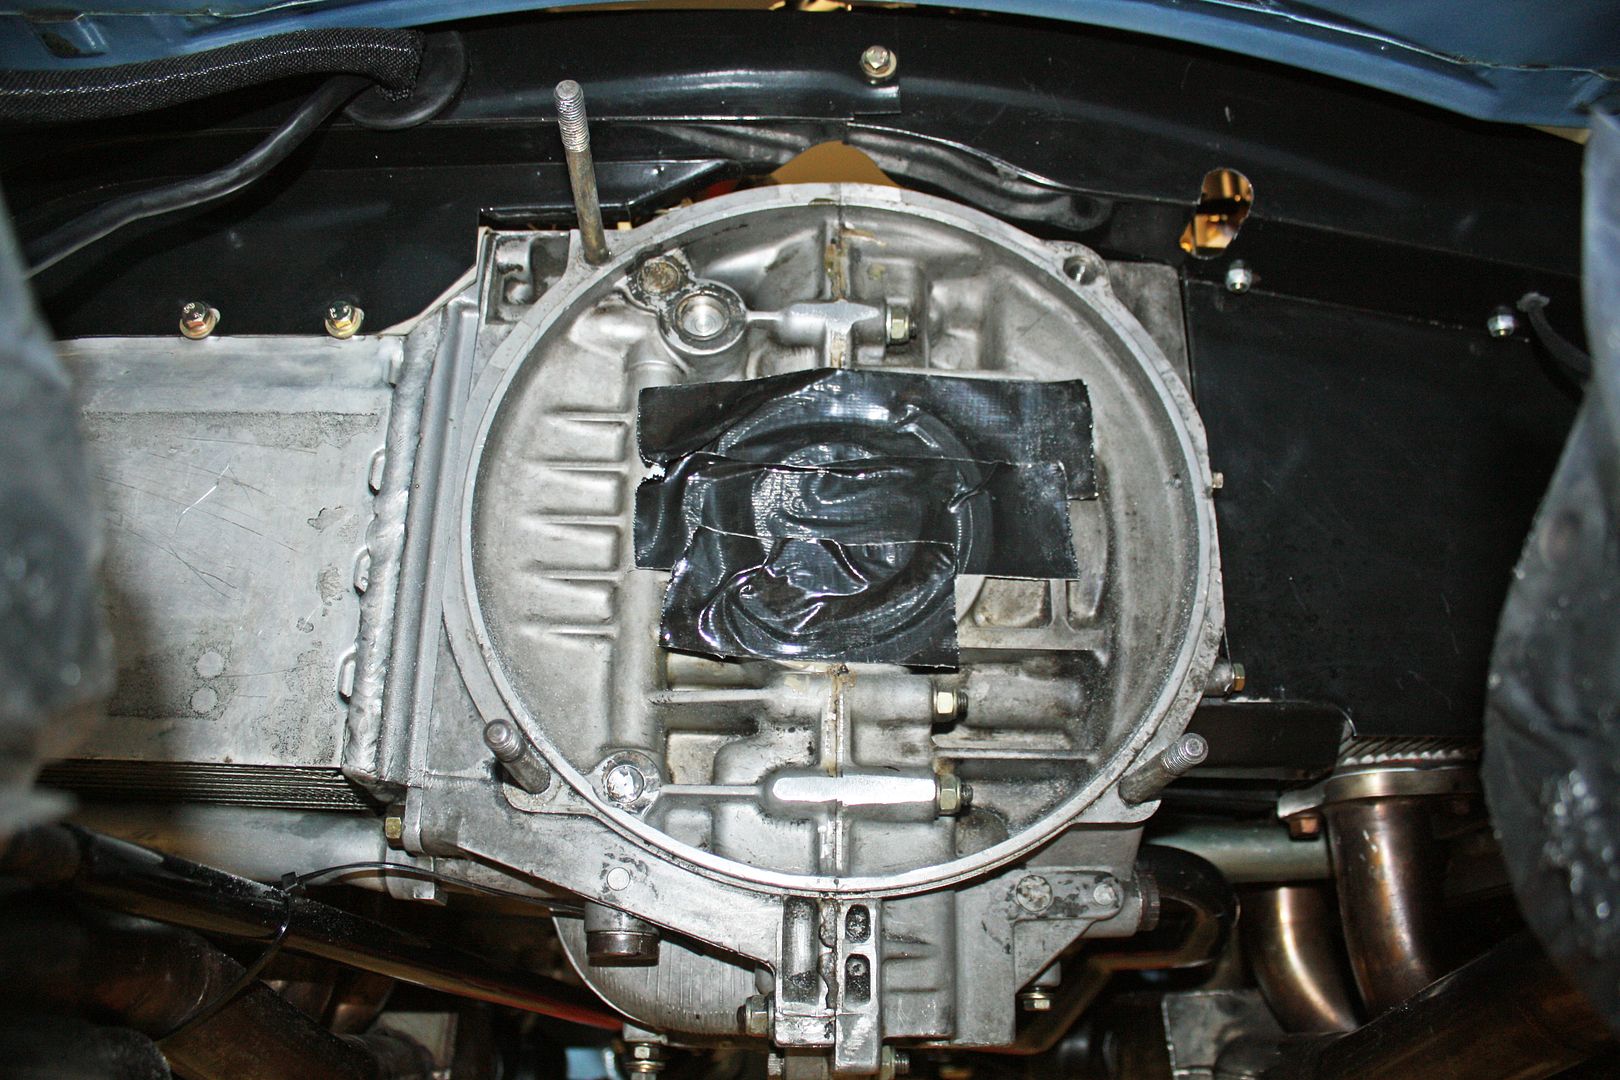
Now we are wondering if the outside of the ring gear is hitting the transmission housing anywhere. The most likely places are the bosses at the bolt holes. Brett recommended placing clay at these positions and then see if they are disturbed when the transmission is in place. I didn't have any clay but I did have some strip putty. I placed it in these areas, slid the transmission in place and none of them were disturbed.
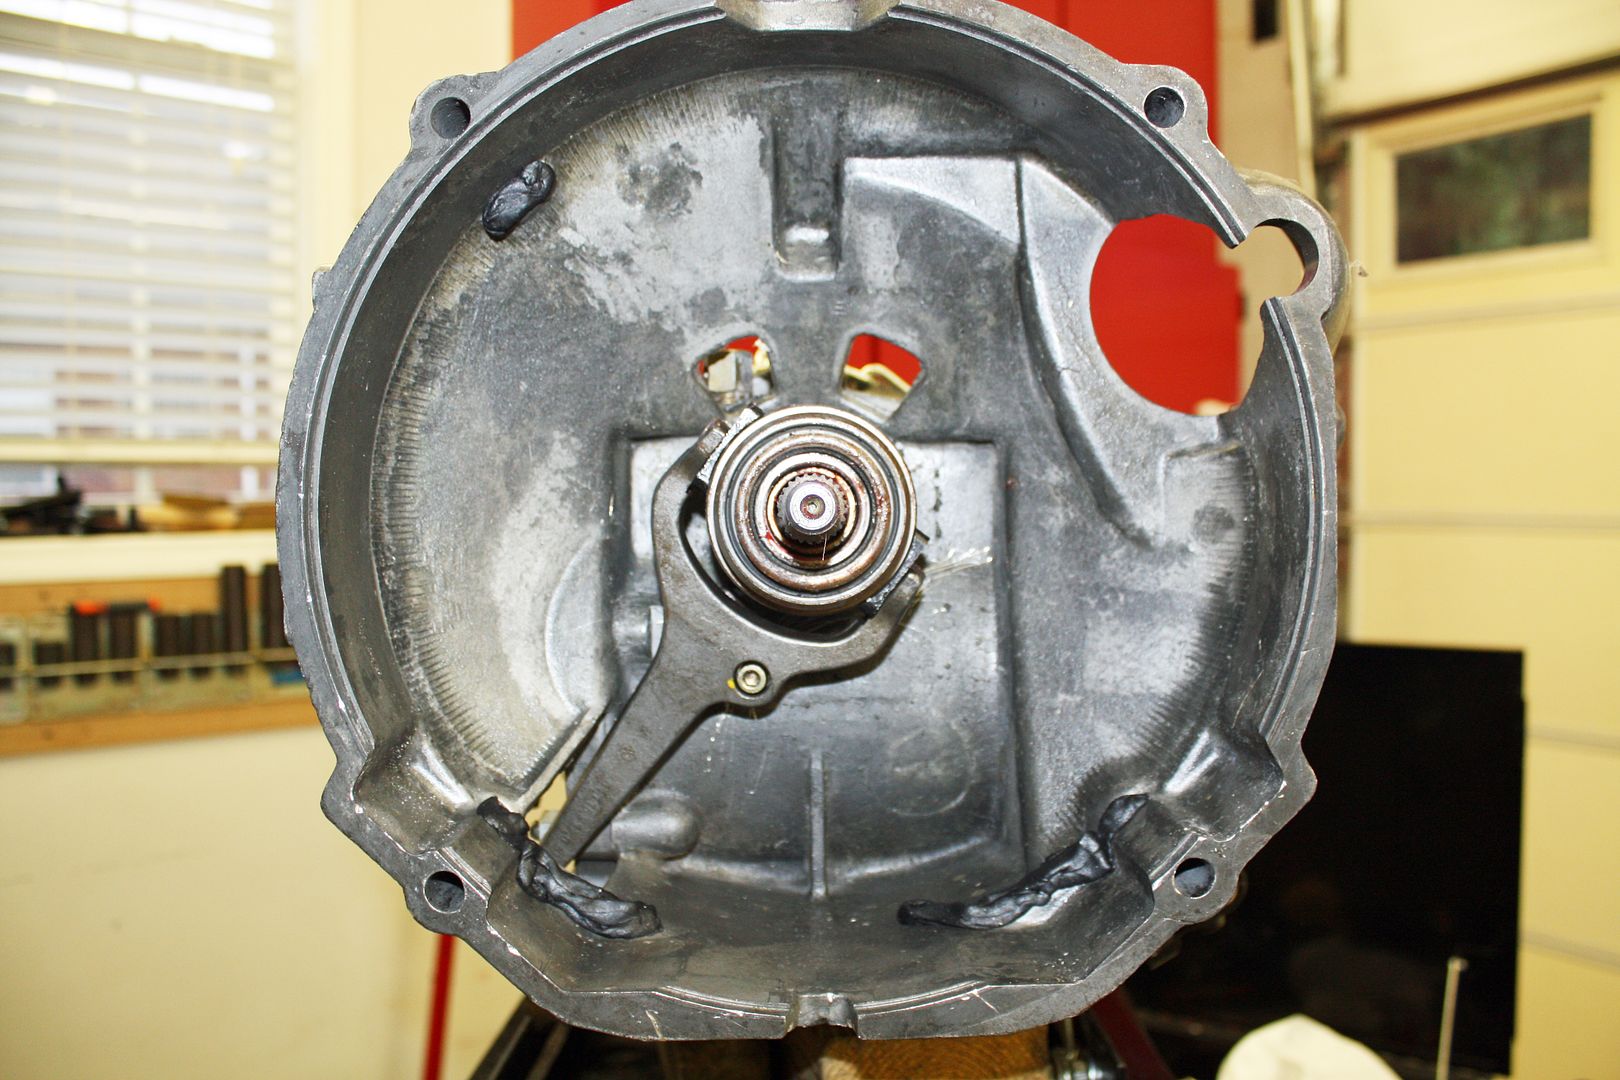
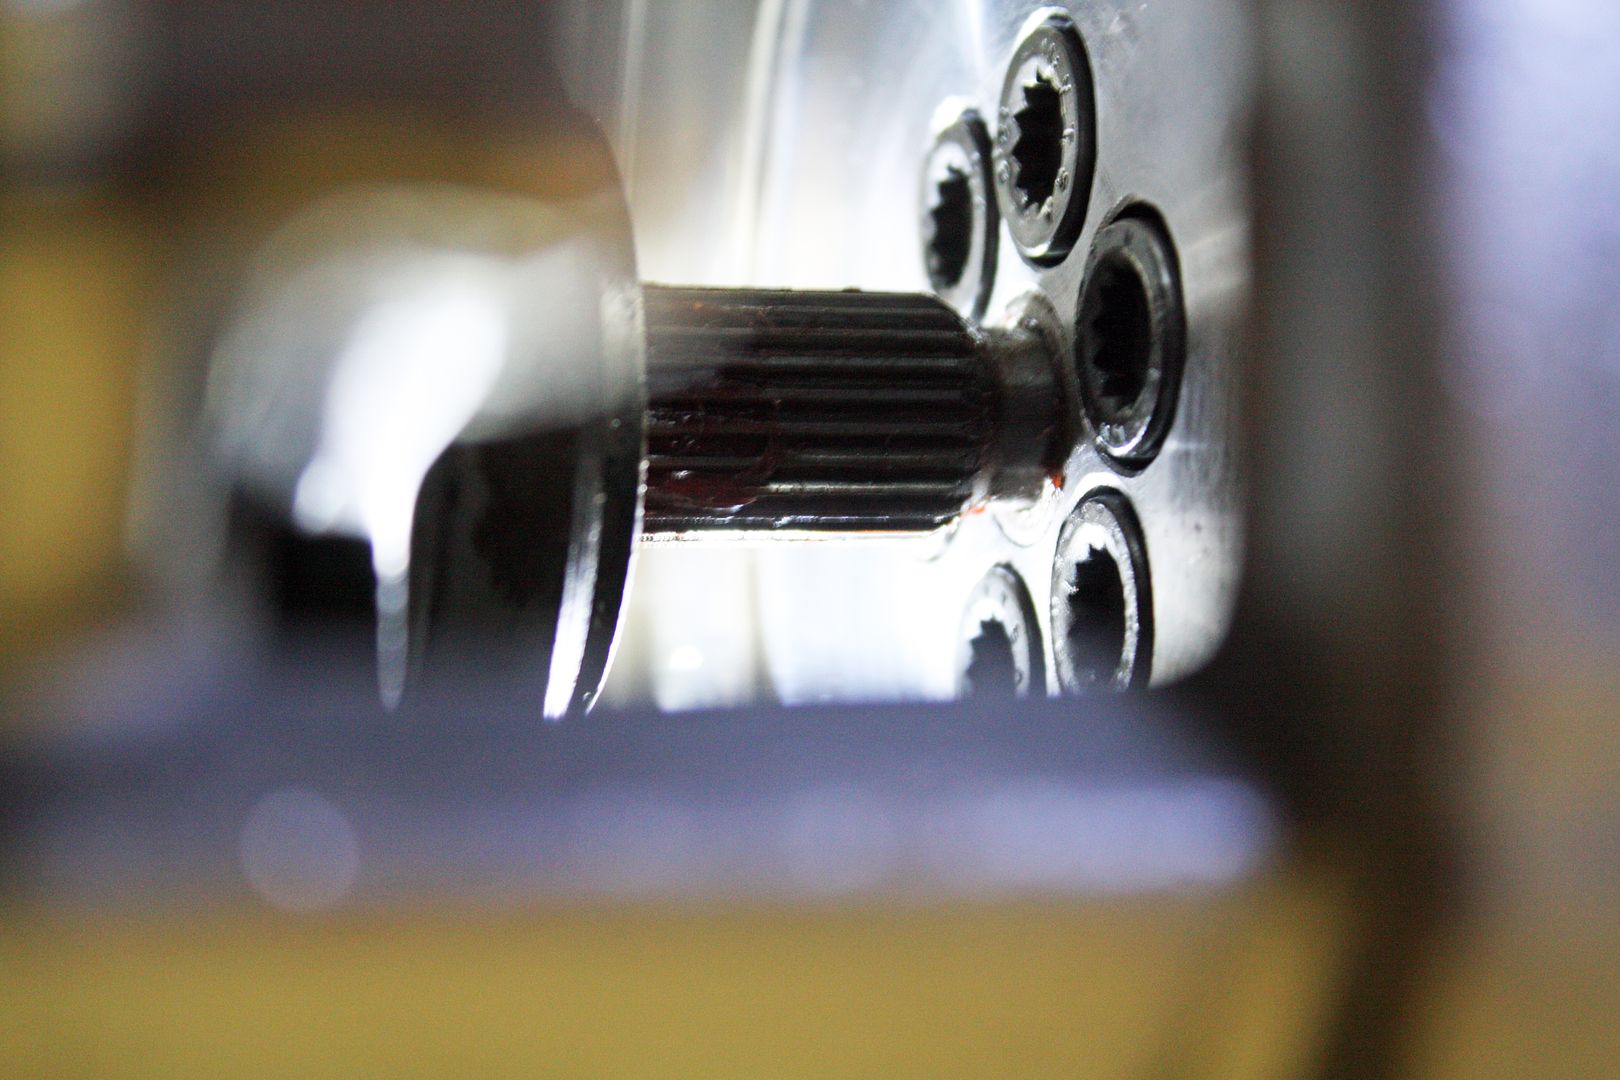
He then asked if the transmission shaft was bottoming out in the flywheel. I had taken a photo earlier of that area and it was apparent that it was not bottoming out. In fact I asked Brett if he thought it was engaged enough. He asked if it extended fully into the pilot bearing. With the transmission out, I could see a grease mark on the shaft. I measured that and it did extend fully into the pilot bearing.
At this point, Brett can't understand why it is locking up. He said that, in the past they did have some issues with the backside of the flywheel hitting the bosses on the engine block. But since the flywheel turns freely with a pry bar when the transmission is not in place, that ruled out that issue. The last conversation we had was for me to remove the flywheel and see if anything does show up on the rear of it. He also said that if I sent the flywheel to him, he would check to make sure it in spec.
At this point, one thing I had not done was try the starter with no clutch in place. CLUNK!!
I had sent my son a link to this thread beginning last week to show him how much fun I was having. His response was to be thankful I had a furnace and a lift!!
I called him this evening to discuss this. He is coming over in the morning. He is a better troubleshooter than me and, at this point, another set of eyes can't hurt.
I can't imagine that it could be the solution, but I am going to look at the early photos I took of the engine with the wiring harness in place to see if I am missing a hookup somewhere that is causing some issue. As I was doing the original wiring, I could only see a 12v lead from the alternator, the power lead from the battery, and a yellow wire that I have been putting on one of the spades on the starter. Am I missing something?
Very frustrating week!!!


As any of you know who have a 911 engine in your 914, getting to the crank pulley bolt is difficult. Once I got the 19mm wrench on the bolt, I wedged a small board in between the wrench and the tin to hold it in place. Since the wrench is short, to increase leverage, I used a box end wrench over the open end of the wrench. I climbed into the trunk and was able to get a good pull on it but the motor did not budge, even with the plugs out. I had the plugs in when I did the valve adjustment and the effort wasn't terrible, albeit with a longer wrench. With the plugs out, it should have moved.

I called Brett at Kennedy to let him know what had happened. He wanted photos. I got out my inspection camera. It has a feature I had never used. You can take photos or videos with it. I snapped a bunch of photos and sent them to Brett.

After looking at the photos, he could not see a clearance issue. He then asked me to measure the depth from the ring gear to the surface where the starter is mounted. It should be exactly 1.43" Since I did not have a lot of room to get a ruler in that hole and be able to read it, I took a piece of dowel and marked 1.43" on it. I then stuck the dowel into the hole. That mark came out exactly to the surface so the ring gear was in the correct position. This also means the crank is in the correct position. He has seen the crank protrude a bit causing everything else to be off.

Now we are wondering if the outside of the ring gear is hitting the transmission housing anywhere. The most likely places are the bosses at the bolt holes. Brett recommended placing clay at these positions and then see if they are disturbed when the transmission is in place. I didn't have any clay but I did have some strip putty. I placed it in these areas, slid the transmission in place and none of them were disturbed.

He then asked if the transmission shaft was bottoming out in the flywheel. I had taken a photo earlier of that area and it was apparent that it was not bottoming out. In fact I asked Brett if he thought it was engaged enough. He asked if it extended fully into the pilot bearing. With the transmission out, I could see a grease mark on the shaft. I measured that and it did extend fully into the pilot bearing.

At this point, Brett can't understand why it is locking up. He said that, in the past they did have some issues with the backside of the flywheel hitting the bosses on the engine block. But since the flywheel turns freely with a pry bar when the transmission is not in place, that ruled out that issue. The last conversation we had was for me to remove the flywheel and see if anything does show up on the rear of it. He also said that if I sent the flywheel to him, he would check to make sure it in spec.
At this point, one thing I had not done was try the starter with no clutch in place. CLUNK!!
I had sent my son a link to this thread beginning last week to show him how much fun I was having. His response was to be thankful I had a furnace and a lift!!
I called him this evening to discuss this. He is coming over in the morning. He is a better troubleshooter than me and, at this point, another set of eyes can't hurt.
I can't imagine that it could be the solution, but I am going to look at the early photos I took of the engine with the wiring harness in place to see if I am missing a hookup somewhere that is causing some issue. As I was doing the original wiring, I could only see a 12v lead from the alternator, the power lead from the battery, and a yellow wire that I have been putting on one of the spades on the starter. Am I missing something?
Very frustrating week!!!


 12-15-2018, 05:09 PM
#138
Racer
Thread Starter
The first thing my son and I did was to use jumper cables from his car ( he drove his 700hp LS turbo motor 1979 El Camino) directly to the starter. CLUNK!! He said there were big sparks when I turned the ignition to start!!
Matt tried to turn the motor on the crank pulley and could not get it to move. But I could use the pry bar and make the motor rotate. However, Matt thought it did not move as freely as it should. So we removed the flywheel. A sign of what we would find was indicated by the fact that we did not have to use a flywheel lock to loosen the flywheel bolts.
We could see immediately see where the flywheel was hitting the lower boss on the engine block. We ground away some of the affected boss as well as the upper boss and put it back together. We could rotate the motor by hand by rotating the flywheel with our hands. Matt wanted to get back to working on his car, so, after he left, I mounted the transmission to the engine and installed the starter. I climbed into the cockpit, turned the key and the engine cranked HURRAH!!!!!!!!!!!!!!!!!!!!!!!!!!!!!!!!!!!!!!!!!!!!!!!!!!!!!!!!!!!!!!!!!! !!!!!!!!!!
I spent the rest of the afternoon mounting the transmission and installing the axles. I need to hook up all the cables, the shifter, re-install the spark plugs, etc. Once I have all that in place, I can troubleshoot the TPS issue. Hopefully, I will be starting the engine next week. Sure feels good to have found the problem. Thanks to all for your suggestions.
Matt tried to turn the motor on the crank pulley and could not get it to move. But I could use the pry bar and make the motor rotate. However, Matt thought it did not move as freely as it should. So we removed the flywheel. A sign of what we would find was indicated by the fact that we did not have to use a flywheel lock to loosen the flywheel bolts.
We could see immediately see where the flywheel was hitting the lower boss on the engine block. We ground away some of the affected boss as well as the upper boss and put it back together. We could rotate the motor by hand by rotating the flywheel with our hands. Matt wanted to get back to working on his car, so, after he left, I mounted the transmission to the engine and installed the starter. I climbed into the cockpit, turned the key and the engine cranked HURRAH!!!!!!!!!!!!!!!!!!!!!!!!!!!!!!!!!!!!!!!!!!!!!!!!!!!!!!!!!!!!!!!!!! !!!!!!!!!!


I spent the rest of the afternoon mounting the transmission and installing the axles. I need to hook up all the cables, the shifter, re-install the spark plugs, etc. Once I have all that in place, I can troubleshoot the TPS issue. Hopefully, I will be starting the engine next week. Sure feels good to have found the problem. Thanks to all for your suggestions.
12-18-2018, 06:25 PM
#139
Racer
Thread Starter
Since I was working on the car Friday and Saturday, my wife and I cleaned the house Sunday morning. After lunch, since it was such a beautiful day (sunny and low 60's), I decided to get the motorhome out of storage and begin loading it for our trip to Florida in a few weeks.
Yesterday morning, I received a message from my son asking if he could borrow some of our electrons for his 911 Tesla. He was heading our way and on over to a friend of mine, Tim, who has a body shop. Tim is going to be painting Matt's car. Since the car has had so little time on the road, Matt is being overly cautious on the range of the car. He has his Tesla charger now so it charges quite bit faster. I have a 220V plug in my garage that he used.
After about fifteen minutes of charging, we drove over to Tim's place. There was talk about how they were going to handle different things on the car. The plan is for Matt to take the car apart in January in preparation for Tim painting in in February. While we were there, he gave Tim a ride. Tim has a Vega drag car that does 6.3 in an eighth mile. So he is used to acceleration G's. But it is an all out race car. He was amazed at how the car laid him back in the seat. And soon it will be faster. Matt is planning on driving it to a Tesla tuner in HIckory, NC Tuesday to get an additional 50HP for a total of 500. For an extra $2,000 he could add 200 more HP.
I drove the car back to my house. It still drives like a 911 so it was very familiar. Once back out our house, Matt plugged in again. Once I got the clutch and throttle cables hooked up, Matt jumped into the car to press the pedals so I could do the adjusting under the car. We also re-installed the spark plugs.
Again, because of the complexity of the car, he was checking on the charging process continually. On one of those inspections, he saw that the charger had shut down. He had blown a 30 amp breaker. The draw is 50 amp and he assumed I had a 50 amp breaker on that line. To be able to continue charging, he adjusted the charger on the car so it would only draw 30 amp.
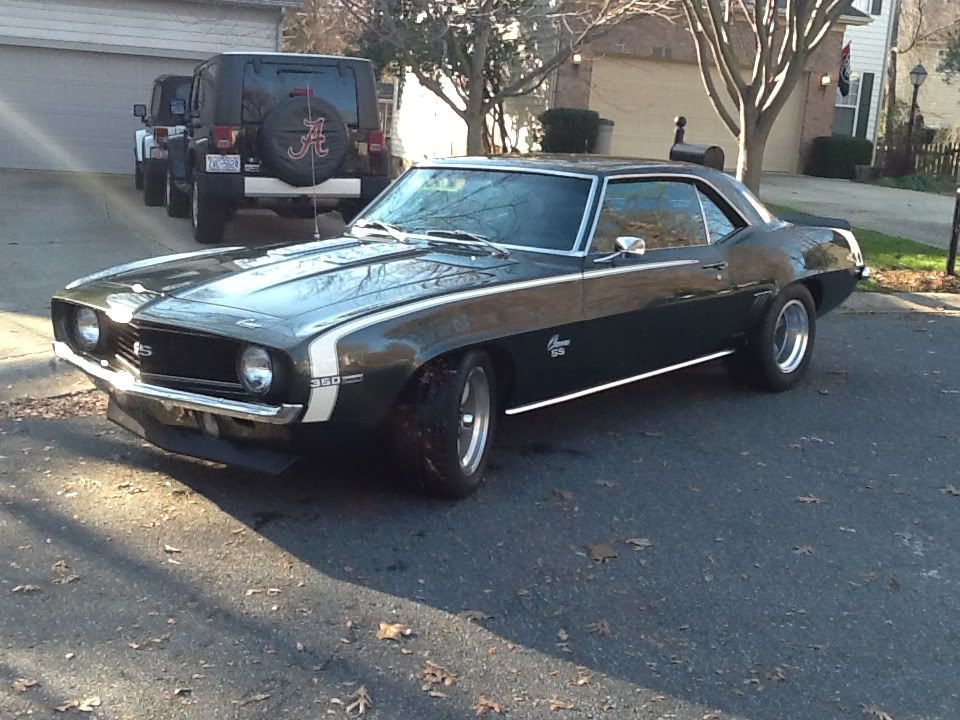
I had mentioned to Matt that the TPS wasn't alive on the car. Years ago Matt built a fuel injection system from scratch for his '69 Camaro. He sold this car this year to fund the Tesla project. He worked for Michelin for 12 years designing race tires. Michelin sent him to France for three years so he could learn the "Michelin Way". While he was over there, I stored his Camaro in my garage. He called me one day to ask if I would take some measurements under the hood.
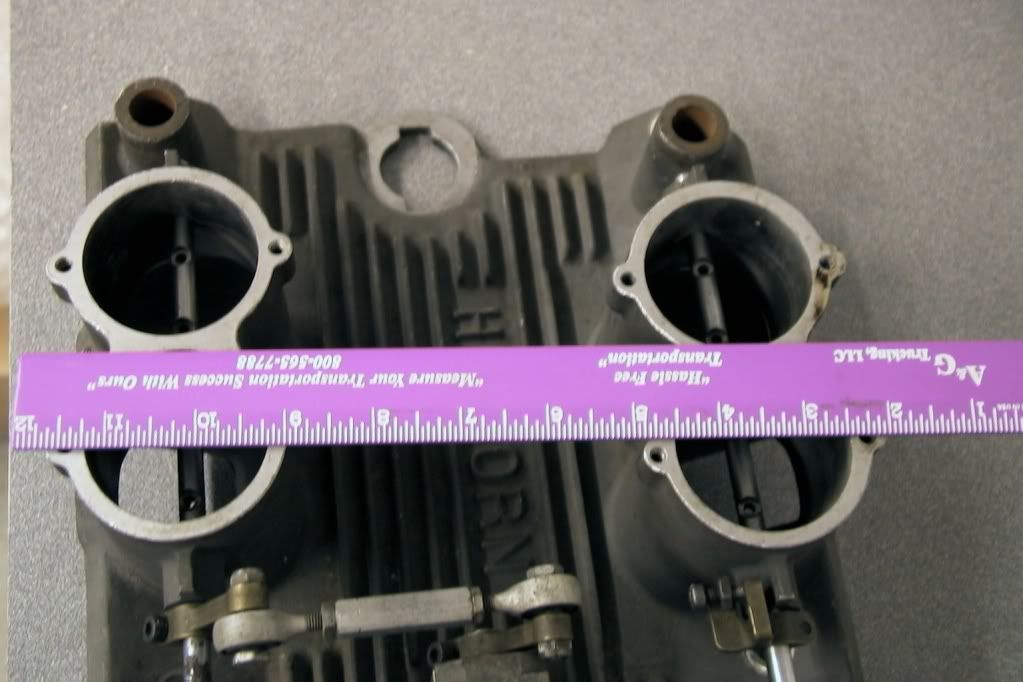
He had bought a Hilborn intake manifold on eBay which he had shipped me. He was going to use motorcycle fuel injectors and other parts he scrounged to make this system. Part of the system was an air box he was going to make out of carbon fiber. He also made the intake horns from carbon fiber as well. He needed the under hood measurements and measurements of the intake to figure out the dimension fo the air box. After measuring the manifold I shipped it to a Michelin colleague who was going to France soon and would take the manifold with him in his suitcase. When Matt arrived back in the states with the air box, he only had to make one small cut to one the hood braces for clearance.
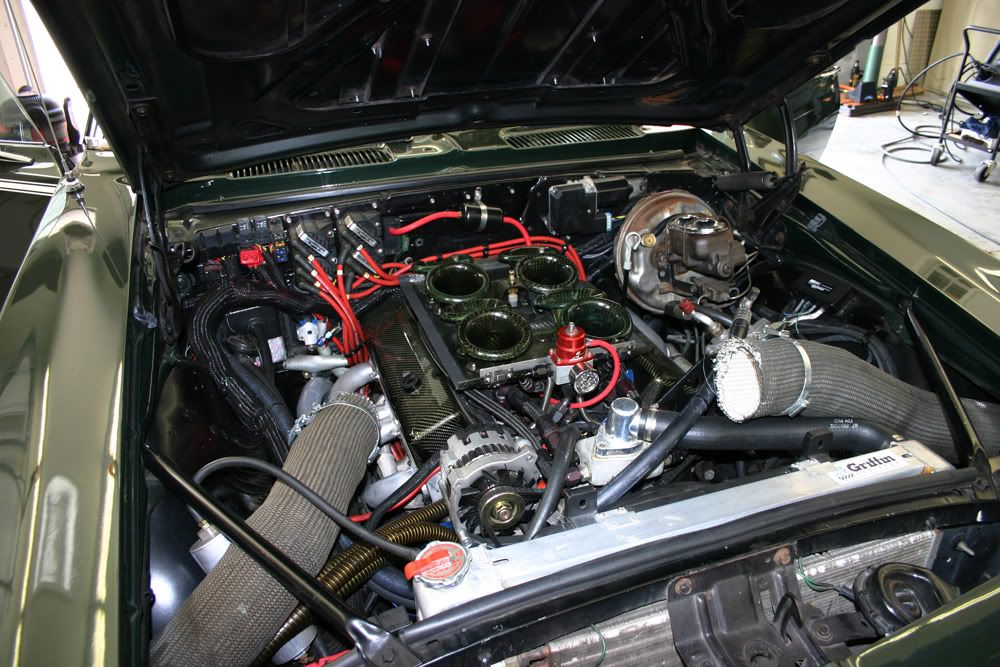
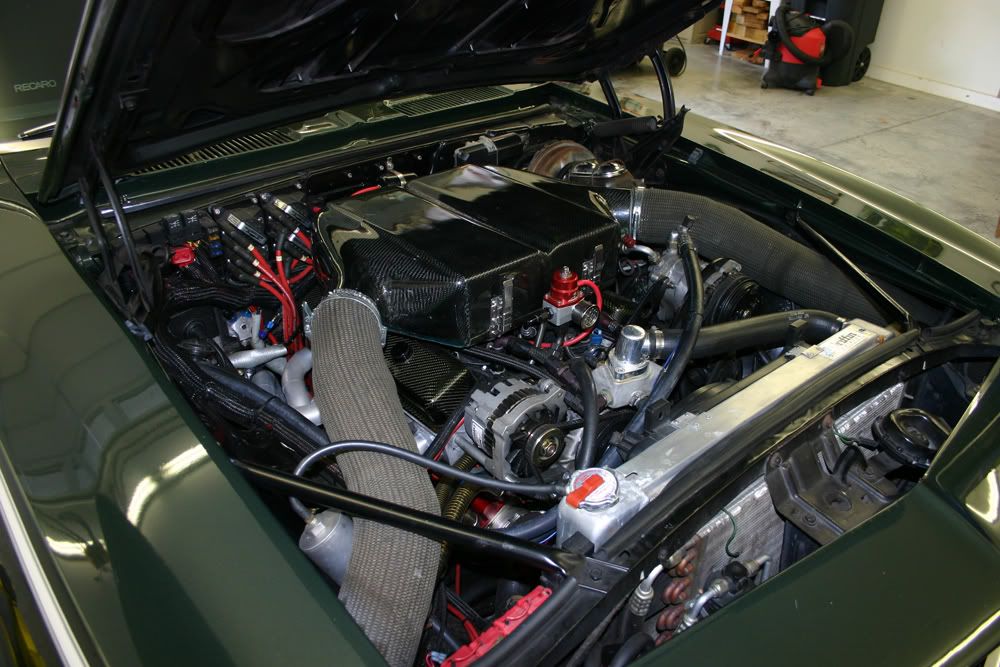
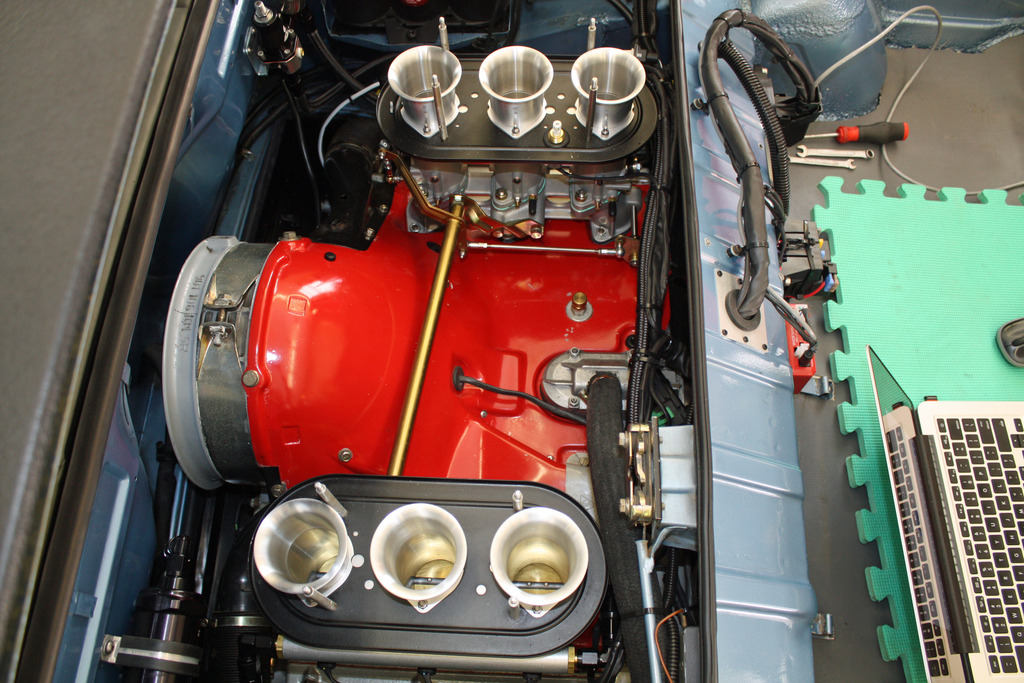
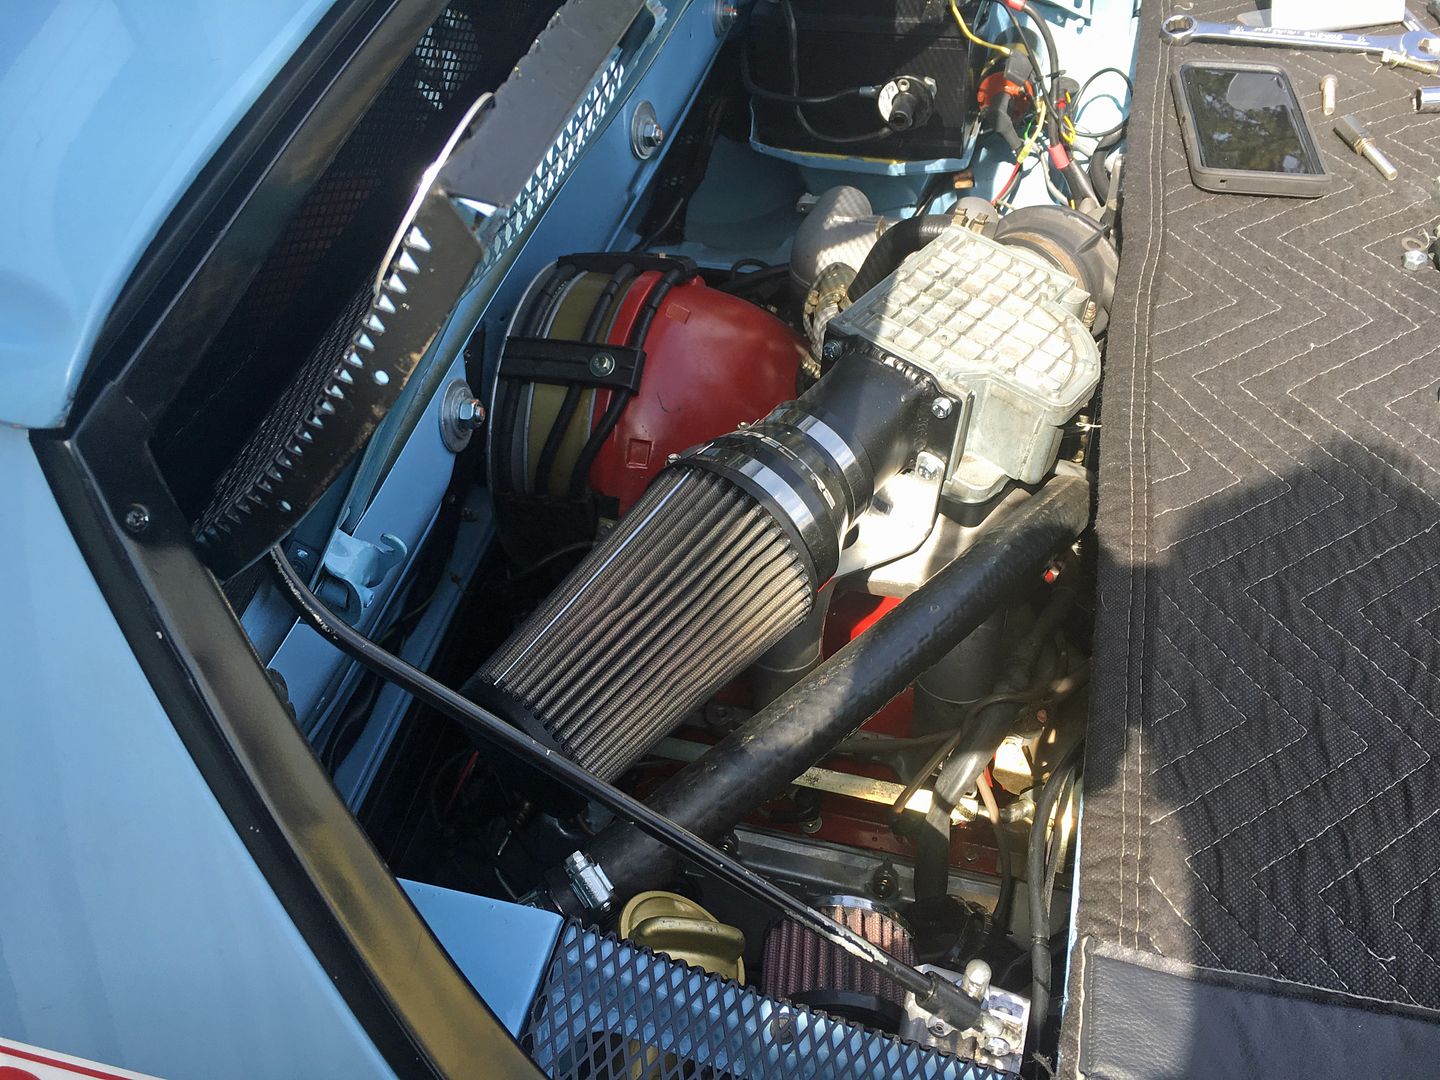
Matt used an Electrtomotive's TEC ECU so he was familiar with the wiring. You can see it in this photo positioned on the hump.
It didn't take long for him to discover that I had voltage going to all of the black/white wires that were sensor grounds. Somewhere I have a black/white wire touching a gray/red wire. I had some other questions for Richard Clewett and he suggested that I unhook the plug for each sensor one at a time and then see when the voltage disappears. That will at least give me a general area to look. When I unhooked the cam sensor plug, the voltage dropped from 3.73 to .50. I had a doctor's appointment this afternoon so that search will have to wait until tomorrow.
Yesterday morning, I received a message from my son asking if he could borrow some of our electrons for his 911 Tesla. He was heading our way and on over to a friend of mine, Tim, who has a body shop. Tim is going to be painting Matt's car. Since the car has had so little time on the road, Matt is being overly cautious on the range of the car. He has his Tesla charger now so it charges quite bit faster. I have a 220V plug in my garage that he used.
After about fifteen minutes of charging, we drove over to Tim's place. There was talk about how they were going to handle different things on the car. The plan is for Matt to take the car apart in January in preparation for Tim painting in in February. While we were there, he gave Tim a ride. Tim has a Vega drag car that does 6.3 in an eighth mile. So he is used to acceleration G's. But it is an all out race car. He was amazed at how the car laid him back in the seat. And soon it will be faster. Matt is planning on driving it to a Tesla tuner in HIckory, NC Tuesday to get an additional 50HP for a total of 500. For an extra $2,000 he could add 200 more HP.
I drove the car back to my house. It still drives like a 911 so it was very familiar. Once back out our house, Matt plugged in again. Once I got the clutch and throttle cables hooked up, Matt jumped into the car to press the pedals so I could do the adjusting under the car. We also re-installed the spark plugs.
Again, because of the complexity of the car, he was checking on the charging process continually. On one of those inspections, he saw that the charger had shut down. He had blown a 30 amp breaker. The draw is 50 amp and he assumed I had a 50 amp breaker on that line. To be able to continue charging, he adjusted the charger on the car so it would only draw 30 amp.
I had mentioned to Matt that the TPS wasn't alive on the car. Years ago Matt built a fuel injection system from scratch for his '69 Camaro. He sold this car this year to fund the Tesla project. He worked for Michelin for 12 years designing race tires. Michelin sent him to France for three years so he could learn the "Michelin Way". While he was over there, I stored his Camaro in my garage. He called me one day to ask if I would take some measurements under the hood.
He had bought a Hilborn intake manifold on eBay which he had shipped me. He was going to use motorcycle fuel injectors and other parts he scrounged to make this system. Part of the system was an air box he was going to make out of carbon fiber. He also made the intake horns from carbon fiber as well. He needed the under hood measurements and measurements of the intake to figure out the dimension fo the air box. After measuring the manifold I shipped it to a Michelin colleague who was going to France soon and would take the manifold with him in his suitcase. When Matt arrived back in the states with the air box, he only had to make one small cut to one the hood braces for clearance.


Matt used an Electrtomotive's TEC ECU so he was familiar with the wiring. You can see it in this photo positioned on the hump.

It didn't take long for him to discover that I had voltage going to all of the black/white wires that were sensor grounds. Somewhere I have a black/white wire touching a gray/red wire. I had some other questions for Richard Clewett and he suggested that I unhook the plug for each sensor one at a time and then see when the voltage disappears. That will at least give me a general area to look. When I unhooked the cam sensor plug, the voltage dropped from 3.73 to .50. I had a doctor's appointment this afternoon so that search will have to wait until tomorrow.
12-19-2018, 05:46 PM
#140
Racer
Thread Starter
Well I found a few things today electrically. I checked the TPS wiring and discovered that I had reversed two wires. However, it is still not responding like it should. Richard suggested I remove it and see if it is mechanically working correctly.
As for my problem of having voltage on the Black/White sensor ground wires, when I removed the sensor plugs, the voltage would drop some with each removal. But it never went to zero. I called my son seeking advice. He said he thought the issue was a grounding problem on the ECU. I had run the ground wire from the ECU plug and one from the power wiring harness directly to the battery. Matt suggested running a wire from the block to the black/white wires. I did that and the voltage went away.
Thinking that the battery was not getting a good enough ground, I ran a battery ground wire directly from the battery to the block. That did not help. I put a call into Richard and, after explaining what I had done, he recommended doing a continuity check from the black white wire to each wire in the harness. I had soldered about six black/white wires together from the various sensors and had that connection exposed.
I put my negative lead there and tried the plug for the black/white wire first as it also had the gray/red wire that was a 5V lead. As I was going from pin to pin in the plug I was surprised to find that I did not have continuity on the black/white wire. That lump of black/white wires was only two inches away so the reading should have gone to zero. I found my terminal removal tool, inserted it into the plug and pulled the black/white wire to remove it. The wire pulled out without the terminal. I evidently did a bad crimp on that terminal. I crimped on a new terminal, fired everything up and I had no voltage on the black/white wire. Happiness ensued!!
Tomorrow I will remove that TPS sensor to see what it going on with it. Once I get that resolved, I need to put the wiring harness back together and make sure everything is working correctly.
12-20-2018, 05:33 PM
#141
Racer
Thread Starter
First thing this morning, I removed the TPS sensor and it appears to be operating correctly. After yesterday's continuity issue, I decided to do the same test on the TPS wiring. As I was pulling my plug from the ECU to the engine bay apart, the blue wire for the TPS pulled out of the plug.
That was the tipping point for me. I have never felt comfortable with having connectors between the ECU and the engine. My original reasoning for wiring it with connectors was for ease of removal of the engine. Unhook the connectors and have the wiring harness remain on the motor. I also did this because I thought access to the engine would be limited once the engine was in the car. Had I known how much access there is once the rear trunk lid is removed, I would have wired everything with the engine in the car. Also, it is easy to unplug the FI connectors from the engine.
So today I cut off all of those plugs and began wiring it direct. In all of my years of working on electrical wiring, I have always felt most comfortable when I am soldering connections. While I have had crimps fail (as in two plugs here in two days), I have never had a soldered connection fail. I know there are those who worry about making the wires more brittle when soldering, but, as I said, I have never had a solder connection fail. I have most of the wires connected but I personally ran out of gas around 3:00. I will finish it up in the morning and see if everything checks out.
I don't know what Richard's schedule is for the holidays. I may or may not get the car started before I leave for Florida. Hopefully I will be calling him tomorrow to start the car.
12-25-2018, 10:37 PM
#142
Racer
Thread Starter
Merry Christmas to everyone!
Last Thursday I was ready to start the car. I called Richard and had everything ready. I turned the ignition to start and was rewarded with the sound normally associated with a dead battery. Whrr, whrr, whrr!
Except the battery wasn't dead. I had just charged it a couple days before. I changed the cable from the battery to the starter with a heavier gauge wire. Same result. I then bought a new battery just to make sure. Same result. I was able to return the battery. After talking with my son, we wondered if the fact that the transmission had been painted might be an issue with the starter not making a good ground. I cleaned off all of the paint. Same result. I then used a jumper cable to run a direct wire from the negative cable of the battery to one of the starter mounting bolts. Same result. I mounted the other starter to no avail.
Now I wonder if we had sufficient clearance on that flywheel. With the spark plugs out of the engine, we could turn the flywheel by hand, although we did not try to turn it 360 degrees. I suspect the transmission will have to come out when we return from Florida. Before I do that, I will buy a new starter just to make sure that the starter isn't the issue.
This has been the most frustrated I have ever been with a project car. Getting away from it for some time will not break my heart. When I get back I will try again to get it going. In the meantime, the car is on the ground and I will be getting the motorhome ready for our trip.
BTW, Fiat did replace the motor in our car. The problem was a defective cylinder wall casting that did not allow the rings to seal. It was an entirely new motor including the turbo. We picked the car up last Friday. Hendrick Fiat in Concord, NC did a fantastic job of getting the motor here and installed so we could tow it behind the motorhome to FL.
02-28-2019, 10:41 PM
#143
Racer
Thread Starter
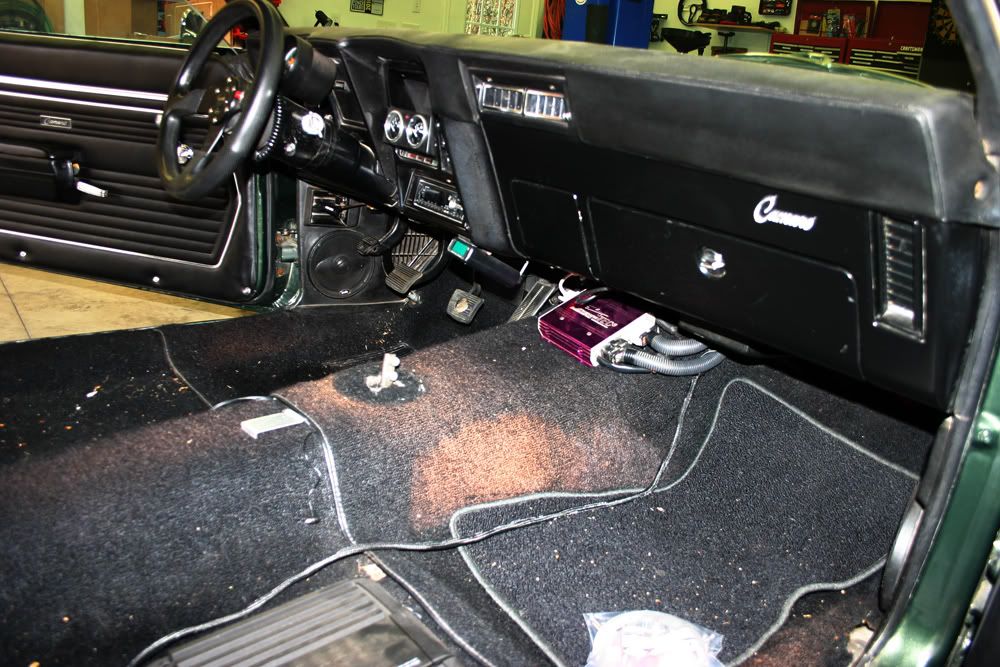
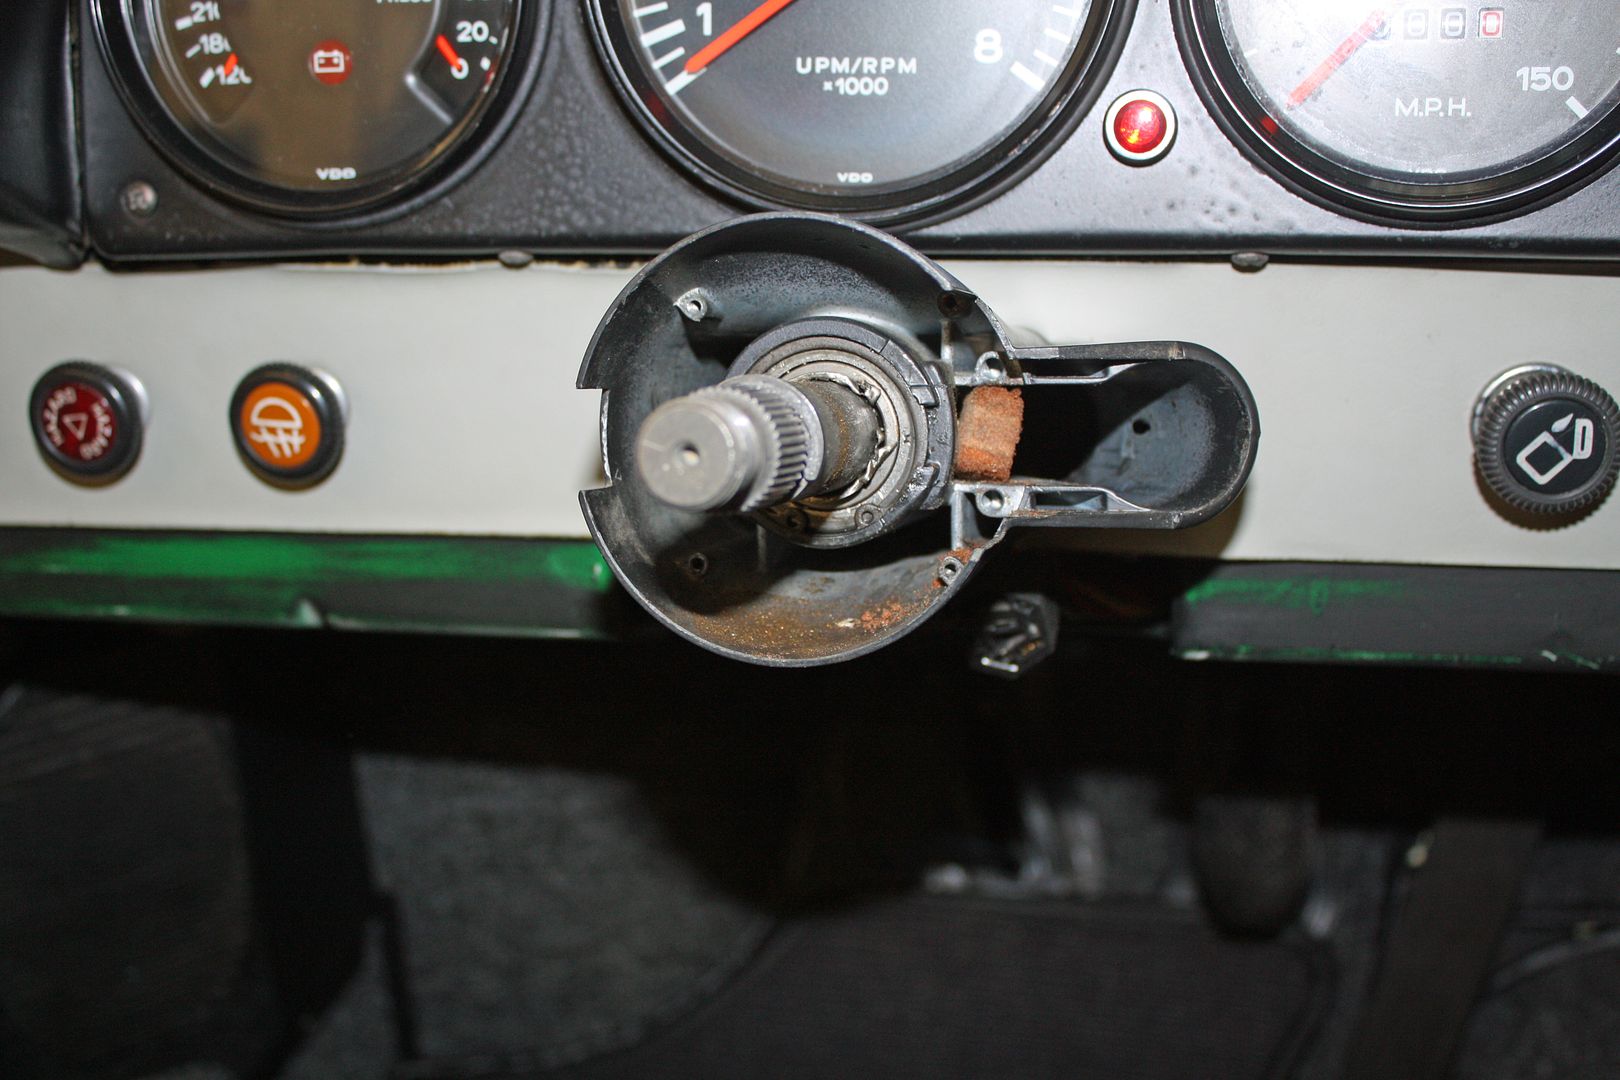
Finally back at working on the car. I had purchased a new ignition switch at the Fort Myers Porsche dealership. Today I installed it. First up was removing the steering wheel followed by removing the knee pad. The knee pad is fastened with a small screw on each end and five bolts on the bottom.
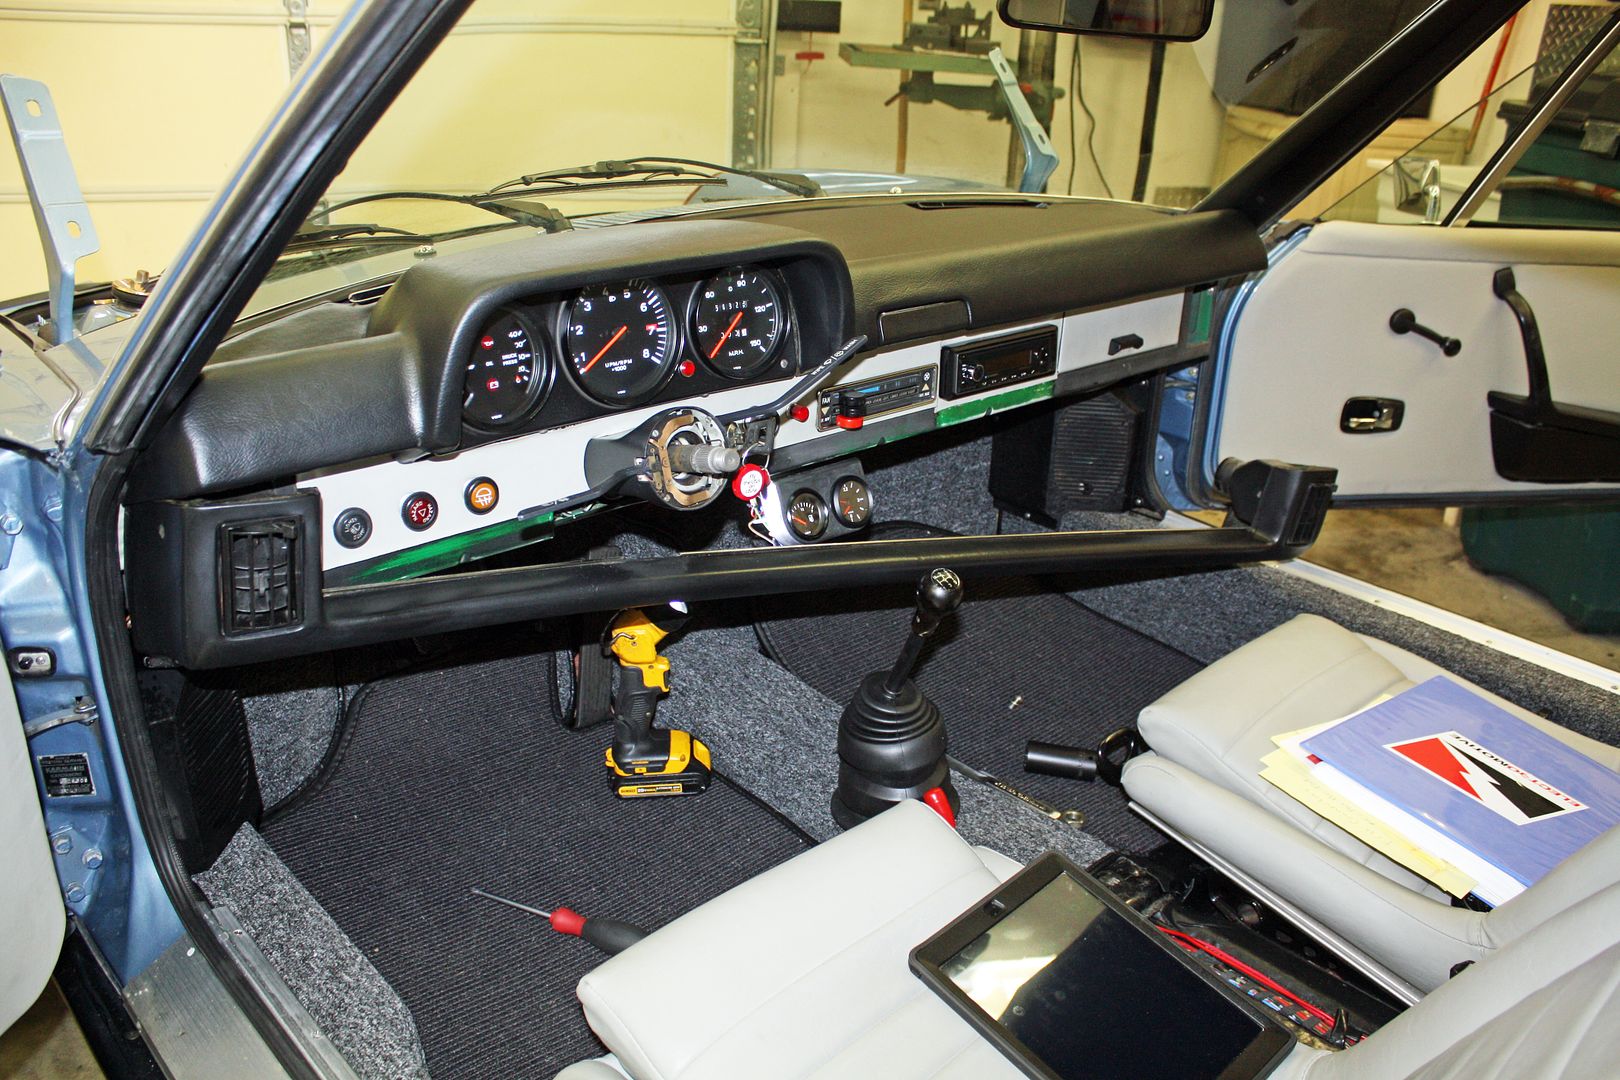
After unplugging the wiper and turn signal switch plugs, i removed the four small screws and pulled the switch out of the steering column.
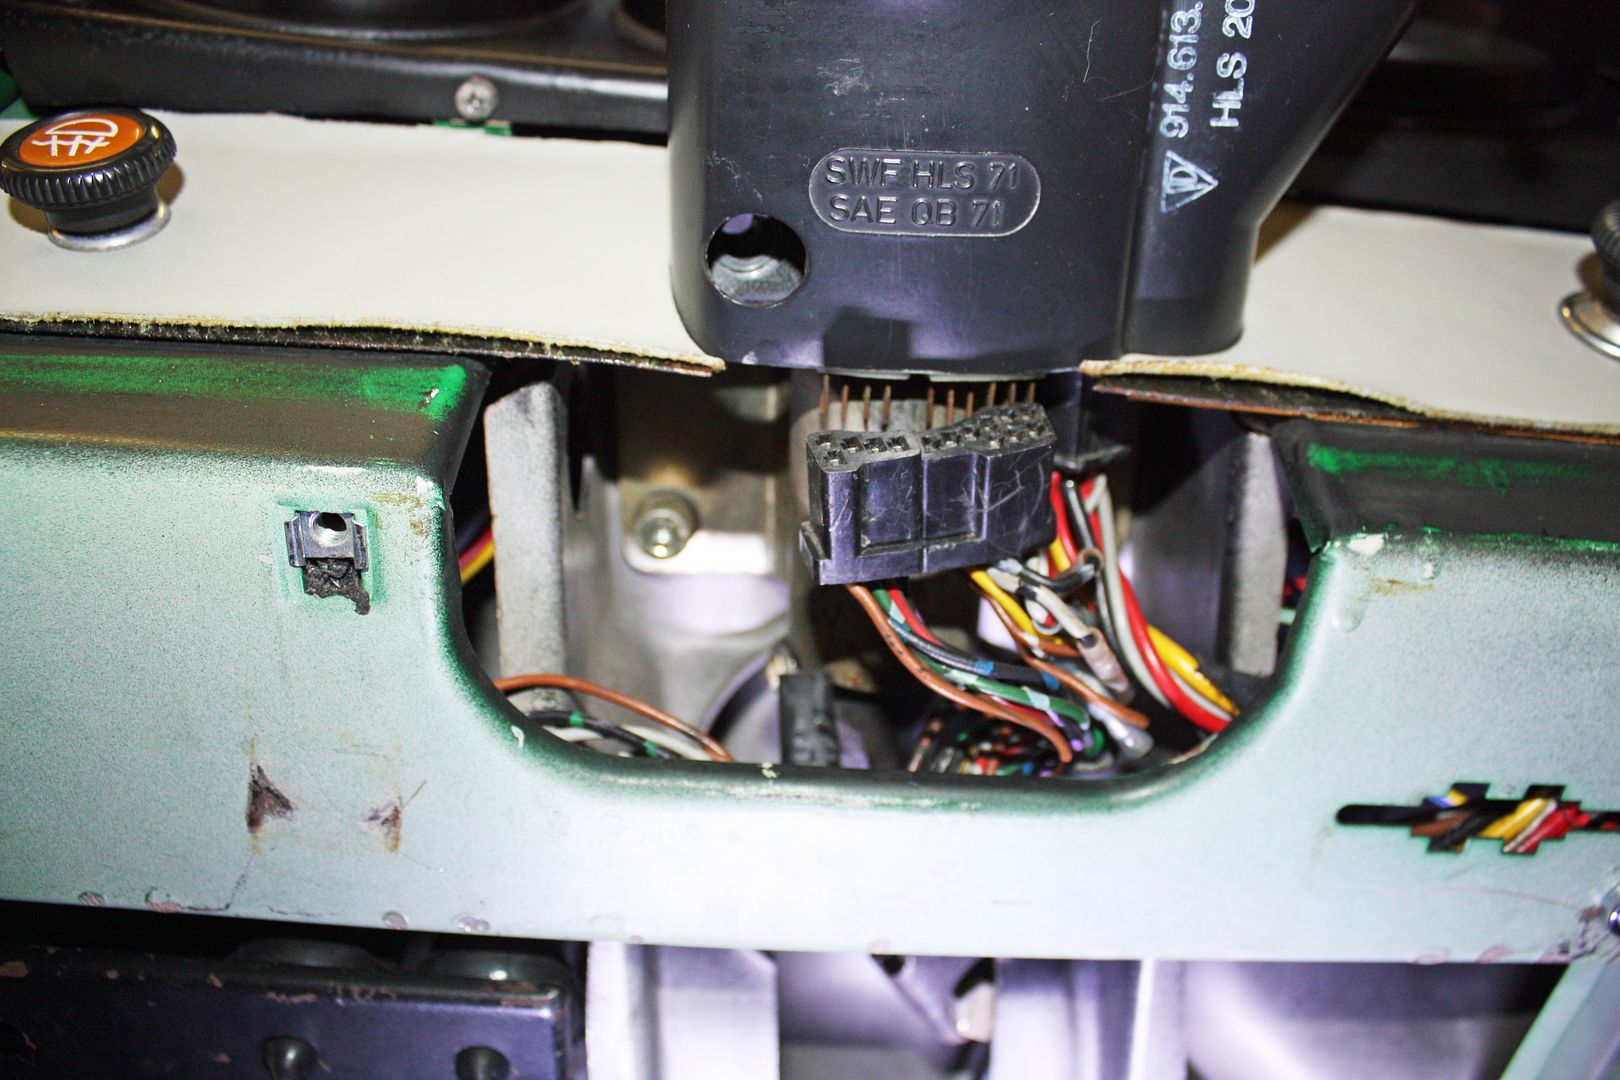
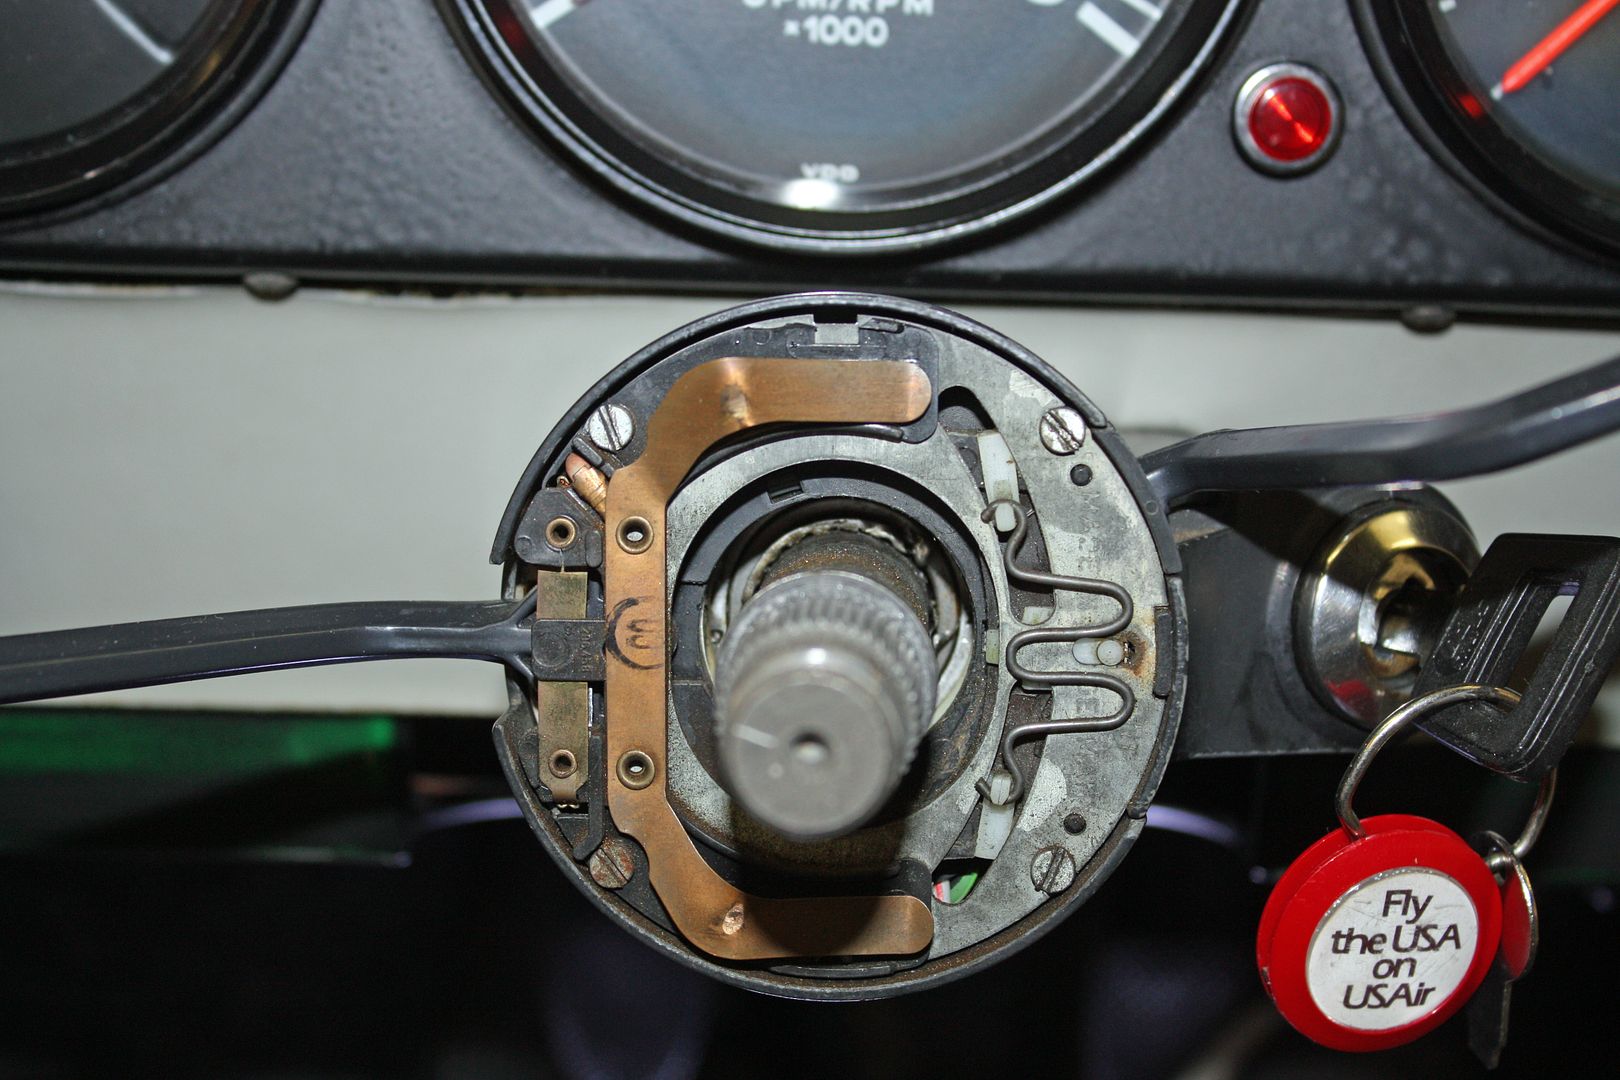

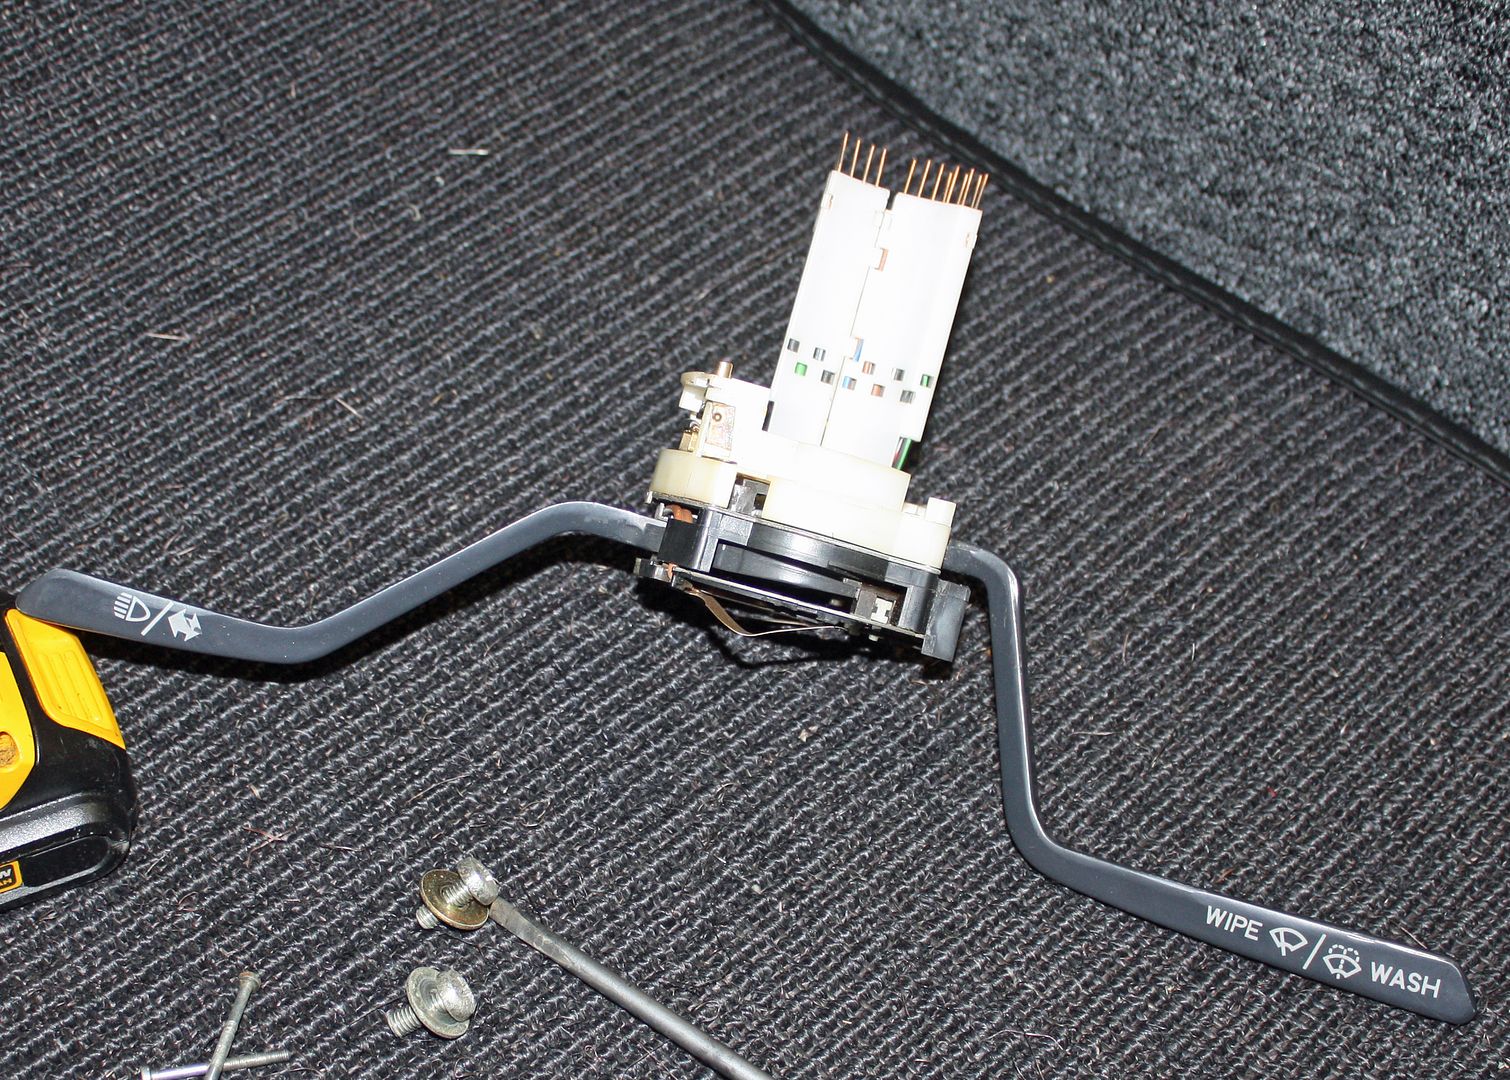
Now the two screws for the small housing that retains the ignition switch can be removed. There is a small spring that one has to be sure not to lose.
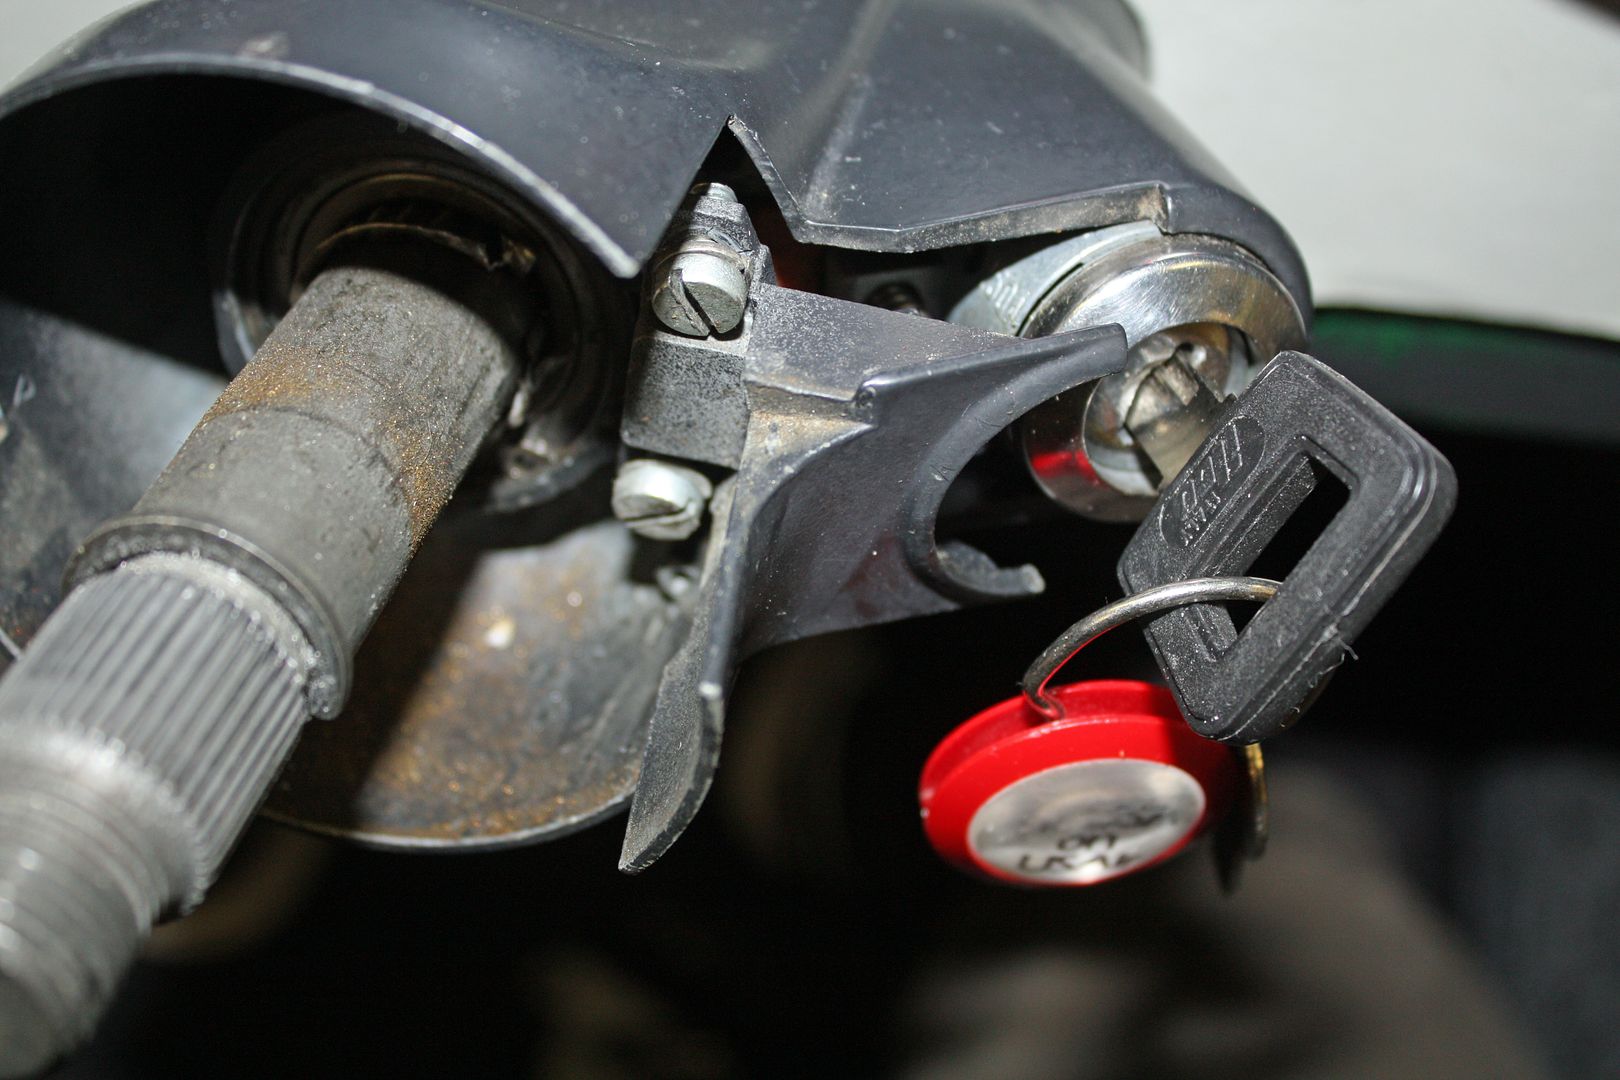
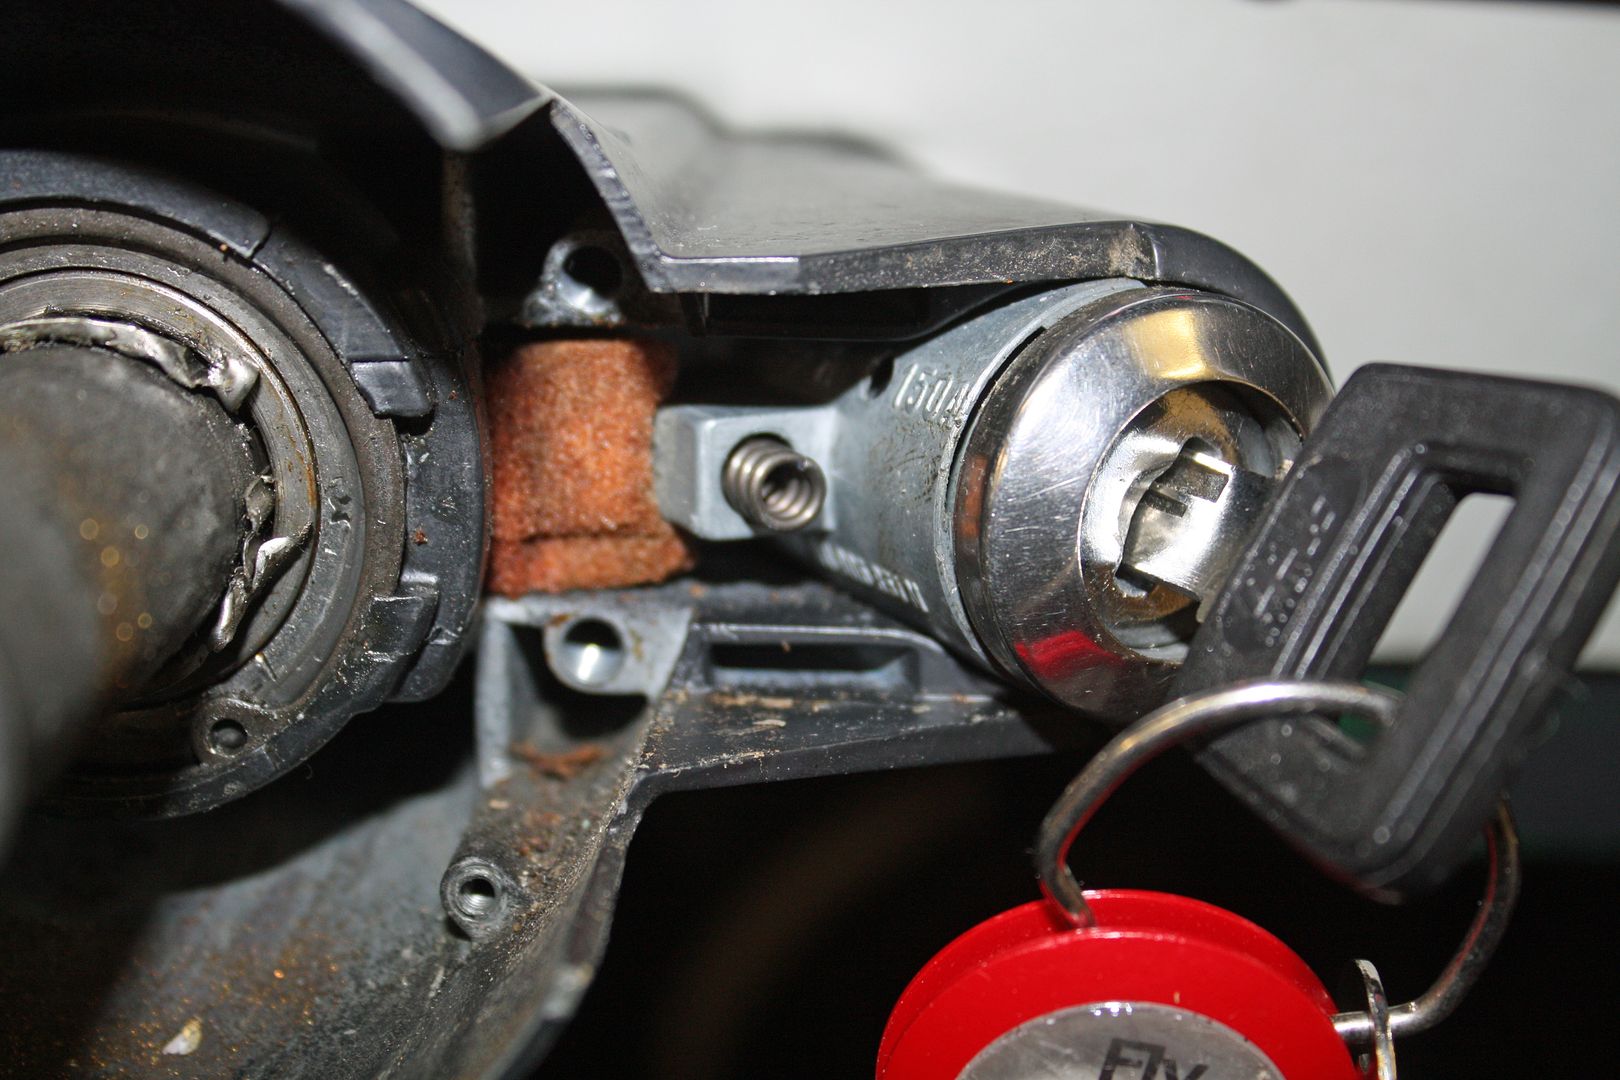
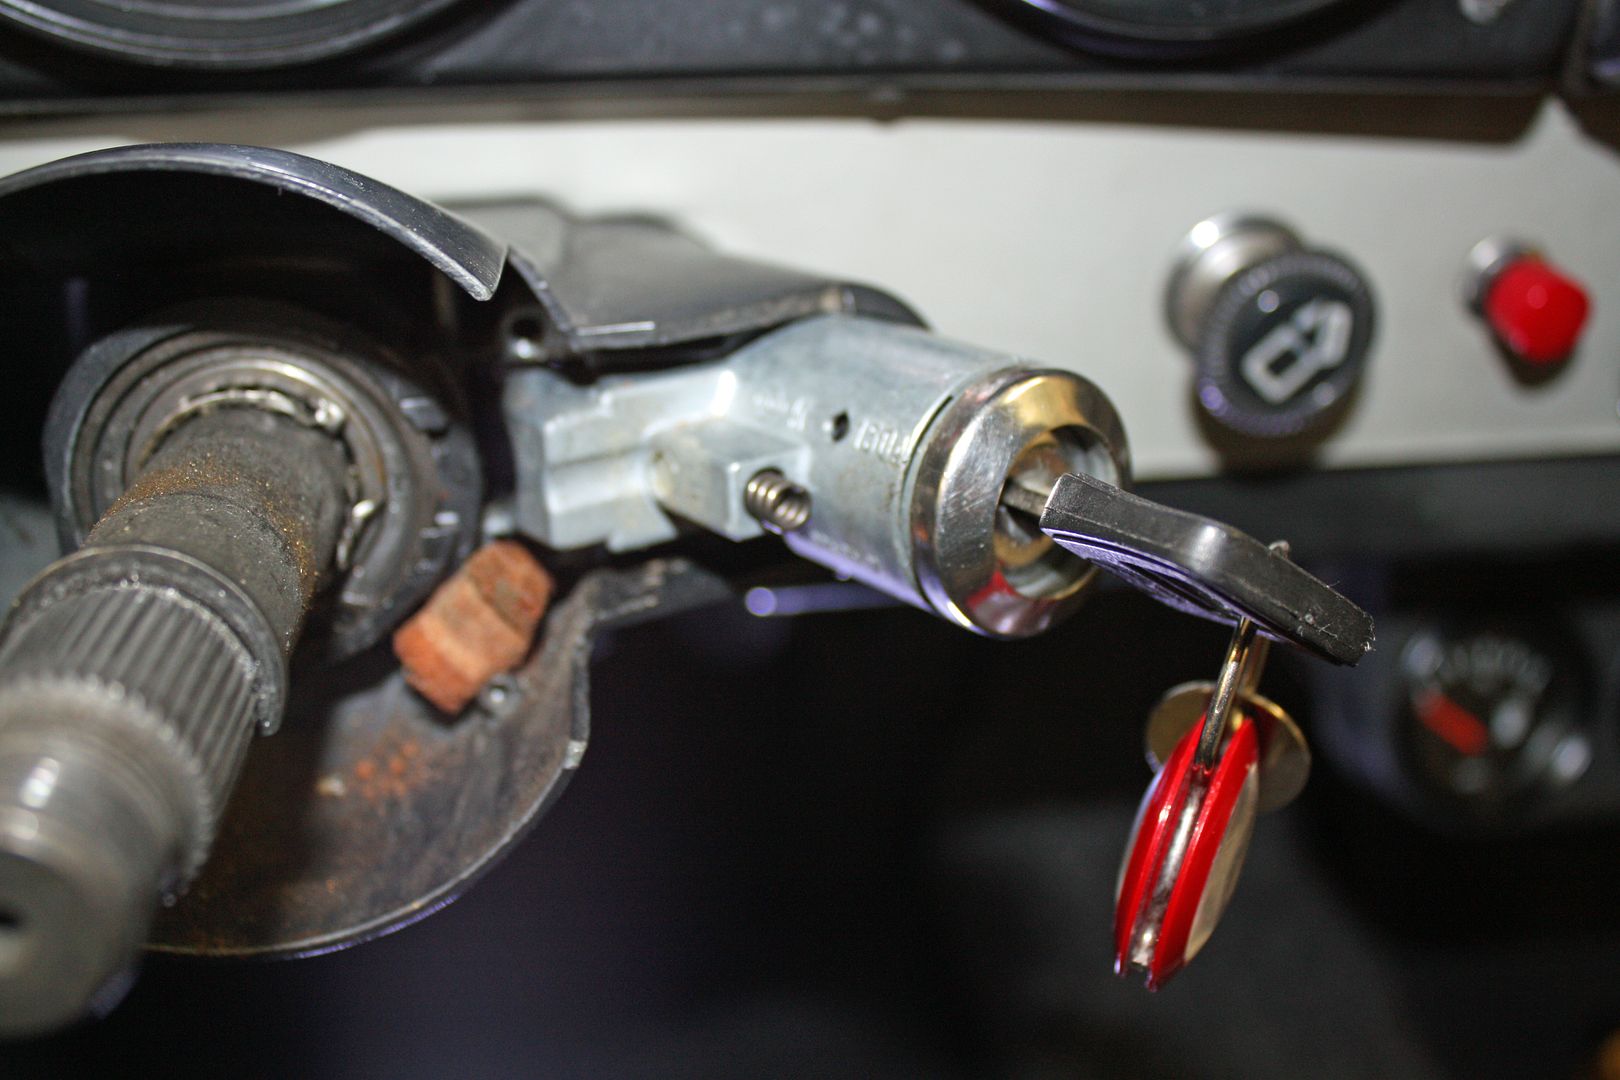
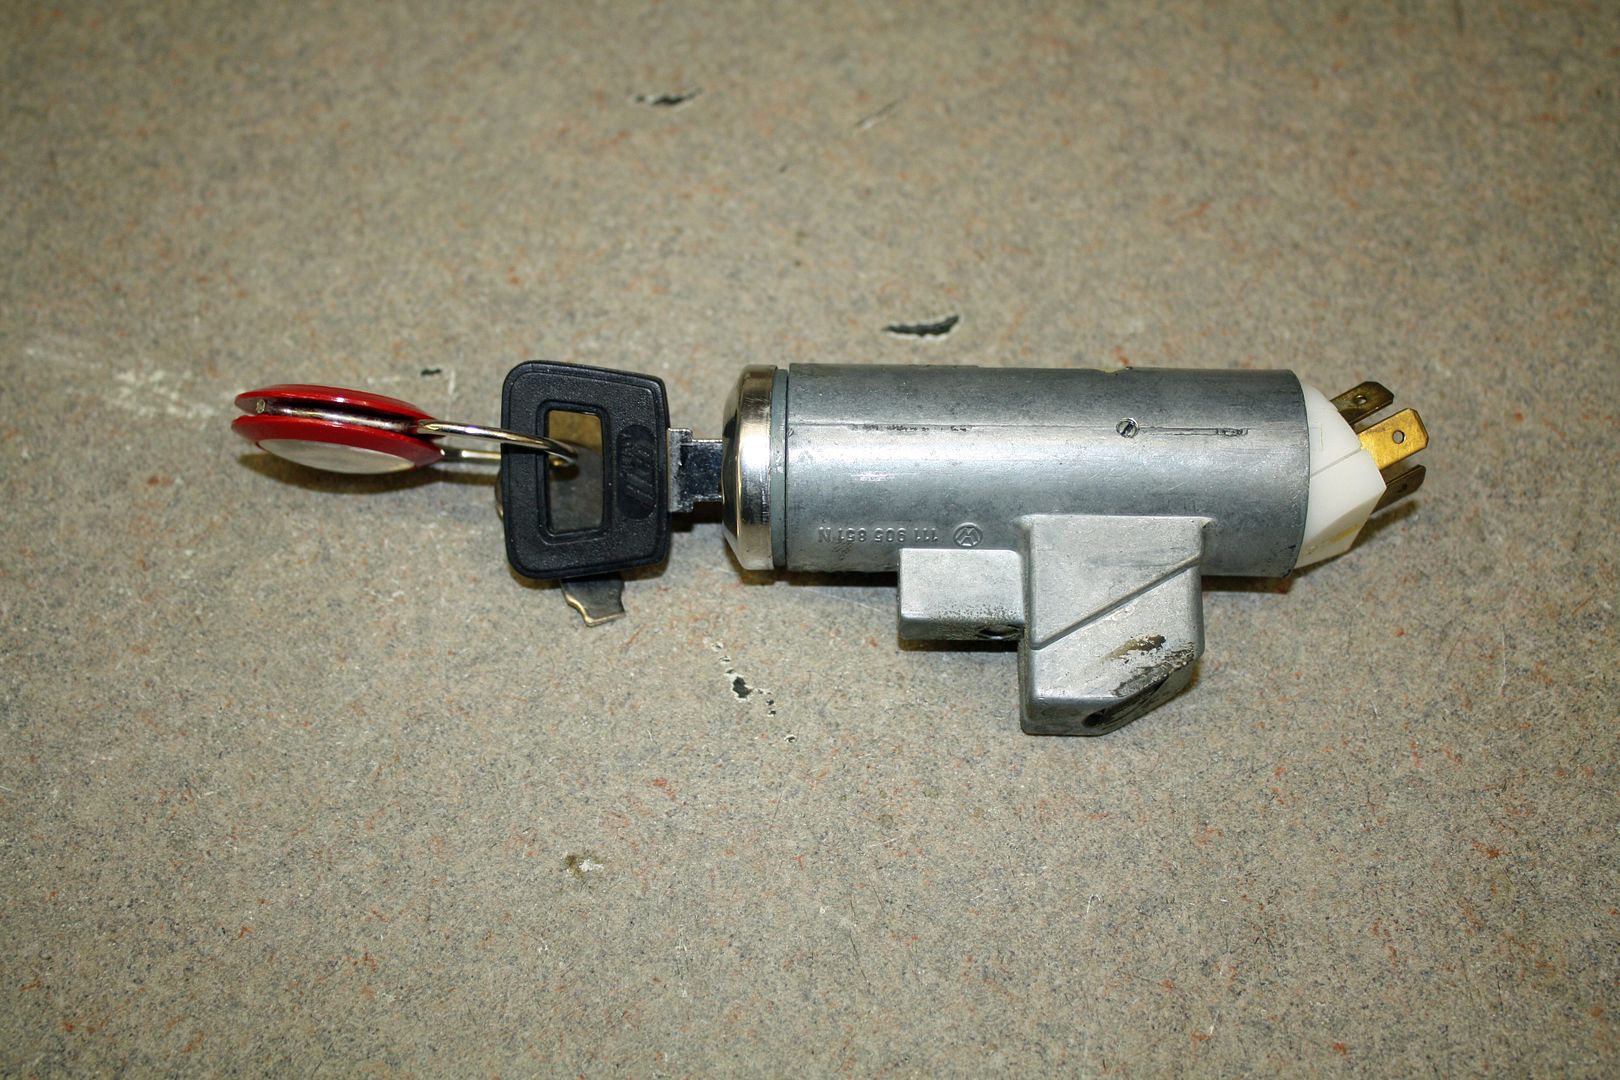
After unplugging the ignition switch, the key can be used to remove the switch housing.


After unplugging the wiper and turn signal switch plugs, i removed the four small screws and pulled the switch out of the steering column.


Now the two screws for the small housing that retains the ignition switch can be removed. There is a small spring that one has to be sure not to lose.


After unplugging the ignition switch, the key can be used to remove the switch housing.


 02-28-2019, 11:03 PM
#144
Racer
Thread Starter
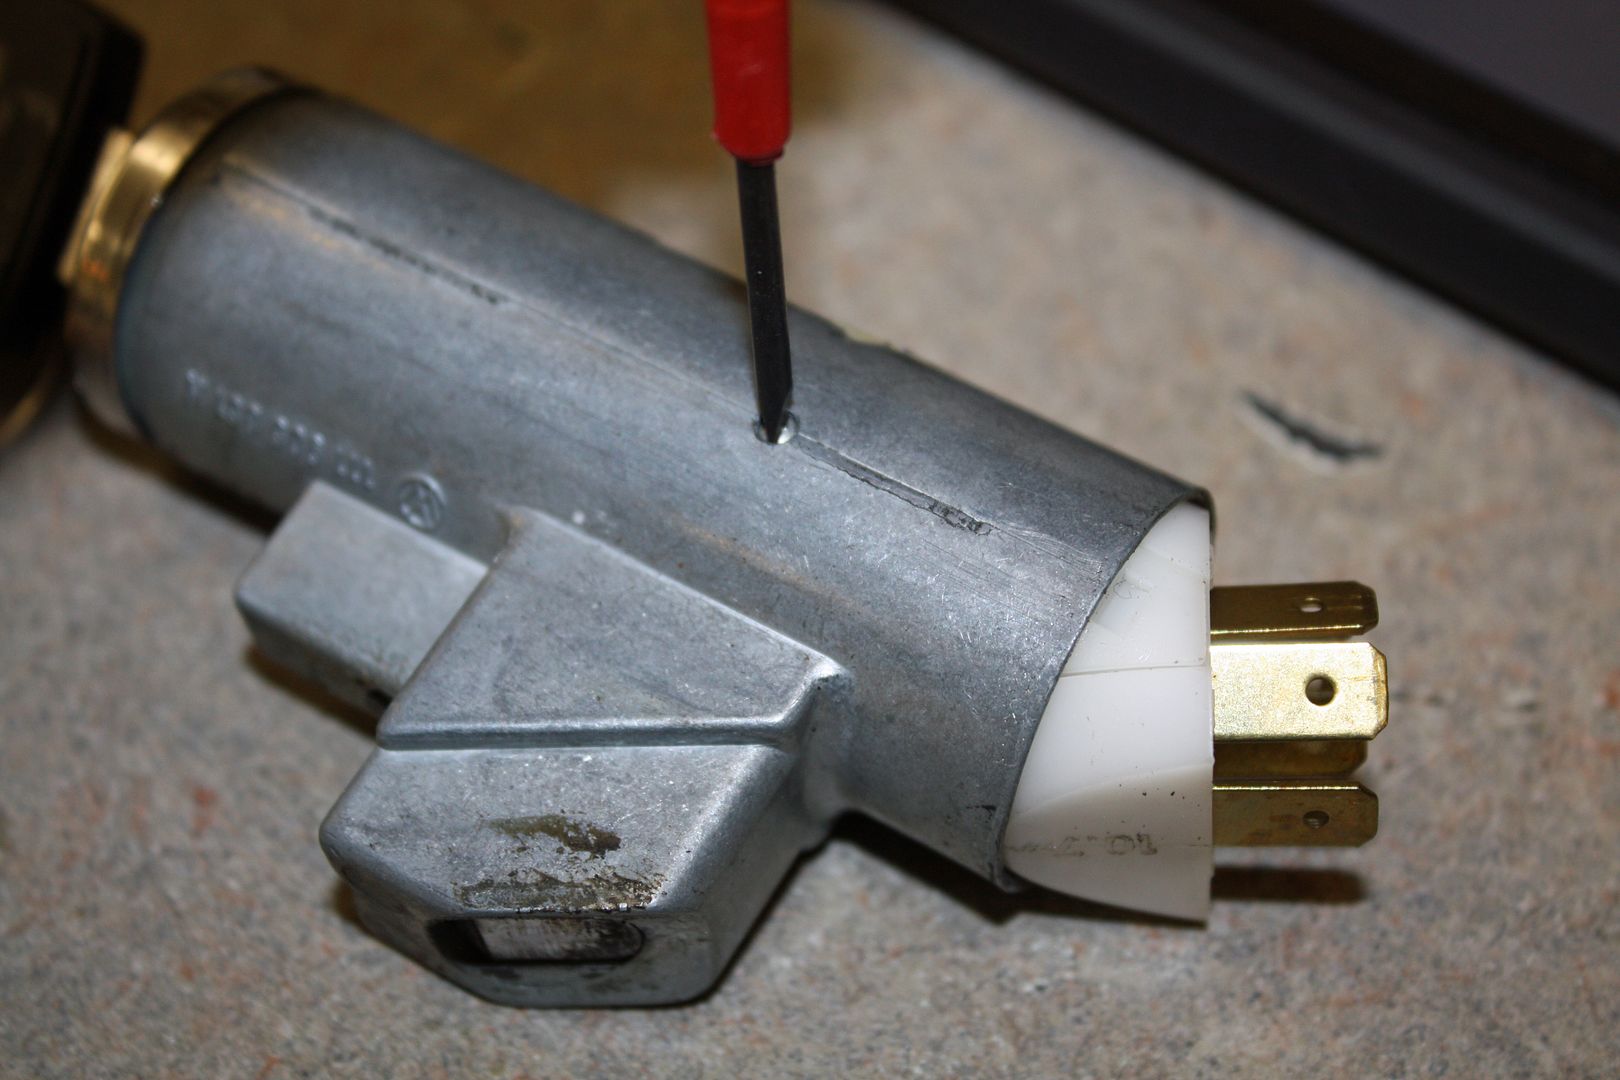
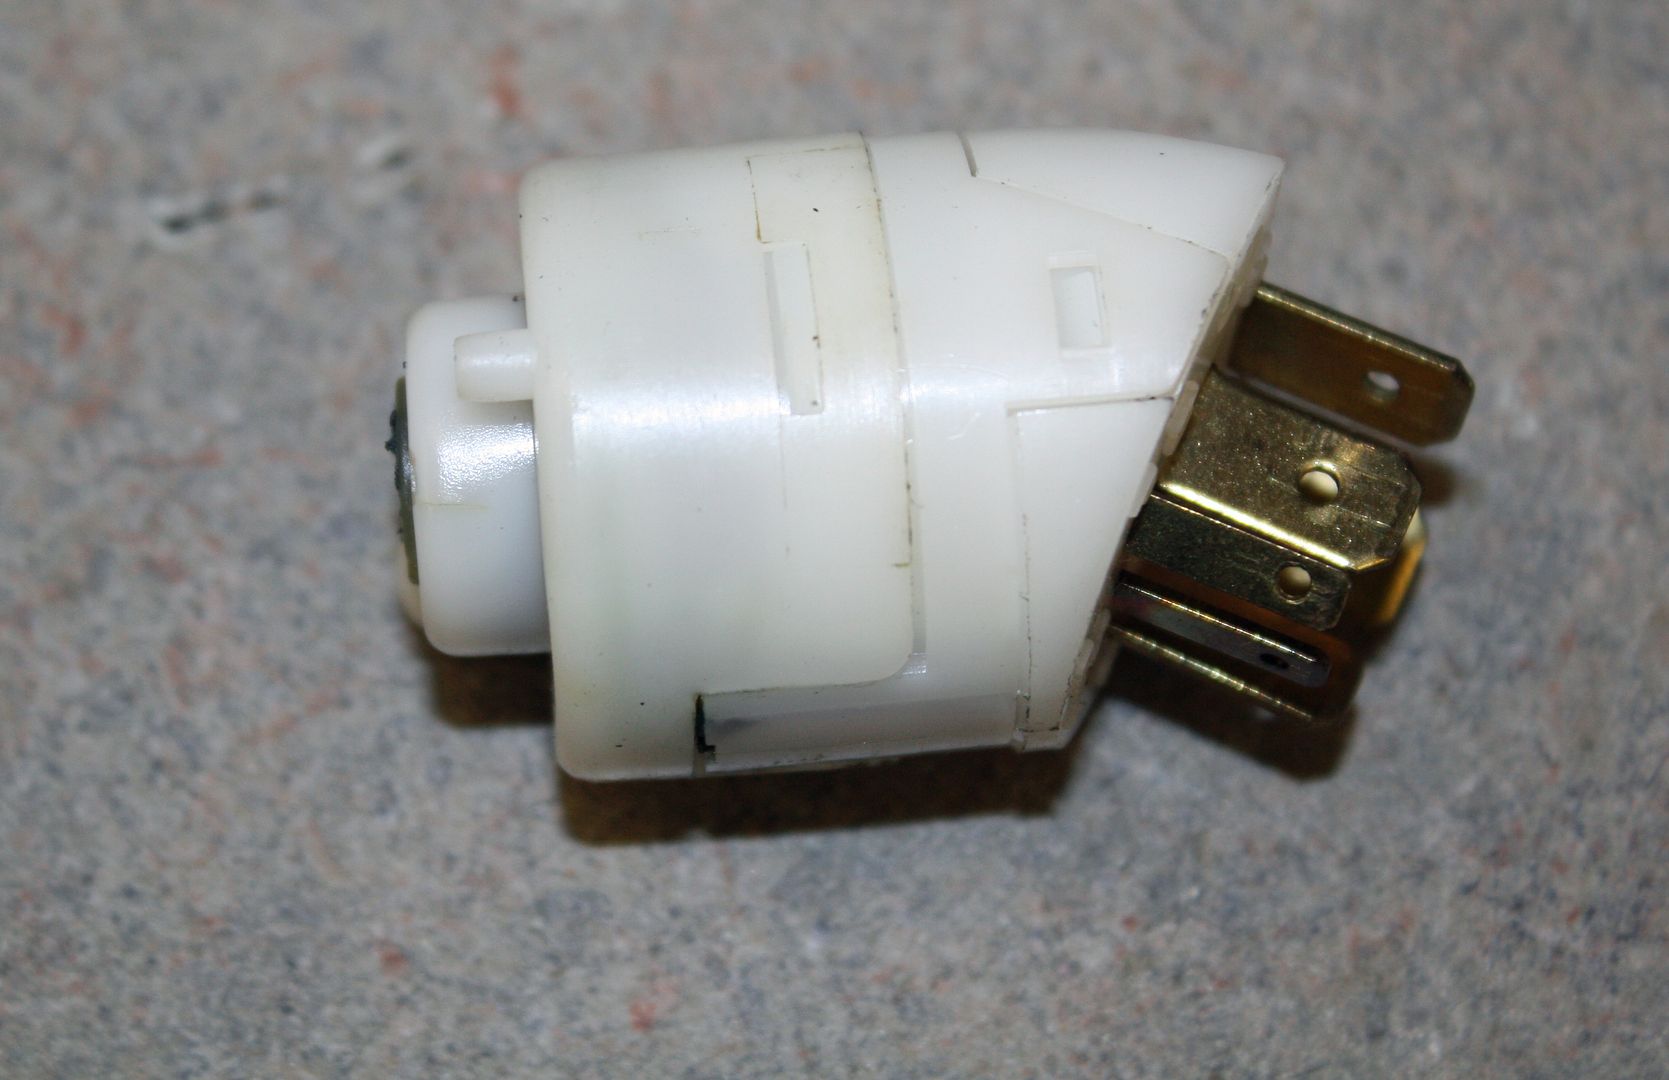
Now I could take the ignition switch housing to the bench to remove the switch. That is done by first removing the very small set screw. I did not see any obvious signs of faiure on the switch so I doubt installing the new switch will solve my problem.
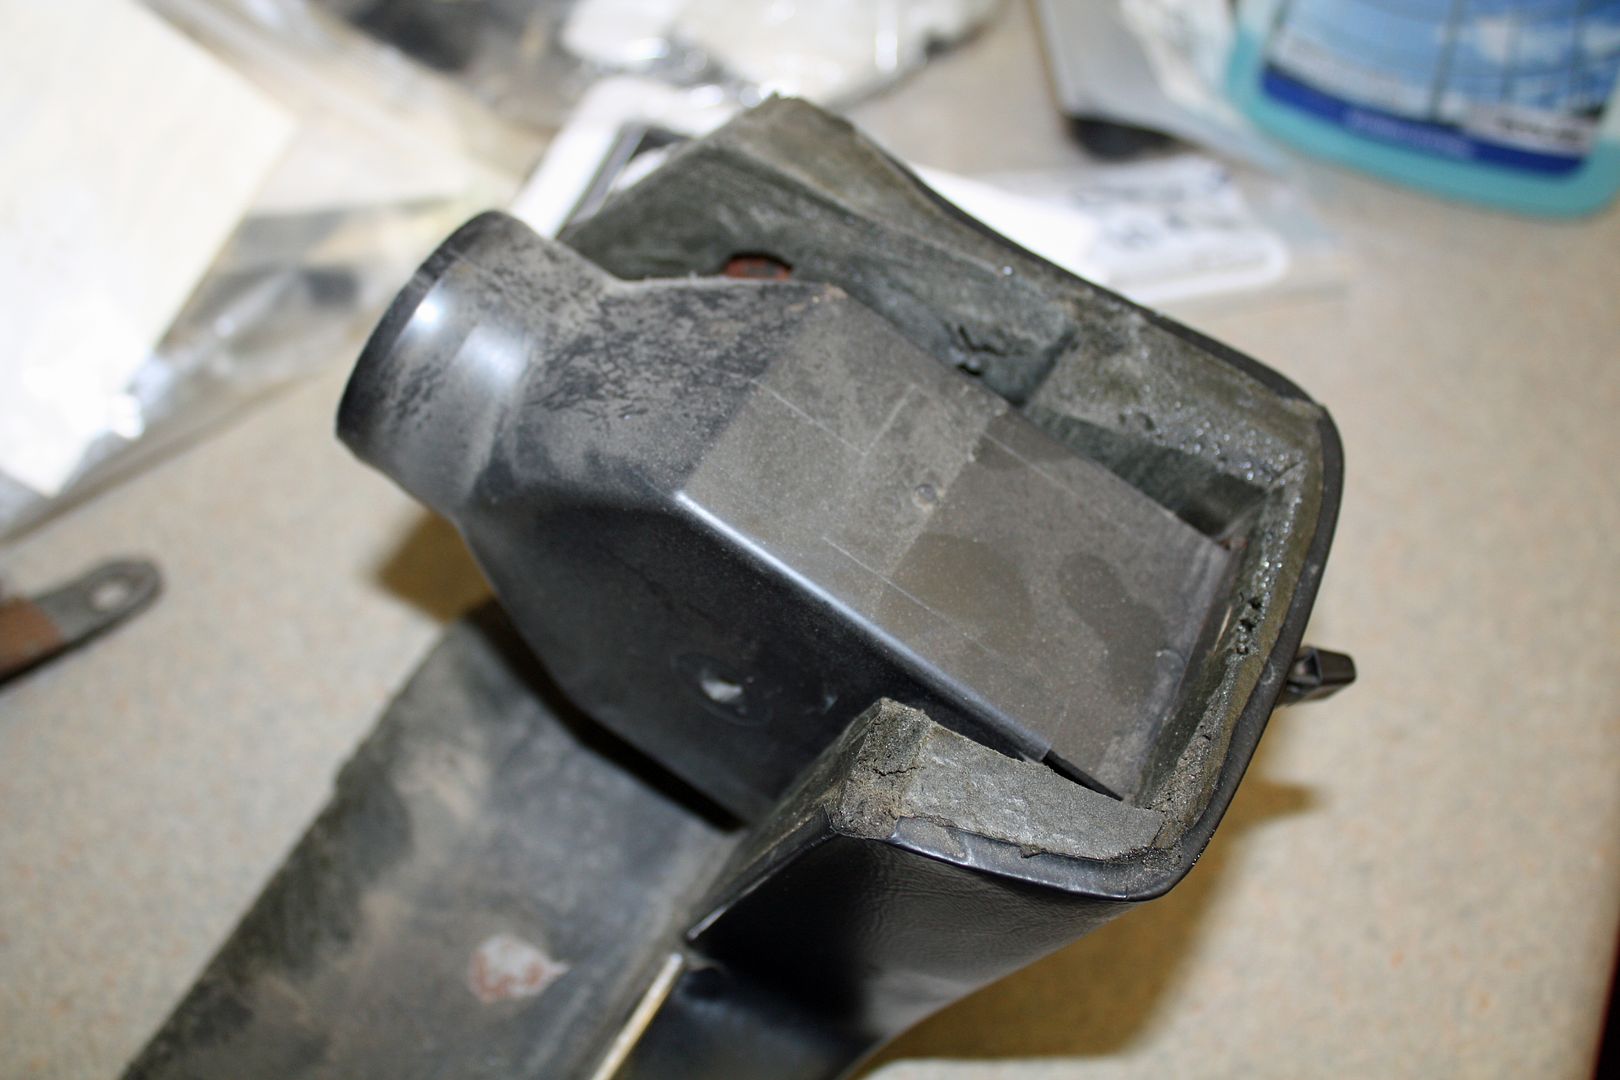
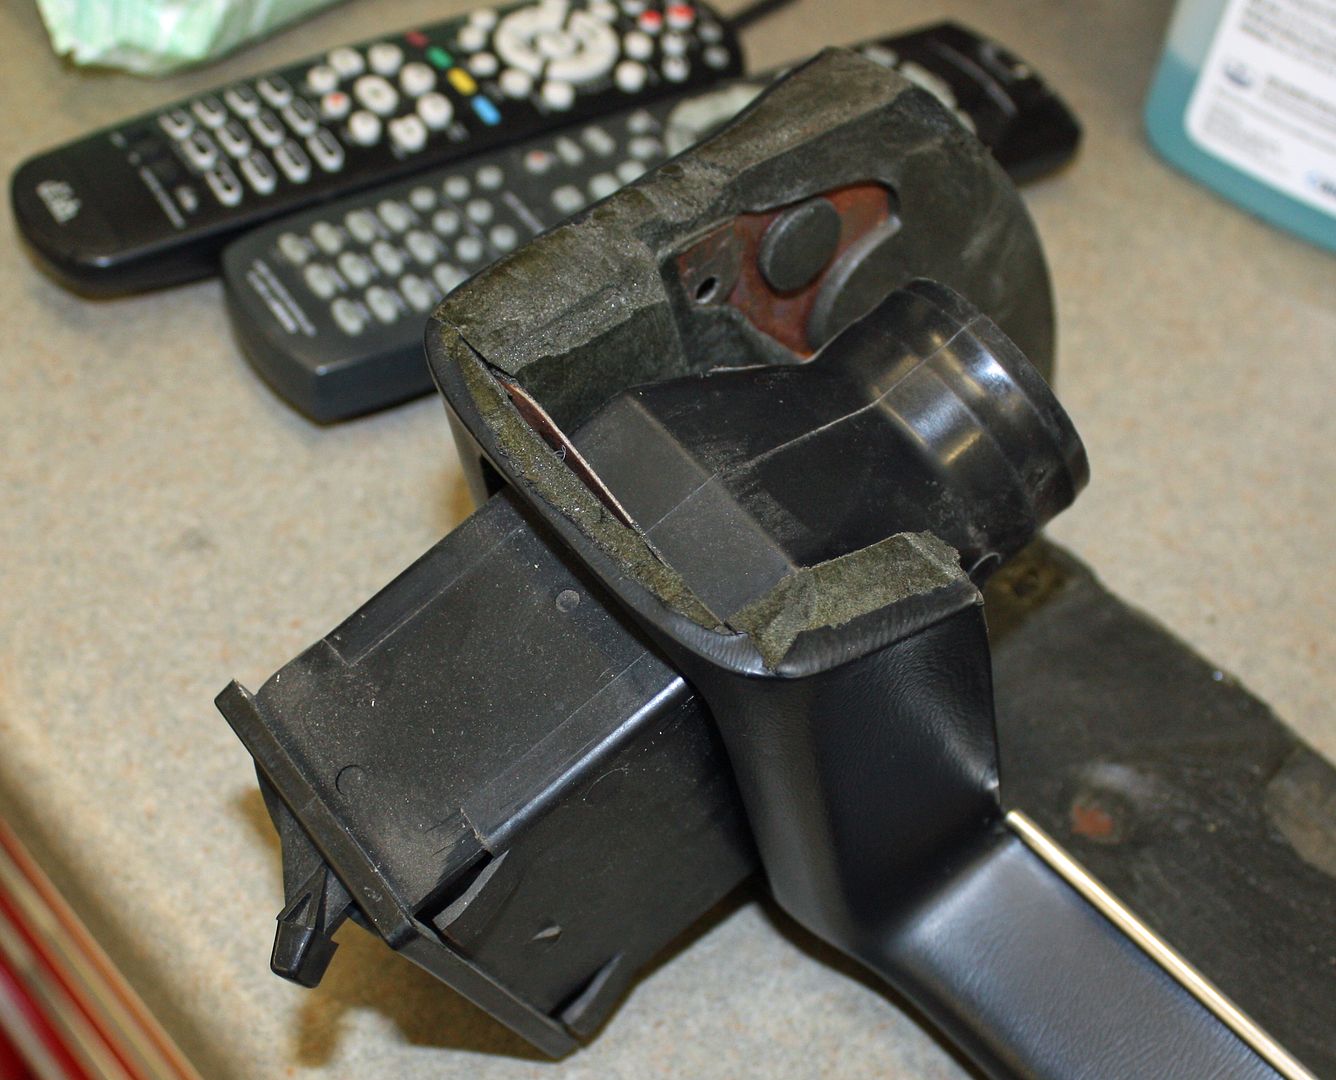
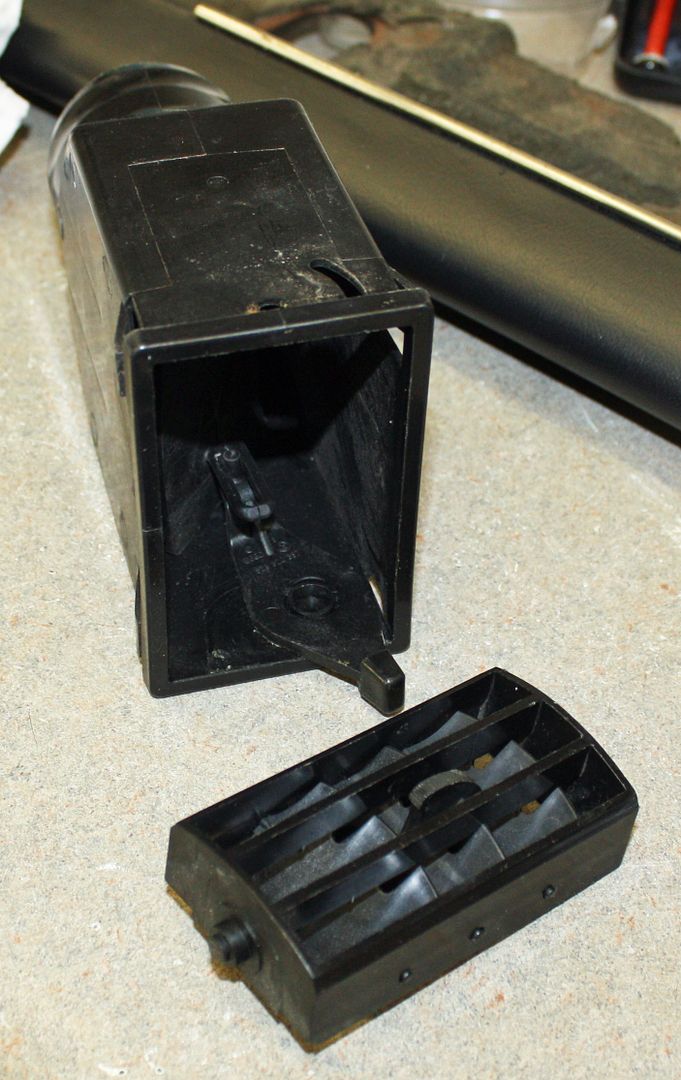
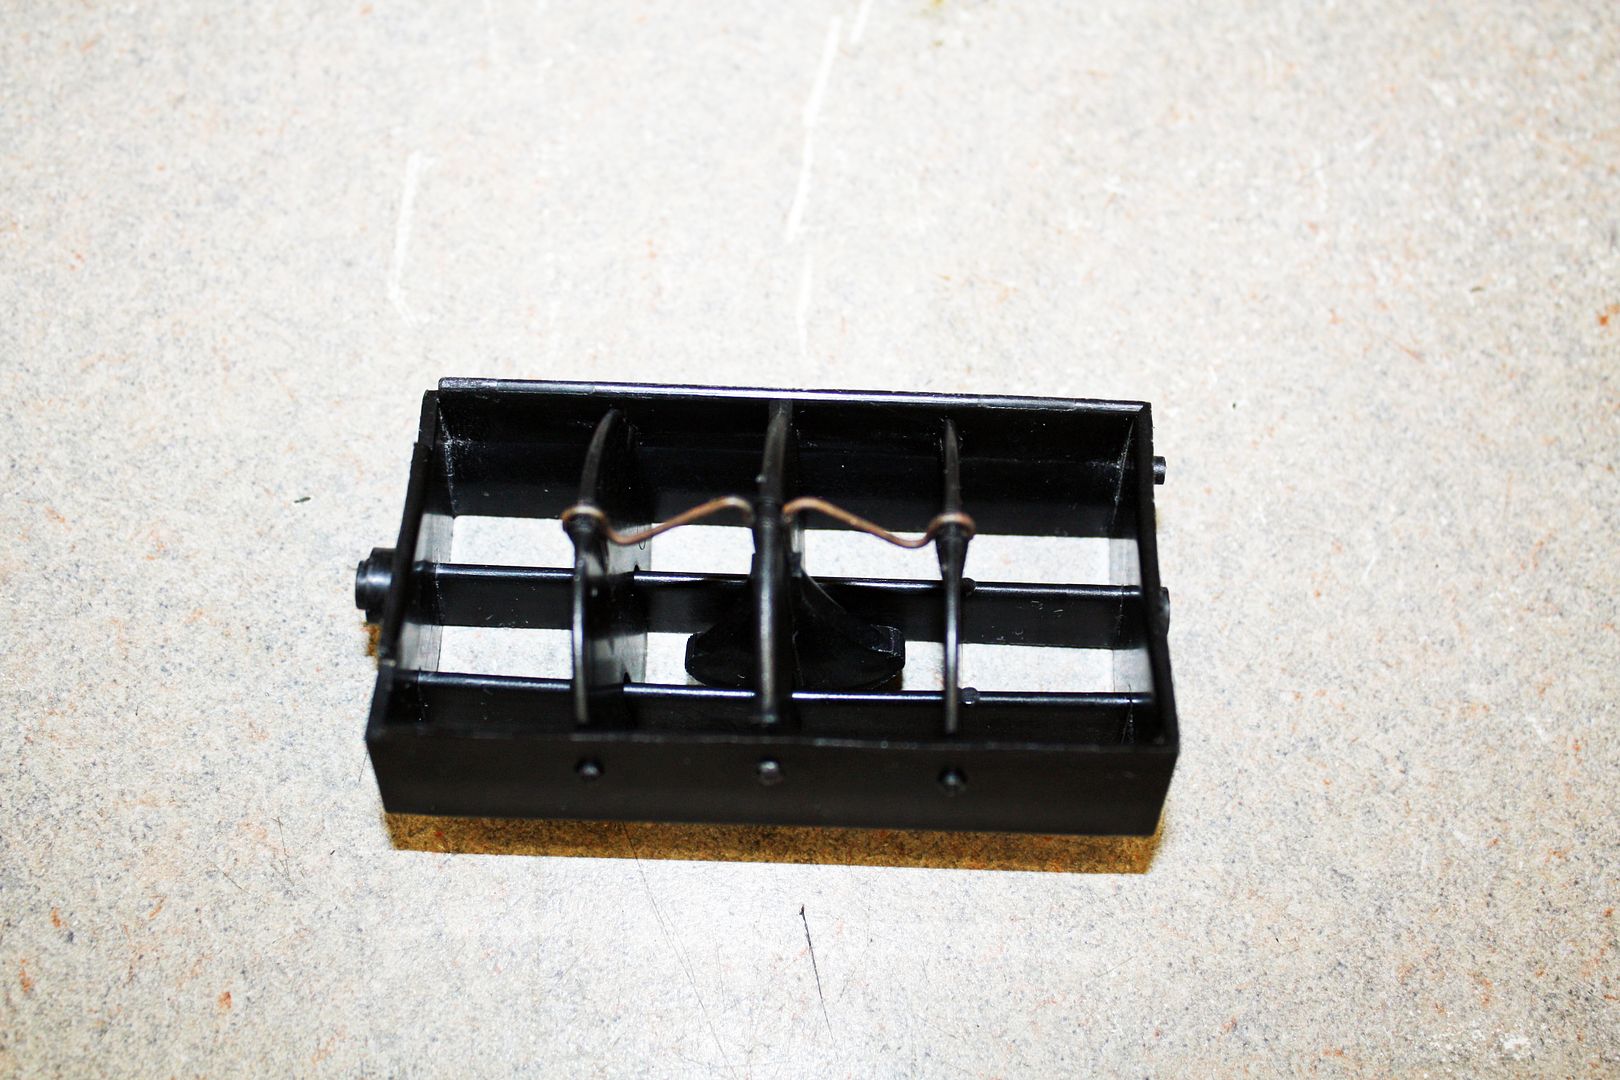
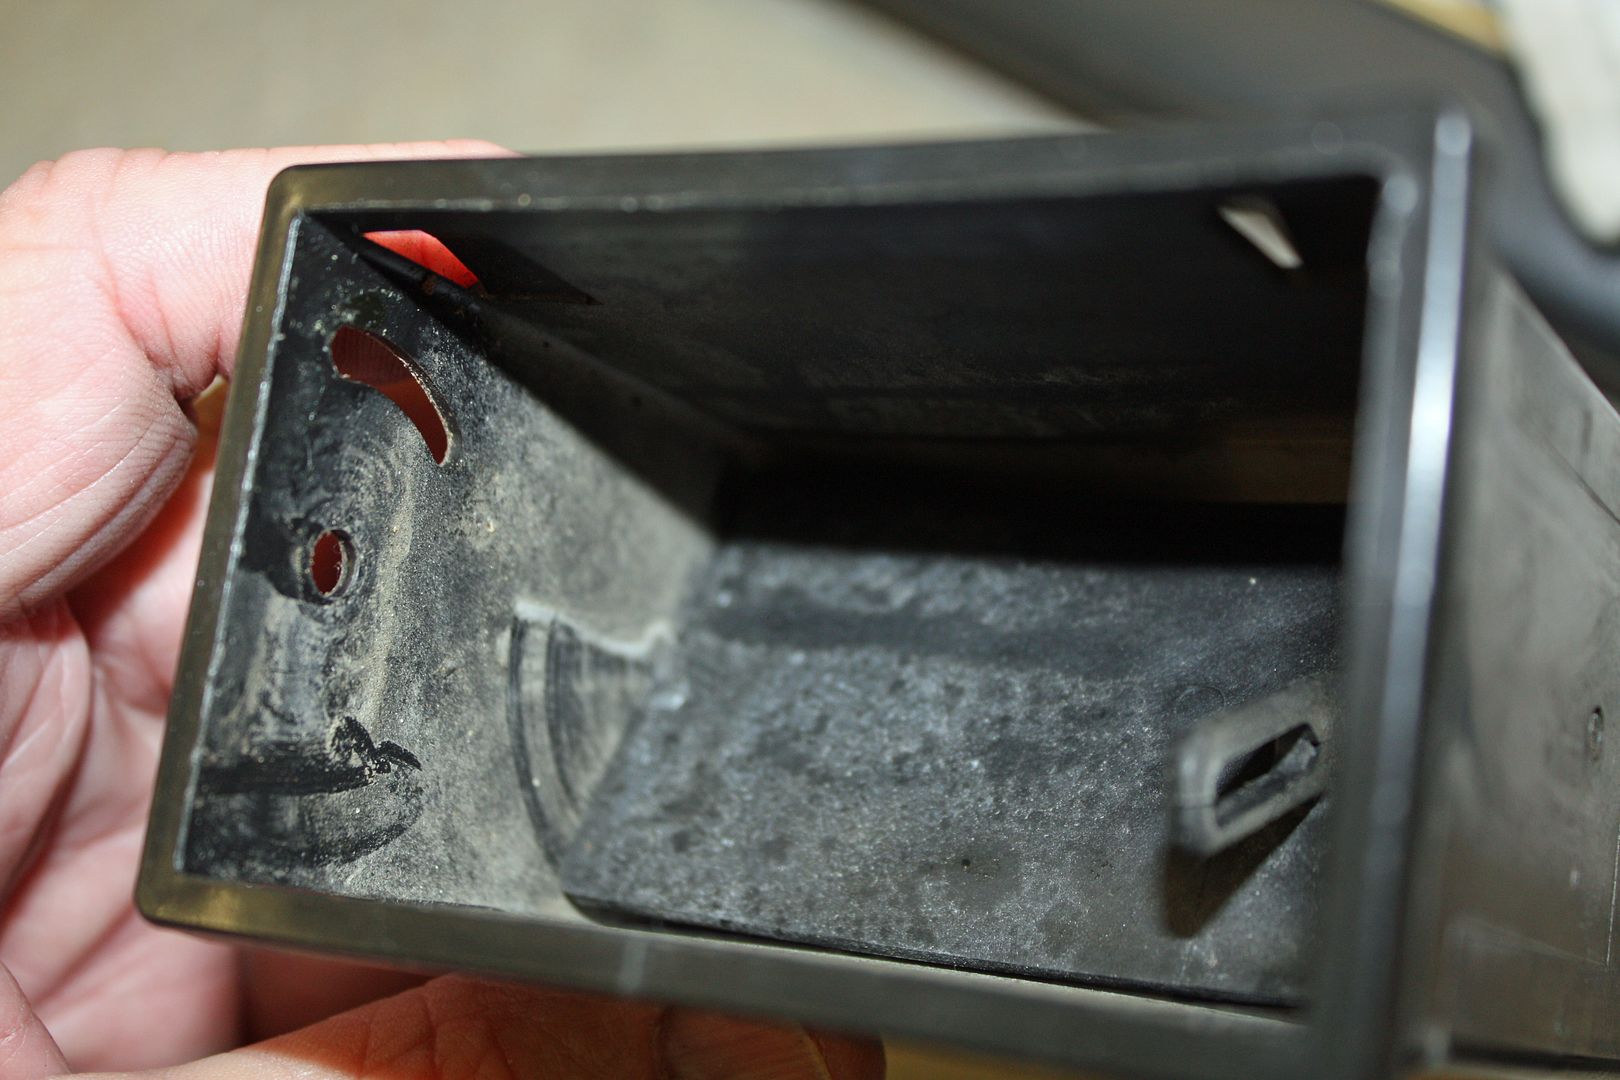
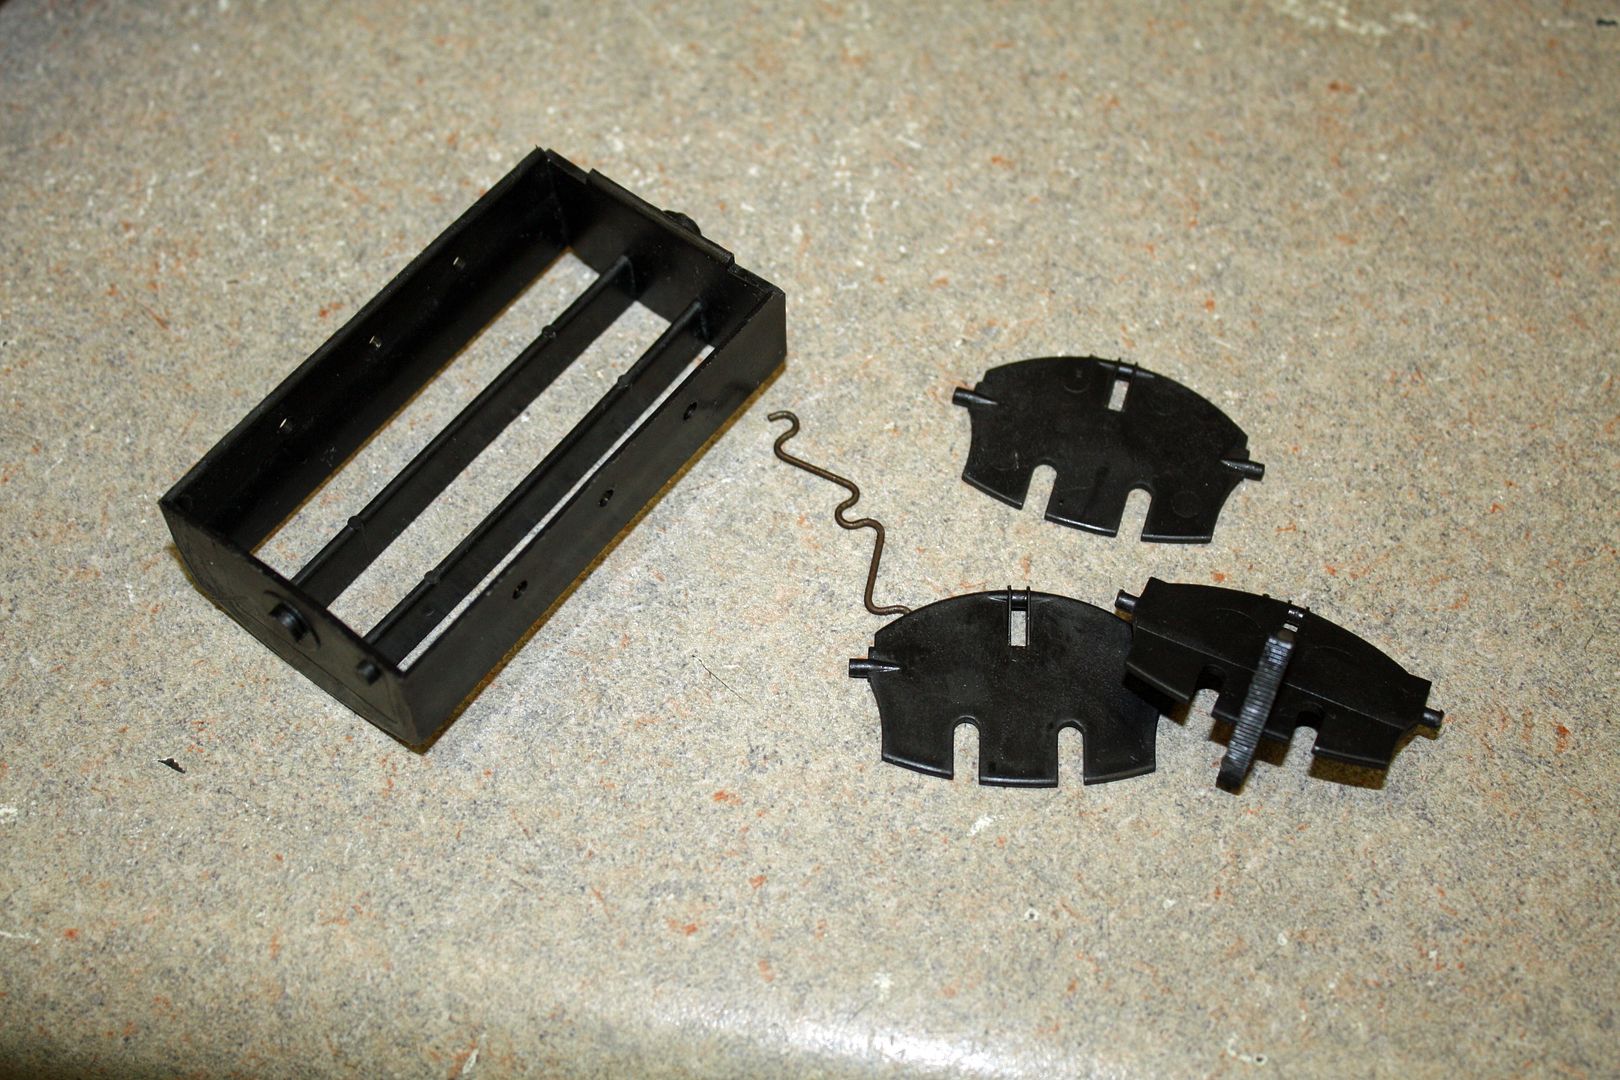
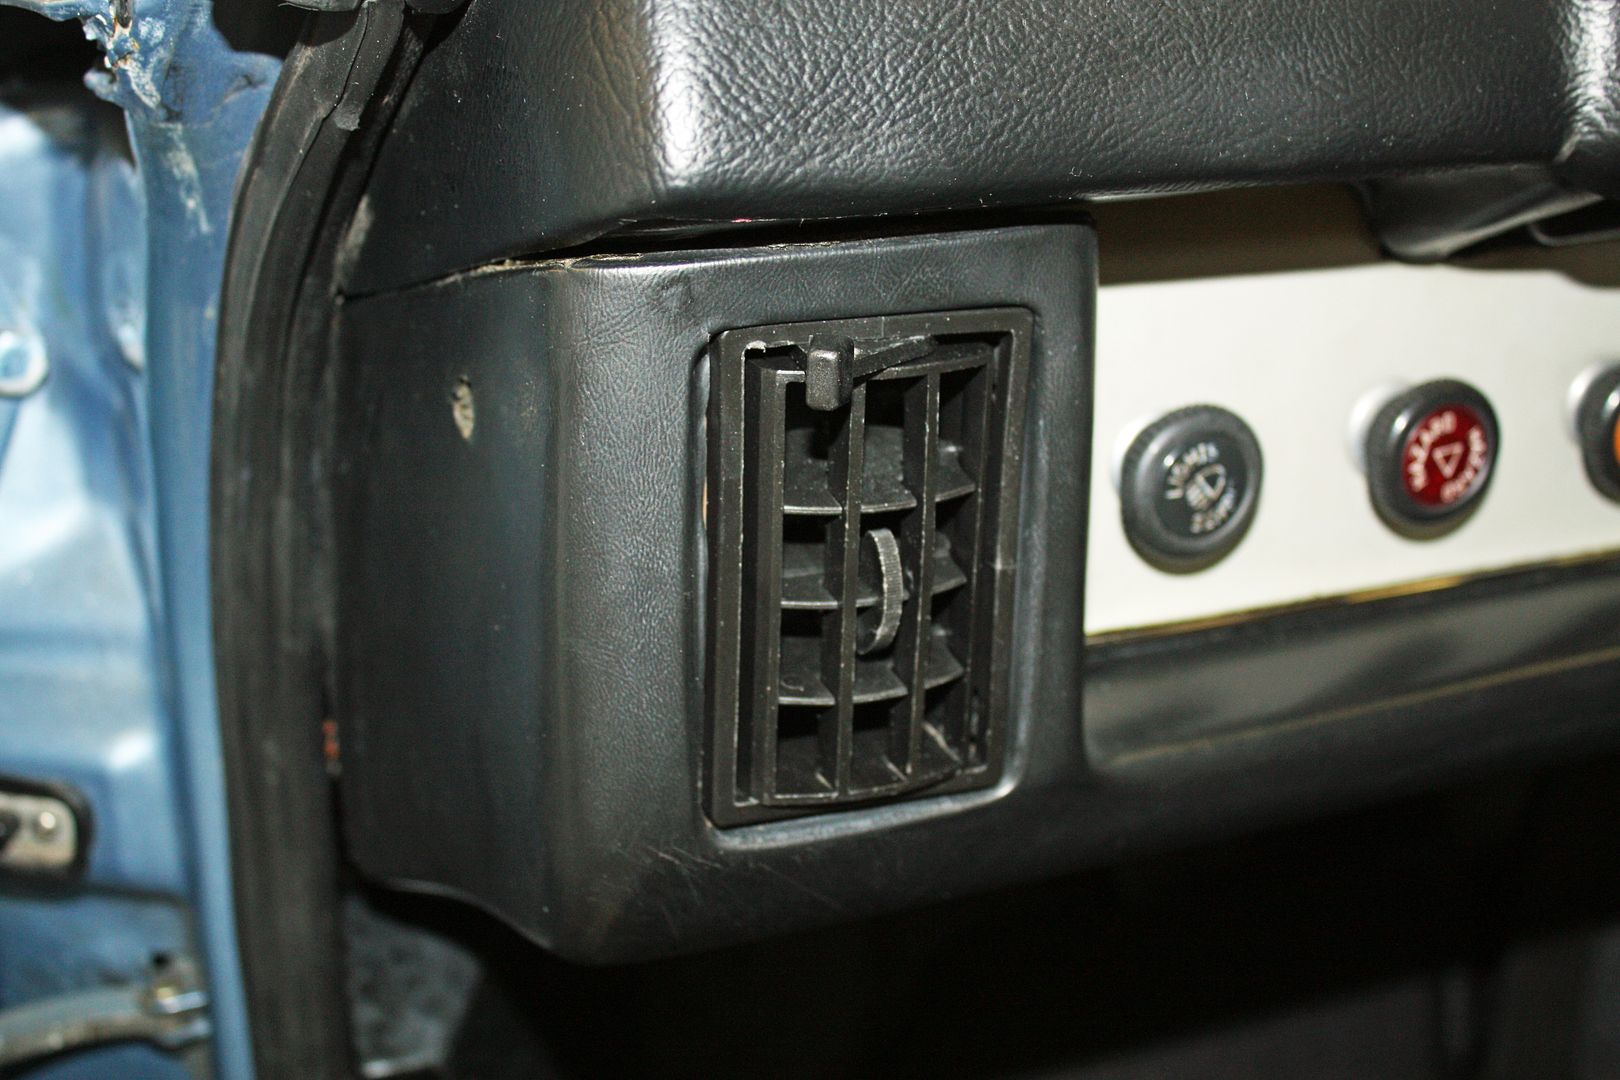
Before re-assembling everything, I decided that I had to clean the vents at each end fo the knee pad. After removing the vents from the knee pad, I removed the swivel part and then disassembled each of those. Now I could clean everything.
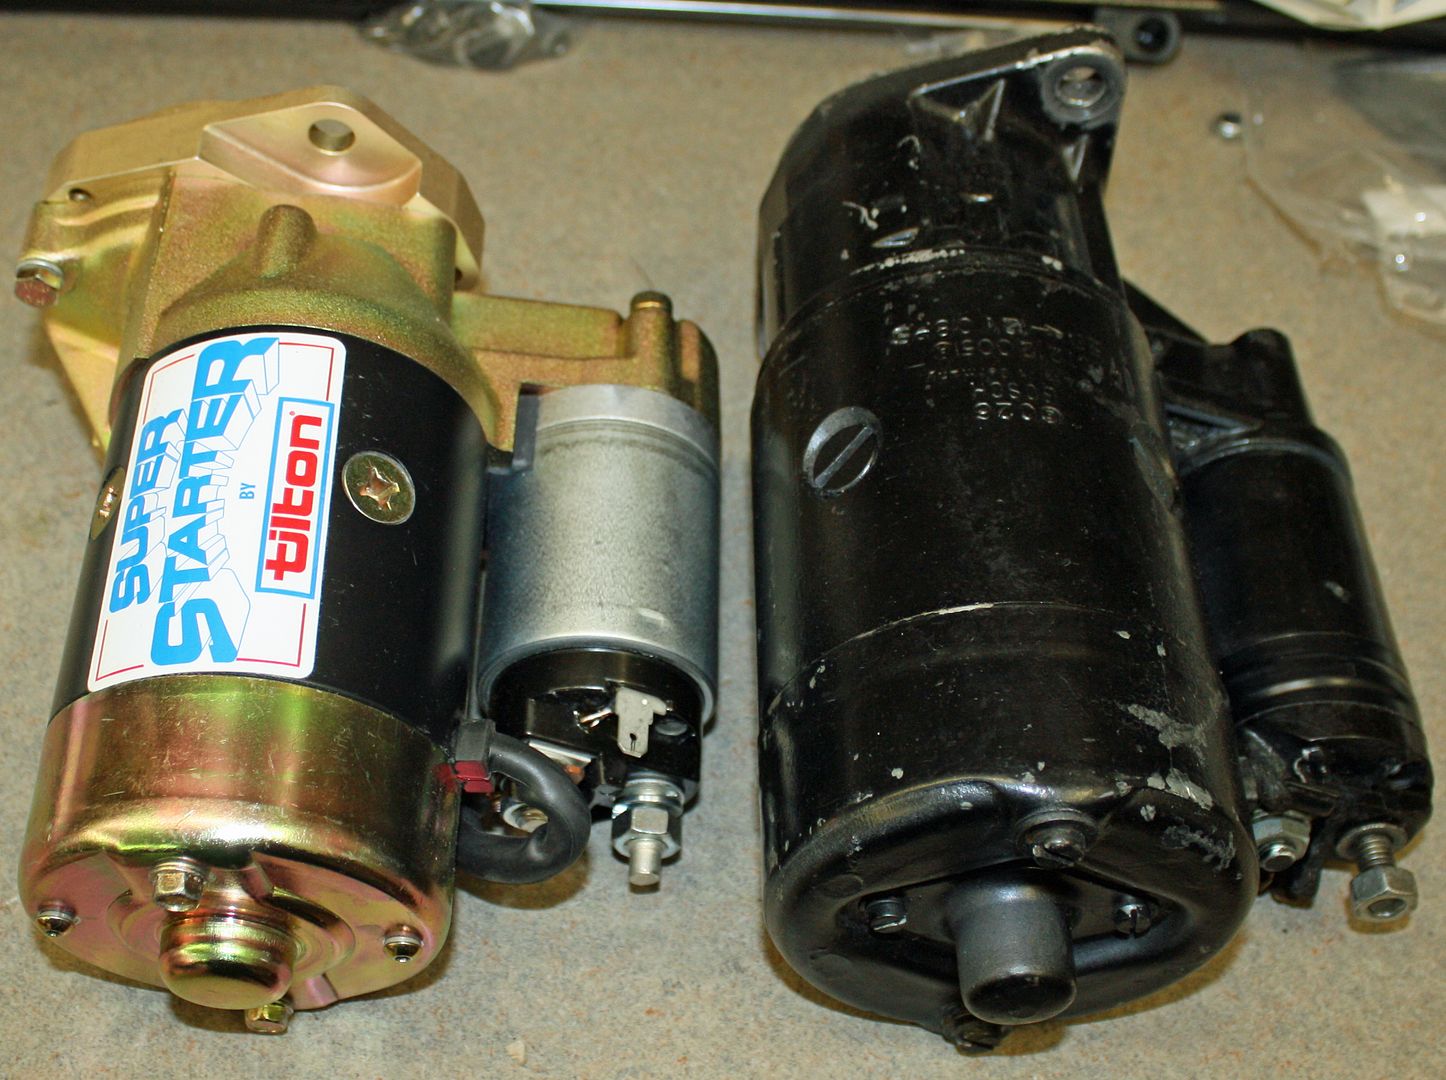
Last summer I had taken both of the starters that came with the car to a local electrical shop to have them checked out. They were both good. My son wondered if I had damaged the starters by trying to start the car when the flywheel was rubbing the block. So I took one of them back to the electrical shop to have it checked. I did buy a new Tilton high torque starter but I am leery of using it until I know why I am having this starting issue. I don't want to damage it. With this switch installed, I can put the car back on the lift and begin to troubleshoot some more.


Before re-assembling everything, I decided that I had to clean the vents at each end fo the knee pad. After removing the vents from the knee pad, I removed the swivel part and then disassembled each of those. Now I could clean everything.


Last summer I had taken both of the starters that came with the car to a local electrical shop to have them checked out. They were both good. My son wondered if I had damaged the starters by trying to start the car when the flywheel was rubbing the block. So I took one of them back to the electrical shop to have it checked. I did buy a new Tilton high torque starter but I am leery of using it until I know why I am having this starting issue. I don't want to damage it. With this switch installed, I can put the car back on the lift and begin to troubleshoot some more.
03-09-2019, 05:12 PM
#145
Racer
Thread Starter
The Sweet Sound of Success
This past Monday I traveled to Denver, NC to buy some parts from John Forbes of Black Forest Racing. John has been working on and racing 914's almost from the beginning. After buying the parts, I related to him the starting issue I was having. His best guess was that I still had a clearance issue.
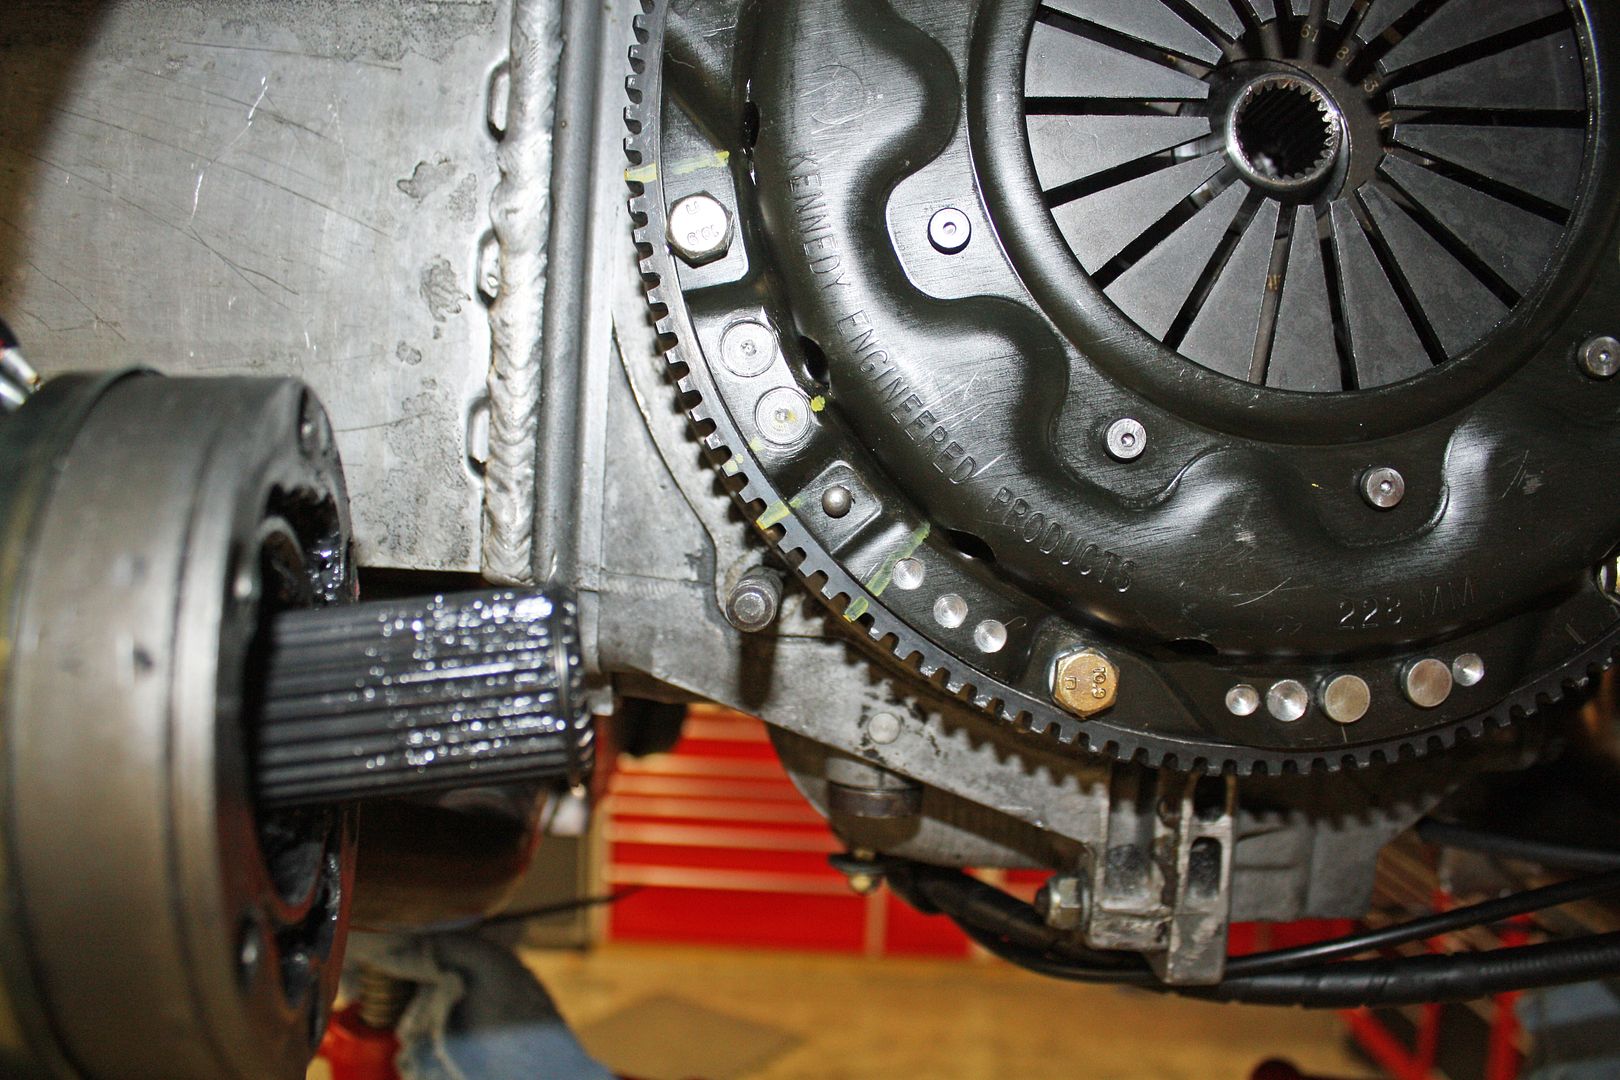
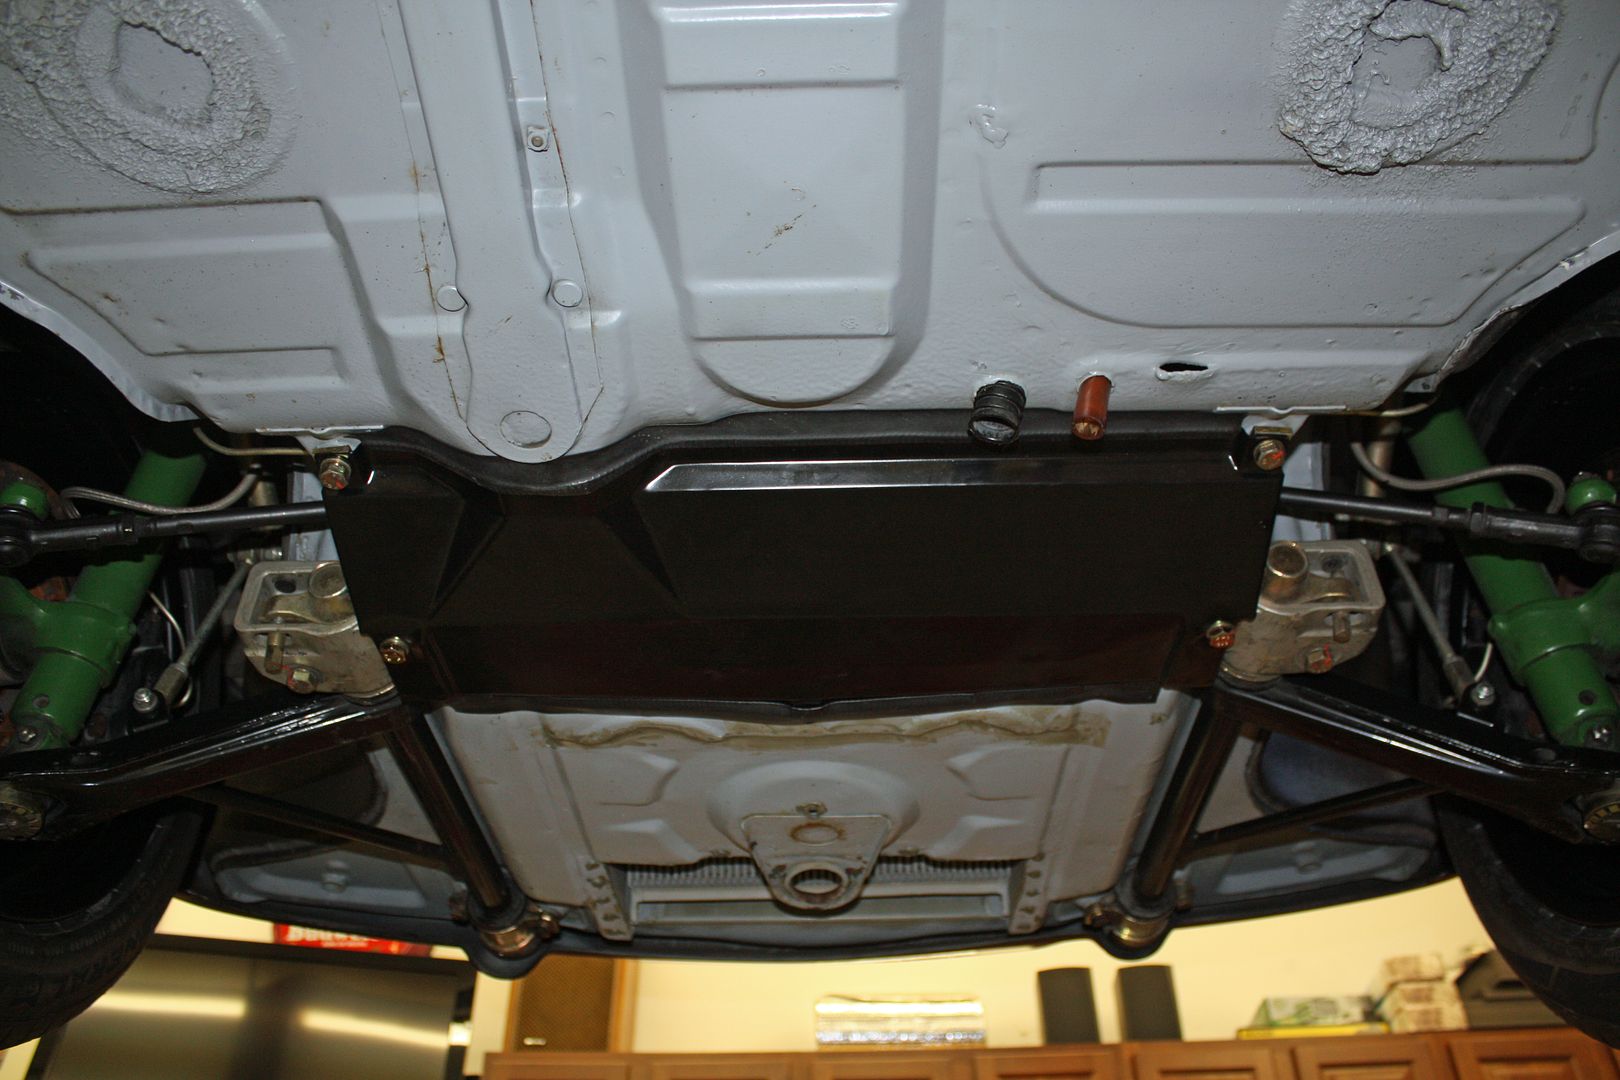
He also told me that on 914's with 911 motor conversions with a 901 tranny, he has always used a stock flywheel and a clutch from Patrick Motorsports. Since I am so frustrated with the Kennedy Engineering flywheel, I decided to take John's advice and order the parts from Patrick. While I was waiting for the parts to arrive, I removed the transmission (again) and removed the flywheel. It was still rubbing on the engine block.
While talking to Brett at Kennedy about this issue last December, he had told me that, if I sent the flywheel to him, he would make sure it was to spec and send it back, free of charge. The flywheel is on the way to him.
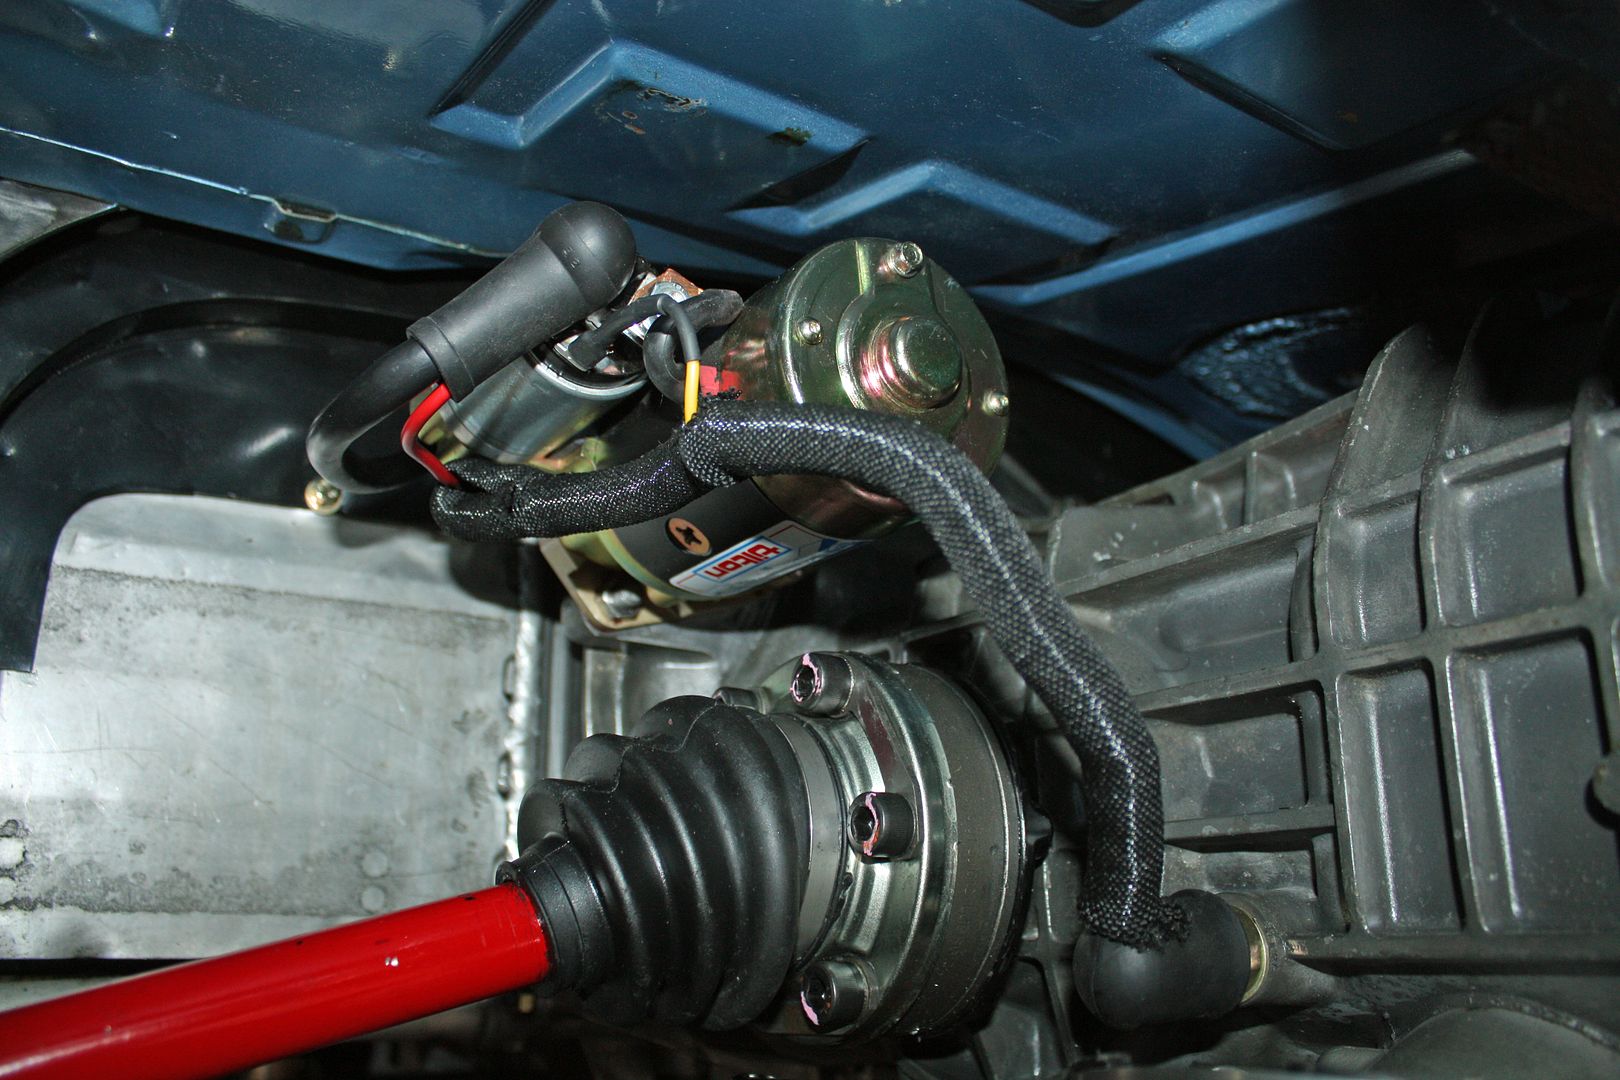
Meanwhile, the Patrick Motorsport parts arrived late yesterday. I installed everything today and the result is what you heard in the video above. That sound was created by the new Tilton high torque starter. I didn't have the fuel pump hooked up as I wasn't actually trying to start the motor. That will come on Monday once I get with Richard Clewett for the initial startup. But I am relieved to have the starter operating as it should.
BTW, Patrick balance the entire flywheel and pressure plate assembly. The pressure plate had a "Made in Germany" on it. All I had to do was line up the yellow lines.
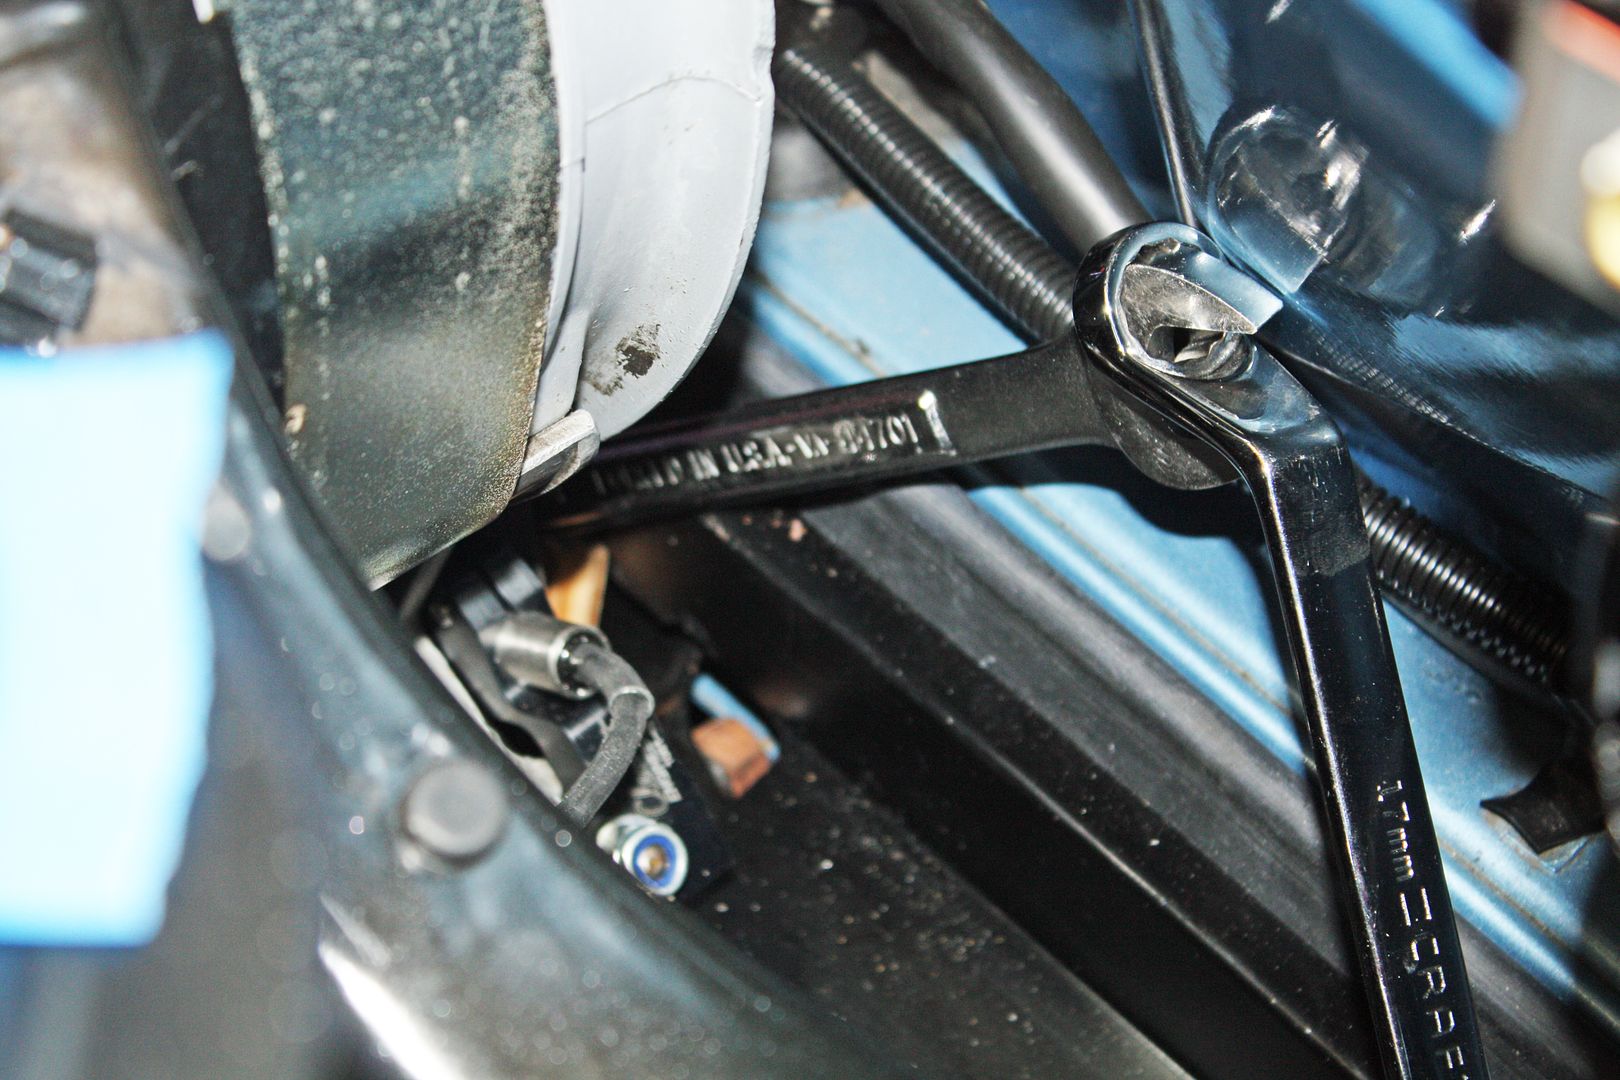
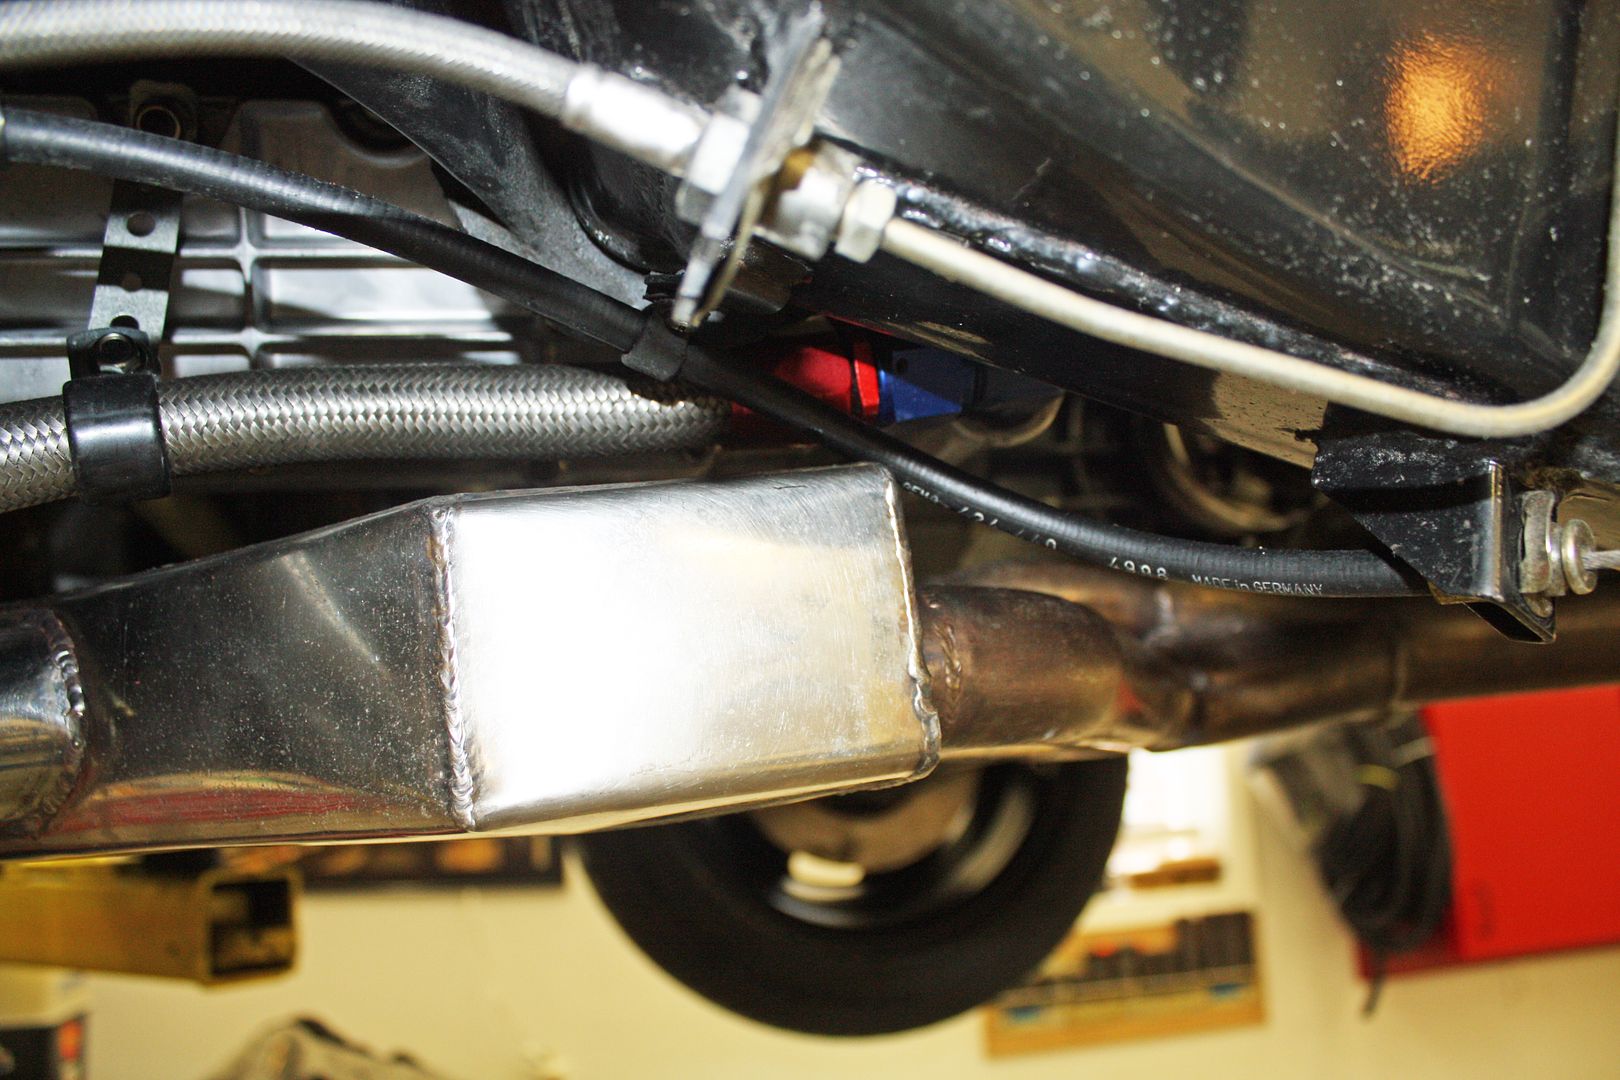
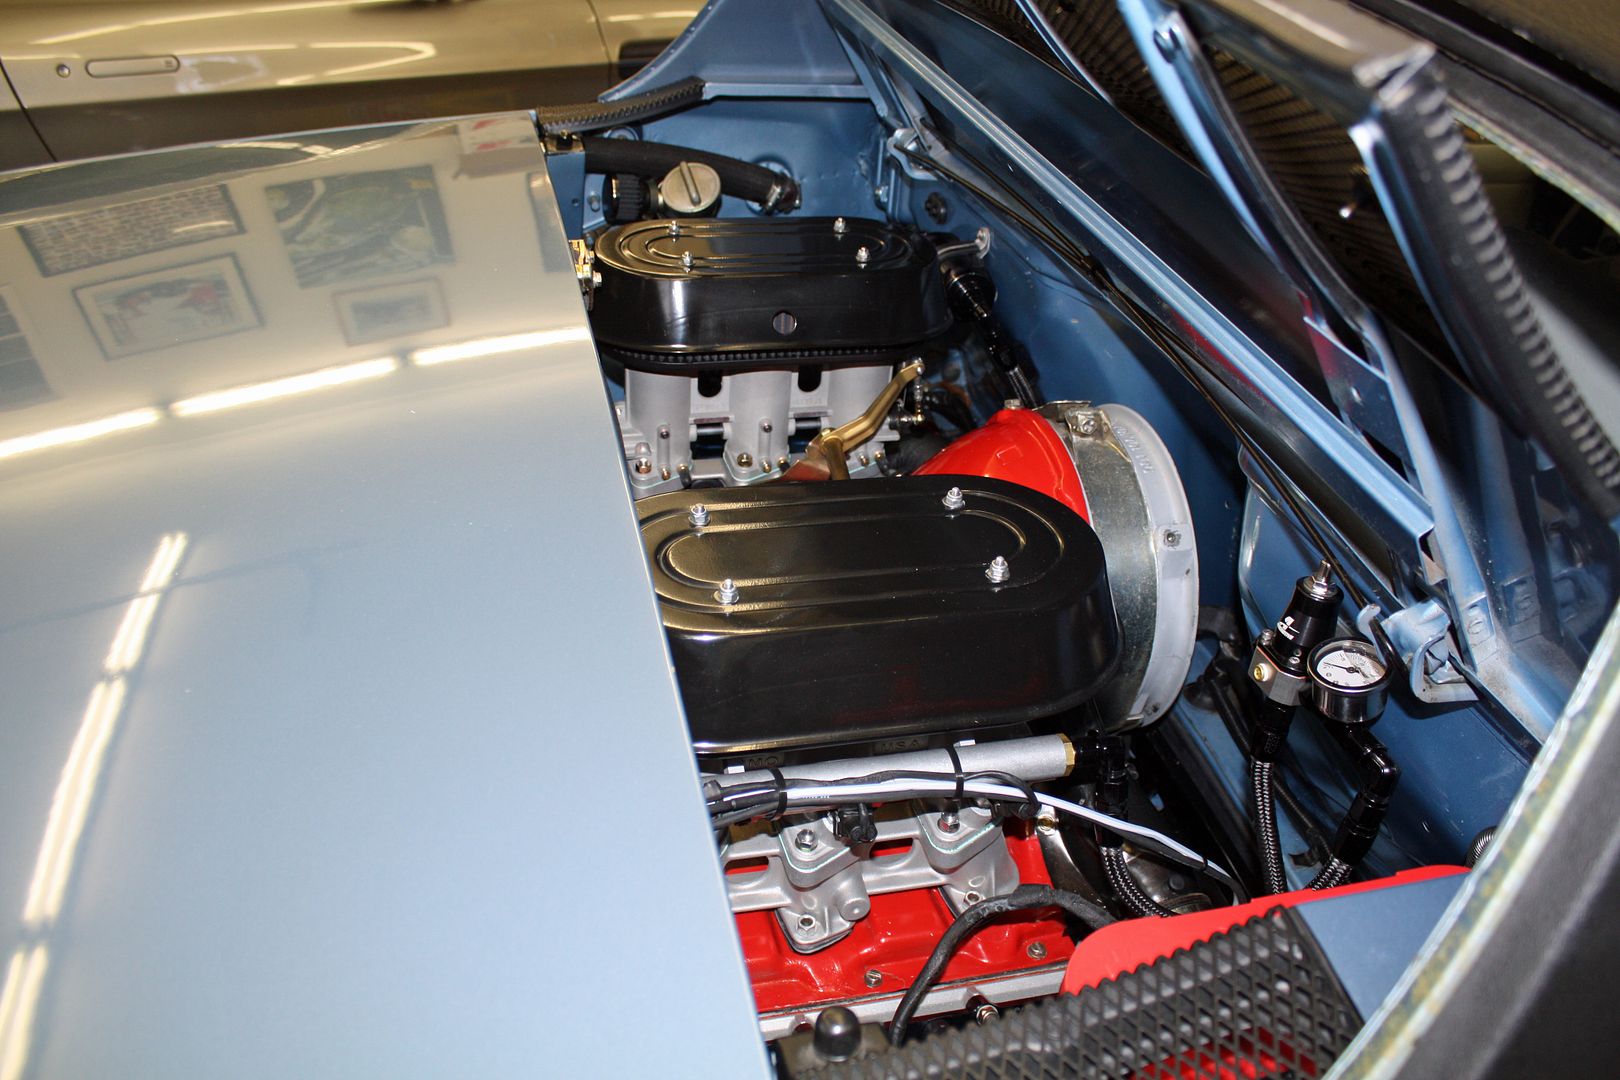
Earlier in the week I also addressed an oil leak. When I cleaned the bottom pan, I found oil in the left rear corner of the pan. I also found oil dripping on the arm of the lift. It was dripping off the rocker panel cover. When I looked up towards the tank, I could see oil on one of the fittings. In the photo below, you can also see a slight twist in the line.
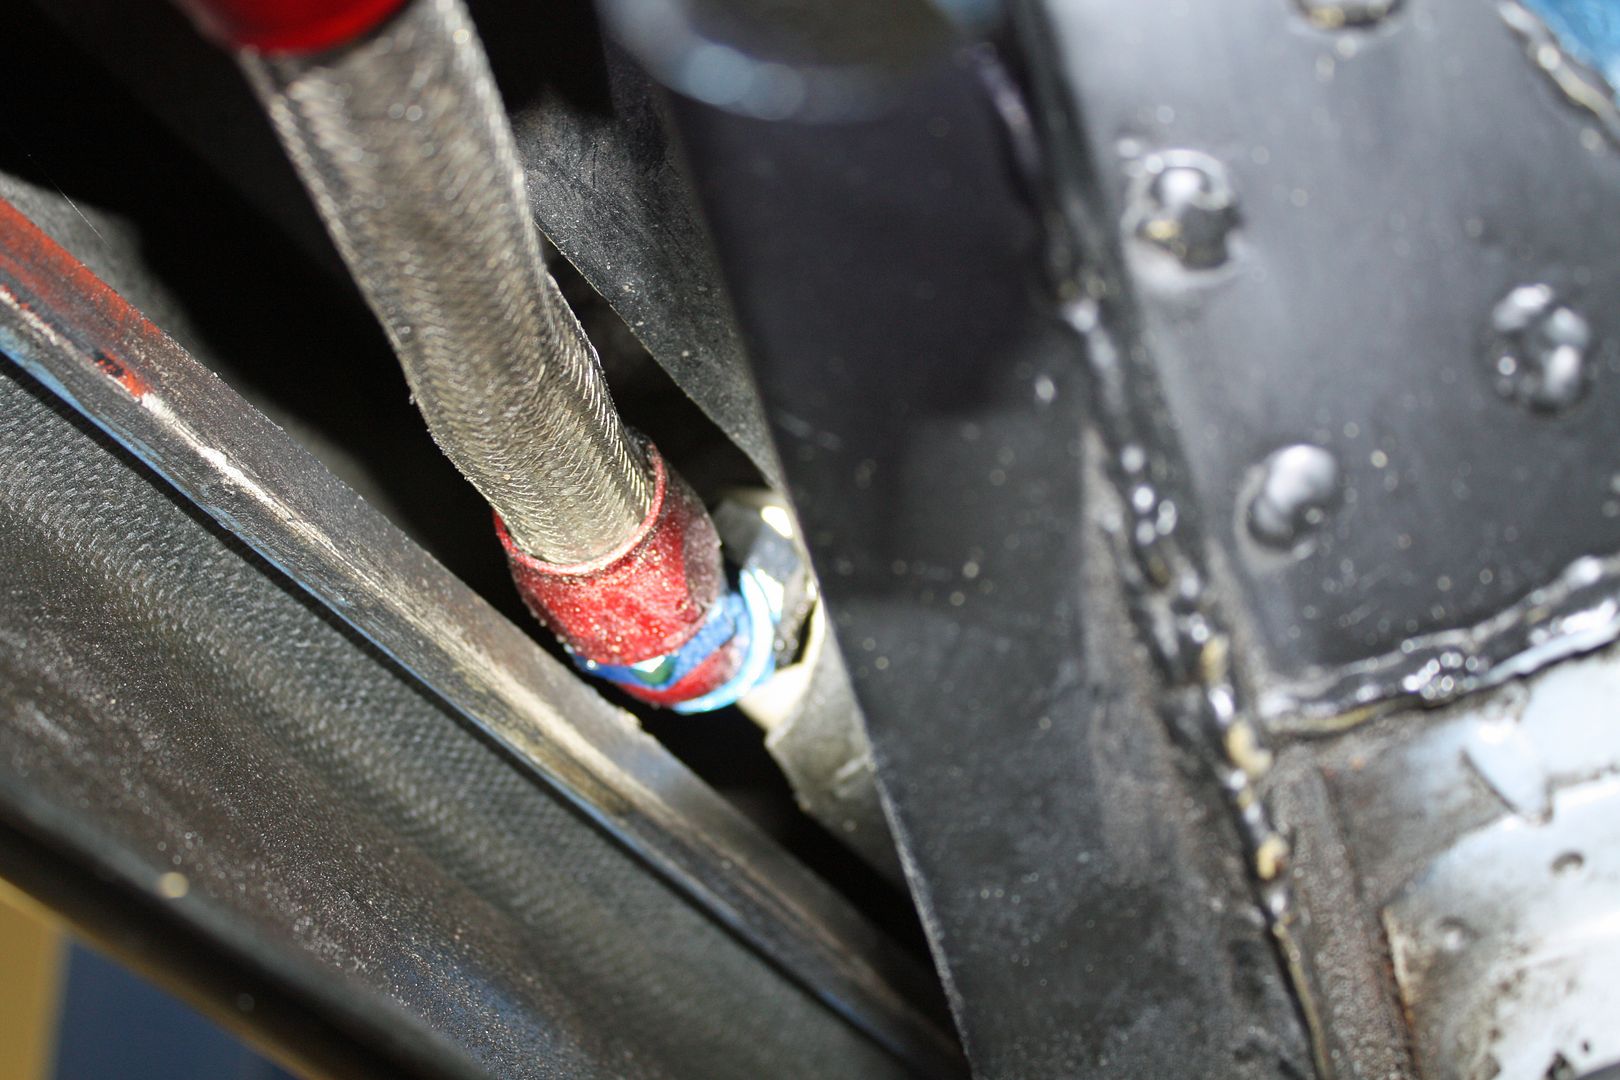
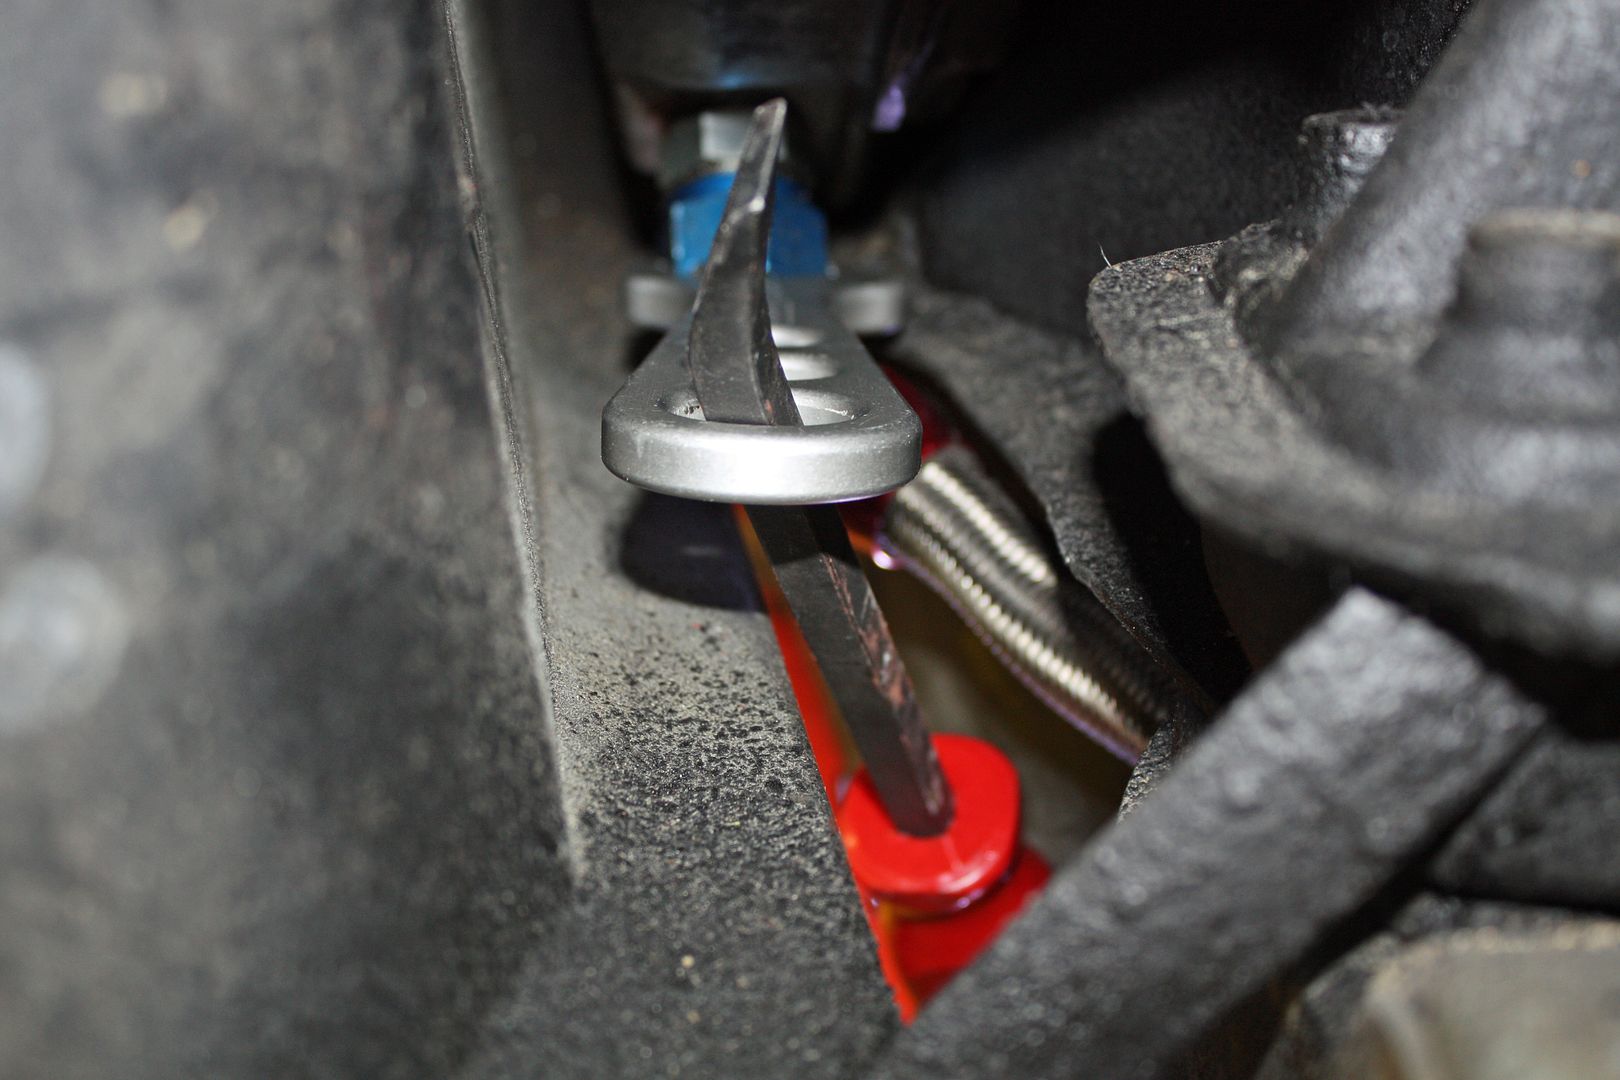
To get to that fitting, I had to remove the rocker cover. Even then, there was very little room to work. My best guess is that the line was installed to the tank prior to the tank installation. I was finally able to get the wrench on it but had to use a pry bar to apply pressure.
I wasn't very happy with how the lines ran to the engine as the entire assembly was just hanging there. I found a hose clamp that worked and then loosened all of the fittings to relieve that twist in the line.
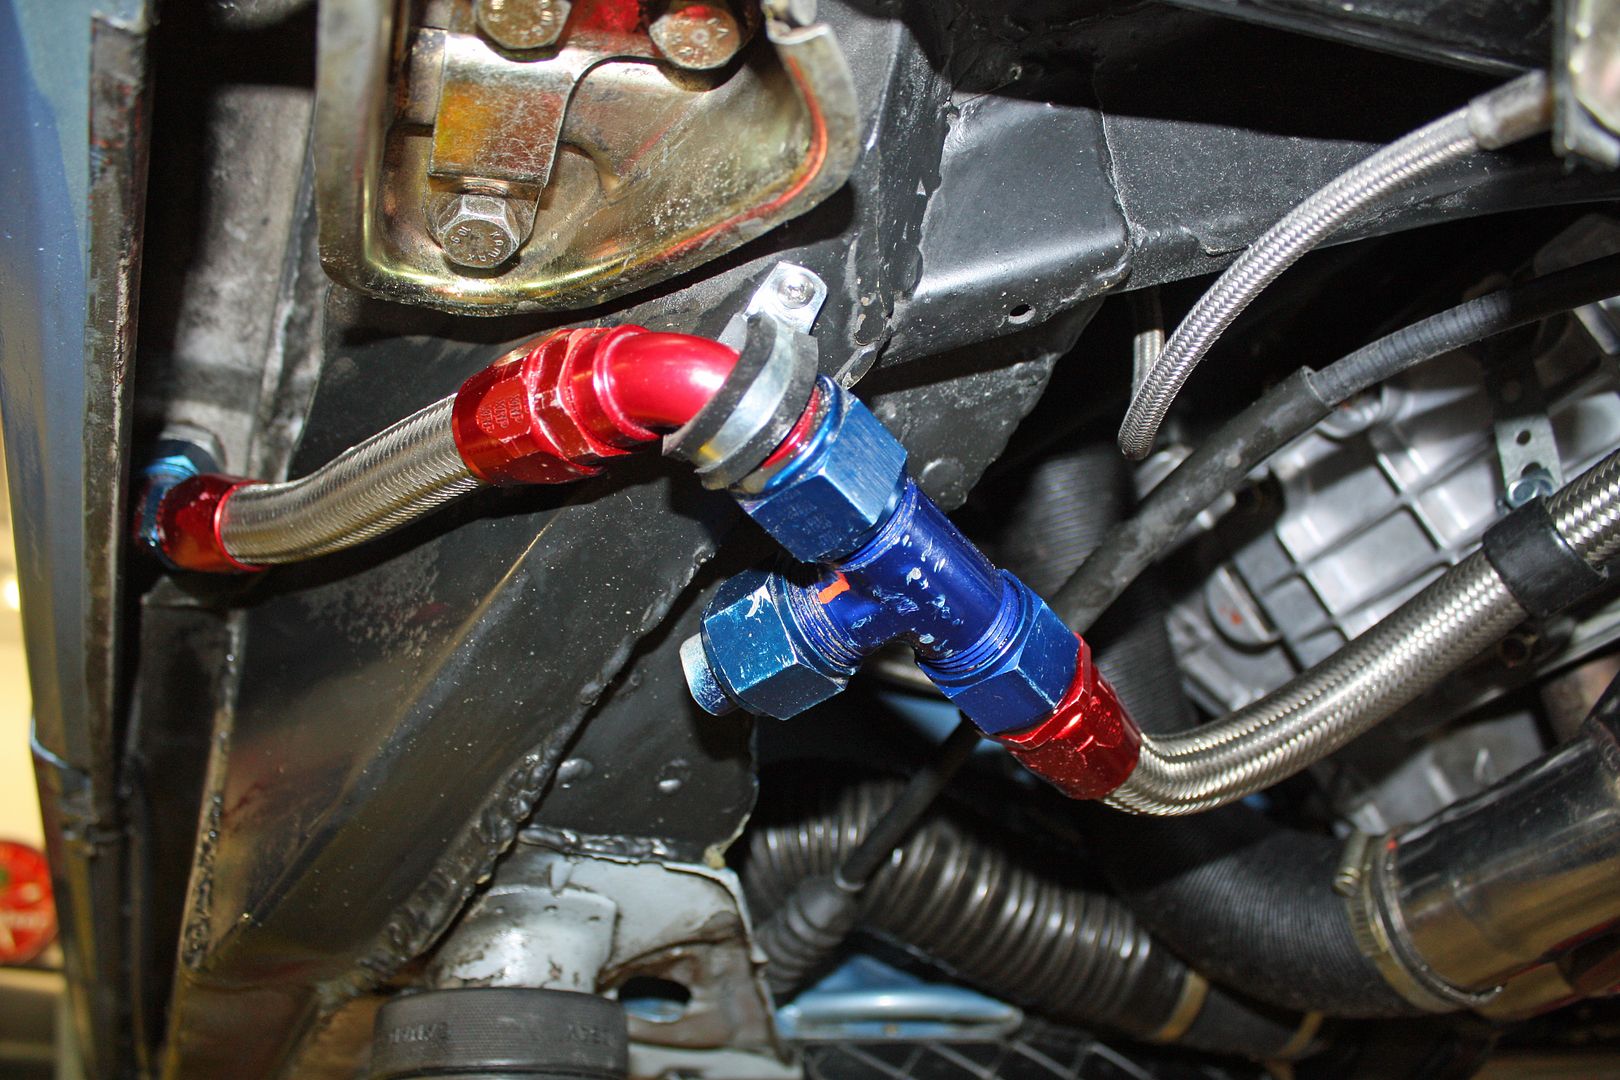
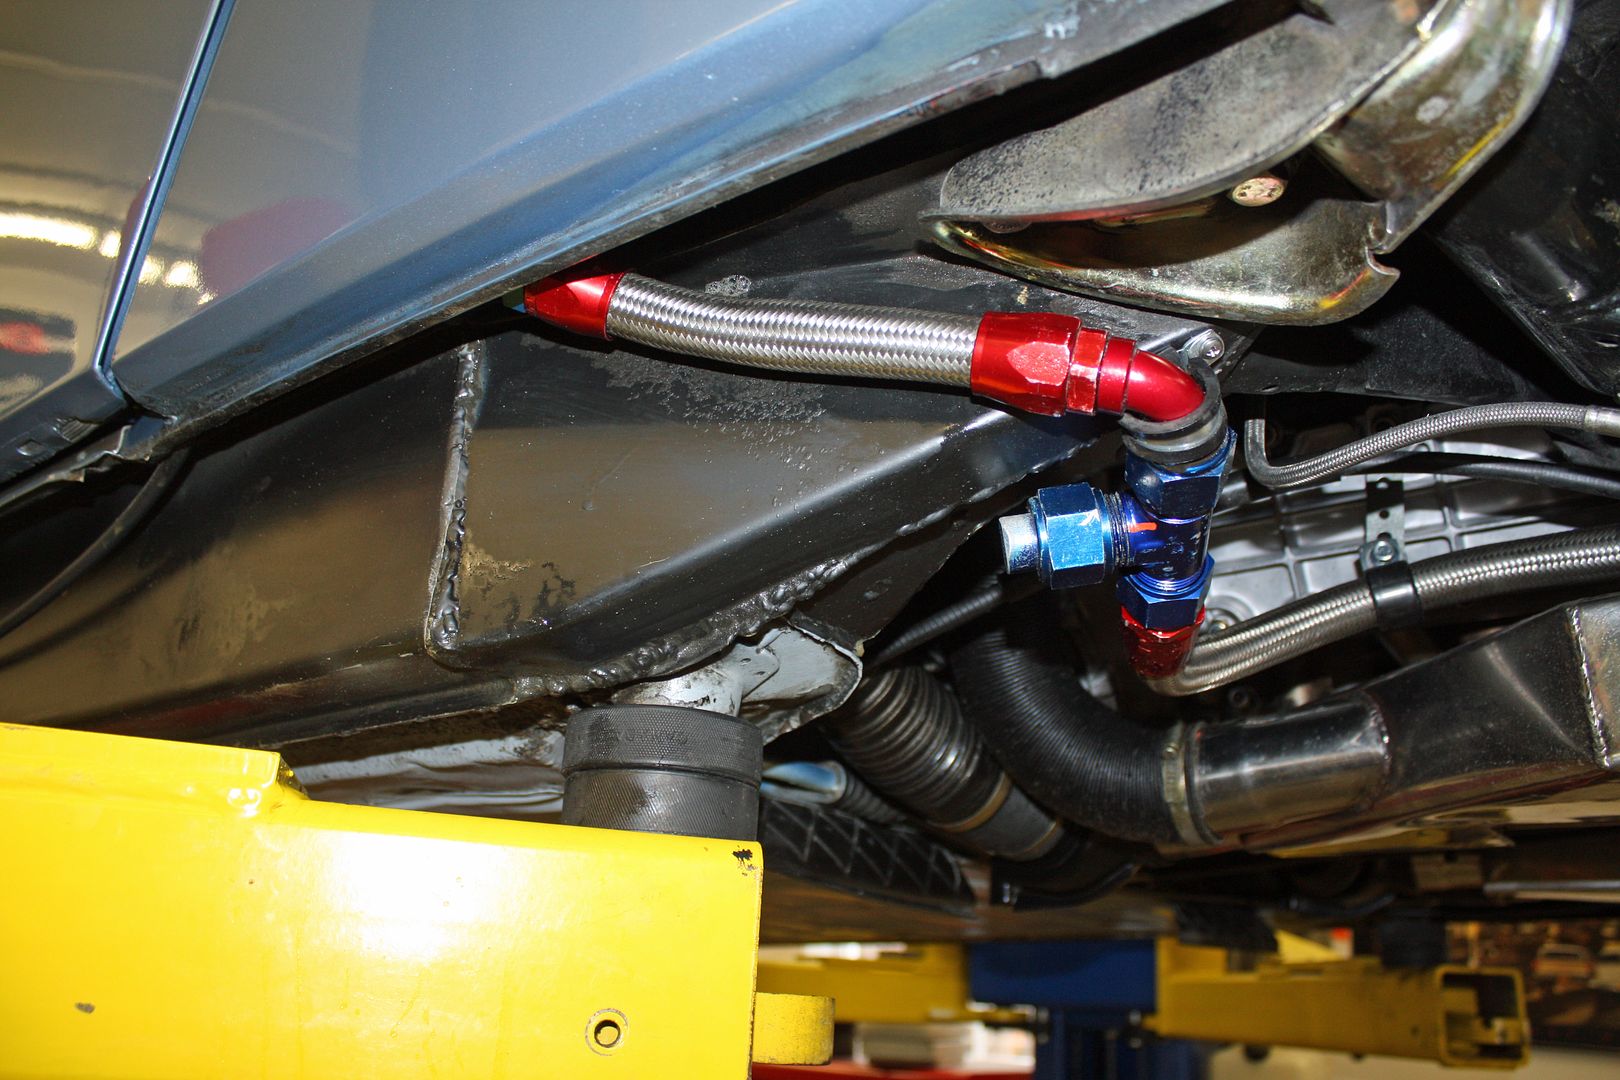
I also rotated the line up where it runs over the top of the heat exchanger as it was nearly touching the exchanger.
This past Monday I traveled to Denver, NC to buy some parts from John Forbes of Black Forest Racing. John has been working on and racing 914's almost from the beginning. After buying the parts, I related to him the starting issue I was having. His best guess was that I still had a clearance issue.
He also told me that on 914's with 911 motor conversions with a 901 tranny, he has always used a stock flywheel and a clutch from Patrick Motorsports. Since I am so frustrated with the Kennedy Engineering flywheel, I decided to take John's advice and order the parts from Patrick. While I was waiting for the parts to arrive, I removed the transmission (again) and removed the flywheel. It was still rubbing on the engine block.


While talking to Brett at Kennedy about this issue last December, he had told me that, if I sent the flywheel to him, he would make sure it was to spec and send it back, free of charge. The flywheel is on the way to him.
Meanwhile, the Patrick Motorsport parts arrived late yesterday. I installed everything today and the result is what you heard in the video above. That sound was created by the new Tilton high torque starter. I didn't have the fuel pump hooked up as I wasn't actually trying to start the motor. That will come on Monday once I get with Richard Clewett for the initial startup. But I am relieved to have the starter operating as it should.


BTW, Patrick balance the entire flywheel and pressure plate assembly. The pressure plate had a "Made in Germany" on it. All I had to do was line up the yellow lines.

Earlier in the week I also addressed an oil leak. When I cleaned the bottom pan, I found oil in the left rear corner of the pan. I also found oil dripping on the arm of the lift. It was dripping off the rocker panel cover. When I looked up towards the tank, I could see oil on one of the fittings. In the photo below, you can also see a slight twist in the line.

To get to that fitting, I had to remove the rocker cover. Even then, there was very little room to work. My best guess is that the line was installed to the tank prior to the tank installation. I was finally able to get the wrench on it but had to use a pry bar to apply pressure.

I wasn't very happy with how the lines ran to the engine as the entire assembly was just hanging there. I found a hose clamp that worked and then loosened all of the fittings to relieve that twist in the line.


I also rotated the line up where it runs over the top of the heat exchanger as it was nearly touching the exchanger.
 03-11-2019, 11:47 PM
#146
Racer
Thread Starter
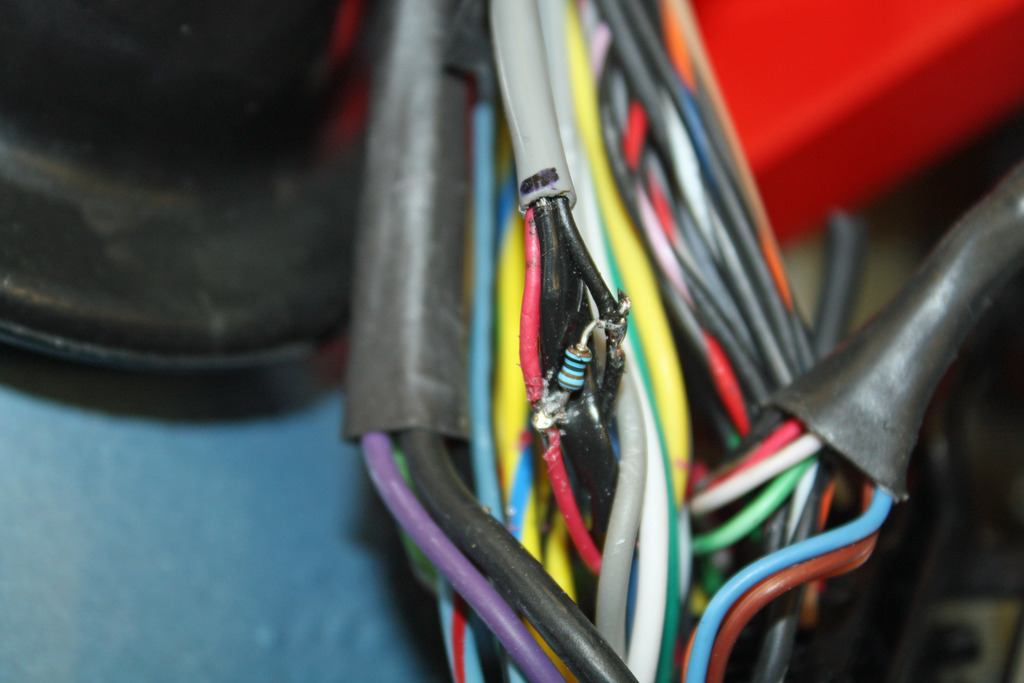
For the first time in thirteen and a half years, the engine ran today...but not well...yet! I called Richard Clewett and, after him hooking up to my computer, he told me to start it. It would not fire. He said there was a problem with the crank sensor signal. He then asked if I was using a high torque starter. Upon hearing that I was, he said that they don't have any noise suppression and that they muddy up the crank sensor signal to the point where the computer will act as if it in not getting any signal. Thus, the engine will not start.
So I hung up and installed the stock starter. I tried it just before I called him and it started!! After getting him back on the phone, I got it to start. It was idling roughly, but idling. He was looking at the readouts when I decided to give it some gas to see if it would smooth out. It died and then would not restart. His conclusion was that we still had an issue with something messing with the crank sensor signal. His solution was for me to install a 1K ohm-1/2 watt resistor between the red and black wires of the crank sensor.
I called around and could not find anyone local selling resistors. Times like this are when we miss Radio Shack!! So I called my son and asked him where he would go to get a resistor. A little later he texted me back that they had a 1K ohm-1/8 watt resistor there at TRD. Since the cranks sensor signal is very low voltage, he thought it would work. It just so happens that he was coming to the house after work so he brought two with him.
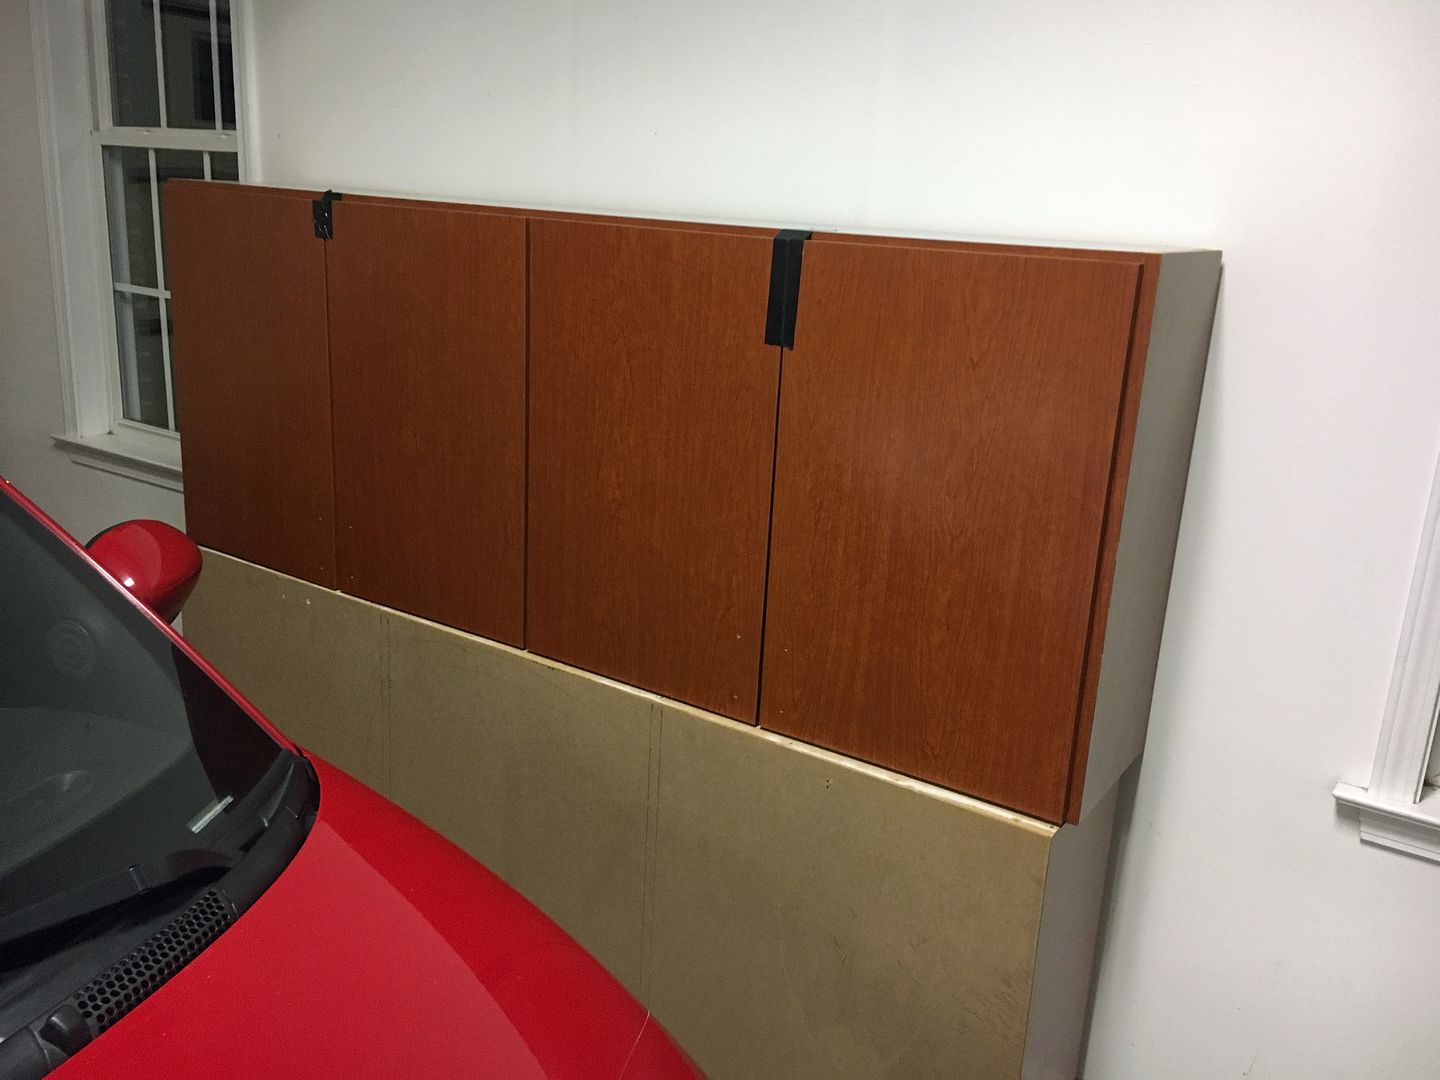
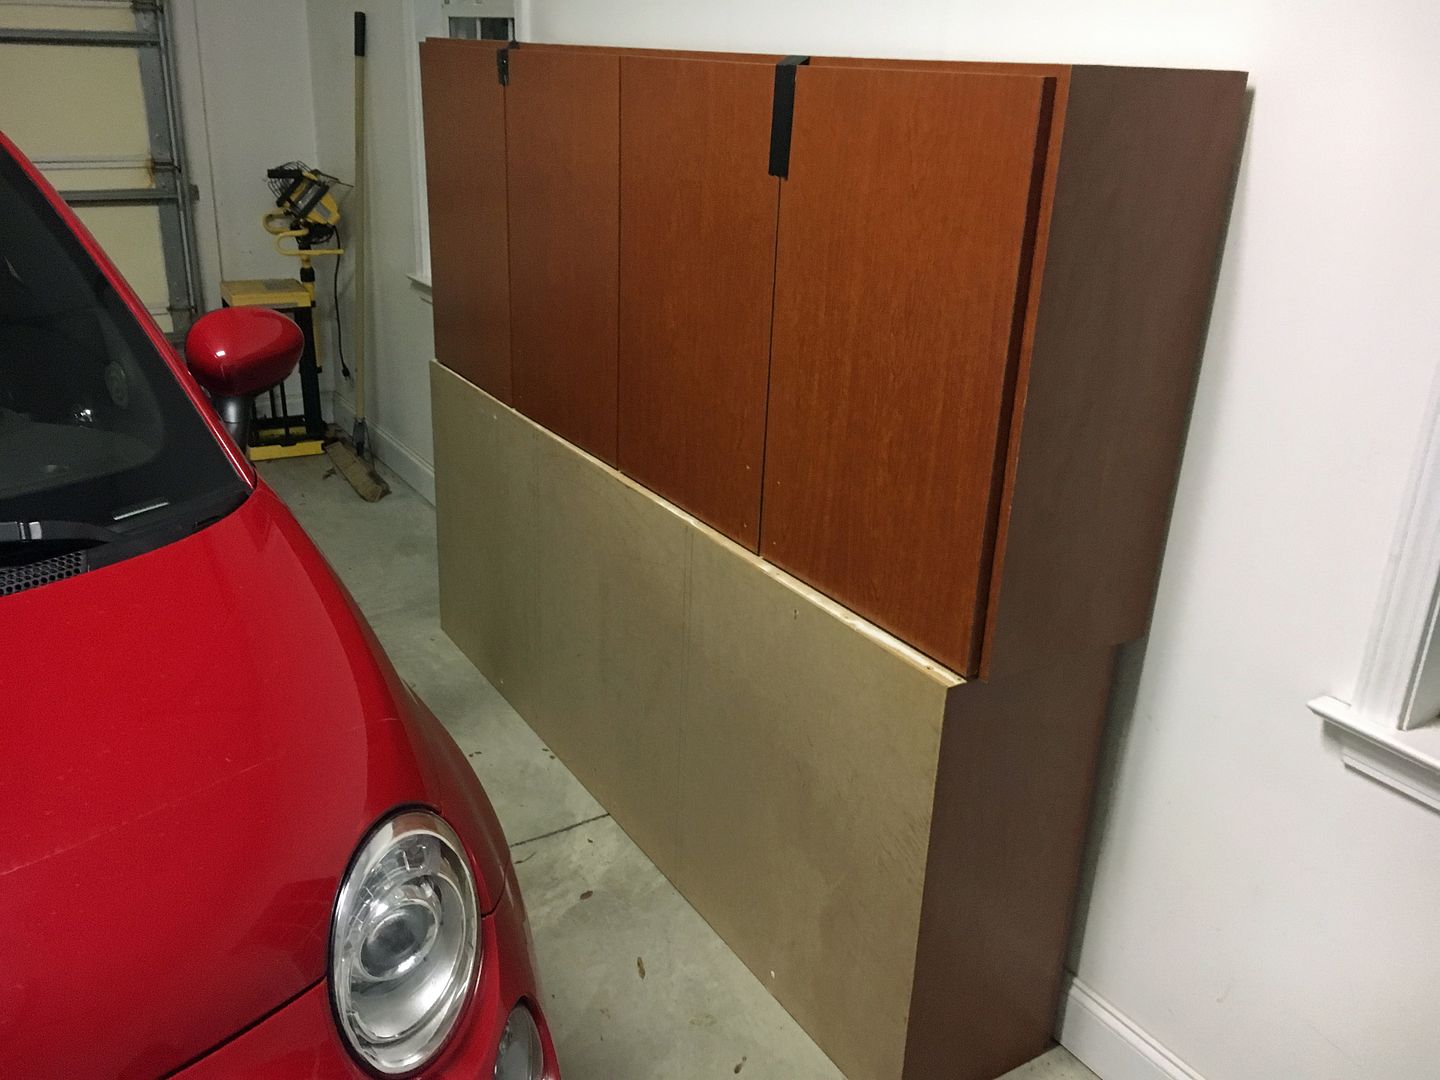
Last Saturday I dd a Craigslist search for some garage cabinets. I came across an ad for four cabinets. Three were 78" long, 30" high and 12" deep. Another cabinet was 52" long. They were taken out of a medical clinic and were in excellent condition. Best of all, they were free as they wanted them out of their sun room. On Sunday, I hooked up my little utility trailer to the Audi and we picked them up. I plan on using two of the 78" cabinets while I gave the other two to Matt. Which is why he was coming to the house.
Before we did anything with the cabinets, we began discussing the issue with the car. He told me that he could not see why a starter would dirty up a crank signal. I told him what had transpired earlier and, after a bit, he said, let's see it we can get it to start. I cranked it over and it started. Again the idle was very rough. Back in 2006 Matt had built a fuel injection system from scratch for his Camaro. He used an earlier version of the TEC ECU so he was familiar with the readouts. He did all of his own tuning on that car.
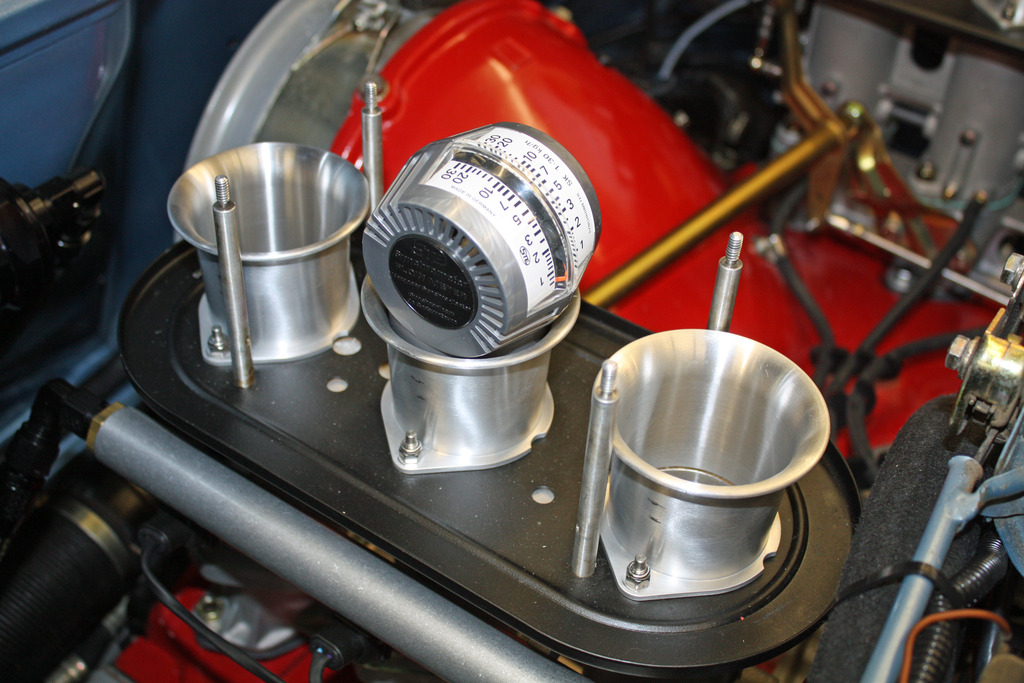
The Manifold Air Pressure (MAP) readings jumped out at him as he thought they were way too high and causing the computer to call for lots of fuel. We could tell it was running very rich. It was five o'clock here, but only two on the west coast. Richard was in and he and Matt were soon discussing the readings. He told Matt that the cams were too radical for the MAP sensor to work. He had Matt disconnect the main hose and plug it. He also wants me to remove all of the hoses that run to the throttle bodies and install a bolt in those places. The MAP will stay in the system but will become a barometer.
He wanted us to back out idle screws all the way and then screw them in 3/4 or a turn. And then we could work on the idle. I started the car and Matt went back and forth adjusting the idle but it did't seem to make any difference. It was idling at 500 rpm. He had me give it some more gas and then, when I let off, the idle went way up. We shut it down at this point and told Richard we would call him back once we had the idle set. After disconnecting the linkage, Matt started over and, again, it did not seem to make and difference where he set the idle screw. He then noticed it was running very lean. So he richened it up and the idle immediately went up quite a bit. Now, when he made an adjustment, something actually happened. This is where we left it for today. Tomorrow I am going to go through Richard's procedure for balancing the intakes with a sync meter. Once I have done that, I will be calling Richard back to have him make final adjustments.
I had a small drop of fuel near the fuel pump area that I need to look into. Also, that original oil leak is still there now that the oil was under pressure. I will see if I can figure out some way to tighten that line without removing the tank. Matt looked at it and said, "Good luck with that!"
So I hung up and installed the stock starter. I tried it just before I called him and it started!! After getting him back on the phone, I got it to start. It was idling roughly, but idling. He was looking at the readouts when I decided to give it some gas to see if it would smooth out. It died and then would not restart. His conclusion was that we still had an issue with something messing with the crank sensor signal. His solution was for me to install a 1K ohm-1/2 watt resistor between the red and black wires of the crank sensor.
I called around and could not find anyone local selling resistors. Times like this are when we miss Radio Shack!! So I called my son and asked him where he would go to get a resistor. A little later he texted me back that they had a 1K ohm-1/8 watt resistor there at TRD. Since the cranks sensor signal is very low voltage, he thought it would work. It just so happens that he was coming to the house after work so he brought two with him.
Last Saturday I dd a Craigslist search for some garage cabinets. I came across an ad for four cabinets. Three were 78" long, 30" high and 12" deep. Another cabinet was 52" long. They were taken out of a medical clinic and were in excellent condition. Best of all, they were free as they wanted them out of their sun room. On Sunday, I hooked up my little utility trailer to the Audi and we picked them up. I plan on using two of the 78" cabinets while I gave the other two to Matt. Which is why he was coming to the house.


Before we did anything with the cabinets, we began discussing the issue with the car. He told me that he could not see why a starter would dirty up a crank signal. I told him what had transpired earlier and, after a bit, he said, let's see it we can get it to start. I cranked it over and it started. Again the idle was very rough. Back in 2006 Matt had built a fuel injection system from scratch for his Camaro. He used an earlier version of the TEC ECU so he was familiar with the readouts. He did all of his own tuning on that car.
The Manifold Air Pressure (MAP) readings jumped out at him as he thought they were way too high and causing the computer to call for lots of fuel. We could tell it was running very rich. It was five o'clock here, but only two on the west coast. Richard was in and he and Matt were soon discussing the readings. He told Matt that the cams were too radical for the MAP sensor to work. He had Matt disconnect the main hose and plug it. He also wants me to remove all of the hoses that run to the throttle bodies and install a bolt in those places. The MAP will stay in the system but will become a barometer.
He wanted us to back out idle screws all the way and then screw them in 3/4 or a turn. And then we could work on the idle. I started the car and Matt went back and forth adjusting the idle but it did't seem to make any difference. It was idling at 500 rpm. He had me give it some more gas and then, when I let off, the idle went way up. We shut it down at this point and told Richard we would call him back once we had the idle set. After disconnecting the linkage, Matt started over and, again, it did not seem to make and difference where he set the idle screw. He then noticed it was running very lean. So he richened it up and the idle immediately went up quite a bit. Now, when he made an adjustment, something actually happened. This is where we left it for today. Tomorrow I am going to go through Richard's procedure for balancing the intakes with a sync meter. Once I have done that, I will be calling Richard back to have him make final adjustments.
I had a small drop of fuel near the fuel pump area that I need to look into. Also, that original oil leak is still there now that the oil was under pressure. I will see if I can figure out some way to tighten that line without removing the tank. Matt looked at it and said, "Good luck with that!"
03-13-2019, 05:58 PM
#147
Racer
Thread Starter
Yesterday I removed all of the MAP hoses and the manifold. Sure cleaned up the engine bay.
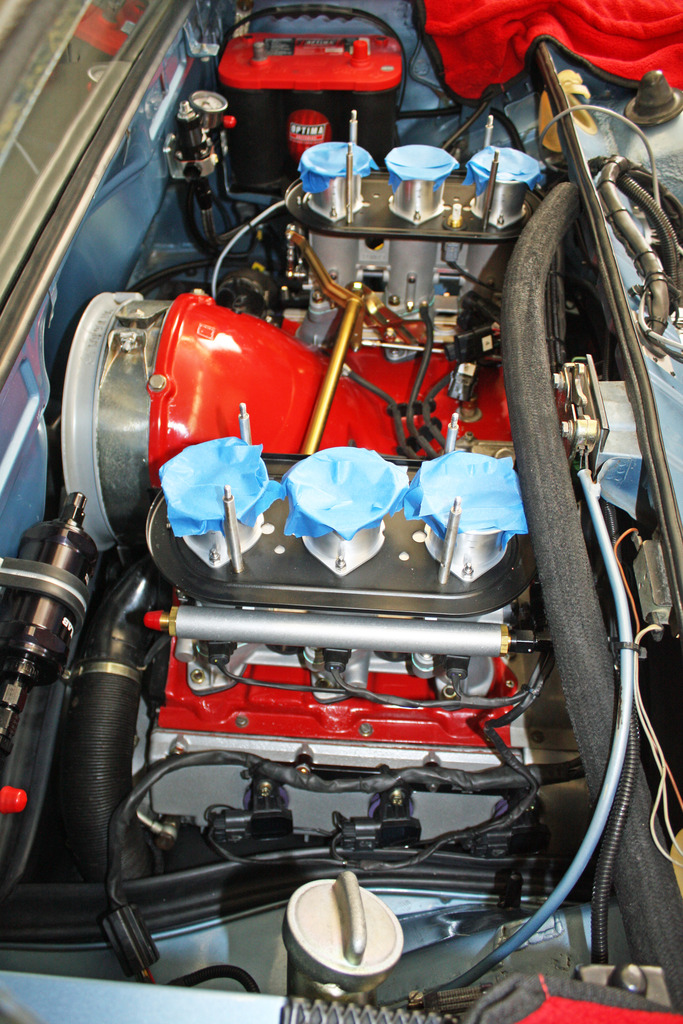
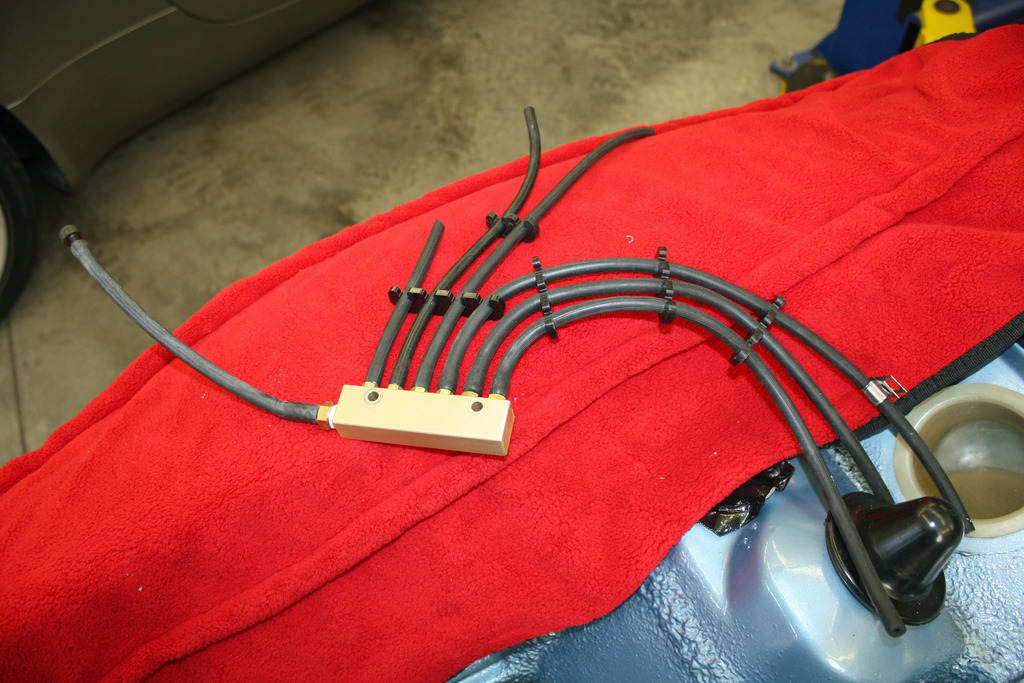
Today I installed the resistor between the red and black wires for the crank fire trigger, as Richard suggested. I unplugged the main plug at the ECU and found the wires there.
Richard has a great video on setting adjusting the idle and airflow on initial startup.
Following these instructions I got the engine to idle and the air flow readings on the synchrometer to be even.
However, I was still not happy with the sound of the engine and the fact that is was spitting. I called Richard back and had him listen to the motor. It kind of sounds like an old tractor motor. After shutting it off, he asked if I had an infrared heat gun. I do have one and he suggested taking a reading on each of the exhaust ports. Cylinder one was about 50 degrees cooler than the other five. So we have an issue there. It was late enough in the day that I did not do any more work today.
I had double checked to make sure I had the correct wires run to each of the injectors and the COP's. First thing tomorrow I am going to open up the cylinder one plugs to make sure the leads are seated properly and that I do not have a broken wire. Assuming they are OK, I will pull the plug to see what i have there. I can then check for spark. My son has a tester for the fuel injector plugs but he is currently in Sebring, FL doing some track testing for TRD. He will be back late Friday. He has to do some last minute preparations on getting his car ready for the body shop, as they are going to pick up the car Sunday morning. If I haven't found anything by then, he is going to bring his tester over. He also has a leak down tester which we may use on cylinder one.
So, close, but no cigar yet!!!


Today I installed the resistor between the red and black wires for the crank fire trigger, as Richard suggested. I unplugged the main plug at the ECU and found the wires there.

Richard has a great video on setting adjusting the idle and airflow on initial startup.
Following these instructions I got the engine to idle and the air flow readings on the synchrometer to be even.

However, I was still not happy with the sound of the engine and the fact that is was spitting. I called Richard back and had him listen to the motor. It kind of sounds like an old tractor motor. After shutting it off, he asked if I had an infrared heat gun. I do have one and he suggested taking a reading on each of the exhaust ports. Cylinder one was about 50 degrees cooler than the other five. So we have an issue there. It was late enough in the day that I did not do any more work today.
I had double checked to make sure I had the correct wires run to each of the injectors and the COP's. First thing tomorrow I am going to open up the cylinder one plugs to make sure the leads are seated properly and that I do not have a broken wire. Assuming they are OK, I will pull the plug to see what i have there. I can then check for spark. My son has a tester for the fuel injector plugs but he is currently in Sebring, FL doing some track testing for TRD. He will be back late Friday. He has to do some last minute preparations on getting his car ready for the body shop, as they are going to pick up the car Sunday morning. If I haven't found anything by then, he is going to bring his tester over. He also has a leak down tester which we may use on cylinder one.
So, close, but no cigar yet!!!
03-14-2019, 05:19 PM
#148
Racer
Thread Starter
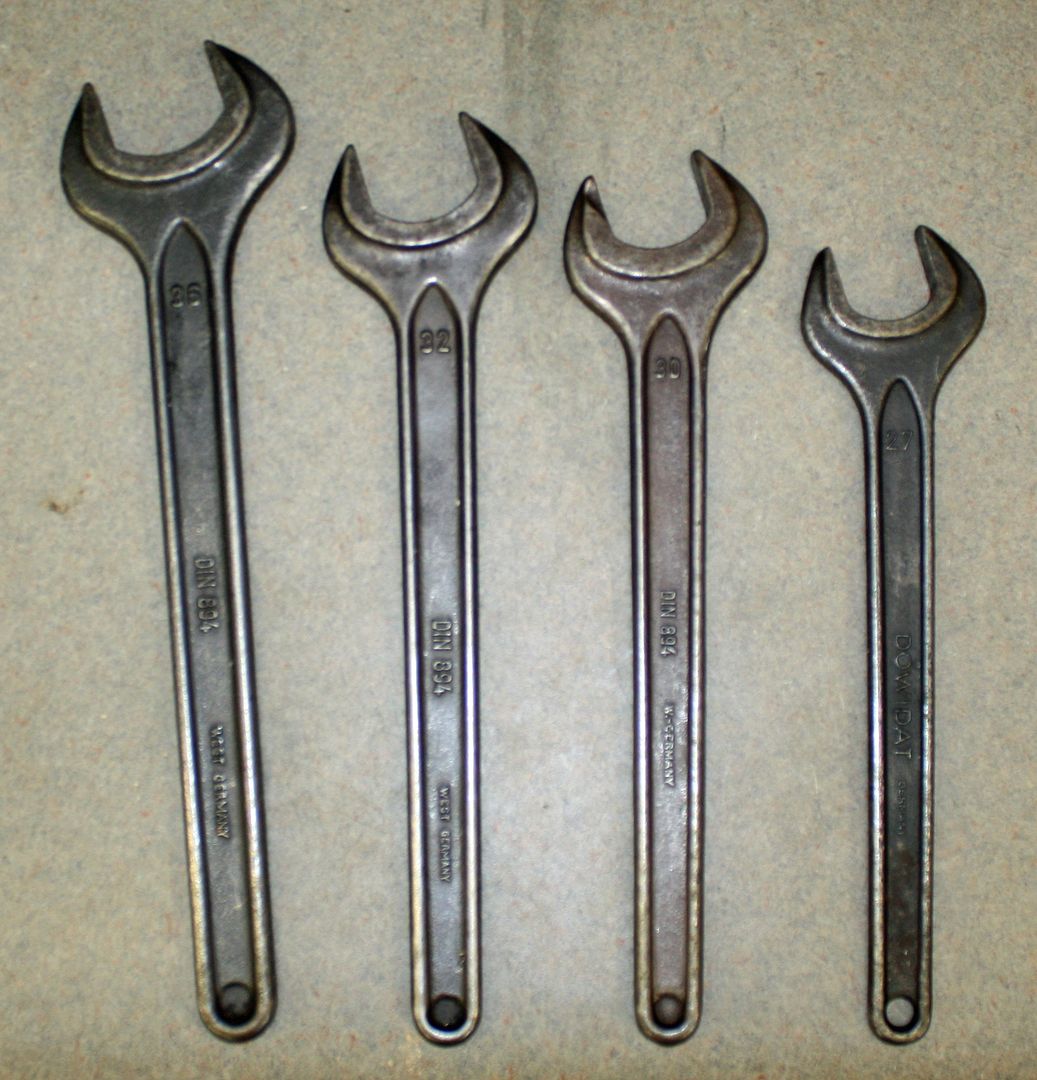
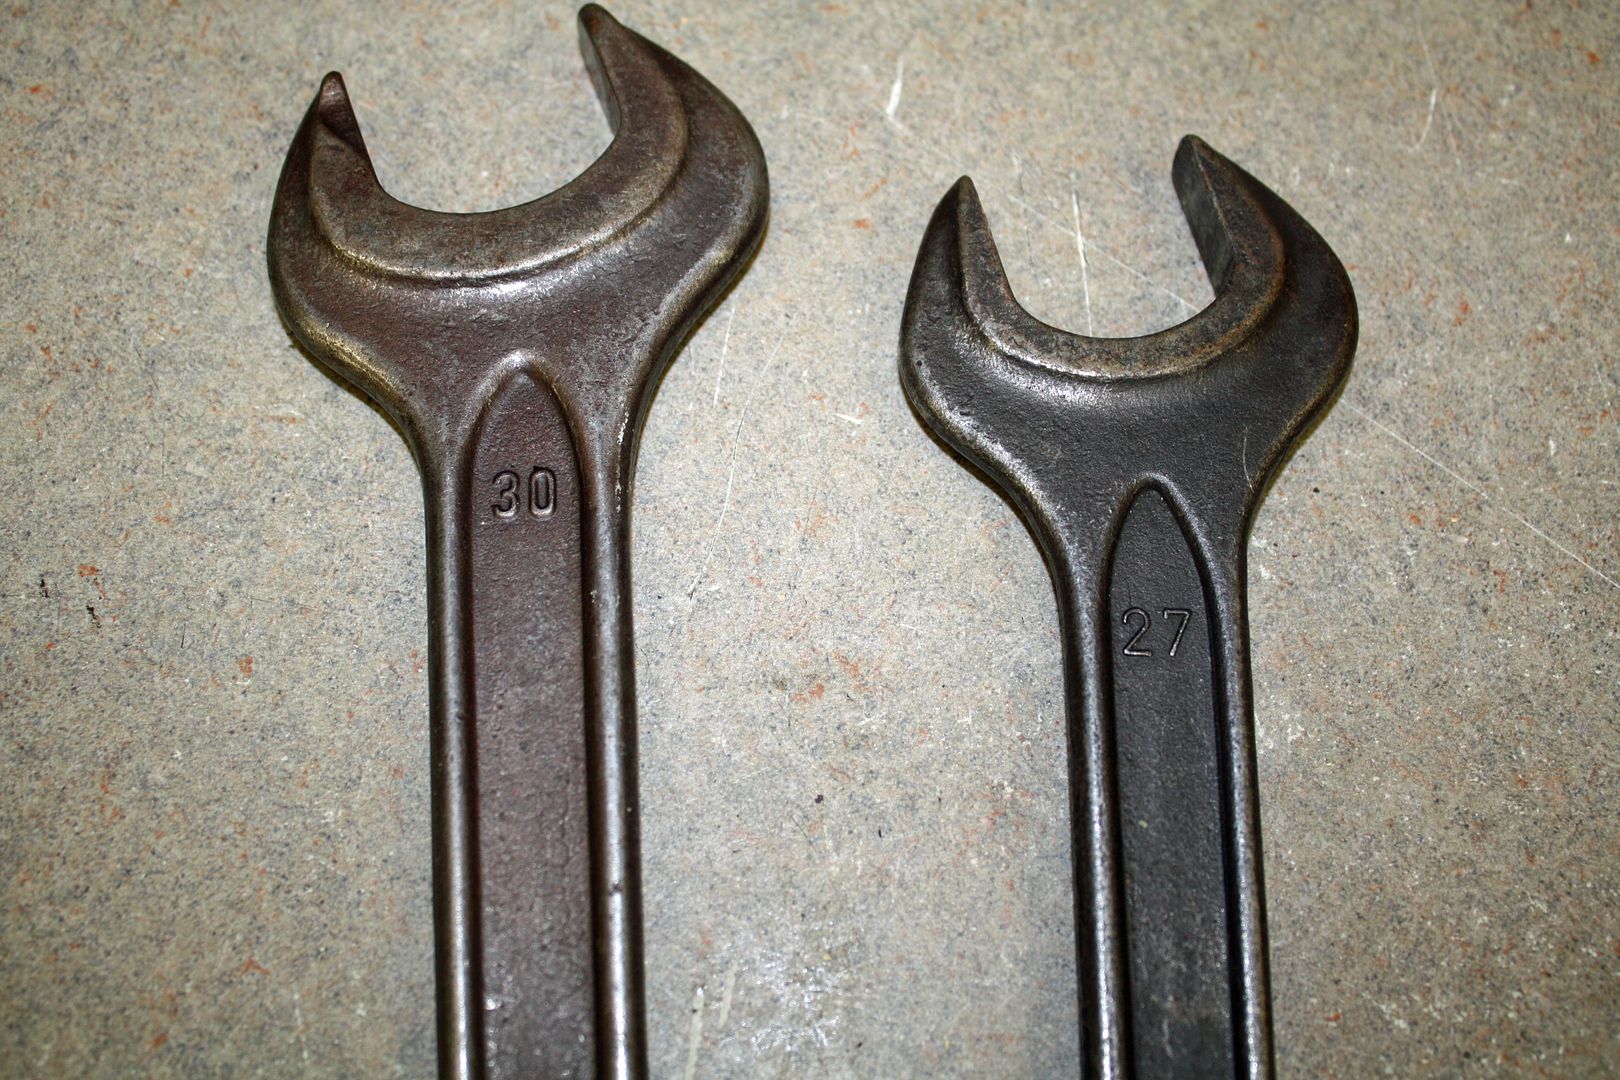
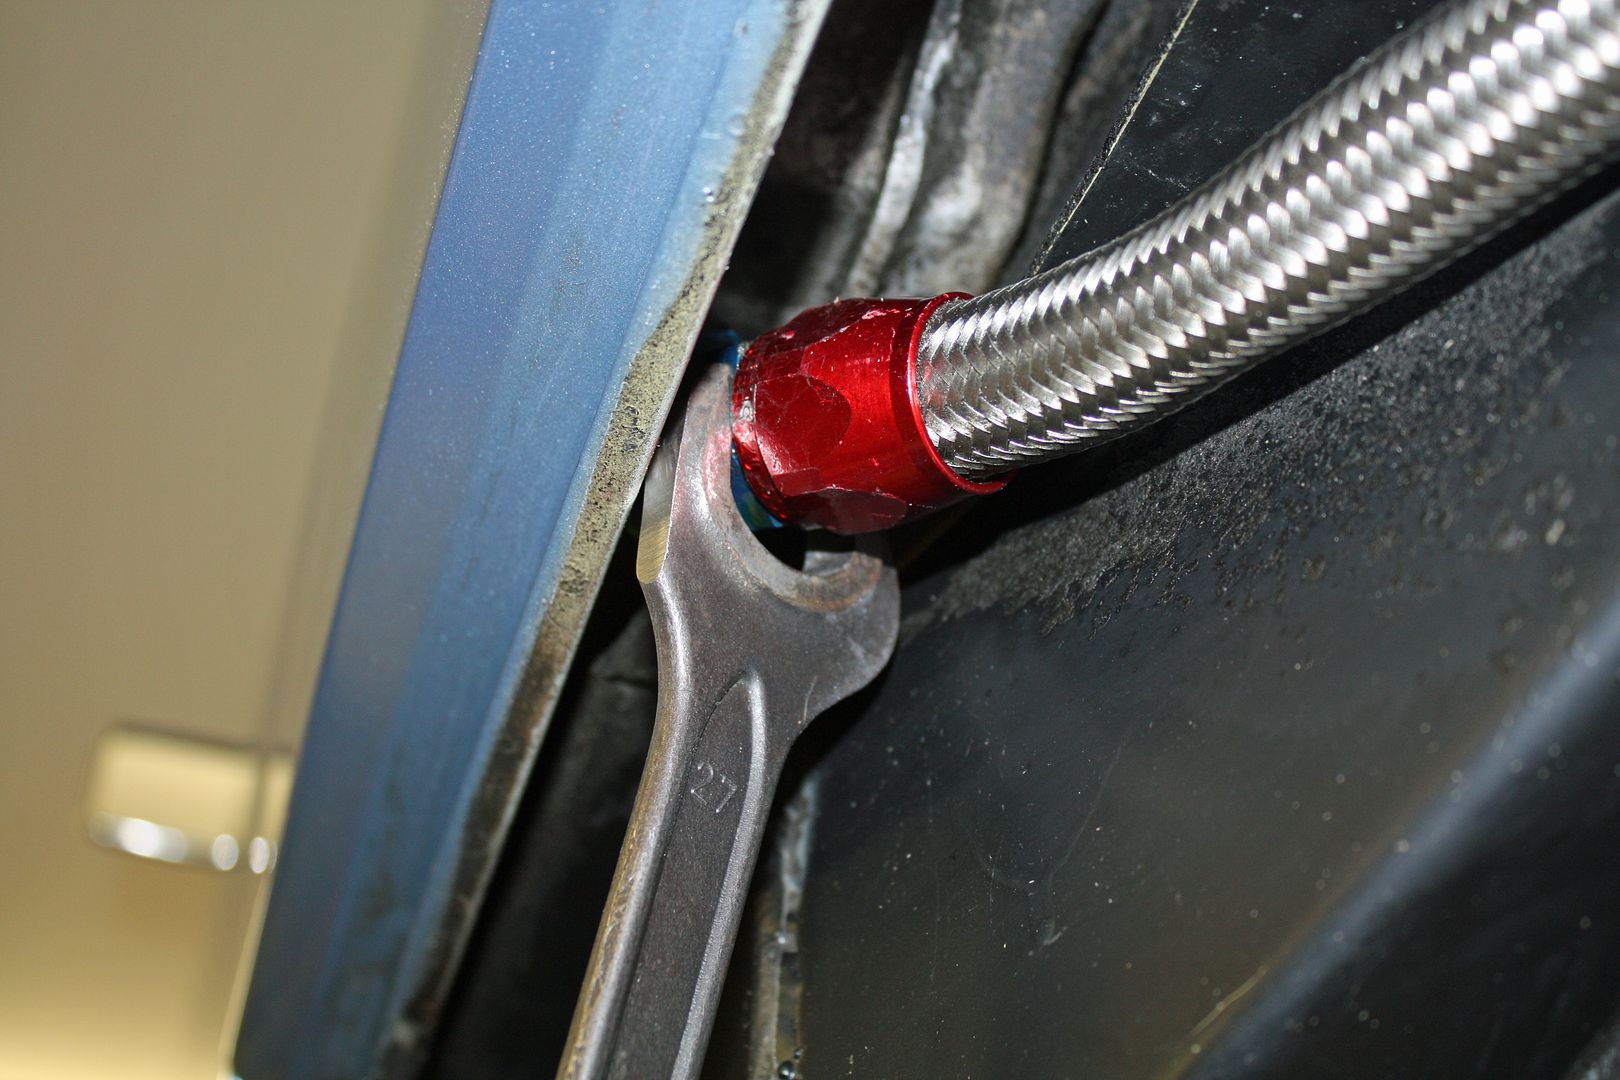
Before I began troubleshooting cylinder one, I worked on the two oil leaks. Both were at connections to lines. The one on the bottom was easy to get to, but I needed a 1/3/16 wrench for one side of the AN fittings. I didn't have a wrench that size. I was about to go uptown to buy one when I wondered if my old 911 oil line wrenches might work. I dug them out and, sure enough, the 27mm and 30mm wrenches fit perfectly. After tightening the center line, it was time to figure out how to get the 27mm wrench on that fitting under the tank. After grinding off a significant amount on the 27mm wrench, I was finally able to make it work. With it in place, I used the 30mm to tighten the line. I ran the motor later one while doing the troubleshooting and both lines were dry after I shut off the motor.

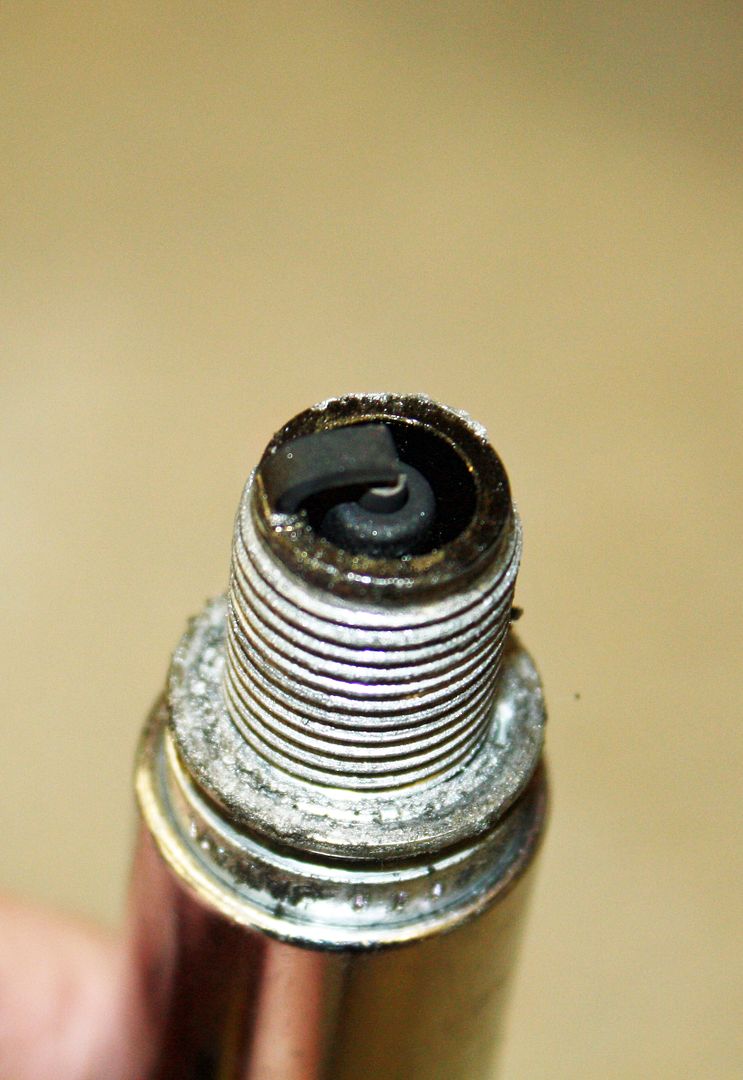
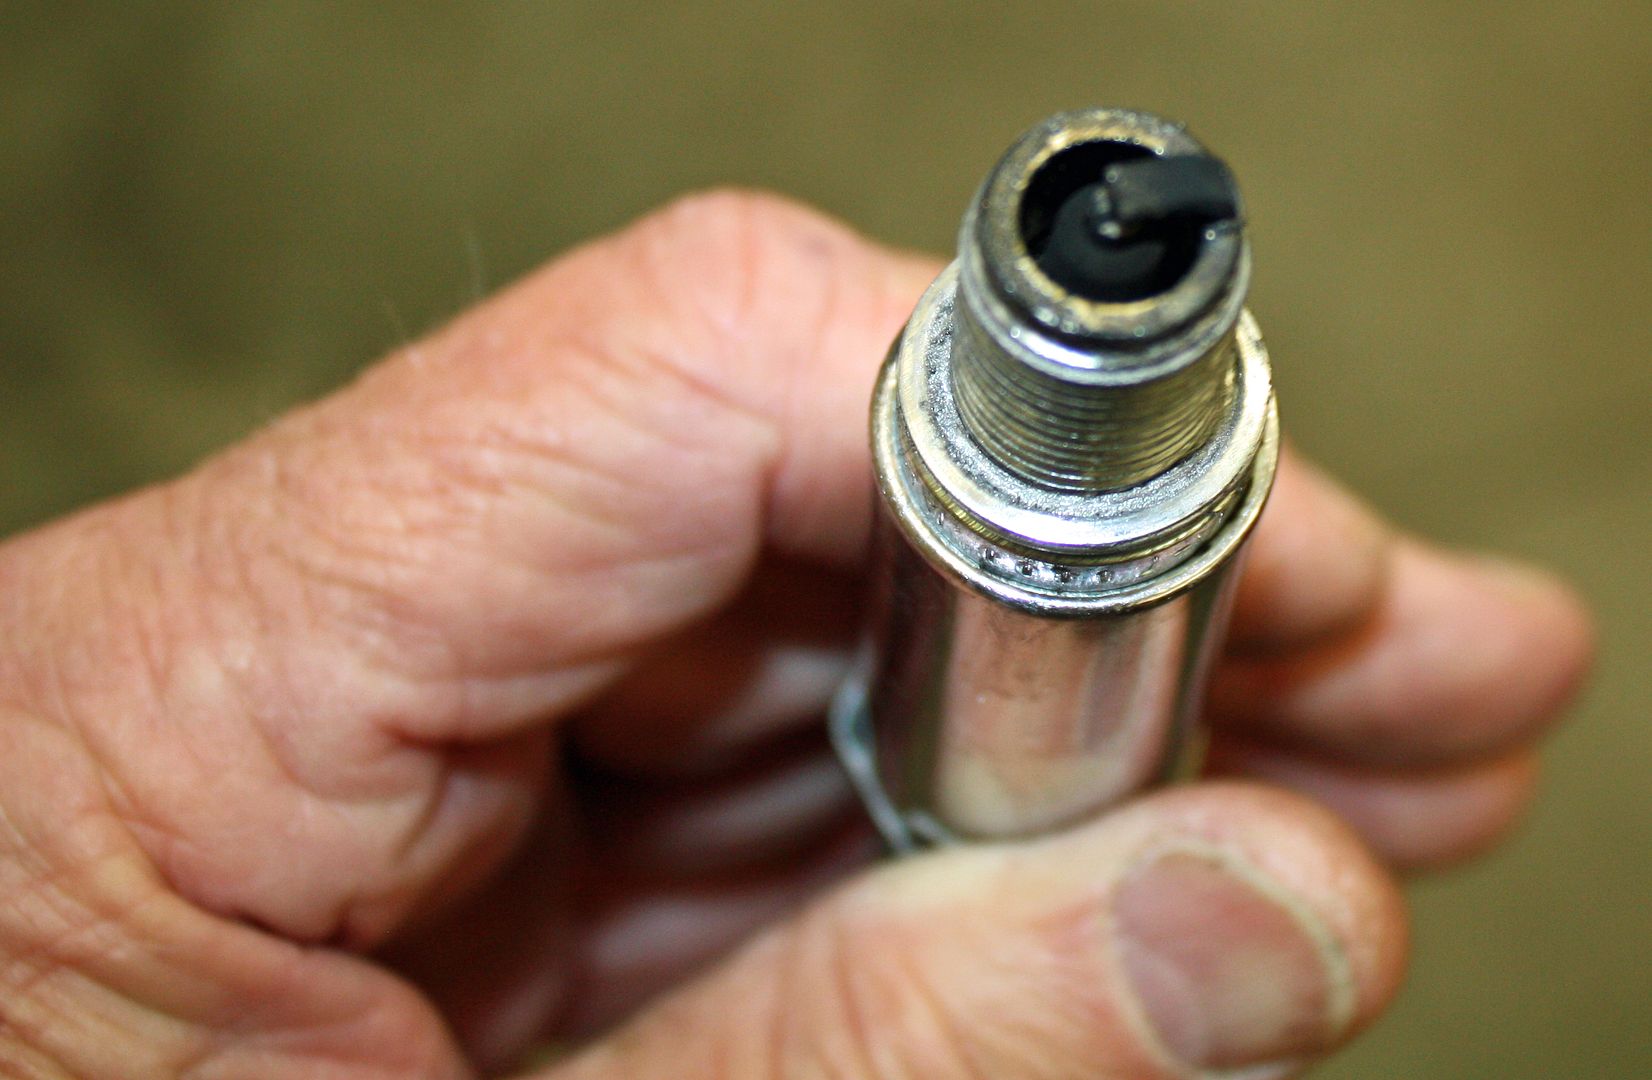
On cylinder one, I pulled the injector and COP plugs. I could not see any obvious wiring issues. The terminals appeared to be seated properly and tugging on the wires did not reveal anything loose. I pulled the spark plug and it appeared to have been firing.
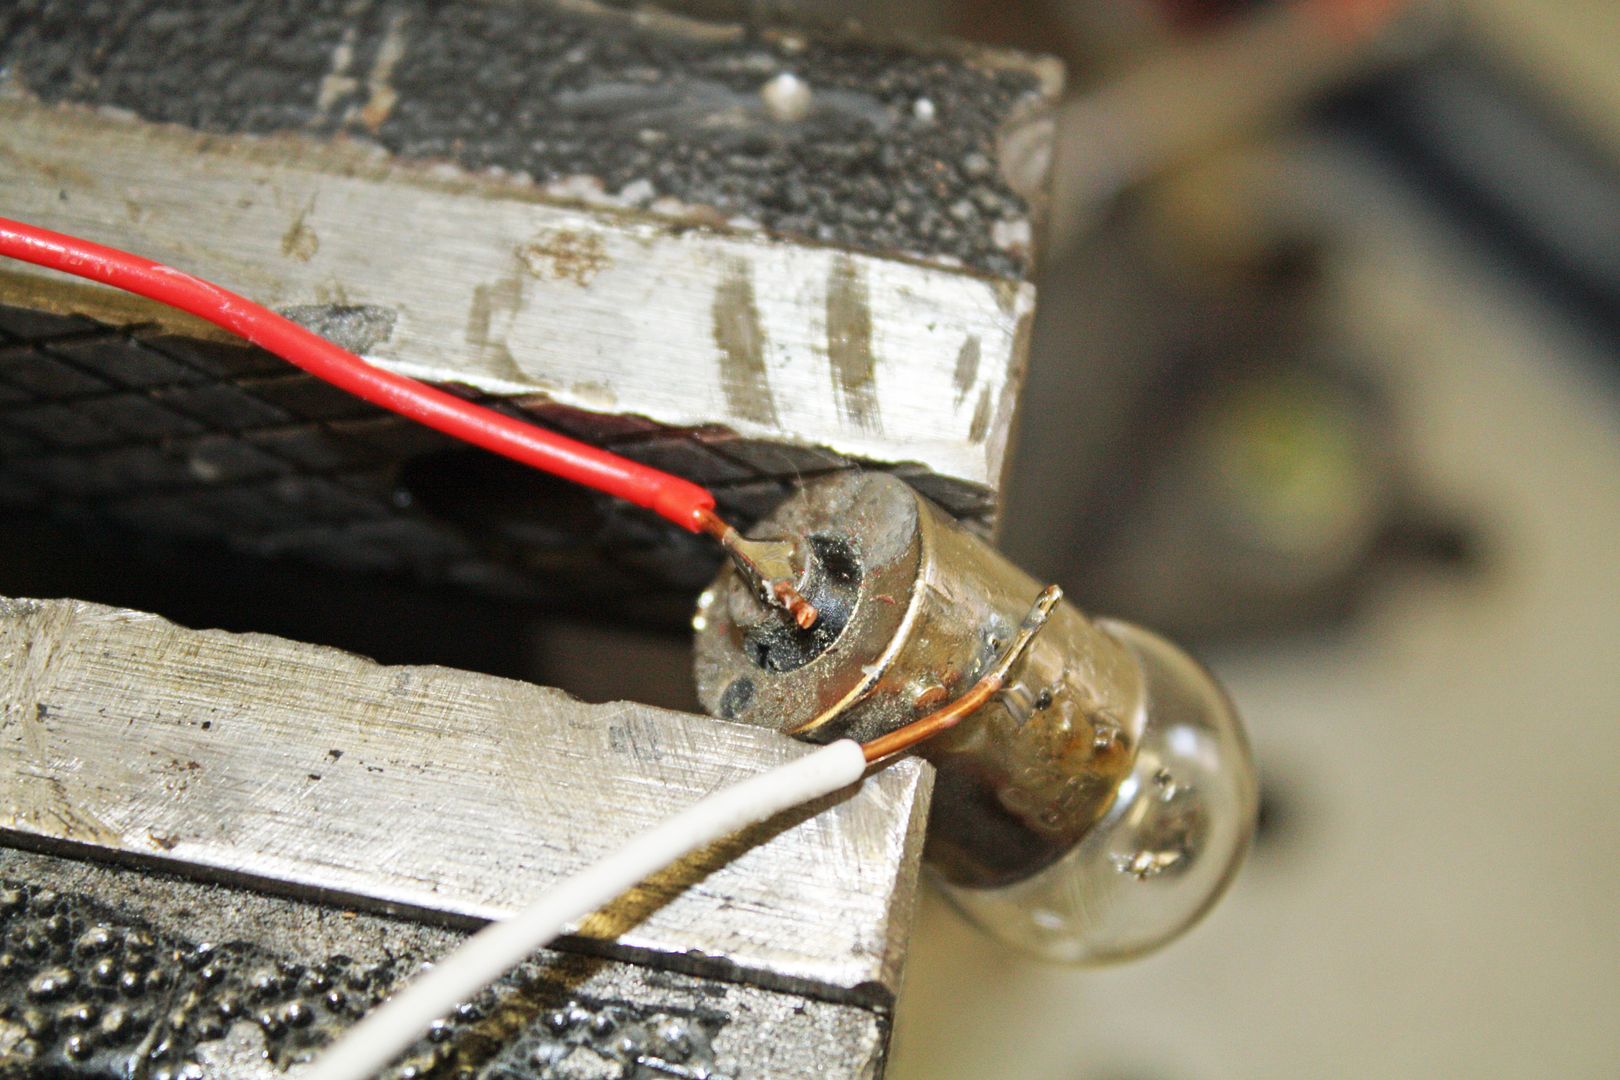
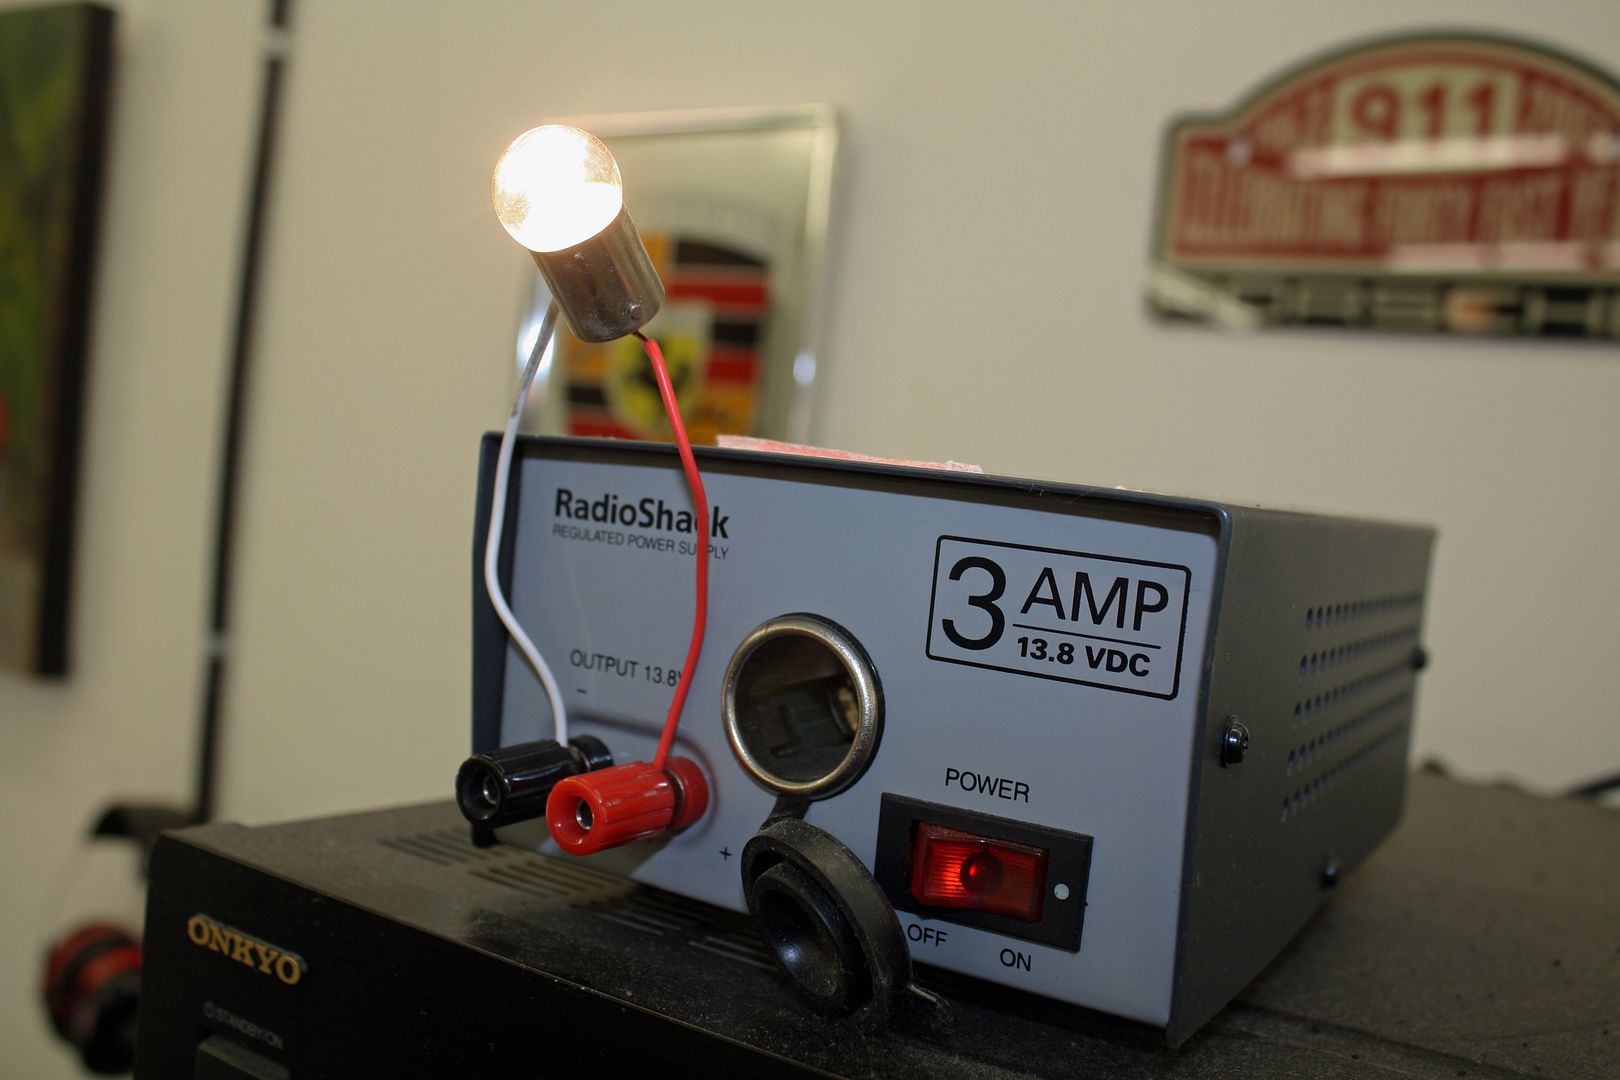
I checked the voltage on the COP plug and it was correct. My son has a test light for the injector plug but he told me I could make one by using a small wattage bulb. I soldered two leads on to the bulb. I tested the bulb to make sure it was working.
When I pulled the injector plug while the engine was running, the idle dropped. I inserted the test lamp leads and there was a faint flickering of light on and off. This is a very low voltage signal so I wasn't expecting the bulb to shine brightly. Based on that test and seeing the plug, I feel there is both fuel and spark in the cylinder.
I then called John Forbes at Black Forest Racing in Denver, NC, about 50 miles from here. After relating the issues, he recommended doing a compression test. My son has a tester and we will do that this Sunday. There is a definite knock on that side so I am afraid that there is something wrong internally. If we discover an issue with the compression test, I will be taking the car to John to have him work on it. Internal engine work is above my pay grade!!
I talked to Ed Scott about what exactly happened when the transmission broke at Grattan over thirteen years ago. He said it was a big non-event for the motor as he went from third to fourth and no one was home. There was no over rev on the motor. So the issue is a mystery.
On the plus side, near the end of our at least half hour conversation, I remarked to Ed that it was apparent that he was feeling better. I could tell a huge difference in his voice from the last time we talked. He reported that sometime in December of January, a turning point was reached and he began to have a lot more energy. He has been doing rehabilitation exercizes and his leg muscles have begun responding a bit. He's not sure what happened but is grateful for the extra energy. I told him that, based on how long it has taken me to get the car back together, he might be able to drive it once it is running well. Very good news on his health!!!


On cylinder one, I pulled the injector and COP plugs. I could not see any obvious wiring issues. The terminals appeared to be seated properly and tugging on the wires did not reveal anything loose. I pulled the spark plug and it appeared to have been firing.

I checked the voltage on the COP plug and it was correct. My son has a test light for the injector plug but he told me I could make one by using a small wattage bulb. I soldered two leads on to the bulb. I tested the bulb to make sure it was working.


When I pulled the injector plug while the engine was running, the idle dropped. I inserted the test lamp leads and there was a faint flickering of light on and off. This is a very low voltage signal so I wasn't expecting the bulb to shine brightly. Based on that test and seeing the plug, I feel there is both fuel and spark in the cylinder.
I then called John Forbes at Black Forest Racing in Denver, NC, about 50 miles from here. After relating the issues, he recommended doing a compression test. My son has a tester and we will do that this Sunday. There is a definite knock on that side so I am afraid that there is something wrong internally. If we discover an issue with the compression test, I will be taking the car to John to have him work on it. Internal engine work is above my pay grade!!
I talked to Ed Scott about what exactly happened when the transmission broke at Grattan over thirteen years ago. He said it was a big non-event for the motor as he went from third to fourth and no one was home. There was no over rev on the motor. So the issue is a mystery.
On the plus side, near the end of our at least half hour conversation, I remarked to Ed that it was apparent that he was feeling better. I could tell a huge difference in his voice from the last time we talked. He reported that sometime in December of January, a turning point was reached and he began to have a lot more energy. He has been doing rehabilitation exercizes and his leg muscles have begun responding a bit. He's not sure what happened but is grateful for the extra energy. I told him that, based on how long it has taken me to get the car back together, he might be able to drive it once it is running well. Very good news on his health!!!
03-16-2019, 05:13 PM
#149
Racer
Thread Starter
To try to eliminate various items, I switched the coil packs on cylinder one and two with no difference. I then switched the spark plugs, again, with no difference. The cylinder two spark plug looked pretty much the same as cylinder one. I also noticed a new oil leak on the bottom of the number one jug.
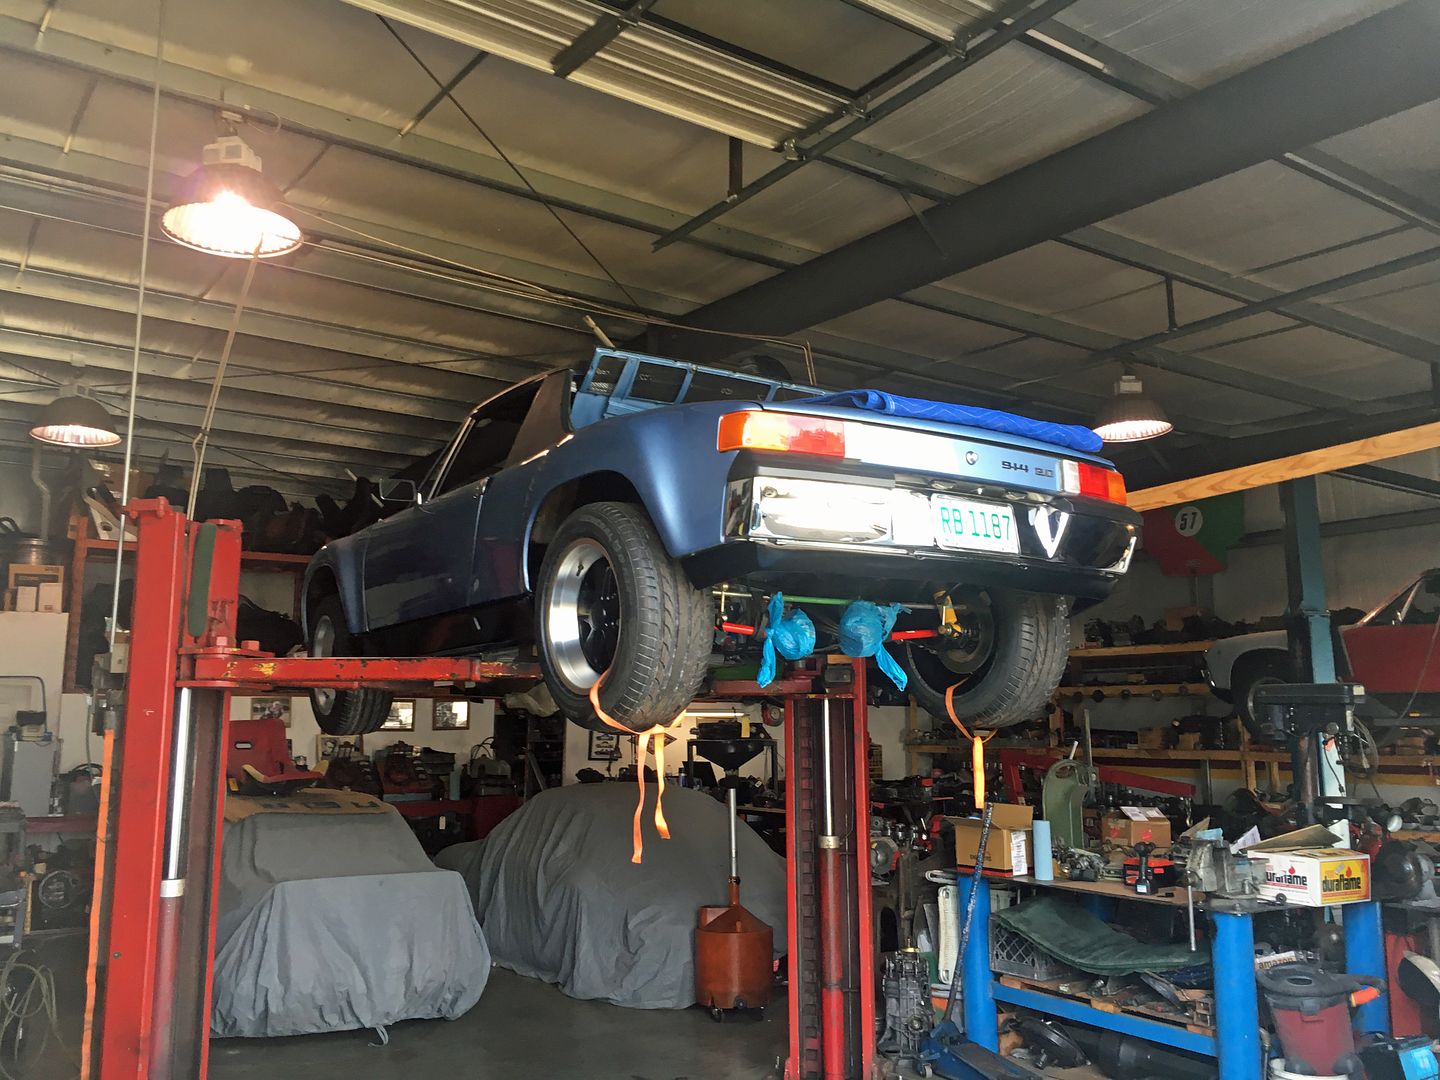
I talked to John Forbes yesterday and he can take the car anytime after Tuesday. He is going to call a guy he has used to haul cars and have him pick up the car. My buddy came down this morning and we installed the trunks and engine lids. I also installed the hats on the throttle bodies and the cover for the steering rack. It is ready to go. Everything is fixable...at a price!!!


I talked to John Forbes yesterday and he can take the car anytime after Tuesday. He is going to call a guy he has used to haul cars and have him pick up the car. My buddy came down this morning and we installed the trunks and engine lids. I also installed the hats on the throttle bodies and the cover for the steering rack. It is ready to go. Everything is fixable...at a price!!!


 03-29-2019, 10:59 PM
#150
Racer
Thread Starter
A BIG FAT DUNCE CAP FOR ME!!!
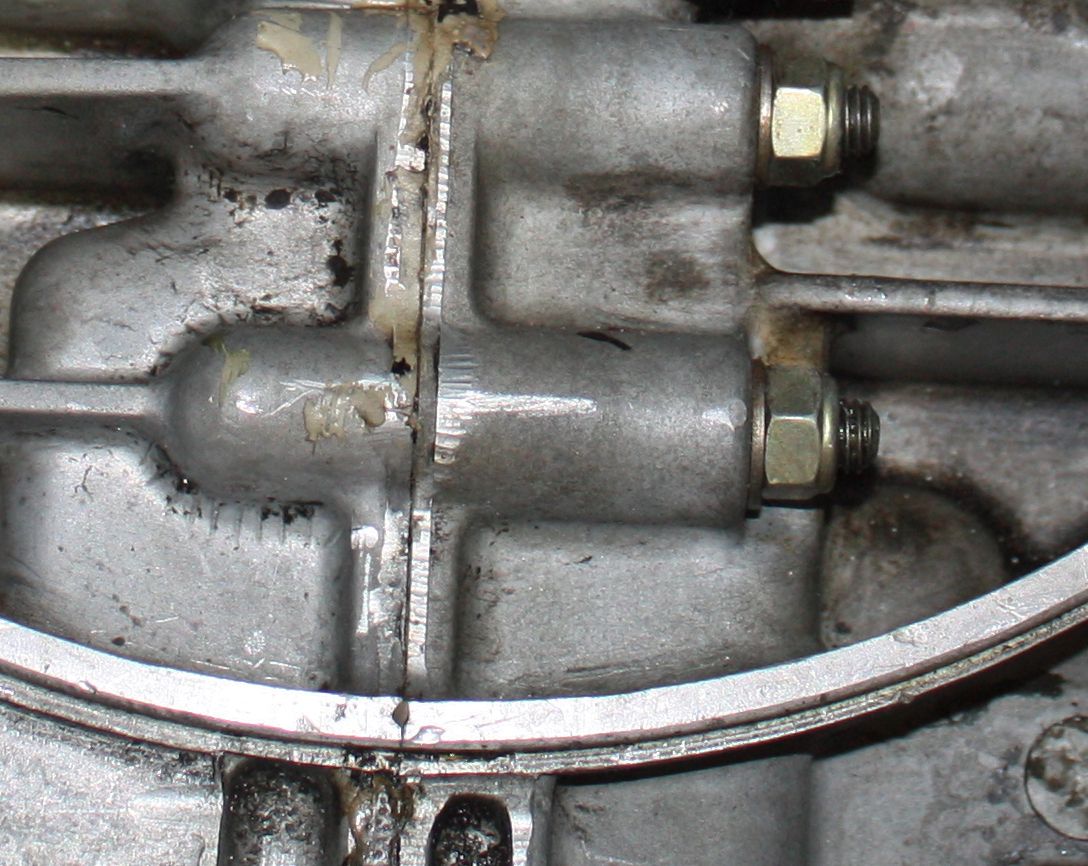
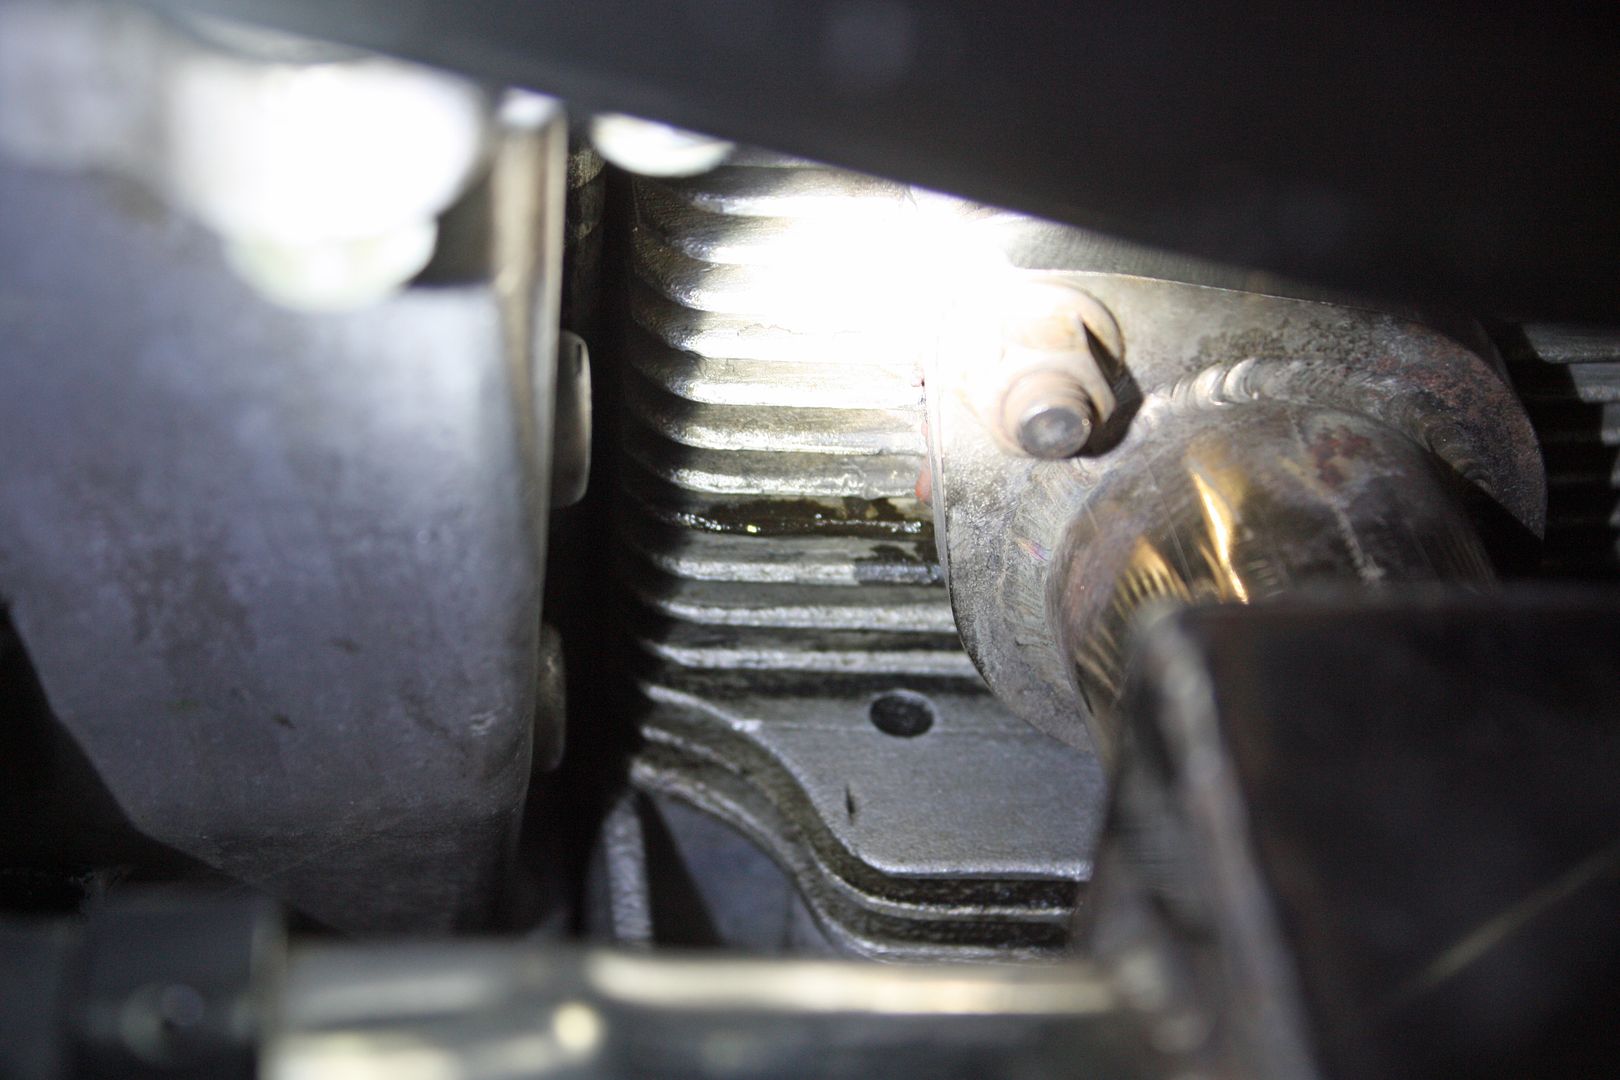
This past Tuesday, John Forbes and some friends picked up the car in an enclosed trailer and took it to his shop, Black Forest Racing, in Denver, NC. The next day he said he had found the problem and sent me this photo.
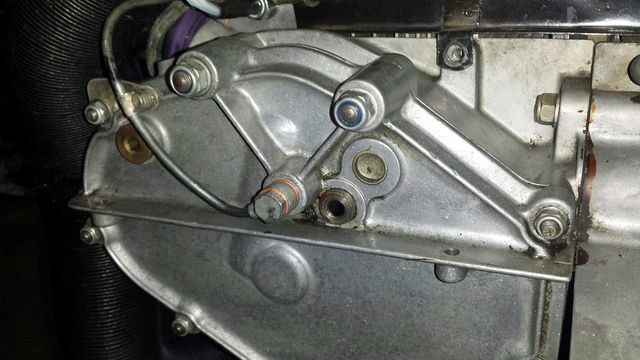
At first I couldn't see what was wrong. And then it dawned on me. I had bolted the oil line for the chain tensioner to the boss rather than to the hole to the right which was the chain tensioner. Which explains the engine sounding like a tractor engine and making weird noises. I had removed that line so that I could drill the hole for the head temp sensor. What really galls me is that I really struggled installing the heater hose because that line was in the way. Bolting it to the boss made the line sit up higher causing the interference. Hence the dunce cap for me!!
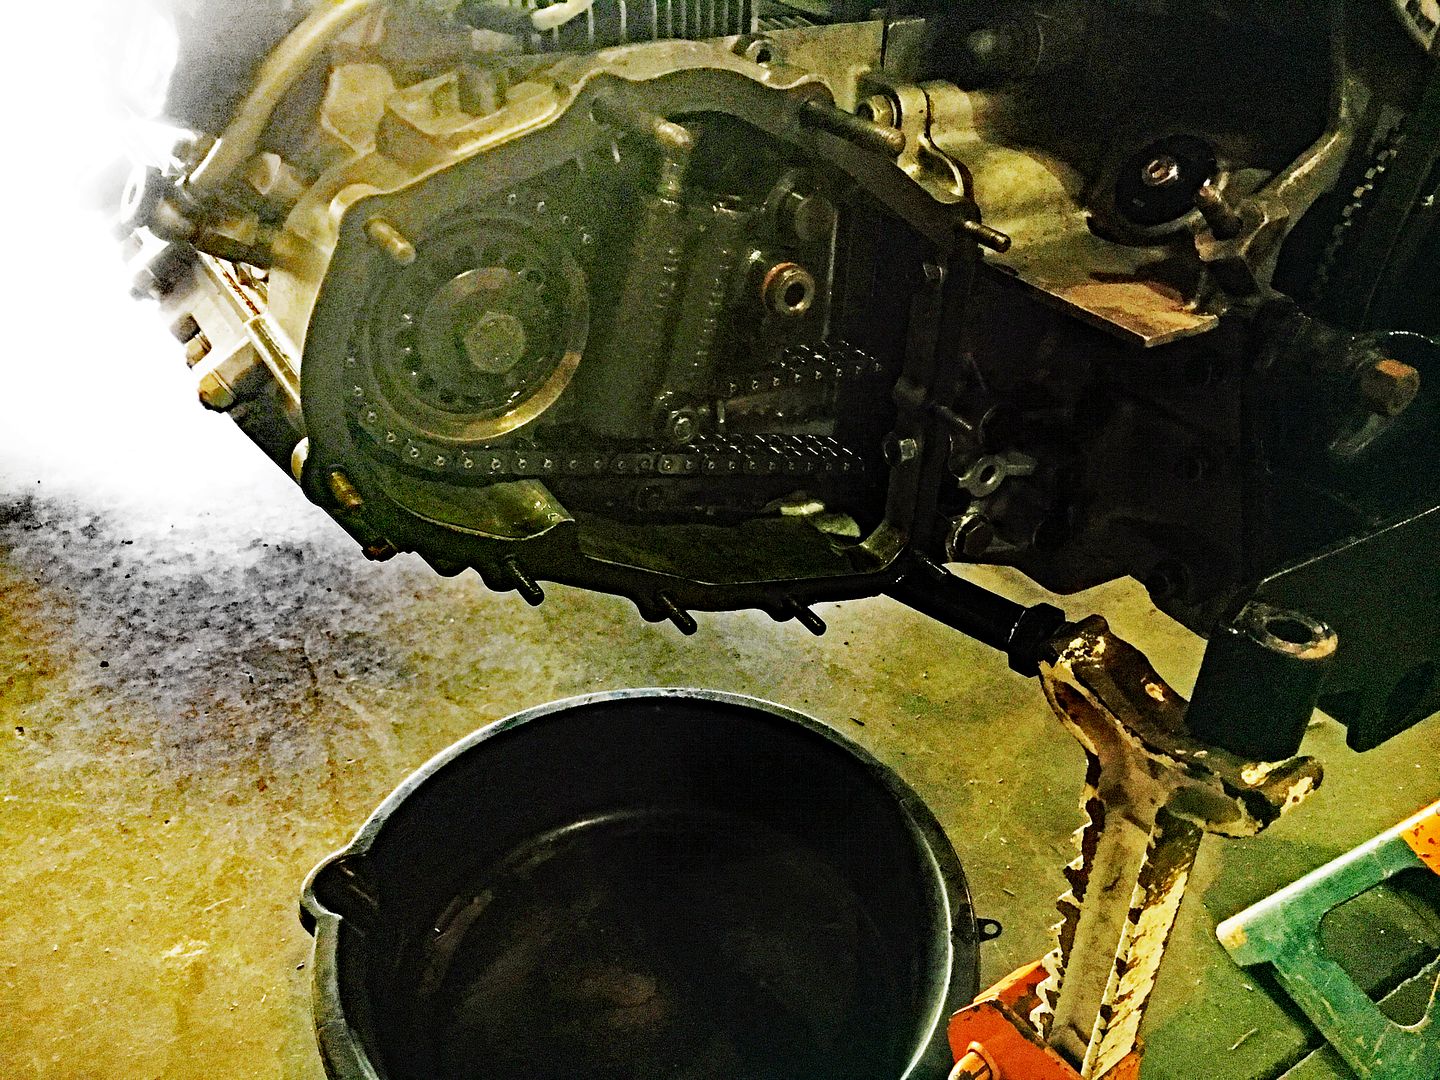
I drove over to John's shop today. He had removed the timing chain cover and did not find any metal shavings are any indication of damage. However, since the tensioner was bouncing around, he is replacing it. He feels pretty good about that being the only issue but, once the car is back together, he is going to do a leak down test to make sure there isn't still a problem in cylinder one. He is also going to check the cam timing. I apologize for the photo below as I had to use my phone in a low light situation.
John's son works with Richard Clewett regularly. Once they have everything fixed and the engine back in the car, they will consult with Richard while they run the car on their dyno.
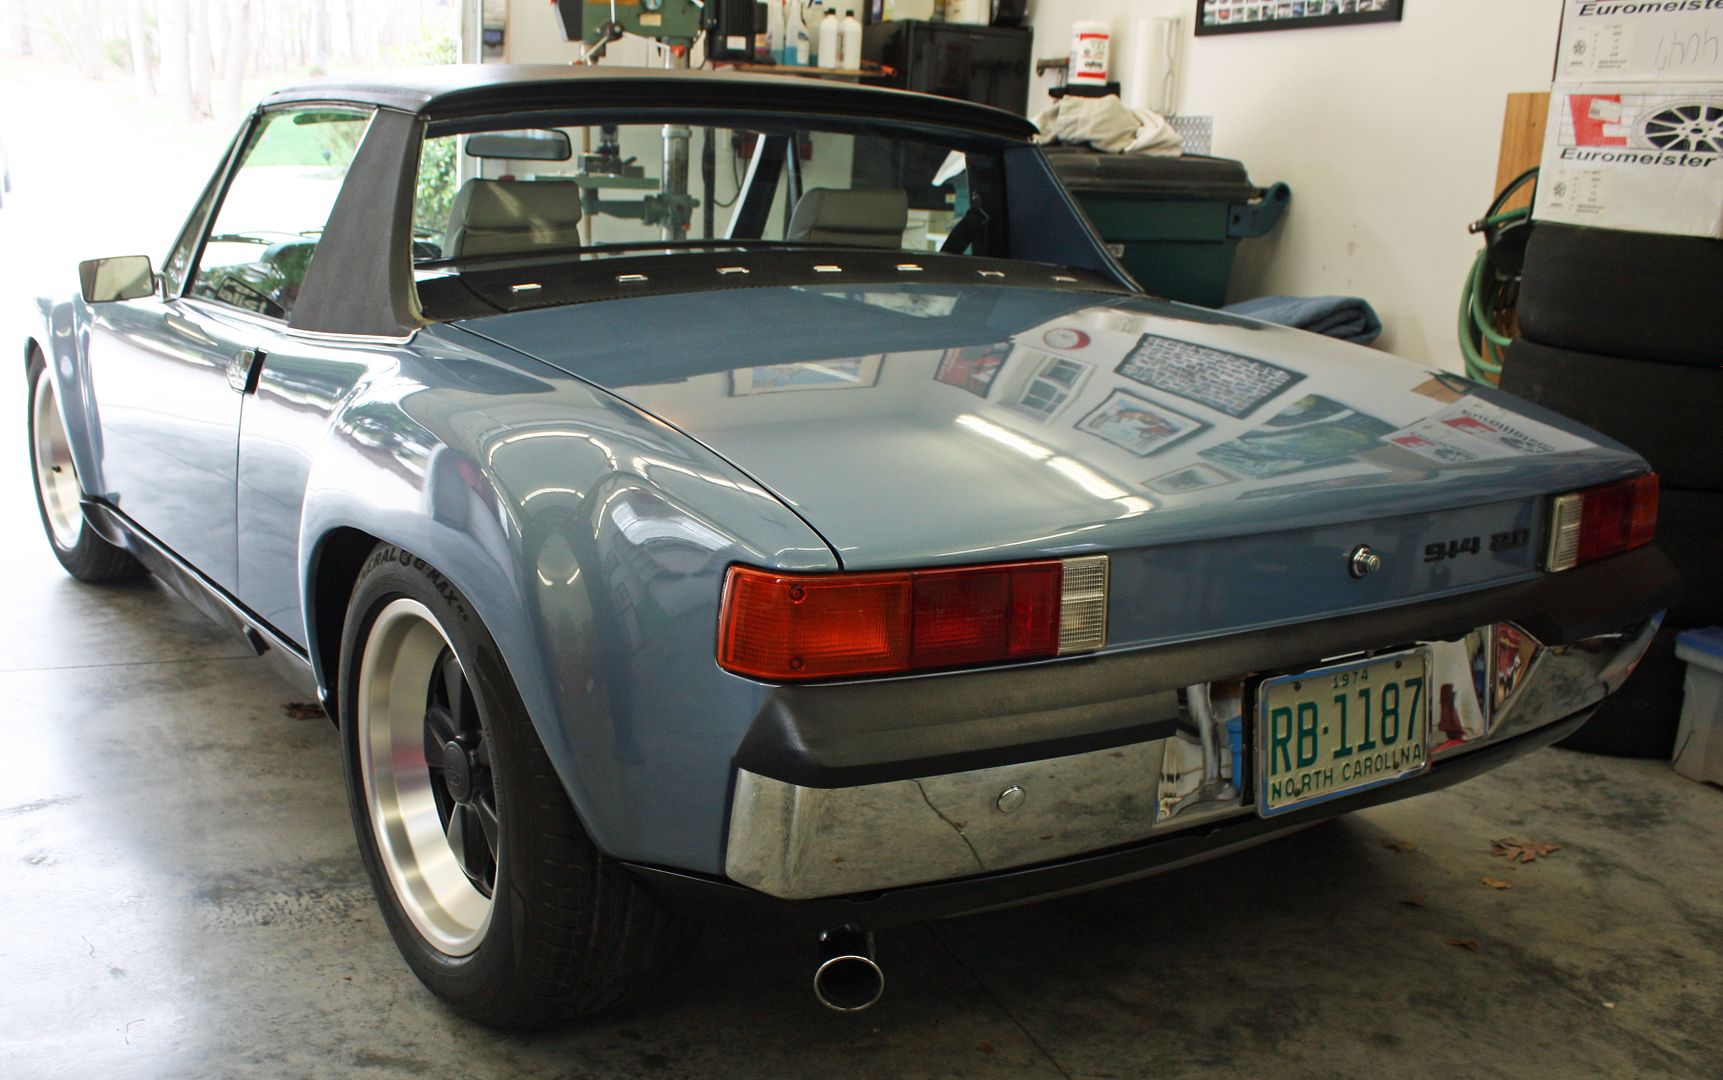
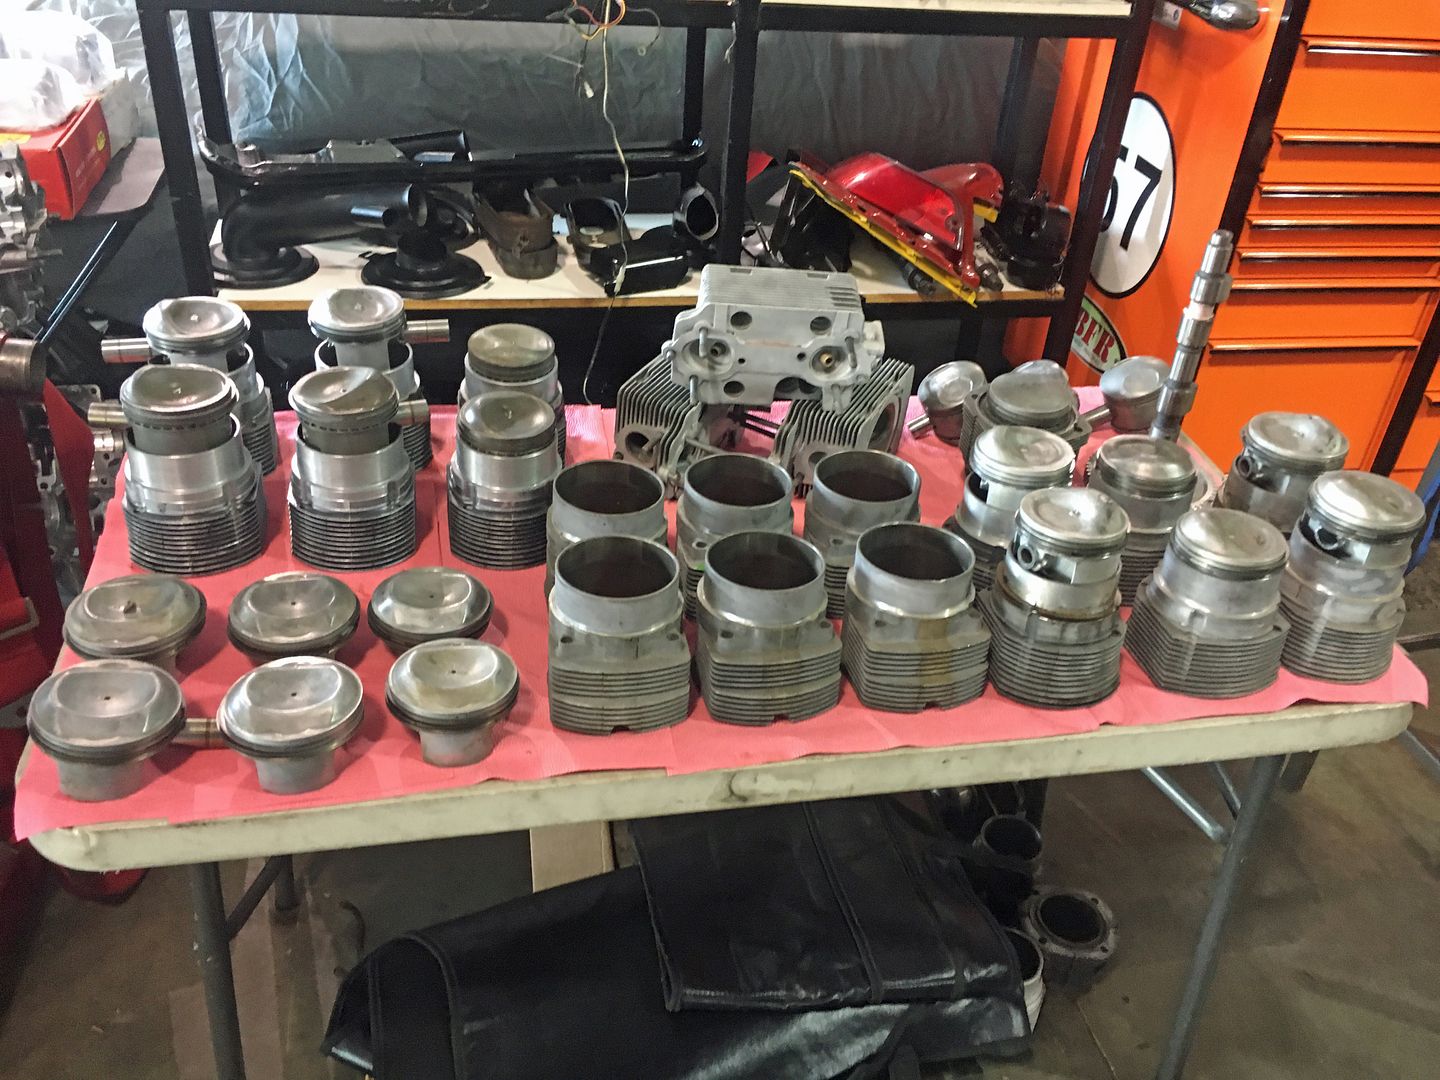
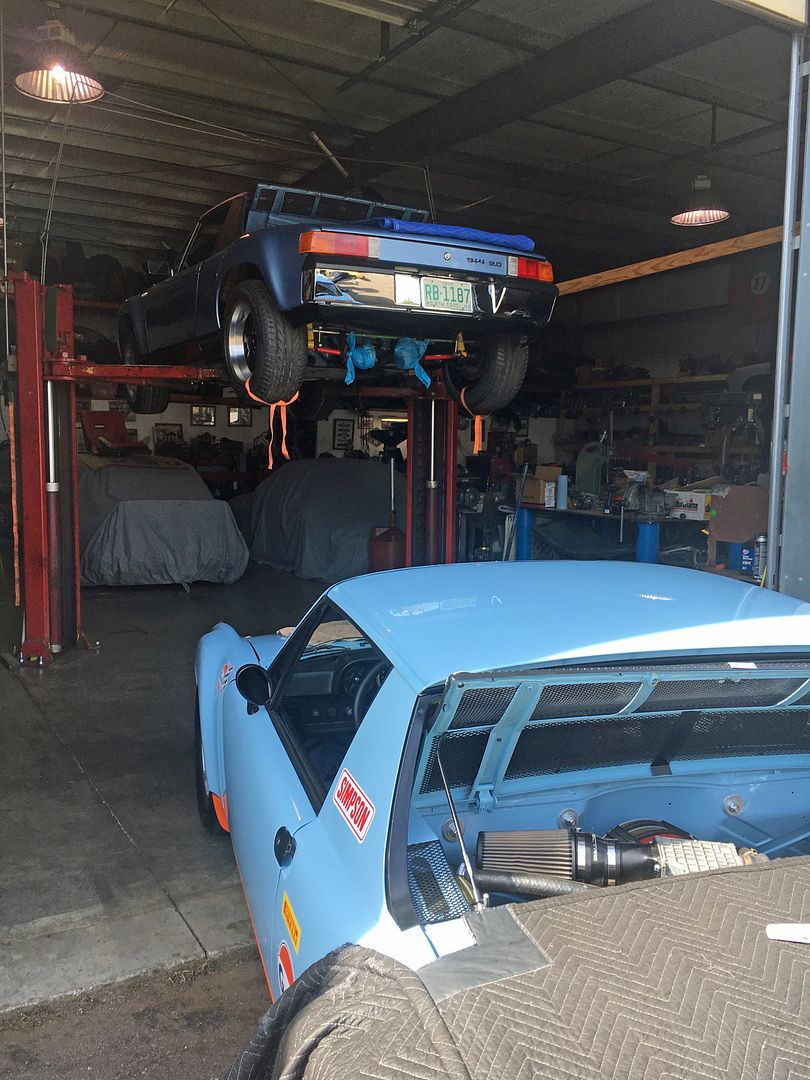
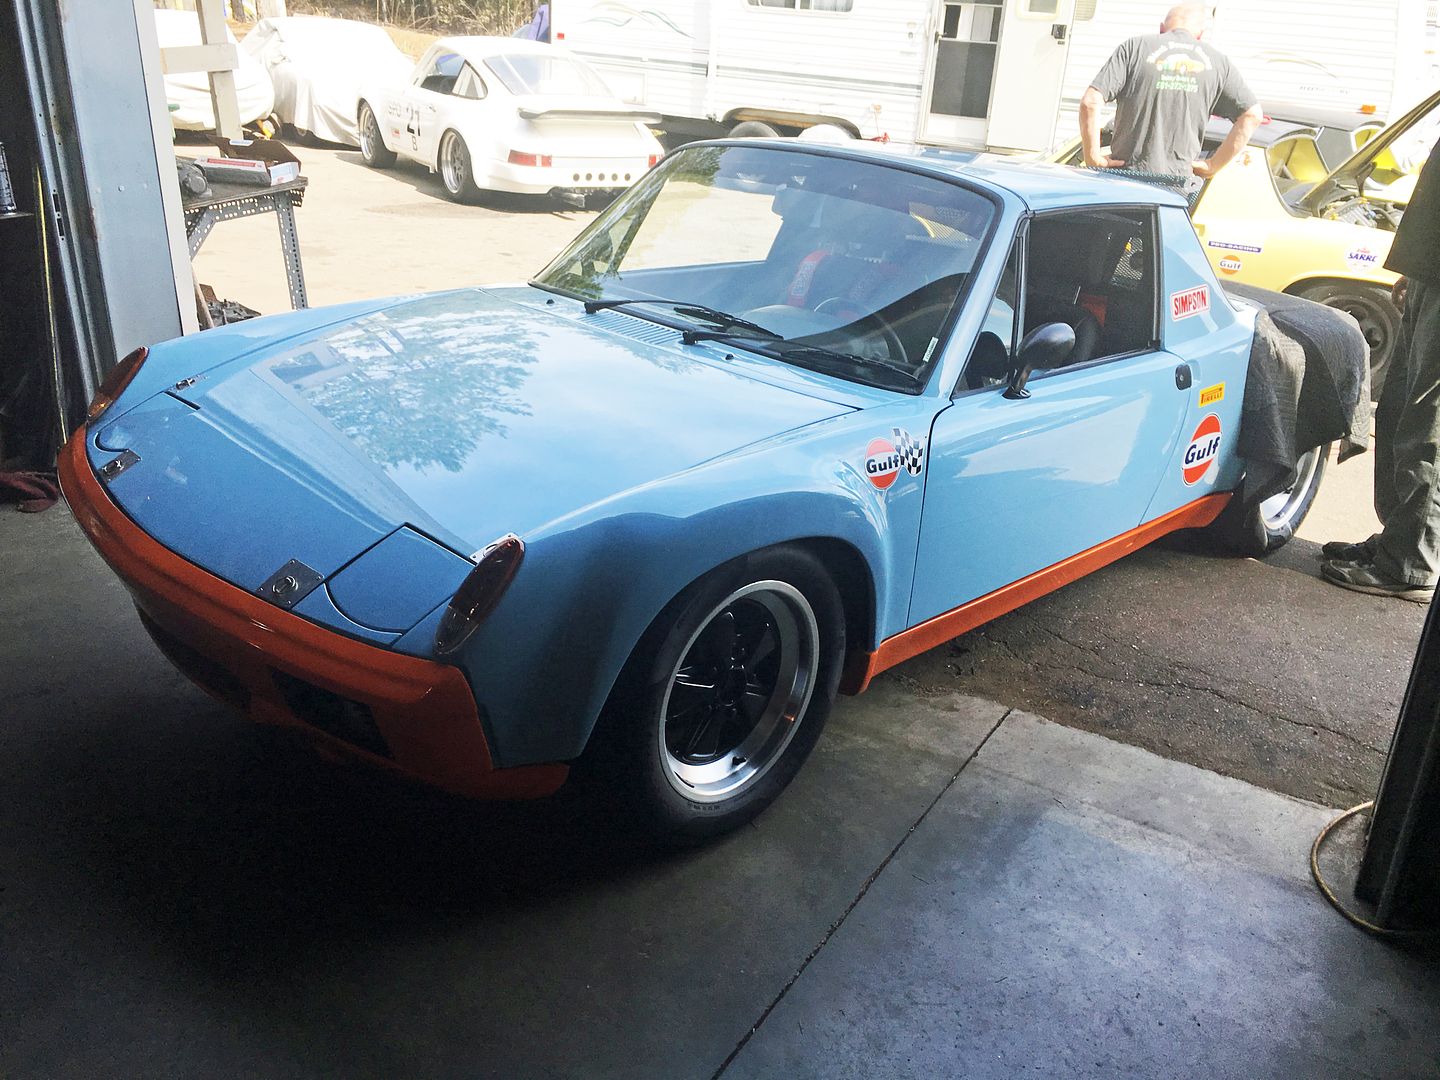
John has been working on 914's since the beginning. Everywhere you looked you saw either 914 cars or parts. They had a beautiful 914 with a 3.2 Carrera motor with flares and finished in Gulf Blue and orange. Beautiful car.
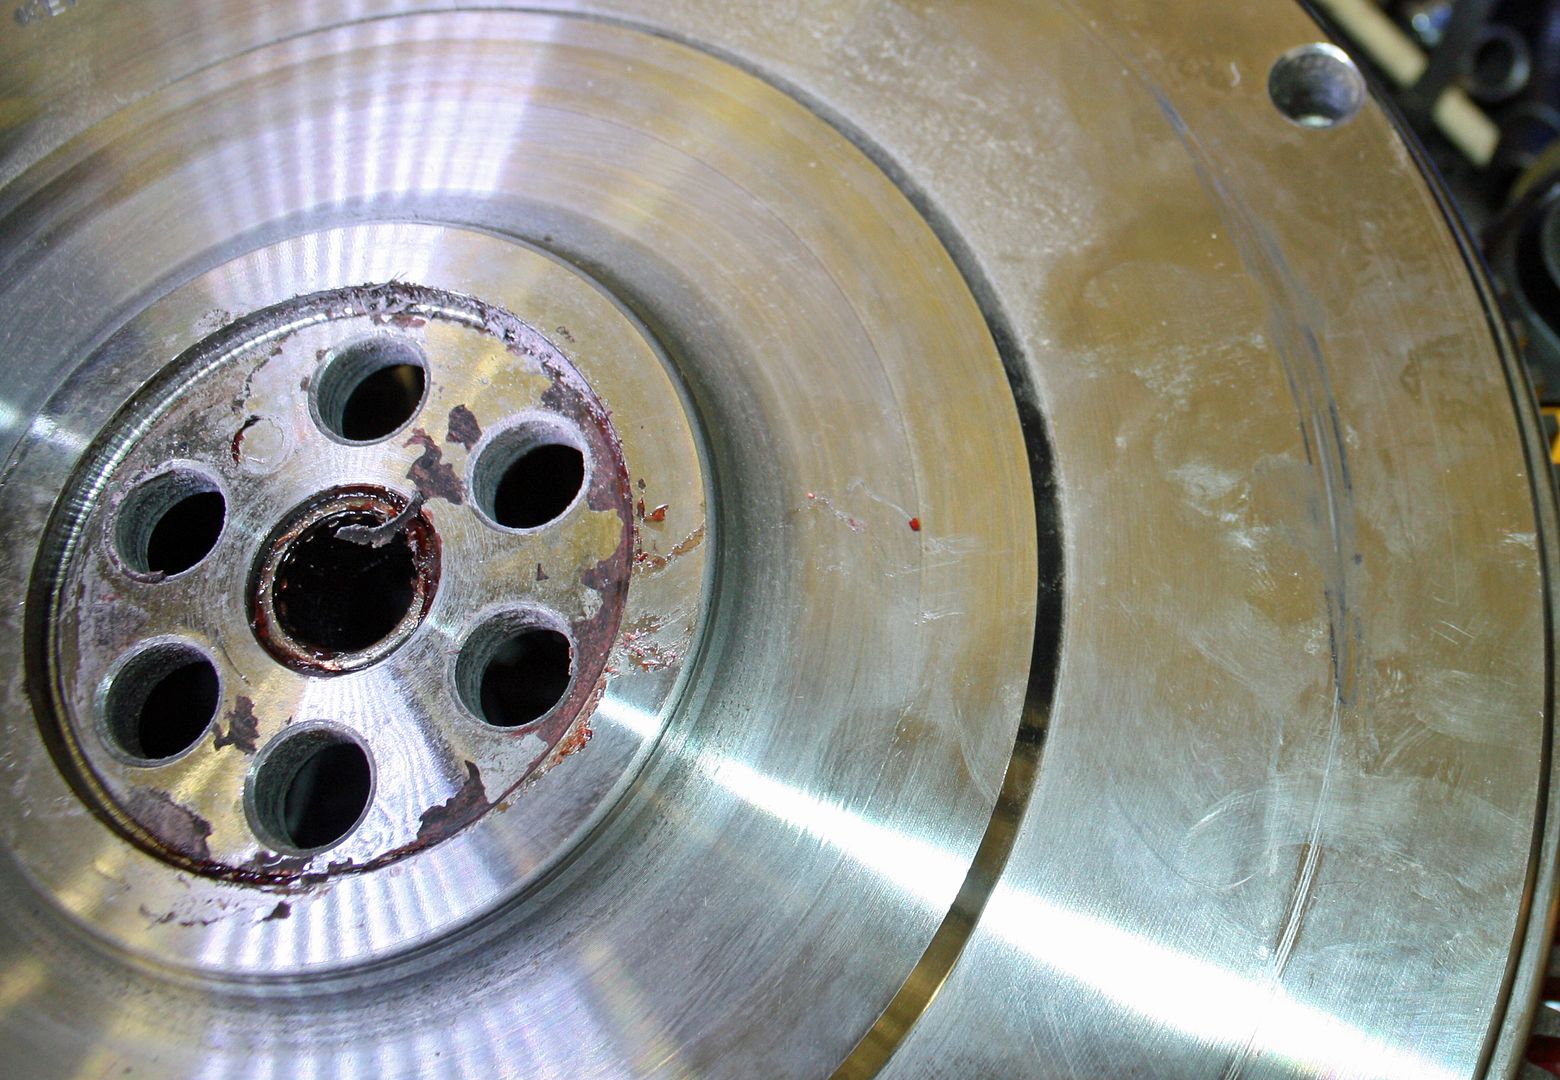
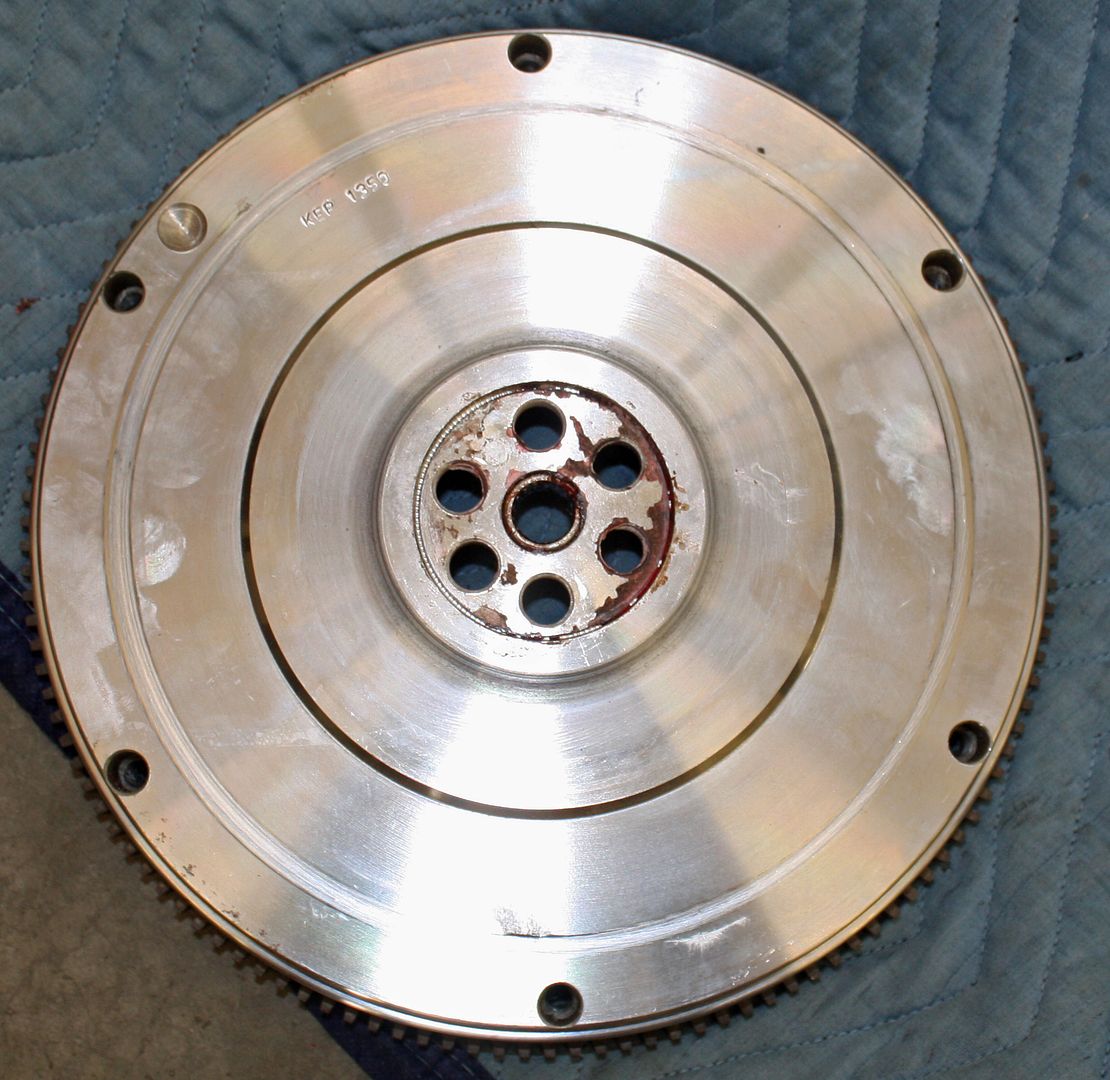
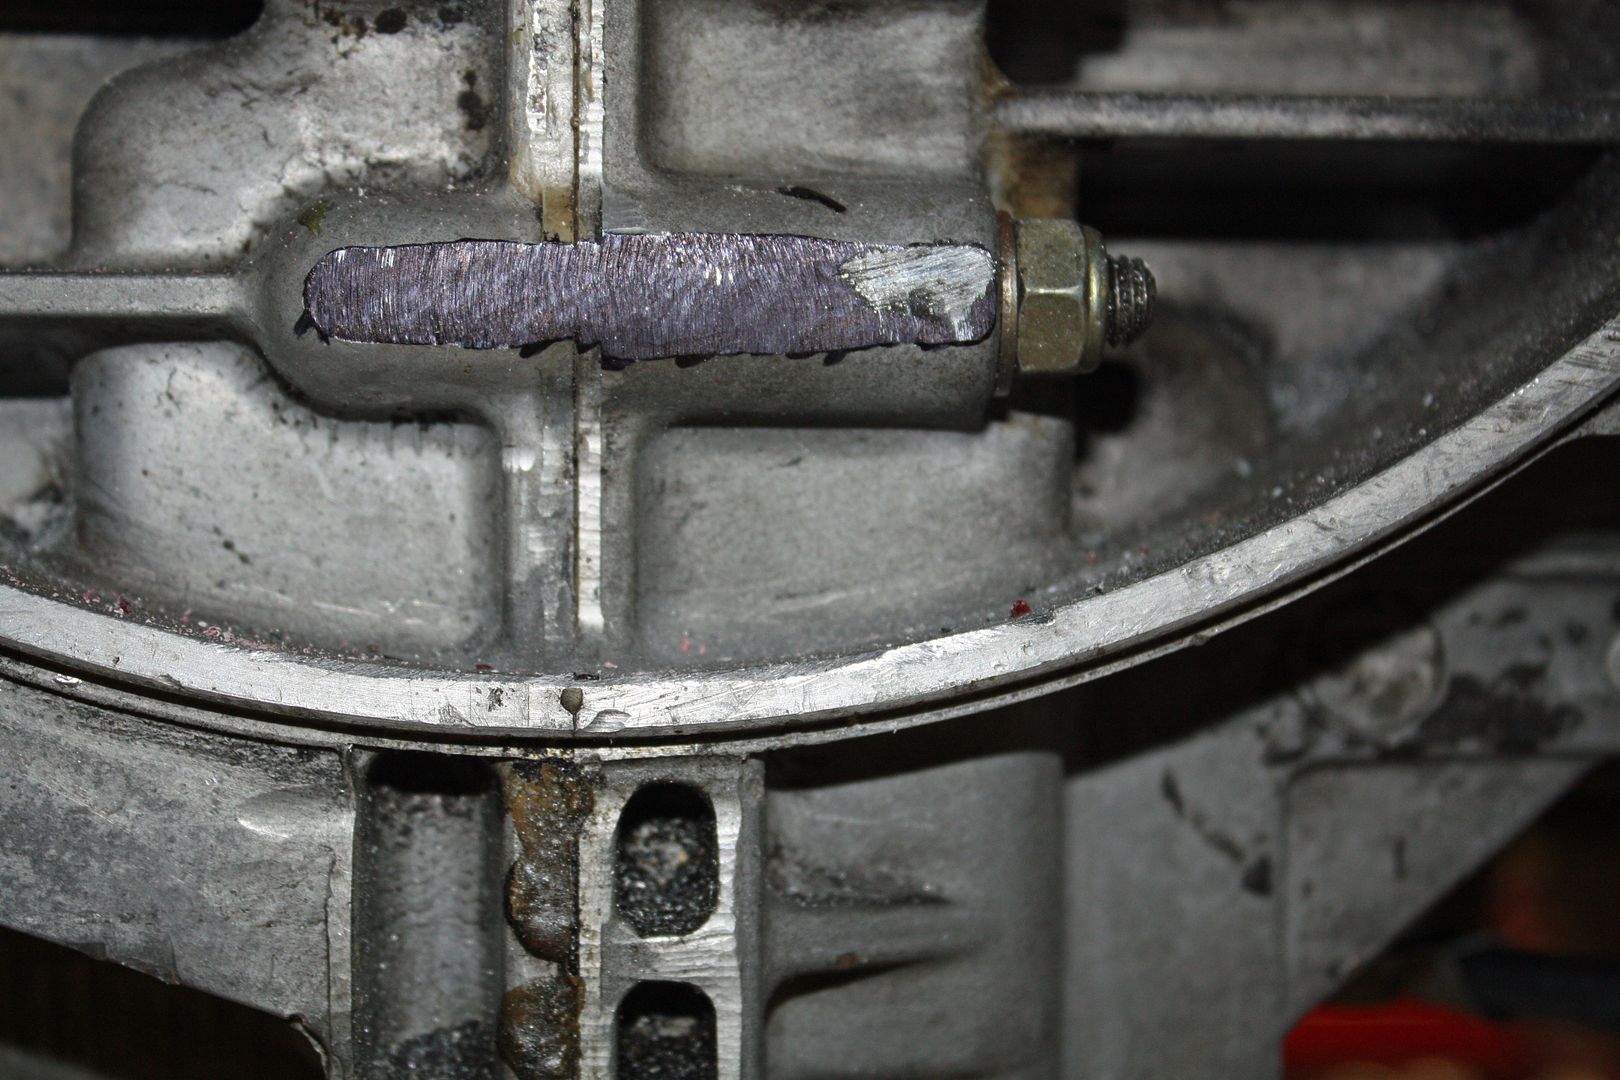
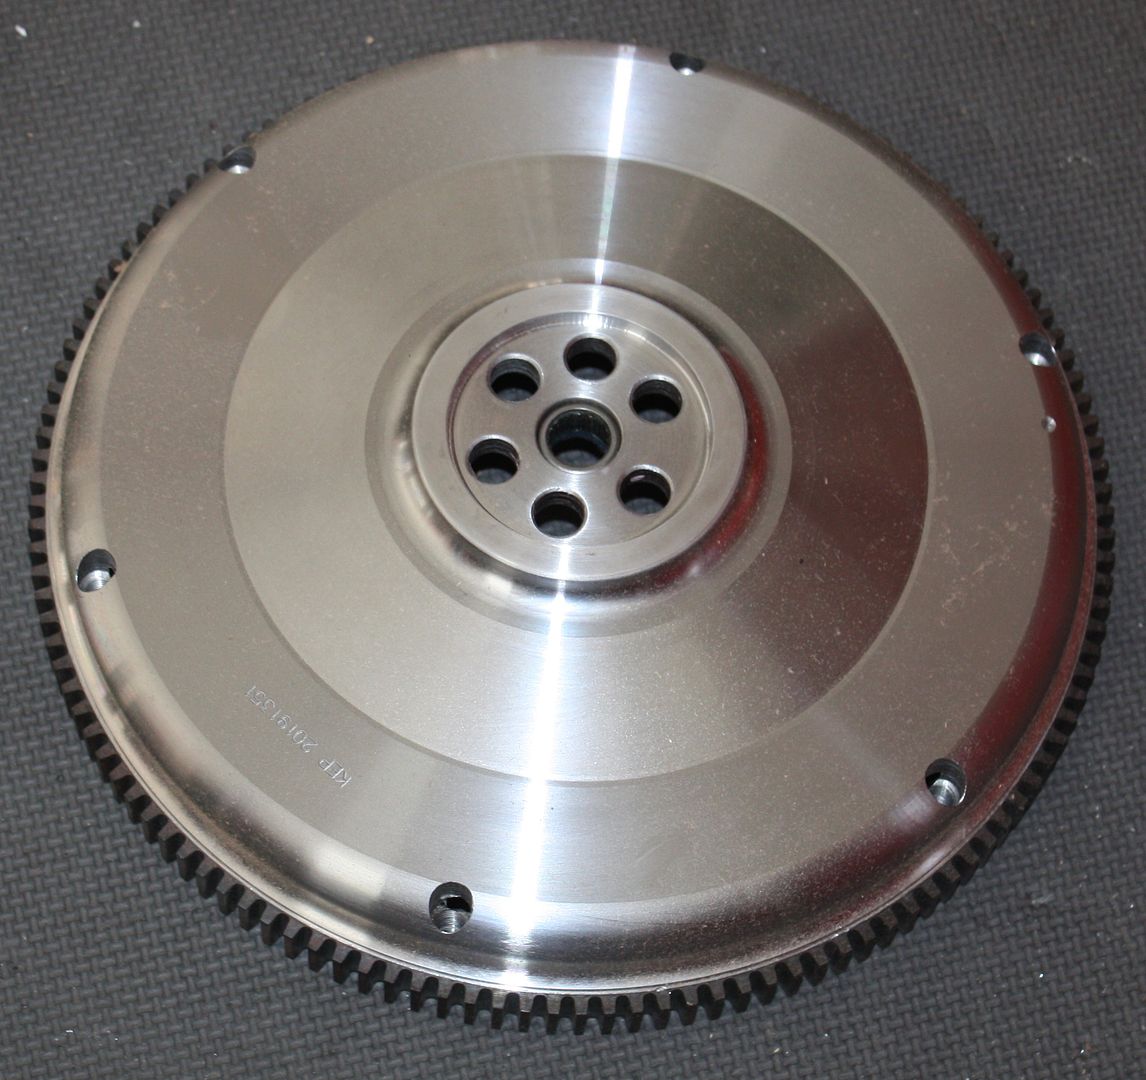
Today I received the resurfaced flywheel back from Kennedy Engineering. He had told me that it would look radically different. See for yourself with the first photo being the rear of the flywheel after I removed it from the car and the bottom photo being the current configuration.
This past Tuesday, John Forbes and some friends picked up the car in an enclosed trailer and took it to his shop, Black Forest Racing, in Denver, NC. The next day he said he had found the problem and sent me this photo.

At first I couldn't see what was wrong. And then it dawned on me. I had bolted the oil line for the chain tensioner to the boss rather than to the hole to the right which was the chain tensioner. Which explains the engine sounding like a tractor engine and making weird noises. I had removed that line so that I could drill the hole for the head temp sensor. What really galls me is that I really struggled installing the heater hose because that line was in the way. Bolting it to the boss made the line sit up higher causing the interference. Hence the dunce cap for me!!
I drove over to John's shop today. He had removed the timing chain cover and did not find any metal shavings are any indication of damage. However, since the tensioner was bouncing around, he is replacing it. He feels pretty good about that being the only issue but, once the car is back together, he is going to do a leak down test to make sure there isn't still a problem in cylinder one. He is also going to check the cam timing. I apologize for the photo below as I had to use my phone in a low light situation.


John's son works with Richard Clewett regularly. Once they have everything fixed and the engine back in the car, they will consult with Richard while they run the car on their dyno.
John has been working on 914's since the beginning. Everywhere you looked you saw either 914 cars or parts. They had a beautiful 914 with a 3.2 Carrera motor with flares and finished in Gulf Blue and orange. Beautiful car.


Today I received the resurfaced flywheel back from Kennedy Engineering. He had told me that it would look radically different. See for yourself with the first photo being the rear of the flywheel after I removed it from the car and the bottom photo being the current configuration.
