
porsche0nut's 3.2 Carrera Engine Project
 02-22-2015, 09:49 PM
#1
Race Car
Thread Starter
I've been dreaming of having my own project thread for years, since long before I even owned my 911. Will be posting my progress in this thread, am looking forward to sharing the project and learning from the community as I go - there will be many questions along the way as I seek the advice of those more experienced than myself!
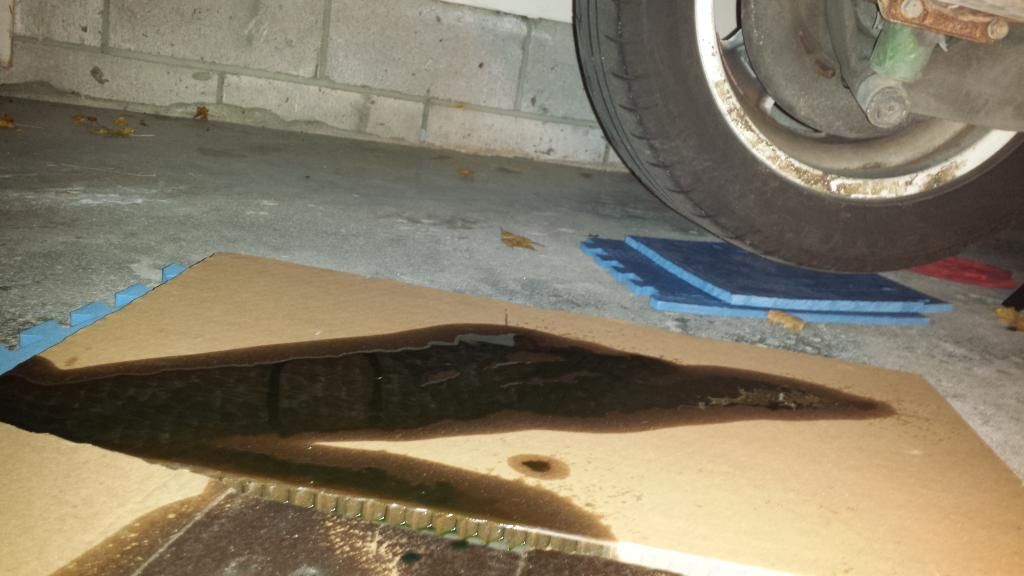
Over the course of my ownership, my 911 has been relatively leak-free, (no more than dime-sized drops underneath the engine) and does not consume much oil (maybe 1L every couple thousand km). This winter I did the usual pre-storage oil change and put her away. To my surprise, a quite sizeable puddle developed beneath the engine.
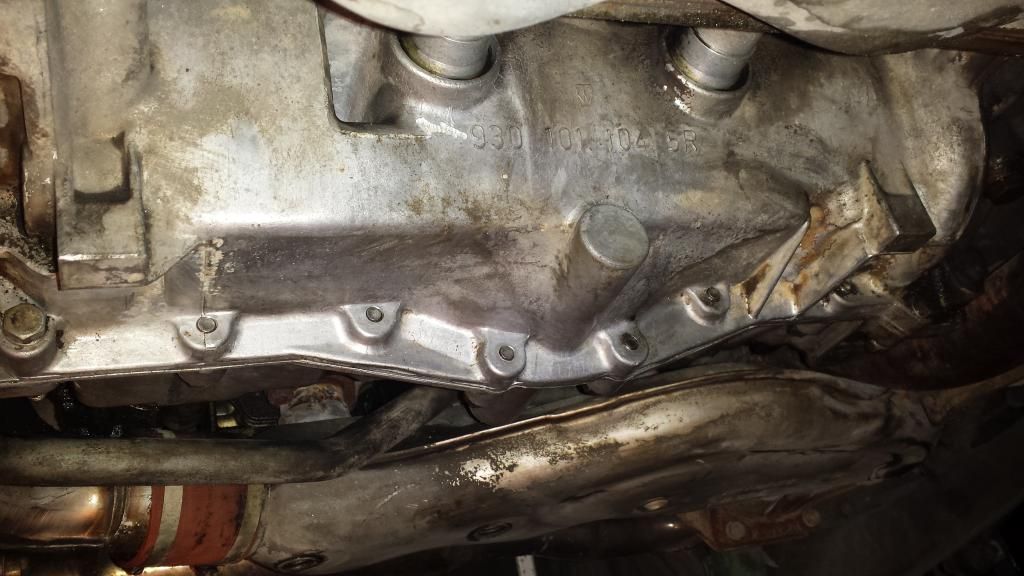
It appeared as if the oil was leaking from the return tubes, you can see in the photos where the fresh oil left a "path" down the side of the case.
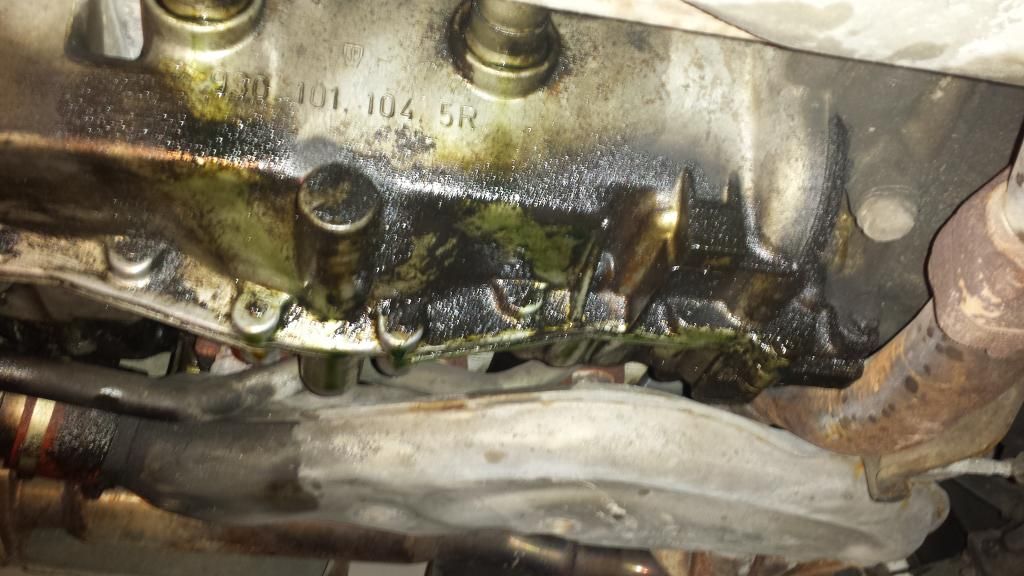

Here cylinder 5 looks like there's another oil leak coming from somewhere - this is strange to me. It was the only one. (see future post... cylinder 5 also was the only cylinder where I found oil collected on the top of the intake valve in the runner, leaking valve guide)
I spent some time cleaning the underside of the engine (it was pretty filthy, grime and oil-covered) so that I could confirm that this was the source of the leak. When I checked the next morning, it was obvious that the oil was leaking from the oil return tubes, fresh oil had collected and everywhere else was bone dry. It sure looked a lot nicer! (pic below is right after cleaning, not after given time to seep)
Excellent, the excuse I needed to drop the engine and get myself into a project! There have been a lot of "want to do" things on my list for some time, so I am going to take this opportunity to dive right in! The goal will be to have it all done in time to drive down to Hershey. Bold... I may end up riding shotgun in a friends car instead - we'll see how things progress!
At the time of engine drop, my list consisted of the following:
Feel free to chime in with any suggestions - things I should add to the list, experience with different parts/suppliers, tips and tricks...

Over the course of my ownership, my 911 has been relatively leak-free, (no more than dime-sized drops underneath the engine) and does not consume much oil (maybe 1L every couple thousand km). This winter I did the usual pre-storage oil change and put her away. To my surprise, a quite sizeable puddle developed beneath the engine.
It appeared as if the oil was leaking from the return tubes, you can see in the photos where the fresh oil left a "path" down the side of the case.
Here cylinder 5 looks like there's another oil leak coming from somewhere - this is strange to me. It was the only one. (see future post... cylinder 5 also was the only cylinder where I found oil collected on the top of the intake valve in the runner, leaking valve guide)
I spent some time cleaning the underside of the engine (it was pretty filthy, grime and oil-covered) so that I could confirm that this was the source of the leak. When I checked the next morning, it was obvious that the oil was leaking from the oil return tubes, fresh oil had collected and everywhere else was bone dry. It sure looked a lot nicer! (pic below is right after cleaning, not after given time to seep)
Excellent, the excuse I needed to drop the engine and get myself into a project! There have been a lot of "want to do" things on my list for some time, so I am going to take this opportunity to dive right in! The goal will be to have it all done in time to drive down to Hershey. Bold... I may end up riding shotgun in a friends car instead - we'll see how things progress!
At the time of engine drop, my list consisted of the following:
- [*]
- [*]
- [*]
- [*]
- [*]
- [*]
- [*]
- [*]
- [*]
- [*]
- [*]
- [*]
- [*]
- [*]
- [*]
- [*]
- [*]
- [*]
- [*]
Feel free to chime in with any suggestions - things I should add to the list, experience with different parts/suppliers, tips and tricks...
Last edited by porsche0nut; 03-16-2015 at 10:26 PM.
 02-22-2015, 10:14 PM
#3
Race Car
Thread Starter
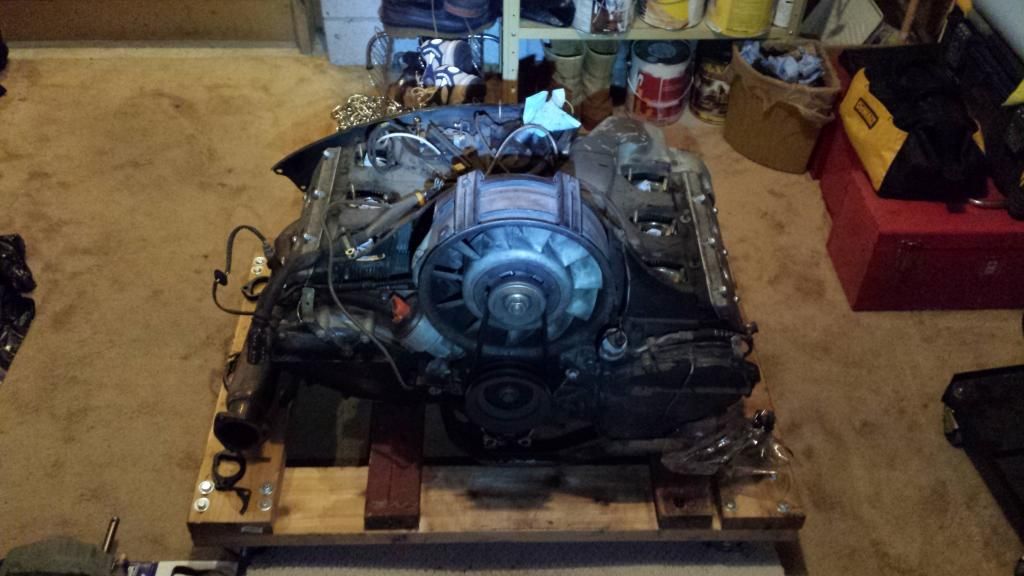
The engine drop went well, without complication. Unfortunately I had decided to do it on one of the coldest days, but we survived! My plan was to figure out a way to transport the engine downstairs from the garage into the workshop so that I could work on it in comfort and warmth, and have everything out of the way and in a cleaner environment than the garage could offer.
Some pics from the drop process...
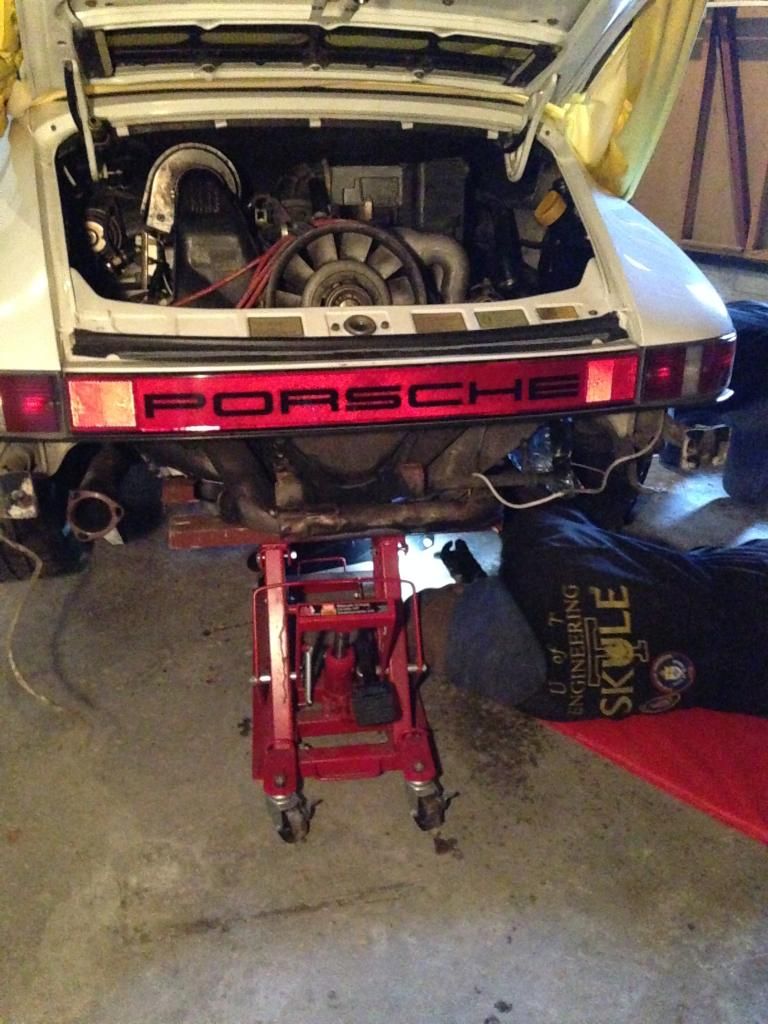
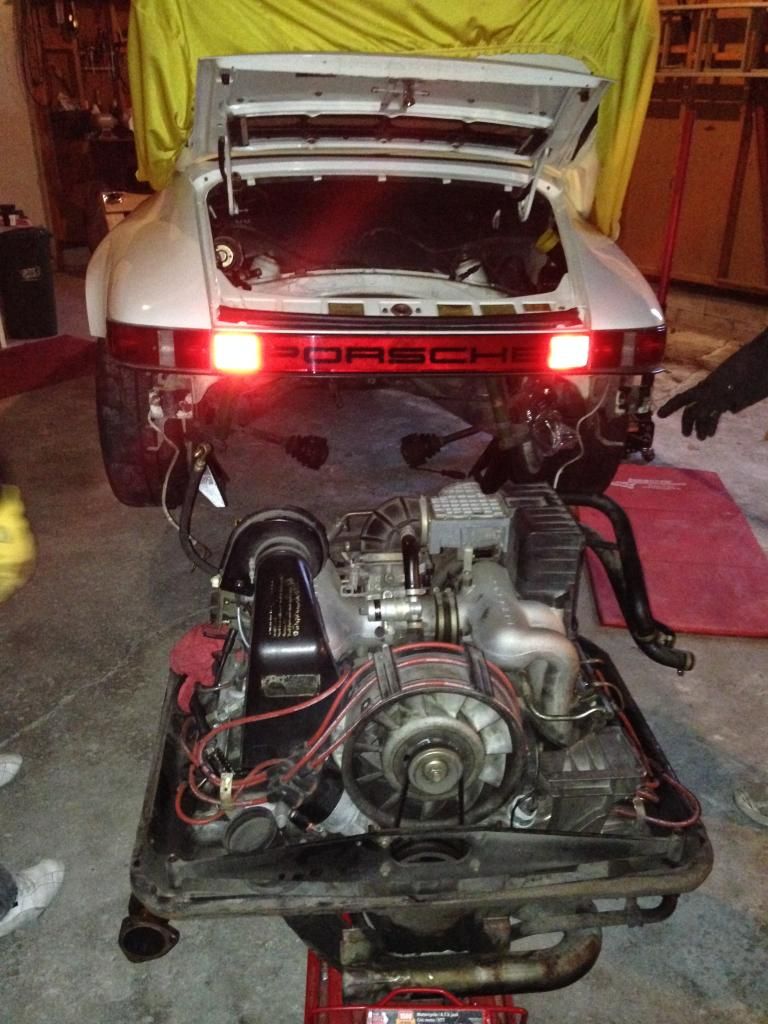
Only a couple minor snags... the fuel supply hose was caught on the top of the fuel filter as we were lowering the engine and bent the bracket the filter mounts to slightly before we noticed it, (no biggie, I can remedy that easily) and the electrical pins that connect into the front of the transmission broke from the wire when I pulled them out (also an easy fix).
Obligatory engine bay pic:

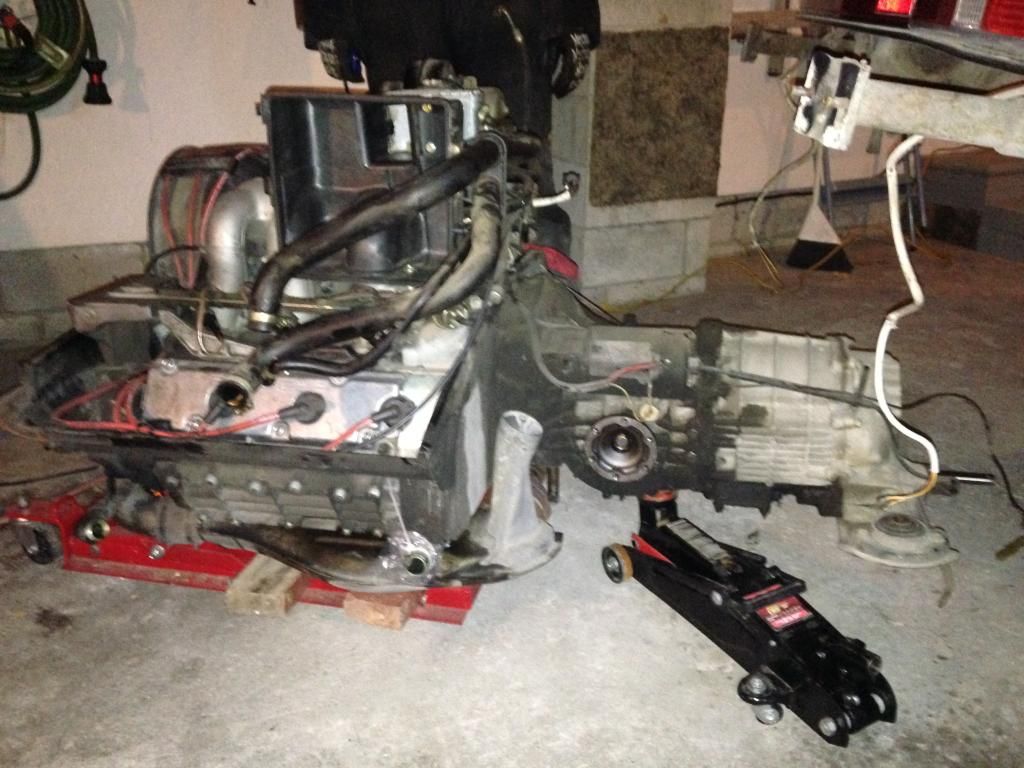
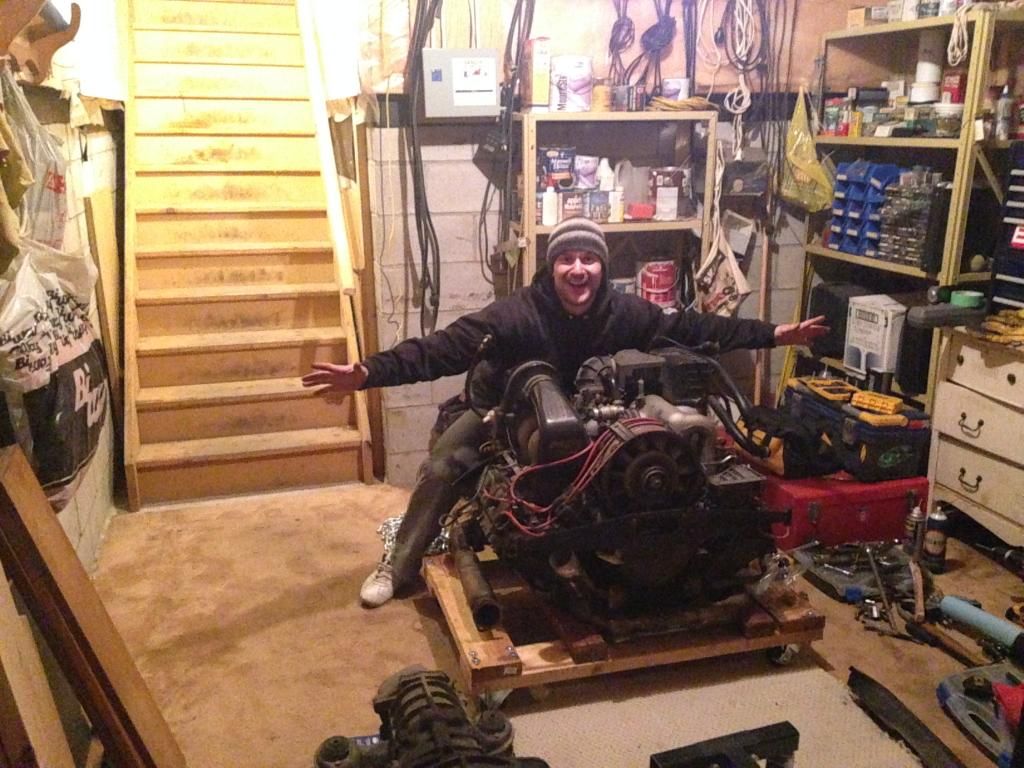
To get the engine downstairs I built a cart, and the original plan was to build a ramp and lower the cart down the ramp with my jetta. My 2 friends and I ended up lifting it down the stairs on the cart step-by-step instead. I think our egos were larger than our muscles but we did it.
Some pics from the drop process...
Only a couple minor snags... the fuel supply hose was caught on the top of the fuel filter as we were lowering the engine and bent the bracket the filter mounts to slightly before we noticed it, (no biggie, I can remedy that easily) and the electrical pins that connect into the front of the transmission broke from the wire when I pulled them out (also an easy fix).
Obligatory engine bay pic:
To get the engine downstairs I built a cart, and the original plan was to build a ramp and lower the cart down the ramp with my jetta. My 2 friends and I ended up lifting it down the stairs on the cart step-by-step instead. I think our egos were larger than our muscles but we did it.
Last edited by porsche0nut; 02-22-2015 at 10:32 PM.
02-22-2015, 10:29 PM
#4
Race Car
Thread Starter
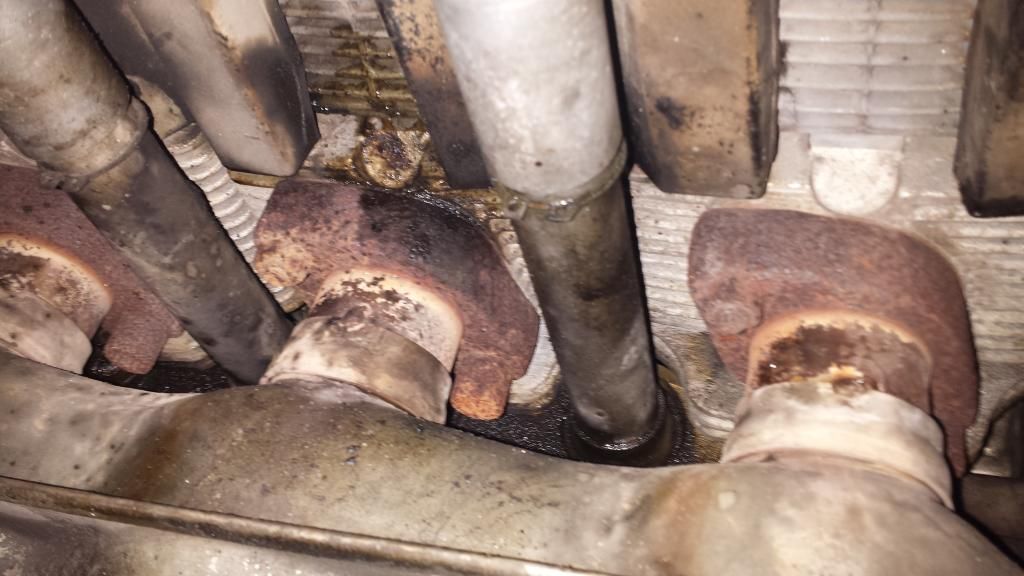
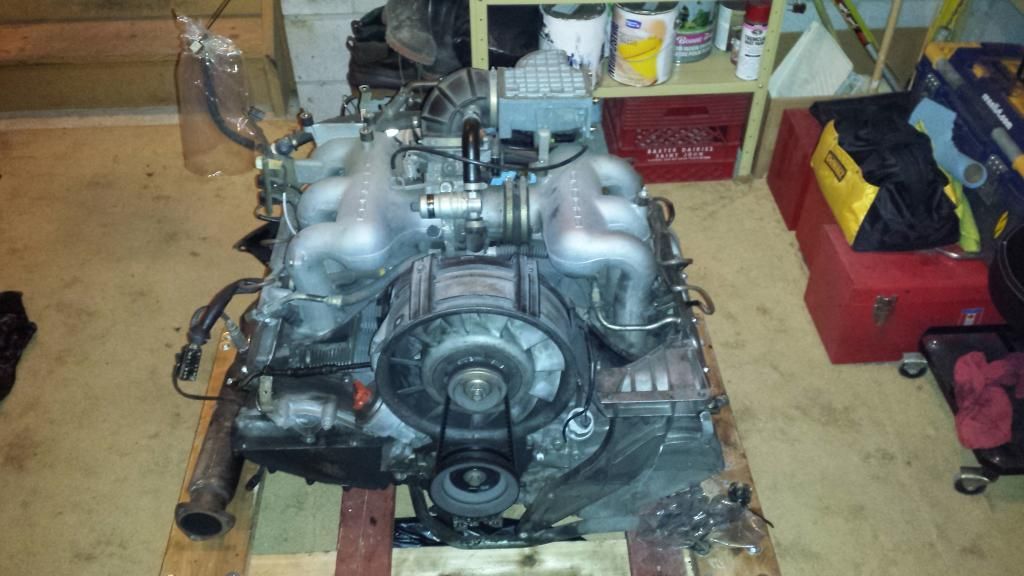
I spent some time this weekend starting to teardown the engine. My plan is to get it down to the long block before I put it on the engine stand. It makes me uneasy putting it on the stand earlier than I need to (silly, right) and with the engine sitting on the cart it is very easy and enjoyable to work away at anyway. I'm taking my time and organizing everything that comes off, labelling my hardware, and taking plenty of pics. So far everything has removed easily without struggle, but I'm sure that will change when it comes time to remove the heat exchangers!
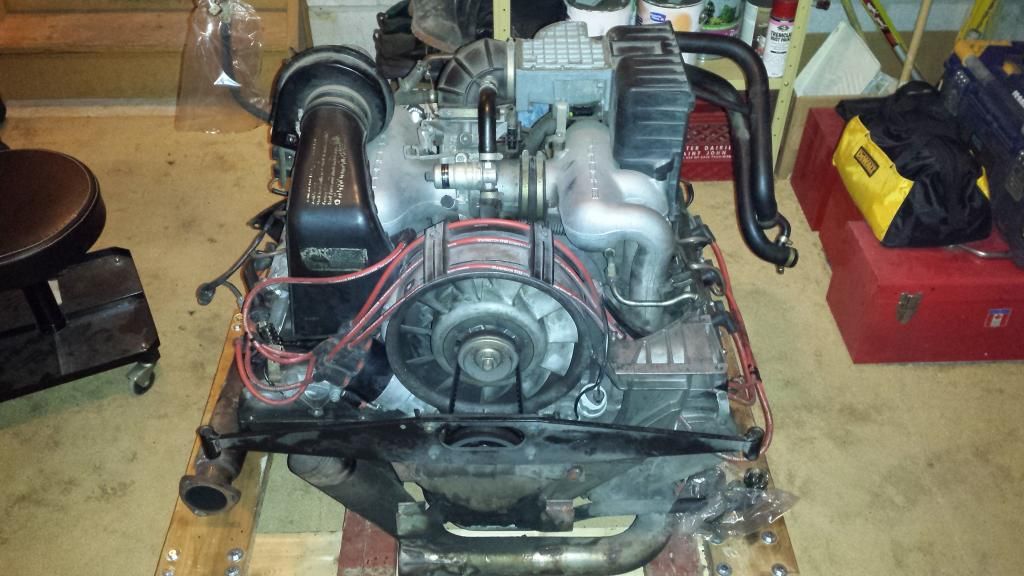
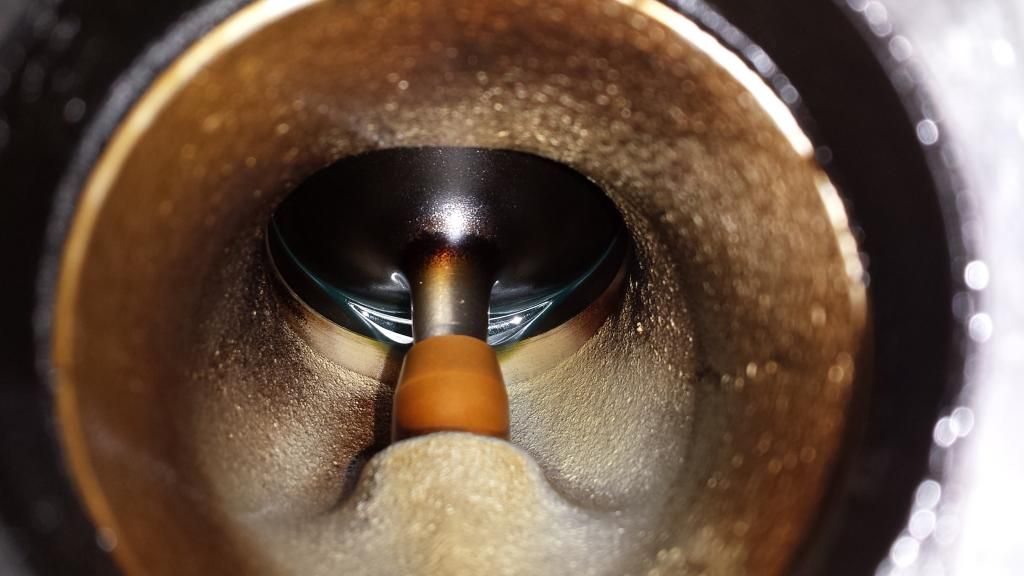
I took pictures of the intake runners for every cylinder. Check out #5, I think my valve guide is leaking on this one, in addition to the oil pooled up you can see the path it has left over time below the guide.
Questions:
Does this mean I need to replace my valve guides? If so, should I do all of them or just this one? What about the exhaust ones?
Also, my intake manifold was pretty dark inside (as in, the walls of the runners had dark coloration/stain). Is this normal to see?

Trending Topics
02-23-2015, 10:33 AM
#8
Team Owner
Okay a few points from my tear down.
firstly don't let anyone tell you what you have to do while you are in there. This can get expensive real fast and you have to draw your own limits. You and i are rebuilding for the same reason , a repair. if the engine is running strong don't feel pressured to do things you don't want to . I have been part of 4 engine builds now so know whats involved and how quickly the costs can run up , so doing my own I am a little more reserved. In fact if i had seen your pics before you pulled i would have advised against pulling it for what you had to do . 90 % of your leaks are from the return tubes, and you already had the collapsible, so you could have gotten away with 8 vitron O rings and then just see how it goes from there , you would have limited your investment to about 6 bucks and some labour. But all that said we are in now.
I did as you and pulled everything off the top before putting on the engine stand, and when i did i supported the front with a 2 by 4 underneath to prop it up. i did however leave on the H/Es .
i spent time doing the cam timing , checking the cam sprocket depth etc before i even started just for practice, but i had done it all before. it is always a good idea to baseline your engine.
i was fortunate enough to have a warm day to get the grease and grime off with cleaners and a pressure washer before i started taking it apart. its not a huge deal if you are taking everything apart but i didn't plan on splitting the case so then it becomes very important. you want nothing falling into the case like dirt and grime.
i have the same leak as you but on a different cylinder. I have determines its in one of 2 places, it is either a rocker shaft leaking and running down ( that will be evident when you look at the ends of the rocker shafts . ) , or leaking at camshaft housing/ head juncture. Thats a PITA coz it means a much work.
i took the head stud nuts off and lifted the entire assembly off ( H/E, cam shaft housing, heads .. ) theoretically if i am just doing a repair, I could pop the cylinders out now , put studs in , pop the cylinders back in , and put the entire assembly back on and away i go . I can also do cam work and rocker shafts and other stuff without ever bothering disturbing the heat exchanges or cam housing/ head interface. it all depends on what you are trying to achieve, and where your leaks are.
I have not made any real decisions yet as every day it gets more expensive with our falling dollar.
just to be clear though some guys will rotate the engine 180 and work on getting the h/e out while its still on the engine stand. Some find it easier.
I didn't . I can still take the cam housing off and work on the heads and h/e on the workbench and save my back . or take them to a machine shop to get work done and get opinions . ( easier than hauling around the engine. )
oh about the heads. i would let the machine shop worry about it . Just take the heads to them and have them cleaned up and serviced. I think being a Carrera you would want valve guides at a minimum , and do all . If you feel they look good dont let them fly cut the heads. as it will mean more work for you shimming the bottom of the cylinders and checking the valve / piston clearances. Its not hard but its a pain .
for sure though if you decide to change one valve guide , then you are all in. My issue is just a broken stud so not nearly as invasive for me if i choose just the repair option.
if any of what i have told you is confusing, then invest the 25 bucks in dempseys engine rebuilding book. Its an excellent resource. Tells you everything you need to know.
Fortunately I have Ed around ( the guy you met going to Randys ) who has done 3 or 4 engines already.
Last edited by theiceman; 02-23-2015 at 02:37 PM.
02-23-2015, 10:39 AM
#9
Rennlist Member
Nice job getting the engine/transaxle out of the car. I would spray the exhaust/heat exchanger bolts with penetrating oil now and let them soak until you are ready to remove them. I like that you guys carried that baby down the stairs.
02-23-2015, 01:51 PM
#10
RL Community Team
Rennlist Member
Rennlist Member
When I went down this road, I went completely overboard and ended up doing a full rebuild, so I am not a good person to ask!! I am very happy with what I eventually accomplished, but it was expen$ive....
IF you are going to replace valve guides for one cylinder, do them all.
Removing the exhaust studs is always a gamble. If you are taking the heads off to do a top end, then let the machine shop take care of the studs.
As Ice says, the real challenge is to know where to draw the line. Compulsive perfectionists like me do very poorly here. My objective recommendation is either to focus on what NEEDS to be done (and the PM stuff that is easy/cheap, like seals, clean up etc.) and only do that OR, go all the way and spare nothing. Trying to land somewhere in the middle is likely not satisfying (you will still spend a ton of money, but also be wishing you had done the "other stuff".
02-23-2015, 07:08 PM
#11
Iceman summed it up.... the "mitaswellas" will kill you, but remember, these engines routinely go 150-200K miles, so they're pretty robust.
But your plan sounds pretty good. A nice balance between restoration and thoughtful modifications. I think you'll end up with a really sweet car.
Keep us posted. We love spending other people's money.
But your plan sounds pretty good. A nice balance between restoration and thoughtful modifications. I think you'll end up with a really sweet car.
Keep us posted. We love spending other people's money.
02-23-2015, 11:06 PM
#12
Race Car
Thread Starter
Okay a few points from my tear down.
firstly don't let anyone tell you what you have to do while you are in there. This can get expensive real fast and you have to draw your own limits. You and i are rebuilding for the same reason , a repair. if the engine is running strong don't feel pressured to do things you don't want to . I have been part of 4 engine builds now so know whats involved and how quickly the costs can run up , so doing my own I am a little more reserved. In fact if i had seen your pics before you pulled i would have advised against pulling it for what you had to do . 90 % of your leaks are from the return tubes, and you already had the collapsible, so you could have gotten away with 8 vitron O rings and then just see how it goes from there , you would have limited your investment to about 6 bucks and some labour. But all that said we are in now.
firstly don't let anyone tell you what you have to do while you are in there. This can get expensive real fast and you have to draw your own limits. You and i are rebuilding for the same reason , a repair. if the engine is running strong don't feel pressured to do things you don't want to . I have been part of 4 engine builds now so know whats involved and how quickly the costs can run up , so doing my own I am a little more reserved. In fact if i had seen your pics before you pulled i would have advised against pulling it for what you had to do . 90 % of your leaks are from the return tubes, and you already had the collapsible, so you could have gotten away with 8 vitron O rings and then just see how it goes from there , you would have limited your investment to about 6 bucks and some labour. But all that said we are in now.
I did as you and pulled everything off the top before putting on the engine stand, and when i did i supported the front with a 2 by 4 underneath to prop it up. i did however leave on the H/Es .
i spent time doing the cam timing , checking the cam sprocket depth etc before i even started just for practice, but i had done it all before. it is always a good idea to baseline your engine.
i was fortunate enough to have a warm day to get the grease and grime off with cleaners and a pressure washer before i started taking it apart. its not a huge deal if you are taking everything apart but i didn't plan on splitting the case so then it becomes very important. you want nothing falling into the case like dirt and grime.
 Been dreaming of headers for a couple years now, so it felt good to finally pull the trigger! I don't plan to get too far into the engine. I am going down to the long block mainly for the learning process and joy of it, and to get at all the seals I want to replace and clean everything when I put it back together. Because it's indoors I don't want to use solvents/degreasers so I used a shop vac to pull away all the loose grime before taking the intake off.
i have the same leak as you but on a different cylinder. I have determines its in one of 2 places, it is either a rocker shaft leaking and running down ( that will be evident when you look at the ends of the rocker shafts . ) , or leaking at camshaft housing/ head juncture. Thats a PITA coz it means a much work.
i took the head stud nuts off and lifted the entire assembly off ( H/E, cam shaft housing, heads .. ) theoretically if i am just doing a repair, I could pop the cylinders out now , put studs in , pop the cylinders back in , and put the entire assembly back on and away i go . I can also do cam work and rocker shafts and other stuff without ever bothering disturbing the heat exchanges or cam housing/ head interface. it all depends on what you are trying to achieve, and where your leaks are.
I have not made any real decisions yet as every day it gets more expensive with our falling dollar.
just to be clear though some guys will rotate the engine 180 and work on getting the h/e out while its still on the engine stand. Some find it easier.
I didn't . I can still take the cam housing off and work on the heads and h/e on the workbench and save my back . or take them to a machine shop to get work done and get opinions . ( easier than hauling around the engine. )
oh about the heads. i would let the machine shop worry about it . Just take the heads to them and have them cleaned up and serviced. I think being a Carrera you would want valve guides at a minimum , and do all . If you feel they look good dont let them fly cut the heads. as it will mean more work for you shimming the bottom of the cylinders and checking the valve / piston clearances. Its not hard but its a pain .
for sure though if you decide to change one valve guide , then you are all in. My issue is just a broken stud so not nearly as invasive for me if i choose just the repair option.
if any of what i have told you is confusing, then invest the 25 bucks in dempseys engine rebuilding book. Its an excellent resource. Tells you everything you need to know.
Fortunately I have Ed around ( the guy you met going to Randys ) who has done 3 or 4 engines already.
When I went down this road, I went completely overboard and ended up doing a full rebuild, so I am not a good person to ask!! I am very happy with what I eventually accomplished, but it was expen$ive....
IF you are going to replace valve guides for one cylinder, do them all.
Removing the exhaust studs is always a gamble. If you are taking the heads off to do a top end, then let the machine shop take care of the studs.
As Ice says, the real challenge is to know where to draw the line. Compulsive perfectionists like me do very poorly here. My objective recommendation is either to focus on what NEEDS to be done (and the PM stuff that is easy/cheap, like seals, clean up etc.) and only do that OR, go all the way and spare nothing. Trying to land somewhere in the middle is likely not satisfying (you will still spend a ton of money, but also be wishing you had done the "other stuff".
IF you are going to replace valve guides for one cylinder, do them all.
Removing the exhaust studs is always a gamble. If you are taking the heads off to do a top end, then let the machine shop take care of the studs.
As Ice says, the real challenge is to know where to draw the line. Compulsive perfectionists like me do very poorly here. My objective recommendation is either to focus on what NEEDS to be done (and the PM stuff that is easy/cheap, like seals, clean up etc.) and only do that OR, go all the way and spare nothing. Trying to land somewhere in the middle is likely not satisfying (you will still spend a ton of money, but also be wishing you had done the "other stuff".
Iceman summed it up.... the "mitaswellas" will kill you, but remember, these engines routinely go 150-200K miles, so they're pretty robust.
But your plan sounds pretty good. A nice balance between restoration and thoughtful modifications. I think you'll end up with a really sweet car.
Keep us posted. We love spending other people's money.
But your plan sounds pretty good. A nice balance between restoration and thoughtful modifications. I think you'll end up with a really sweet car.
Keep us posted. We love spending other people's money.
Ice is right though - our CAD dollar is really making purchases painful right now. My money would have gotten me a lot further a year ago!
02-24-2015, 09:20 AM
#14
Race Car
Thread Starter
Will let you know next weekend, haven't taken the clutch off yet.
I'll probably use some good heat I want to replace all the exhaust studs. Have heard stories of them breaking not only when taking the exhaust off, but when tightening the nuts putting the new one on. Will save myself future trouble by doing the hard part upfront.
I'll probably use some good heat I want to replace all the exhaust studs. Have heard stories of them breaking not only when taking the exhaust off, but when tightening the nuts putting the new one on. Will save myself future trouble by doing the hard part upfront.
02-24-2015, 09:45 AM
#15
Team Owner
Will let you know next weekend, haven't taken the clutch off yet. I'll probably use some good heat I want to replace all the exhaust studs. Have heard stories of them breaking not only when taking the exhaust off, but when tightening the nuts putting the new one on. Will save myself future trouble by doing the hard part upfront.
Last edited by theiceman; 02-24-2015 at 10:20 PM.