When you click on links to various merchants on this site and make a purchase, this can result in this site earning a commission. Affiliate programs and affiliations include, but are not limited to, the eBay Partner Network.
Trying to do little things during the week to keep this project moving. I had the hubs media blasted and I sealed them with high temp clear to provide some corrosion protection. Removing the bearing races went ok by using a socket and drift very carefully and I put the new races in the freezer overnight which helped press them in. New bearings and seals are being installed once I pack the bearings with grease.
^ I may. I still am not sure what I am doing for a motor yet. However, I may do things like go thru the MFI. I am not sure yet as I am going to have my hands full with all of this sheet metal work. I think this project is turning into a longer project - I will be making updates to this thread for months - but will have fun doing the work
Finally had time to get out in the garage this morning. Had a little extra motivation to get some work done after going with my buddy to see the progress on his 356. Car was just painted in its original Irish Green and was being under coated when we visited the shop. He did all of the rust repair/sheet metal work himself and did an outstanding job.
With the motor and trans out of the way, I was able to remove the rear seat buckets. After using a wire wheel to expose the spot welds along the chassis, I carefully drilled them out being careful not to drill all of the way thru since I would drill into the hollow subframe sections. After drilling out spot welds along chassis, I cut the remaining circumference using my air saw. I was pretty conservative with my cutting line as I tried to cut out the minimum by cutting up to where there was good metal. I also tried to preserve the seat belt anchors (there is a large backing plate). I figure I can cut more out if I need to, but rather start conservative. If you recall, the passenger side was really bad, with a large rust hole up high on the back panel, so this is why I had to remove more metal on that side. Shot with epoxy primer to protect all of the bare metal until I get back to working on this section. The dark areas that you see in the photos is not rust - it is adhesive left over from removing the sound deadening.
After media blasting the control arms and bushing collars, I shot them with epoxy primer and a 2k ceramic finish. I then installed new Lemforder ball joints with new hardware (although I am going to wait to install the castle lock plates and cotter pins until the arms are on the car and I can really torque them down) and also pressed in new Elephant control arm bushings. The bushings were easy to install with the tools provided, a large clamp and generous amounts of hand soap.
Guys I am seriously contemplating bringing the motor inside my wife has been very understanding of all these parts everywhere in the house and it allows me to get small things done after work without going into my packed garage. I have to move cars out when I go to the garage. Once I am done with the parts in my dining room I'm gonna be looking for more to do - maybe the motor!
Andy Elsener had recommended that I wire wheel the parcel shelf area and window channel to assess condition. He recommended to cut out rusted areas instead of removing the entire shelf. I did this and found that the window channel and lower window corners were perfect - like not even surface rust. However I found quite a bit of rust on the parcel shelf. Strange - water got past the seals and sat on the shelf but didn't rust out the channel or corners (which are common areas for rust)?? So I cut out the rusted sections of the shelf which resulted in some big holes. Not sure this is going to be any easier to repair than the entire shelf but this is what I was told to do. I am at the point where I need to get Andy out here to view my progress to see if I am headed in the right direction.
Here is a shot of the aftermath. It is a weird angle, as I am looking up at the shelf thru the engine compartment. You see my rolled up garage door at the top. There are areas of glue residue from the sound pad - that isn't rust. Anyway, this will require a large section from another parcel shelf to be grafted in. We will see what Andy says.
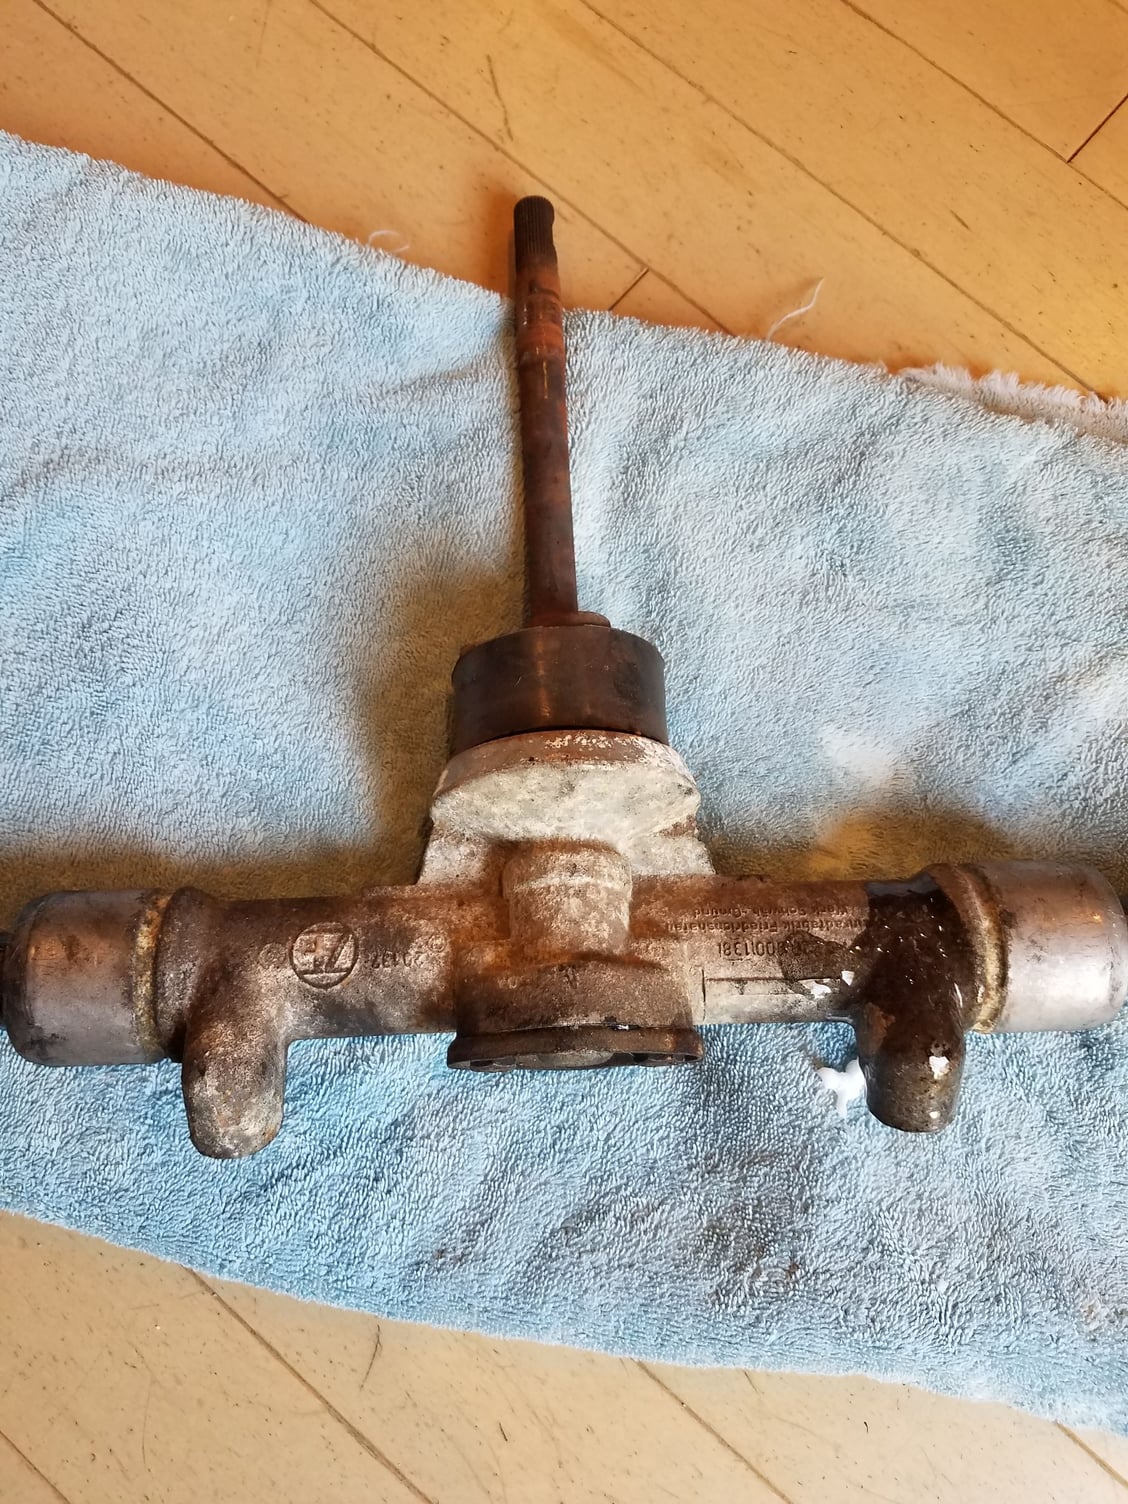
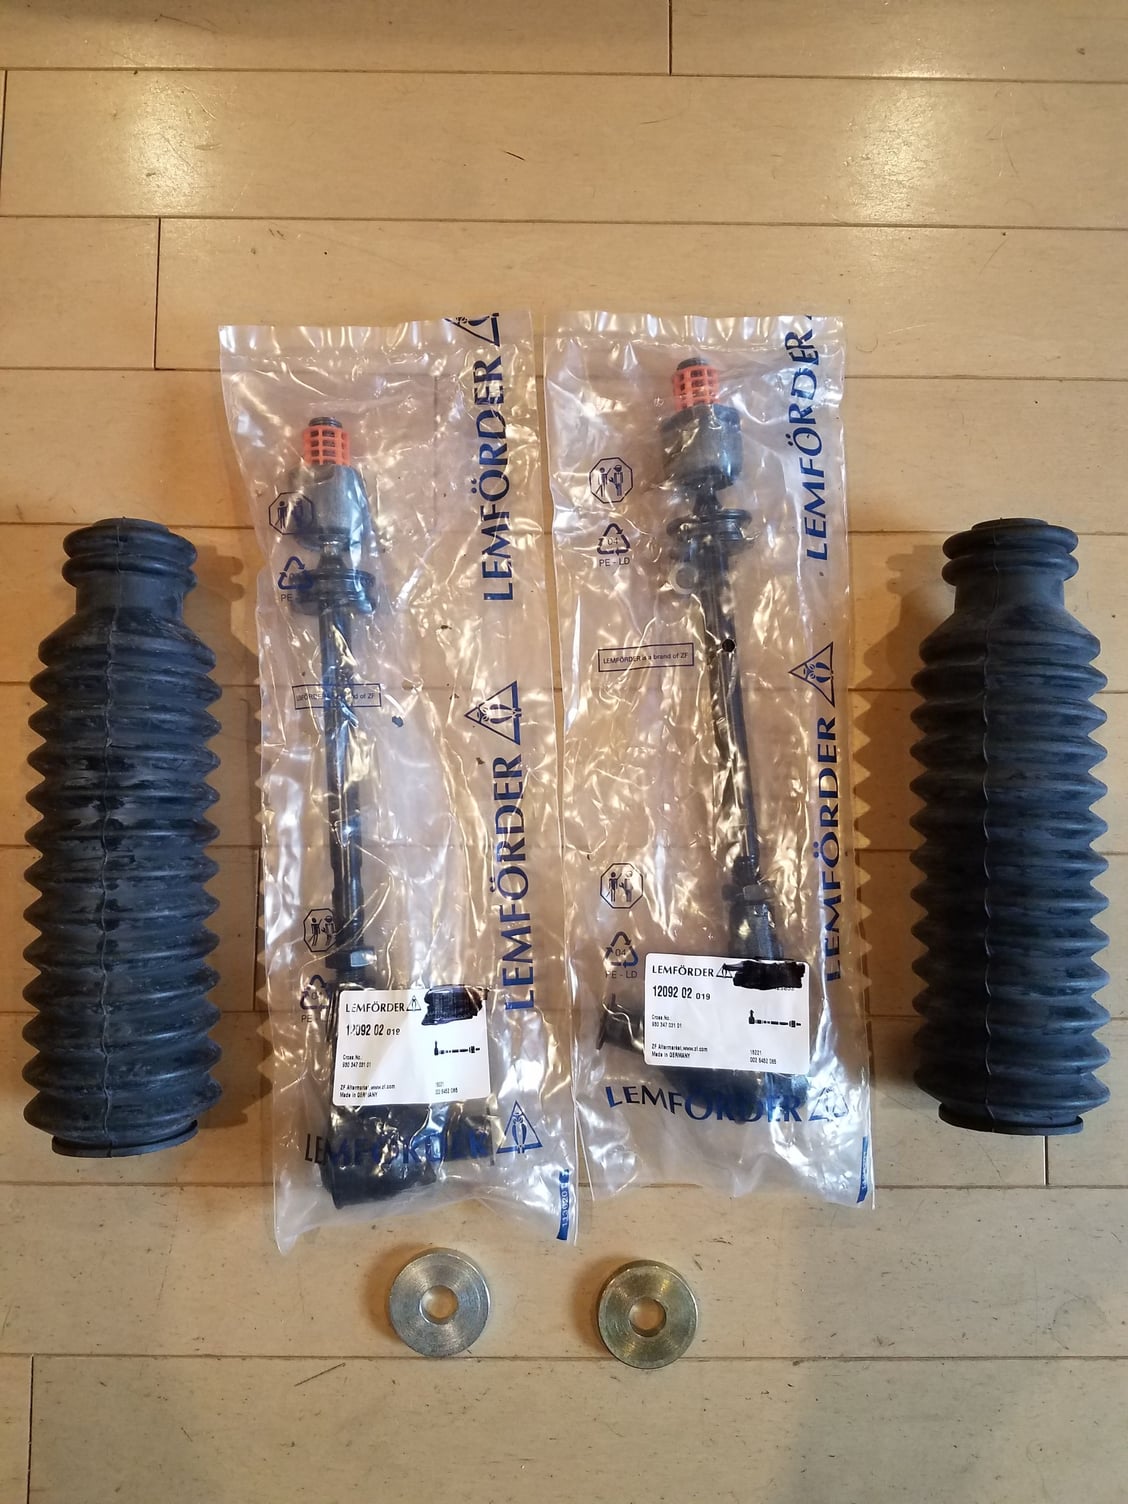
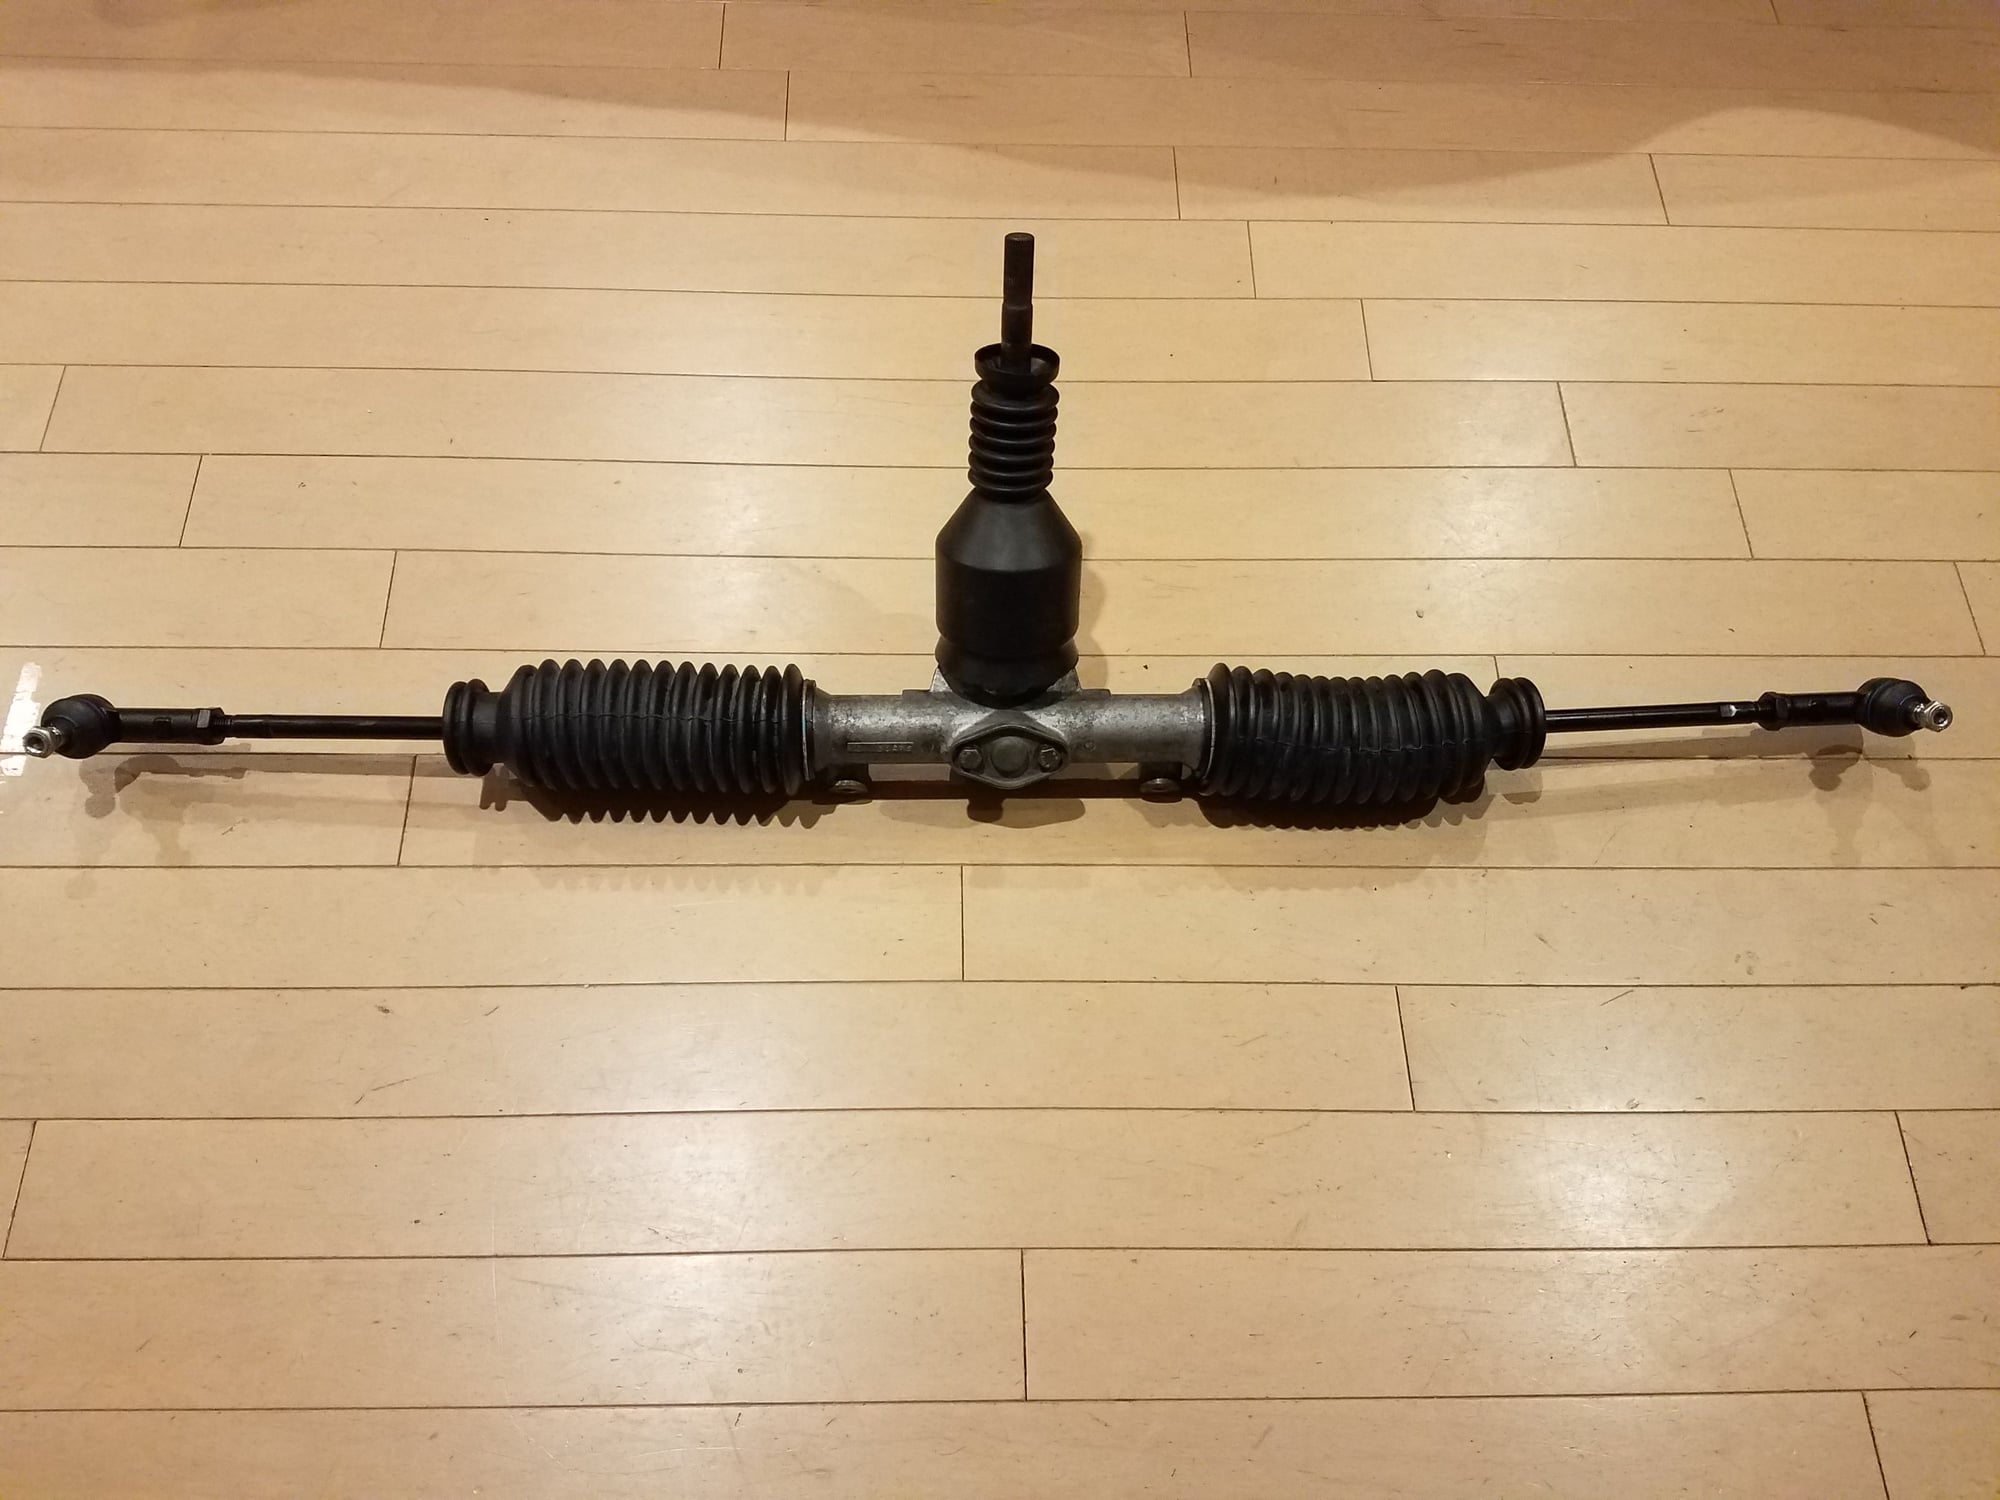
I have had the turbo tie rod kit sitting in the dining room for a few weeks now. Decided to open a beer and assemble my steering rack after work - in my living room of course!
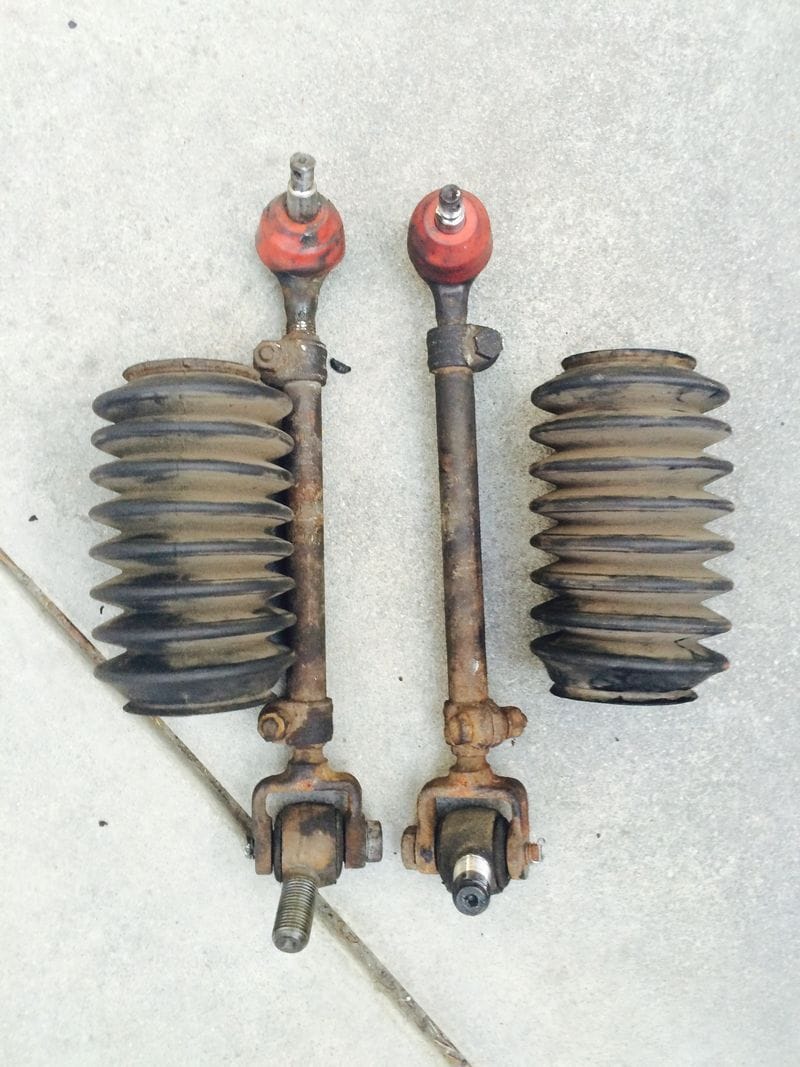
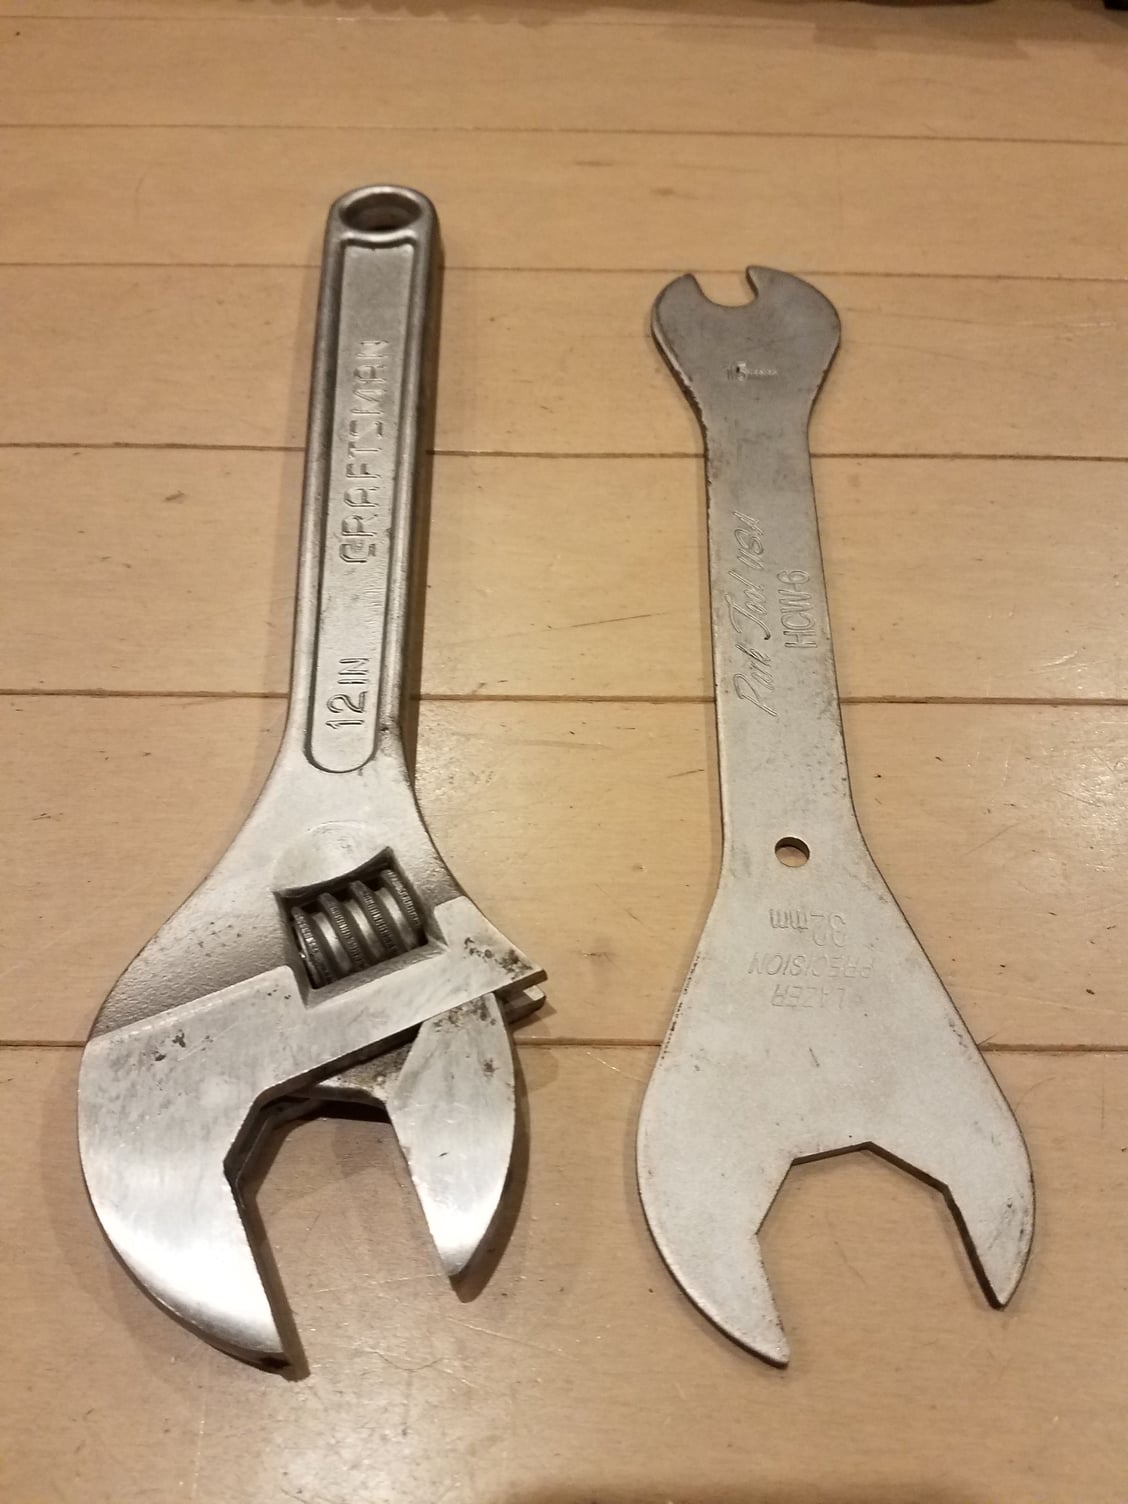
My old tie rods were shot and the steering rack housing was very corroded. I first cleaned up the housing to remove the corrosion. I then removed the two plates to access the bearing and thrust puck to clean out all of the old and tired grease. Also cleaned all of the old grease off the rack. Then repacked/lubed the bearing, thrust puck and the rack. I then installed the new turbo tie rods and Lemforder tie rod ends. It was easier to do this work with the rack on my floor than it was up in the car when I did my SC years ago. I used a large crescent wrench on the rack and a thin head 32mm bike wrench on the tie rod to tighten them up. If you have done this job then you know there is very little space to put a wrench on the tie rod - what is cool is that I bought this wrench for this same job almost 20 years ago when I did my SC! It was waiting in my tool box for another day in the spotlight. Anyway, the steering rack is good to go, but I will install a new steering column bushing when it goes in the car as mine has seen better days.


 03-12-2019, 06:13 PM


 my wife has been very understanding of all these parts everywhere in the house and it allows me to get small things done after work without going into my packed garage. I have to move cars out when I go to the garage. Once I am done with the parts in my dining room I'm gonna be looking for more to do - maybe the motor!