When you click on links to various merchants on this site and make a purchase, this can result in this site earning a commission. Affiliate programs and affiliations include, but are not limited to, the eBay Partner Network.
you could always strip the 993 for parts and put the R. suspension and engine into your early car...
I would love to put that 3.6 in there
Actually, I have been thinking more lately about selling the 993. It is a beautiful car and I enjoy it a lot. However, the values of those WB 993's have gotten crazy and mine is unique in some ways which makes it more valuable than a typical WB 993. It has actually taken some of the fun out of driving it. That is why I am really enjoying this hotrod project - I want something I can really enjoy driving without having to worry about mileage, originality and value so much. Now, my SC may stay with me forever. It is also in great/original condition, but I have owned it for 20 years and it has sentimental value.
You mentioned above about SSIs and a GT3 style muffler. I just received my custom street version M&K GT3 from Brian @ RarelyL8 Motorsports and the build quality is amazing as is the weight. Very light. You should check him out.
You mentioned above about SSIs and a GT3 style muffler. I just received my custom street version M&K GT3 from Brian @ RarelyL8 Motorsports and the build quality is amazing as is the weight. Very light. You should check him out.
Full disclosure I have not put it on the car yet. It will be a little while.
Hey, Rob. Definitely like the build quality of the M&K and certainly like the fact that it is lighter. An option I will have to consider for sure when I get there. After reading the thread you shared, it did get me thinking about the back-pressure/set up needed for my motor. I am thinking I need to figure out the motor build before committing to the purchase to be sure I get the right back-pressure dialed in? Keep me posted on your experience once it is installed!
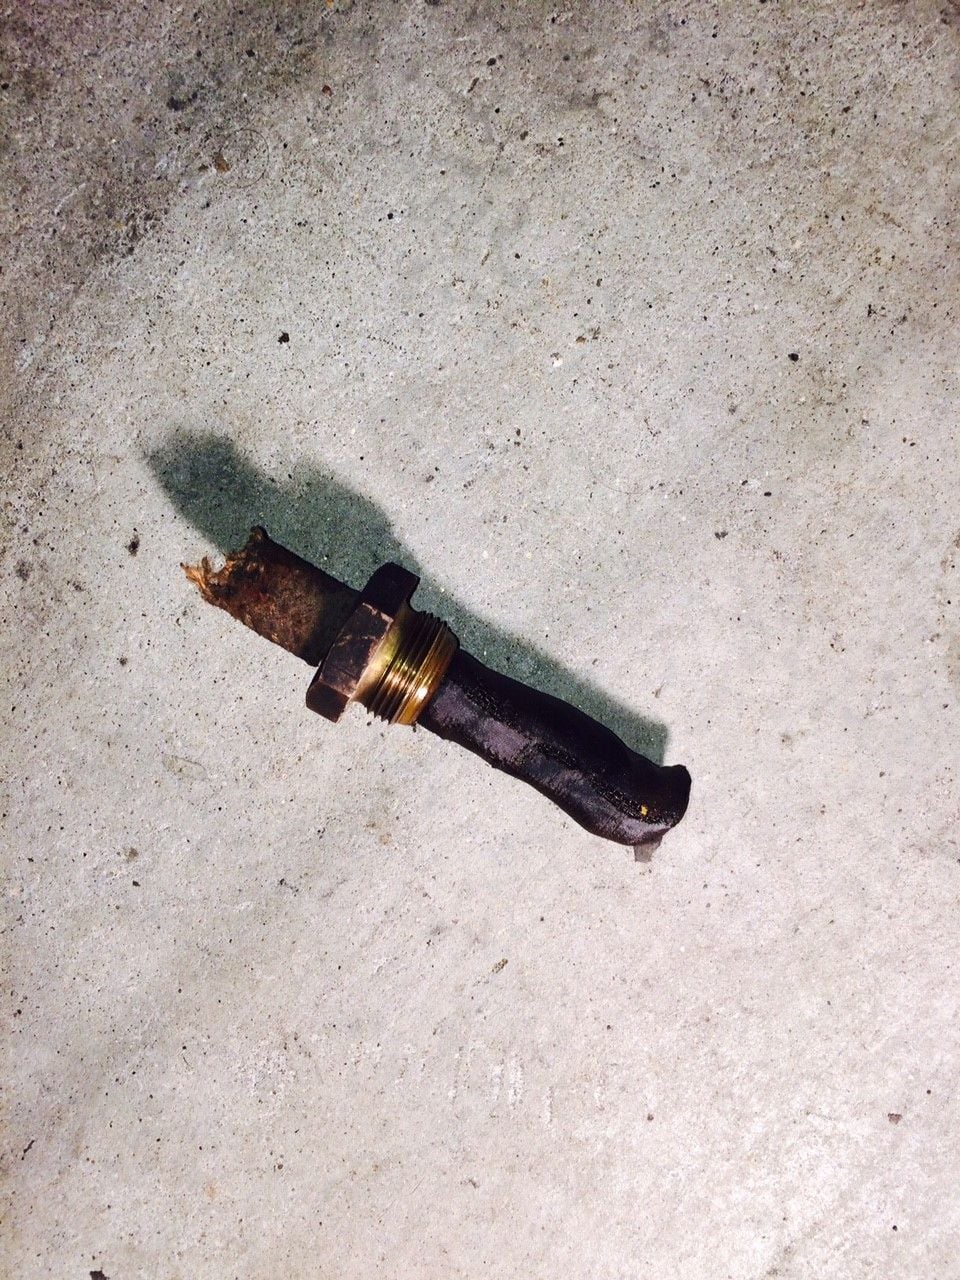
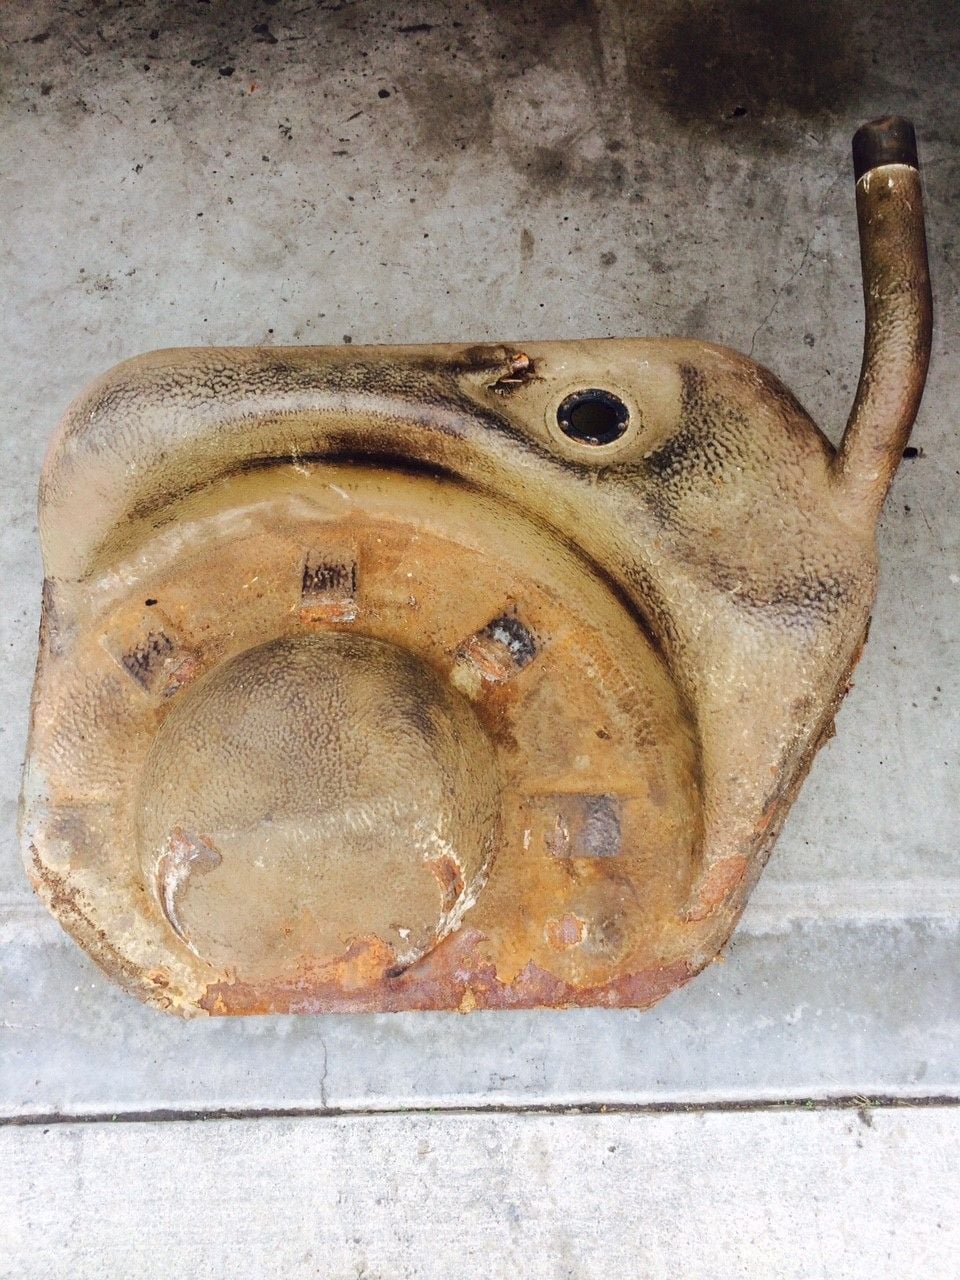
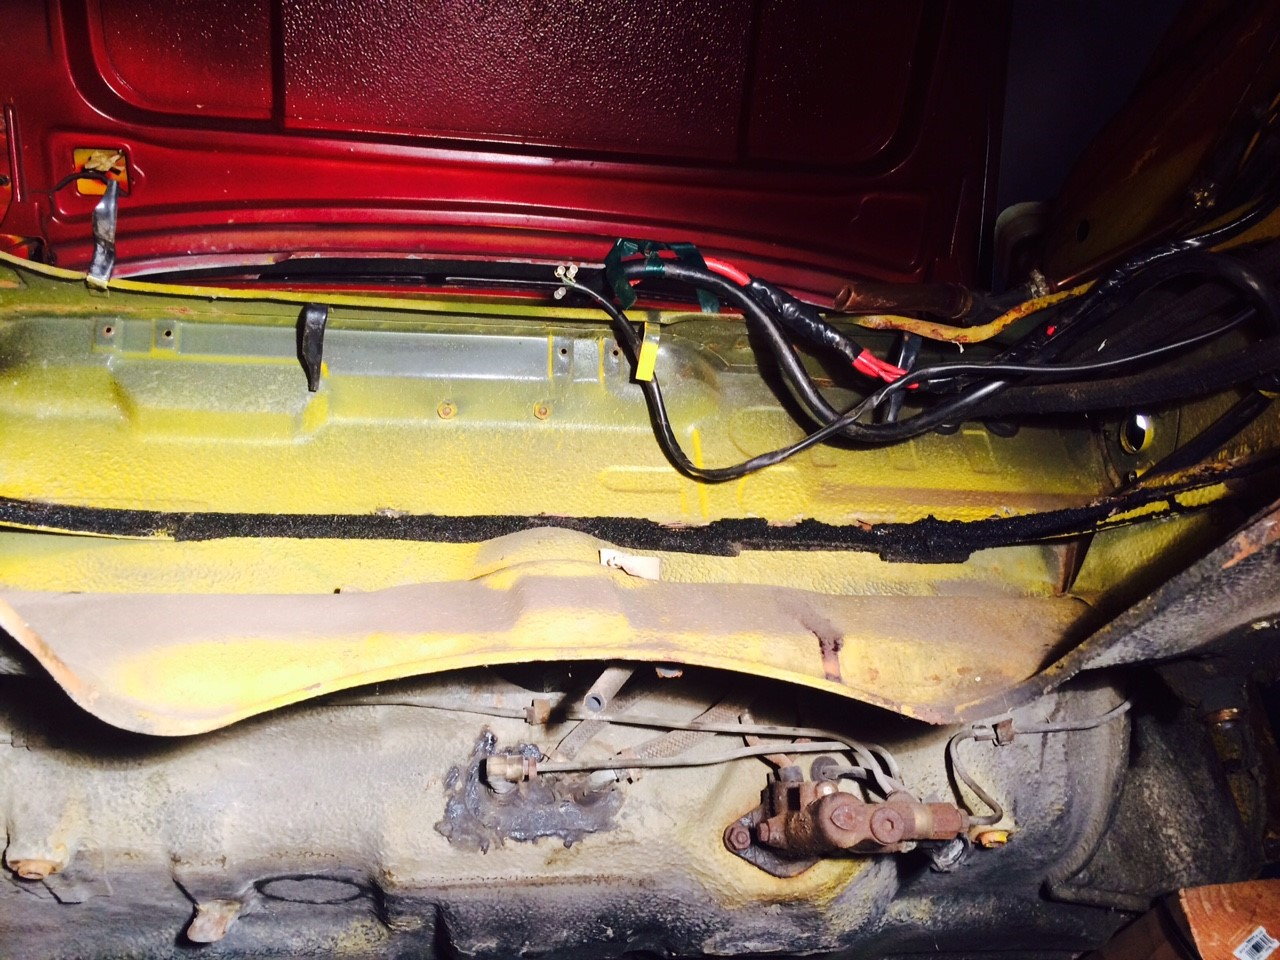
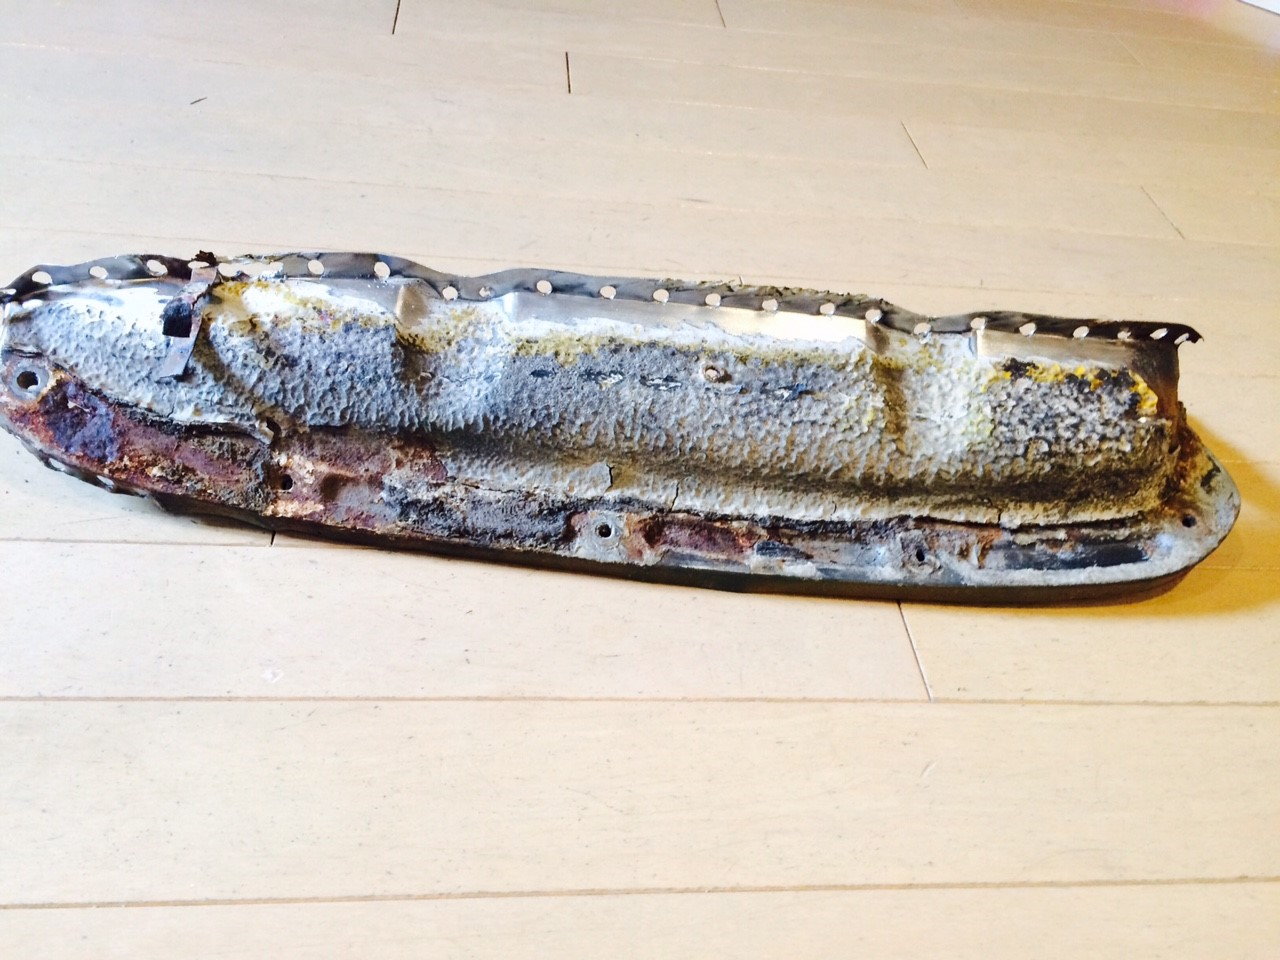
So, the gas tank is out of the car. I had already siphoned the gas out a few days ago. Today, I removed the tank from the car - which was petty easy with the fuel already out.
Here is the condition of the strainer/filter - black and disintegrating
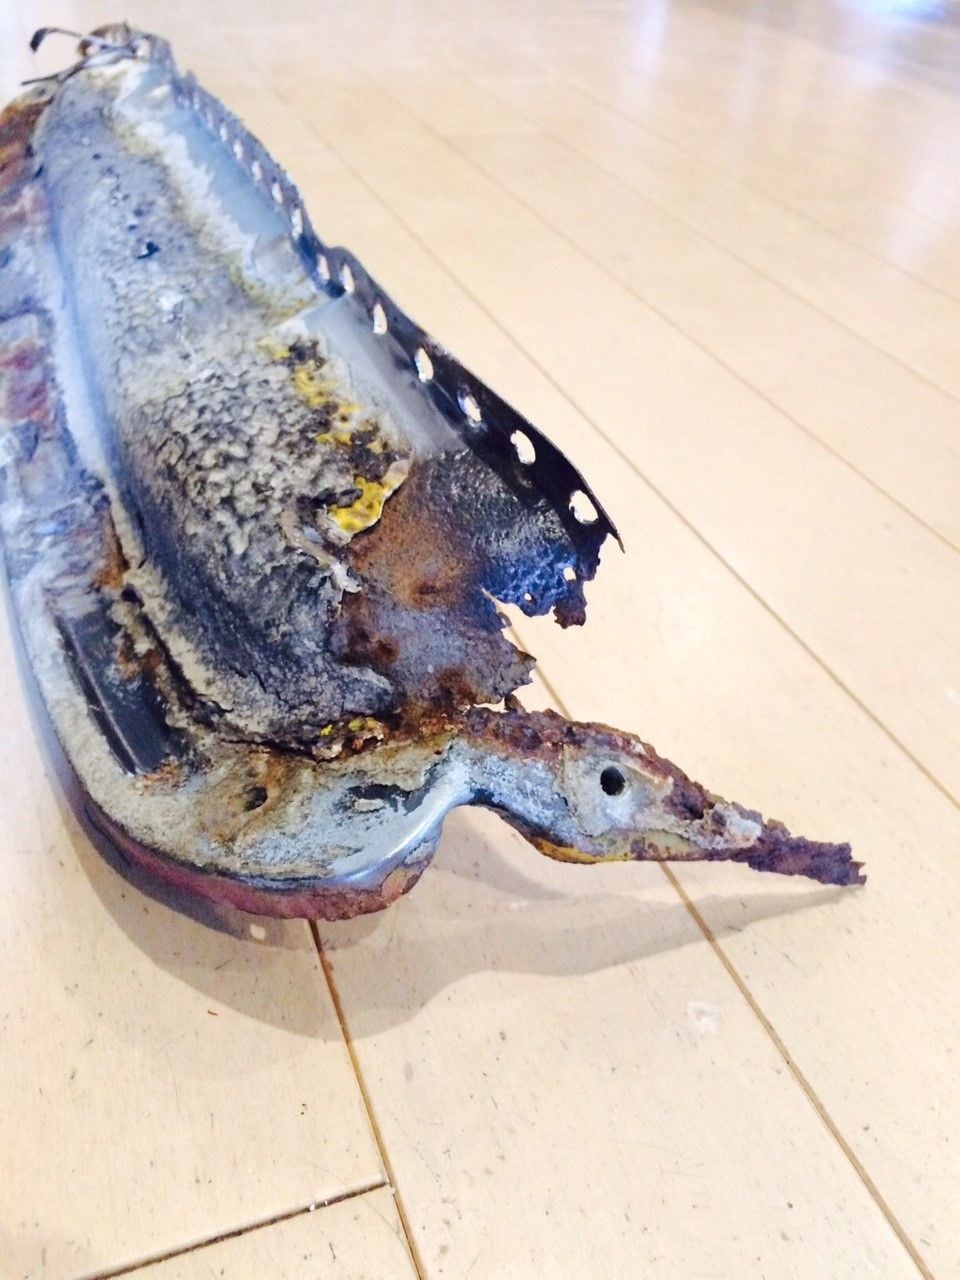
The gas tank has some surface corrosion along the front edge. I have read up on the best ways to refinish the tank.
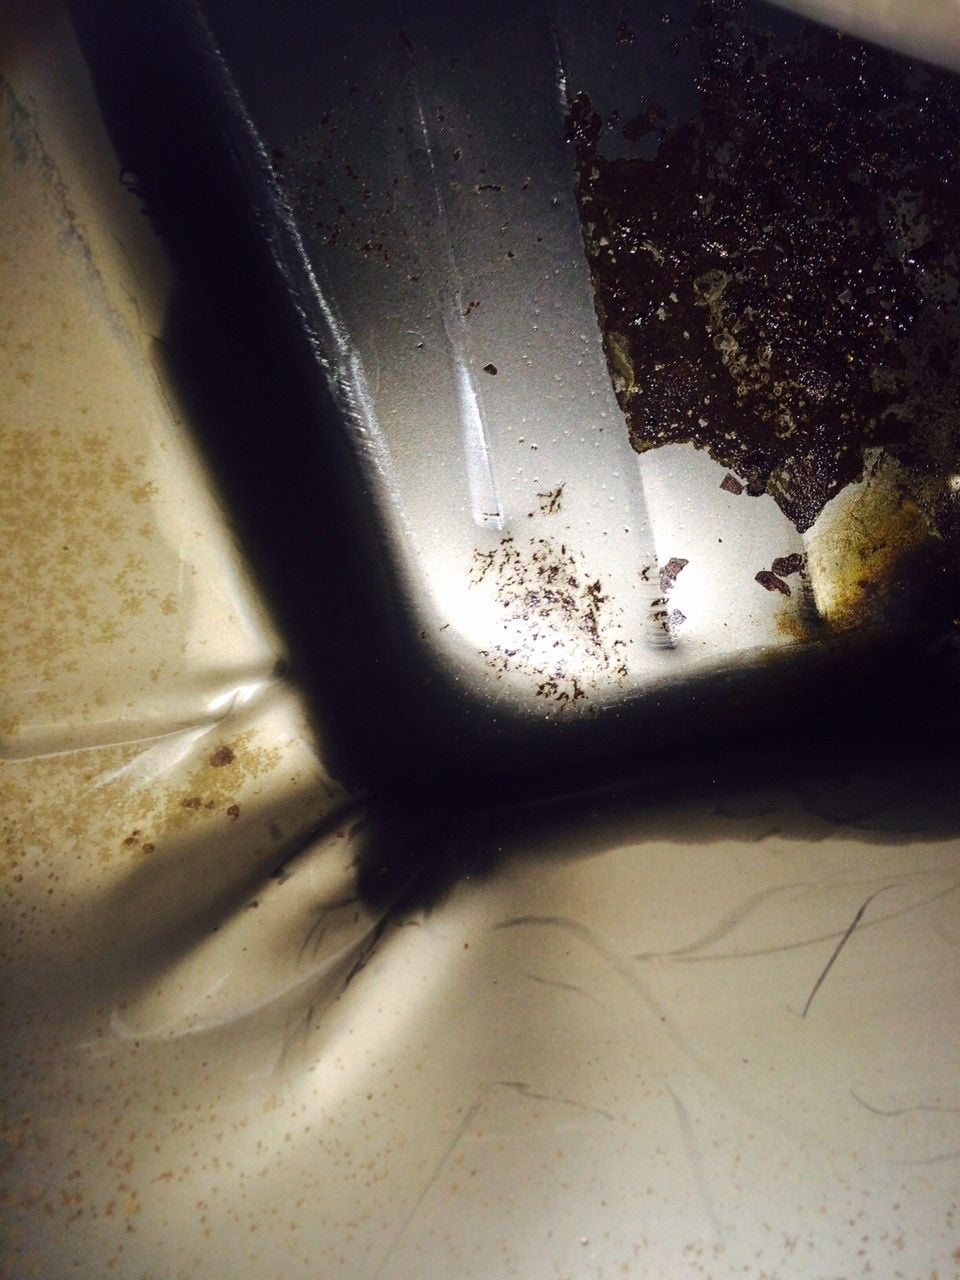
Peeking inside, there is a black substance (most likely old gas varnish) stuck to various places along the bottom. I have read that it is fairly easy to clean the tank out - a few different cleaners recommended from vinegar, ammonia to chemicals.
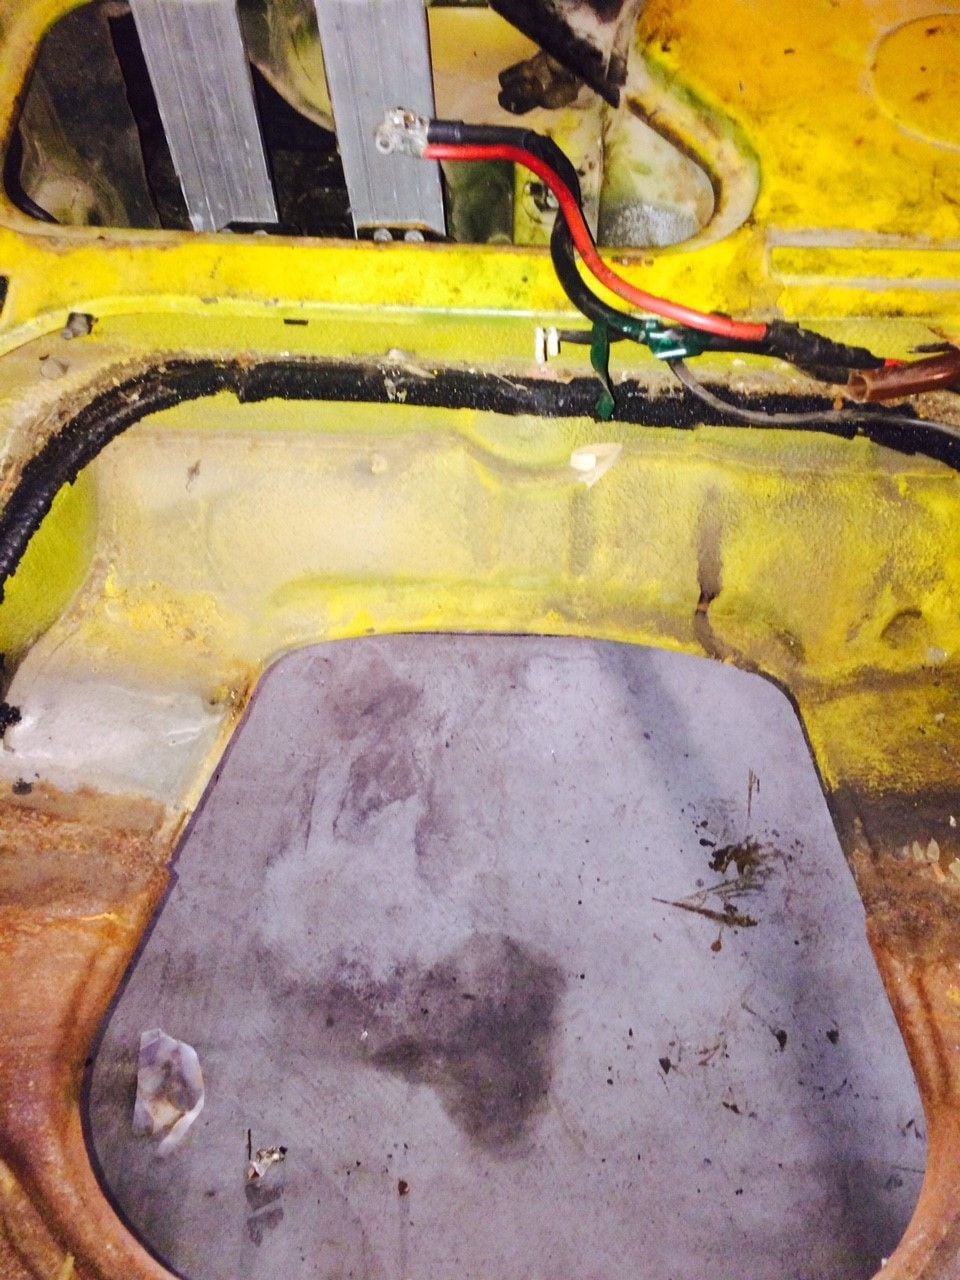
So, before we get into to ugly (I will get into that in the following post) - here is the good. Everything was perfect up and around the backside of the tank. These were areas I couldn't really see, so was happy to have no more surprises.
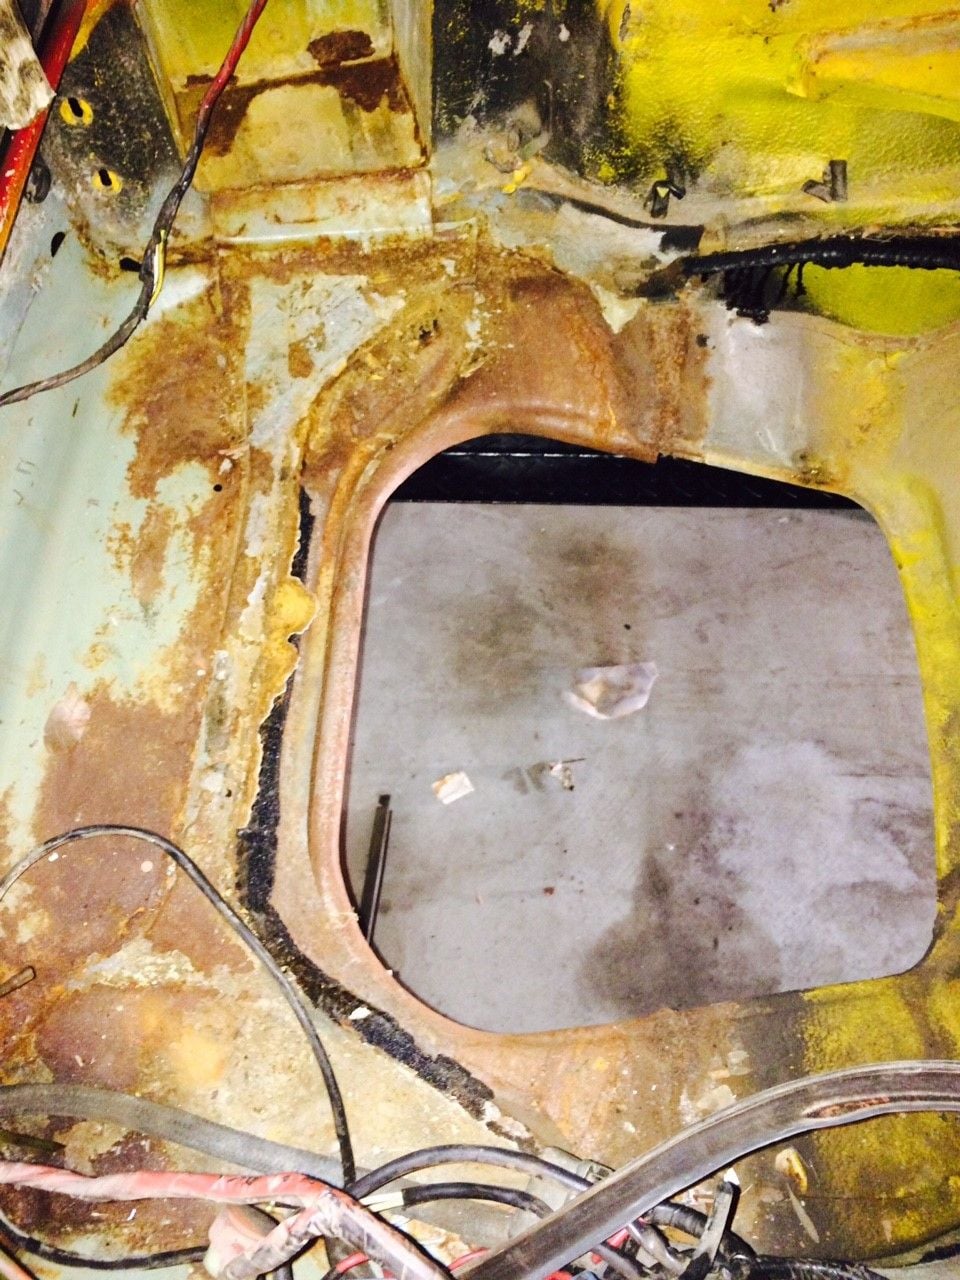
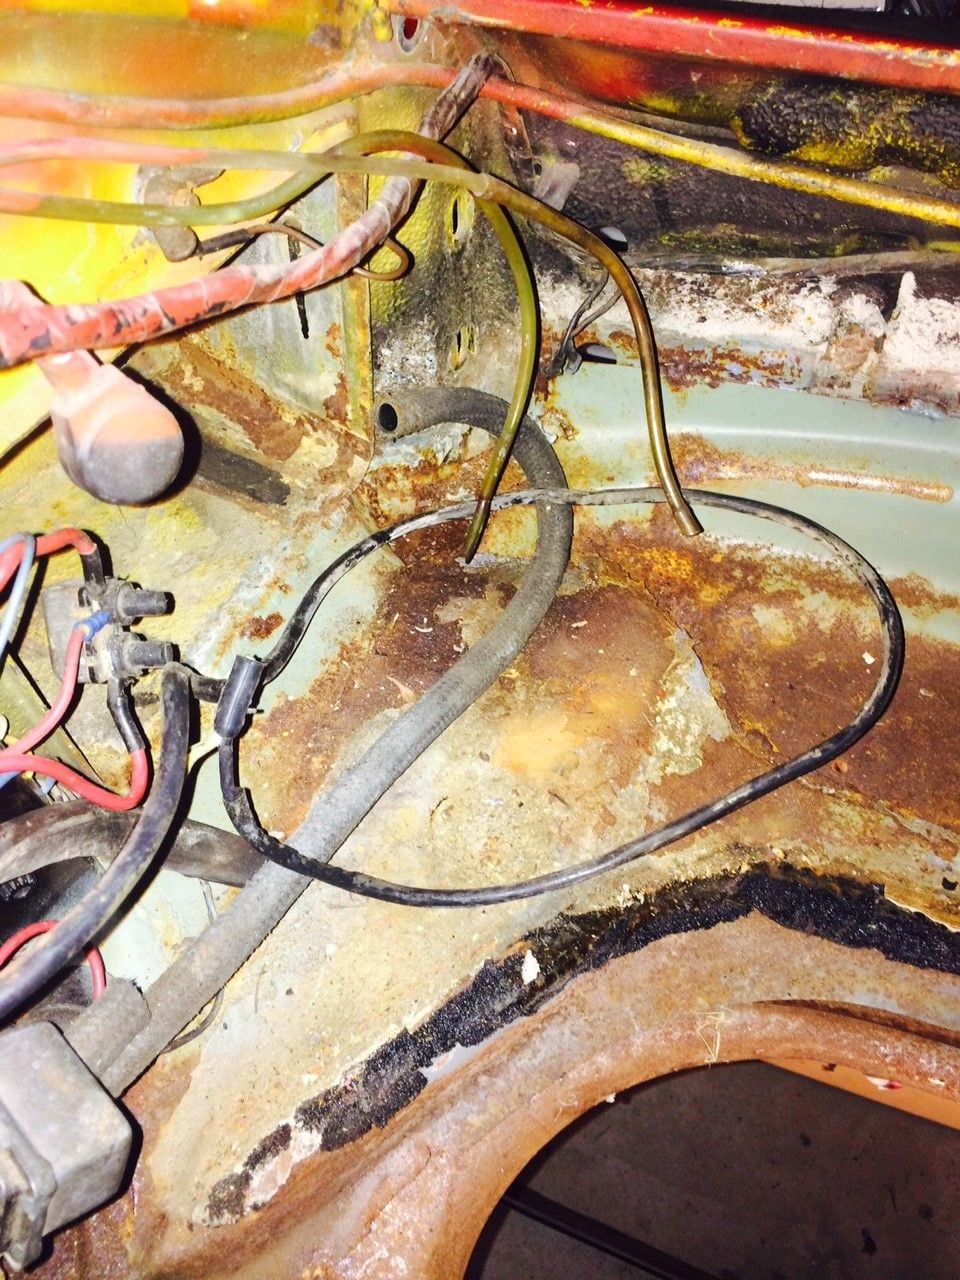
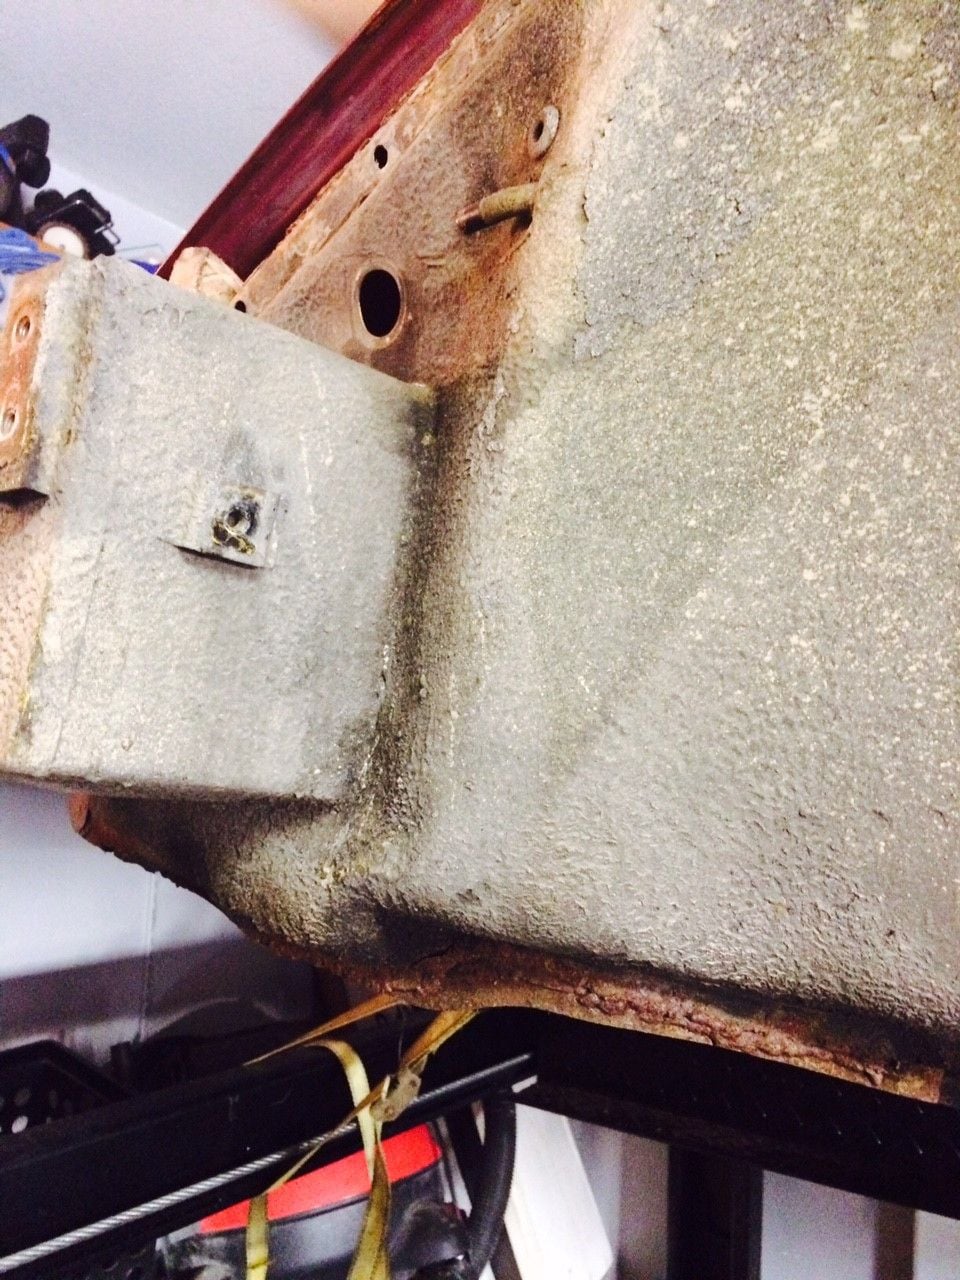
So up and behind the tank all seems to check out. Moving on to the front area. As mentioned previously, this car had a suspension pan replacement many years ago. Whoever did the replacement didn't do a good job. Not only was the welding/placement poor, but they didn't bother protecting the new metal with undercoating or anything. Once I removed the tank I also realized that they didn't replace the left and right gas tank lateral supports. Both of them were cut off near the battery boxes and just left that way. They welded in some random/homemade pieces under the battery boxes to replace some of this section. All of this replacement metal has corrosion and was poorly welded. The nose section/latch panel will need to be replaced as well.
Here are some photos showing the shoddy work that I am going to begin to remove
Note the lateral gas tank support in this photo - it is cut off about 6"behind the battery box. A piece was welded below the battaery box where the lateral support would normally be.
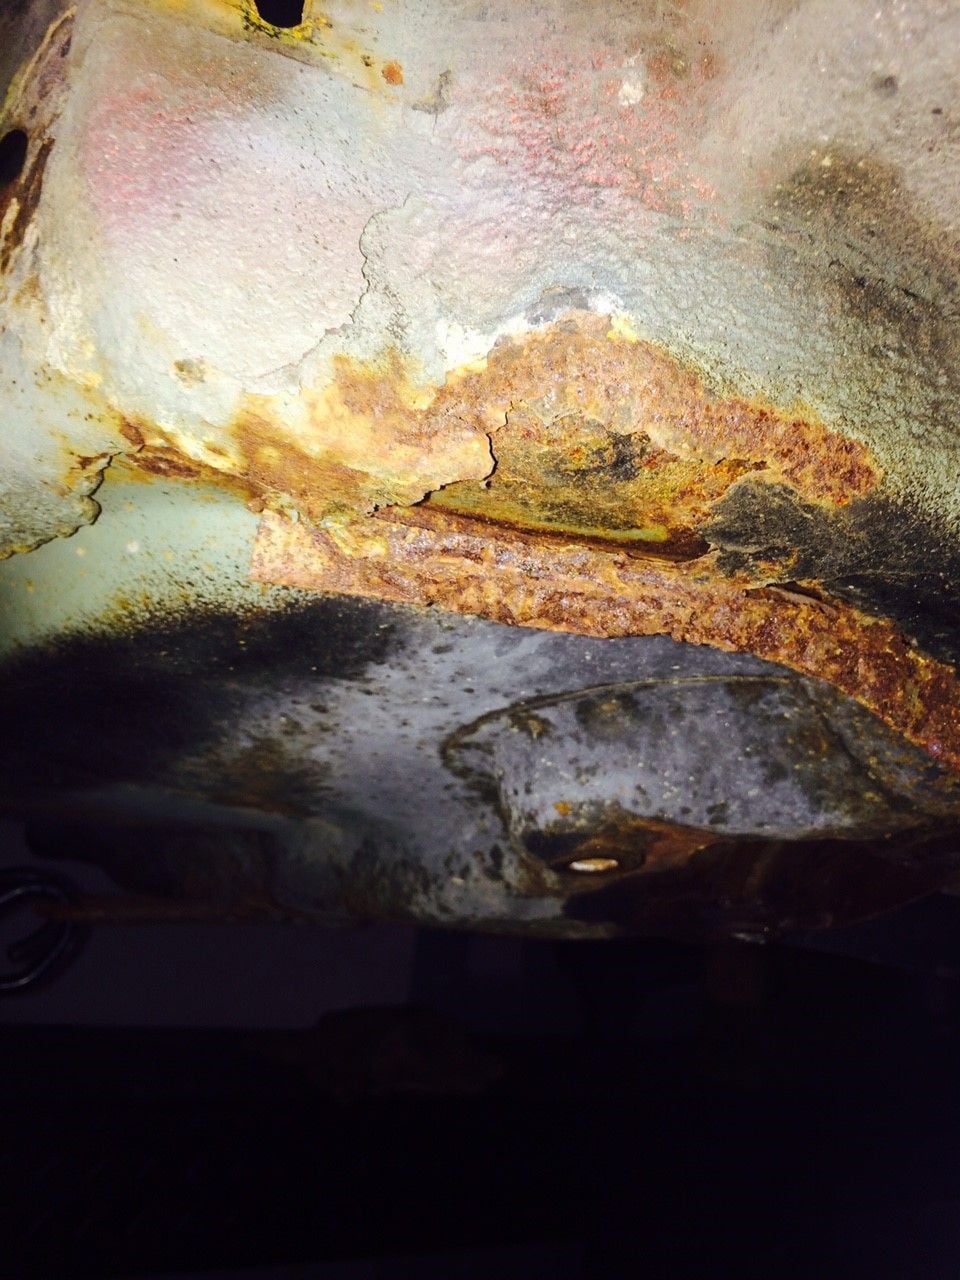
The front of the suspension pan was poorly welded on the nose/latch panel section. The nose section is corroded on the front side and back from when the undercoating was removed to weld the suspension pan in and new protection wasn't added afterward. You can also barely make out the front gas tank support piece that runs on top of the suspension pan between the two battery boxes. It is very corroded and not complete - I am wondering if they tried to reuse some of the old piece when they did this work?
Close up of the battery box with the homemade piece under it in place of where the lateral support and front support would be joining.
Moving on to the driver's side - same story but there is more to come on this side soon (can you feel the anticipation!)
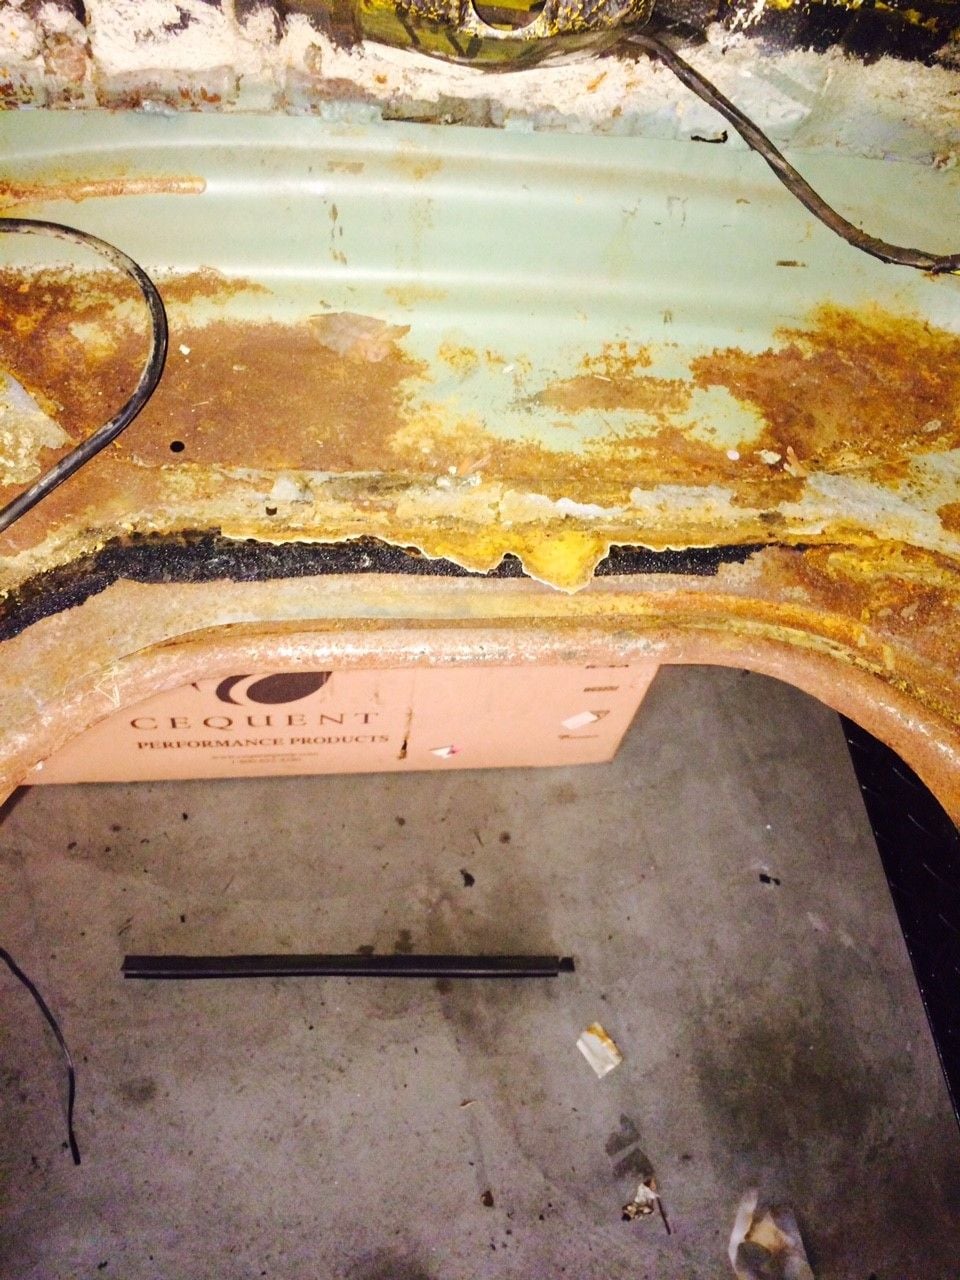
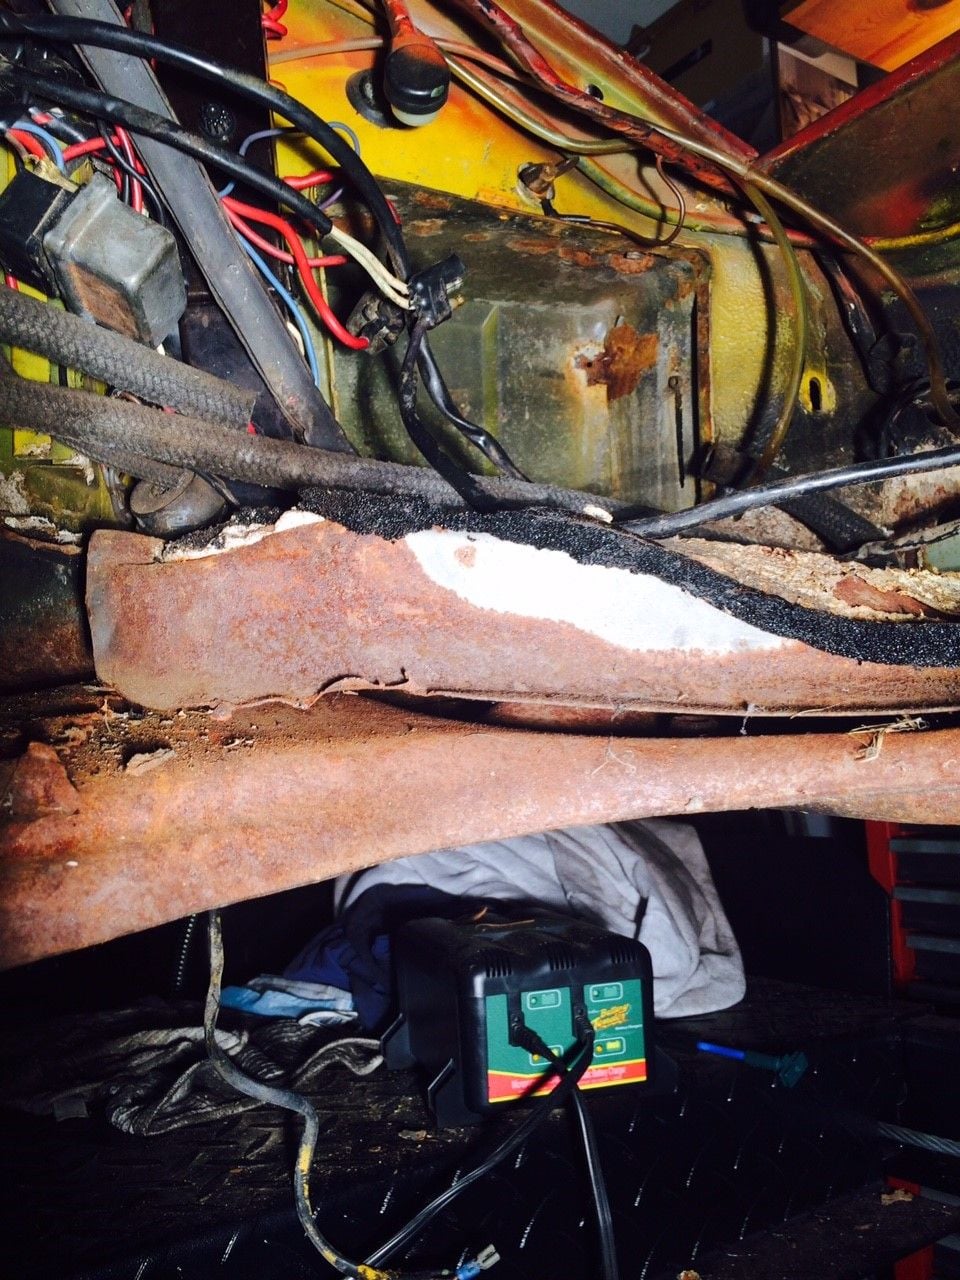
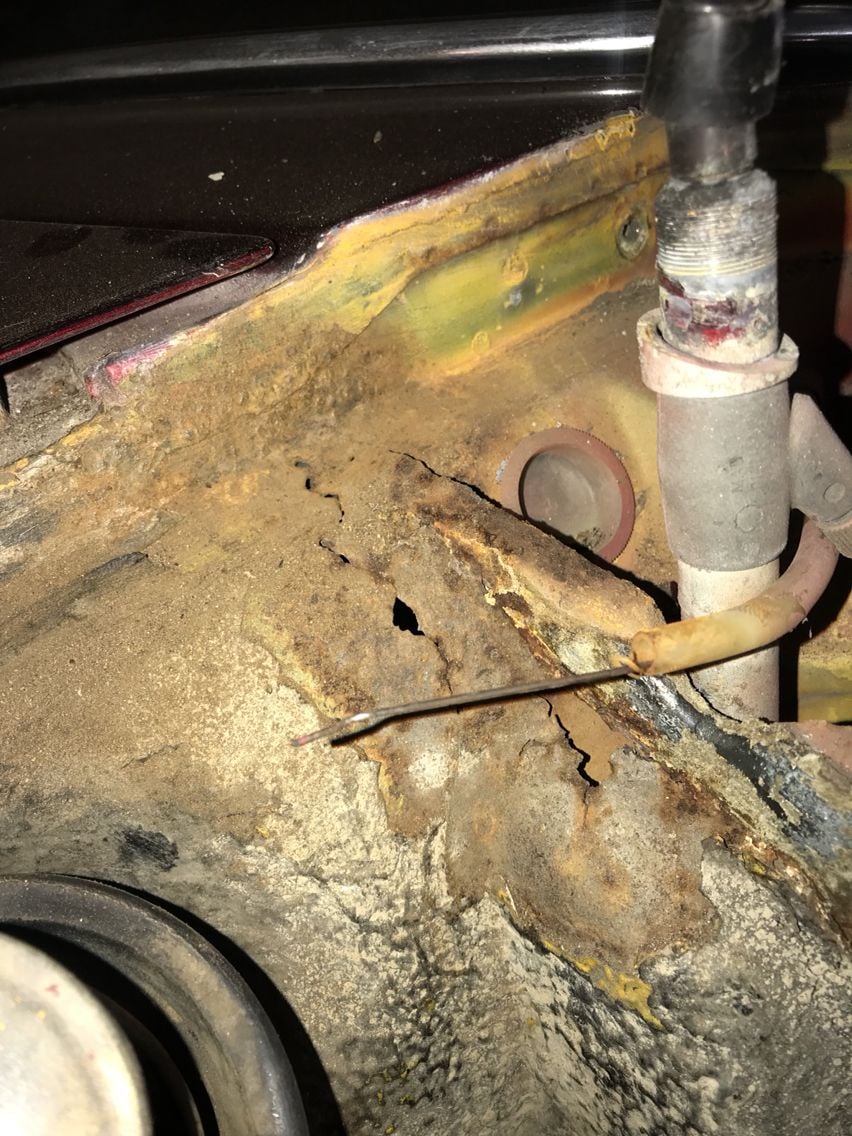
This is the left lower section under the battery box. This will be cut out and patched.
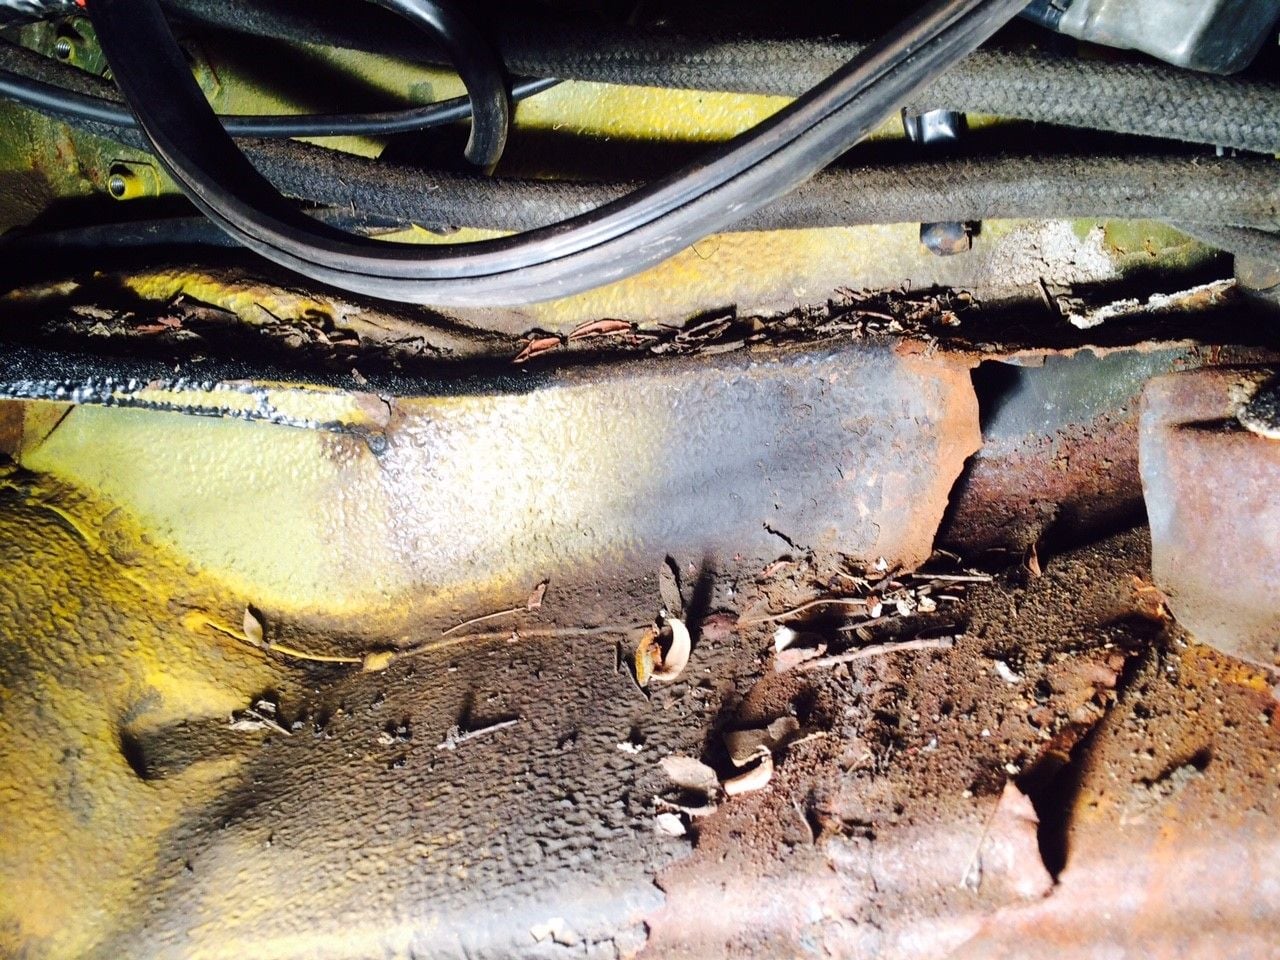
Here is a view of the lateral support on the drivers side. You can see it is cut off and it was also never welded to the new suspension pan!
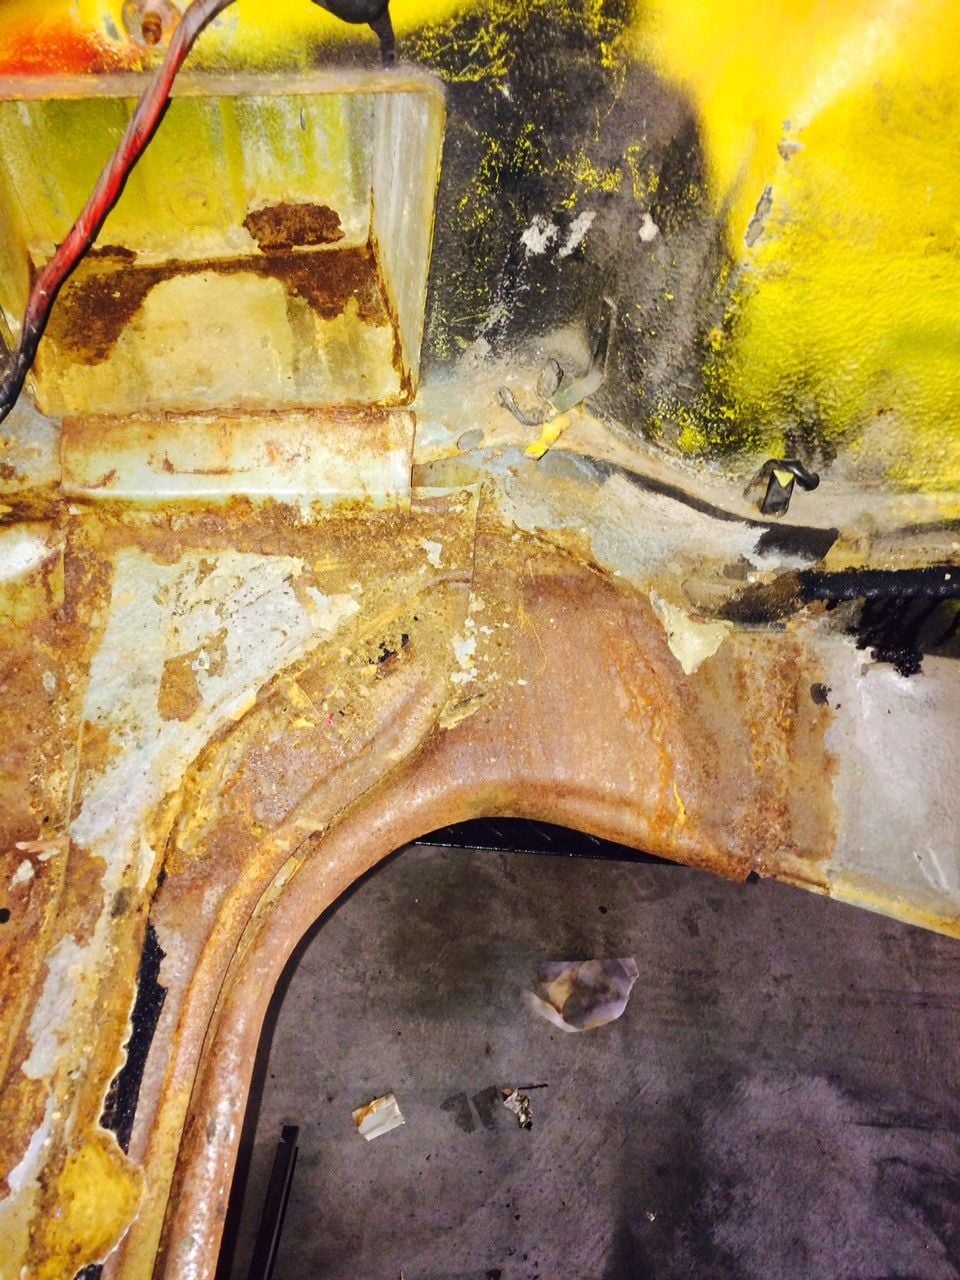
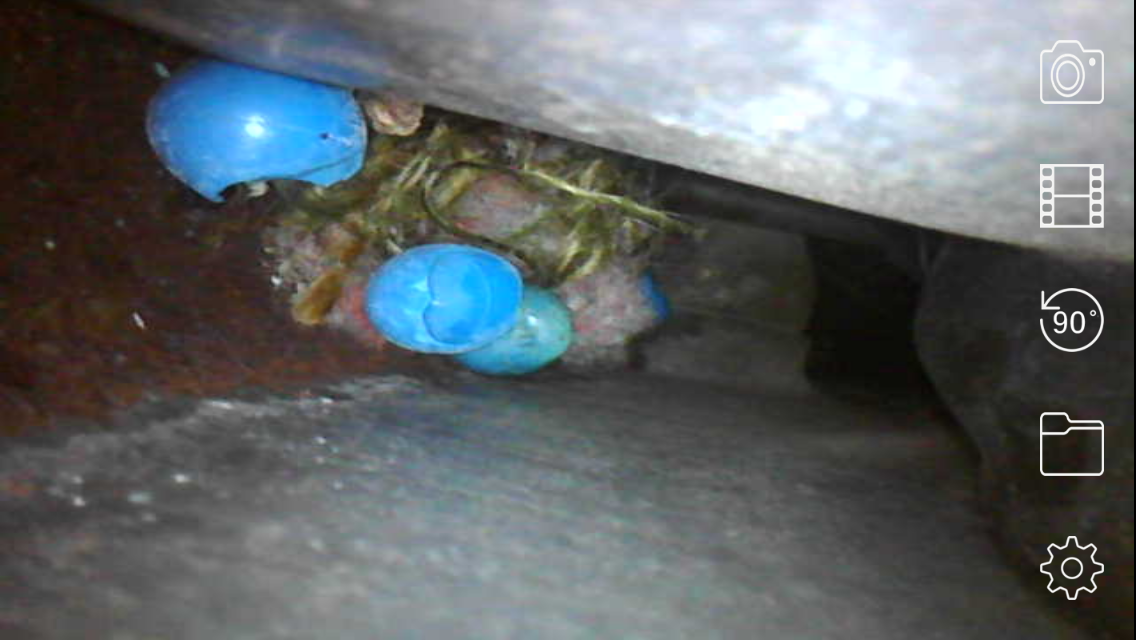
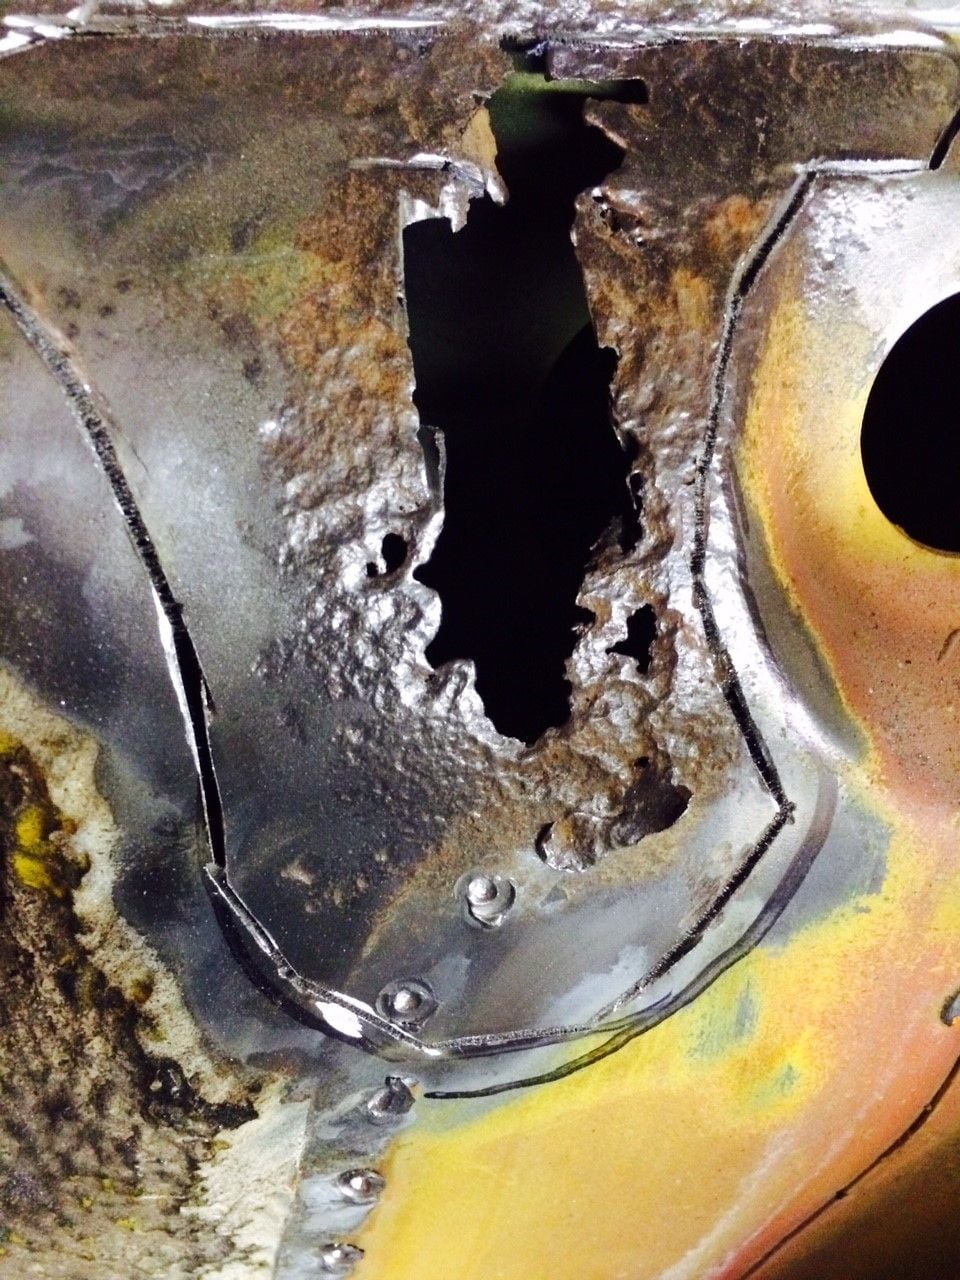
Here is a clearer shot showing the lateral support being cut off. I used an endoscope to look inside there for the condition - there was a surprise in there - I love surprises!
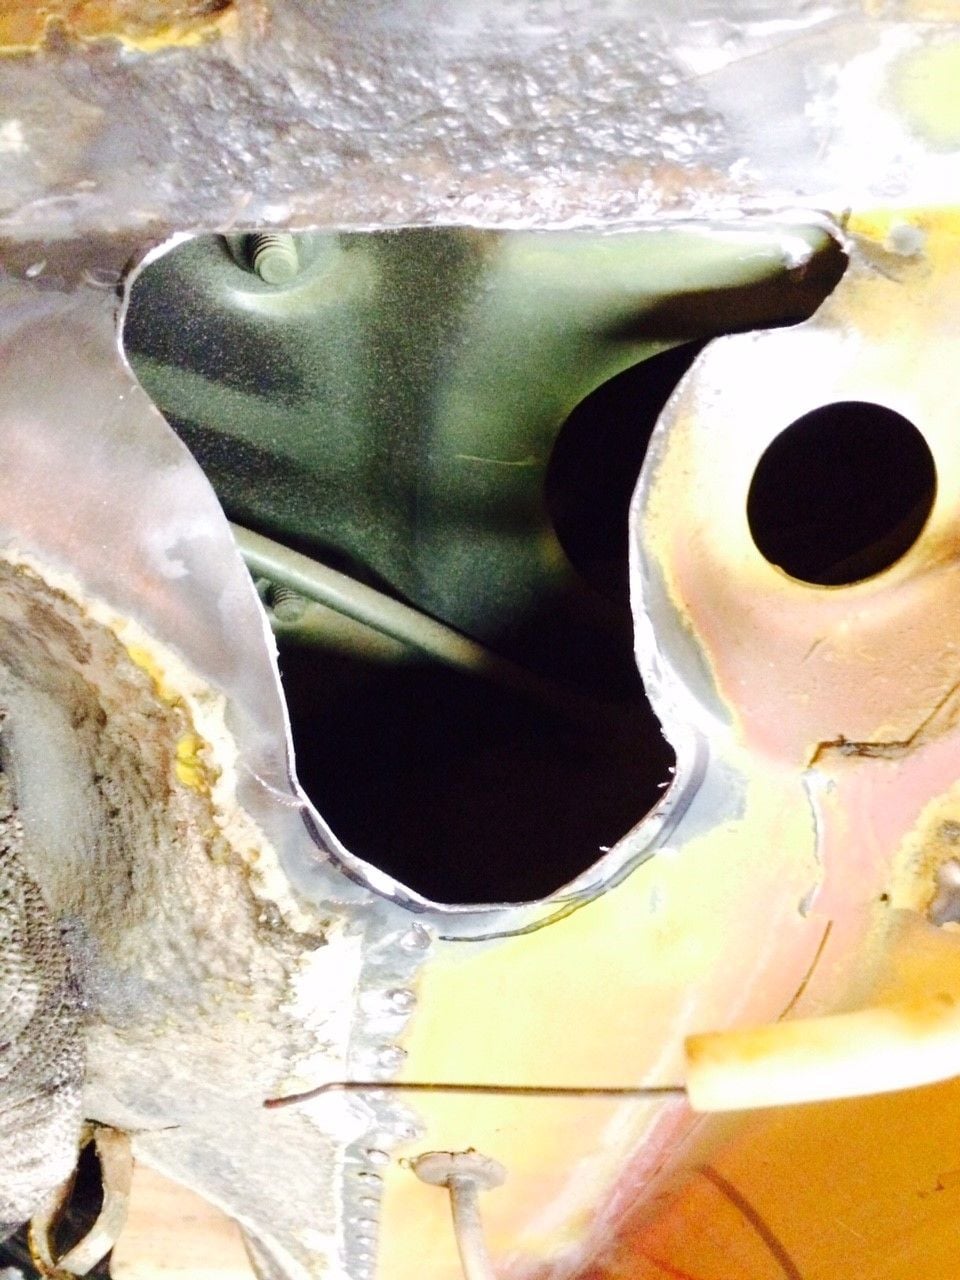
Here is a photo from my endoscope looking down/inside the lateral support - I found another mouse's nest like the one that I had found on top of the oil tank.
Here is another discovery. There was evidence of an accident on the driver's front. The fender had some repairs and the gaps weren't as good and bumper didn't line up as well. Not knowing longhoods very well - I didn't notice this until now..... The accident must have been a hit on the side. The impact pushed the battery box up and in.
So my buddy came over to assess the areas needing love. Based on his expertise, I have a plan of attack for all of these areas, including the rear seat buckets and parcel shelf (I shared that rust many posts ago) and also the front left fender joining panel. Based on his recommendations I ordered some new tools (ordering new tools is right behind ordering Porsche parts for the fun factor!). My plan is to repair the area with accident damage and remove all of the areas with rust or other issues. I will be dropping the motor/trans for the rear buckets. I will then purchase new replacement pieces and fit them. If all works according to plan, I would then trailer my car to the body shop to have them weld in the new pieces and paint the car.
ok, so you have to love Amazon Prime. The tools I sat down and ordered at 6pm last night while enjoying a beer arrived this morning. So, I anxiously headed to the garage to remove my first rusty panel.
I decided to start with the driver side fender joining panel.
First I removed the undercoating along the edge to expose the spot welds using a wire wheel on my angle grinder. Then used one of my new spot weld drill bits to drill out each weld. I admit that I drilled thru the first two welds (this metal is surprisingly thin), but got the feeling after that and now should be on my way.
Piece is gone - most of the areas around it look good. The exception is at the top near the gas tank filler. There is a small area that I will need to cut out and have a fabricated piece welded in.
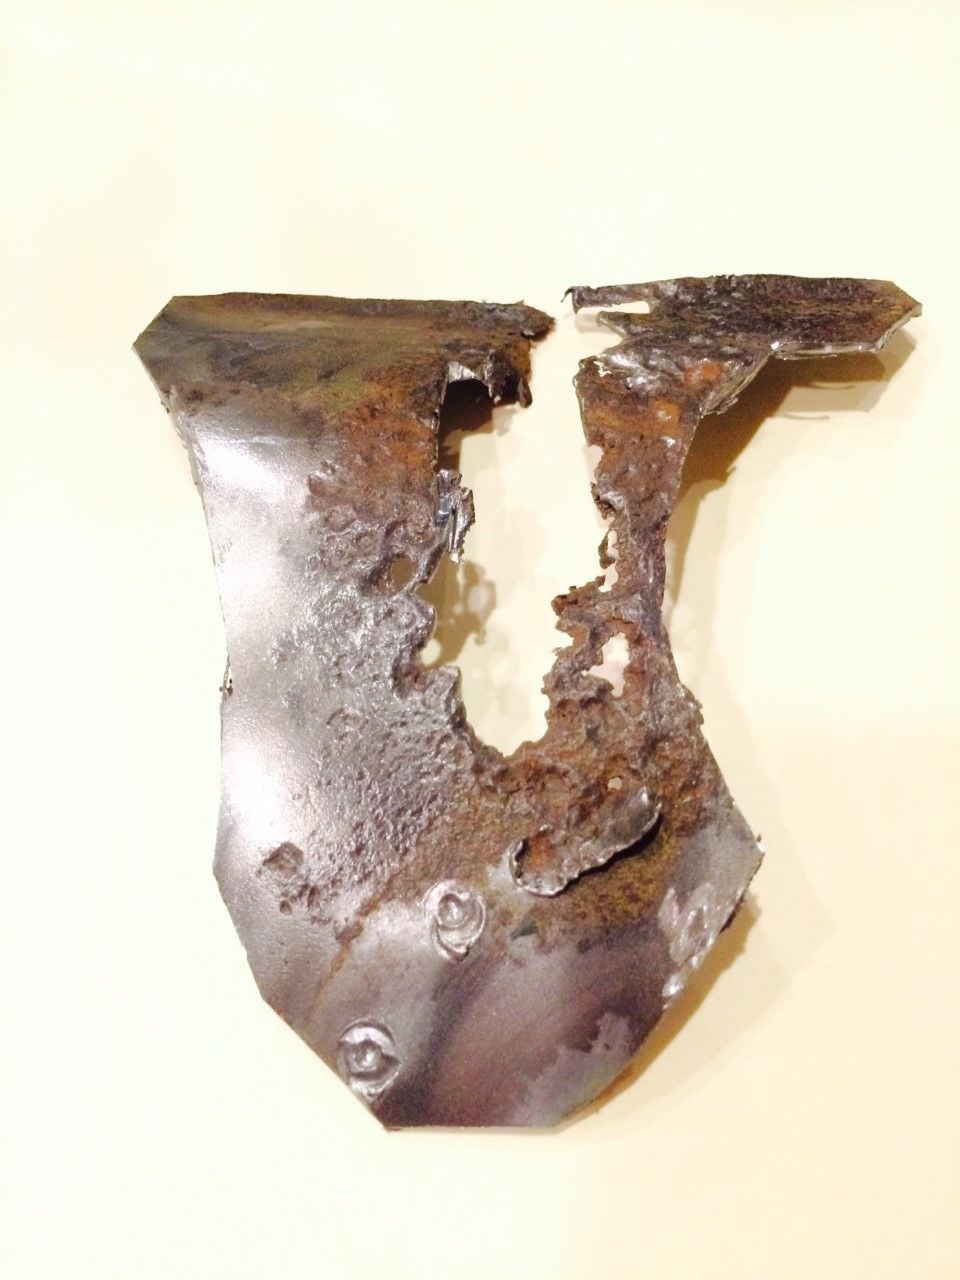
This piece had seen better days - a brand new panel from Restoration Design will take its place
With the fender joining panel removed I could begin to deal with the rust hole on the fender right above. I used my angle grinder with wire wheel again to remove paint and undercoat to see how far from the rust until I found good metal. I drew a rough outline of the area I wanted to cut out, then used my dremel with 1.5" cutting wheel to do a rough cut out, followed by grinding the edges for smoother/better lines. It is hard to tell in the photos, but there is a recessed area on this panel. I cut along the radius of the recessed area. The good news is that looking down in the fender area, there is no rust inside - just the factory green primer everywhere.
It had just been repainted when I purchased the car in 1987 and was supposed to be signal yellow, the original color. Wasn't until many years later that I realized the color wasn't correct. I called it school bus yellow. Was a great little ride but a 2nd kid was entering my life and I had to shelve the 911 ownership for a few years.


 02-05-2019, 04:10 PM


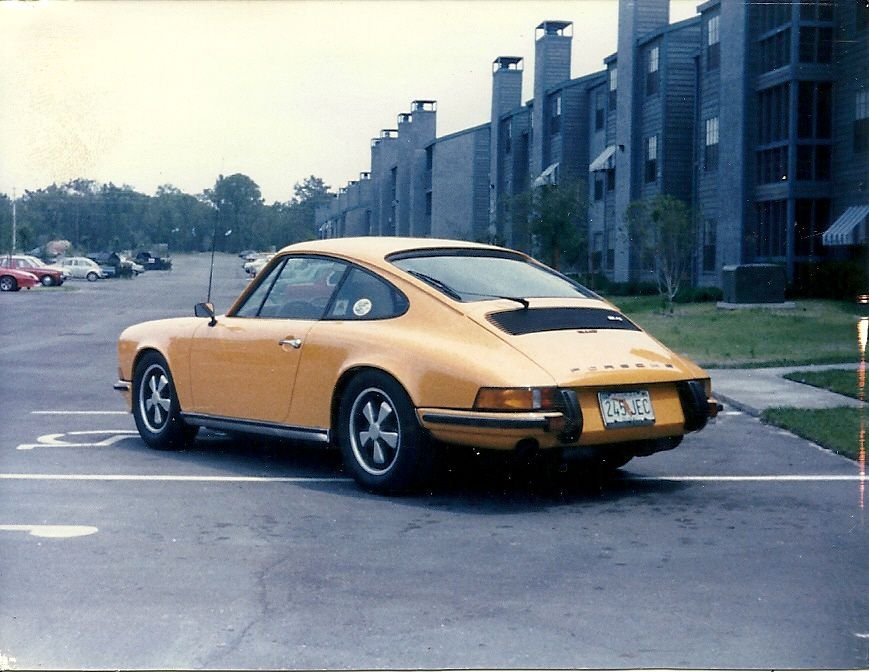


 Was a great little ride but a 2nd kid was entering my life and I had to shelve the 911 ownership for a few years.