Porsche 997: How to Service Rear Spoiler
The adjustable rear spoiler on your Porsche 997 is an automatically controlled device that changes its height and angle at speed. The spoiler is a moving part and does require servicing, no matter how minute it may be. Here is how to keep it functioning properly.
This article applies to the Porsche 997 (2005-2012).
Everybody knows that changing oil, checking tire pressure, and replacing filters are just something to be expected with scheduled maintenance visits. But for owners of certain model years of the Porsche 997, there is one very unique maintenance item that should be addressed – the rear spoiler. If left to its own devices, the rear spoiler can cease to function or simply make a lot of noise while operating. To make sure yours continues to function properly, ensure that it stays clean and lubricated by following these steps.

Materials Needed
- White lithium grease
- Light penetrating lubricant (such as Zep 45)
- Torx and metric sockets/driver sets
Step 1 – Remove shroud covering drive assembly
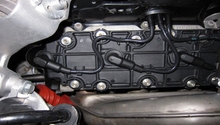
There are a total of eleven bolts and fasteners that hold the shroud in place, which covers the drive assembly. In the diagram below, these are pointed out with yellow (nuts), red and aqua (bolts), and blue (cable fasteners) arrows. Remove all of them. Next, disconnect the power cord for the fans from the clip that holds it in place.
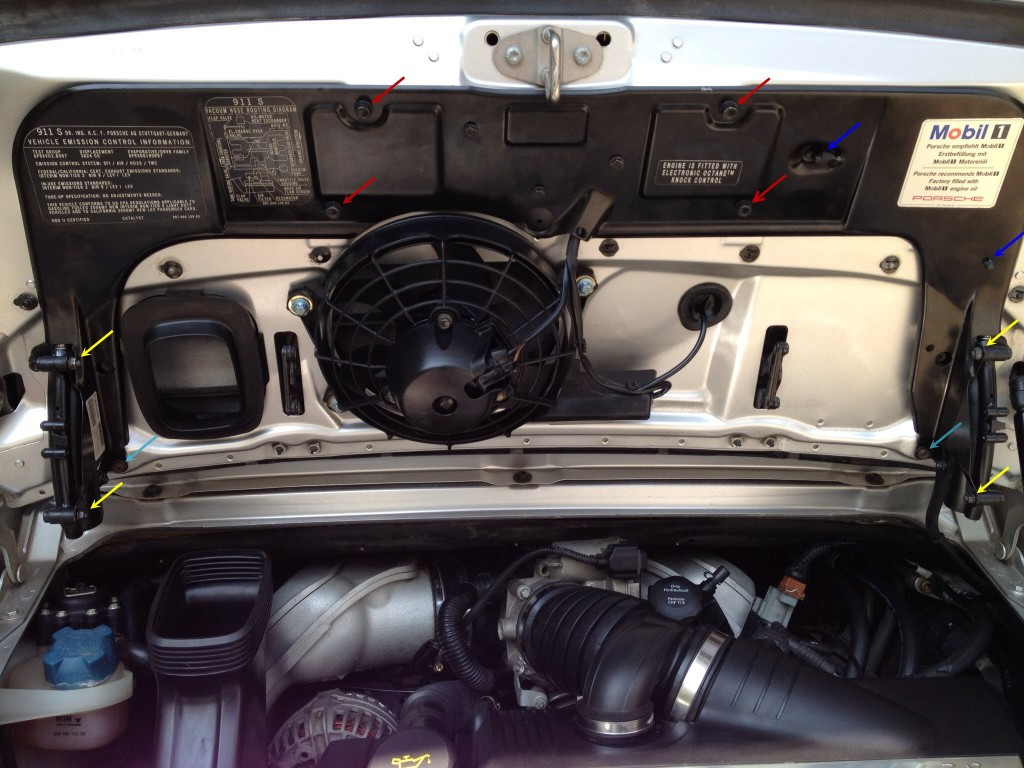
Figure 1. Remove the eleven nuts and bolts shown to remove the shroud. 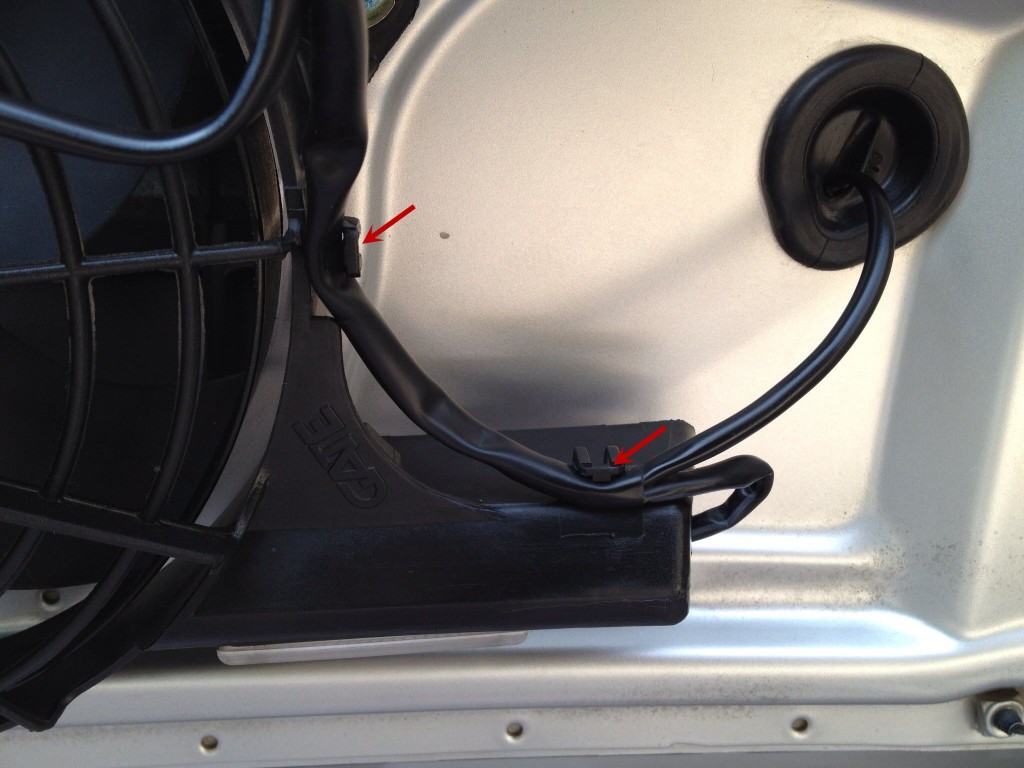
Figure 2. Remove the power cord from the fan assembly as shown.
Step 2 – Remove and lubricate motor
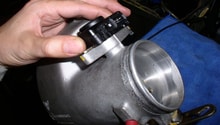
Remove the nuts and power connections from the motor and set it aside. Clean off all the old grease and apply a fresh coat of white lithium grease to the internals. Pull back the two tabs to release the motor housing from the drive assembly.
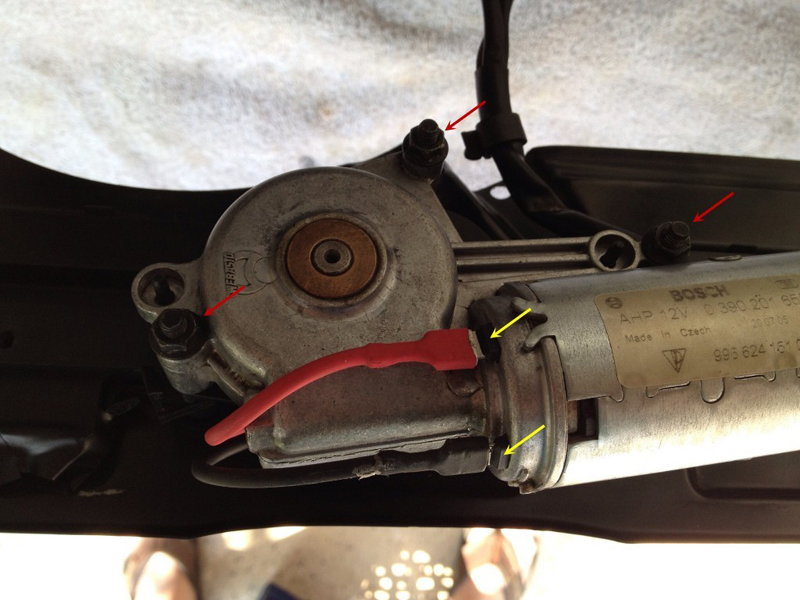
Figure 3. Remove the nuts and power cable from the motor. 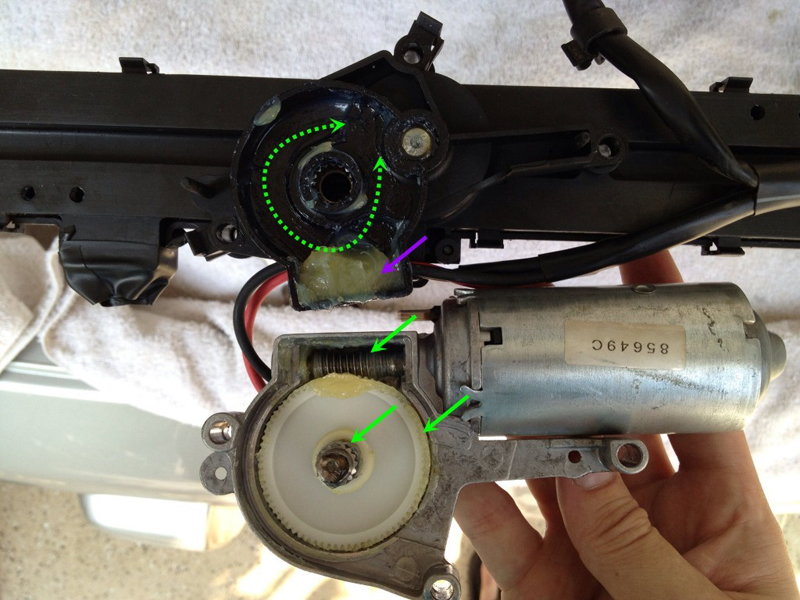
Figure 4. Lubricate the motor internals as shown.
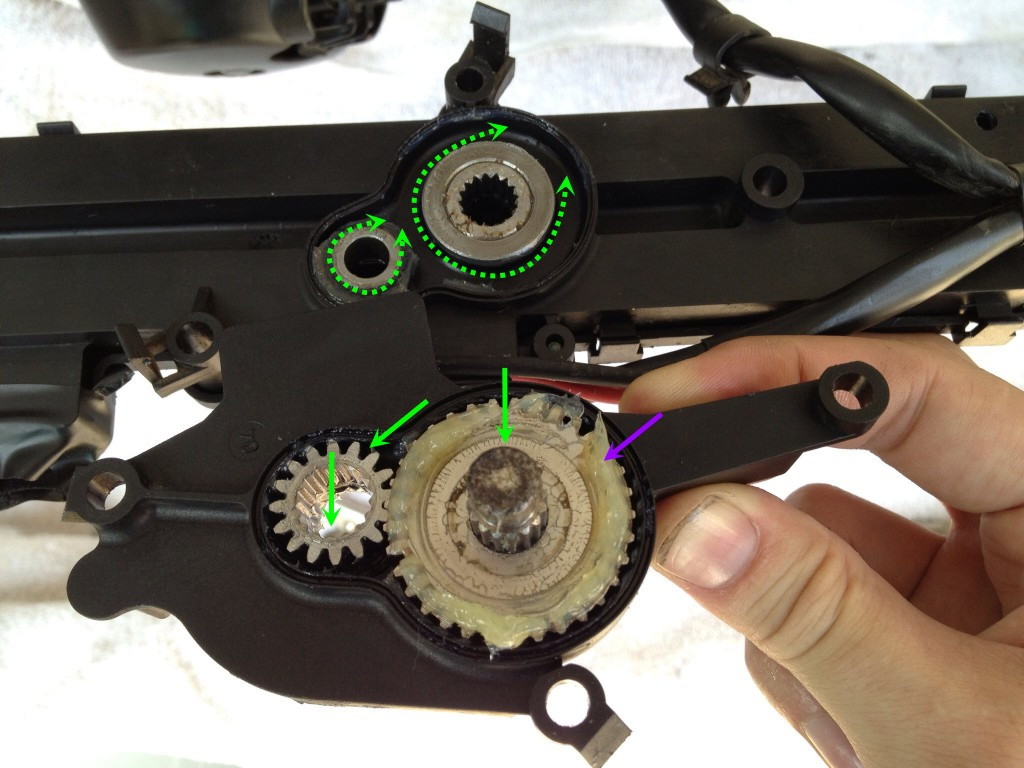
Step 3 – Lubricate internal gears
Remove the two gears and gear shaft and clean off any old grease. Apply a new coat of grease to the parts shown in Figure 5.
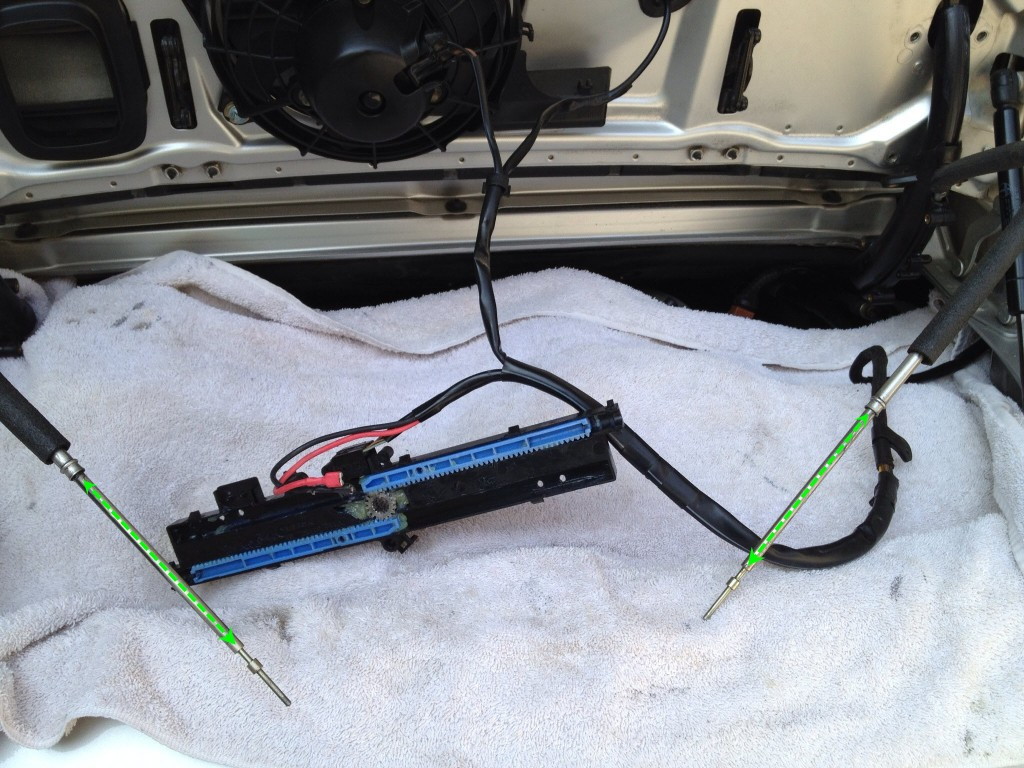
Step 4 – Remove and lubricate drive assembly
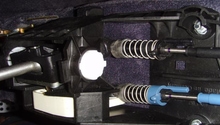
Use a Torx driver to remove the two screws that hold the spoiler sensors to the drive assembly, then pull back the nine tabs to open the assembly. Remove the drive lines from the blue rack gears, being careful not to lose the tension springs. Remove the two sensors over the two plastic posts. Clean all the old grease from the internal parts of the drive assembly and apply a new coat of grease. Clean any debris from the pressure sensors as well.
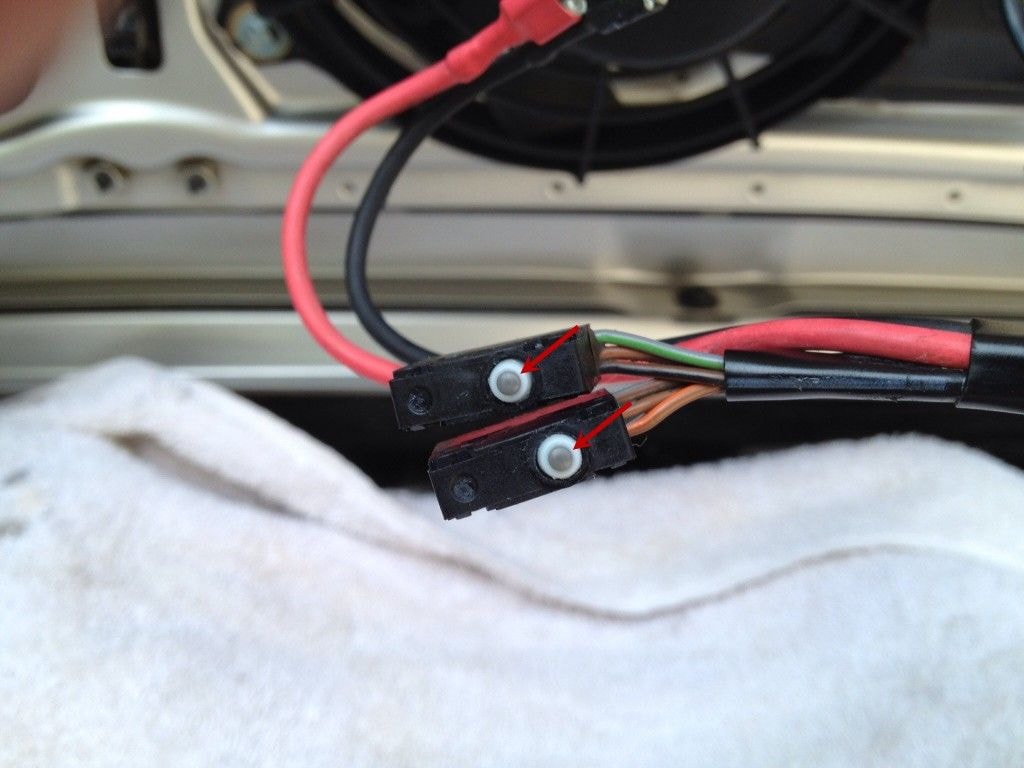
Figure 6. Clean the two pressure sensors. 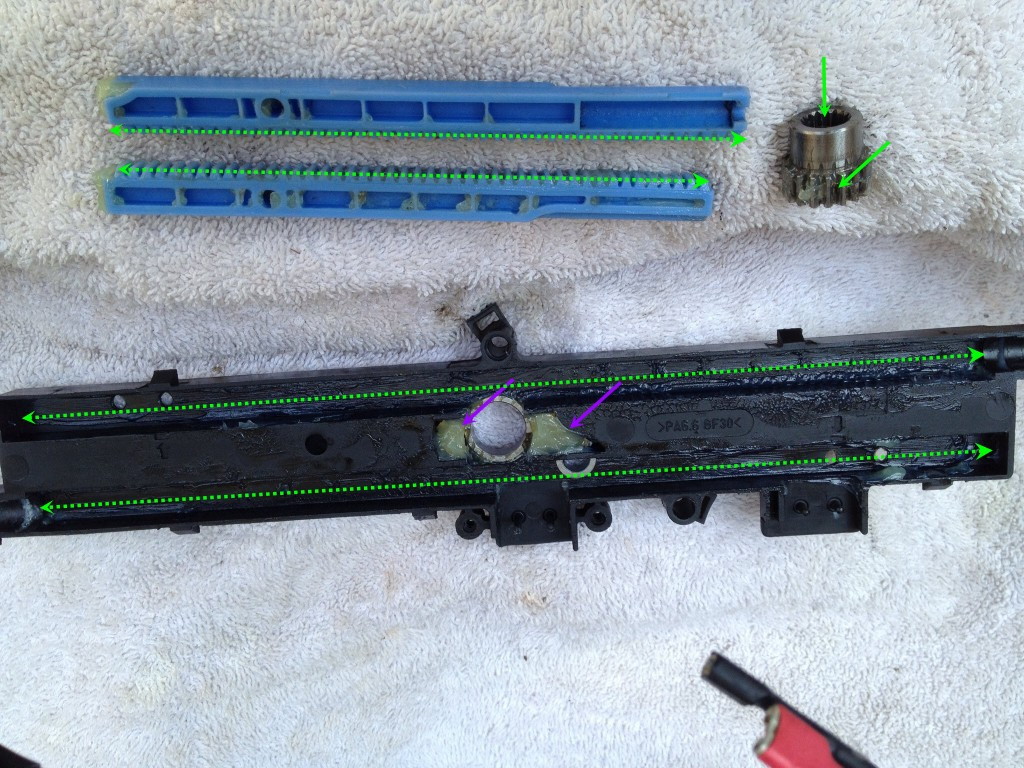
Figure 7. Clean and regrease the internal components of the drive assembly.
Step 5 – Clean drive lines
Remove the bolts that hold the spoiler hinge to the deck lid to access the drive lines. Wipe off any old lubricant and debris from the drive lines and apply new lubricant.
Step 6 – Reassemble components
Replace the drive lines and re-install the two bolts in the spoiler hinge. Re-install the drive lines back in the drive assembly and push it back together. Replace the two Torx screws holding the spoiler sensors in place. Push the motor housing back into the drive assembly and re-install the motor power wire and nuts. Reconnect the power wire into the fan clips and the bolts, nuts, and cable fasteners holding the shroud in place.
Related Discussions
- Rear Spoiler Button Problem - Rennlist.com
- Rear Spoiler Drive Assembly Rebuild - Rennlist.com