Porsche 997: How to Bleed Your Brakes
Nobody likes a squishy brake pedal. Here's how to perform one of the most common brake procedures on your Porsche.
This article applies to the Porsche 997 (2005-2012).
Bleeding the brakes is one of the most common procedures to perform on your car. If you plan to do most of your own maintenance, it's a good idea to get very familiar with this procedure. Just like most other procedures, everyone has their own way to do it, and when it comes down to it, there isn't just one specific way. This article covers the basics so you have an idea of what is required, and then you can decide if it's something you want to tackle.

Materials Needed
- Jack
- Jack stands
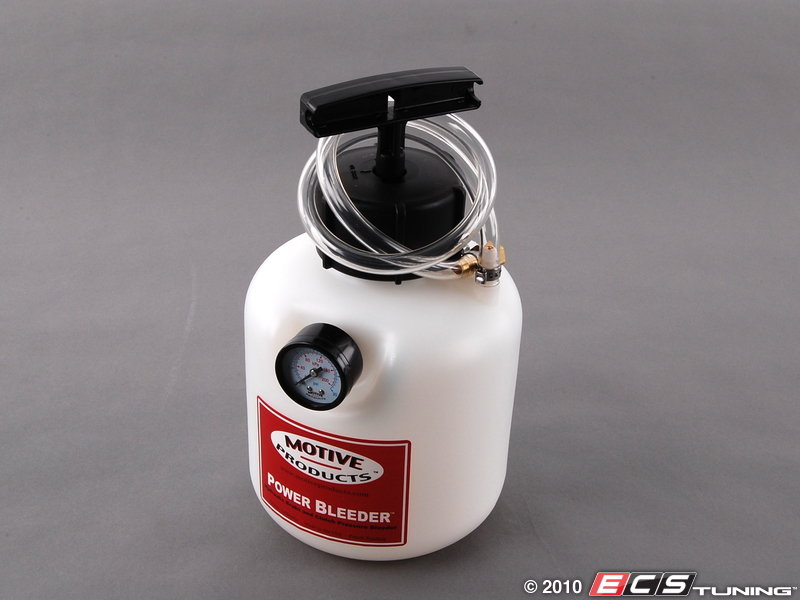
- Power or vacuum bleeder
- 11mm wrench or flare nut wrench
- Catch can with clear hose
- Willing assistant (only if you're not using a power bleeder)
The best, easiest, and cleanest way to bleed the brakes on your car is with a power bleeder. The other way to do this, which is probably the oldest and most common way, is to have someone press the brake pedal to apply pressure to the brake system while you bleed off the fluid at the caliper.
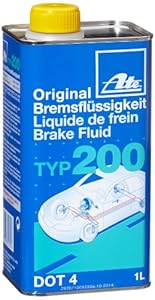
The brake fluid used in Porsches is DOT 4 brake fluid. If you are driving your Porsche mostly on the street or even do an occasional track day, one of the most popular brands of brake fluid to use in your Porsche 911 is ATE DOT 4. If you track your car very frequently, you might want to look into using a more extreme brake fluid that can withstand the abuse of the track.
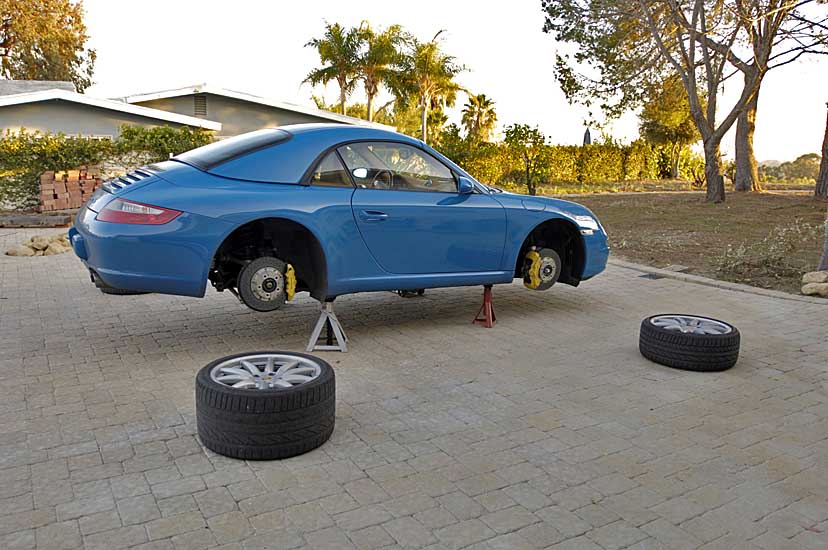
Step 1 – Elevate car off the ground
Loosen the lug nuts then jack up your Porsche. The Porsche 911 997 has specific jacking points. Using these jacking points will ensure that your car does not get damaged in any way by elevating it off the ground. Remember that when the car is off the wheels, the weight of the car is being supported by the unibody/frame and not by the suspension anymore. Also make sure that the car is level; that way, the weight is distributed evenly.
(Related Article: Porsche 997: How to Jack Up Your Car - Rennlist.com)

Pro Tip
There are some companies that make specific jack stands for the Porsche 911. Using these might make this part a little easier and will better support your car. If you already have jack stands, there are even adapters made by some companies that you can also purchase.
Step 2 – Remove the wheels from the car
Using the correct tool, remove the lug nuts from the wheel and remove the wheel. Be very careful when removing the wheel as to not let it hit the brake caliper or brake disc. This could possible cause damage to these parts.
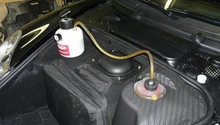
Step 3 – Locate the brake fluid reservoir
The brake fluid reservoir is located under the hood of the Porsche 911 997. Once you open the hood, you will see a small cover located on the driver's side. Remove this cover and you will see the brake fluid reservoir underneath.

Pro Tip
If you can't find anything or would like more assistance in locating certain parts, remember to always refer to your owner's manual.
Step 4 – Remove the brake fluid reservoir cap
After locating and revealing the brake fluid reservoir, go ahead and remove the cap. Once you remove the cap, you will see the brake fluid inside the reservoir.
Step 5 – Fill the brake fluid reservoir to the edge with fluid
After removing the cap, you're going to want to fill the brake fluid reservoir with new fluid. The level of the brake fluid before adding new fluid should be between the Min and Max lines on the reservoir. Adding the fluid will keep the reservoir from running dry while bleeding the brakes.
Pro Tip
During the bleeding process, you never want your brake fluid reservoir to run dry. This will allow air to enter the brake system, and you will have to start the bleeding process all over again.
Step 6 – Connect your bleeding device to the brake fluid reservoir
- If you are performing this procedure with a power bleeder, connect the power bleeder to the brake fluid reservoir with the proper adapter. If you are not using a power bleeder and are either using a vacuum bleeder or having an assistant depress the brake pedal, skip the brake fluid reservoir and go straight to one of the calipers.
- If you're using a vacuum bleeder, connect your device to the caliper you are going to start with at the bleeding nipple.
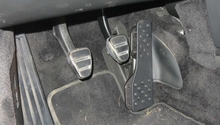
- If you're using an assistant to apply pressure to the brake system with the brake pedal, tell them to depress the brake pedal three times and hold it on the third time.
- Remember, when performing the bleeding procedure, you want to start with the caliper that is the farthest away from the brake fluid reservoir and work your way to the closest. This means that if you have a Left Hand Drive car, you will be starting with the Right Rear, then going to the Left Rear, then on to the Right Front, and ending with the Left Front.

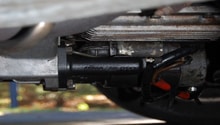
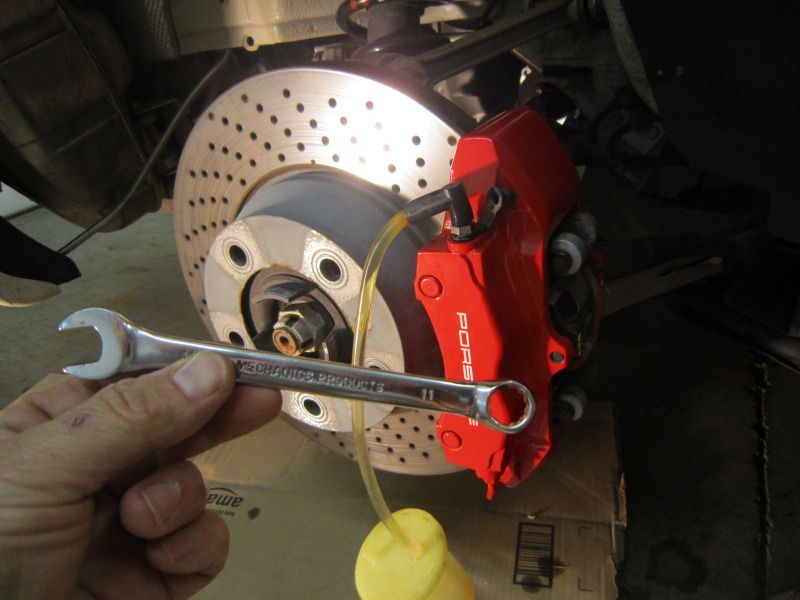
Step 7 – Connect catch can to bleeding screw on caliper
After applying pressure to the brake system and locating the brake caliper you will be starting with, connect a catch can to the bleeding screw on the caliper. You will want to use clear tubing to connect the catch can so you can see the brake fluid coming out of the caliper. This will also allow you to check the brake fluid for air bubbles.
Step 8 – Open bleeding screw on caliper
Once you have applied pressure and connected your catch can to the bleeding screw on the caliper, you can now use your 11mm wrench to open the bleeding screw that you have the catch can connected to. Remember that there are two bleeding screws per caliper on these cars, and you will have to bleed both of them.
- Also remember that every time you allow fluid to come out, you need to keep an eye on the brake fluid reservoir and make sure that the fluid level is staying high enough so it doesn't run dry.
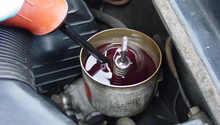
- When checking the fluid coming out, you want clear, bubble-free brake fluid to be seen in the clear line. Then you know you are performing the bleeding process correctly.
Step 9 – Close bleeding screws
After making sure the brake fluid looks clear and bubble-free, you can close the bleeding screw and move onto the next caliper. Once you are done with all the calipers and have tightened all the bleeding screws, double check the level of fluid in the brake fluid reservoir, and top off the fluid if necessary.
Now that you have performed the bleeding procedure, you can now replace any covers that you removed, re-install your wheels, lower your car back to the ground, and perform the most exciting part of this procedure: the test drive.
Related Discussions and Site
- Clutch Brake Bleed - Rennlist.com
- DIY Brake Bleed - Rennlist.com
- Bleed the Brakes - Pedrosgarage.com