Porsche 993: How to Replace Brake Pads/Calipers/Rotors
Every part of the braking system will need to be changed eventually, some sooner than others. Read on to learn how to replace three of the most used brake components on your Porsche.
This article applies to Porsche 993 (1993-1998).
We all are aware that brake pads and rotors are consumable parts which means that as we use our cars and put miles on them, we are going to have to change them out on a regular basis. Since the early 993s are going on 20 years old now, it's probably a good idea to give those calipers a change also.
While calipers are not necessarily consumable parts, they do contain components that wear out over time. For instance, the pistons that slide in and out and push the brake pad into the rotor when you press the brake pedal can develop wear or grooves in them which can cause them to stick or not slide as smoothly as they once did. The seals that keep the brake fluid from leaving the caliper can also wear over time. Of course, that beautiful paint that most 911 calipers have will become dull, and while this may not have anything to do with the performance, we all want our cars to continue looking fresh.

DIY Cost Breakdown
- Front brake pads: $31-212
- Rear brake pads: $23-155
- Front left brake rotors: $105-166
- Front right brake rotors: $105-173
- Rear brake rotors: $105-169
- Calipers: $889-1,300
- Caliper rebuild kits: $33-53
- Caliper hardware: $4
- Super brake kit: $1,141 (does not include calipers)
Materials Needed
- Jack
- Jack stands
- Drip pan
- Gloves
- Vise grip pliers or pliers with strong gripping force
- Flat head screwdriver
- 10mm hex socket
- Flare nut wrenches: 18mm, 17mm, 14mm, 11mm
- C-clamp or caliper tool
- Phillips bit or impact driver set to remove rotor screws
Step 1 – Elevate the car off the ground
Using your jack, raise your car off the ground and place securely on the jack stands. It's best to place the car so that all four wheels are off the ground. This will help in performing the entire job at all four corners.

Step 2 – Remove the wheels from the car
Remove the wheels from the car and place them out of the way so that you can get to the brake caliper, pads, and rotors.

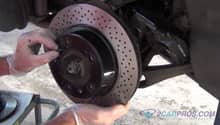
Step 3 – Remove the brake pad sensor wire on the caliper
Porsche 993 calipers have a brake pad sensor on them. The first thing you will want to do is locate this wire on the caliper you are working on and remove it. There will be a holder that will be captured in. Remove the wire from the holder first. After this, you will notice that the wire is somewhat captured by the brake pad retainer. Using your vise grips or pliers, squeeze the brake pad retainer and pry it up with a flat head screwdriver. This should free up the brake sensor wire and allow you to unclip the electrical connector and remove it.

Figure 3. Removing the brake pad sensor. 
Figure 4. Removing the brake pad retainer.
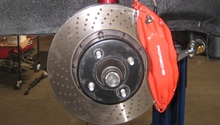
Step 4 – Unbolt and remove the caliper
First, loosen the short rubber brake line that attaches to the caliper. It is easier to do this by starting at the chassis end of this line and then finishing at the caliper. Brake fluid will drip out once you loosen the line, so make sure you have a pan there to catch it. After the lines are loosened, you can now loosen the bolts with your 10mm hex socket that hold the caliper to the suspension. Because we are changing out calipers and rotors, we can remove the caliper with the pads still in it.

Pro Tip
Using flare nut wrenches is the best way to loosen brake lines to keep from rounding off the fittings.
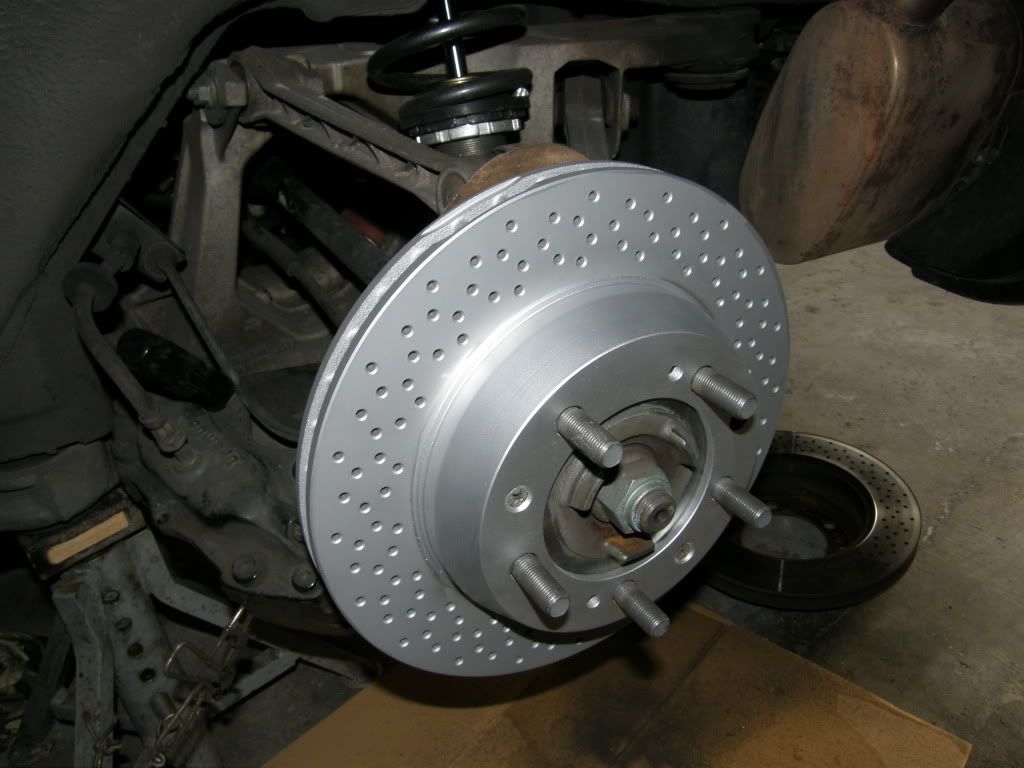
Step 5 – Remove the brake rotors
The brake rotor has two Phillips head screws that hold it in place. These screws must be removed in order to remove the brake rotor. Sometimes these screws can be difficult to remove. Take extreme caution not to strip the head or you will have to drill them out. When removing the rear rotors, you will want to make sure that the parking brake is not set. If the parking brake is set, then the rotor will not come off.

Pro Tip
An impact driver will sometimes make it easier to remove stubborn screws.
Step 6 – Install the new rotor
After everything has been removed and you have cleaned the area, you can now install the new rotor. Make sure to use new Phillips head screws when installing the new rotor. The old ones are not good once removed.
Pro Tip
Make sure everything stays as clean as possible when working on brakes. The last thing you want is to ruin all your hard work by getting everything dirty and causing it not to work correctly.
Step 7 – Install brake caliper and pads
Now, it's time to install the brake caliper. Either you have purchased a new one or have rebuilt your old one. Either way, you have done it and you will want to decide if you are going to install it with the brake pads in place, or bolt the caliper on first and then install the brake pads. Whichever way you decide to go, you will want to make sure that the pistons on the caliper have been retracted into the caliper as far as they will go. This will help in installing the caliper. In order to do this, you can use a C-clamp or a caliper tool if you have one.
- If you decide to install the caliper with the pads in place, do so without the pad retainer installed and install the retainer after the caliper has been bolted on.
- If you decide to install the caliper without the pads in place, then don't worry about the retainer and bolt the caliper back onto the suspension.
- When installing the caliper, make sure to use new hardware. The old hardware is 20 years old in some cases and should be replaced at this point. It is critical for ensuring that your caliper stays attached to your car.
- Make sure to reconnect the brake lines and install the brake pad sensor to finish everything up.

Step 8 – Bleed the brake system
After replacing all of these items, you will need to bleed the brake system. It is also a good idea to flush all of the old fluid out and replace it with new fluid. You don't want all that old fluid getting into your new or rebuilt brake calipers.
(Related Article: Porsche 993: How to Replace Brake Fluid - Rennlist.com)
Pro Tip
When changing rotors or pads, remember that there is a bedding procedure that must be followed to ensure that your new brakes will operate at maximum performance. The bedding procedure will be different depending on what company you purchased your brakes through. You want to make sure that you don't make any emergency-type stops during this period.
Related Discussions and Site
- Changing Brake Pads in Under an Hour - Rennlist.com
- Brake Caliper Removal - Rennlist.com
- Pelican Parts Brake and Rotor Change- Pelicanparts.com