Porsche 928: How to Convert Automatic to Manual Transmission
Are you tired of that automatic transmission in your Porsche 928, and the lack of driver involvement it gives you? Well, here's how to change all that. This article will guide in the process of swapping the automatic transmission with a manual transmission on your Porsche 928.
This article applies to the Porsche 928 (1978-1995).
Before beginning, the first thing you will have to consider is what kind of manual transmission you are going to convert to. The easiest way to do it is to find a donor Porsche 928 with a manual transmission, and swap over the necessary components. There is also the possibility of piecing together what you will need part by part. That will probably be the more expensive way to go, but will give you the most options when it comes to deciding what transmission to use. A very common swap is the 6-speed transmission from the late model Corvettes. That car was equipped with a trans-axle just like the Porsche 928, so it is a possible swap candidate. You just have to consider the fact that it will require some cross-member modification, or a complete fabrication.
For the sake of simplicity, it would be best to stick with the easier task of using a manual donor car. This will be the easiest and most cost effective route to take. The biggest difference between the two cars is the fact that the manual car has a mount and hole in the firewall for the clutch master cylinder. This mount and hole will need to be added to any auto car you will be making the conversion on.

Materials Needed
- Complete set of hand tools (wrenches, ratchets, extensions, breaker bars, sockets, pliers, screwdrivers, pry bars, etc.)
- Metal cutting equipment
- Riveter
Before embarking on a project of this magnitude, you must remember that if you're doing this for the first time, you might run into problems that you did not foresee. It is a good idea to not rush through it, and allot yourself a good amount of time to complete everything. Rushing a project like this will never work out to your advantage.
Also, keep in mind that there is always, as they say, more than one way to skin a cat. These kinds of projects are best approached with an open and creative mindset. There might be a better way to go about accomplishing certain tasks, and it's always best to follow what will work for your situation. This is especially important when doing things like cutting metal, or fabricating certain parts and pieces you might need.
This article will go over the basic steps in completing your conversion. It's very difficult to go in depth as each conversion will be different in certain ways.
Step 1 – Remove the automatic drivetrain
After you have decided what direction you are going to go when converting to a manual transmission, the first step is to remove all the automatic drivetrain parts, and associated equipment such as pedal assembly, transmission, rear cross-member, torque tube, etc. The more you can remove, the better because this will give you the most space to ensure you can install all the components needed for your manual setup. There are some people that even suggest removing the engine. Removing the engine will help greatly, but it is not absolutely necessary to complete the conversion.
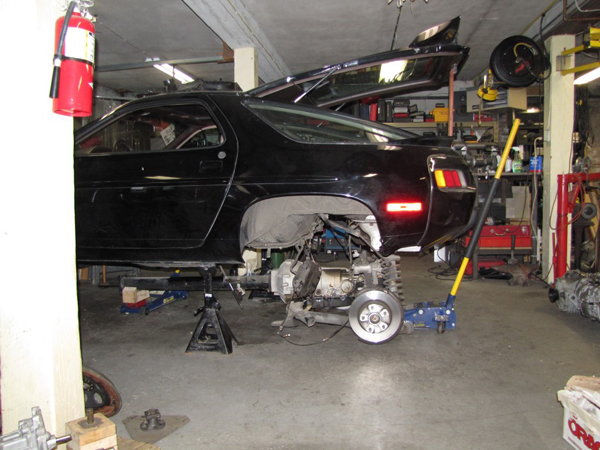
As you can see in Figure 1, the easiest way to take out all of the drivetrain parts in the rear of the car is to disconnect the suspension from the car, and then drop the entire cross-member with transmission as well as torque tube attached. This will actually save you time later as you will need to swap out your rear auto cross-member with a manual cross-member, and bolt it to your manual transmission in place.
Step 2 – Modify firewall to mount clutch master cylinder
As said above, the major difference between the auto and the manual is the clutch master cylinder mount as well as the hole that the manual car has in its firewall. For the most part, cars that came to the U.S. that are left hand drive are like this. Right hand drive cars, like ones found in the UK and Australia, might have the hole and mount already there, which will require you to remove the plug covering it up.
Either way, if you need to put it there, the easiest way to do it is by cutting this section of firewall out of a manual car to attach it to the firewall of the auto car. It can be attached by riveting it to the firewall, or by welding it. The easier way to do it is to rivet it, and also use some form of adhesive to hold it in place.

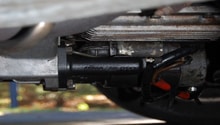
Figure 2. Clutch master cylinder mount. 
Figure 3. Clutch master cylinder mounted to firewall with master cylinder installed.
Step 3 –Install manual transmission bell housing and flywheel
The engine that is in the auto car will have a bell housing and flywheel for that auto transmission. You will need to remove the auto's bell housing and flywheel to install it to the manual application because they are different.
In Figure 4, you can see the difference in the bell housings. The manual trans drivetrain is on top, and you can see how the bell housing is slightly bigger to accept the clutch and flywheel.
Step 4 – Modify center console to accept manual trans shifter
Another difference between auto and manual cars is that the center console (where the shifter is located). For the automatic transmission, there is a spot where the shifter can be bolted to. For the manual shifter, the place where the shifter mounts is actually on the torque tube itself, so all you need is an opening in the center console for the shifter to pass through. This will just require you to cut out the mounting place of the automatic shifter, which will give you an opening big enough for the manual shifter.

Figure 5. Automatic shifter mount in center console. 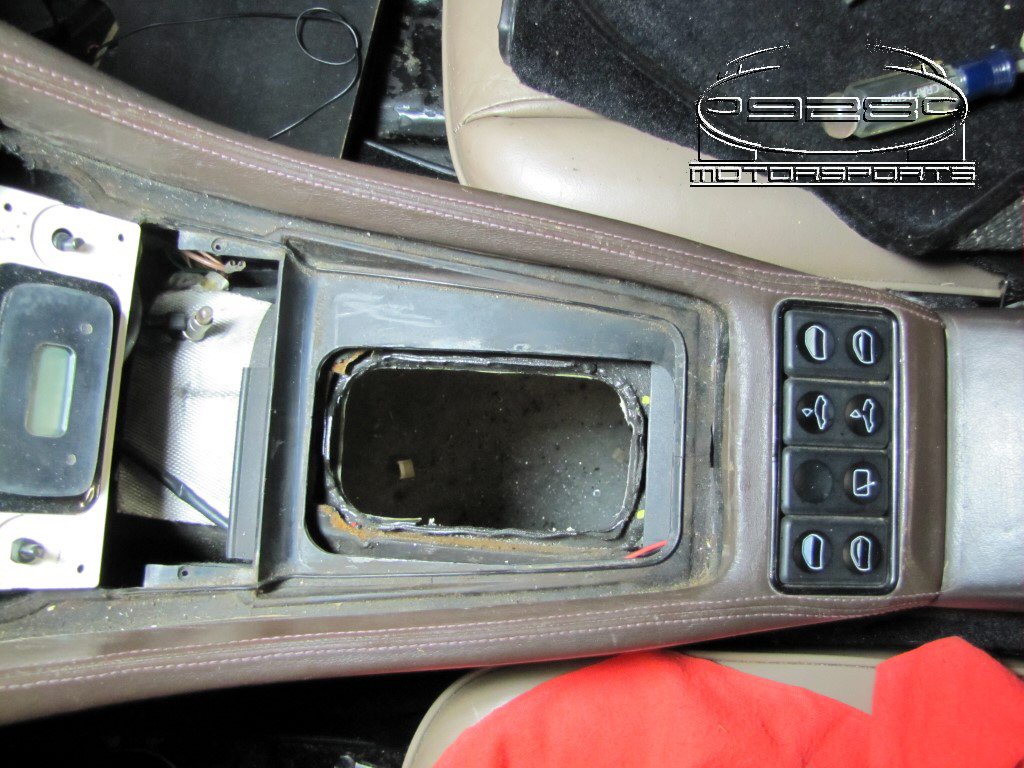
Figure 6. Opening for manual shifter after automatic shifter mount has been cut out.
Step 5 – Swap automatic cross-member for manual cross-member
The other important difference between an auto car and a manual car is the rear cross-member that the transmission mounts to. You will need to acquire a manual transmission cross-member from your donor car in order to bolt your manual transmission into your car, and attach the suspension components.
If you followed the step above, you would have dropped everything out when you removed your automatic drivetrain components. At this point, it should just be a matter of bolting everything to the manual cross-member, and then re-installing it. If you are going to reuse the suspension that came off of the car originally, then this would be where you would swap all of that over.
Step 6 – Install manual drive-train
Finishing up the installation is just a matter of bolting all the components in place, and hooking everything up.
Step 7 – Test drive, shakedown period, and alignment
After installing all your necessary components, make sure you didn't miss anything and all the fasteners are tight. You will then need to take it for a test drive. Be easy on it at first to make sure everything is working as it should.
After a few miles, you will need to make sure you get a four wheel alignment done from an alignment shop that understands these vehicles.
Also, after a major conversion like this, go through a few shakedown runs to make sure everything is working like it should. At the end of about 250-500 miles of shakedown, go over all the fasteners to make sure they are still nice and tight. If you happen to find fasteners that are coming loose, first determine why, and then get it realigned to make sure it is within spec.
Related Discussions
- Auto to Manual Conversion with 6 spd - Rennlist.com
- S4 Auto to Manual Conversion - Rennlist.com