When you click on links to various merchants on this site and make a purchase, this can result in this site earning a commission. Affiliate programs and affiliations include, but are not limited to, the eBay Partner Network.
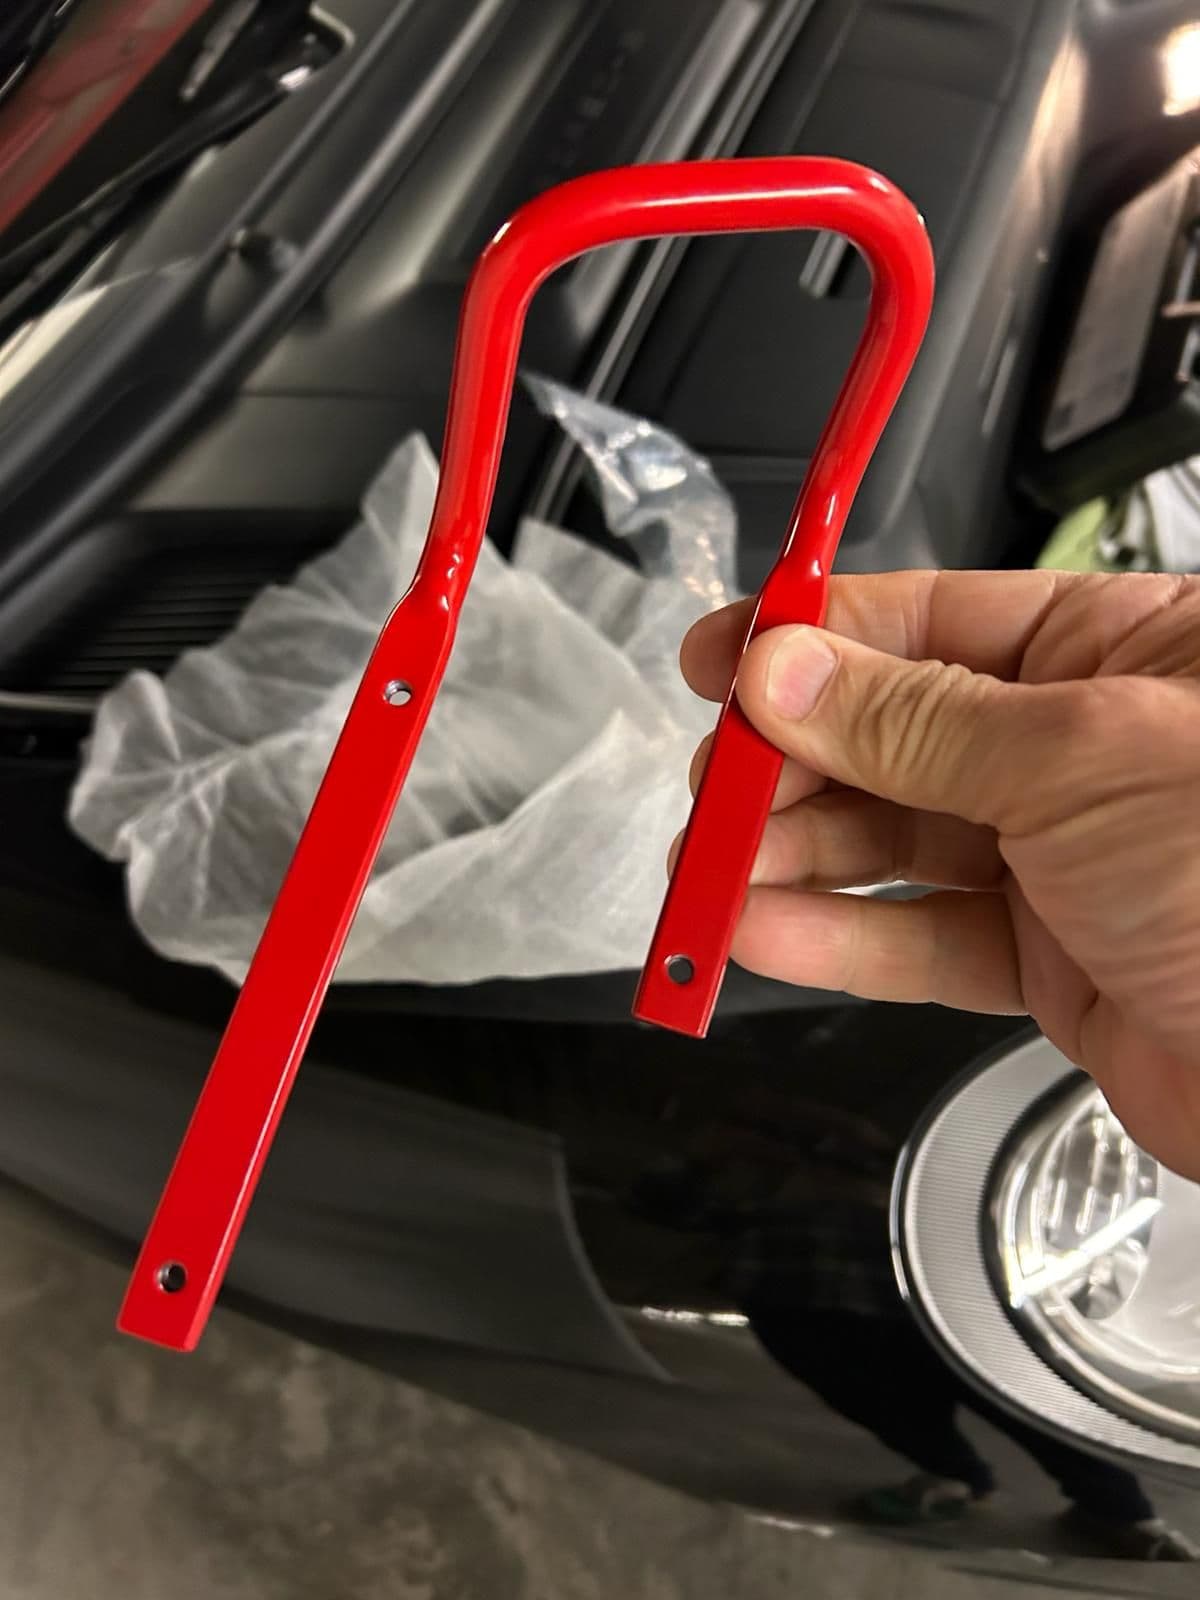
BACK STORY - I'd purchased my 2011 Spyder really sight unseen and found some typical spots of wear and tear on arrival day. One of those areas was chipping on the left red angle bracket that secures the roof. Not that it would have been a deal breaker, right? I replaced them as follows, part numbers in pararenthisis.
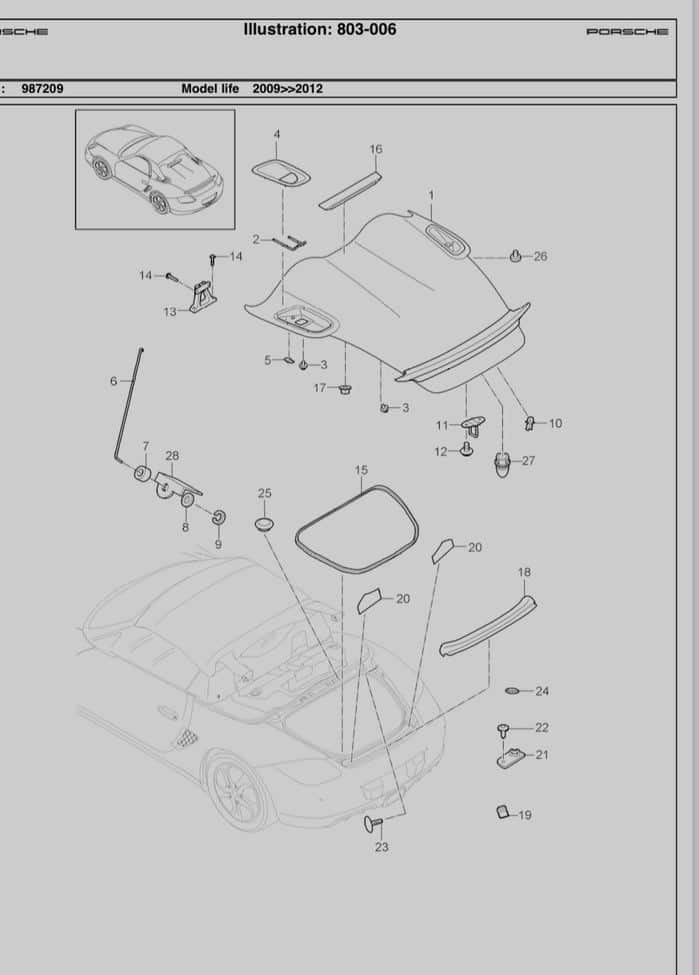
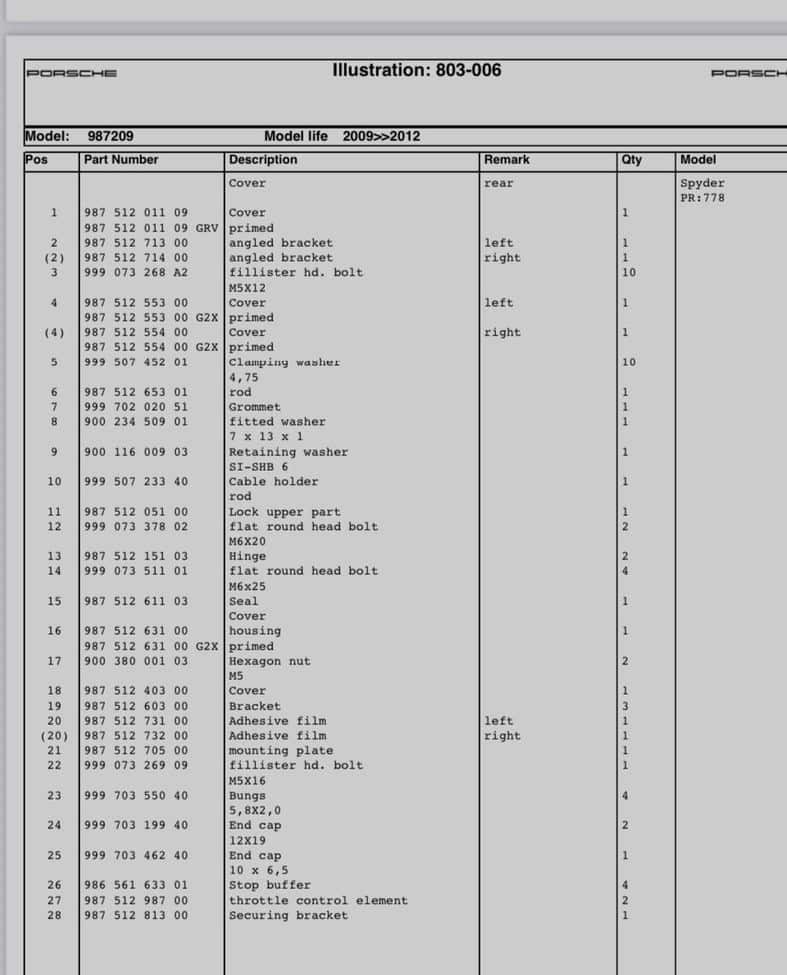
PROCEDURE:
1. Raise rear cover (1) and secure with rod (6).
2. Unclip left and right streamers from the angle backets, fold back and place on roof.
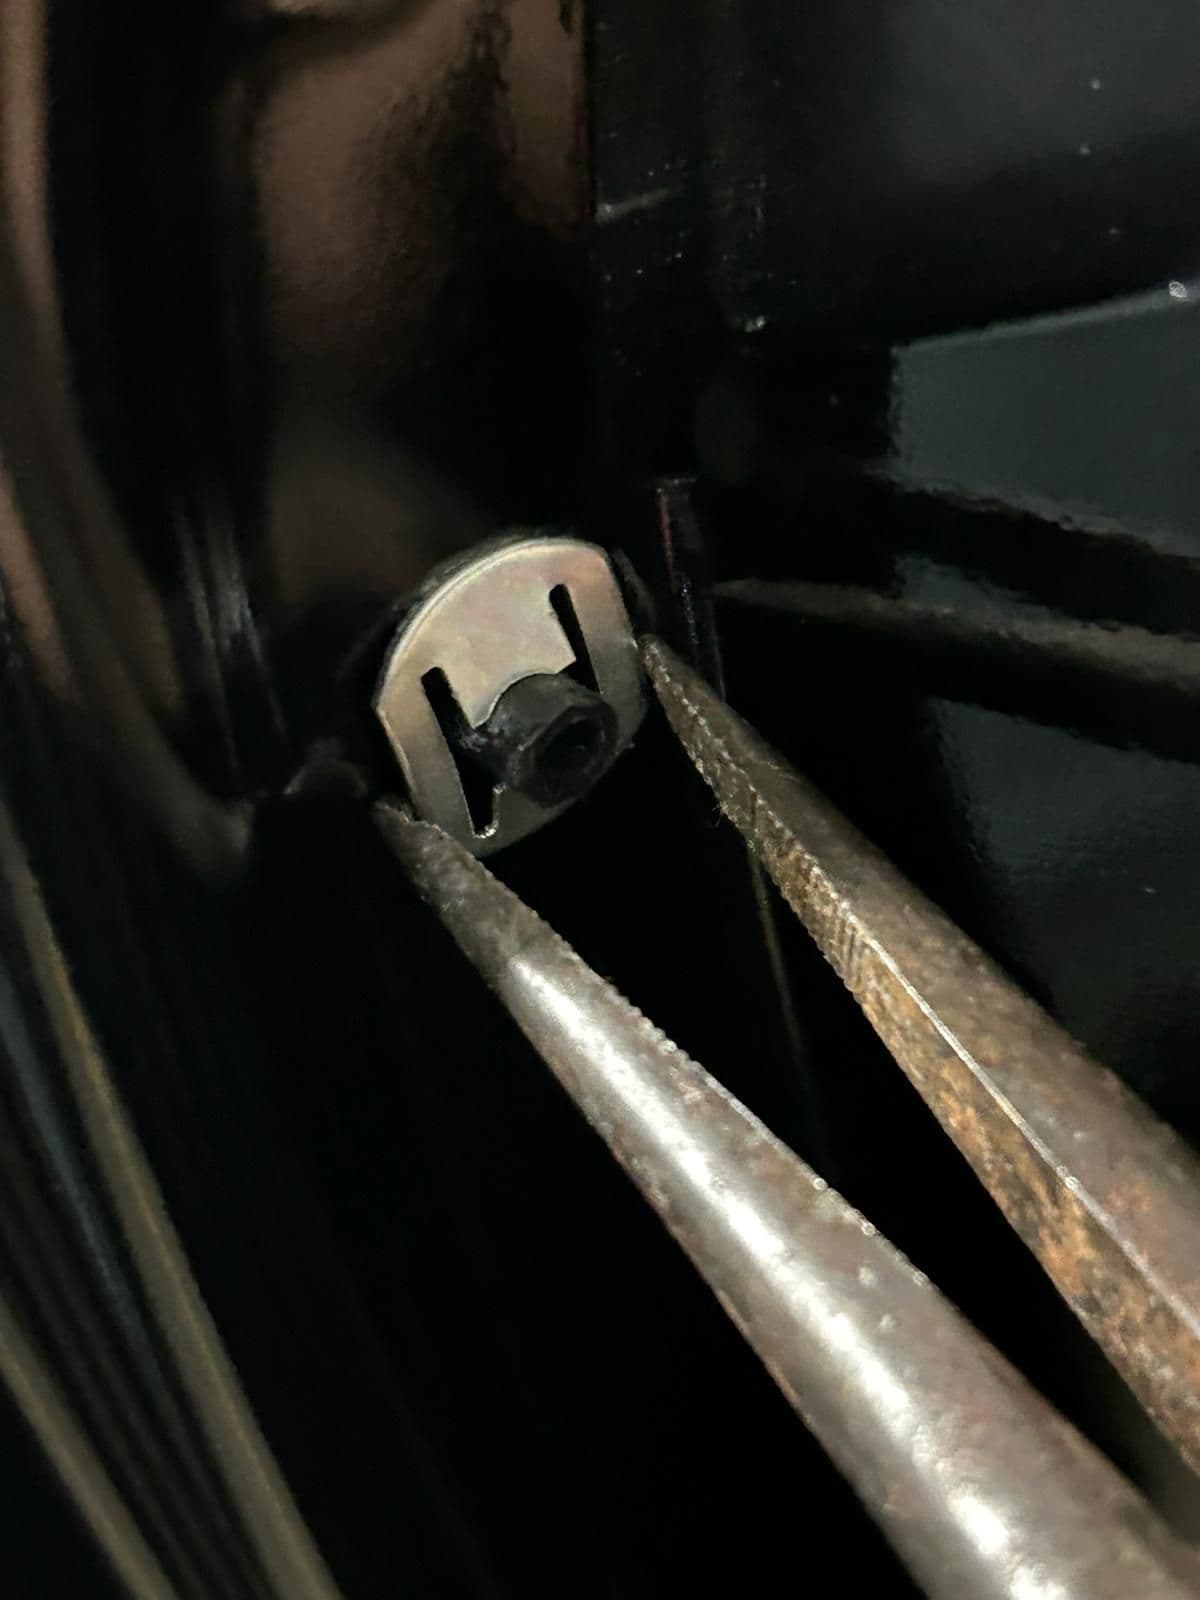
3. Carefully remove all 5 clamping washers (5) (just 4 on my left side as the medial (inside) one had broken off ) using a pair of needle-nose pyers to grasp each side of the metal clamping washers and rotating back and forth with a gentle pulling pressure. I was suprised as to how easily they came off. No serious force was required, just gentle pressure, patience, and nothing broke.
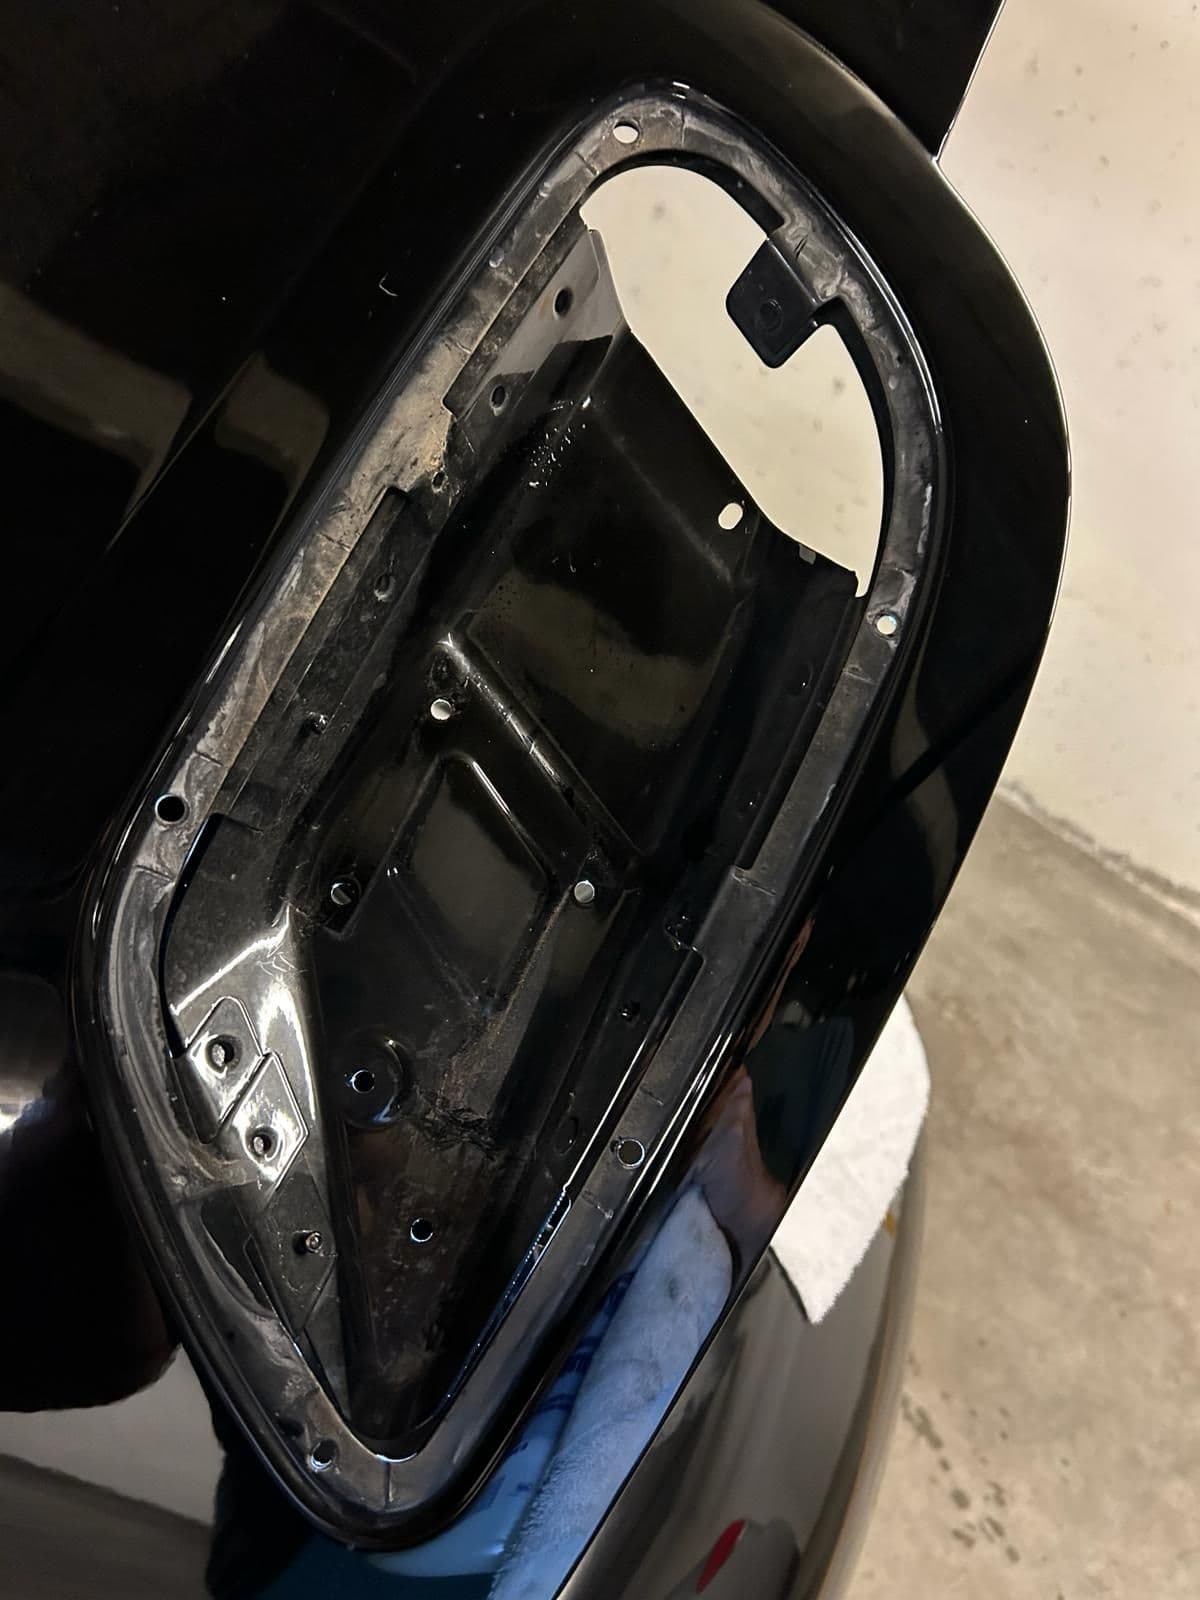
4. Remove the plastic cover (4) and spray clean the underside.
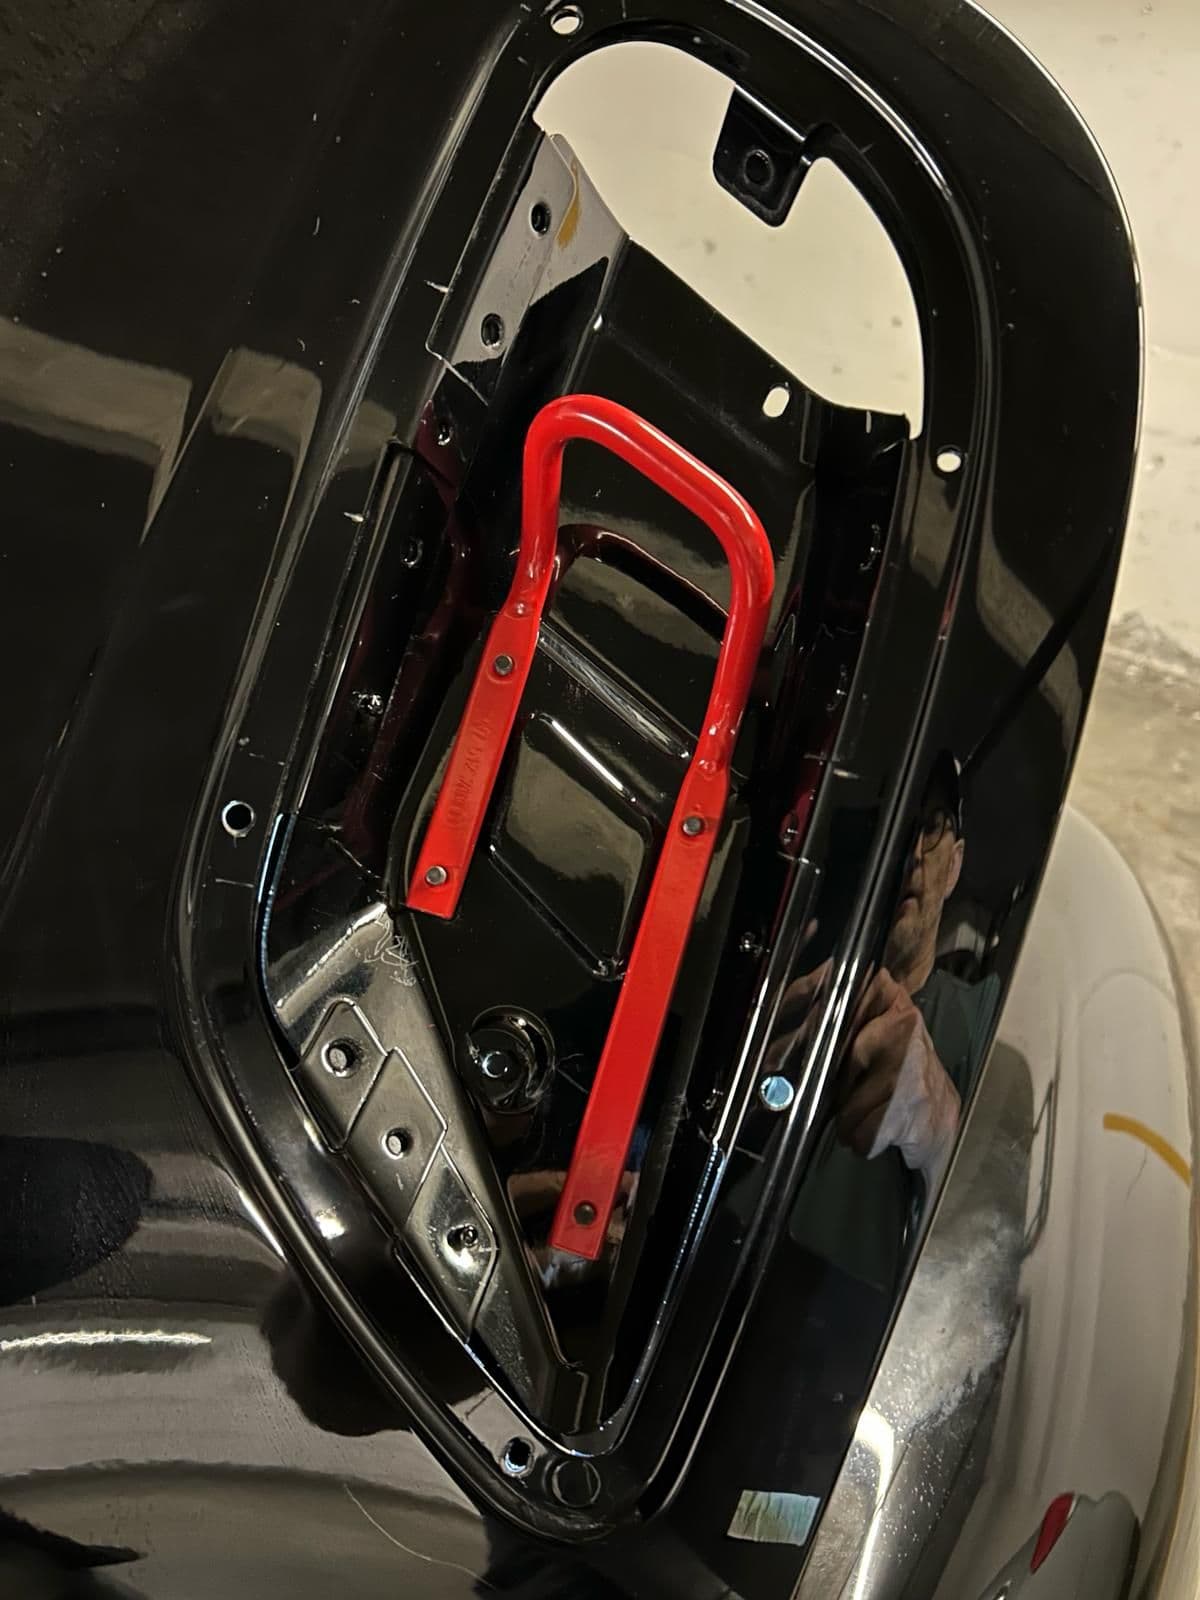
5. Using a hex tool, remove all 4 fillister head bolts (3) from red angle bracket (2) and set aside.
6. Clean up underside of lid with spray cleaner - I was surprised just how dirty it was (concourse cleaning step?).
7. Instal the new angle brackets - note: as they are new I recommended starting all 4 bolts into the new threads as they are tight.
8. Replance lid with new clamping washers simply pushed on with fingers with a final push of the needle-nose plyers.
9. Stand back and admire your nice new sexy red angle brackets!
10. Re-attach streamers, drop lid, and you're ready to go.
New red angle bracket out of the packaging. Underside of back lid with angle bracket removed showing dirt. Installed new angle bracket with 4 fillister hex bolts. Parts diagram of back lid assembly. Parts list of back lid assembly.
Nice work! I can�t believe those plastic rivets/tabs didn�t break given how weak they seem to be. Maybe doing this type of work would be a good time to place a few dabs of RTV on the underside of the plate just in case all of the plastic tabs were to fail?
Last edited by islaTurbine; 03-21-2024 at 11:10 PM.
I’m curious, are the red angle brackets painted or do they have a plastic type coating on them?
I can certainly appreciate the access you get to detail the undersides, it’s tempting for that reason alone but the fear of braking those plastic tabs stops me from wanting to do it.
Nice work! I can�t believe those plastic rivets/tabs didn�t break given how weak they seem to be. Maybe doing this type of work would be a good time to place a few dabs of RTV on the underside of the plate just in case all of the plastic tabs were to fail?
I was very very careful, my friend. And to be honest, surpised some did not break. The trick was to get a good grip on it and with a gently clockwise / coutner clockwise motion pull / wiggle it off.
I’m curious, are the red angle brackets painted or do they have a plastic type coating on them?
I can certainly appreciate the access you get to detail the undersides, it’s tempting for that reason alone but the fear of braking those plastic tabs stops me from wanting to do it.
Afshin - they appear to be just very thick paint, like brake-caliper paint.
I agree with your caution on this, if just for cleaning. But I started with one, then another, then another etc...
I feel I've now kicked in your concours winning OCD. You were probably lying in bed awake last night, thinking of all that DIRT under there!
 03-21-2024, 04:10 PM