When you click on links to various merchants on this site and make a purchase, this can result in this site earning a commission. Affiliate programs and affiliations include, but are not limited to, the eBay Partner Network.
Cayenne S 957 V8 Crankshaft Position Sensor Replacement DIY
About 3 weeks back I started getting a CEL with a Code 0335 Crankshaft Position Sensor "A" Circuit. Upper Limit Exceeded.
After clearing the code it kept coming back within a day or two and the car stalled on two occasions. Based on research on the forums, this seemed very much in line with sensor failures on 955's and a DIY existed for these model years, but not the 957.
My 957 now has around 120k miles, and the engine runs incredibly well, aside from this one recent anomaly.
I ordered a replacement sensor, from Pelican Parts which arrived the next day (very impressive service) :lowdown: thanks Pelican
Crankshaft Sensor
Brand: Bosch Note: Engine Type: 4.8L 4806cc V8 (3.78x3.27; 96.0x83.0) (2008 Porsche Cayenne S Sport Utility)
Part #: 0-261-210-292-INT
As there was no info available on this DIY for a 957 so I'm hoping the following will help others get this done easily when needed, and in particular so you can save the 2 hours extra it took me to figure out where and how everything was located, as well as how to get to it.
Which I did while I was waiting for the new part to arrive
However once that research was done, the actual job of replacing the sensor took about 45 minutes.
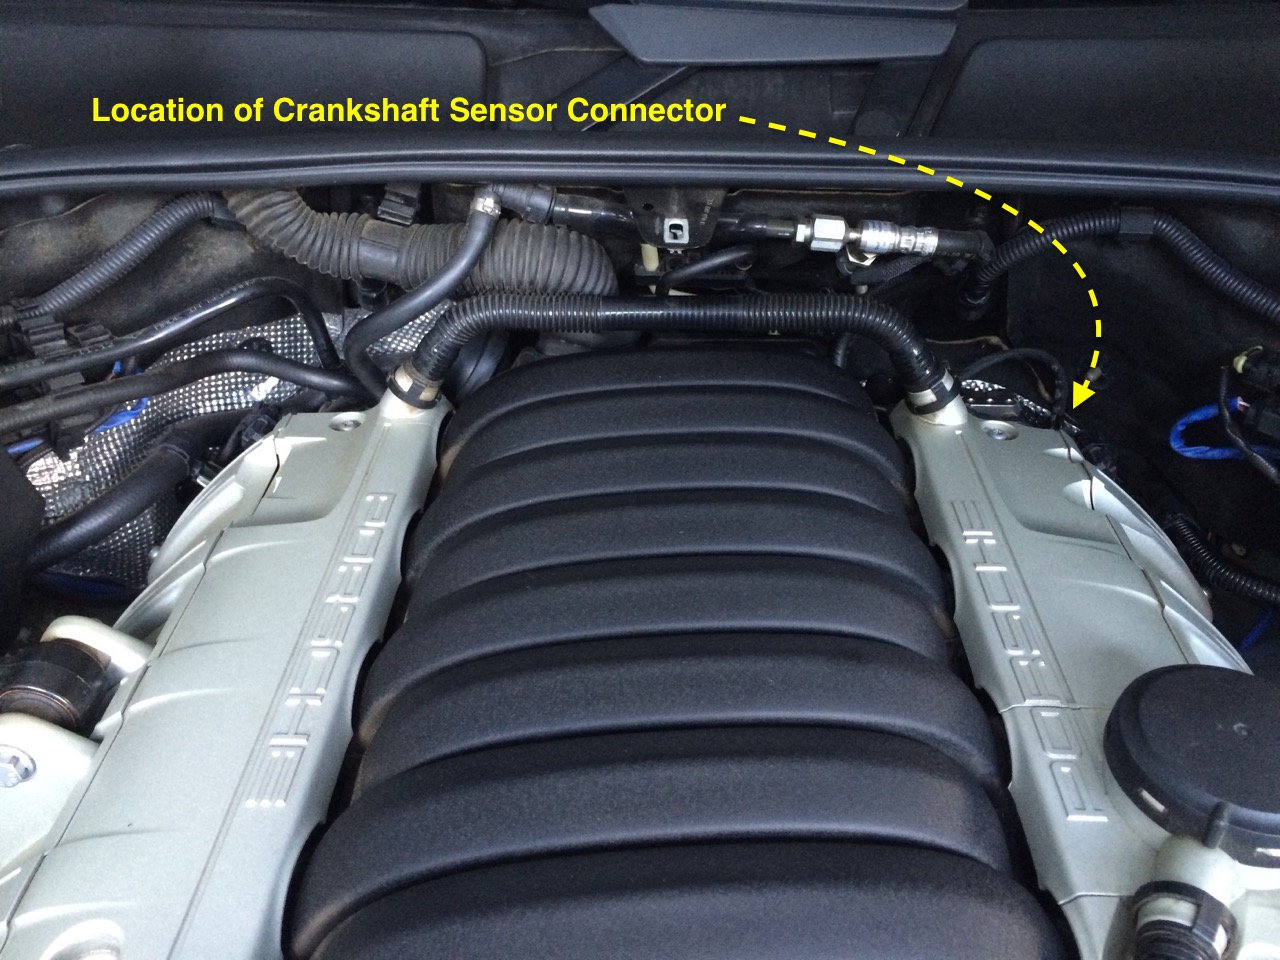
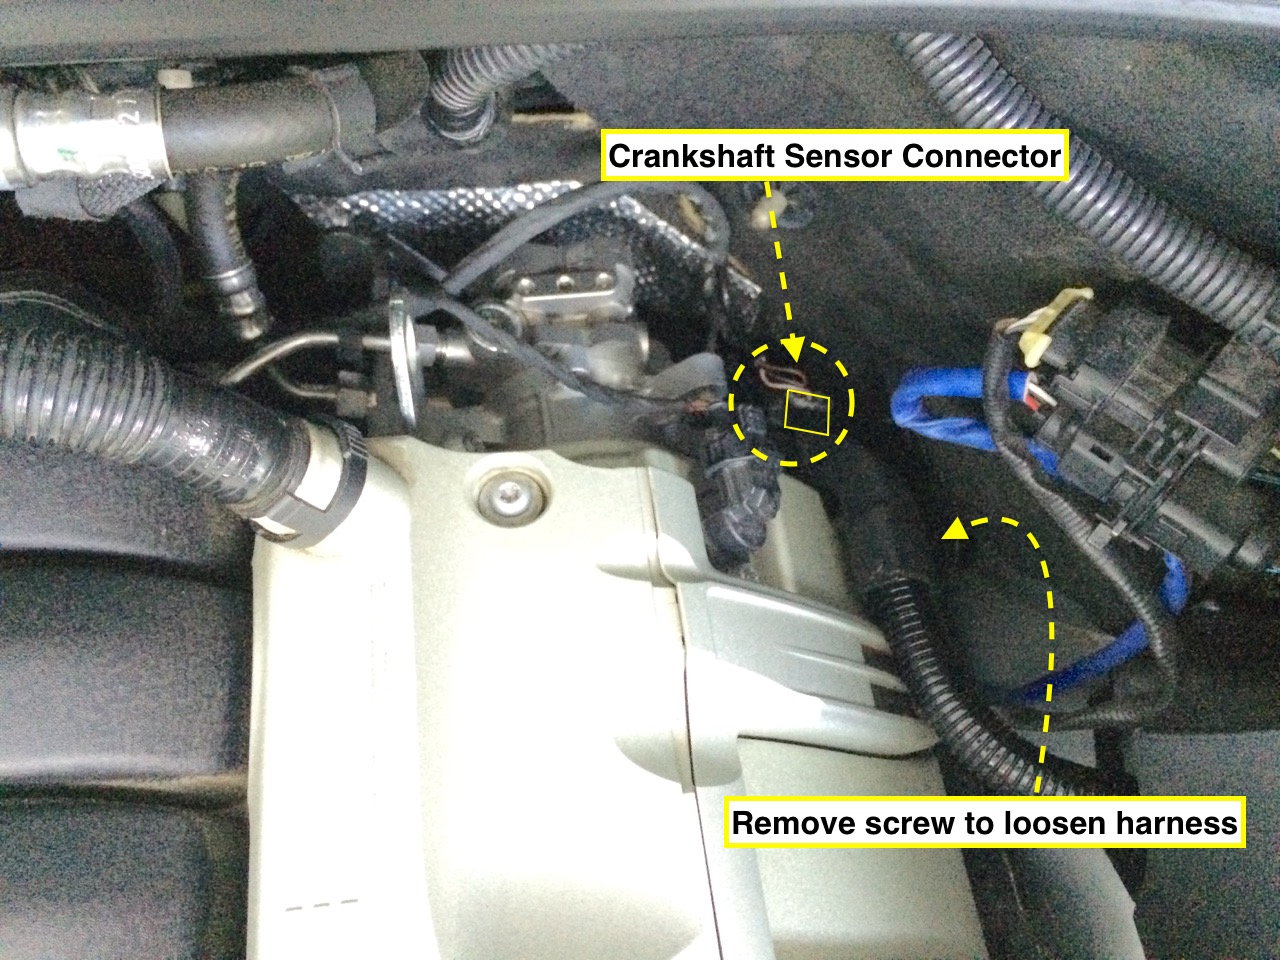
The main challenge is that the connector is difficult to access as it is behind and below the fuel pump on the right hand side as you face the front of the car. Even with an inspection scope it was difficult to locate. It was only once I looked from under the car that I could see where it was located.
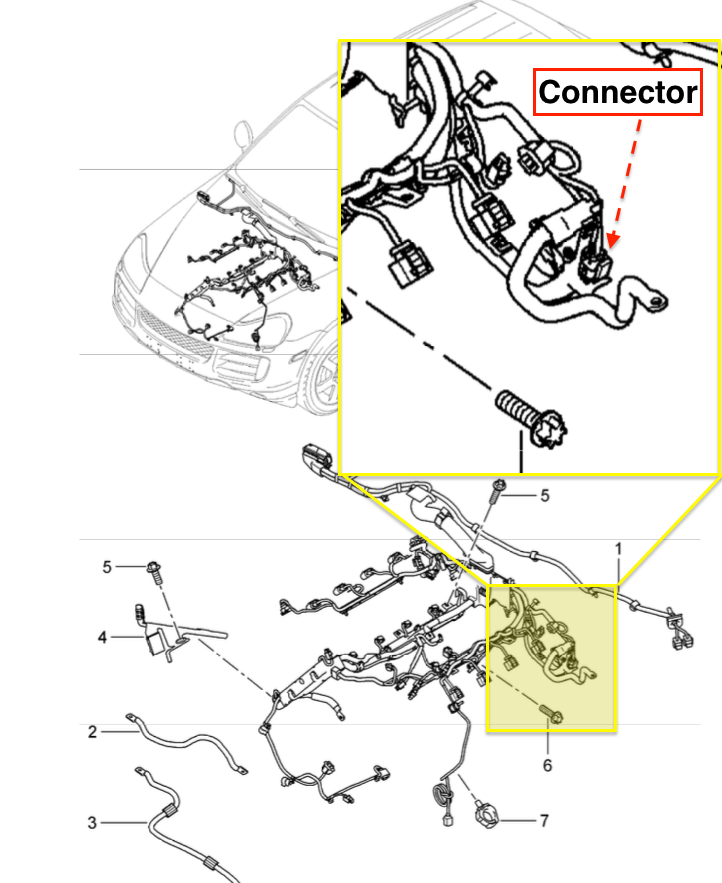
Also the connector plug is attached to a rectangular section of plastic tubing/conduit on the wiring harness, by a clip which is very rigid.
After multiple attempts to release this clip it broke off. I think give the location it gets very hot and over the years becomes brittle.
You should remove the engine compartment trim at the rear of the engine for better access.
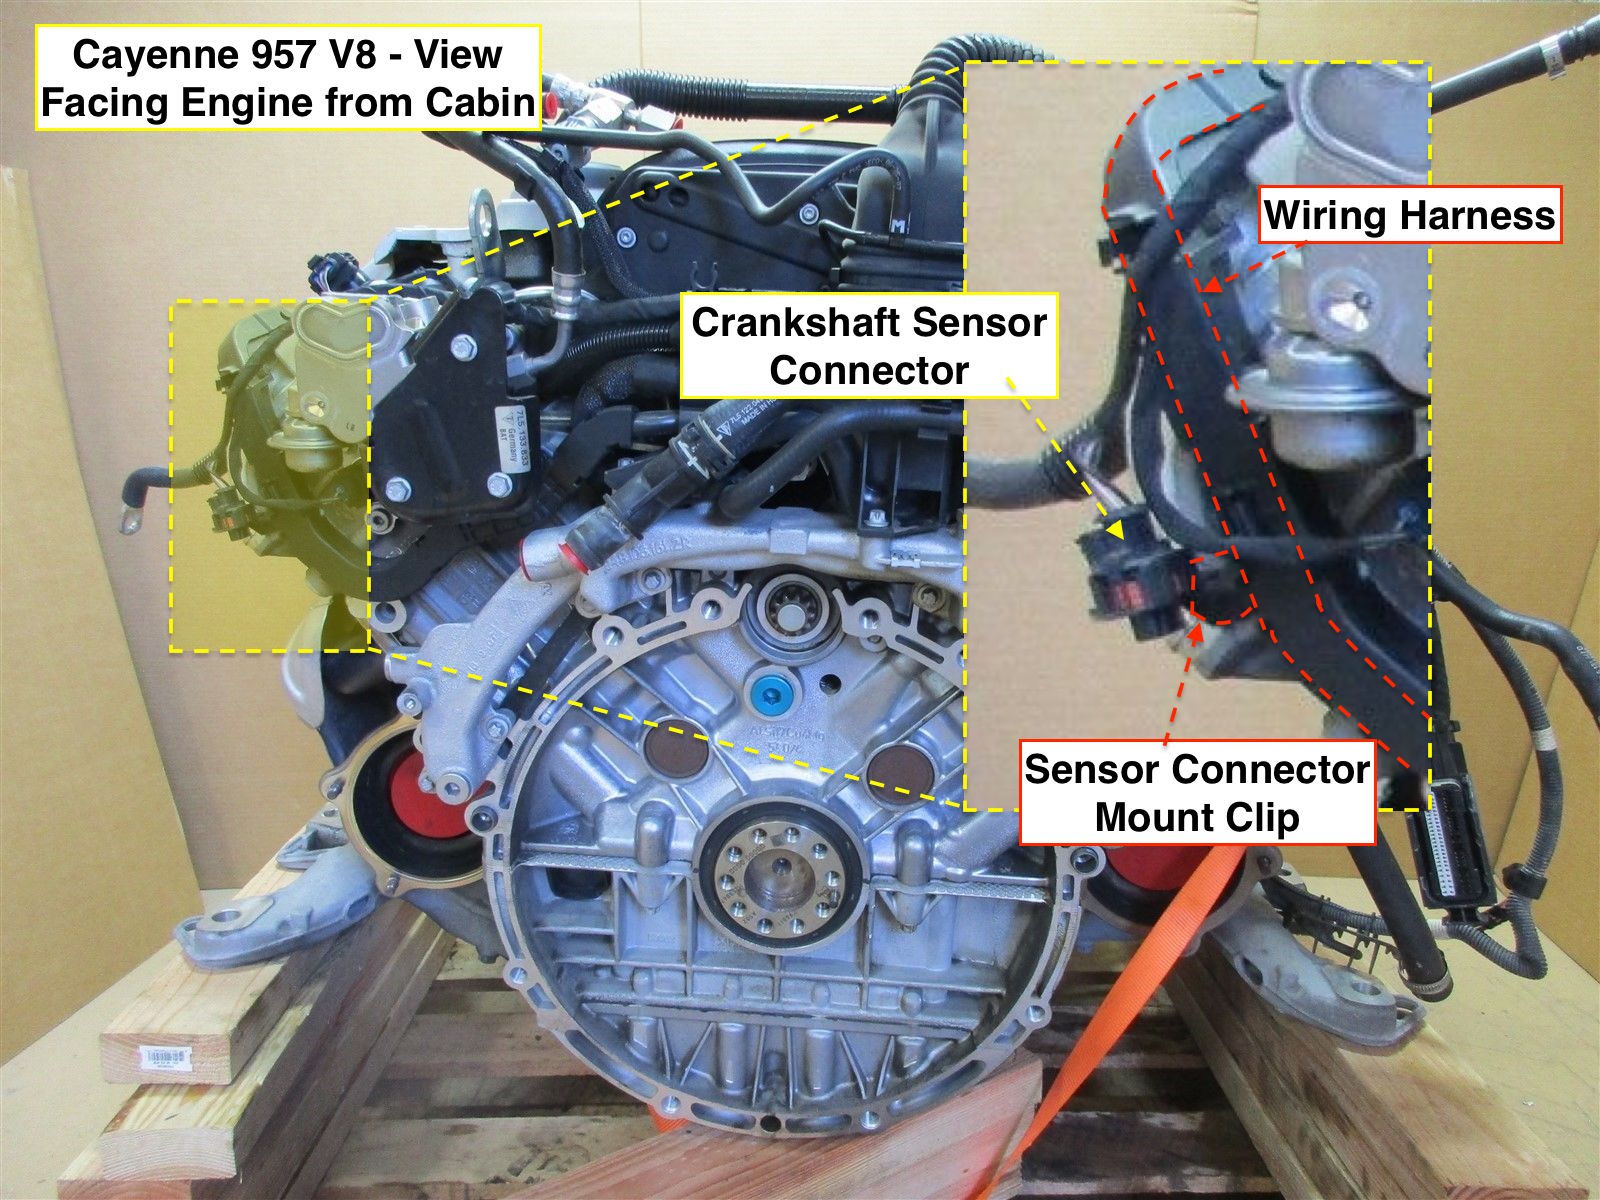
I also borrowed a few pics of an engine on the web to mark the location:
I also found that removing the harness from the engine made it easier to get my hands around the connector to get the two ends separated.
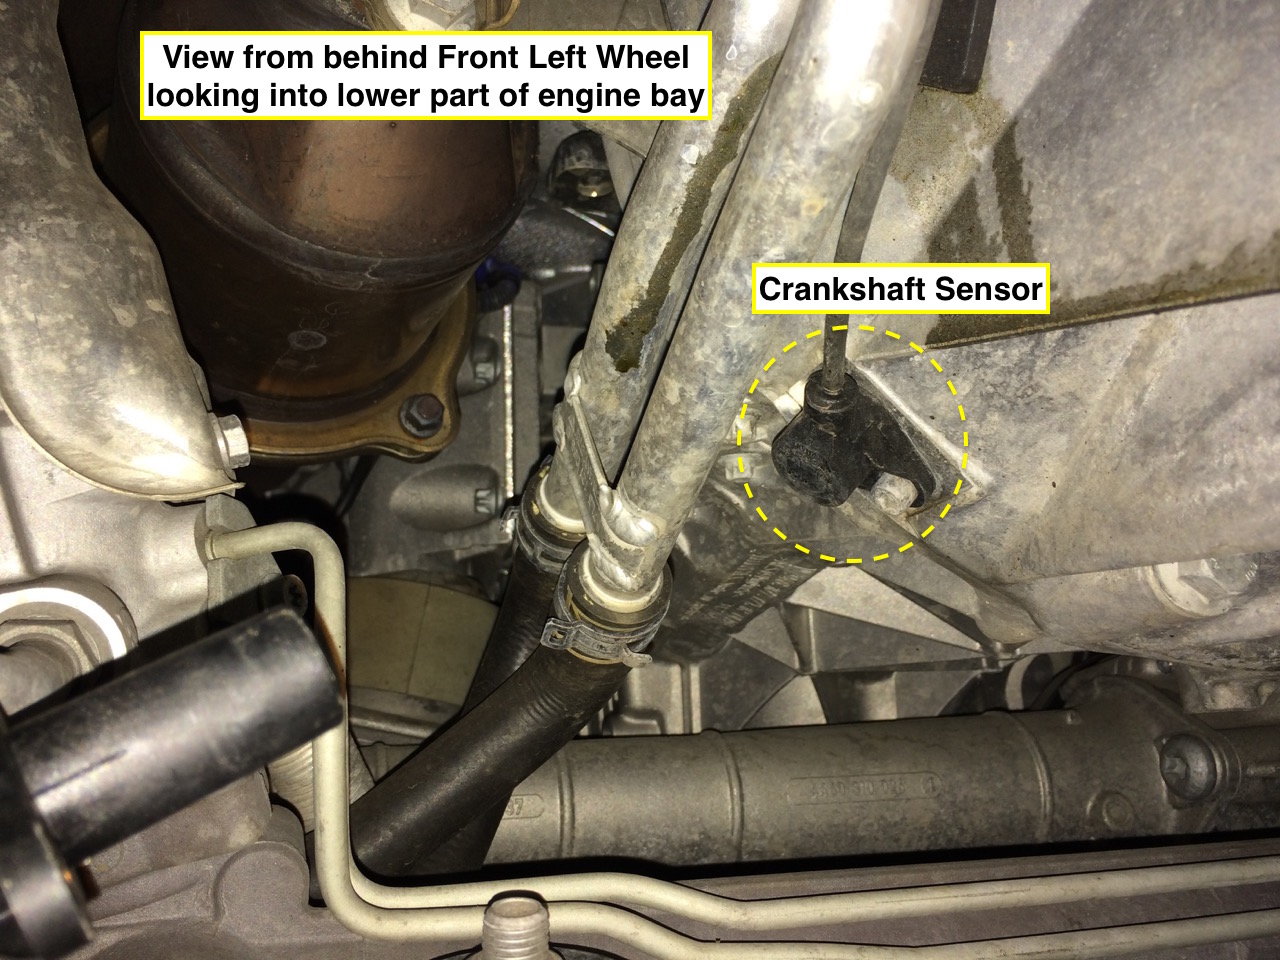
Once you have the old sensor connector removed, insert the new sensor connector plug and tape the end of the new sensor tip with some painters tape just for protection, and then slowly lower it down into the engine compartment. It will end up either side of the primary cat where it is easily accessible from below.
Also let the old sensor cable drop into the engine bay as you will then extract it from below.
Now move to underneath the vehicle.
I only needed to jack up the front left of the vehicle (jack stand + jack for extra safety). No wheels need to be removed. Do not jack up the car before dealing with the connector at the top of the engine bay as it will make it difficult to reach.
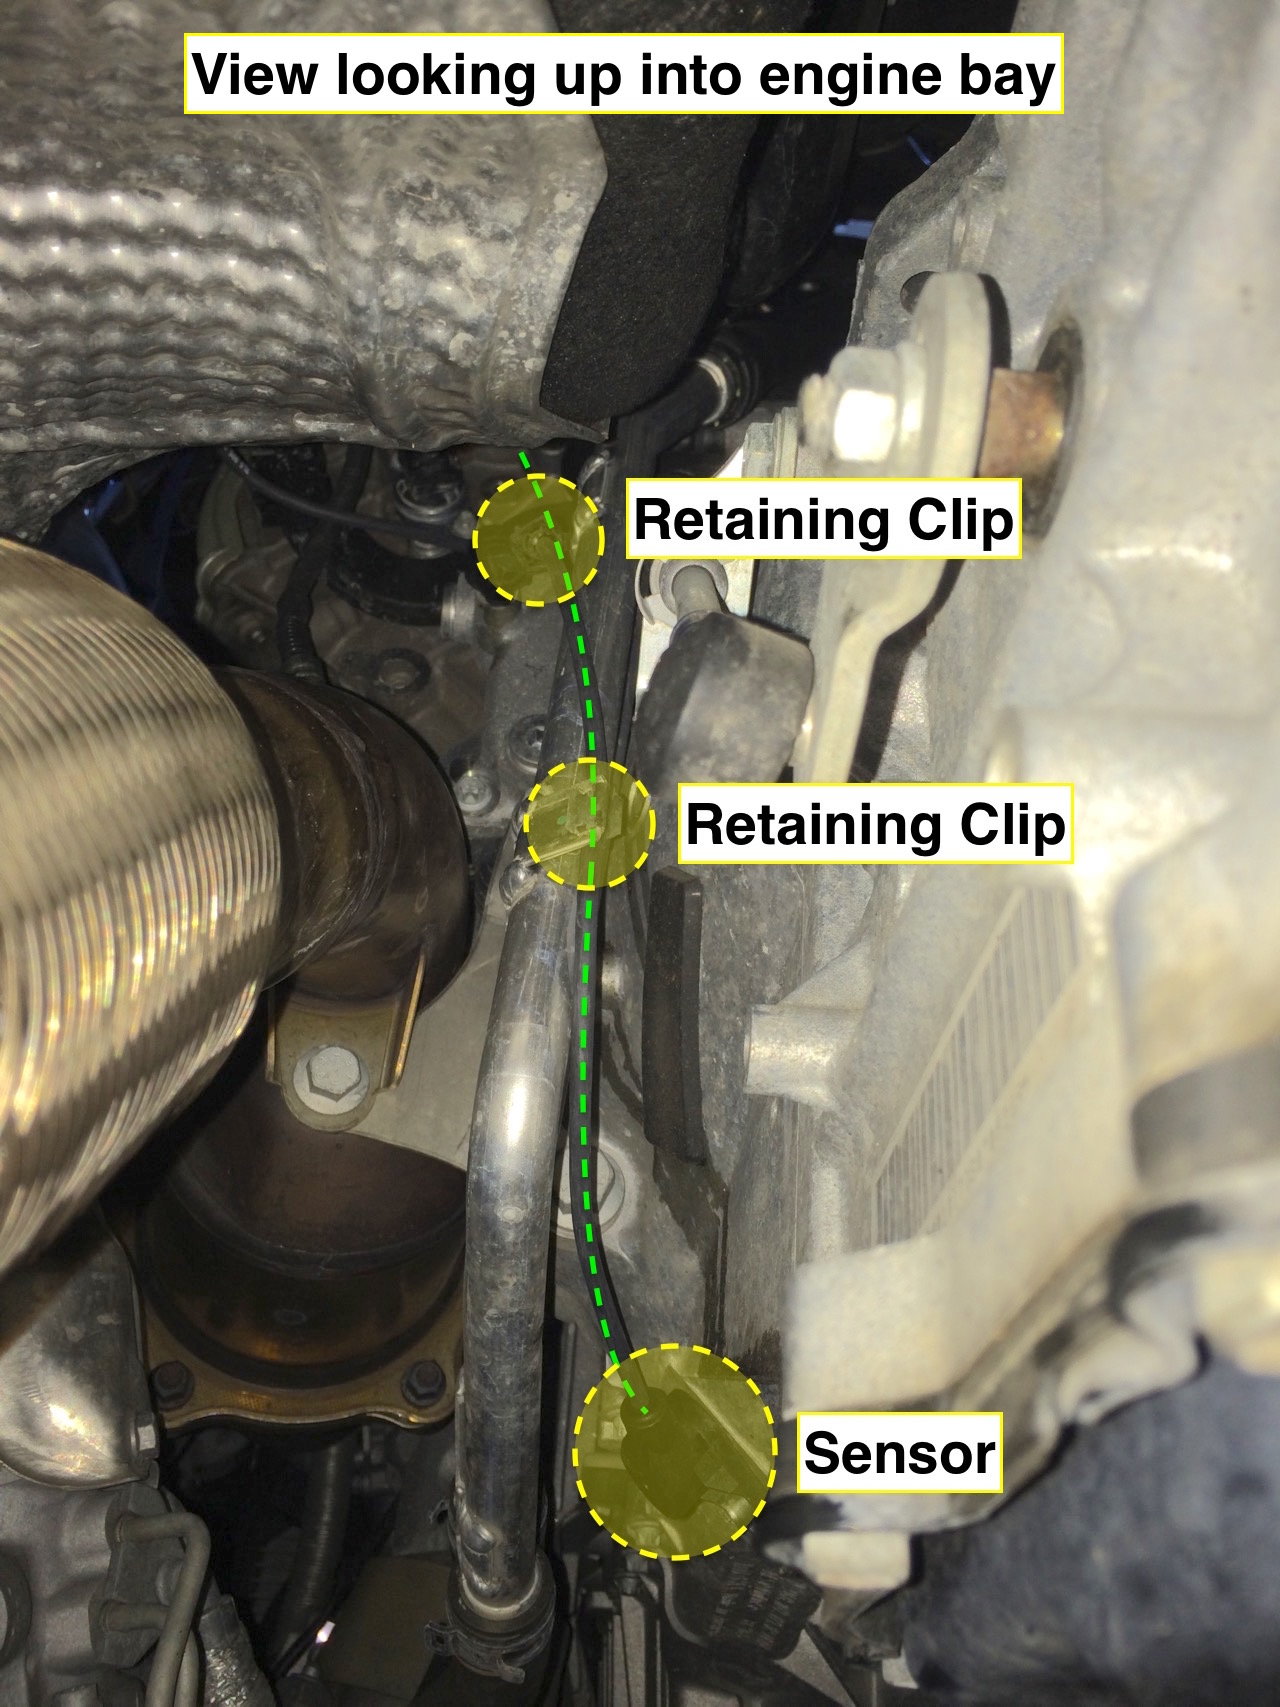
Between the connector and the sensor, the cable is secured at 3 locations. See pictures below.
The cable is pretty easy to remove and secure from below the vehicle and it can be seen and accessed without removing any of the under trays (depending on your level of flexibility).
The lowest retaining clip is a push in type retaining clip where you simply press the cable into the tensioned clip.
The two upper retaining clips are circular in shape and hinge open and closed. With a built of gentle persuasion you can pull them open and the cable comes out easily. I could not get the uppermost one in the pics but it is similar to the 2nd one shown in the pics.
The sensor is held in place with a single torx T5 screw.
Once you have the old sensor off you can pull it out and put it aside and attach the new one.
I suggest attaching the sensor first and the attaching the cable to the retaining clips.
Very rewarding and inexpensive fix, and everything is back to normal. No more codes and the car runs beautifully!
I'm new here, and I don't have this particular issue, however, I came across it and I'm glad I did. It gives me faith in the DIY Porsche community. You're a great ambassador.
WOW an excellent DIY post. Clear and concise....should be a sticky.
This will be saved in my archives.
Actually - I'm going to copy it over to the Cayenne DIY forum - if you're not familiar with it - you should be. LOTS of good info lives there. EMC2 - excellent work and photos. THANK YOU!
Thanks for this. It is an excellent DIY! I would suggest that if you get to 120k and need to replace the sensor, you might as well do the coil packs at the same time...a few of the components also need to be removed to get to the back coil. After seeing how the coils can begine to fail within as little 40-50k miles, I am planning on setting my change interval accordingly.
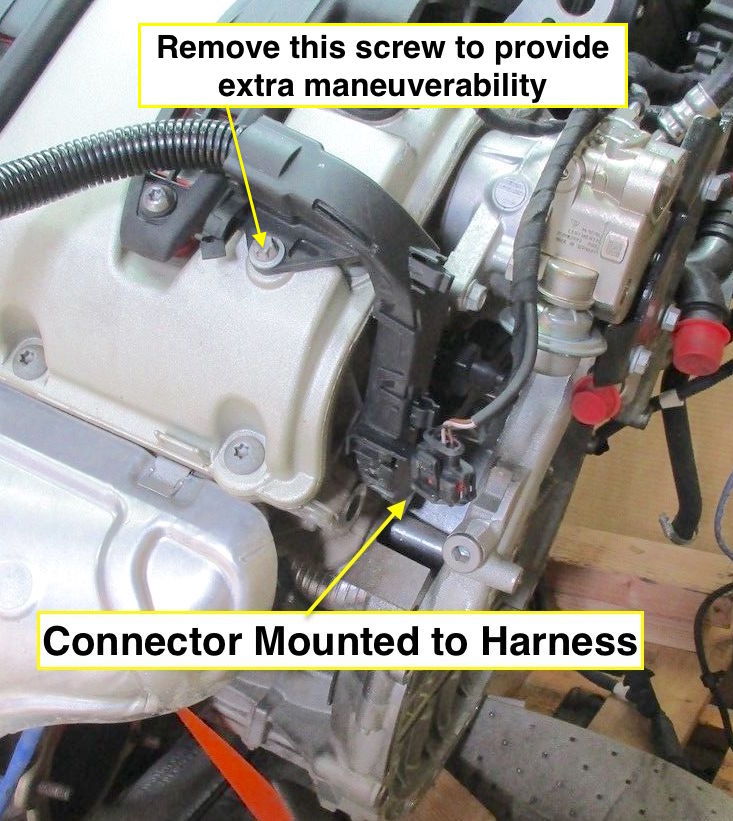
Thanks for all the information. That was very helpful and useful. My 07 S is approaching 180 000 km. It too me 3 hours because i did not understand that how the sensor is mounted in harness before i took it down with screwdriver under the car. Me, novise did not undesrstand in picture 5 this detail. It was very easy job after that and you can change the sensor by hands. Thousand thanks.
Thanks for all the information. That was very helpful and useful. My 07 S is approaching 180 000 km. It too me 3 hours because i did not understand that how the sensor is mounted in harness before i took it down with screwdriver under the car. Me, novise did not undesrstand in picture 5 this detail. It was very easy job after that and you can change the sensor by hands. Thousand thanks.
Thanks for the DIY. Just wanted to add that I used a long pair of pliers (the left one pictured below) to pinch the top connector and remove it. Then I used a pick to break the orange tab that holds the sensor into the holder. With this done, I was able to push the orange connector down and towards the firewall to get it out of the holder.

 07-15-2016, 11:21 PM