When you click on links to various merchants on this site and make a purchase, this can result in this site earning a commission. Affiliate programs and affiliations include, but are not limited to, the eBay Partner Network.
Project : Install double air-drier for air suspension compressor on a 2004
Hi all
Want to share my DIY-project which involves installing an extra air drier for the air suspension.
Background : My compressor died of rust inside, and the built in one-time drier inside compressor was very wet. Moist weather contains a lot of vapor that will condense inside compressor. The drying substance inside compressor is a chemical that binds water, I think it's molecular sieve desiccant. When it's saturated with water the air suspension system will get wet from the compressed air. The chemical is not possible to replace with new in an easy way. You need to dismantle the whole compressor, a big task and easy to break something.
My project : Install an extra air-drier that removes moist from air before it gets to the compressor. Must be possible to recover after a few years. This will make compressor and air suspension components last much longer.
Photos are attached.
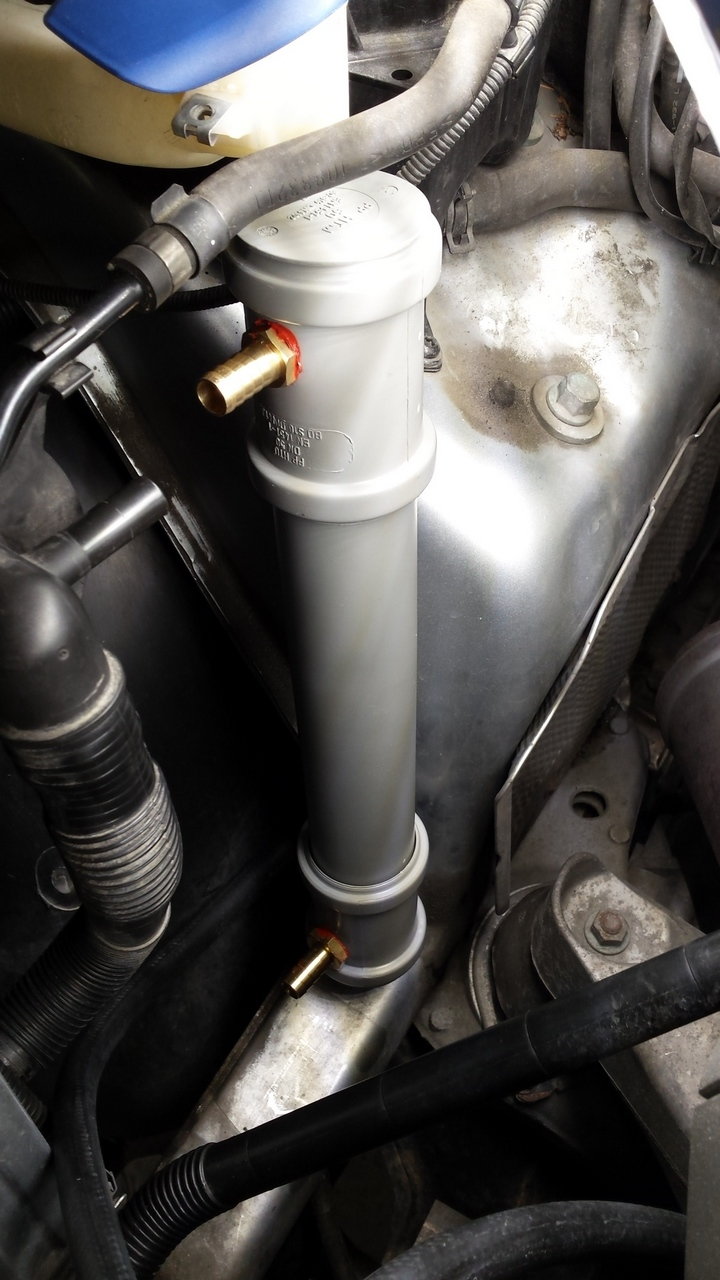
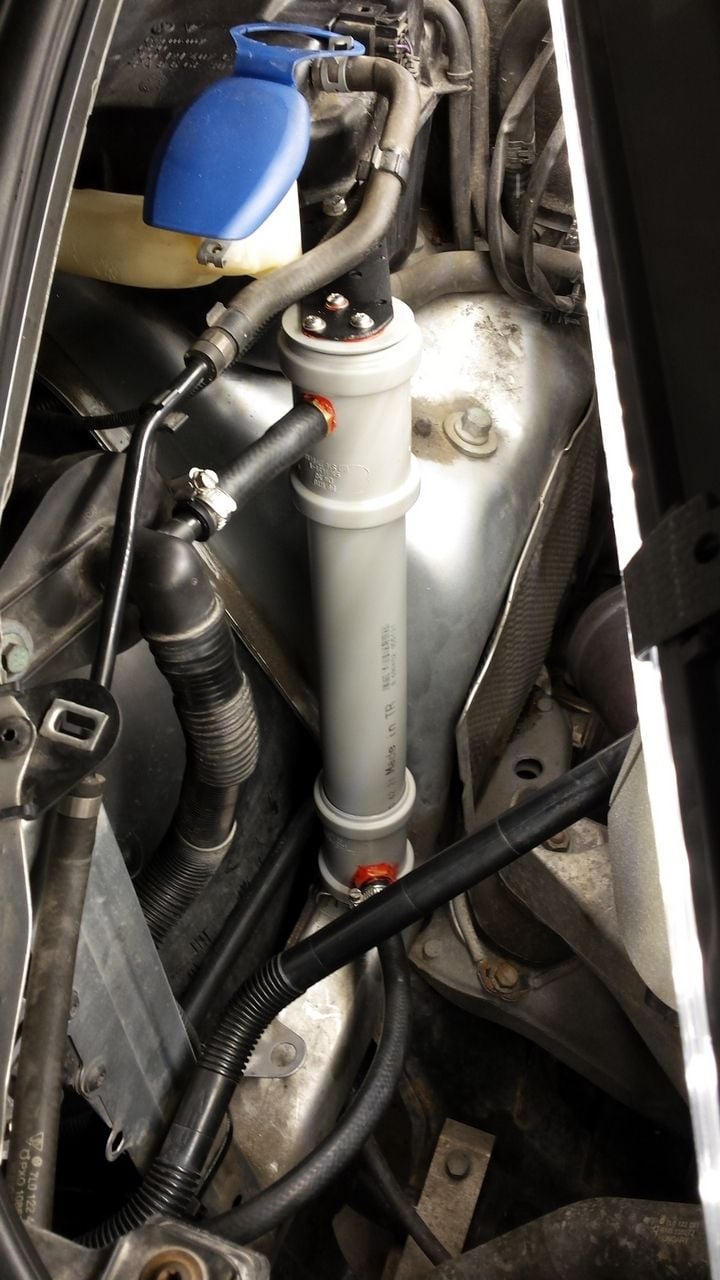
I found a great place to have the extra air-drier. I have placed it between the compressor and air filter, in the right side of engine compartment. A lot of space there. I loosed the cover inside right wheel area to get access to the air tube, and took off engine covers on right side to get access to the big space under them.
I removed the original 12mm hard-plastic air-tube (last picture), replaced it with 10mm(inside) fuel rubber hose.
The air-drier is made of standard water-pipes for buildings. The tube is 50mm (2") diameter, two extensions and two blind-covers.
2 brass fittings on top and bottom.
Put a girls pantyhose inside and filled it with Silicagel, a chemical that absorbs water and change color from orange to light orange when saturated (can be dried in an oven). The pantyhose is there to make it easy to take out and dry.
A filter is placed in bottom so the brass fitting have room inside to let air pass easily, so the pantyhose will not plug the opening.
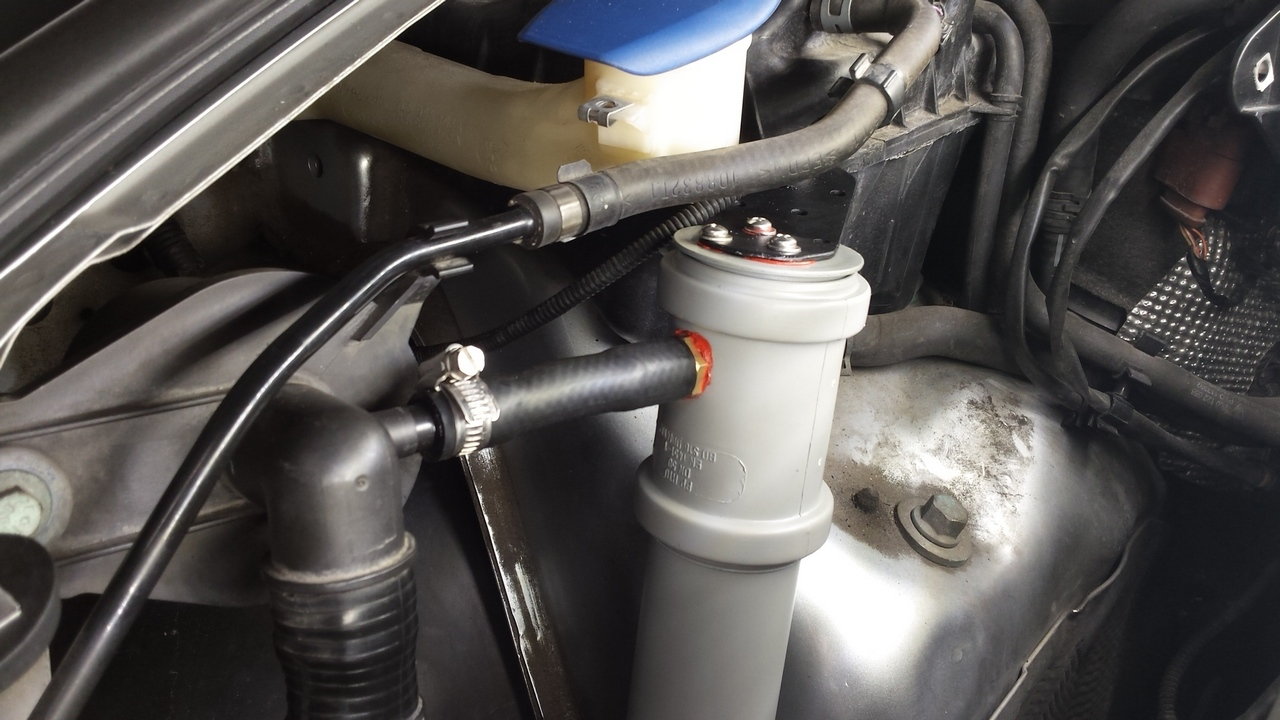
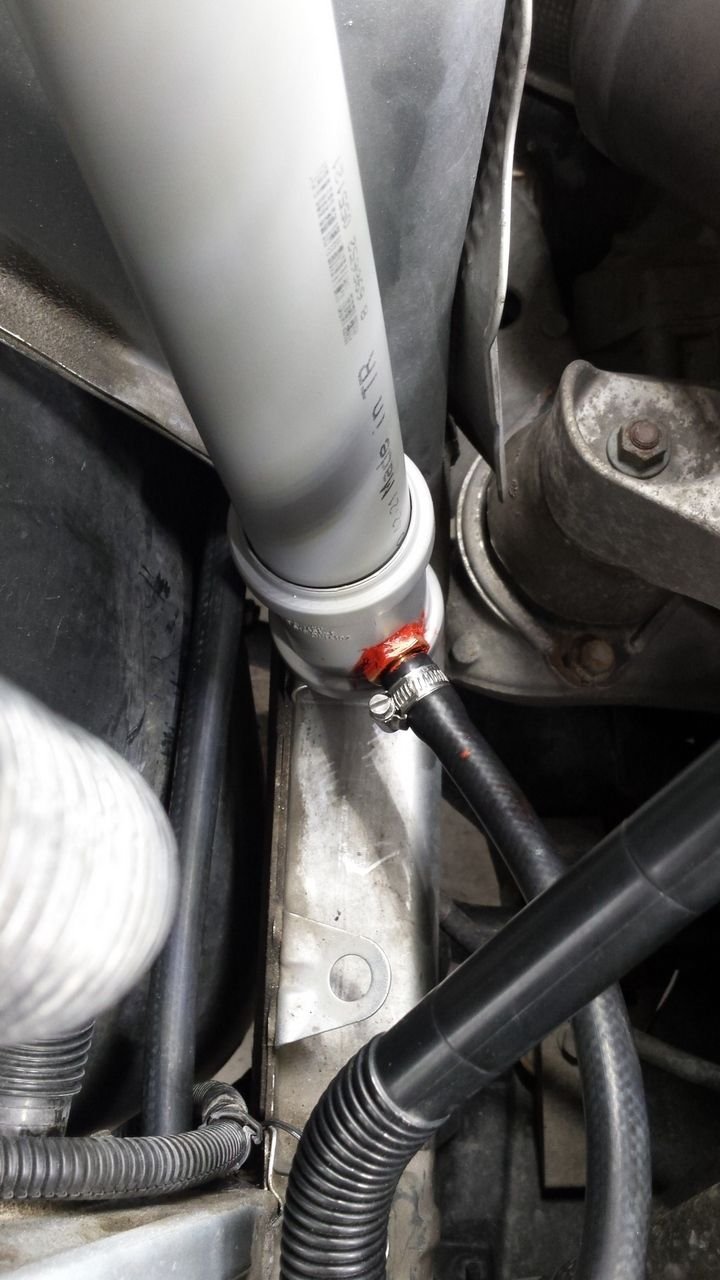
The air-drier is placed on an existing perfect metal-ear on the car, you can see one of the ears in front of the air-drier. I bolted it through with rubber hose around the screw, o-rings and a nut. The rubber parts are there so it's not metal-to-metal that make rust.
The top of air-drier is bolted to a free hole on the cooling-water-tank, with a metal plate that I painted black. It's fastened to the top of blind-cover, with some silicone to make it air-tight.
The new rubber-hose from compressor is connected to bottom and a small piece of about 10cm is between top fitting and the existing air-filter.
Used stainless steel clamps one some connections. This system will not rust! :-)
The system is working as attended. Will open the top of my air-drier after a couple of years, lift up the pantyhose with silicagel and check the color of it. If it's saturated all the way down I need to refresh it more often.
I hope this will make longer lifespan on air springs, release valves, valveblock and compressor.
My total cost was about 400 NOK ($45) in parts.
2 hours buying parts
7 hours planning how to make the drier, where to place it etc. (you may skip this)
2 hours making the drier
30 minutes removing cover in wheel well, original air-tube and covers in engine compartment
30 minutes mounting the drier
Air dryer without hoses. 50mm plumbing parts.
Screw to fix the blind lid to the car, with rubber parts under there you cant see. Screw is not touching metal from car.
Finish. Hose from air filter (top left) to top of my air-drier. Air goes down through the silicagel and out in bottom-hose that goes to compressor.
Top is fixed with a metal plate to cooling-water tank. Metal plate made of a house construction plate of steel. Cut it with a grinder and painted black.
Bottom hose connected and a stainless clamp. Fuel-rubber hose is 17mm outside, 10mm inside. The metal ear you see in front of my air-drier is the second ear there. The first is the one I fastened my air-drier to. Have not drilled anything in car to get this mounted!
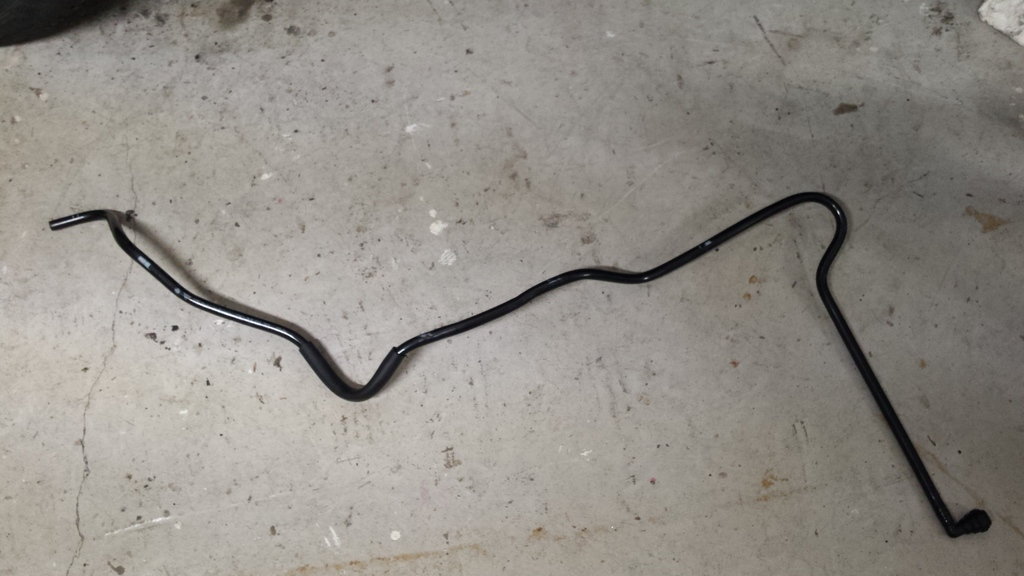
The original hard plastic air-tube that I replaced with rubber. It's possible to cut it in engine compartment, but I chose to remove it completely.
Last edited by kjbu; 02-10-2016 at 05:01 PM.
Reason: Added pictures
I love what you did here.. Have to see if this might be possible for the 958 series.. One other thought - not quite as large as what you have, but an air-conditioner receiver/dryer might work as a plug and play solution.
I applaud your effort at increasing the dryer capacity, I think this is a critical element of the system.
A few years back I read a technical article that described the operation of the air suspension and the compressor/dryer. My memory of that article is imperfect, but what I can remember leads me to believe that there may be a more optimum placement for the dryer.
If your compressor was truly rusted out, then I expect that was do to being submerged and not from the intake of moist air. I base this statement on the information contained in the article (which I can't find right now).
Bottom line is this. The compressor compresses the air and pumps it through the dryer (the one mounted to the compressor), from there the air goes through the control valve and then into either the accumulators or air springs. This dehumidifies the air that is pumped into the expensive mechanical components of the suspension (a/s control valve, pressure holding valves, etc).
Here's the catch, when the system releases air it passes back through the drier prior to being released into the atmosphere. By passing the dehumidified air back through the dryer, it dehumidifies the dryer itself, prolonging the service life of the dryer.
The system is designed this way to deal with the moisture that precipitates out of air due to being compressed/decompressed. Doing it this way is the most efficient way to remove moisture from air.
So in the end, your system will help give the system dry air, but its placement outside of the pressure loop of the system will reduce its overall effectiveness.
Not trying to rain on your parade at all. But I've contemplated buying the $200 ECS tuning compressor rebuild kit just for the sake of replacing the dryer to get me through the next 130K miles.
Here's the catch, when the system releases air it passes back through the drier prior to being released into the atmosphere. By passing the dehumidified air back through the dryer, it dehumidifies the dryer itself, prolonging the service life of the dryer.
Hi
Thank you for input, but I don't agree on this statement.
If you check the physical properties of Molecular Sieve (https://en.wikipedia.org/wiki/Molecular_sieve) this chemical will not release the absorbed moisture without a lot of heat. That means when it's saturated, it stops working.
I'm not 100% sure the drier in compressor is molecular sieve, but it looks just like this : http://paperpallet.com.my/products/s...esiccant-clay/
That is one-time use and will not regenerate itself without heat.
A great idea however, as Jagman pointed out, there's no way to purge the new dessicant drier of it's moisture. A small solenoid release valve at the very bottom of the new cannister wired to an adjustable timed delay relay could work; in the same way an in-line water separator on a shop air system works.
I love what you did here.. Have to see if this might be possible for the 958 series.. One other thought - not quite as large as what you have, but an air-conditioner receiver/dryer might work as a plug and play solution.
955 & 957's have an open air system, the 958 has a closed system filled with nitrogen, not air.

 02-10-2016, 04:53 PM