When you click on links to various merchants on this site and make a purchase, this can result in this site earning a commission. Affiliate programs and affiliations include, but are not limited to, the eBay Partner Network.
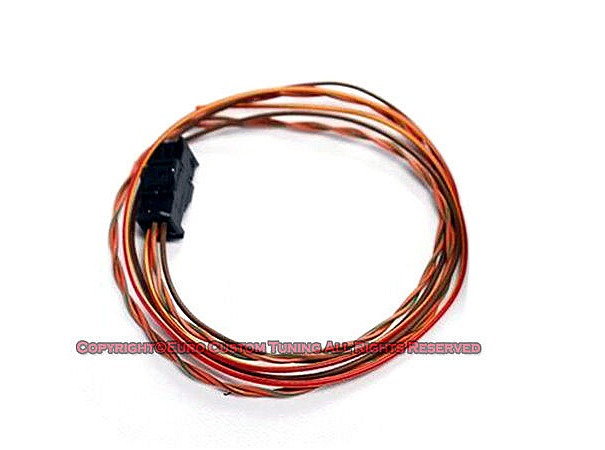
Thought I'd post a pic of the ebay cable. I note that the color codes on the wires appear correct, which should make it fairly easy to find the correct ones to splice into on the back of the PCM. I do have diagrams of what pins are used on the PCM - and the wire colors - if anyone needs those.
Meanwhile - here is what they're supposed to be sending me (shipped last night):
Can be ordered via dealer spare parts, but yes you are right doesn't show up on online sites.
Also can see an alternative code here from a 981 which also works.
Can be ordered via dealer spare parts, but yes you are right doesn't show up on online sites.
Also can see an alternative code here from a 981 which also works.
Meanwhile I can report back on installing my clock. Took about 2 hours to do it - a portion of that time tying to make sense of the diagrams from the service manual.
I didn't take any photos (sorry.. but it would have been difficult to take ones that were useful.)
What I bought:
1 - Clock, standard off Ebay - used - probably one where the second hand fell off and someone stuck it back on. Cost was $135. I also was gifted a chronograph/stopwatch - but since I don't have the lap-timer button on the steering column it wouldn't be a lot of use to me.
2 - New center console panel. Got one in black with the clock mount. Ordered from the dealer new - used are impossible to find - $135
3 - Wiring harness - as described above - $90
4 - 20 small (18-22 gauge) Positap connectors - Amazon. $26. Only needed 2. So I have 18 left for other projects if I think of any.. or if anyone wants to buy smaller quantities than 20.
Total: $135 + 135 + 90 + 26 = $386. There is a guy selling a "kit" that consists of most of the above on Ebay - he asked $750 IIRC. So less than half his price.
The cable from China via eBay was satisfactory. The connector was correct and the wires are color coded. Only problem - the data line is color coded reverse of what it should be. There is a high and a low digital multimedia line. One of them is color coded brown strip on orange wiring. That's the "low" line on the data bus. The wiring harness used brown-strip on orange wiring - but on the high side of the data bus. Dunno if the bus IS polarity sensitive - some are - some aren't - but it would have been nice if the color code followed the standard used by Porsche.
Removing the center panel is fairly easy if you have the blue plastic interior panel tools (Harbor Freight for around $4 - instead of the Porsche parts places for $40.. SAME IDENTICAL TOOLS!) Use your finger to pull up a corner of the grille vent, and slip an L shaped tool under it. Pry up - slip another L shaped tool further down the grille. Pretty soon one side is released. Repeat on the other side. The clips on the middle of the grille just push down into retainers - it requires some brute force to pull them loose. I managed several times without breaking anything.
Next off are the two vents on either side of the PCM. There are little loops that sort of stick out of the inside walls of the vents. You'll need a Maglite to see them. These get pulled toward the center of the vent. Someone posted a link to a neat-o Ford tool that allows you to grab opposite ones and pull them both toward center. The tool makes it very easy to remove the vent. I did it by releasing the bottom ones and the vent pivoted out. There is a wire attached to the vent for the lighting for the ****, and a switch on the **** that probably tells the HVAC that the vent is closed. It could be disconnected, or you could just leave the vent dangling by the wire like I did.
The PCM is now exposed. There are 4x T-27 screws that hold in. I started the engine, moved the shifter to drive, and shut the engine off. The car wasn't happy (it told me so on the dash) - but that moved the shifter out of risk from the PCM. I then covered the shifter and center console with a big-*** towel to keep from scratching anything.
The wiring going to the back of the PCM is one big connector - held in by a "bail" that must be pivoted down to release the connector. There are a lot of wires going to this connector and they all go into a 3 bundles that then go into one bigger bundle, making it awkward to work on the harness. The harness isn't too long, so the work has to be done with the harness barely out of the PCM hole.
I cut back the covering on the bundle that carries the power lead to allow me to access it more easily.
I ran the cable purchased above - after wrapping it in some cloth electrical tape (looks factory that way..) - down through the big hole under the center grille and it comes out in the back of the PCM compartment.
I then used two Positaps to connect up the data lines - after studying the color codes. It's tight, but the Positaps I selected are quite small so it's doable.
The next challenge was the power line. The main power line to the PCM is the big RED with Yellow Stripe wire. It's probably about 14 gauge. I ended up using a tiny knife to cut back a short bit of insulation off the wire - then stripping and wrapping the clock cable RED power lead to the bare section, and soldering it. Then I covered this with cloth electrical tape, and wrapped the whole thing with a layer of cloth electrical tape.
The ground wire from the clock cable - is BLACK. I didn't want to strip the main ground (BROWN, 14G) to the PCM, so I figured I'd just fasten the ground wire under one of the tiny Torx screws holding the PCM together, and use it's chassis as ground. That was easy to do.
All hooked up - I plugged in the stopwatch clock - and turned the ignition on. The hands moved to zero. So things were working.
I then reinstalled the PCM and side vents. I hooked up the normal clock, which was installed in the new grille and banged it down into place in the center of the dash.
Turned on the ignition and the clock hands did their dance - and set themselves to the time shown on the PCM + 3 hours. Hmmm.. took the grille out, clock out, unscrewed the front bezal and moved the hour hand to the correct hour setting, then reassembled it all again. Connected up, power on - the hands did their dance and now stopped on the correct time - same as on the PCM. Changing the time zone using the vehicle settings menu changed it in the PCM display, dash display and now - the clock.
So it's all working.
On a 1-10 scale - the install is probably a 5. It would be easier if I was younger and thinner with more agile hands. Mine are 7+ decades old and don't quite move as easily as they used to.
BTW - I *STRONGLY* recommend using Positaps rather than the red "Scotch-Lok" connectors. The Scotch-Lok type connector destroys the wire it's attached to by cutting some of the strands. The Positap uses a sharp pin to pierce the insulation and then run between the wiring strands. The Positap is much less damaging to the wiring. Costs more - but worth it.
The reason I didn't use a Positap for the power lead is - the ones I had were made for 18-22G wire on both ends (the wire being tapped and the wire being connected to the tap.) The power lead is much bigger. Positap does make ones that have two different size ends. If I'd realized this was how the wiring was - I would have ordered some of those. I did the running-tap solder joint because I'm old and learned to solder about 63 years ago.. this technique isn't damaging to the wiring strands being tapped into, but does require some skill to do. Not too many people have those skills today (or even a decent electronics soldering iron and real solder.)
HTH,
If there are questions, I'll do my best to answer them..
One other note.. to get the lighting in the clock to turn on was a bit of a challenge.
I could turn it on and off using my diagnostics software - but if I turned it on that way it stayed on when the engine was off and the car asleep.
Finally found it - under Vehicle, Settings, Time/Date - a new option appeared [ ] Chrono time - checking that turned on the lighting so it worked with the rest of the interior lighting.
Hi Don,
Do you think the same wire will work for a compass ?
Thought I'd post a pic of the ebay cable. I note that the color codes on the wires appear correct, which should make it fairly easy to find the correct ones to splice into on the back of the PCM. I do have diagrams of what pins are used on the PCM - and the wire colors - if anyone needs those.
Meanwhile - here is what they're supposed to be sending me (shipped last night):
As expected, those sellers disappeared. Do you still have their email address from your paypal payment history ?
Don't even ask how I found it.. but I did. It went up in price ($100US). I have not ordered anything from this source so I can't vouch for them, but it's the identical picture that was used for the ebay listing, and it's coming from Hong Kong, so - at your own risk:
Yes they will also work, they all need just 4x wires connected.
+12V (Power)
Ground
CAN HIGH
CAN LOW.
It's a bus systems so you are essentially giving the device power and then taping into the bus network.
Save yourself the trouble and just ask your dealership to order in the item from the spares department. This is the one time I have found that online 3rd parties are a more expensive solution to genuine.
Apparently people who have tried ordering it via the dealership spares haven't had any luck yet. Have you?
Yes got mine through their spare parts division, installed and working fine.
Just give them the screenshot from PET with the part number to make their life easier.
Yes got mine through their spare parts division, installed and working fine.
Just give them the screenshot from PET with the part number to make their life easier.
The PET screenshot shows a cable with 3 connectors on it. I've heard from Termite - he finally got the one he ordered - and promises to take a photo of his - and it has 3 connectors on it. I'm guessing one of the connectors is for the clock, and perhaps the other two are male-female pass-through connectors allowing the harness to be put between the main harness and some component in the Boxster.
Is that what you got?
You said you installed it. What was involved?
I assume some cutting of the extra connectors was involved.

 11-02-2016, 01:00 PM