DIY Door Strap Change
 01-30-2016, 09:19 AM
#1
Rennlist Member
Thread Starter

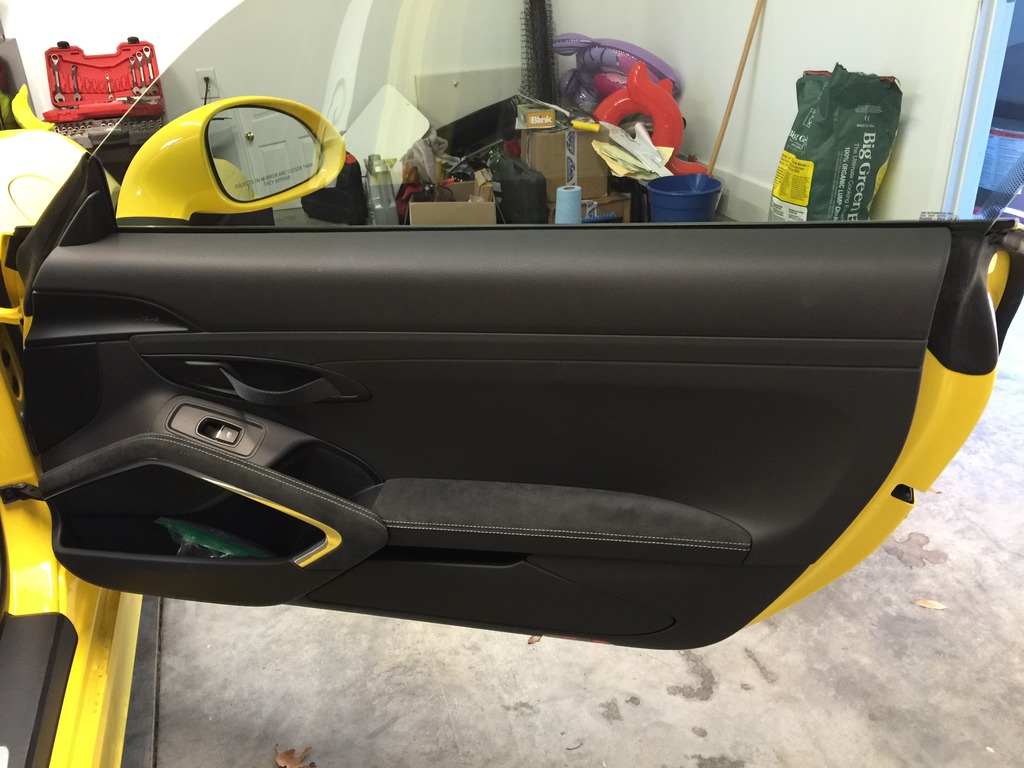
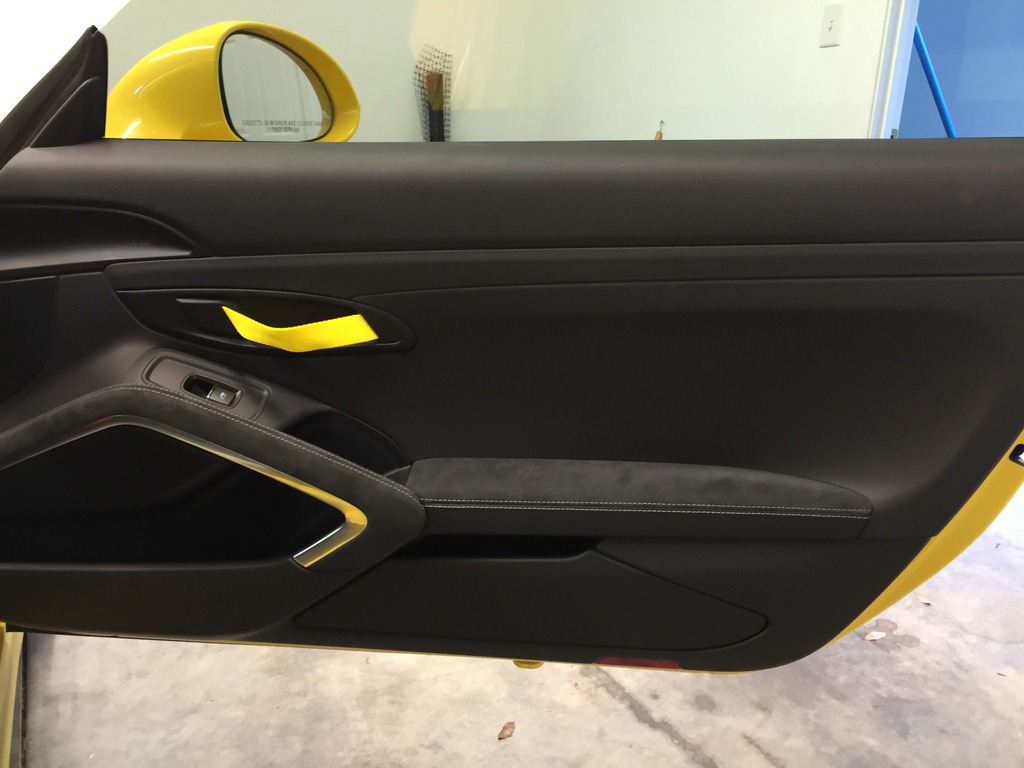
Was thinking this might be useful to the community. If you are like me and didn't feel like speccing leather and stitching just to get the yellow or red door pulls this is for you. You don't have to buy the 500+ assembly that is sold. All you need is 2' of 25mm x 2mm nylon strap.
Tools Needed
t15 Toro
t27 torx
blow torch
vise grip
solder gun
8mm socket
exacto blade
small prying tool (can really be anything)
small flat head screw driver
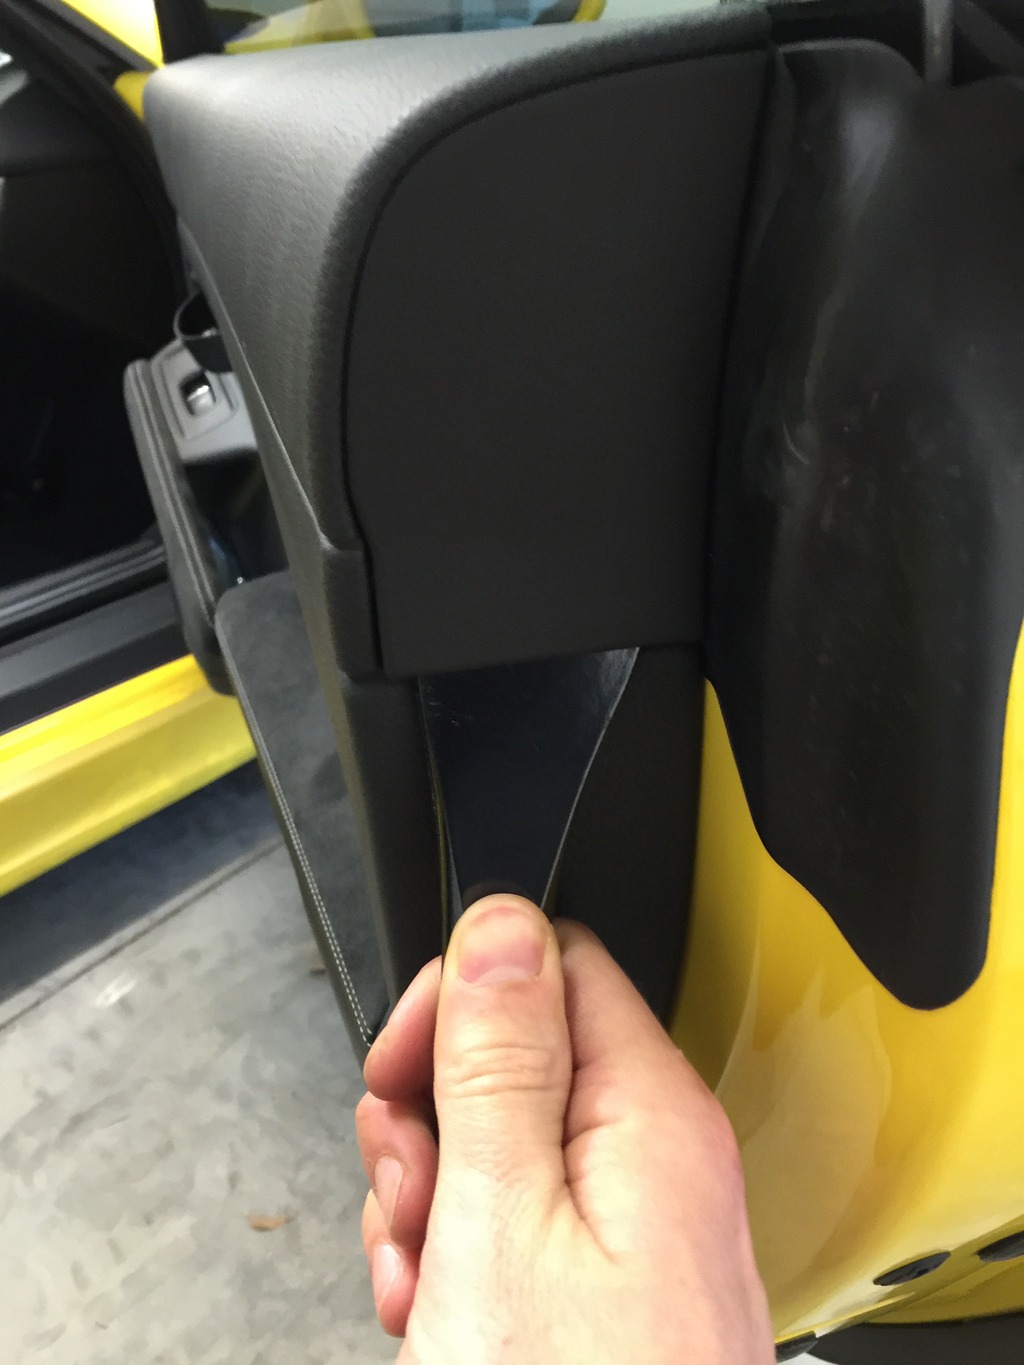
Start by using your prying tool and prying up on the bottom of the plastic clip on the top side of the door. This will reveal one t27 torx screw that will need to be removed.
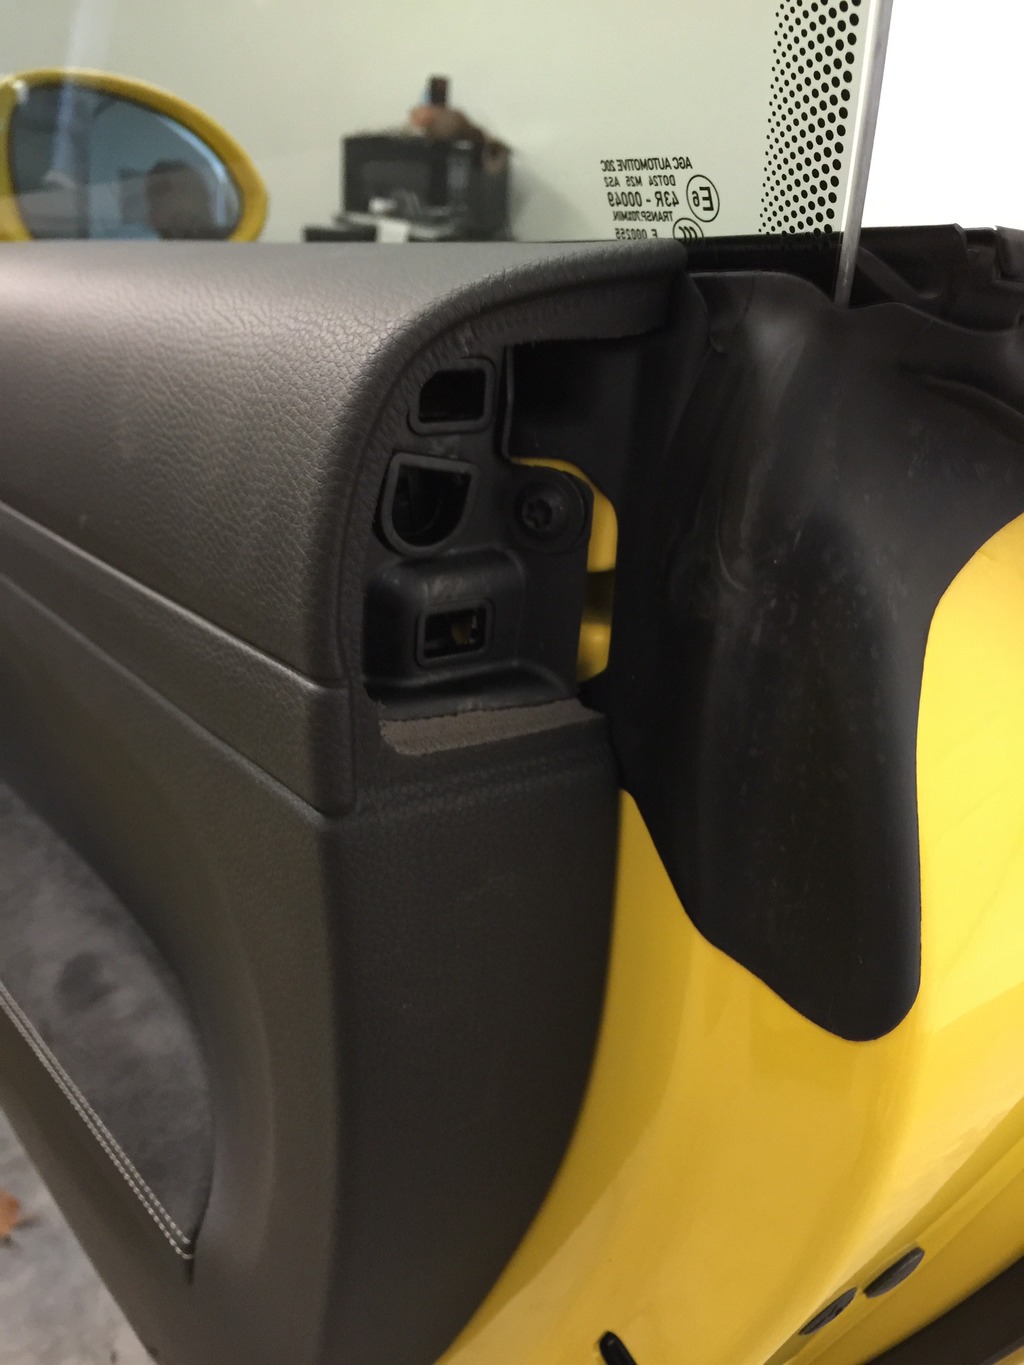
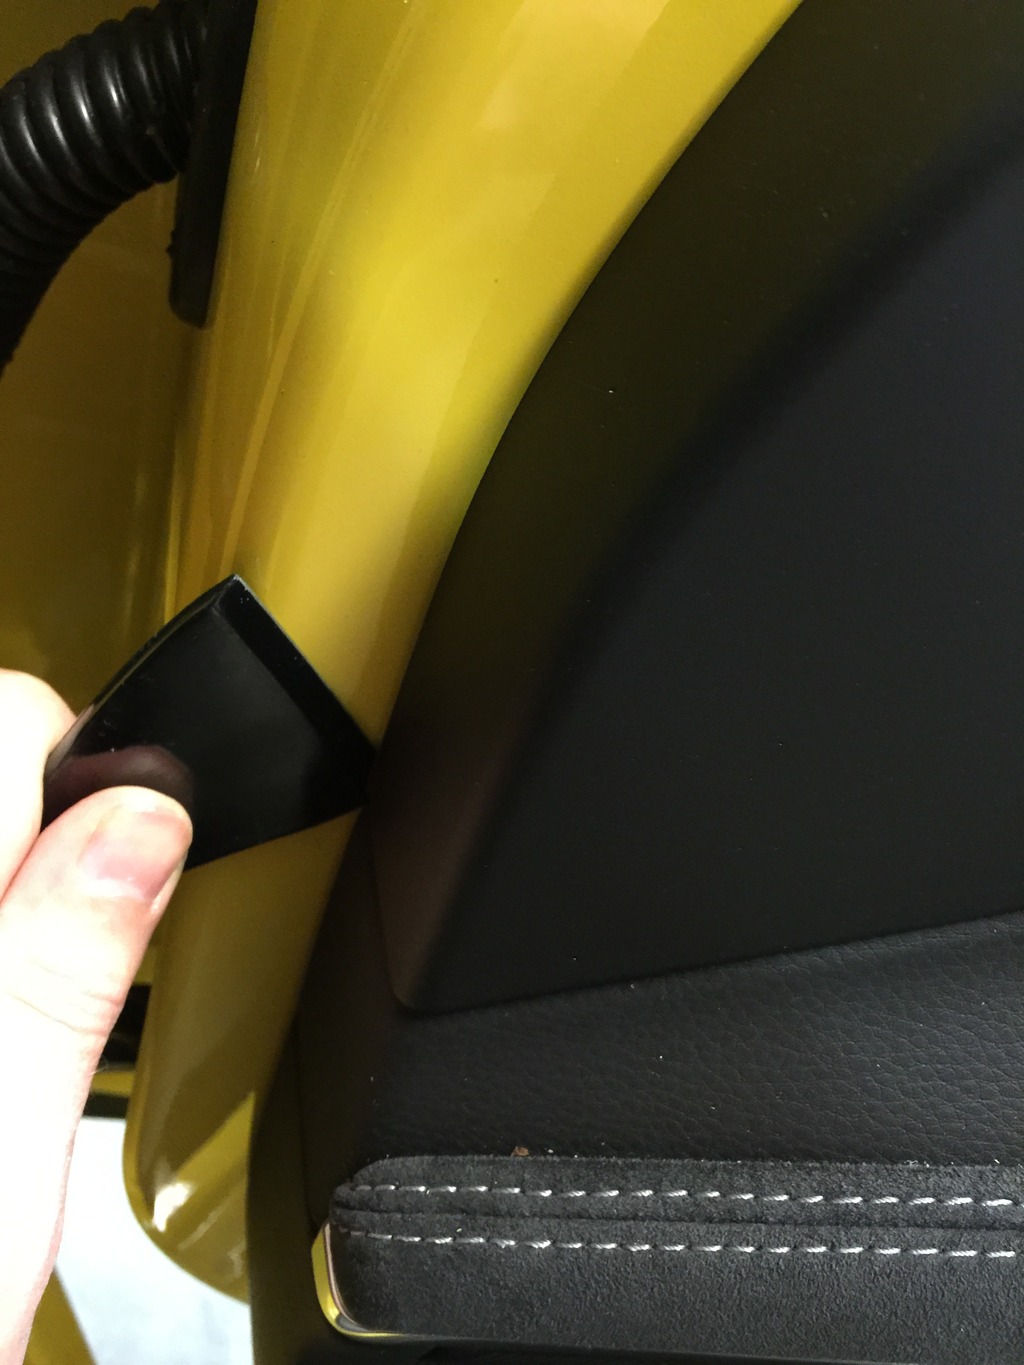
Move to the top plastic piece near the door jamb that says air bag on it. Place your pry tool at the bottom corner of this piece and slightly pry out. Once it first snaps out you can get the rest out just by lightly pulling out with your hands. Once this piece is removed it will reveal 2 more t27 torx screws that will need to be removed.

From hear move up to the top of the door and slowly pry up the plastic piece on the inside of the mirror.
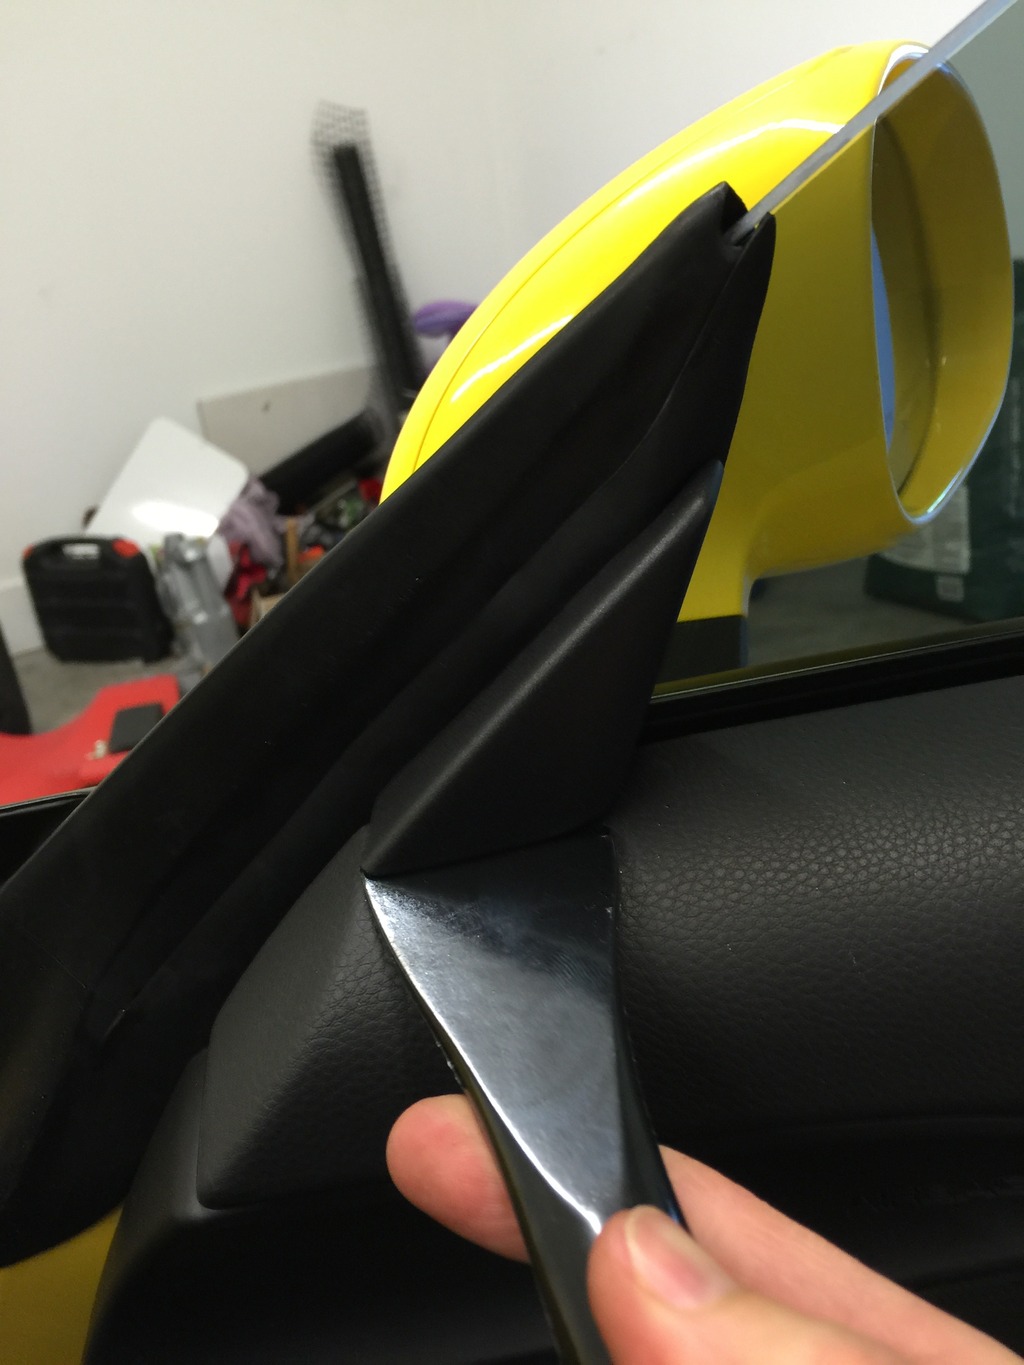
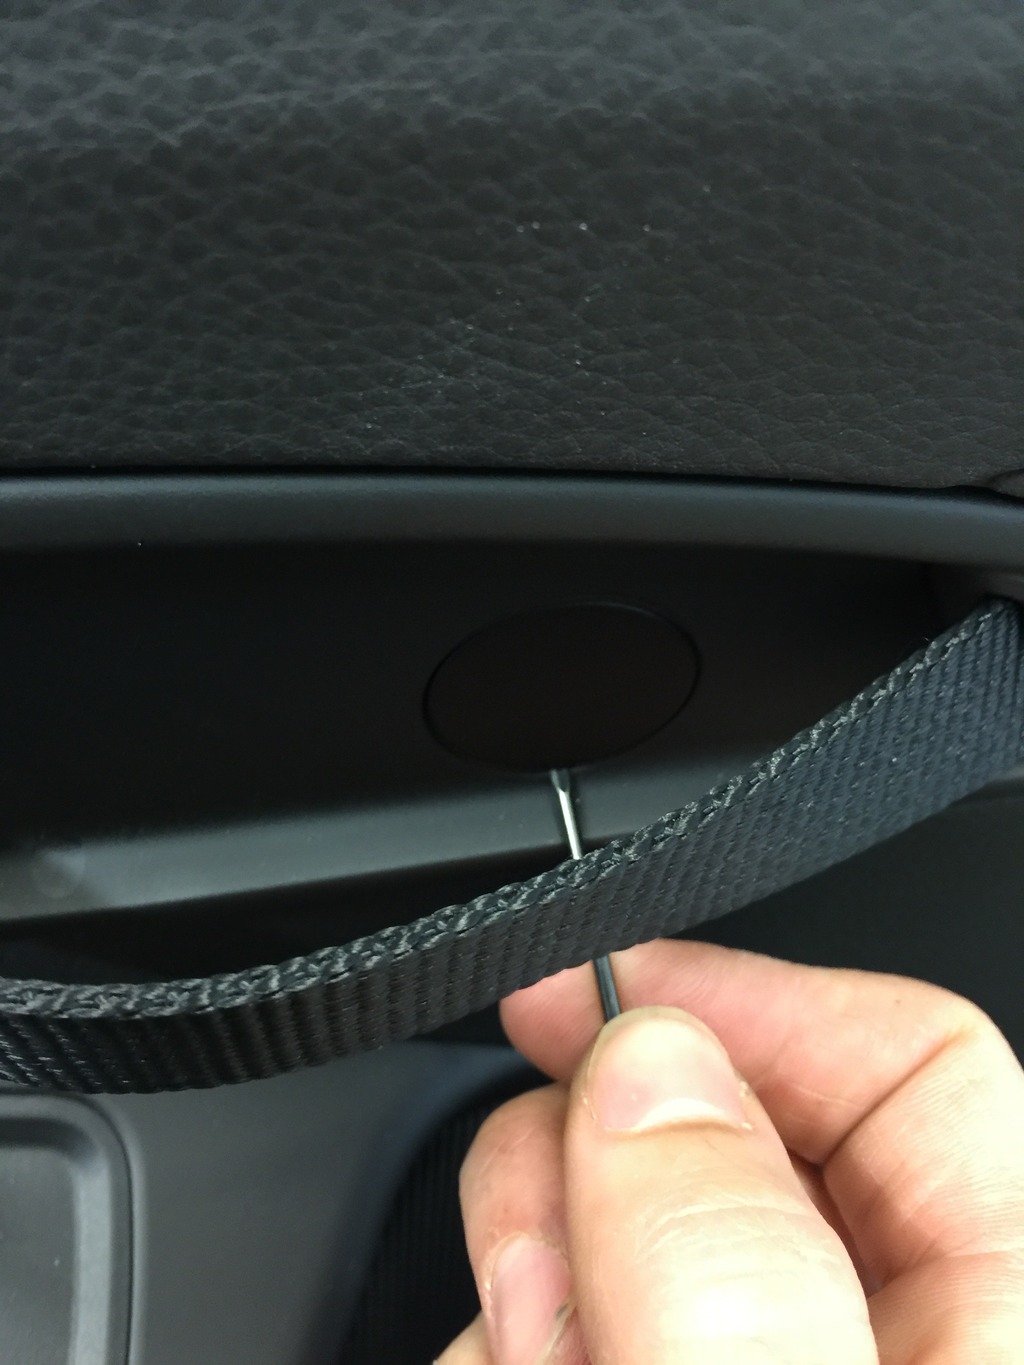
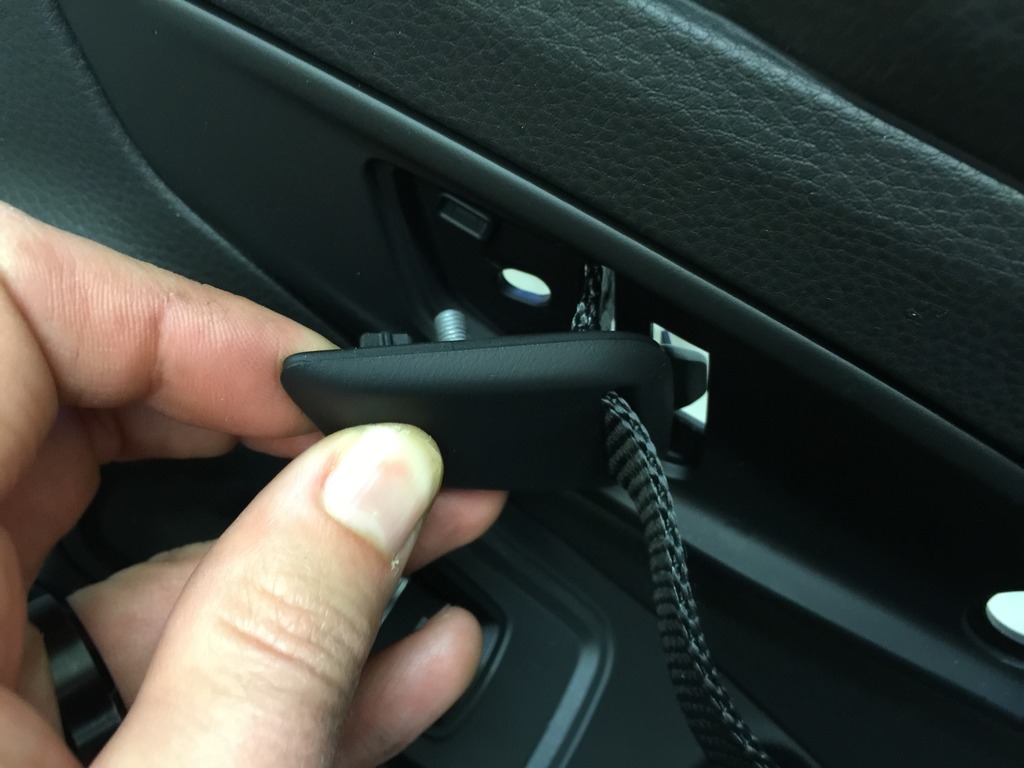
Use a smal screw driver and place it at the bottom of the circle clip behind the door strap. From hear just pry up and it will pop out. Behind this piece is the last t27 torx screw that needs to be removed.

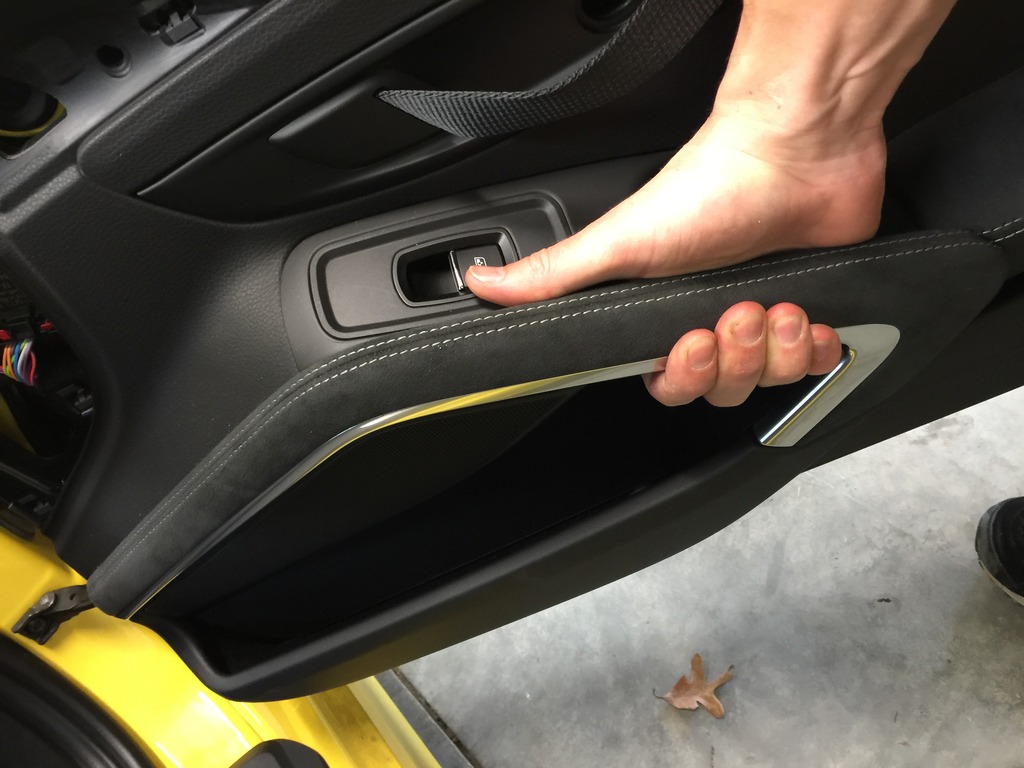
Now you need to pull up on the door to remove it. Start at the back of the door card and gently lift up, you will feel it release. Then move to the front and pull up. The door will no easily lift out. Take your time though as there are two cables that need to be disconnected. You can set the door in the bottom holders to help hold the card during this next step.
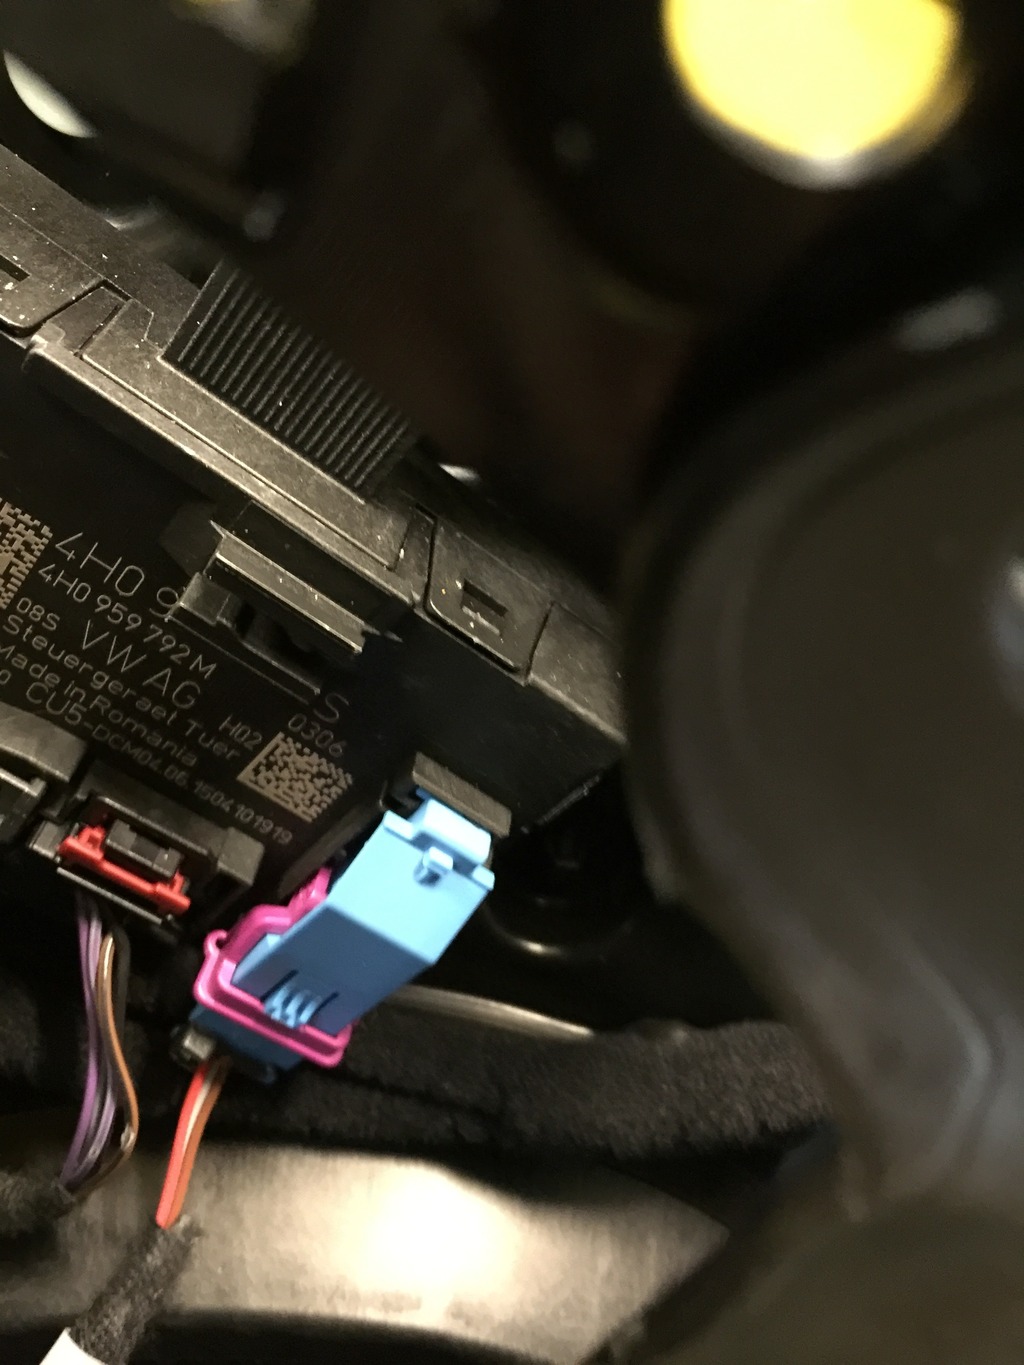
Release the blue window button by swinging the purple disconnect up.
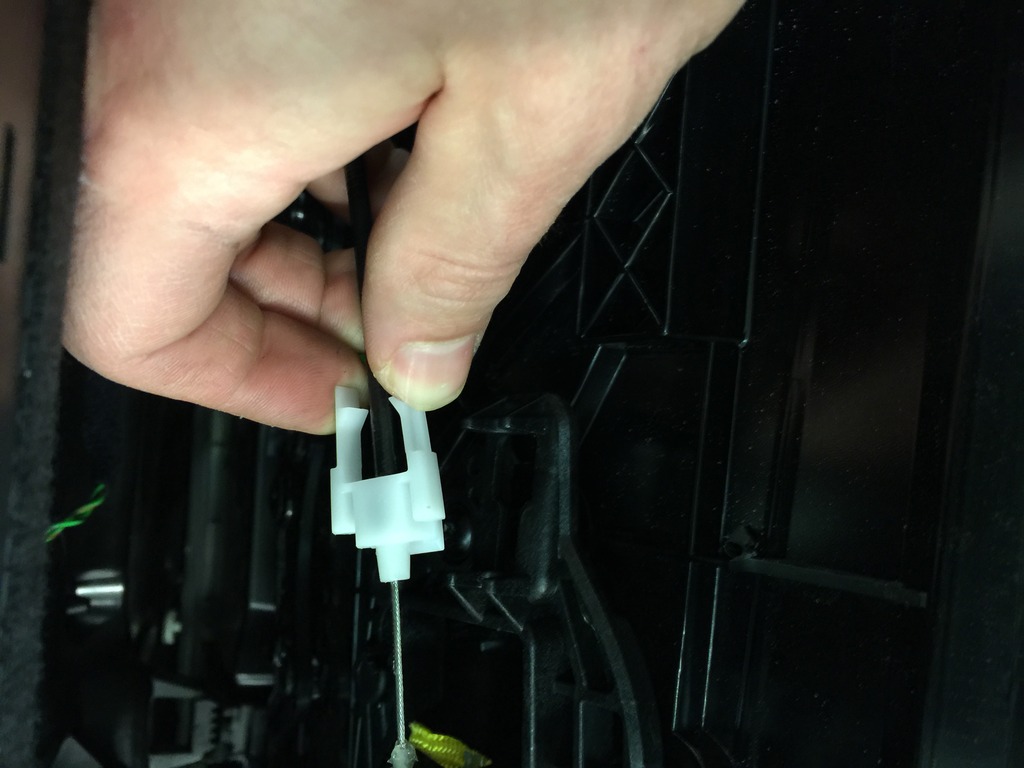
Next move to the door handle cable. Press together the end of the white clip and pull out then up. Now you just have to light lift cables anchor out of its hole.
Now place the door card on a blanket or carpet that is free of debris, interior side up.
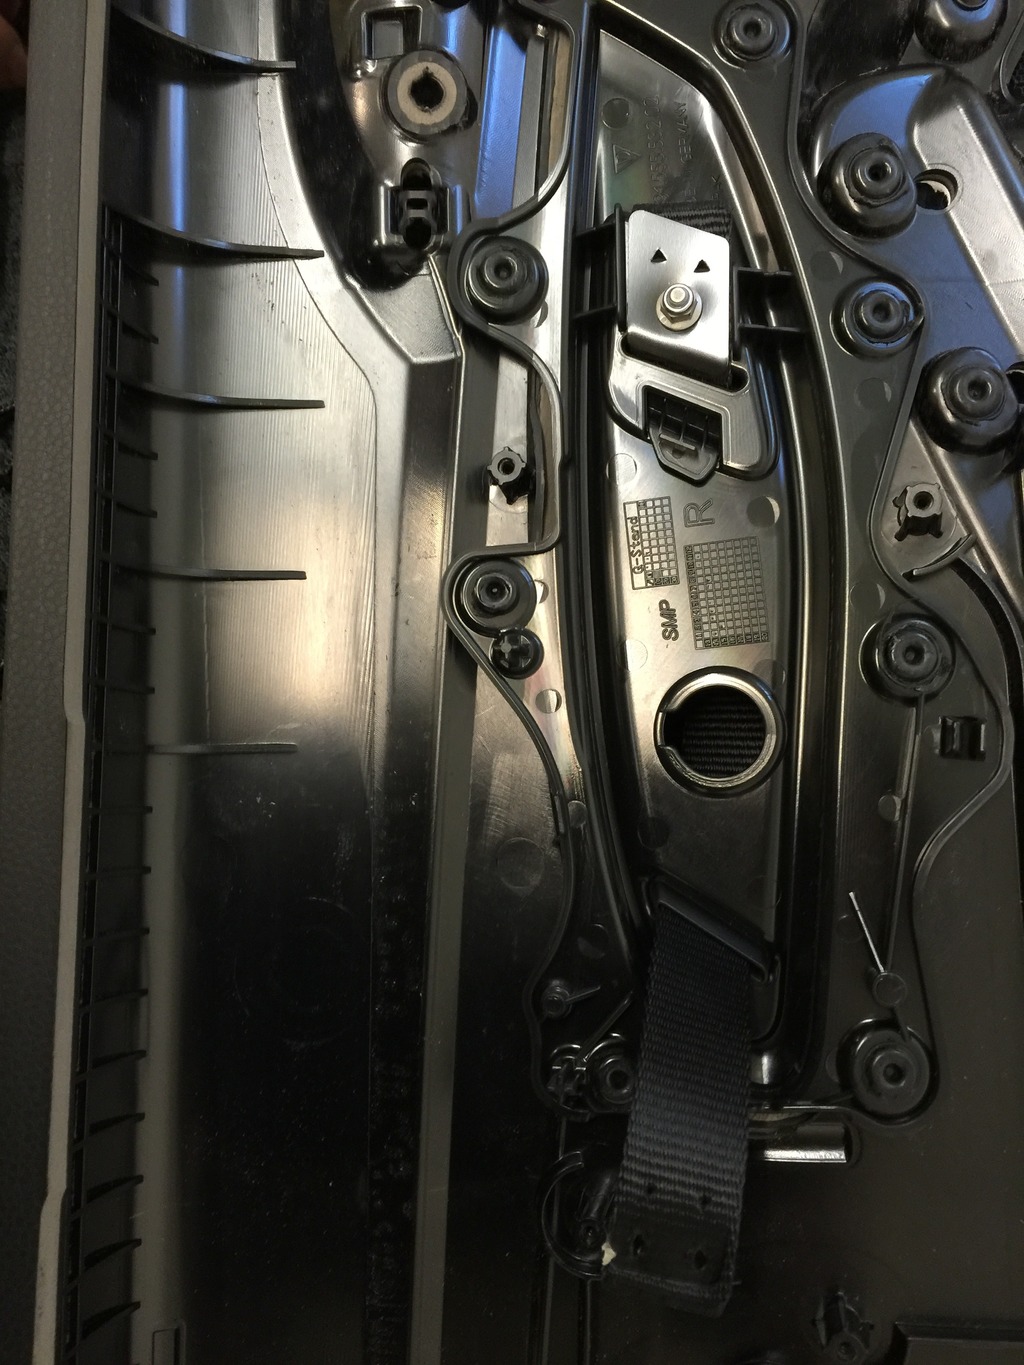
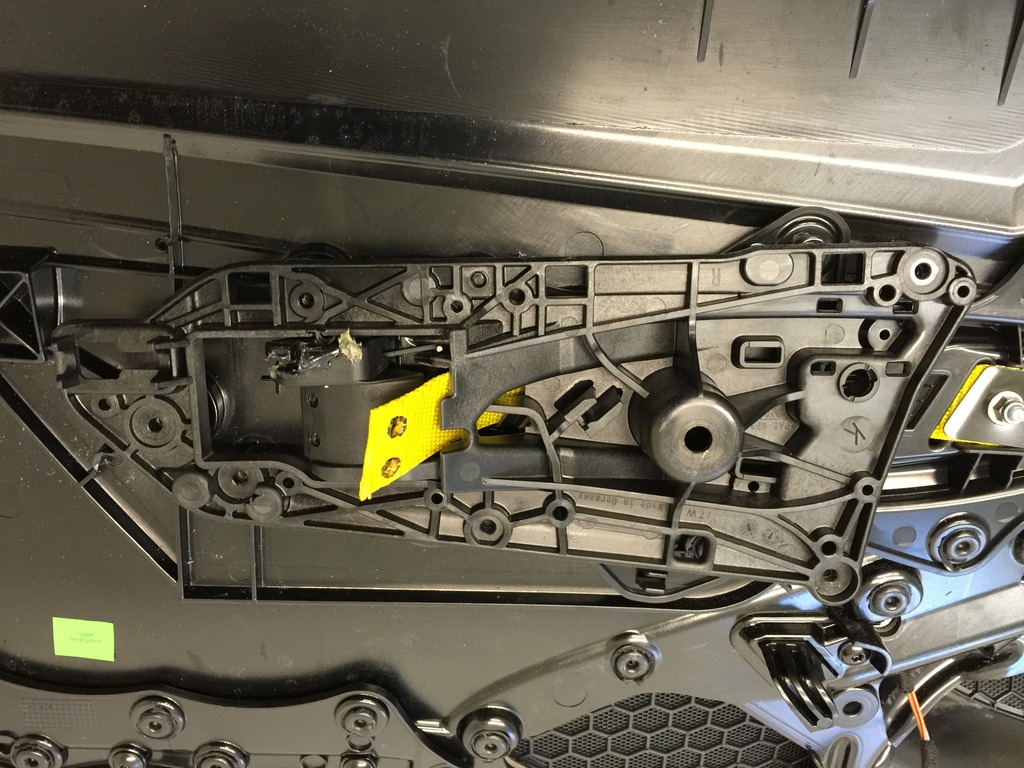
Now move to the main door handle assembly and remove the 5 T15 torx screws that holds the main bracket to the door card.
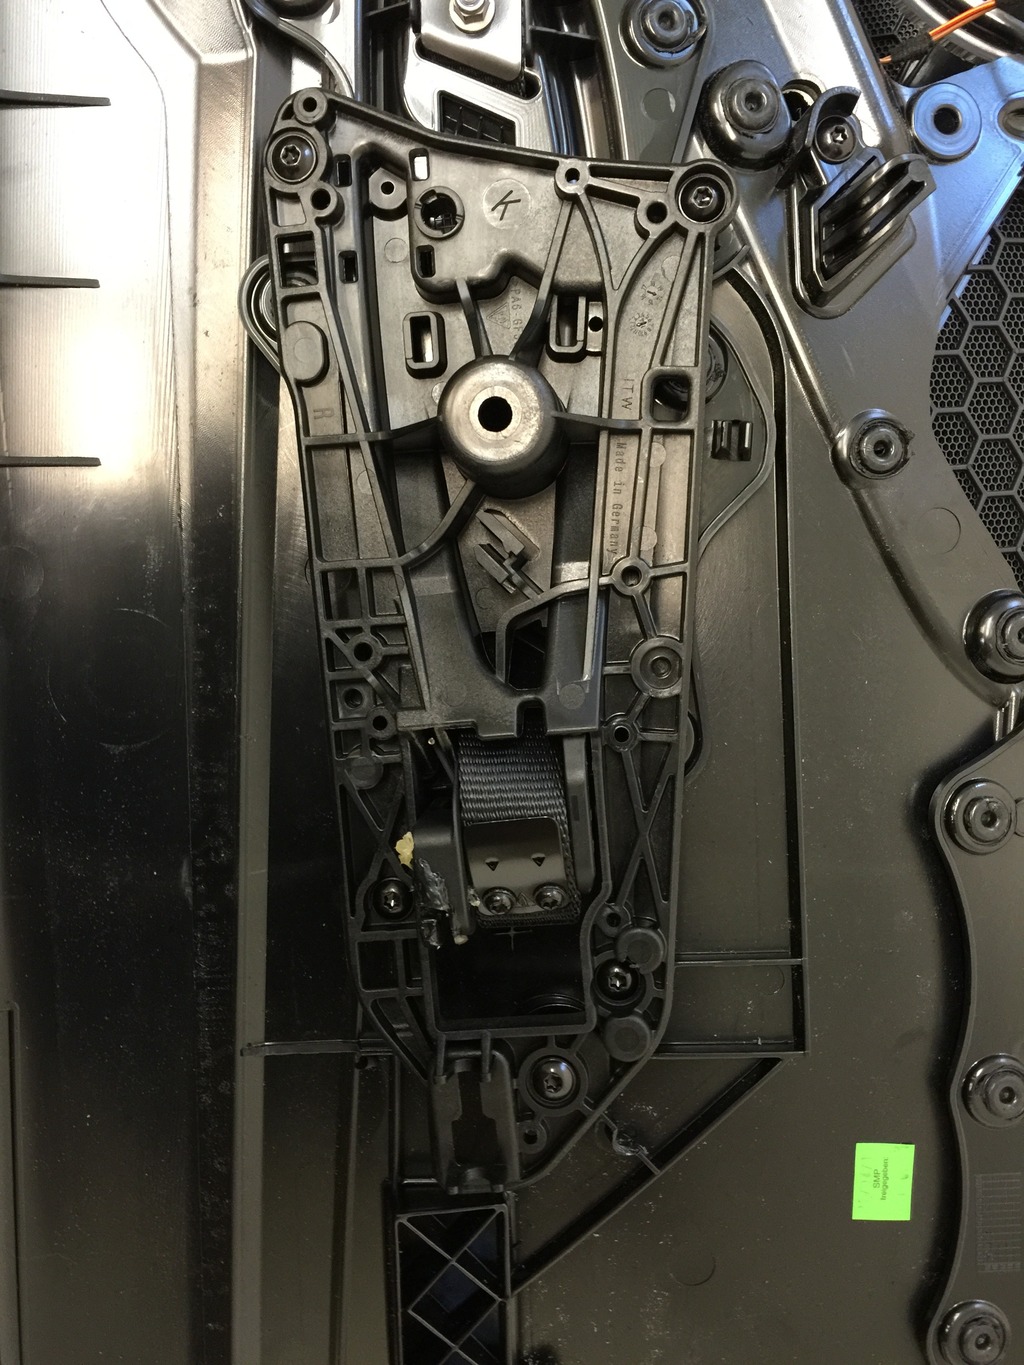
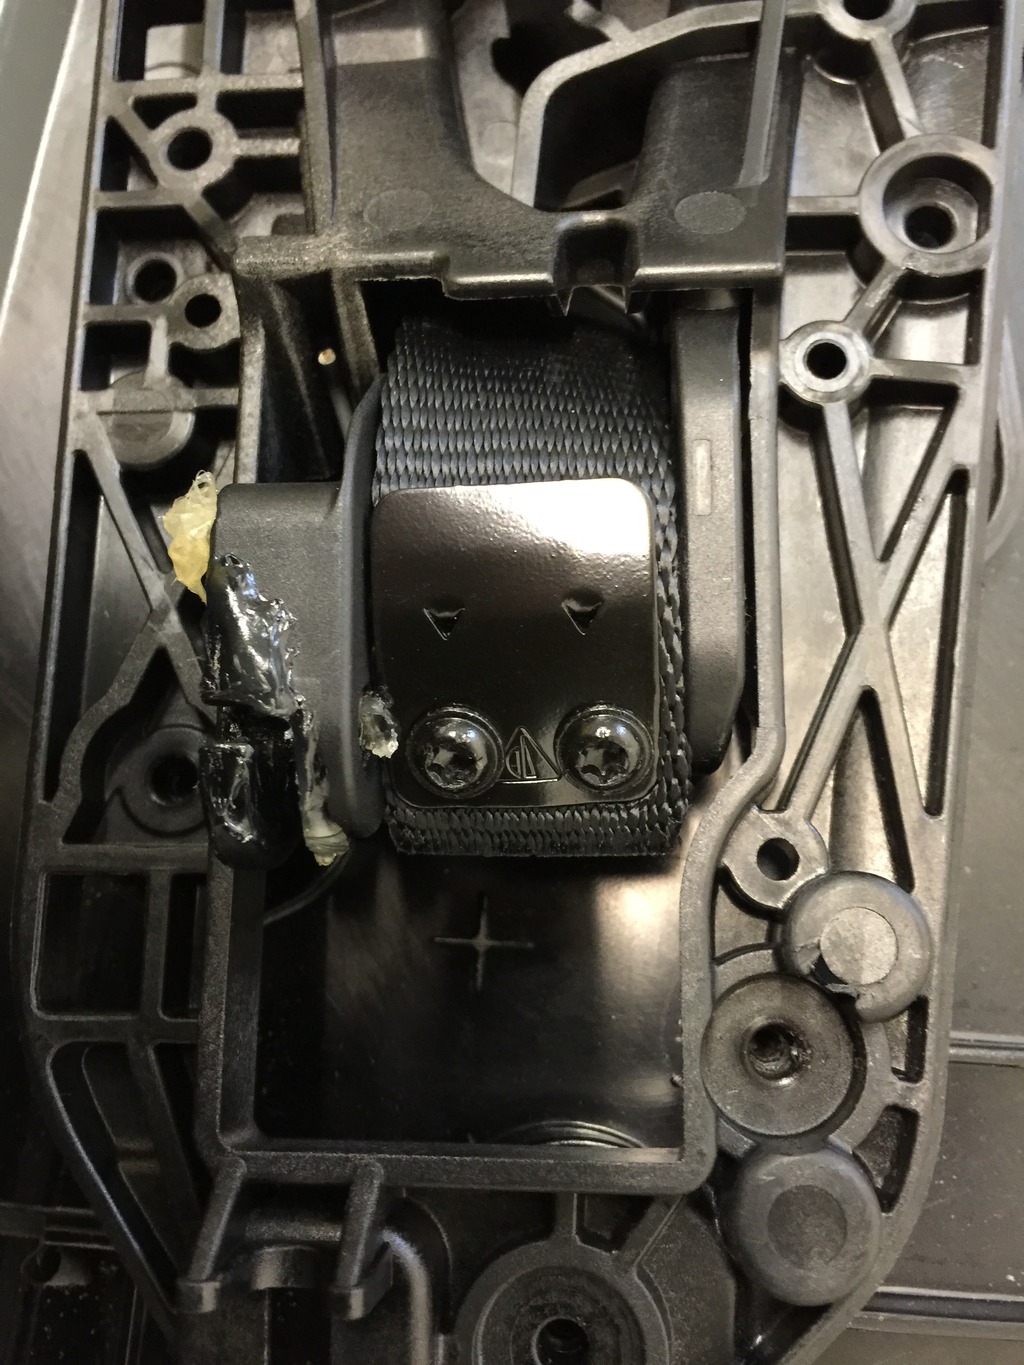
Then remove the final two T15 torx screws and clip that attach the door strap to the assembly.
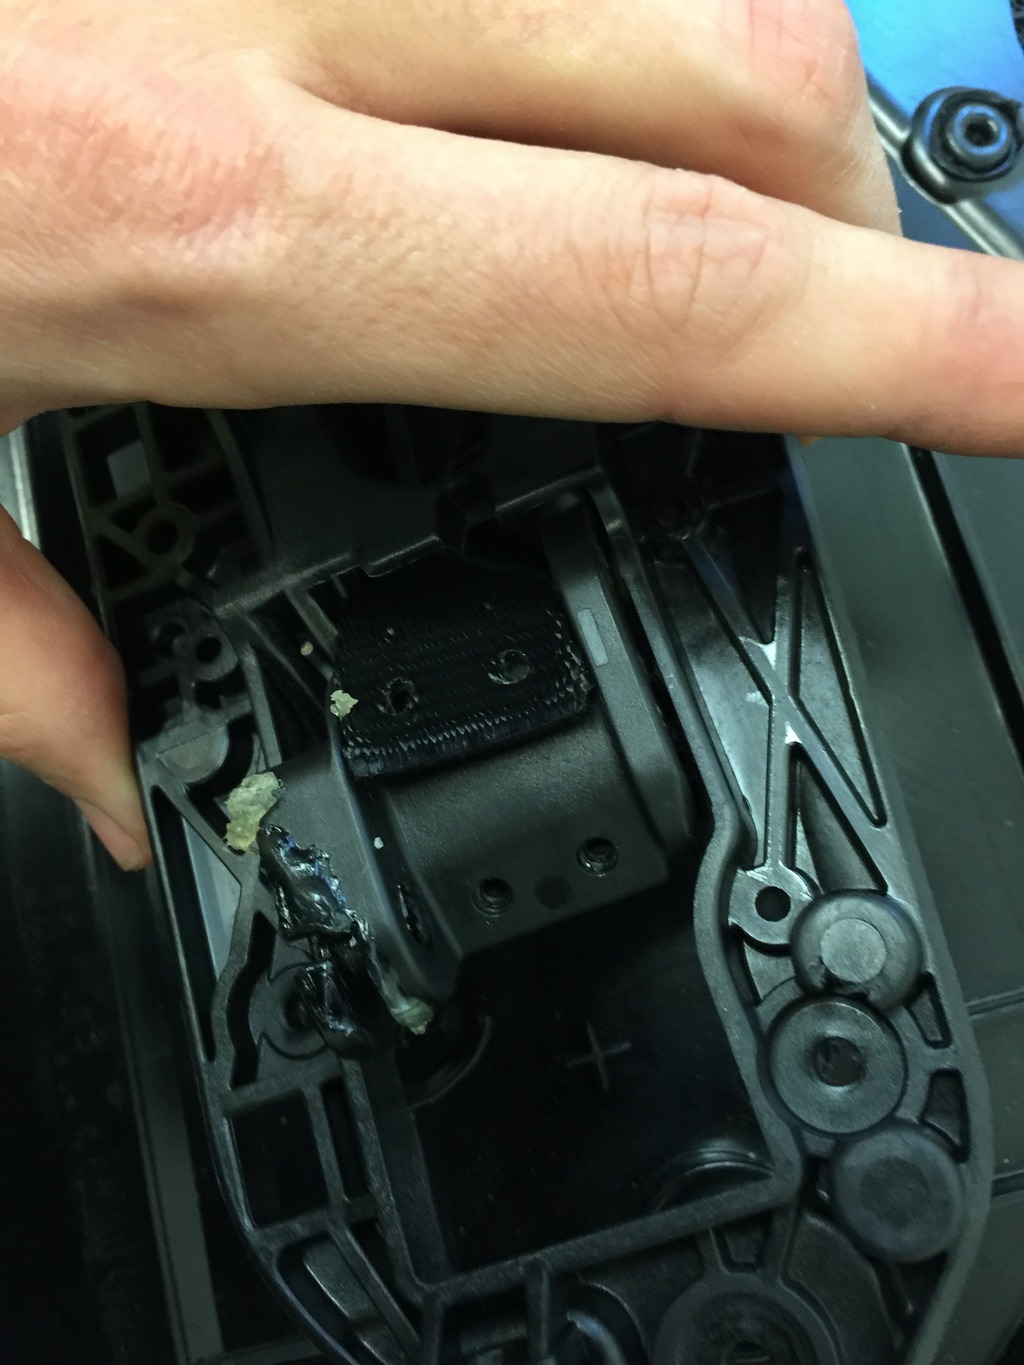
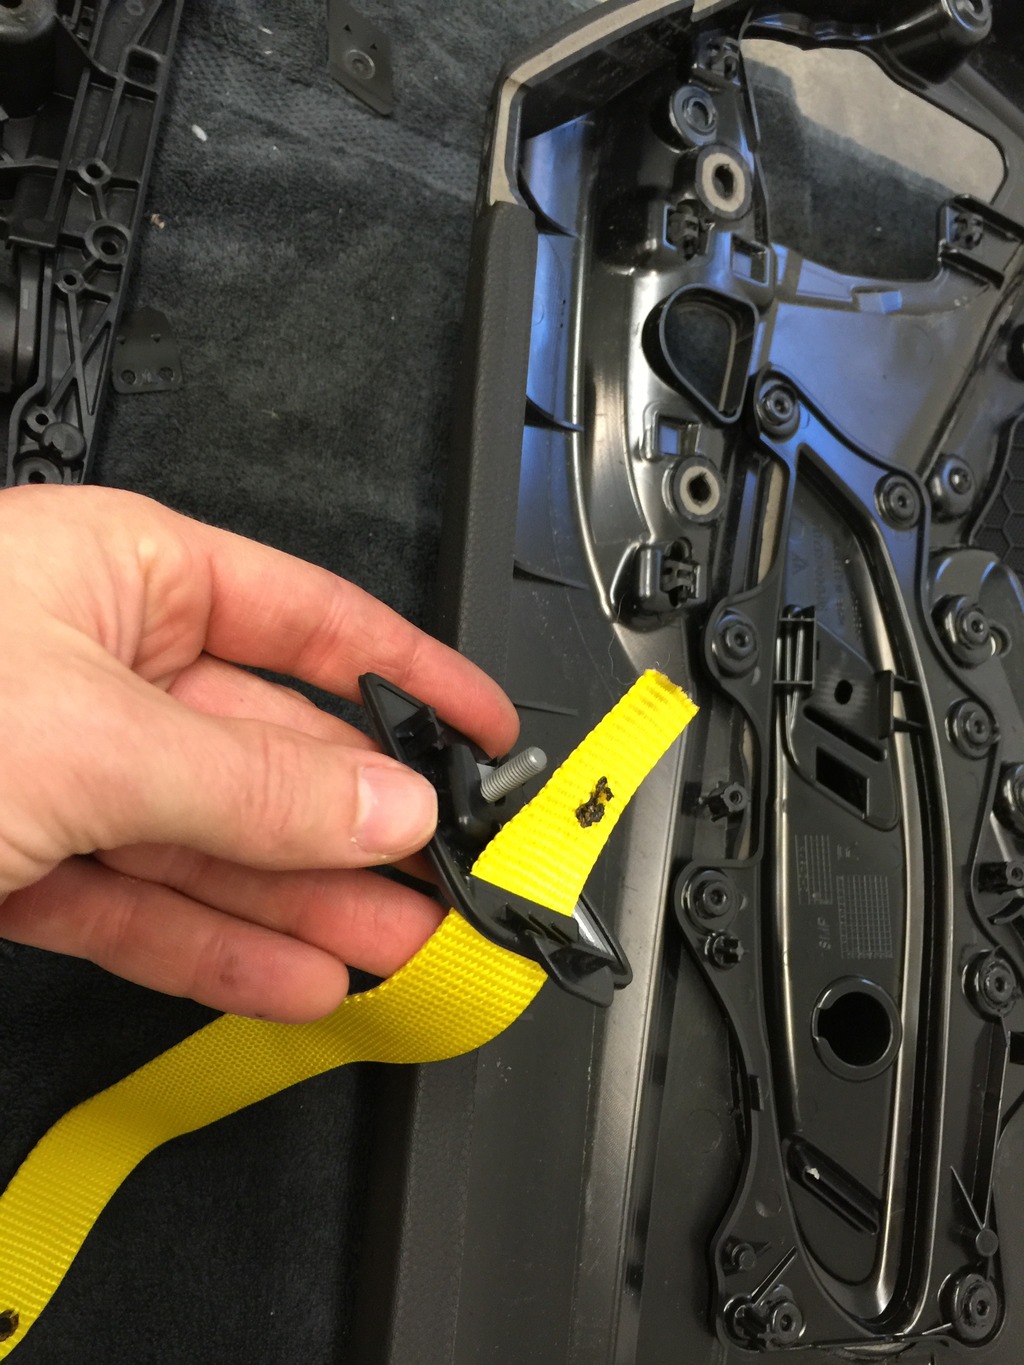
Locate the 8mm nut on the door strap and remove it and its clip. The strap can now be gently pulled out of the door.
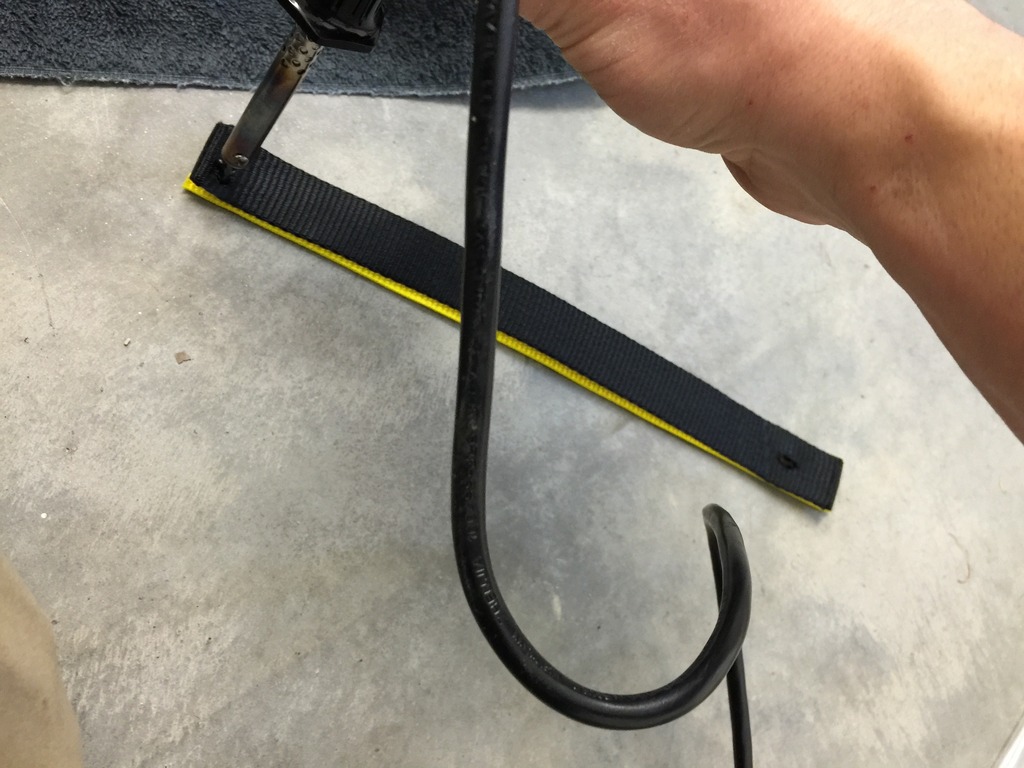
If your new strap came in one length like mine did you will have to cut it. The easiest way to do this is to take your exact knife and grab it with the vise grips and lock it tight. Start the blow torch up and heat the exact knife up until it start to change color. It will cut through the strap like butter now (blade doesn't even have to be sharp). To make this quicker there is really no need to cut it to the exact length of the original strap as i did (11"-11 1/2"). There is plenty of room for more to extend on either end. (sorry didn't take pics while I was doing this)
Next lay the oe strap onto of your new strap. Let your solder gun heat up and then burn the holes in the new strap using the old one as a layout. If your burn holes protrude a little bit just use your vise grips to clamp them flat.
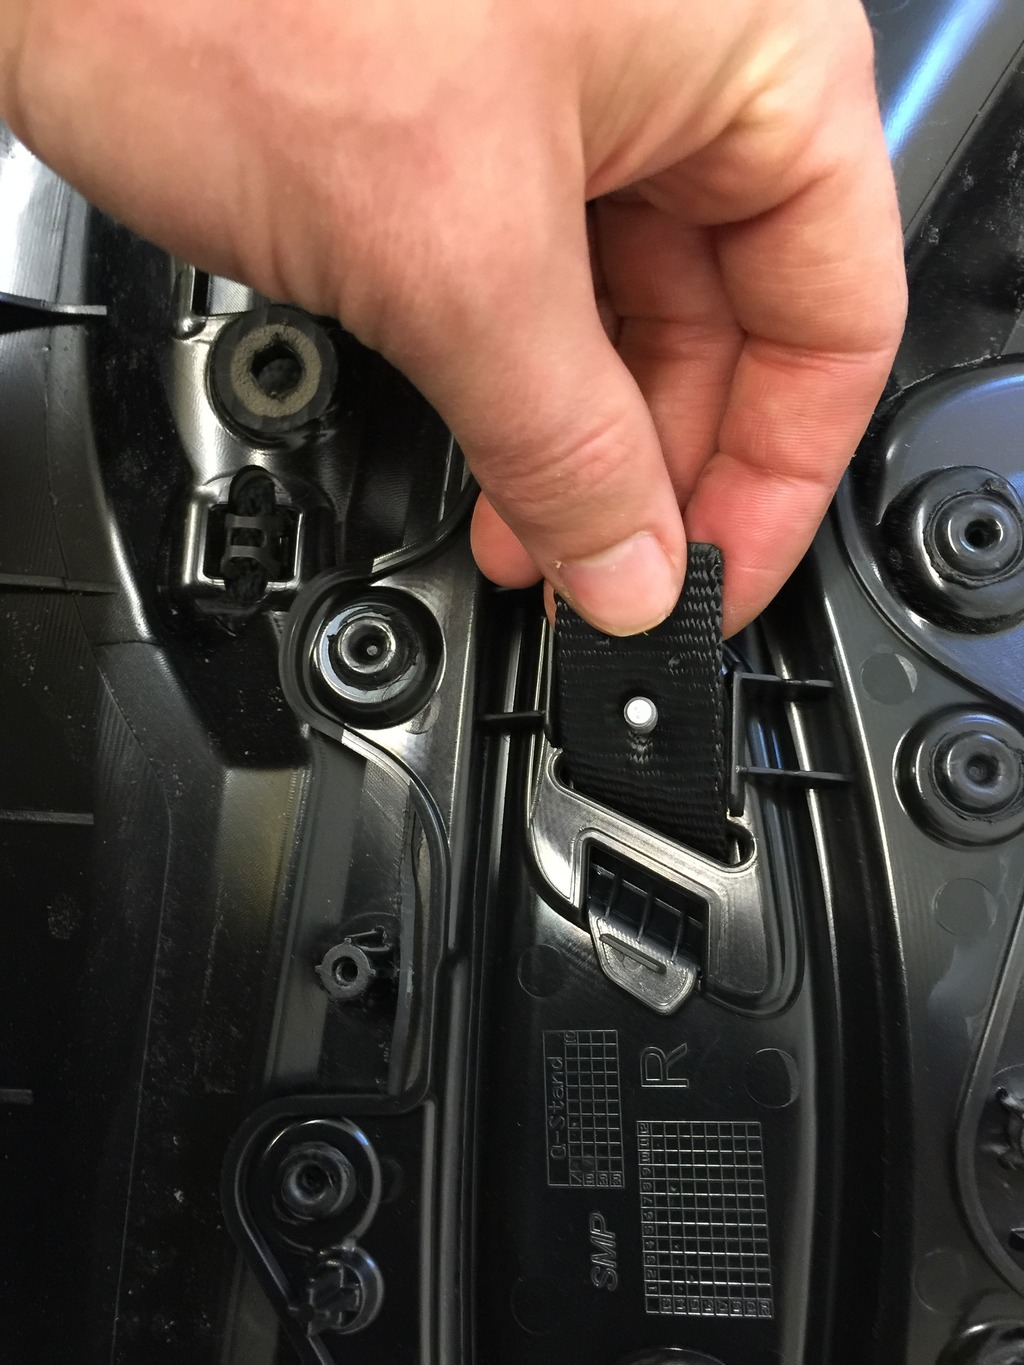
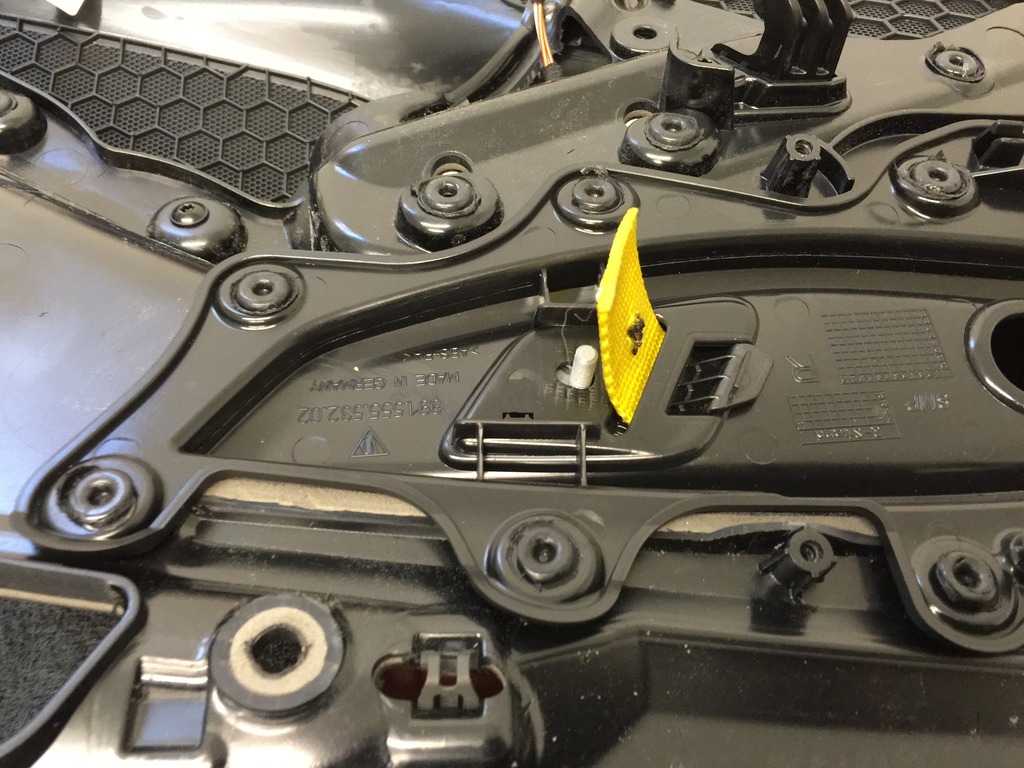
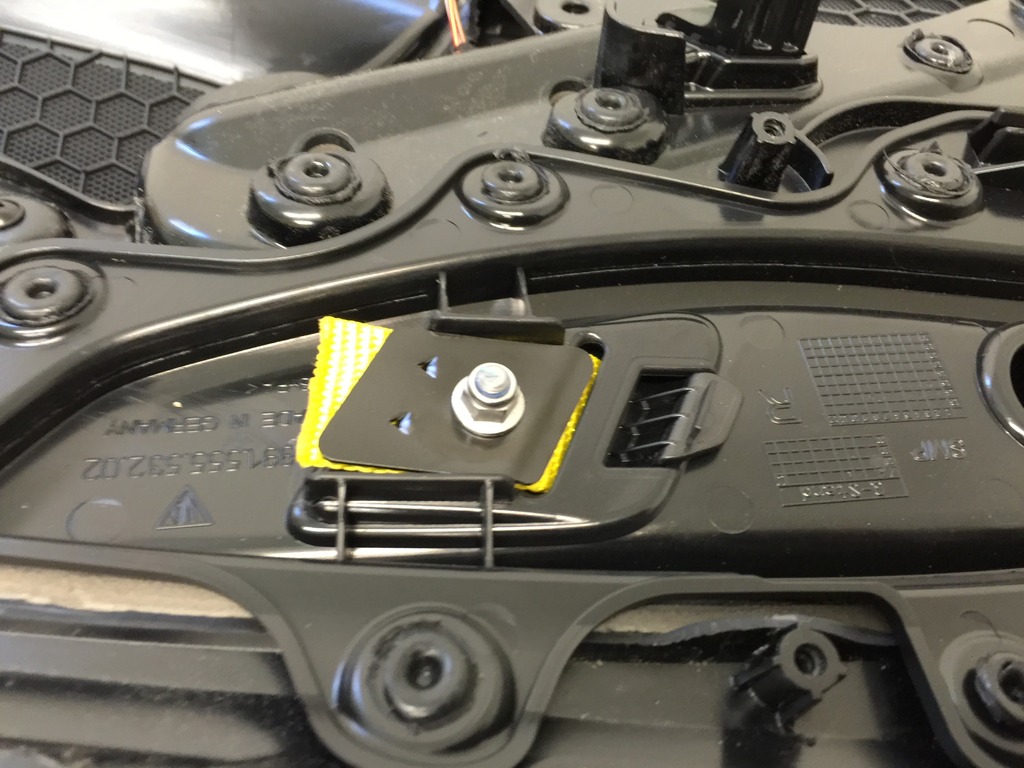
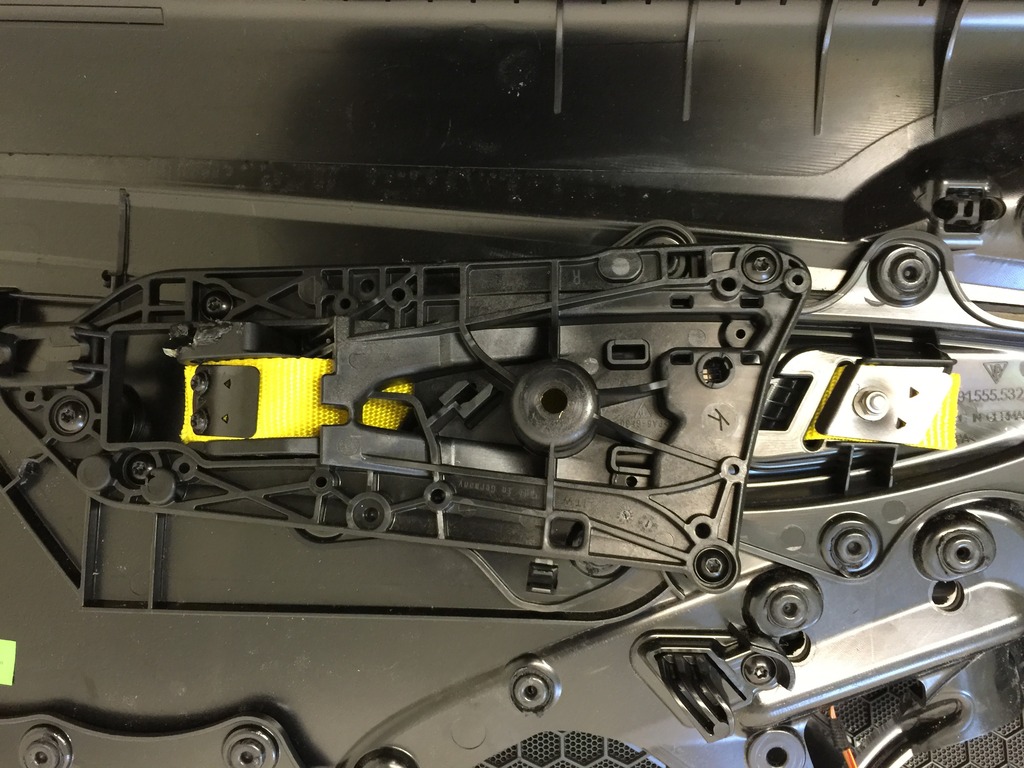
Now slide the 8mm hole side of the strap into the small plastic piece that came out of the door card when you removed the strap. Once the strap has been pulled approximately 1 1/2" into the plastic piece insert this piece into the front of the door card and slide the strap through the hole in the door. The strap can now be put over the 8mm bolt that is on the plastic piece. Reinstall 8mm nut and bracket and tight down.
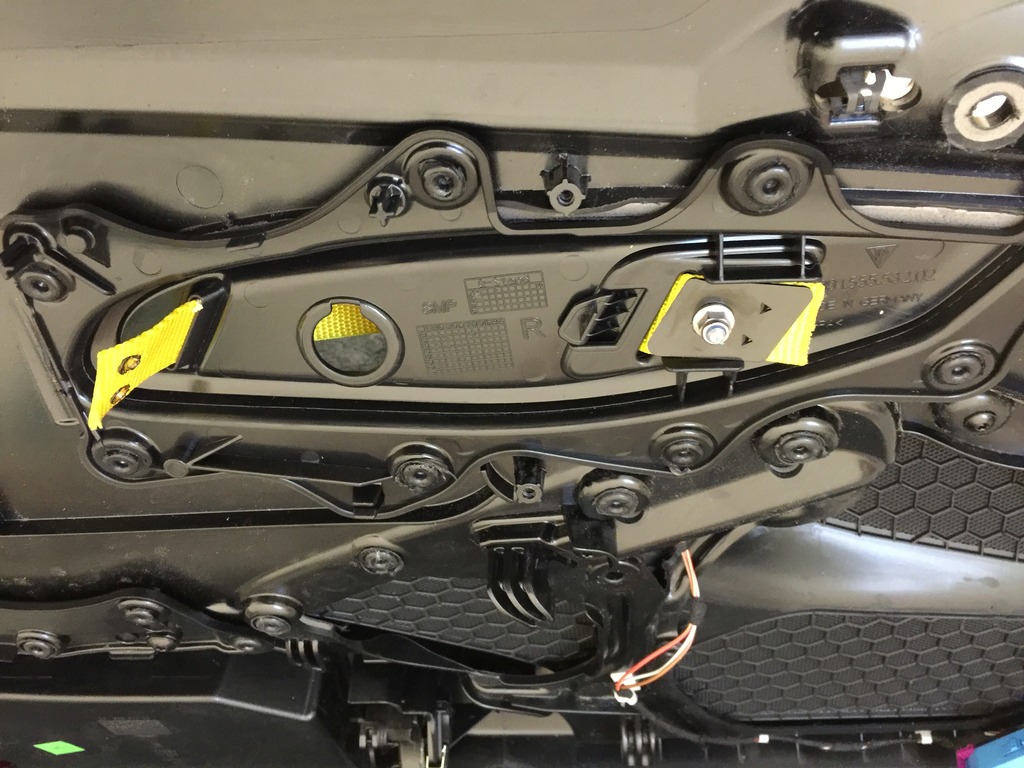
Route the other side of the strap into the back of the door. Place the door handle assembly back in place, routing the strap through it. Re-Install the 5 T15 screws that hold the handle assembly to the door card. Now reinstall the last two T15 screws and bracket to the strap and handle assembly.
Just Reinstall the door card and you are all done.

Tools Needed
t15 Toro
t27 torx
blow torch
vise grip
solder gun
8mm socket
exacto blade
small prying tool (can really be anything)
small flat head screw driver
Start by using your prying tool and prying up on the bottom of the plastic clip on the top side of the door. This will reveal one t27 torx screw that will need to be removed.


Move to the top plastic piece near the door jamb that says air bag on it. Place your pry tool at the bottom corner of this piece and slightly pry out. Once it first snaps out you can get the rest out just by lightly pulling out with your hands. Once this piece is removed it will reveal 2 more t27 torx screws that will need to be removed.


From hear move up to the top of the door and slowly pry up the plastic piece on the inside of the mirror.

Use a smal screw driver and place it at the bottom of the circle clip behind the door strap. From hear just pry up and it will pop out. Behind this piece is the last t27 torx screw that needs to be removed.


Now you need to pull up on the door to remove it. Start at the back of the door card and gently lift up, you will feel it release. Then move to the front and pull up. The door will no easily lift out. Take your time though as there are two cables that need to be disconnected. You can set the door in the bottom holders to help hold the card during this next step.

Release the blue window button by swinging the purple disconnect up.

Next move to the door handle cable. Press together the end of the white clip and pull out then up. Now you just have to light lift cables anchor out of its hole.

Now place the door card on a blanket or carpet that is free of debris, interior side up.
Now move to the main door handle assembly and remove the 5 T15 torx screws that holds the main bracket to the door card.


Then remove the final two T15 torx screws and clip that attach the door strap to the assembly.

Locate the 8mm nut on the door strap and remove it and its clip. The strap can now be gently pulled out of the door.


If your new strap came in one length like mine did you will have to cut it. The easiest way to do this is to take your exact knife and grab it with the vise grips and lock it tight. Start the blow torch up and heat the exact knife up until it start to change color. It will cut through the strap like butter now (blade doesn't even have to be sharp). To make this quicker there is really no need to cut it to the exact length of the original strap as i did (11"-11 1/2"). There is plenty of room for more to extend on either end. (sorry didn't take pics while I was doing this)
Next lay the oe strap onto of your new strap. Let your solder gun heat up and then burn the holes in the new strap using the old one as a layout. If your burn holes protrude a little bit just use your vise grips to clamp them flat.

Now slide the 8mm hole side of the strap into the small plastic piece that came out of the door card when you removed the strap. Once the strap has been pulled approximately 1 1/2" into the plastic piece insert this piece into the front of the door card and slide the strap through the hole in the door. The strap can now be put over the 8mm bolt that is on the plastic piece. Reinstall 8mm nut and bracket and tight down.


Route the other side of the strap into the back of the door. Place the door handle assembly back in place, routing the strap through it. Re-Install the 5 T15 screws that hold the handle assembly to the door card. Now reinstall the last two T15 screws and bracket to the strap and handle assembly.


Just Reinstall the door card and you are all done.


The following 6 users liked this post by CarAholic:
5280_GT3 (05-22-2020),
BLKFLAG (05-13-2020),
HelpMeHelpU (08-13-2020),
LifeIsGr8 (04-06-2023),
PistolPete (01-30-2022),
and 1 others liked this post.
 01-30-2016, 10:02 AM
#3
Very cool. I found some dark red Nylon webbing online - could be a cool match for Carmine red. Thanks!
The following users liked this post:
HelpMeHelpU (08-13-2020)

The following users liked this post:
HelpMeHelpU (08-13-2020)
The following users liked this post:
HelpMeHelpU (08-13-2020)
Trending Topics
The following users liked this post:
Sennafan (11-20-2021)
01-30-2016, 12:15 PM
#10
Burning Brakes
We need more thread like this!
The following users liked this post:
HelpMeHelpU (08-13-2020)

The following users liked this post:
HelpMeHelpU (08-13-2020)
01-30-2016, 12:37 PM
#13

Better than any shop manual Ive ever seen! When ever I get into a DIY i never have the patience to do a step by step. Thought about it several times but never take the time and effort. Great Job!
carl
carl
The following users liked this post:
HelpMeHelpU (08-13-2020)
01-30-2016, 12:46 PM
#14
Rennlist Member
Thread Starter
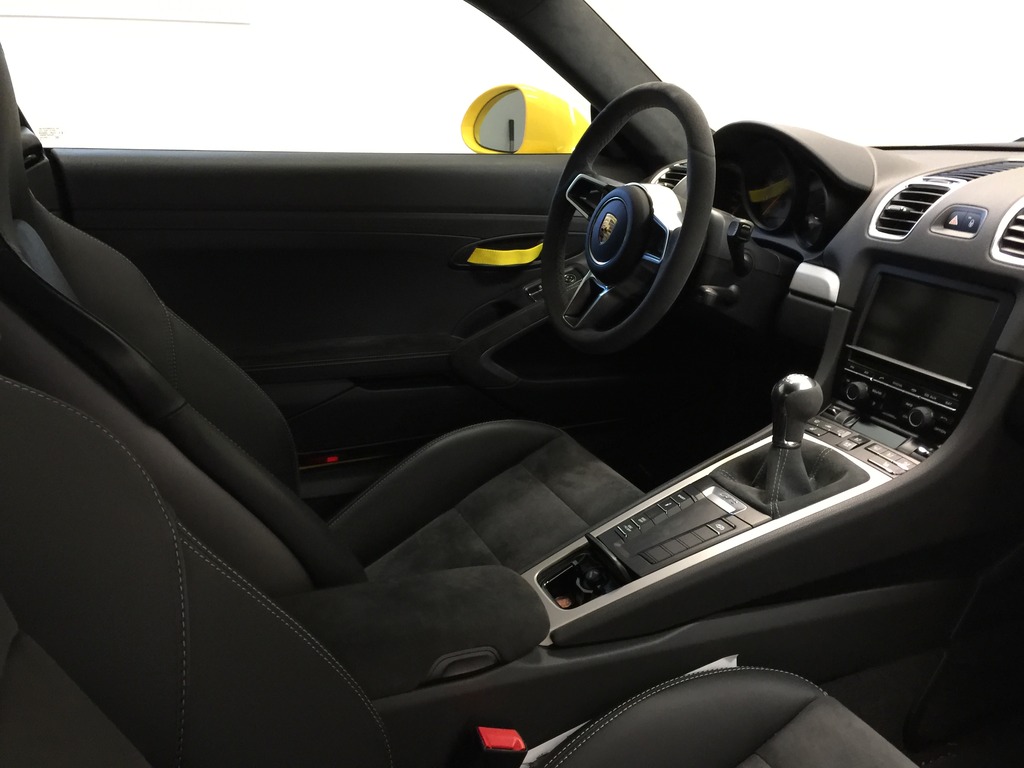
Thanks guys, this really gives us endless possibilities now for combos. My yellow is not an exact match to the seat belts but it's pretty close. They are never close together so it's not galling. Come to find out after I finished I looked any my dogs leash and it was a closer match, go figure. The first door should prob take 20 min the next can easily be knocked off in 10. Took me about 40 minutes to do the whole thing while taking pictures and learning the ropes.
 ..........Phil