When you click on links to various merchants on this site and make a purchase, this can result in this site earning a commission. Affiliate programs and affiliations include, but are not limited to, the eBay Partner Network.
DIY to drain and refill Cayman / Boxster 987.1 diff and Tiptronic transmission
This DIY describes how to carry out a drain and fill of the differential and Tiptronic transmission for a 2005-2009 Porsche 987.1 Cayman or Boxster (as the minimum quote I got was for over $1000). The procedure will be similar for 1998-2005 996 and Boxster, plus 2005-2009 997. While it is not as comprehensive as a professional flush using a specialist flushing machine, it will get most of the fluid replaced.
I am happy to modify the DIY with feedback or other advice. This work is done at your own risk, I take no responsibility for you skinning your knuckles, damaging your car or anything else by using these instructions!
Total time taken to drain and refill both diff and transmission was about 3 hours and 2 beers, including taking pics and notes.
Tools needed
Sockets
13mm
15mm
4� extension
Allen sockets
8mm (for diff fill plug)
17mm (for transmission drain plug)
Torx
T27 for transmission pan
T40 torx socket for transmission fluid filter bolts
Other tools
Ratchet
Torque wrench
Laser temperature gauge
Fluid pumps for transmission and diff fluid
Jack stands
Jack
Drain buckets
Consumables and parts
Pentosin ATF 1 x 8 quarts (I bought 2x 5 quart containers from Amazon for $55 each)
Differential 75W90 gear oil x 1 quart (around $20)
Transmission gasket. Part number: 986-397-016-00 (around $22)
Transmission oil filter. Part number: 986-307-403-00 (around $40)
Transmission drain plug seal. Part number: 986-397-014-00 (around $3)
Threadlock
Mechanics gloves
Degreasant to clean transmission pan
Lots of shop towel / rags to clean up spillages
Step 1
Park on flat lever ground and apply the parking brake firmly. Then jack up the car and put it securely on axle stands.
Try as hard as you can to push and dislodge the car. If you can�t move it, it will be fine. The security of the jack stand positioning is important as you will need to start the car and run it through the gears while on stands later in the procedure.
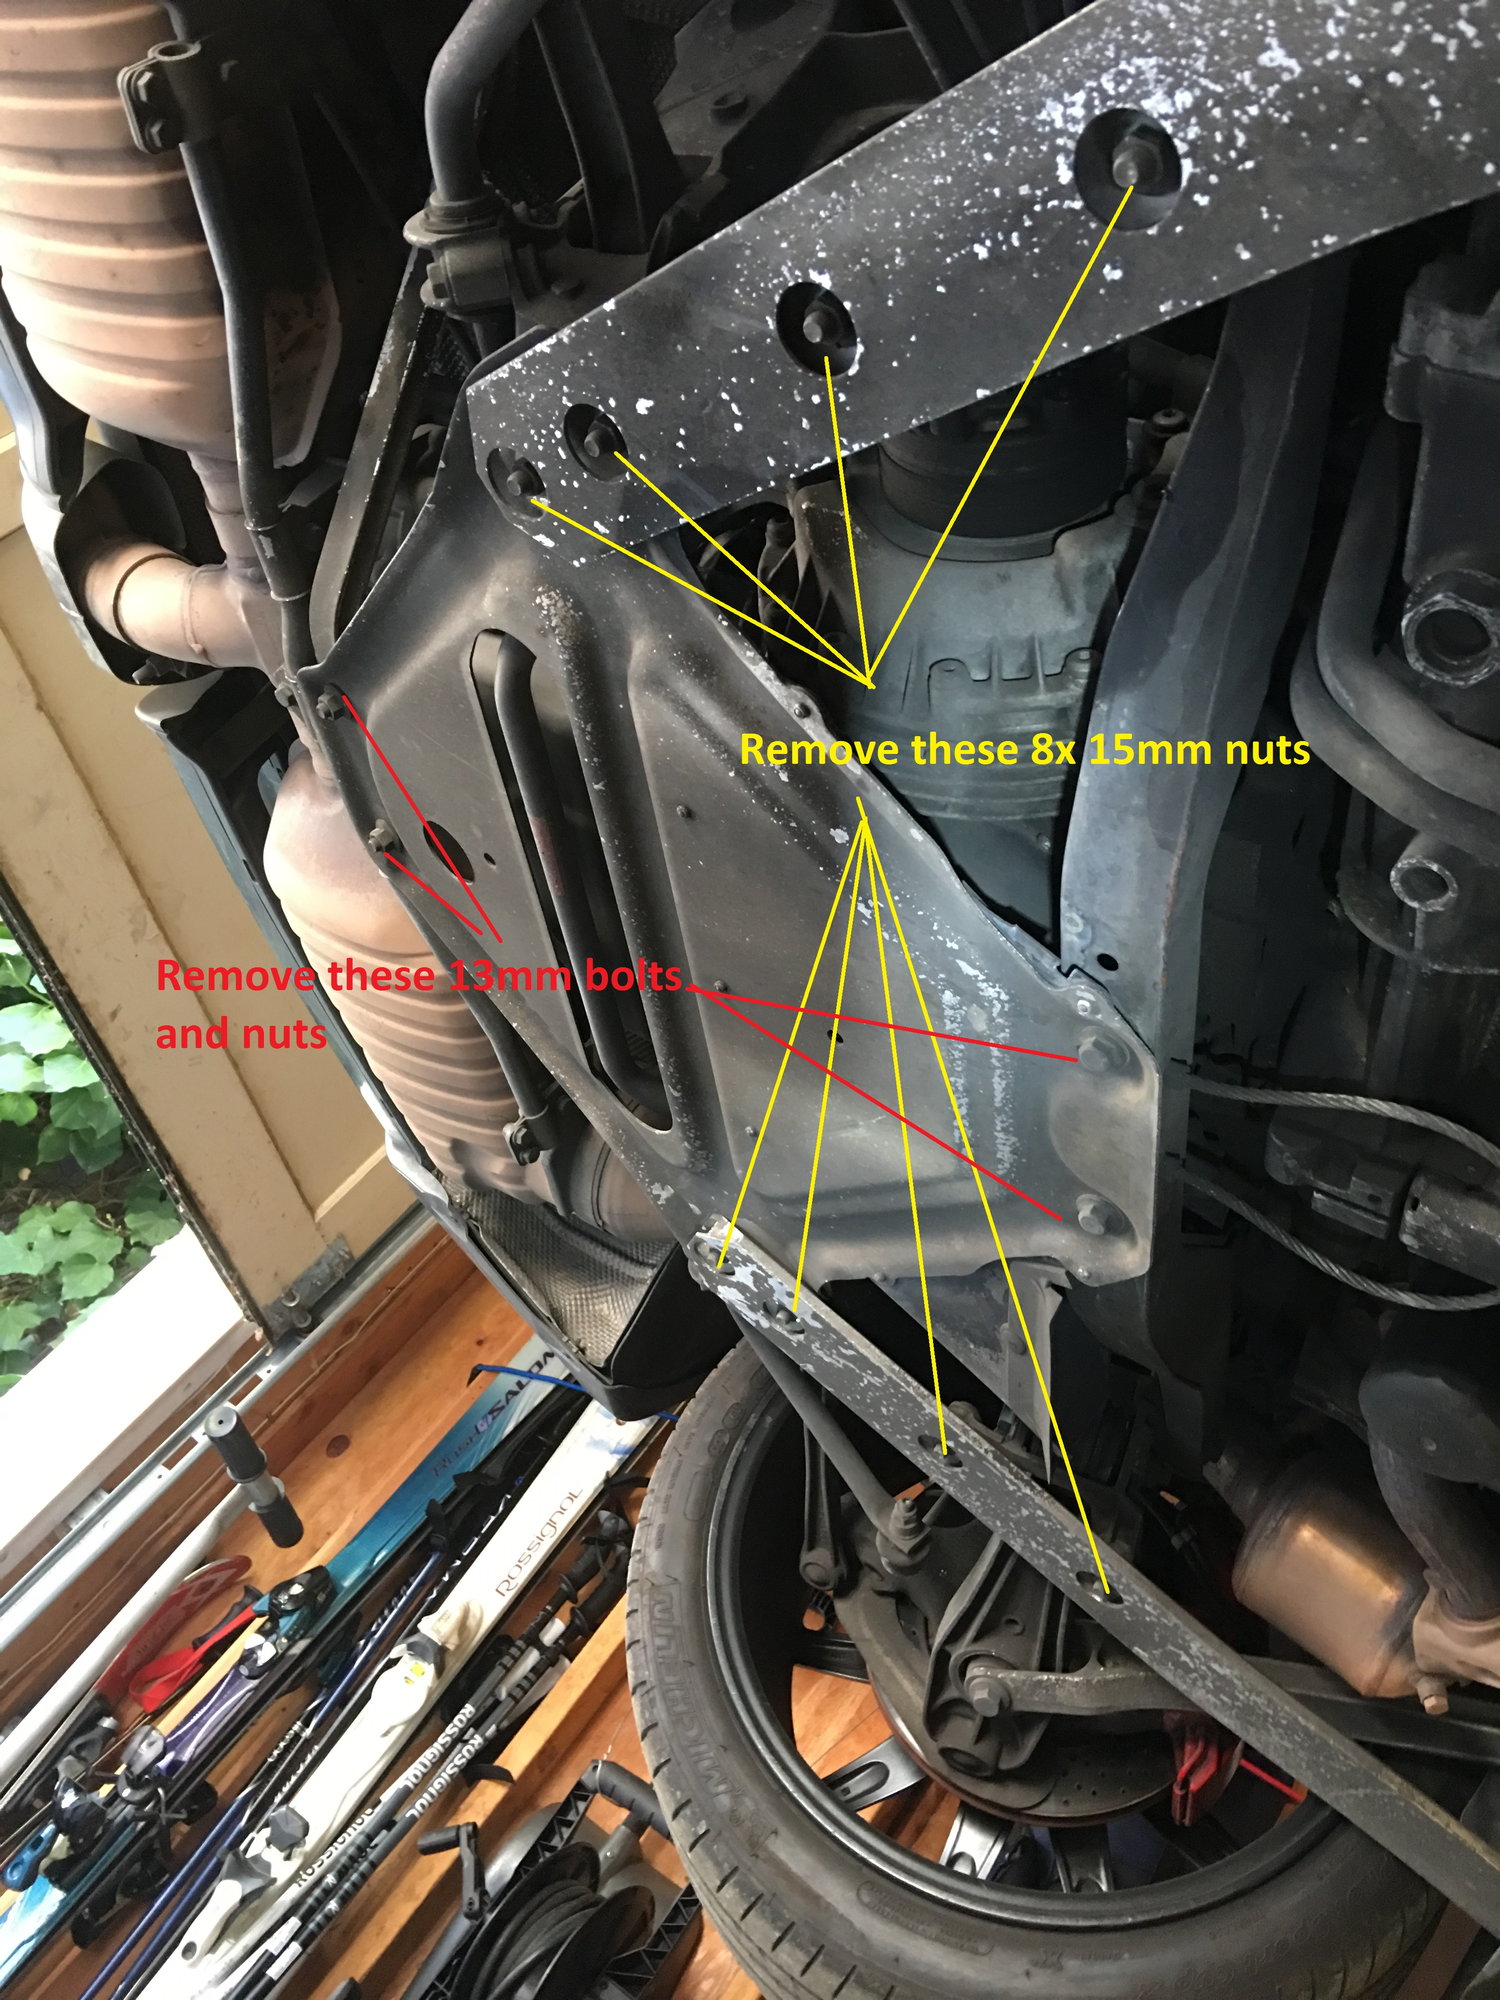
Remove the 2x 15mm bolts located 1 inch aft of each the rear jacking points.
Remove the 8x 15mm nuts holding the aluminum diagonal braces over the transmission sump.
Move the braces out of the way.
Remove the 2x 13mm nuts and 2x 13mm bolts holding the transmission skid plate in place and remove the plate.
Step 2
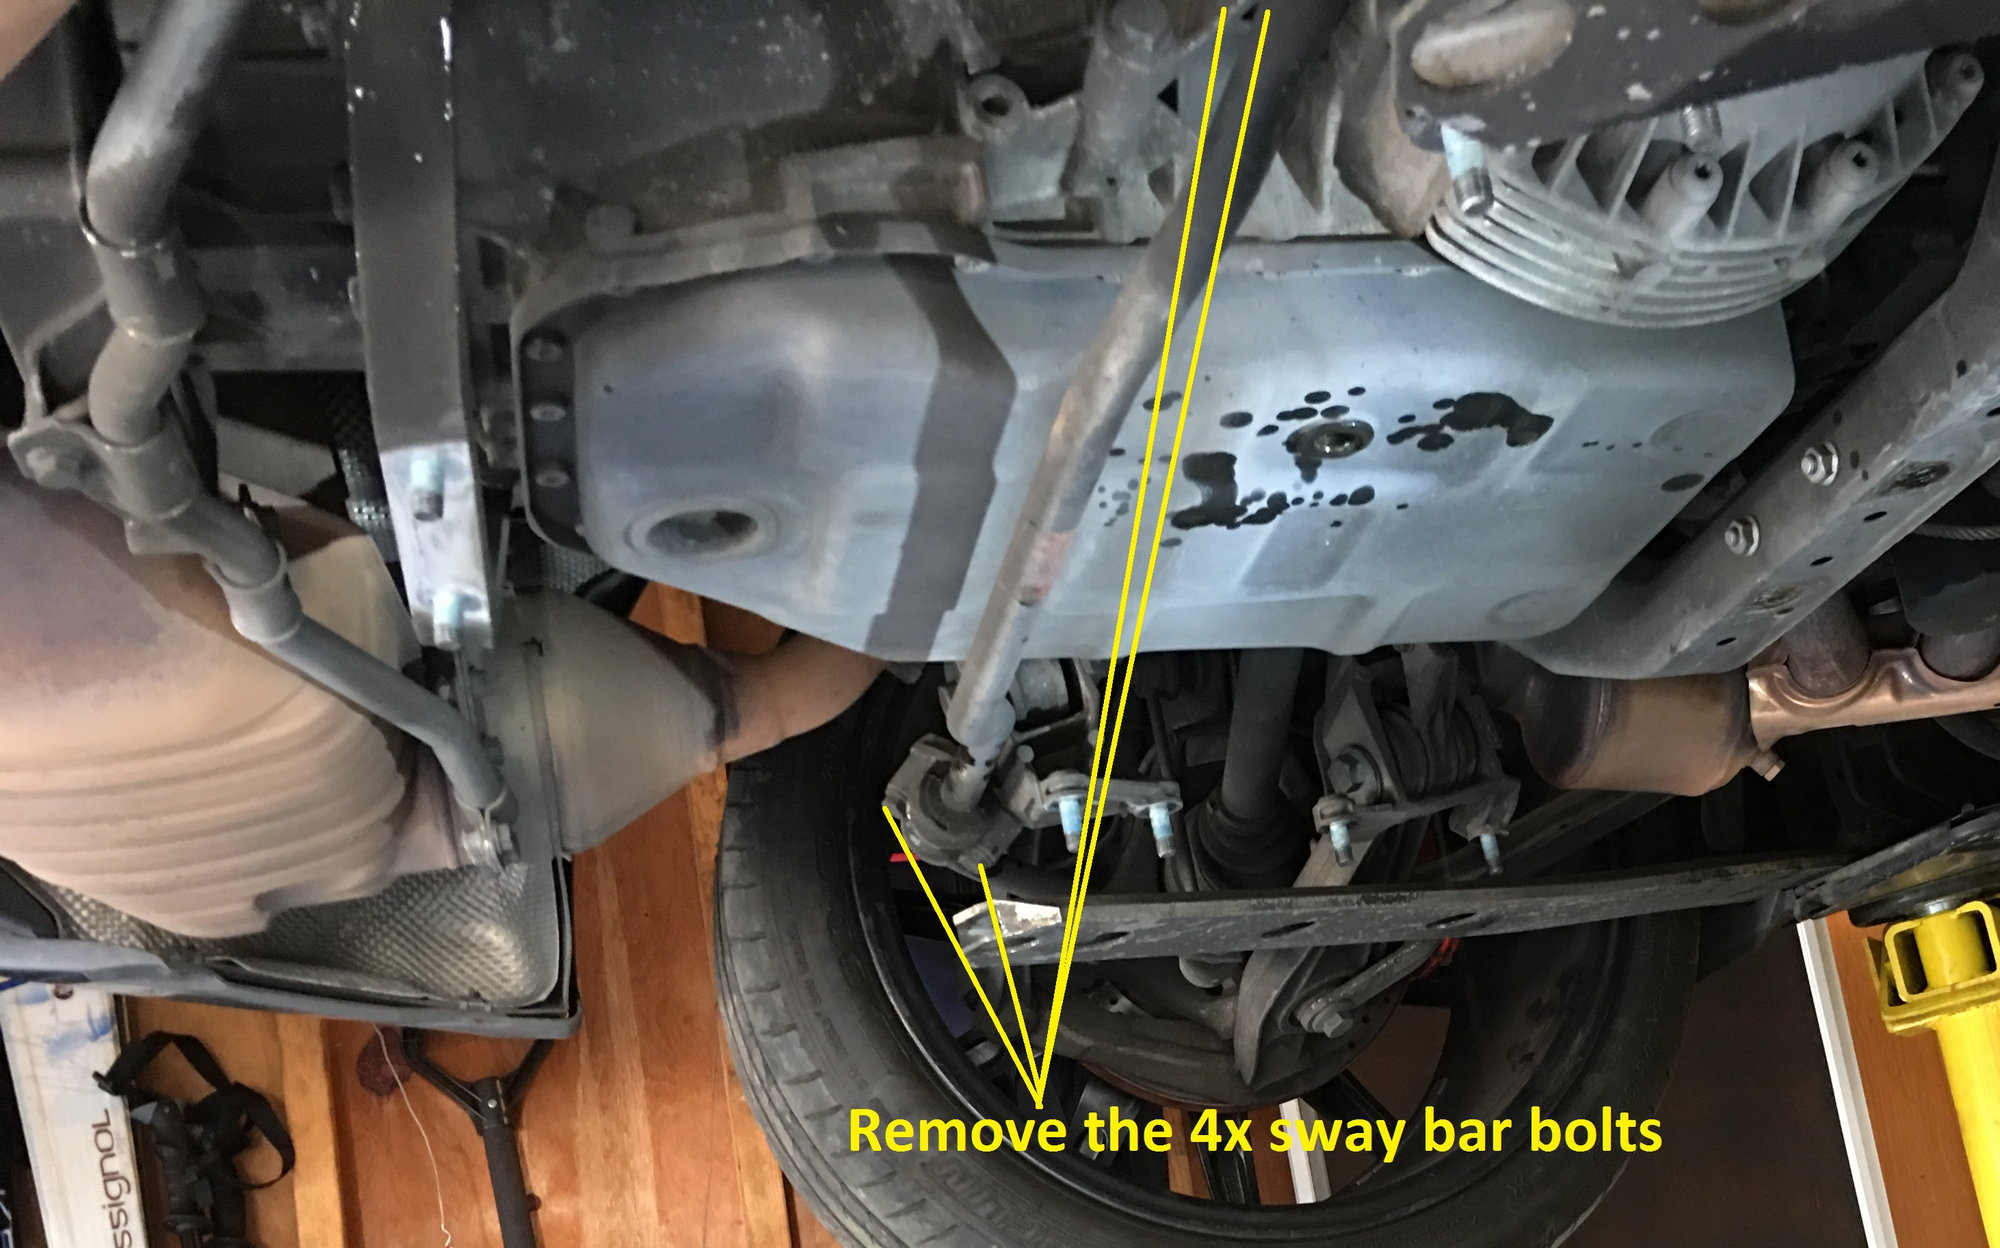
Remove the 2 bolts on either side that hold the rear sway bar in place then rotate it downwards to give clearance to remove the transmission pan.
Step 3
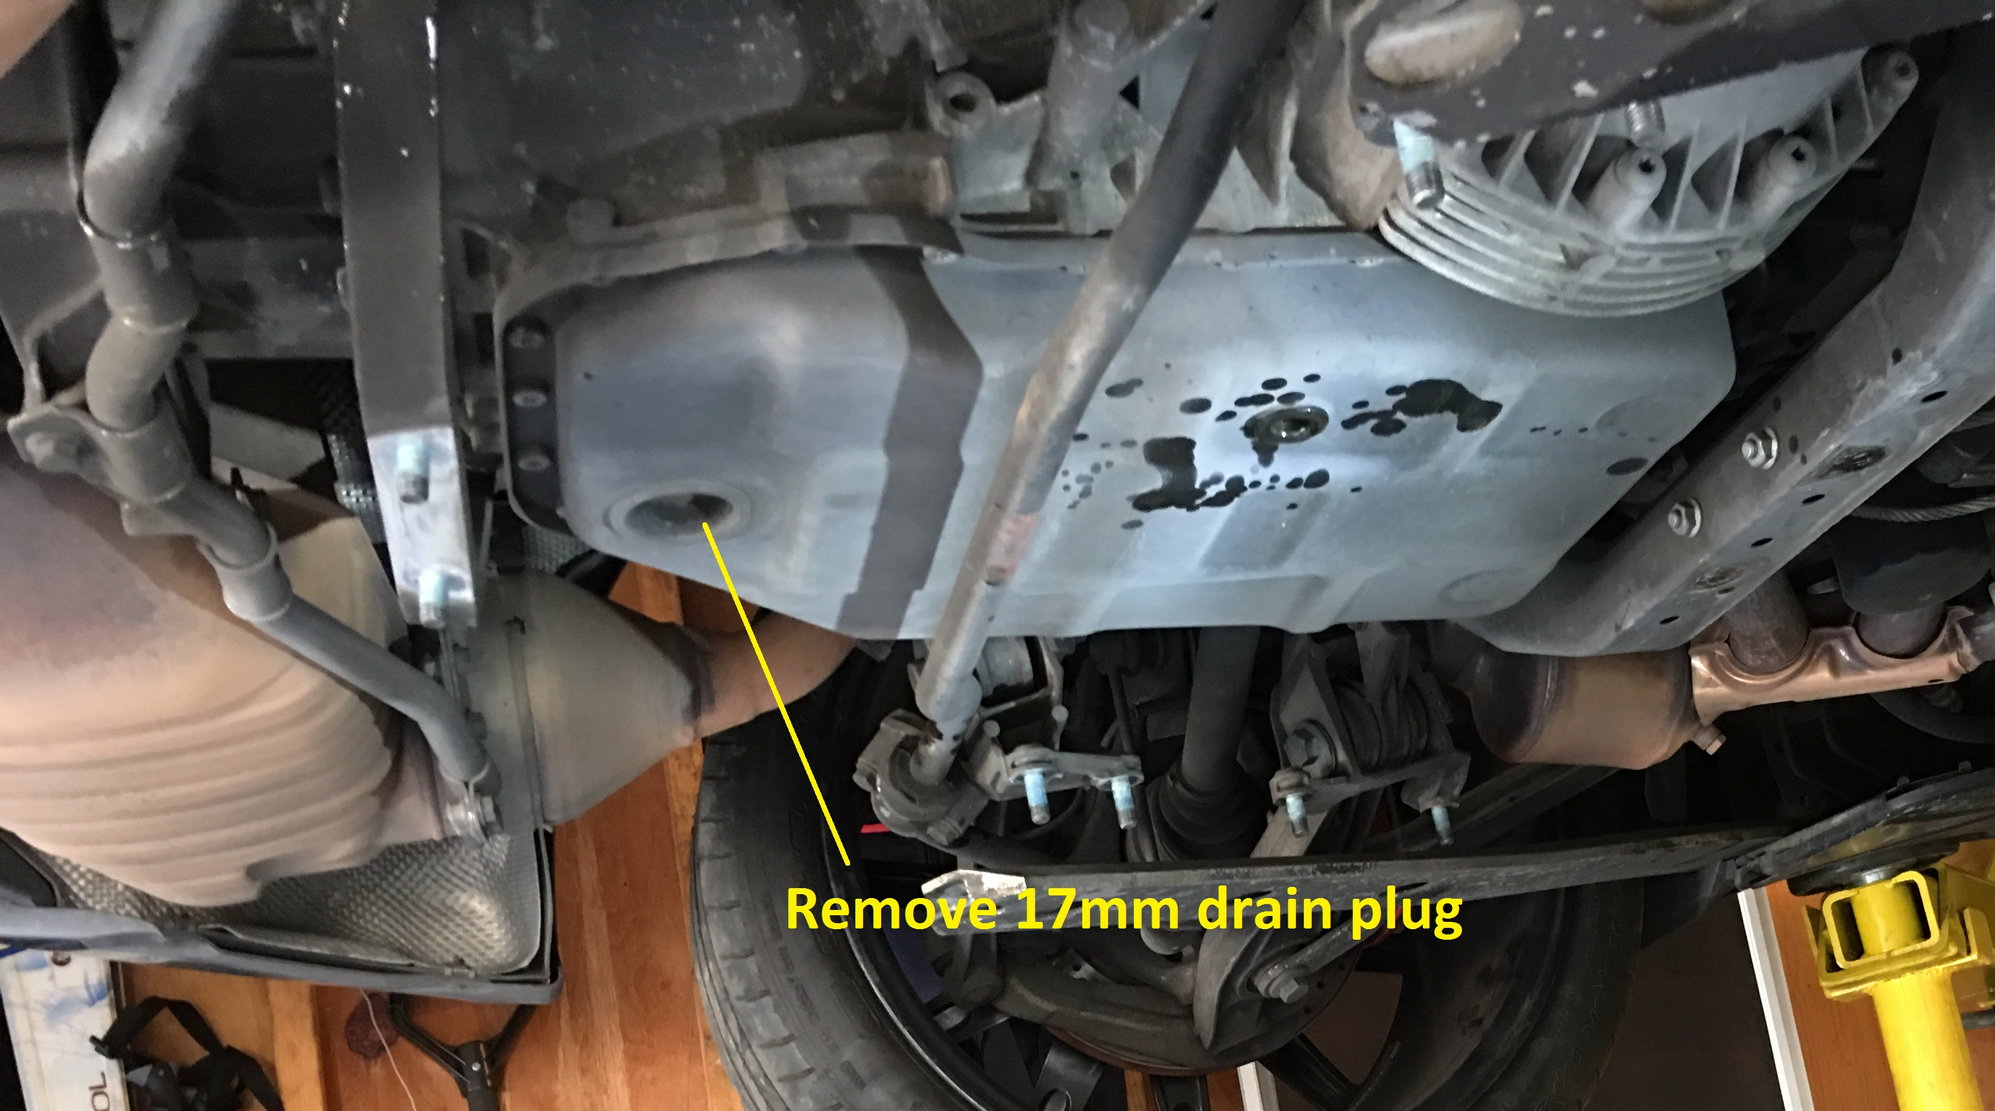
Remove the 17mm (hex or allen) transmission drain plug at the rear of the transmission pan. Drain the fluid into a bucket or oil tray.
I drained about 5 quarts from my transmission at this point. Be careful as it comes out fast and splatters a lot. You should minimize spillage so you can measure the volume of fluid you remove.
Step 4
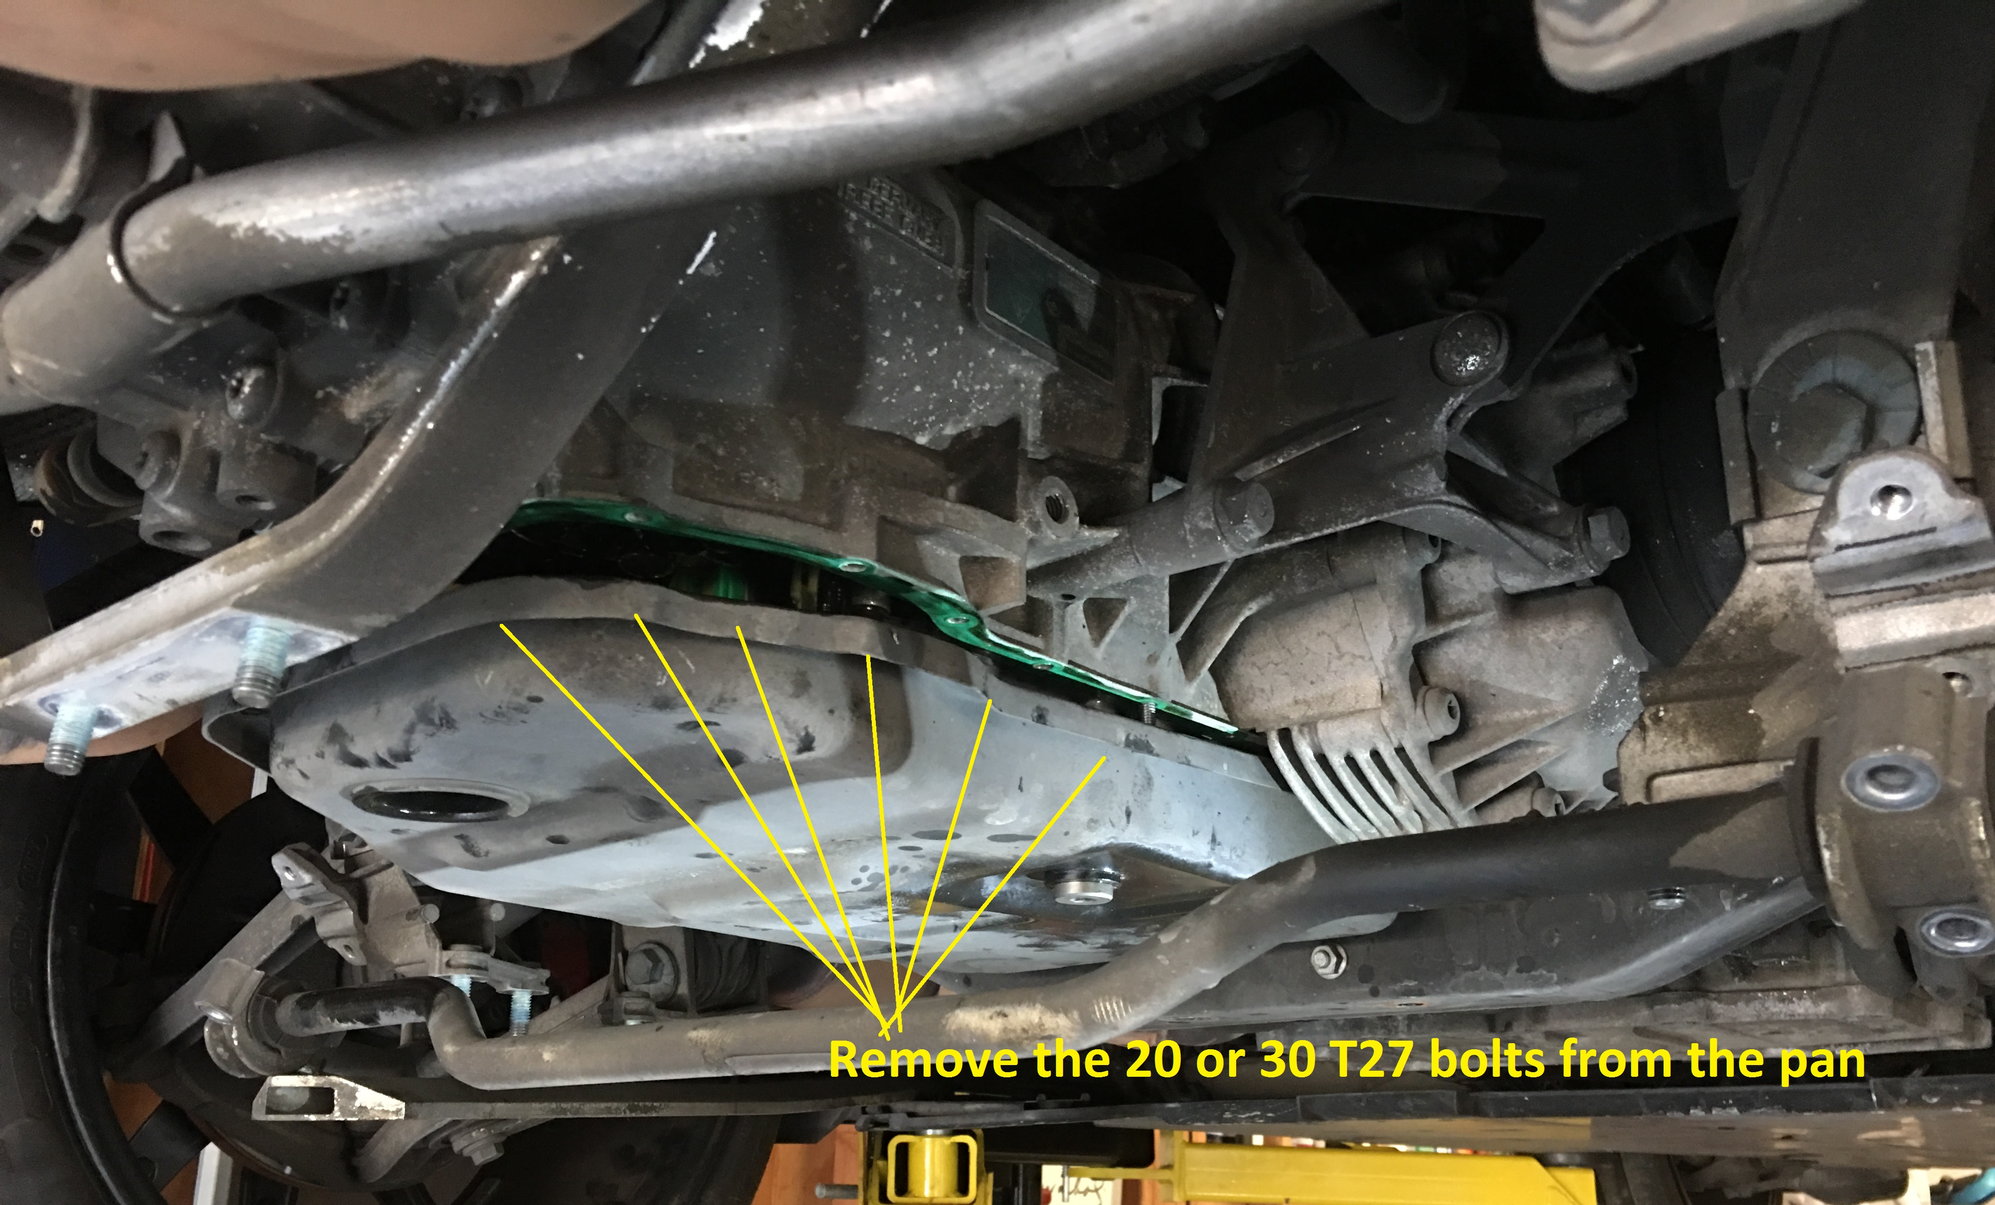
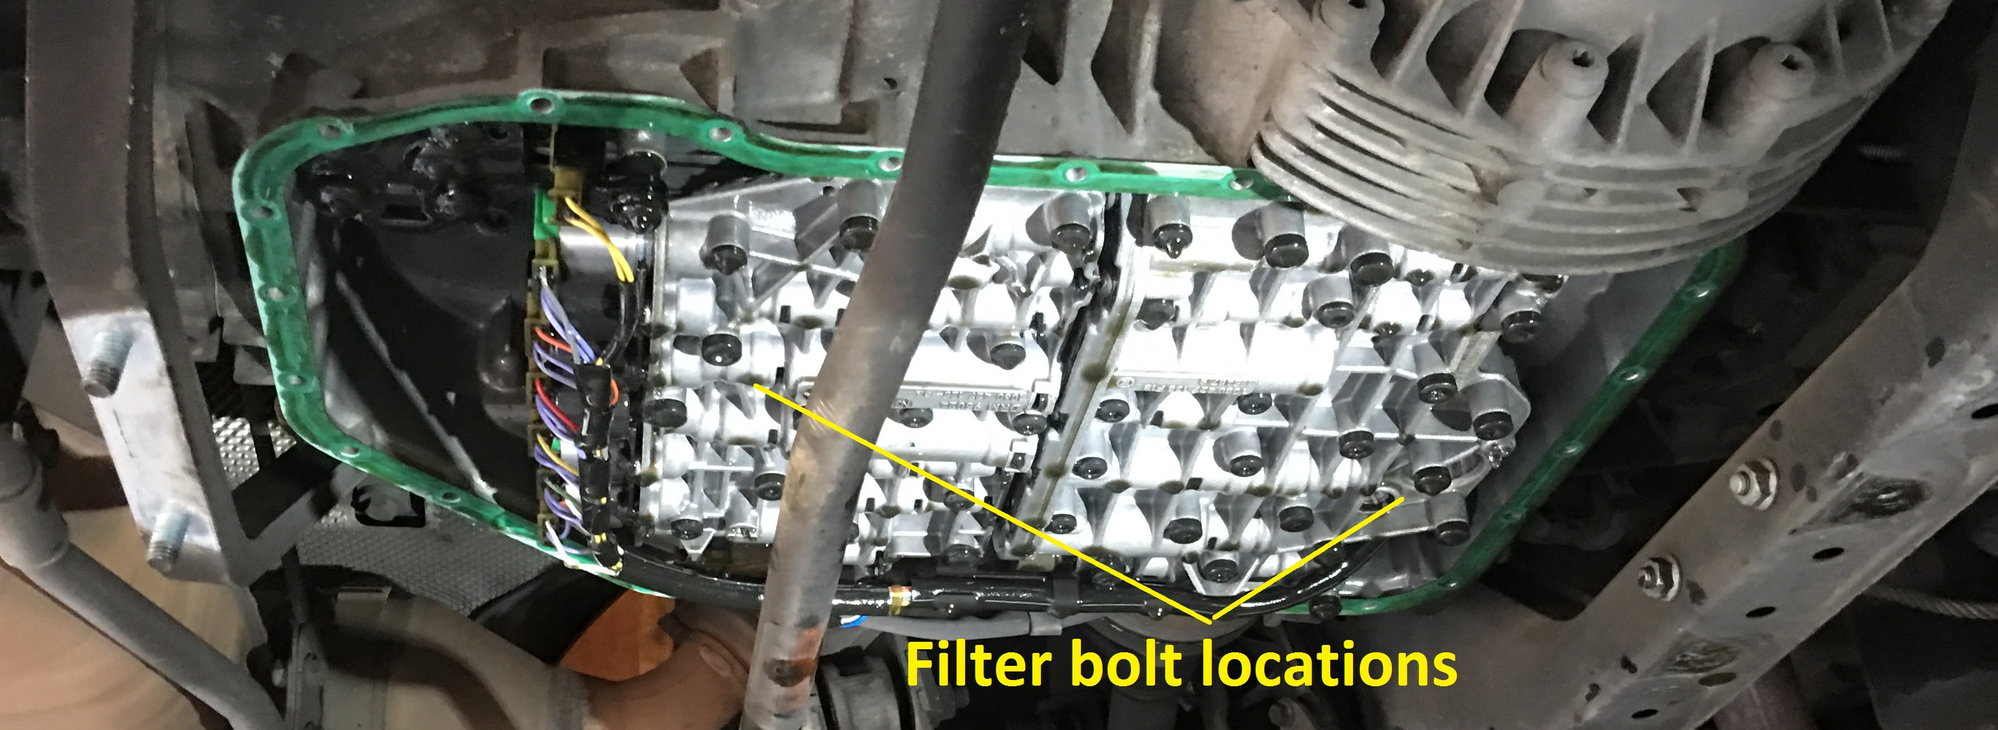
Remove the many T27 torx bolts that hold the transmission pan in place. Be careful as there will some fluid still in the pan. Try not to spill it so you can measure the volume.
Step 5
Remove the 2x T40 bolts holding the transmission filter in place, then remove the filter. Be careful, there will be some fluid in the filter and above the filter.
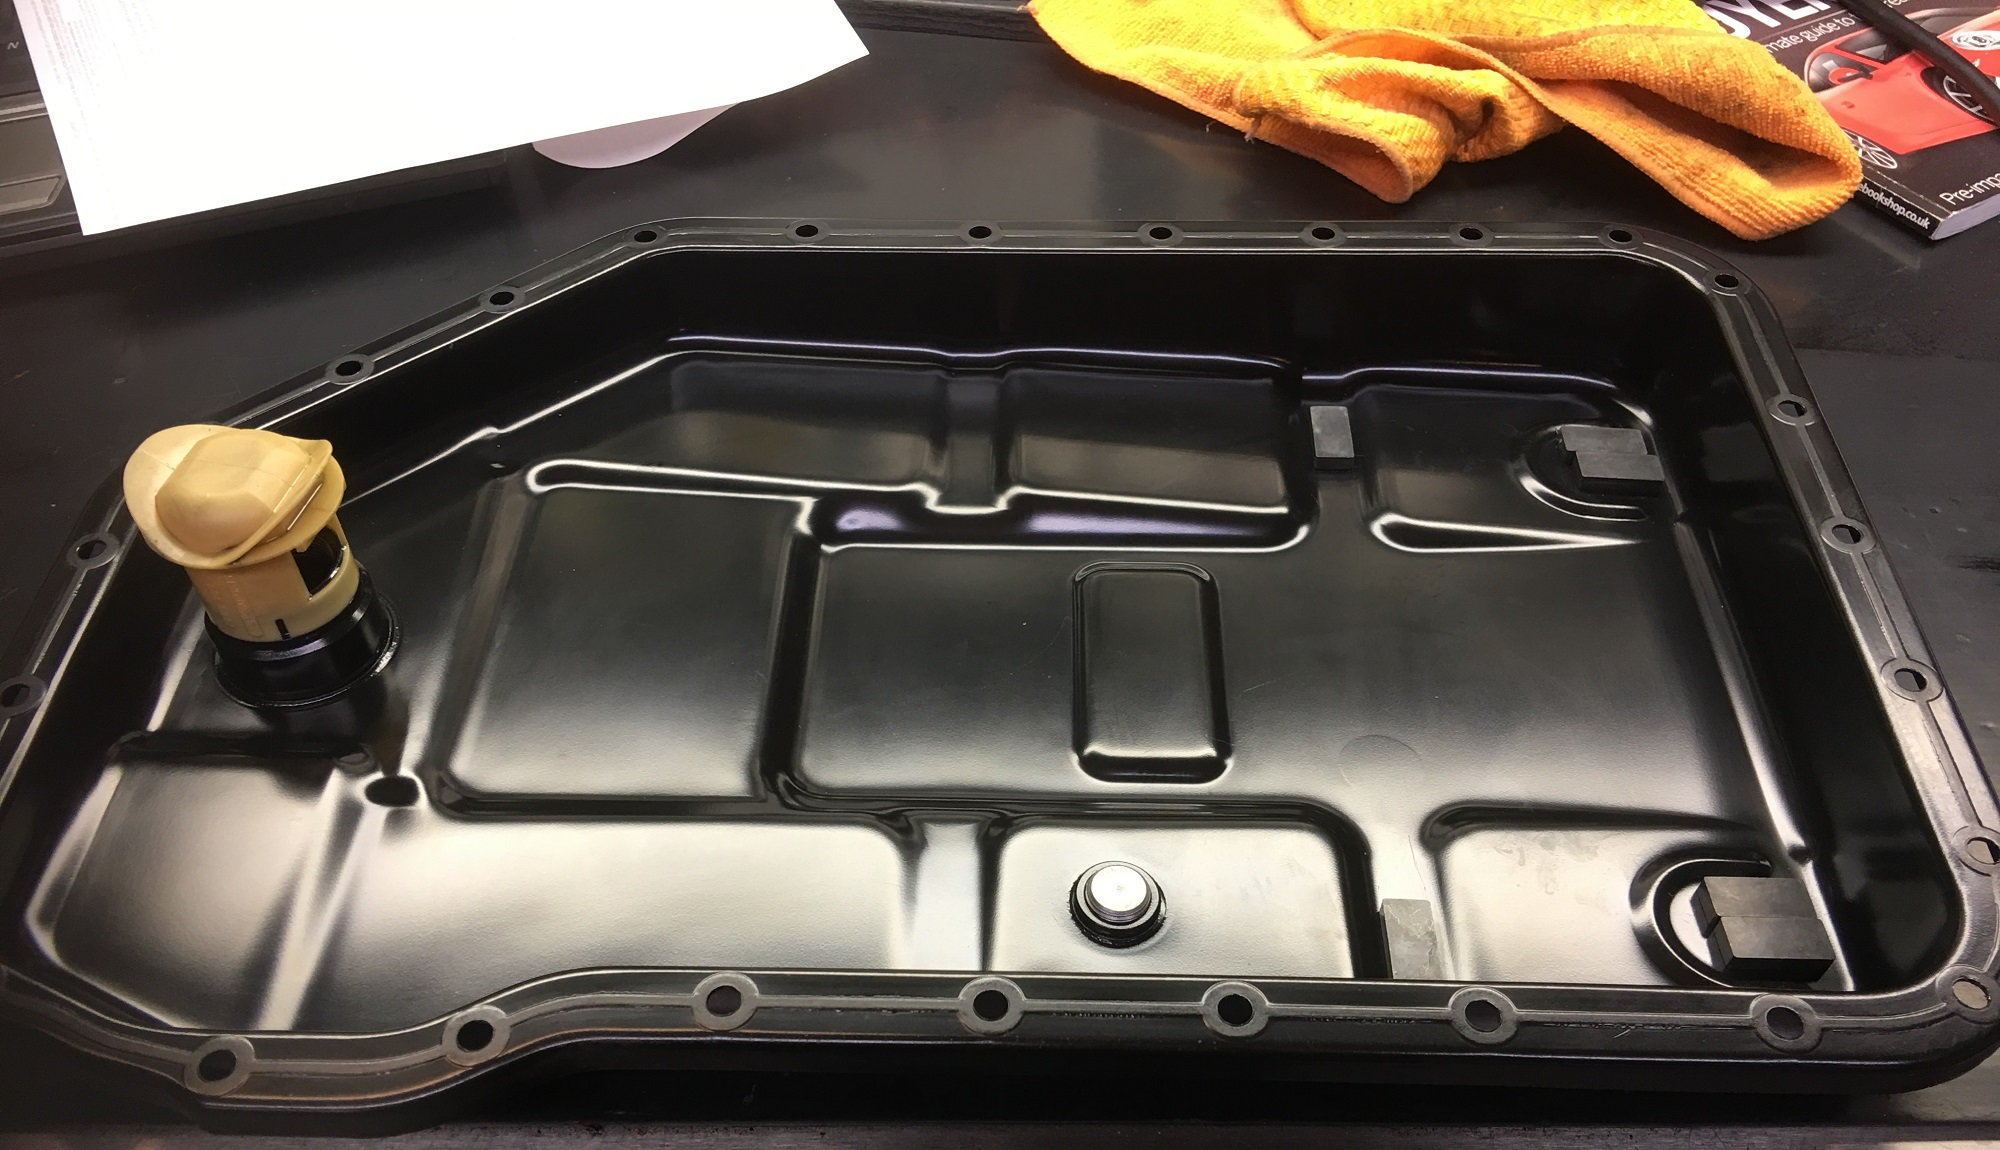
Then remove the old green gasket from the transmission. Clean the mating surface carefully and do not scratch it.
Then clean the transmission pan inside and out extremely well using degreasant then a lint free cloth. Remove the magnets and clean them. Then reinstall the clean magnets to the clean pan.
Step 6
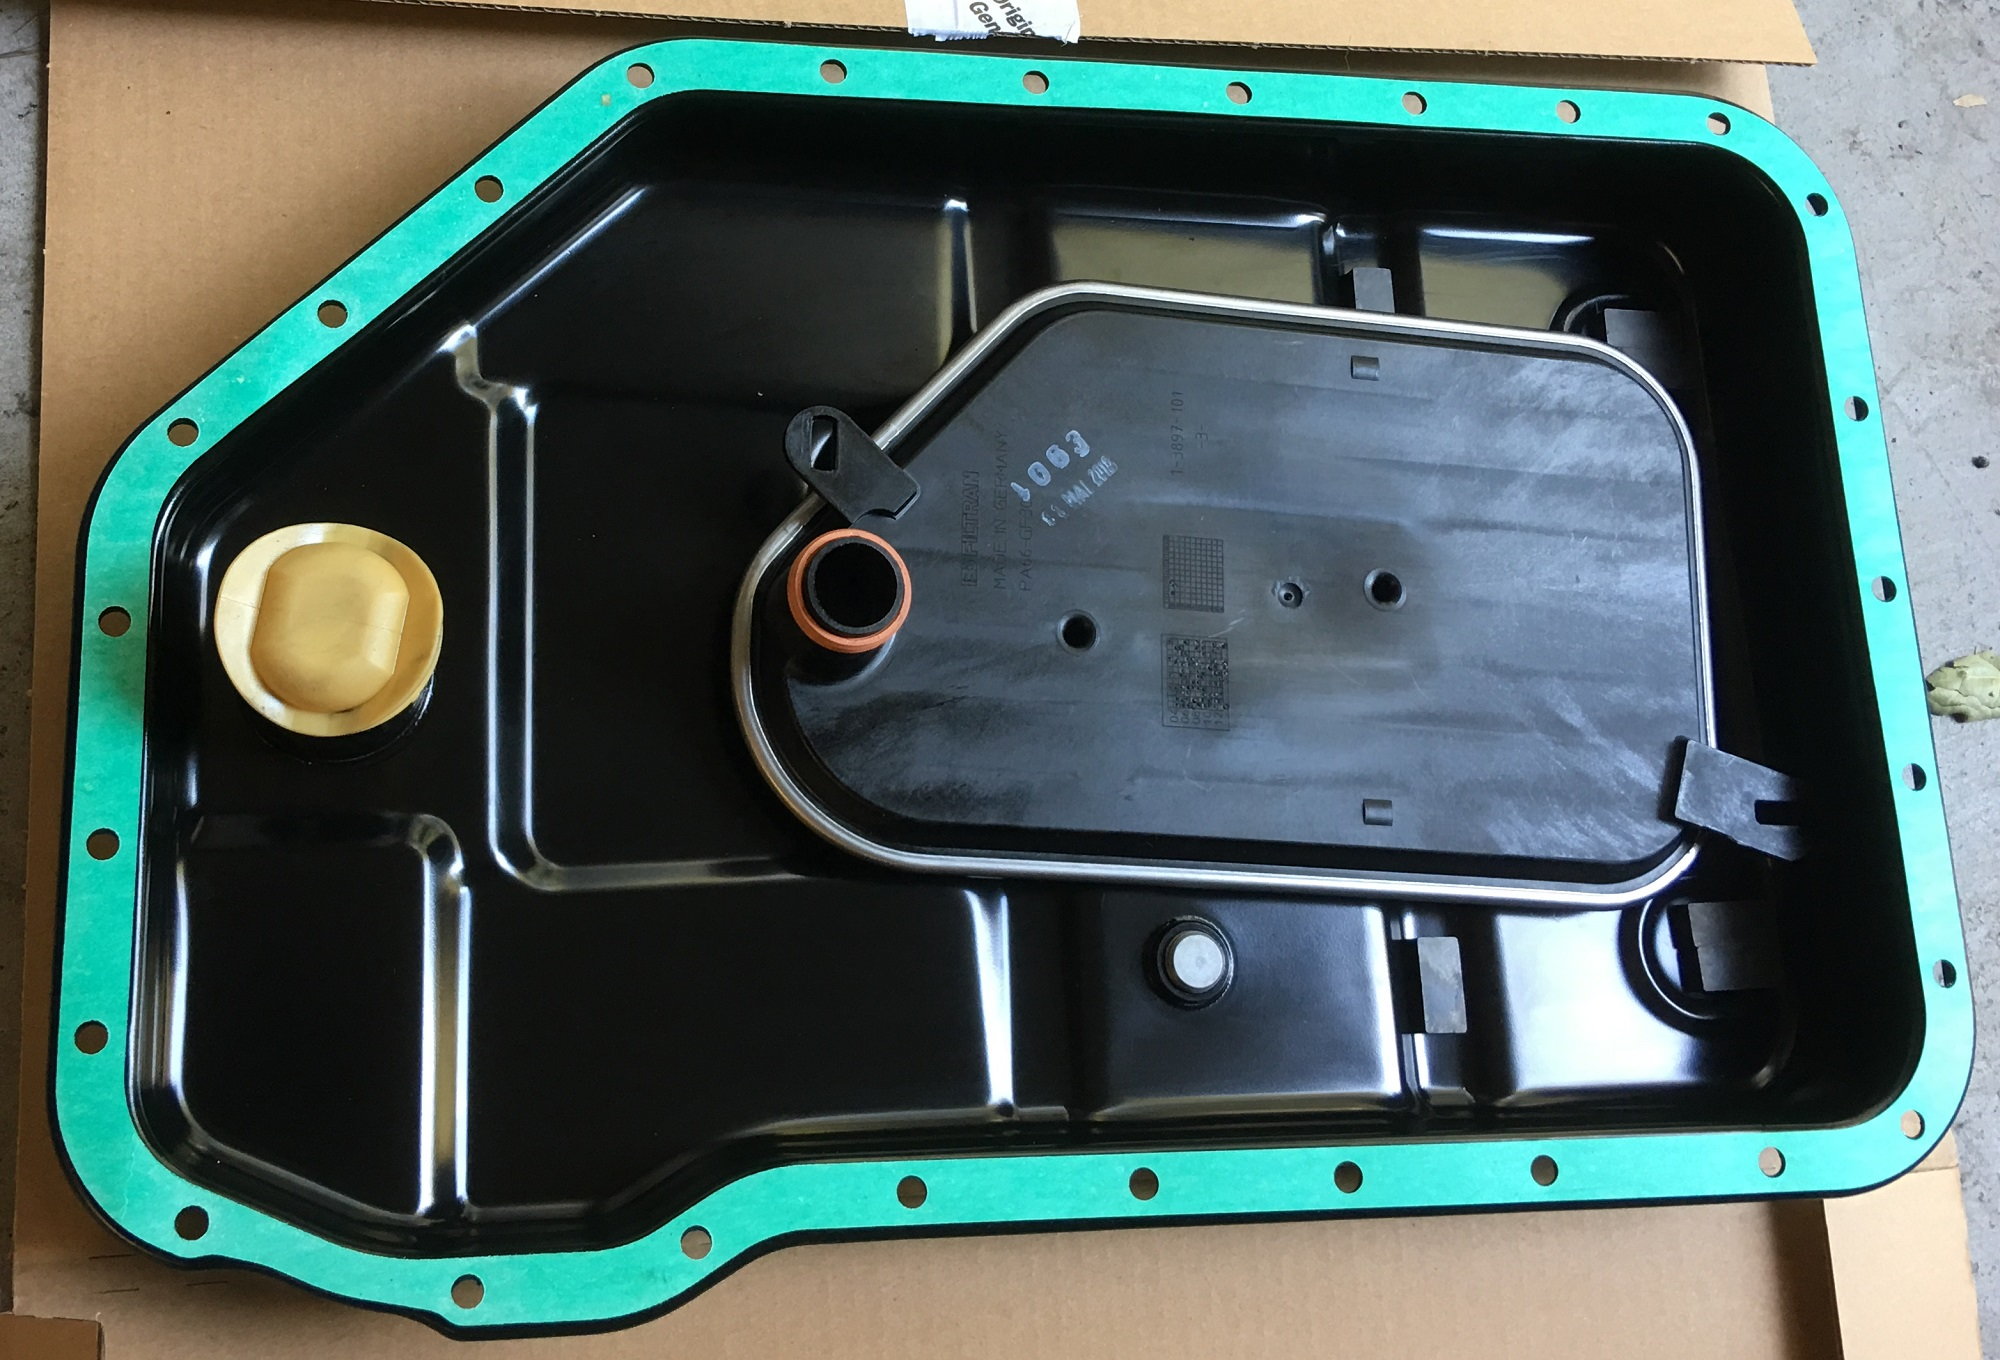
Fit the new filter into place in the transmission after applying some transmission fluid to the rubber seals so allow them to seat correctly and without damage. Lightly screw in the T40 bolts to 6NM torque.
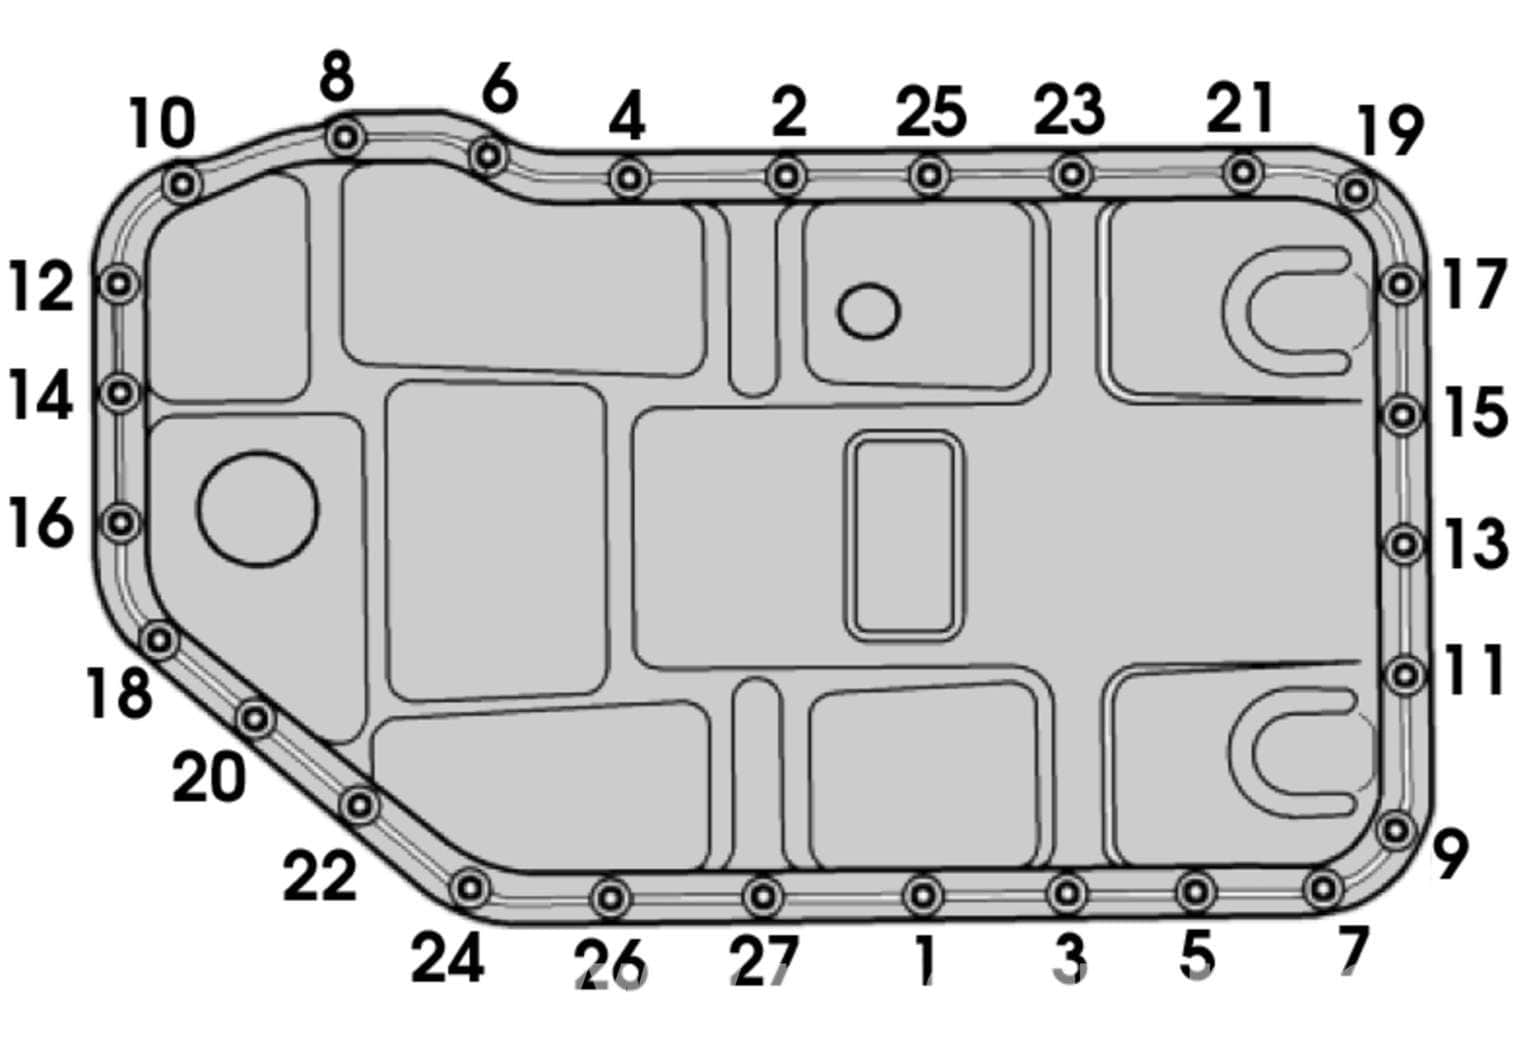
Fit the new pan gasket in place then screw it back to the transmission. Torque in a crosswise manner to 11NM.
Step 7
Refill the transmission using the Pentosin ATF 1. I got about 3 or 4 quarts in before it started to overflow. At this point, start the engine and go through the gears. Warm the engine until you can read 35-40C using the laser temp gauge on the base of the pan. While the car is in gear, top up the fluid again until it starts to drop out the filler. Then replace the seal on the filler plug, fit it into the pan and torque to 80NM.
The transmission job is now finished. However, there is still a few quarts of old fluid in the plumbing to the cooler that I would like to try and remove or dilute further, so in about a week, I will do a quick drain and refill (no pan drop or filter change) with a further 4-5 quarts of new fluid. This should leave me with about 7.5 quarts of new fluid and about 2 quarts of old fluid, which should be fine for the next 50k miles.
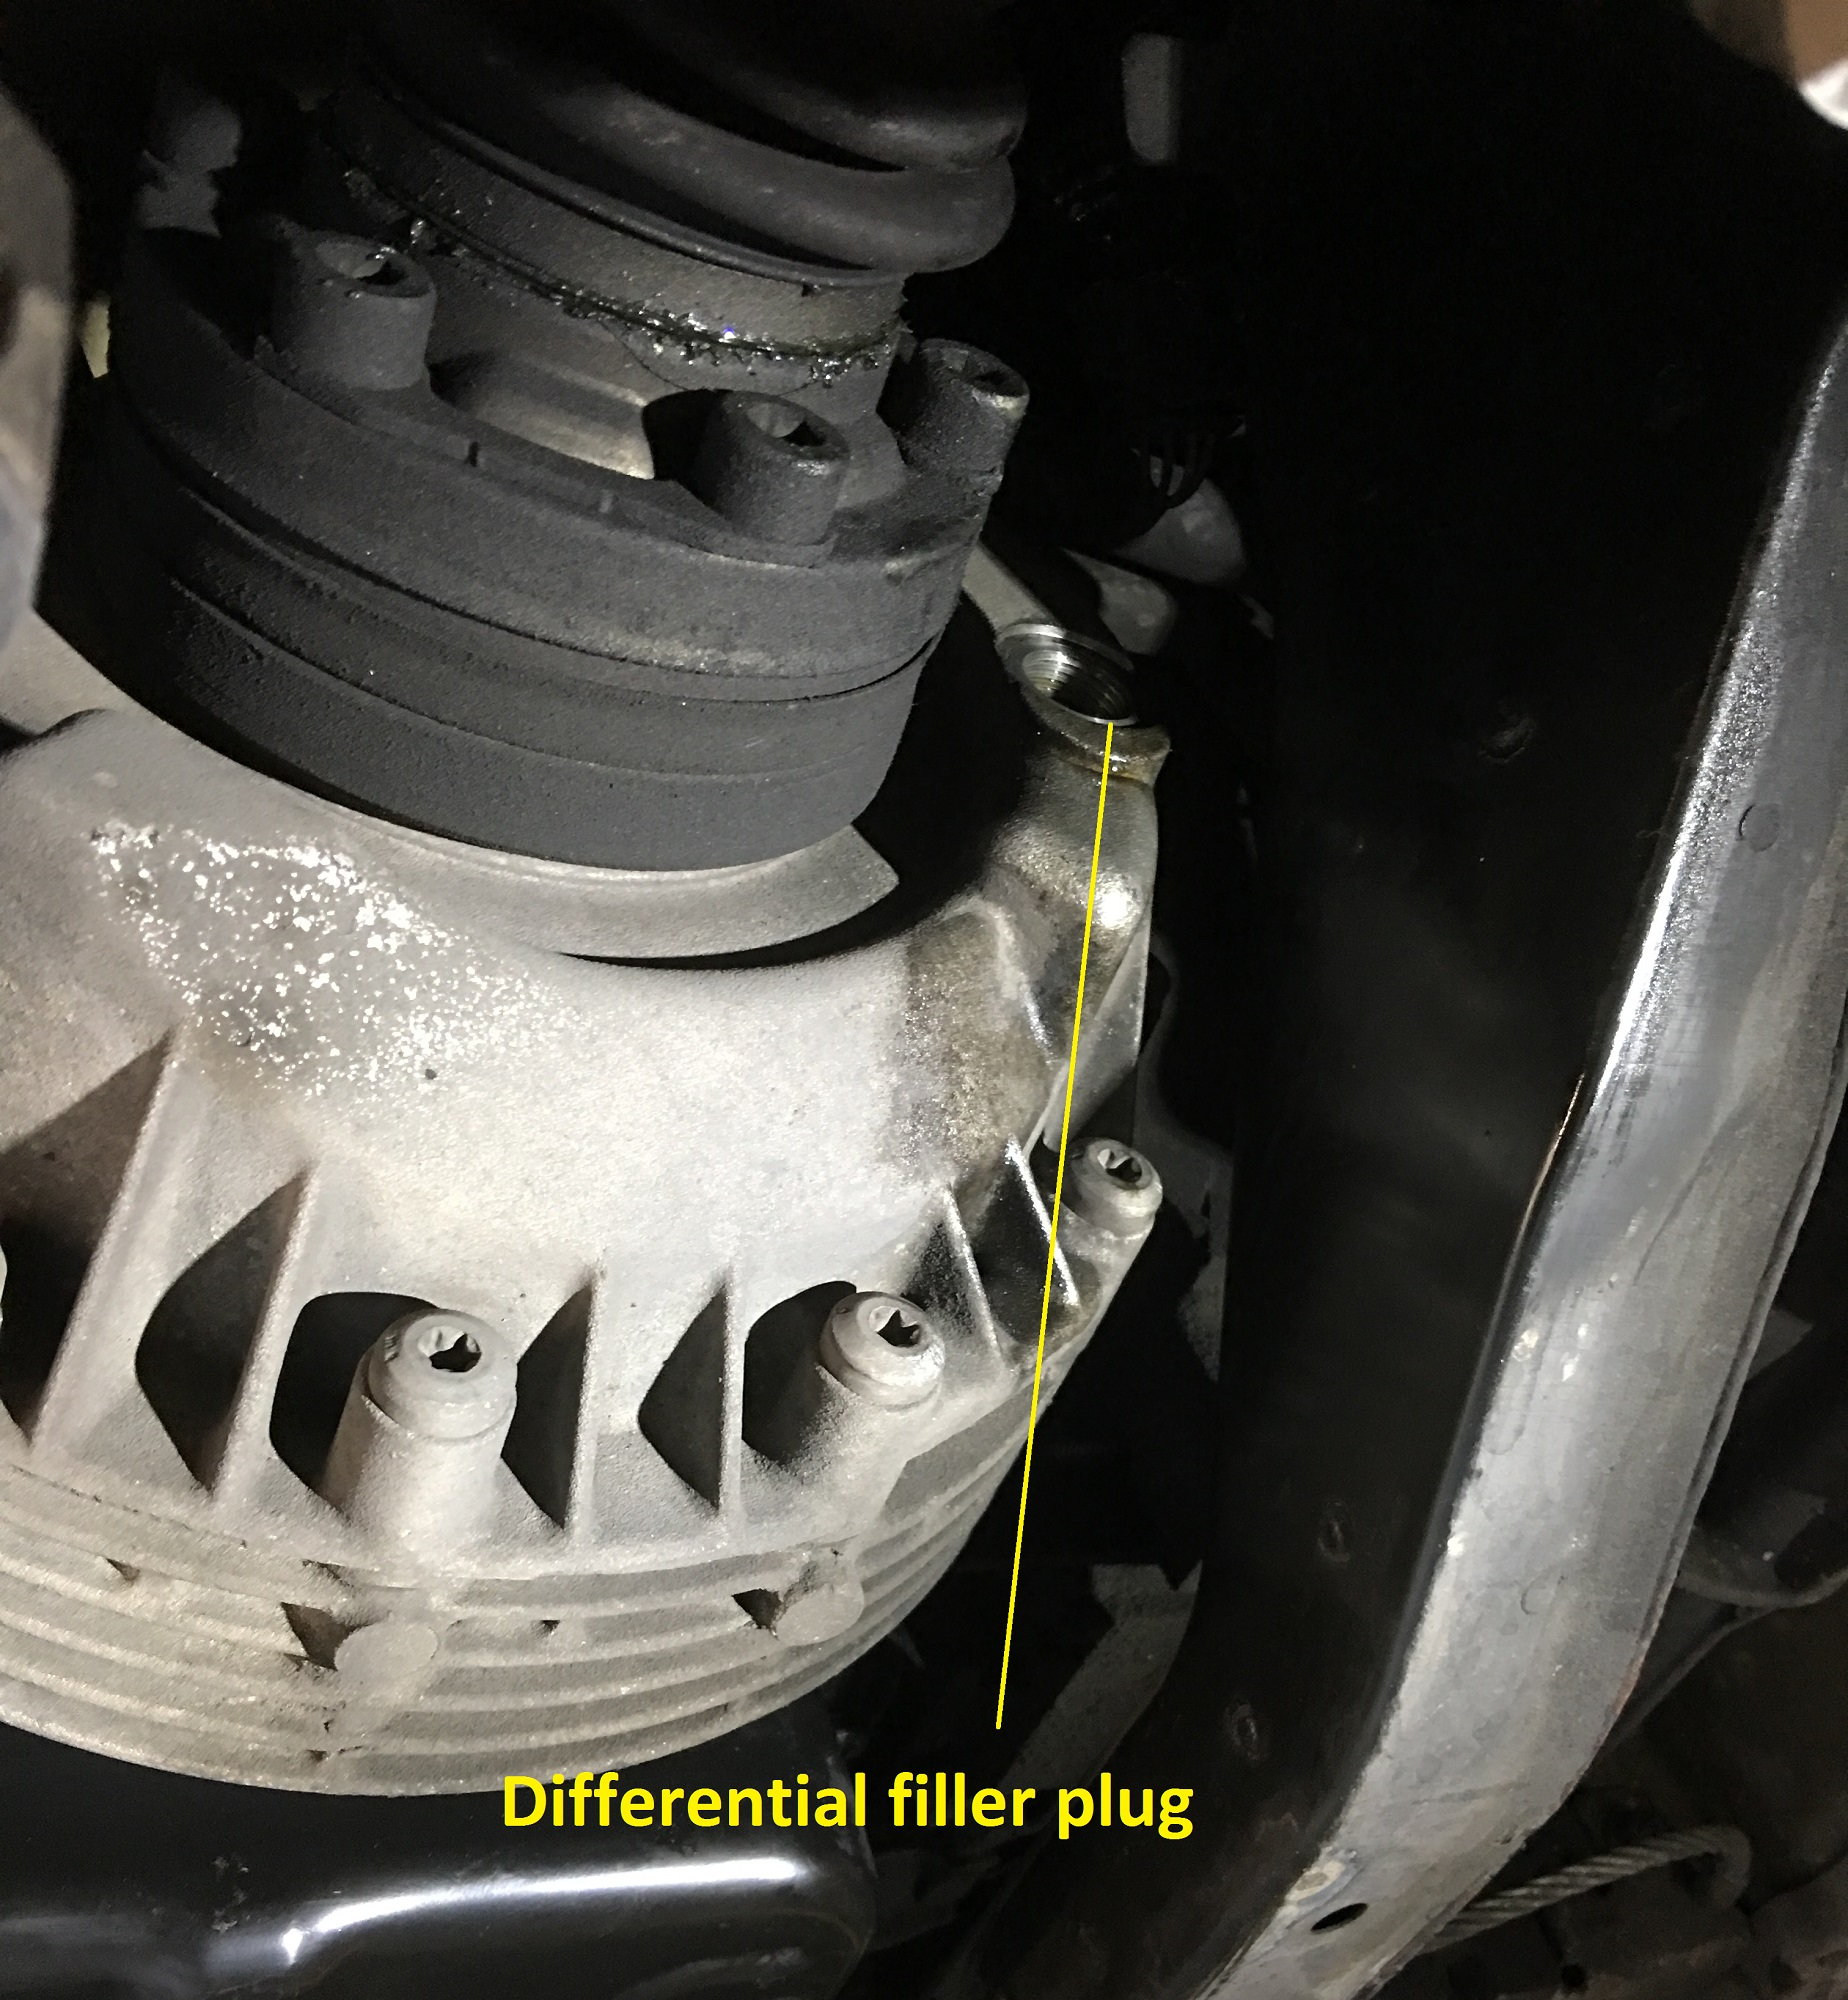
Step 8 (Differential fluid change)
Remove fill plug from the side of the diff just forward of the transmission (passenger side in a left hand drive car). Note there is no drain plug, the fluid needs to be pumped out of the filler plug.
I bought a cheap ratchet powered fluid pump for this job.
Step 9
When you have drained as much out as you can get (maybe � of a liter), refill using the same quantity of new 75W90 and the same pump. It is full when it starts to drip out the filler hole. Fill quite slowly as there are baffles on the inside of the hole. Allow it to settle for a few mins then try to top up again.
Reinstall the filler plug and torque to 35NM.
Added to step 1 is to make sure your car is level when on the stands. I placed my level on the transmission pan to confirm the car was level once up in the air.
Immaculate images!
One different step or misinput word? of "Step 3; Remove the 17mm (hex or allen) transmission drain plug at the rear of the transmission pan. Drain the fluid into a bucket or oil tray."
I think, at least in the 986 ZF 5HP 19 Transmission Tiptronic, Remove the M16-1.5mm drain bolt by the 8mm Allen key, the 17mm hex pin is for the fill plug at the rear of the tranny pan.
The posterior one is for filling and checking the ATF level.
Thanks for the excellent images
Last edited by bachmoza; 04-13-2017 at 08:37 PM.
Reason: miss typing
 10-01-2016, 12:53 AM