How To: 996 Racing Seat Install (Pic Heavy)
 06-21-2016, 08:28 PM
#1
AutoX
Thread Starter
This DIY is to show you how to install a bucket / racing seat into a 996. While it is a fairly easy install that I am sure most could figure out by themselves  I thought I would share the write up that I recently made for a blog. I used a Bride Zeta III as it is my favorite seat and one that I have not seen installed into a 996 before.
Time to Install: ~30 Minutes
Tools Needed:
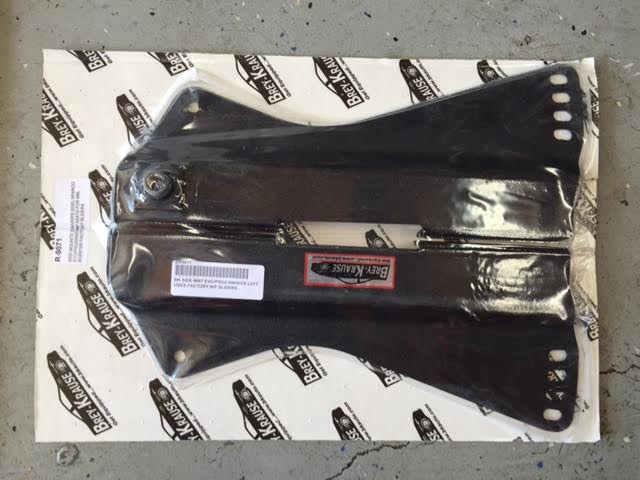
I took some time deciding on which mounts to use. I knew that rails/sliders were not going to be needed and I would prefer something that didn't require any drilling. I was recommended Brey Krause and thought I would give them a shot. They offer many options for a custom fit but I ended up settling on the R-9044 for the seat base and the R-9060 for the side mounts. I chose this base as it has a harness bar add on that will be very useful as I didn�t feel like drilling holes in my car. The Bride Zeta III is not listed on their fitment chart. I expected this as these seats aren't as common. Having run many different seats in the past though, I knew that mounts that work with a Sparco Evo should get me very close.
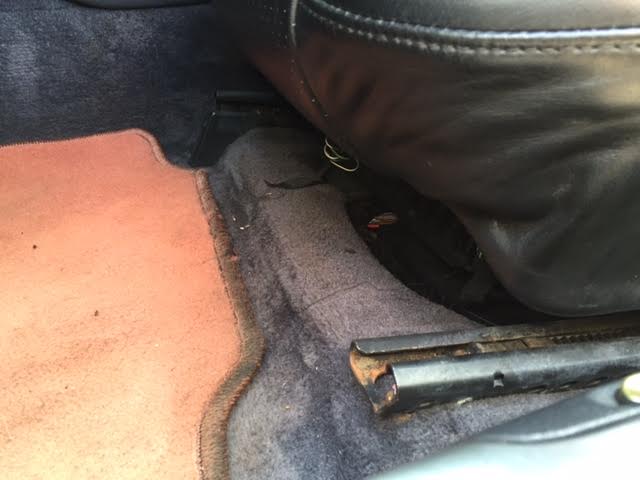
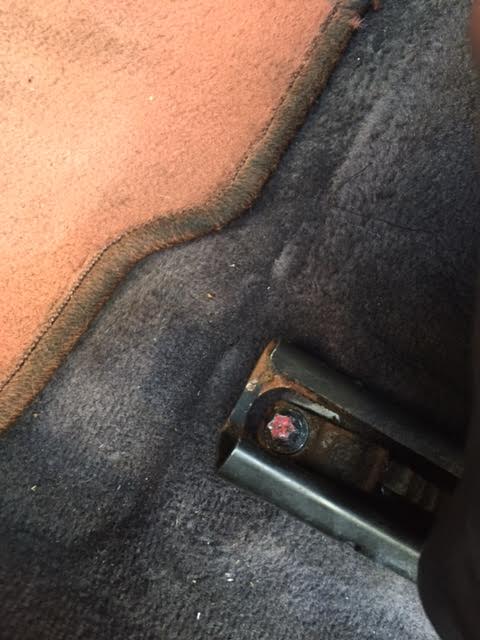
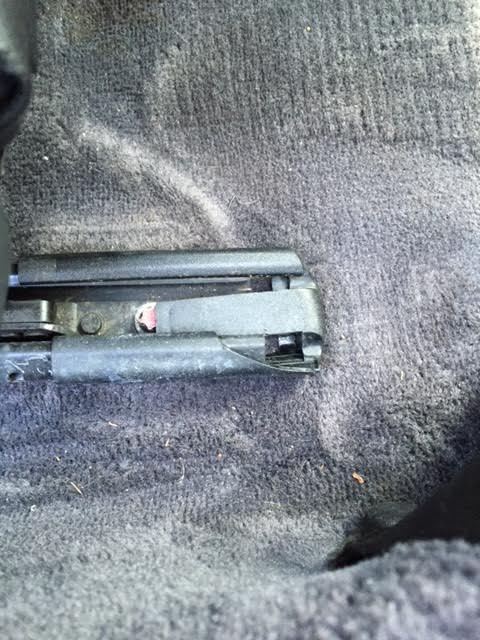
1.) To start with you will have to remove the factory seat (didn�t see that coming did you?!). This is very easy as there are only four torxs bolt to remove, one on each corner covered by a plastic cover. You will need to roll the seat back to access the front two, and then move it forwards to reveal the rear two. We recommend re-centering the seat once you have removed all four bolts. Storing this seat will be a lot easier if the rails aren�t poking out the front or rear at full length.
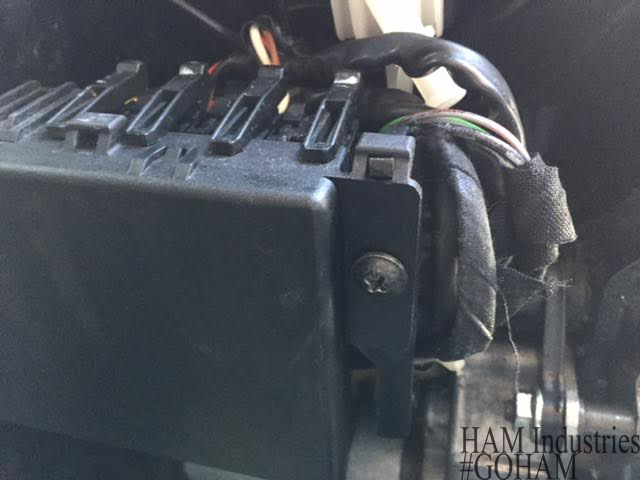
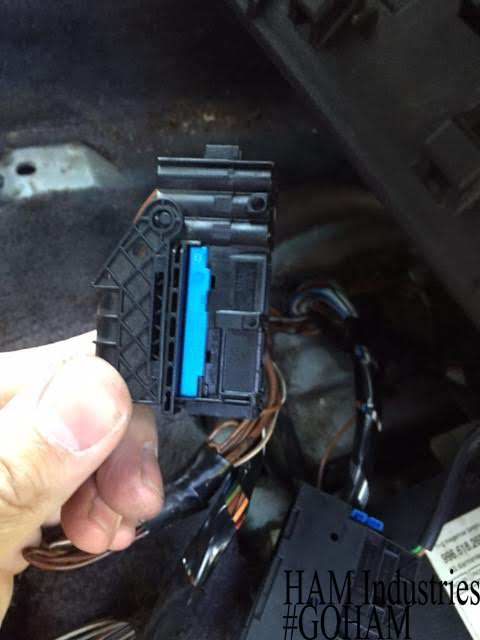
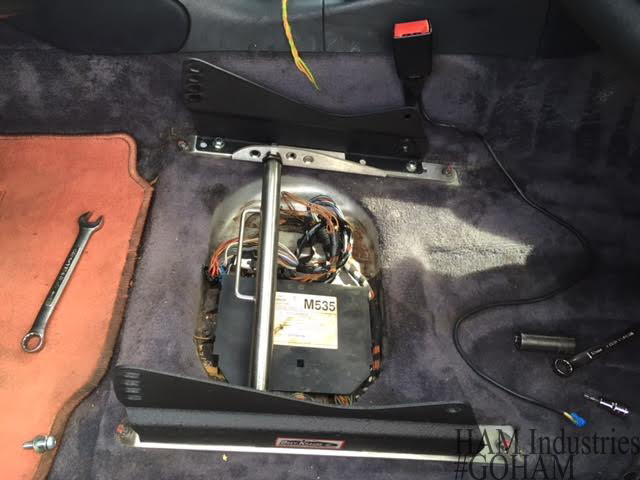
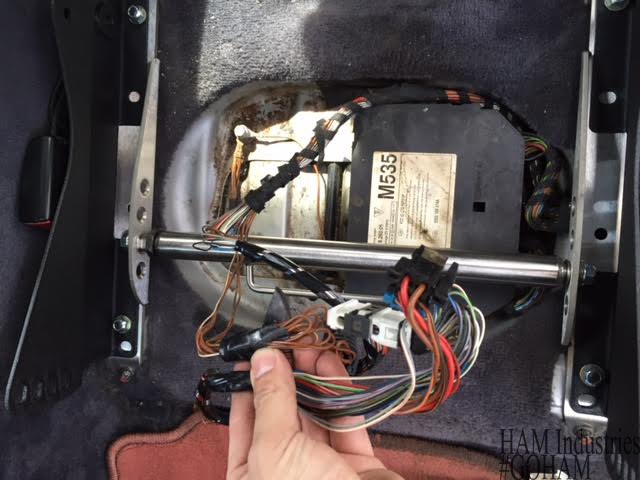
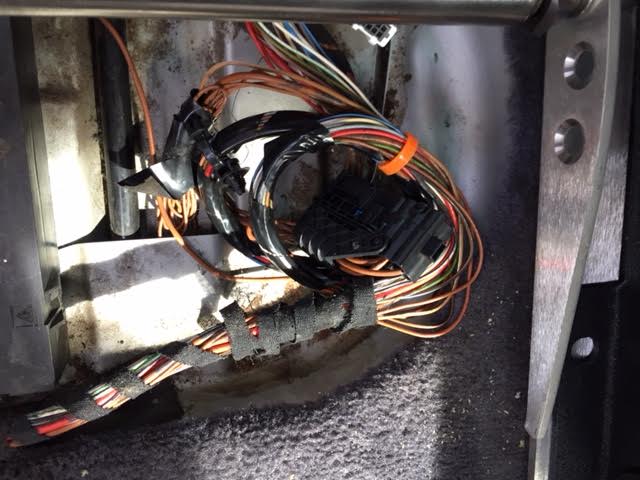
2.) Before you can fully remove the seat, you will want to tilt the whole seat back to reveal the wires underneath. There are three plugs to remove which are easily accessed by removing this box. There are two Phillips screws on either side. Remove those and the whole unit will come down which allows easy access. Now you can remove the seat! Watch your back; the seat is extremely heavy so remove it with caution. Keep in mind that the rails are sharp, you may want to cover them with a towel so that you don�t scratch your paint as you exit the car.

3.) Now is a great time to bust out the vacuum cleaner and thoroughly clean the area under the seat. This area will be gross. Once cleaned, roughly mock up the parts to ensure you know where all the parts go and ensure that they fit correctly. If you are going to install your seat using rails, go ahead and mount the side mounts to the rails and then the rails to the floor mounts now. If, like us, you are not using rails we shall skip go straight to step 4.
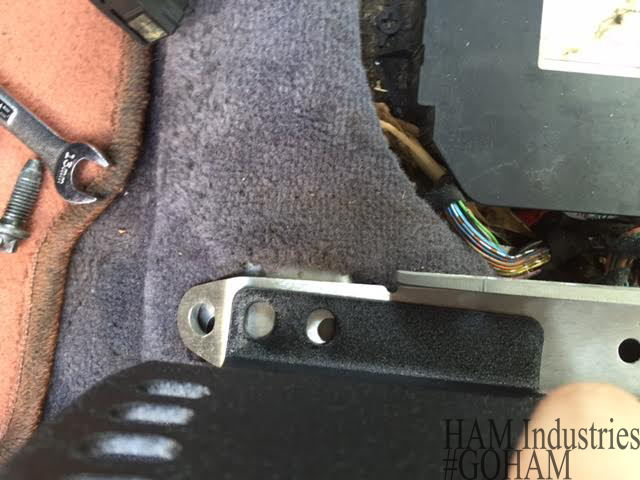
4.) If you are not using rails, bolt the floor mounts to the floor now. This is done with four torxs bolts. Next we mount the side mounts to the seat and lower the seat onto the floor mounts. Final assembly will require the side mounts to be mounted to the floor mounts outside of the car and then the seat lowered in at the end. Since we are not using rails, we need to know roughly where to bolt the side mounts to the floor mounts. We run a test fit this way so that we can see where to bolt them down. We gently lowered ourself in and slid the seat back and forth to find a position that felt comfortable. Once that position was found, we looked down to see which holes lined up and took note. (We apologize, we did not take pictures of this step!)
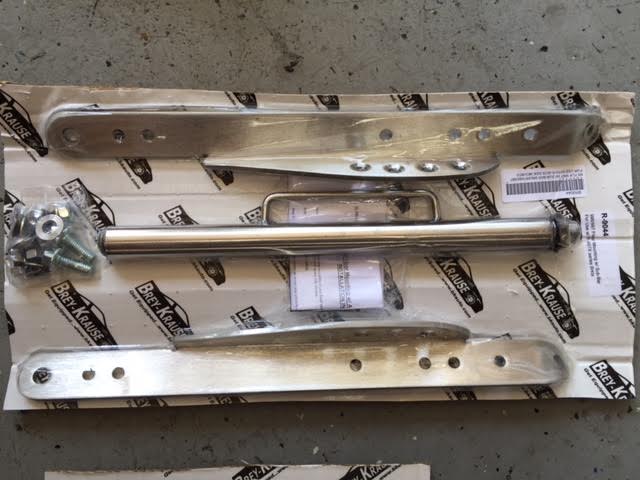
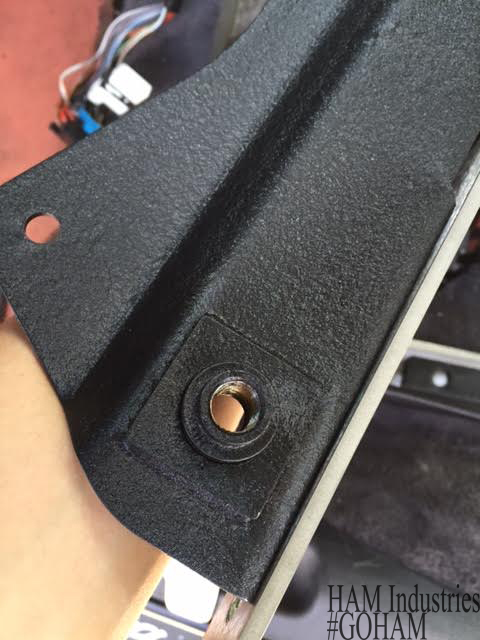
5.) Now that we know which holes to use, I removed the seat and all of the hardware from the car. Bolt the side mounts to the floor mounts along with the harness submarine bar (if you ordered mounts that include a harness submarine bar). Before you put this back into the car, make sure to transfer over your seat belt buckle! This is a 17mm bolt and thankfully, Brey Krause has already incorporated a threaded hole for it on the new mounts. A great feature that all mounts should have! Now you will bolt this whole setup back into the car.
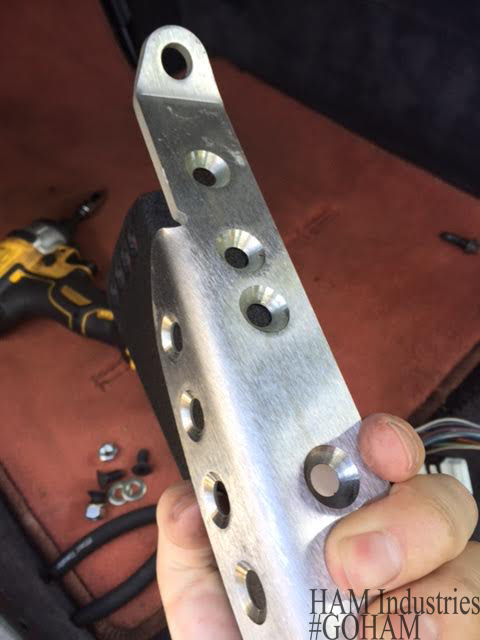
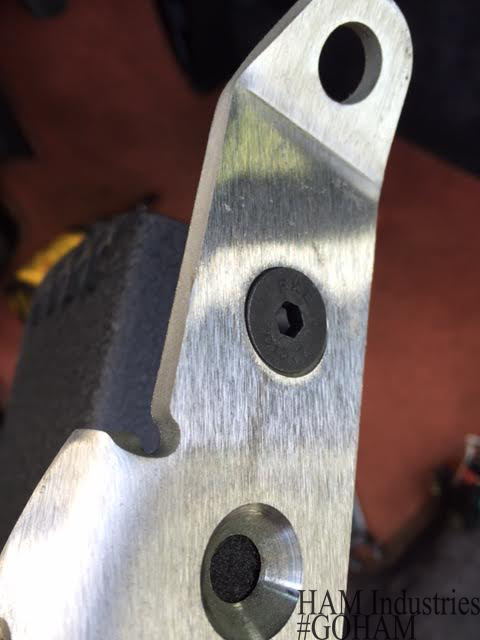
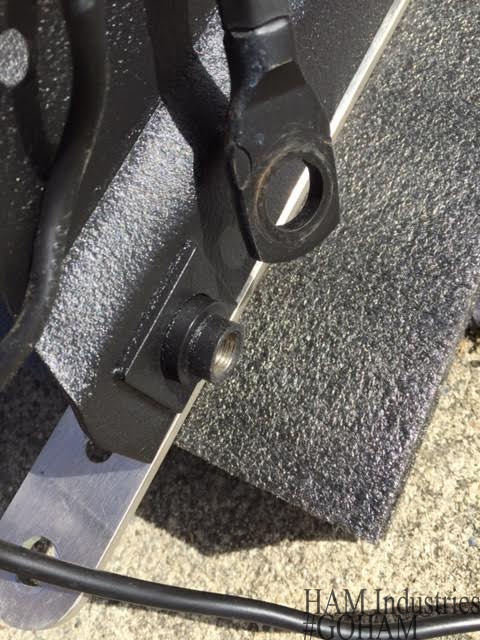
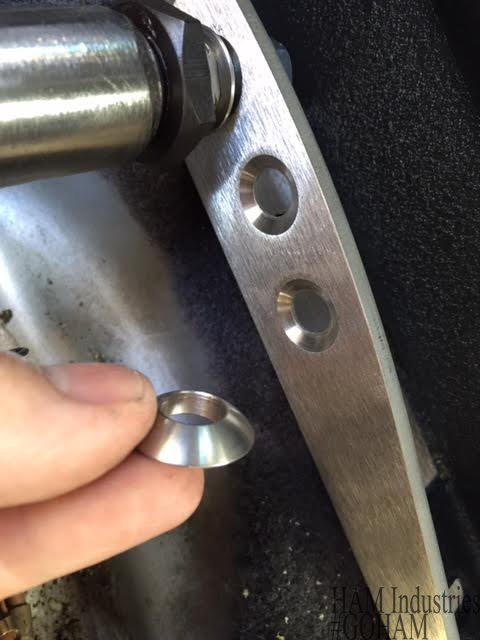
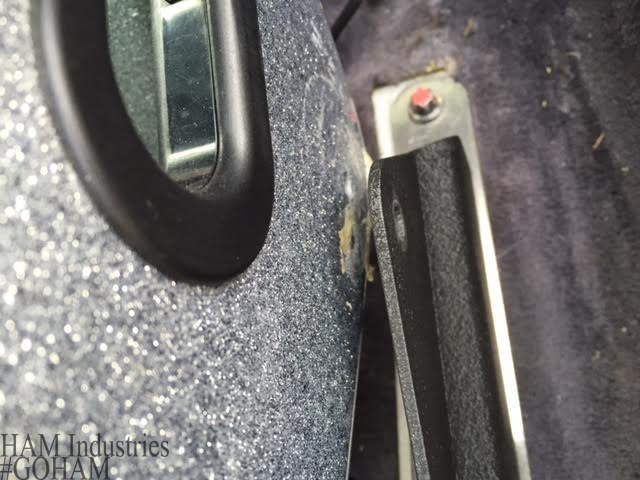
Note how Brey Krause tapers and recesses all of their hardware? Awesome quality.
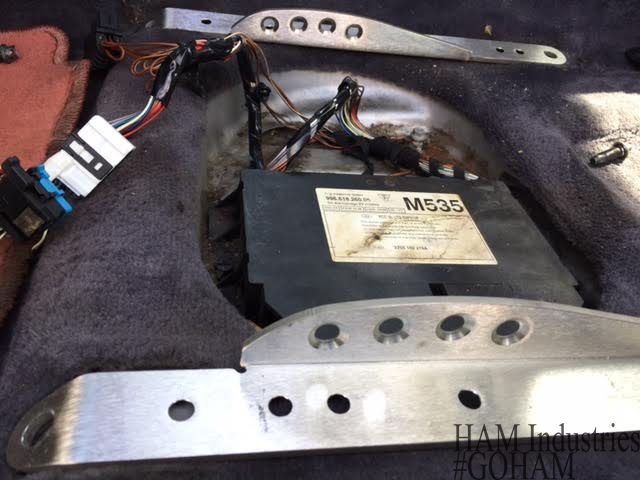
6.) Perhaps you can call this the OCD step but all of these now unused wires annoyed us and surely will rattle against the floor. I secured these with a simple zip tie to keep things clean and tidy.
7.) With the hardware and mounts installed in the car, it is time to lower the seat into the mounts. Be careful doing this so as not to scratch your seat. A bit of painters tape around each mounting hole will help keep it scratch free.
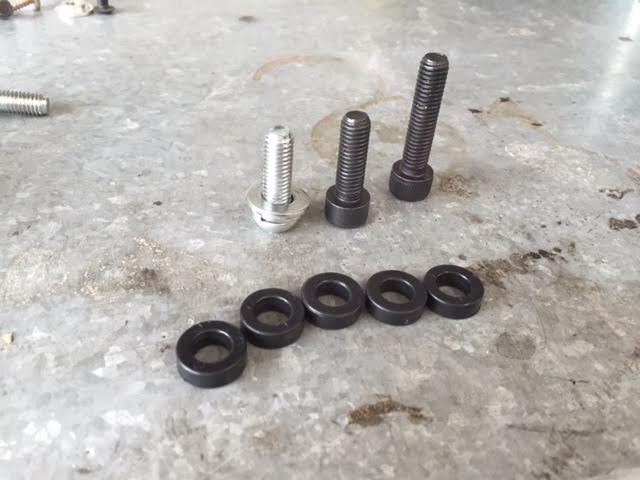
I quickly noted that my seat ran a bit narrow for the mounts. I was roughly 10mm off from a snug fit. Don�t worry if this is the case on your seat as this is common with certain seats (usually Recaro�s). I used slightly longer bolts and utilized a simple spacer to fill in the gap. Tighten the bolts until the lock washers close. Do not overtighten these bolts!
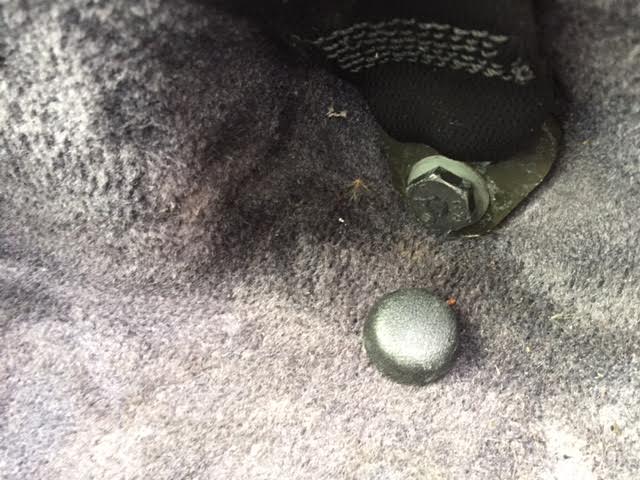
8.) Whenever I know that the stock belt will be used with a bucket, I like to run the belt through the outer harness hole. This will make sure that the belt still sits across your lap at the correct level. Again this is a simple 17mm bolt and only takes a second to do. I highly recommend this step.
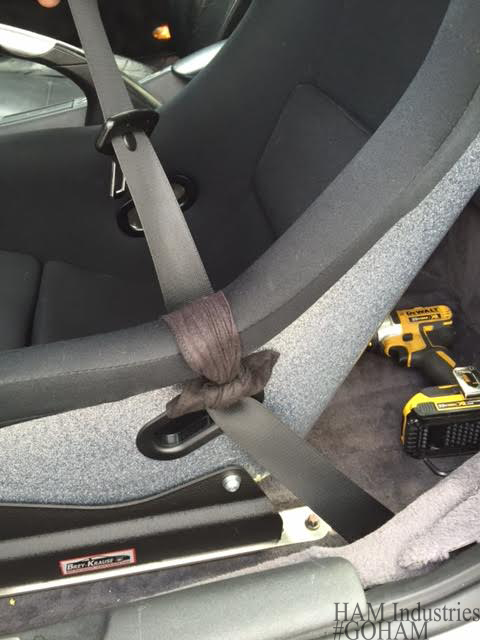
Again with the OCD� I run a bit of material over parts of our seat that will see a lot of seat belt abuse. Namely the part pictured above and the shoulder area at the top.
9.) Now run through all of the bolts once more to ensure they are all tight and you are done! Go enjoy your new seat, which I find is one of the best modifications you can make to a car!
As a recap, I love the new driving position in the 996! The stock seating position was not ideal for me. It felt too high and lacked any sort of support. Now being lower in the car and solid mounted, it feels fantastic! Please note though, a roll bar will be going in very soon. It is generally un-wise to run a fixed back seat in a car with no roll bar. Also, removing the stock seat will cause an airbag light and improper functioning of the airbag. For me, this was not an issue as a MOMO steering wheel went in at the same time.
I am also extremely impressed with the Brey Krause mounts (sadly I am not paid to say that). They were highly recommended to me and so I was anxious to try them out. Having used many different brands of seat mounts, these certainly feel the most well thought out. Not only did they fit with OEM type standards, the seat is dead center to the wheel! Of the many many cars that I have installed bucket seats in, I have become accustomed to sitting slightly off-center of the steering wheel�no longer is that the case! I also had no clearance issues to the door or transmission tunnel. I can see a wide seat being installed with relative ease and clearance as well (the Zeta is a standard sized seat much like a Sparco Evo or Recaro SPG). Like I mentioned above, the Brey Krause side mounts had an incorporated seat belt buckle attachment which is a fantastic feature as many companies leave the seat belt bucket attachment up to you to figure out. Good jobs guys!
I thought I would share the write up that I recently made for a blog. I used a Bride Zeta III as it is my favorite seat and one that I have not seen installed into a 996 before. Time to Install: ~30 Minutes
Tools Needed:
- Phillips Screwdriver (P2)
- Torxs Socket E12
- 17mm Socket
- 14mm wrench
- 4mm and 5mm Allen for seat bolts
- 3/8� Ratchet
- One zip tie (totally optional)
I took some time deciding on which mounts to use. I knew that rails/sliders were not going to be needed and I would prefer something that didn't require any drilling. I was recommended Brey Krause and thought I would give them a shot. They offer many options for a custom fit but I ended up settling on the R-9044 for the seat base and the R-9060 for the side mounts. I chose this base as it has a harness bar add on that will be very useful as I didn�t feel like drilling holes in my car. The Bride Zeta III is not listed on their fitment chart. I expected this as these seats aren't as common. Having run many different seats in the past though, I knew that mounts that work with a Sparco Evo should get me very close.
1.) To start with you will have to remove the factory seat (didn�t see that coming did you?!). This is very easy as there are only four torxs bolt to remove, one on each corner covered by a plastic cover. You will need to roll the seat back to access the front two, and then move it forwards to reveal the rear two. We recommend re-centering the seat once you have removed all four bolts. Storing this seat will be a lot easier if the rails aren�t poking out the front or rear at full length.


2.) Before you can fully remove the seat, you will want to tilt the whole seat back to reveal the wires underneath. There are three plugs to remove which are easily accessed by removing this box. There are two Phillips screws on either side. Remove those and the whole unit will come down which allows easy access. Now you can remove the seat! Watch your back; the seat is extremely heavy so remove it with caution. Keep in mind that the rails are sharp, you may want to cover them with a towel so that you don�t scratch your paint as you exit the car.


3.) Now is a great time to bust out the vacuum cleaner and thoroughly clean the area under the seat. This area will be gross. Once cleaned, roughly mock up the parts to ensure you know where all the parts go and ensure that they fit correctly. If you are going to install your seat using rails, go ahead and mount the side mounts to the rails and then the rails to the floor mounts now. If, like us, you are not using rails we shall skip go straight to step 4.


4.) If you are not using rails, bolt the floor mounts to the floor now. This is done with four torxs bolts. Next we mount the side mounts to the seat and lower the seat onto the floor mounts. Final assembly will require the side mounts to be mounted to the floor mounts outside of the car and then the seat lowered in at the end. Since we are not using rails, we need to know roughly where to bolt the side mounts to the floor mounts. We run a test fit this way so that we can see where to bolt them down. We gently lowered ourself in and slid the seat back and forth to find a position that felt comfortable. Once that position was found, we looked down to see which holes lined up and took note. (We apologize, we did not take pictures of this step!)

5.) Now that we know which holes to use, I removed the seat and all of the hardware from the car. Bolt the side mounts to the floor mounts along with the harness submarine bar (if you ordered mounts that include a harness submarine bar). Before you put this back into the car, make sure to transfer over your seat belt buckle! This is a 17mm bolt and thankfully, Brey Krause has already incorporated a threaded hole for it on the new mounts. A great feature that all mounts should have! Now you will bolt this whole setup back into the car.

Note how Brey Krause tapers and recesses all of their hardware? Awesome quality.


6.) Perhaps you can call this the OCD step but all of these now unused wires annoyed us and surely will rattle against the floor. I secured these with a simple zip tie to keep things clean and tidy.


7.) With the hardware and mounts installed in the car, it is time to lower the seat into the mounts. Be careful doing this so as not to scratch your seat. A bit of painters tape around each mounting hole will help keep it scratch free.
I quickly noted that my seat ran a bit narrow for the mounts. I was roughly 10mm off from a snug fit. Don�t worry if this is the case on your seat as this is common with certain seats (usually Recaro�s). I used slightly longer bolts and utilized a simple spacer to fill in the gap. Tighten the bolts until the lock washers close. Do not overtighten these bolts!


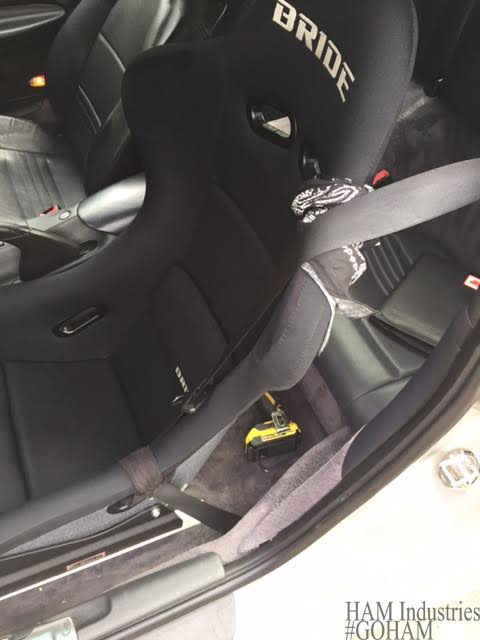
8.) Whenever I know that the stock belt will be used with a bucket, I like to run the belt through the outer harness hole. This will make sure that the belt still sits across your lap at the correct level. Again this is a simple 17mm bolt and only takes a second to do. I highly recommend this step.


Again with the OCD� I run a bit of material over parts of our seat that will see a lot of seat belt abuse. Namely the part pictured above and the shoulder area at the top.

9.) Now run through all of the bolts once more to ensure they are all tight and you are done! Go enjoy your new seat, which I find is one of the best modifications you can make to a car!

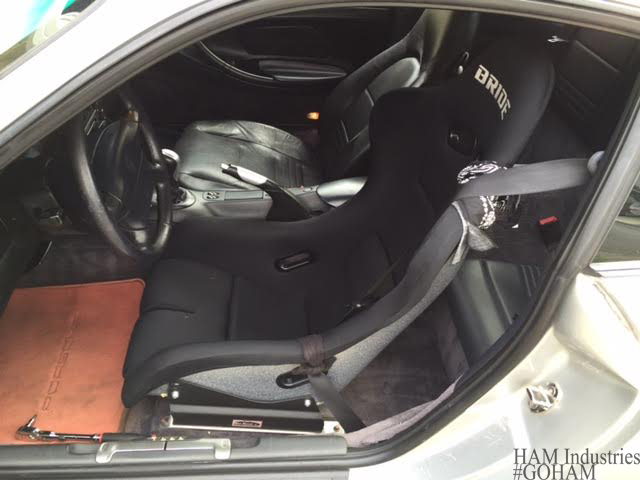
As a recap, I love the new driving position in the 996! The stock seating position was not ideal for me. It felt too high and lacked any sort of support. Now being lower in the car and solid mounted, it feels fantastic! Please note though, a roll bar will be going in very soon. It is generally un-wise to run a fixed back seat in a car with no roll bar. Also, removing the stock seat will cause an airbag light and improper functioning of the airbag. For me, this was not an issue as a MOMO steering wheel went in at the same time.
I am also extremely impressed with the Brey Krause mounts (sadly I am not paid to say that). They were highly recommended to me and so I was anxious to try them out. Having used many different brands of seat mounts, these certainly feel the most well thought out. Not only did they fit with OEM type standards, the seat is dead center to the wheel! Of the many many cars that I have installed bucket seats in, I have become accustomed to sitting slightly off-center of the steering wheel�no longer is that the case! I also had no clearance issues to the door or transmission tunnel. I can see a wide seat being installed with relative ease and clearance as well (the Zeta is a standard sized seat much like a Sparco Evo or Recaro SPG). Like I mentioned above, the Brey Krause side mounts had an incorporated seat belt buckle attachment which is a fantastic feature as many companies leave the seat belt bucket attachment up to you to figure out. Good jobs guys!

The following 2 users liked this post by Ying:
2005 996 C4S (01-19-2020),
Kdon (03-02-2023)