When you click on links to various merchants on this site and make a purchase, this can result in this site earning a commission. Affiliate programs and affiliations include, but are not limited to, the eBay Partner Network.
This is a suggestive guide detailing steps one can take to replace the engine air filter in the 987 (Boxster/Cayman) cars. The first section includes steps to put the Boxster convertible top into service position, as the 2007-on Porsche owner�s manual no longer includes these steps. Putting the top in service position will enable the owner to access the engine bay.
Important dress/outfit tip: You�ll be leaning on the car/paint OFTEN. Unless you don�t care about paint work, I strongly recommend wearing clothes that do not have buttons, zippers or made of tough fabric (i.e., AVOID button down shirts, jeans, belts, etc.). Gym shorts, sweat pants and regular tee shirts are great. If you want to be George Costanza and �drape myself in velvet if it were socially acceptable�, now is the time.
Putting Convertible Top in Service Mode:
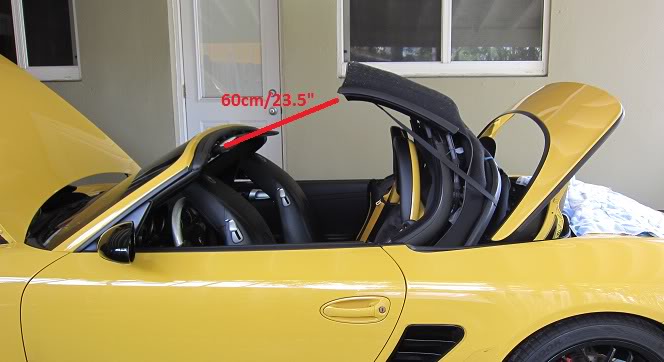
1) Open the convertible about half way as pictured below. According to pre-2007 owner�s manual, Porsche suggests a distance of 60cm (23.5 inches) between the top windshield frame and the convertible top.
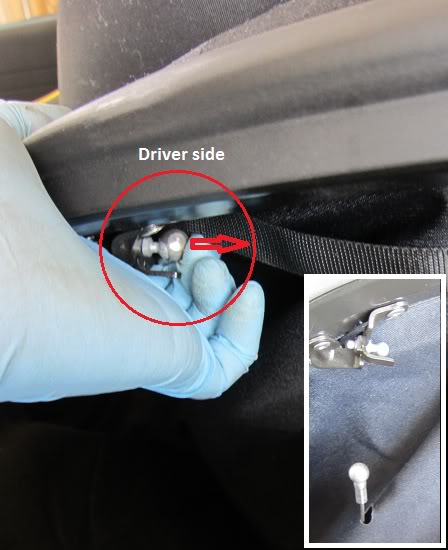
2) Lift the rear glass about 6 inches or so to find a silver wire cable attached to the window frame via a ball-joint. Simply �pop� the ball-joint out of the socket (circled & close-up). Repeat for other side. This let you lift the glass frame greater than the 6� now.
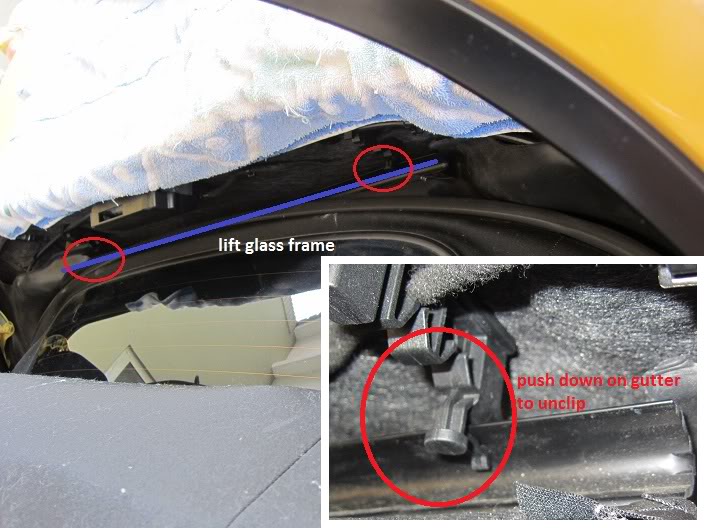
3) As you lift up on the rear window glass frame, you�ll find a fabric cover connected to a drain gutter/channel (blue line) clipped to the trunk firewall. Unclip the �gutter� from the two clips (circled) located at the firewall to the trunk - see close-up.
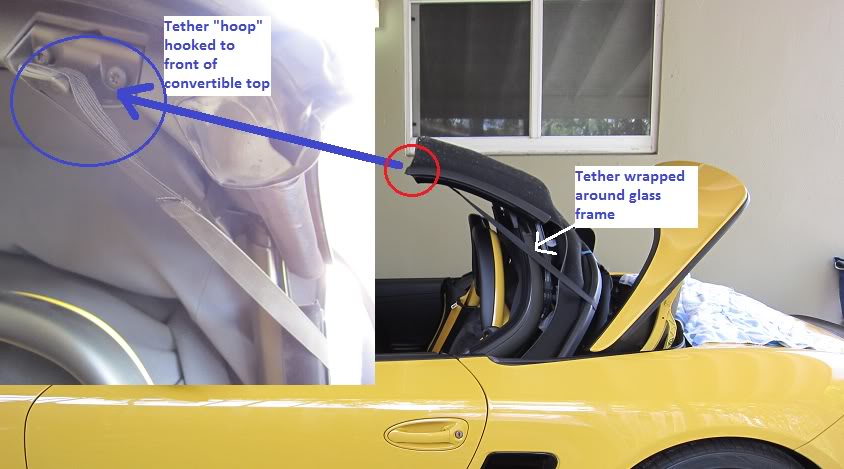
4) Now, lift up on the rear window, un-Velcro the tether (circled) and hook the �hoop� to the front of the convertible top to hold the window frame at service position (see picture & close-up). That�s it. The top is now in service position. I then used some painters tape to �tape up� the fabric cover.
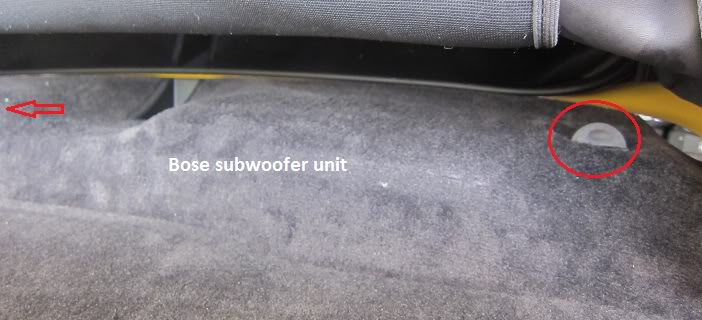
Removing Bose Subwoofer:
If you have the Bose system with Subwoofer, you�ll need to now remove the subwoofer from the shelf. If you don�t have this option, you can skip to next section.
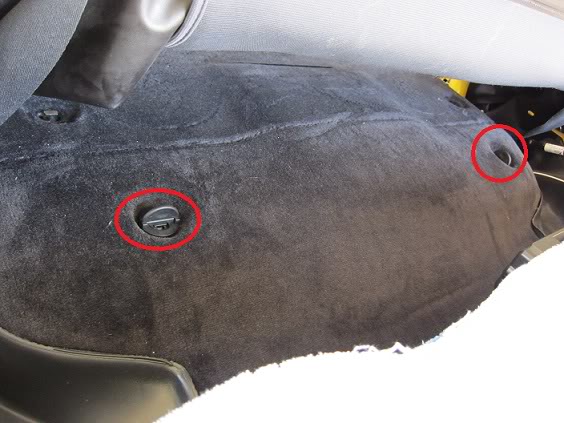
1) Look for two twist lock holding the subwoofer down (circled). Turn the lock 90 degrees to un-lock. Repeat for other side (arrow). You should now be able to move/wiggle the subwoofer unit.
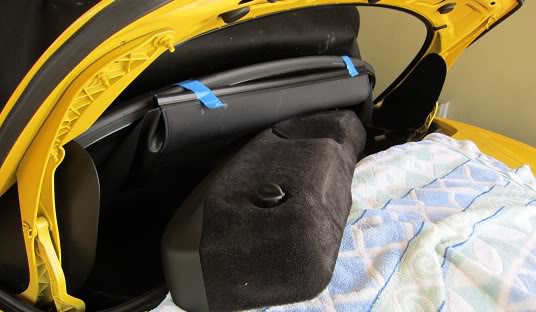
2) You must now disconnect the power connector at the sub. I found it was easier to wiggle the driver side of the sub at an angle towards rear of the car. This will give you more room to flip open the door and disconnect the connector. Now is also a good time to lay a towel down across the trunk to protect the paint.
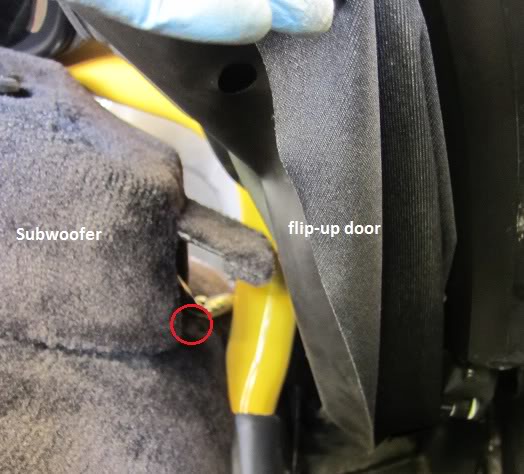
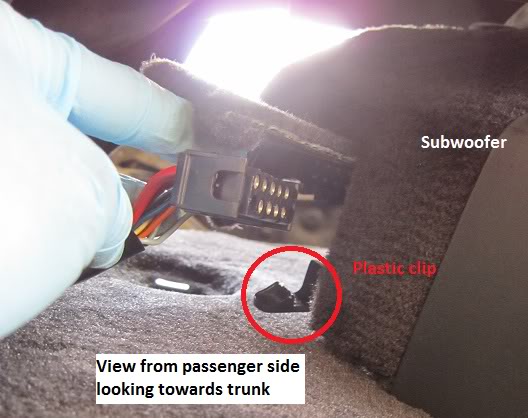
3) The power connector is located passenger side, under a small �flip-up door�. There is a small plastic clip (circled) that you need to push down so you can flip-up to open the door. Reach in, follow the cable and unclip the power connector. Like other connectors, you squeeze the sides and pull. After that, simply remove the sub from the trunk side.
Removing Engine Cover Carpet & Aluminum:
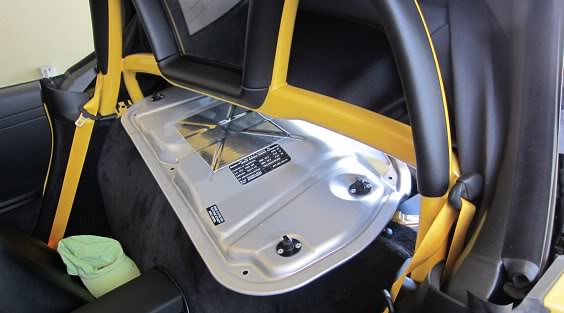
1) Un-lock the two twist locks by turning them 90 degrees. Now, you can lift the carpet out of the way.
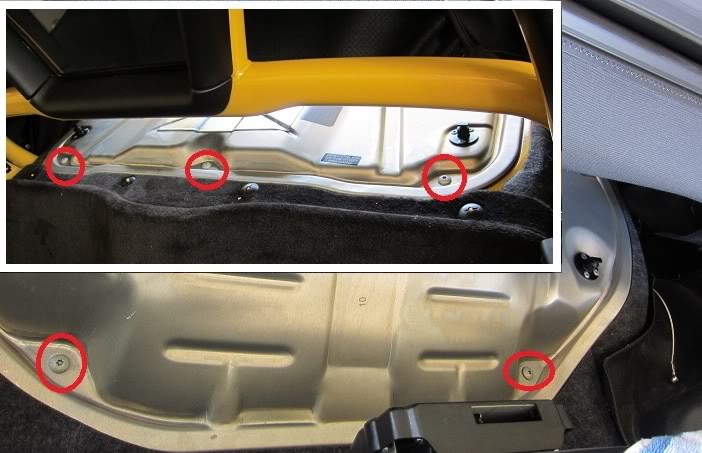
2) Undo the five T30 torx screws (2 towards back of trunk and 3 under the roll-bar to remove the aluminum engine cover. Tip: You can remove the aluminum cover from the cabin side to avoid risk of scratching paint.
Air Filter Replacement:
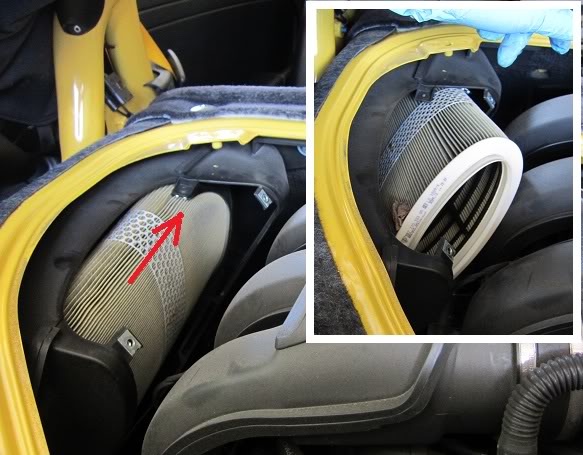
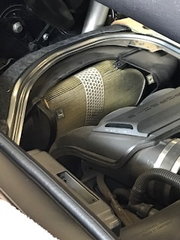
1) Find the airbox (on drive side) and remove two Philips head screws (circled). Pull up and remove the cover/flap from the airbox, then remove the 3rd screw (circled)
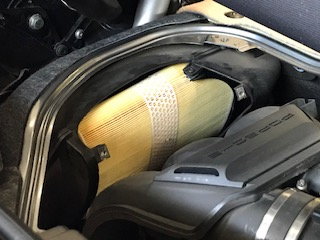
2) Push the filter towards front of car. Once filter is free, wiggle it out of the airbox.
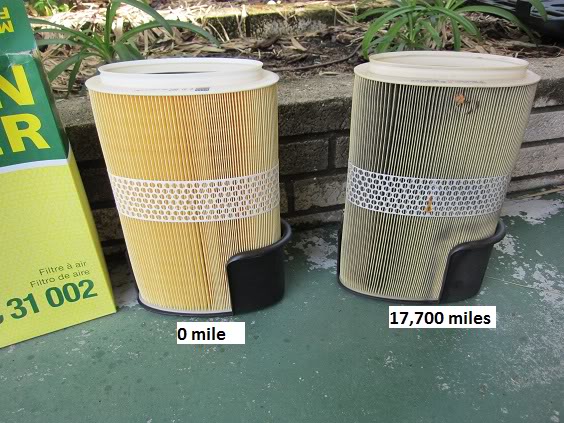
3) Re-installation is reverse. Be patient as you put the filter back into the box. The filter removes easier than the install. Depending on location, 17.7k miles filter looks like this.
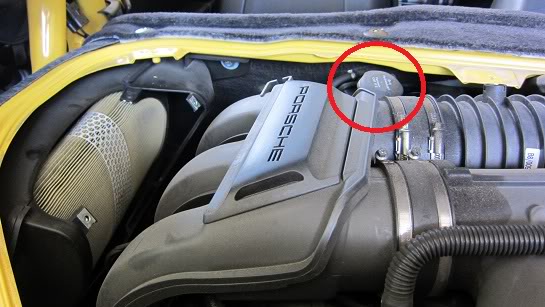
While you have the engine bay open, it�s also a good time to check your hydraulic fluid. Open the twist top (circled) and check the dipstick � one side marks for hot/other side for cold.
Thank you so much Lithium. I was at my independent mechanics who was kindly letting me use his shop and assisting when needed. 2007 Boxster S. We weren't sure how to deal with the glass as he is only now starting to see late model cars as they come off warranty. Your guide is well done and made the job easy. Great Job! Thank you again!
To make the installation of the air filter go smoothy put a little dish soap on your finger and rub a small amount on the inside lip of the new air filter and the outside of the plastic intake. Pops right on!
Lithium- really clear and helpful post. I will be very confident in doing this service in the near future with this post as a reference. Probably save some serious $$$ doing this myself.
Great write up. Easy to follow here in the garage with the .pdf open on the IPad. Also took the front inspection cover off to check the serpentine belt and inspect for fluids, etc. No issues, so I am about to put everything back together.
First time took about 2 hours. Next time should be an hour.
I couldn't edit the original post... but this also applies to Cayman. In the Cayman, you basically pick up from where you remove the aluminum engine cover.
Just replaced my air filter for the first time. Great reference here with this DIY. (Also, it's helpful to find an online owners manual that still has the service position instructions... like a 2006 Boxster).
Some comments on this work...
-disconnecting the Bose speaker box was kind of tedious and challenging, but with patience was able to get it disconnected
-I don't think my engine had ever been accessed from the top (12 years, 40k miles). Found some of the foam insulation below the carpet layer sticking to the metal engine cover. Not a big deal but had to get in there with a thin piece of wood to help separate the foam and metal surface.
-And as noted in the DIY... putting the new filter back in is trickier than removing the old one. Finally was able to finagle the new one in.
Old & new:
I am a newbie. Took around an hour.
Two things I noted:
The third air filter screw is on the filter. I got carried away and took the filter out without removing it. Luckily caused no damage.
When I removed the elastic from the front of the hood, somehow it broke the plastic cover. Not a big issue but annoying. Worth taking extra care when putting everything back together.
 05-19-2012, 05:33 PM