When you click on links to various merchants on this site and make a purchase, this can result in this site earning a commission. Affiliate programs and affiliations include, but are not limited to, the eBay Partner Network.
Last big rain some water reach the back of the seat... classic 986 story... ok
But I have a new top, new ECU with waterproof case, drains were clear and functionals(tested them), etc..
But I found the issue (almost sure).
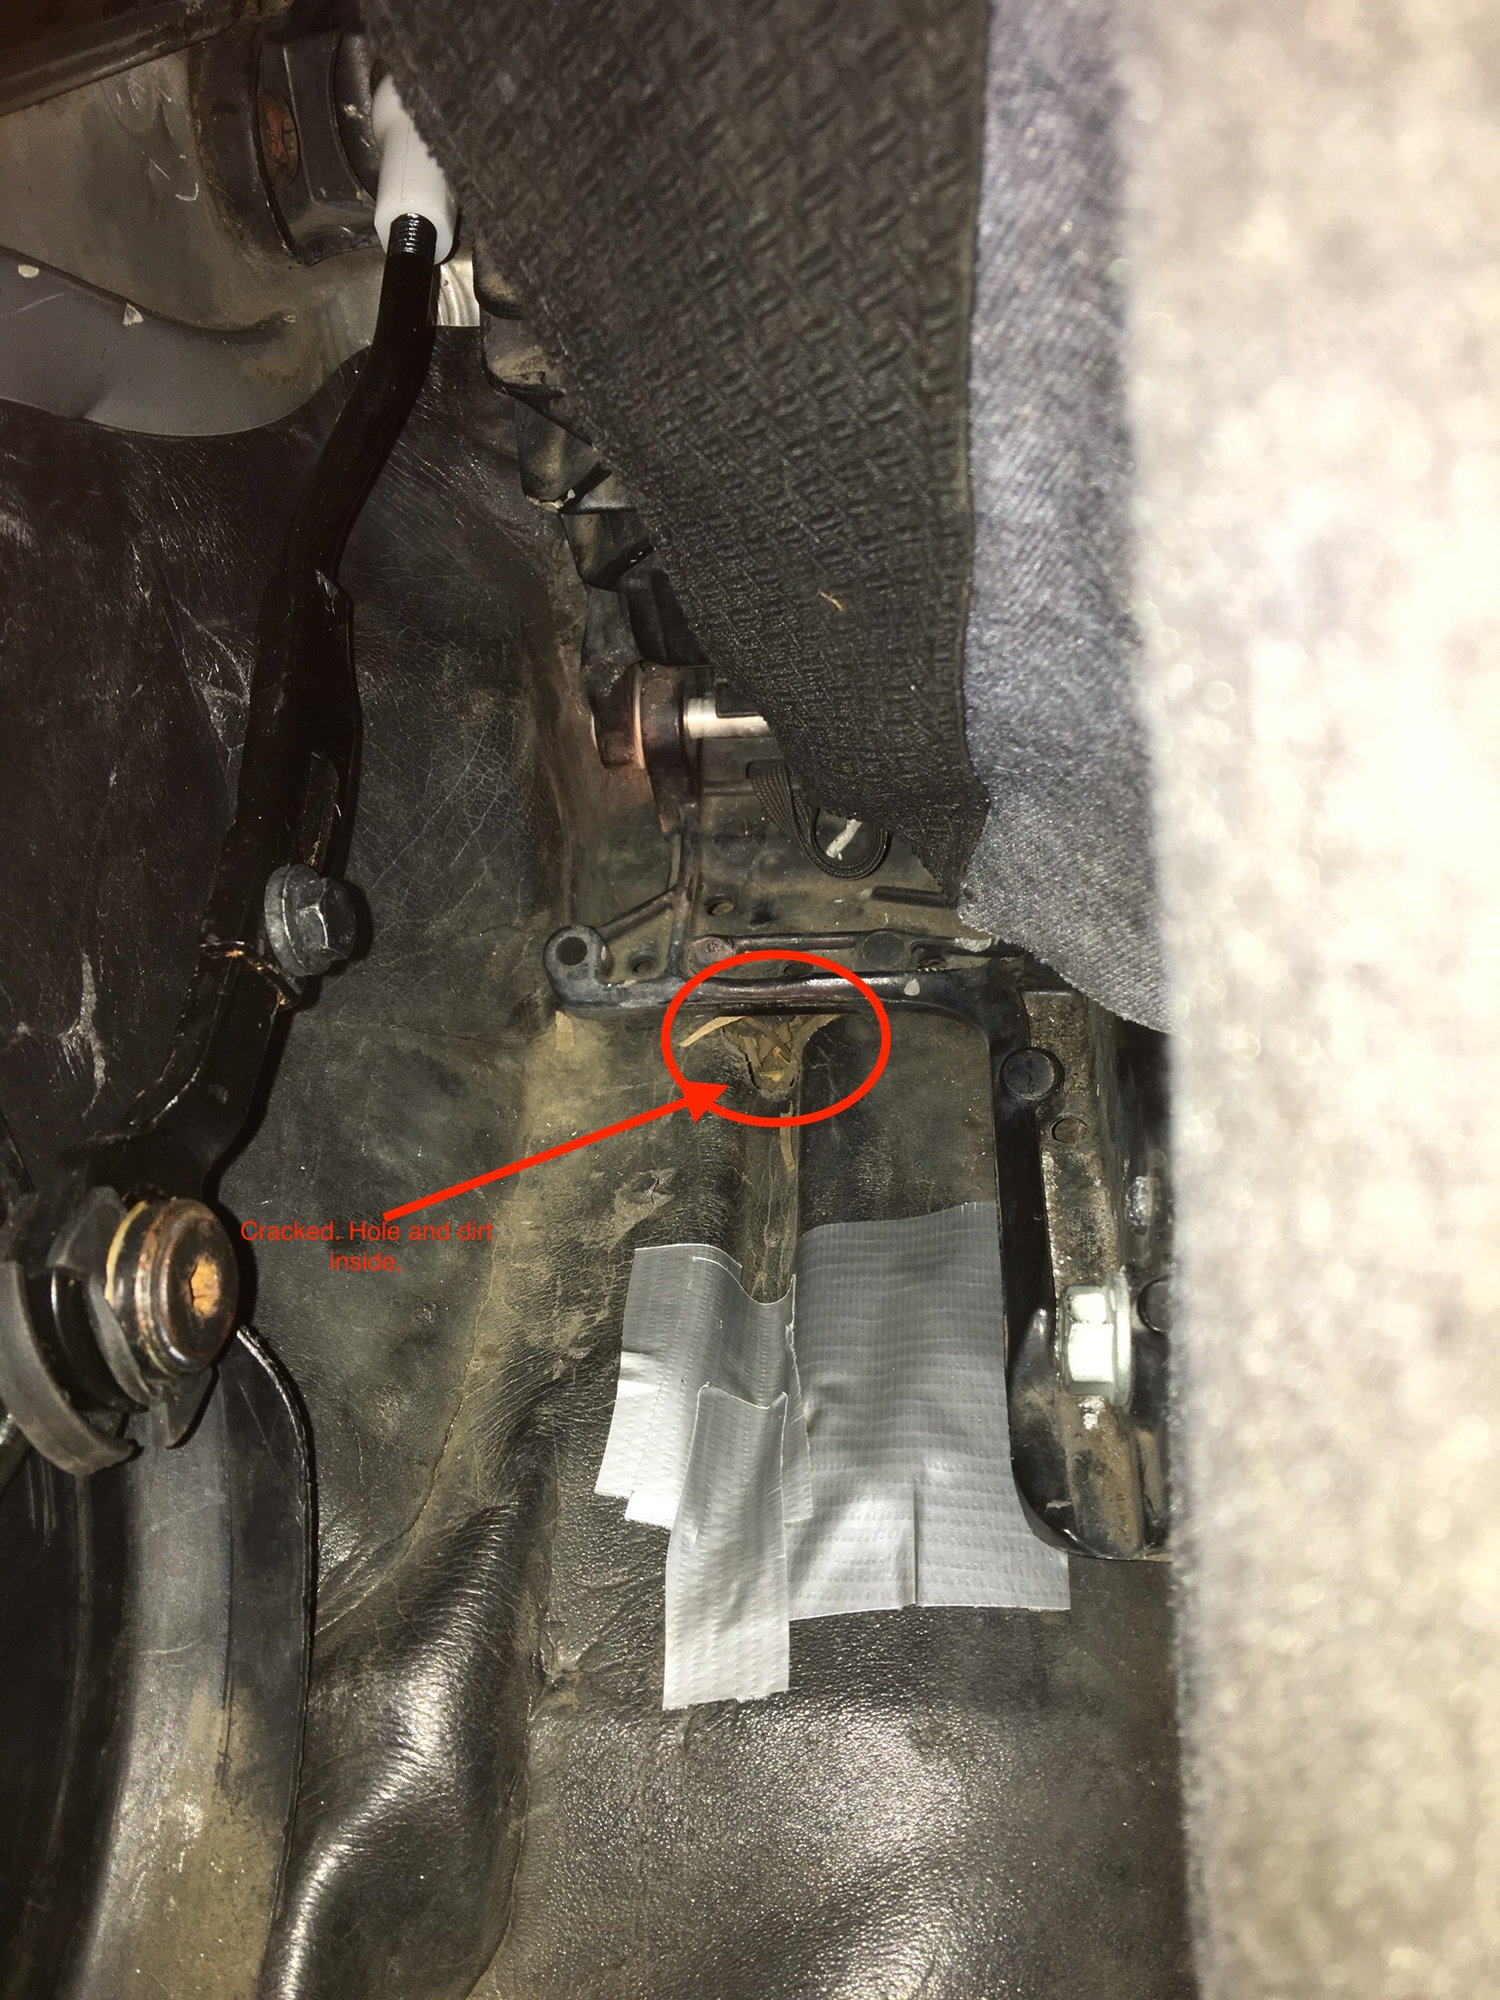
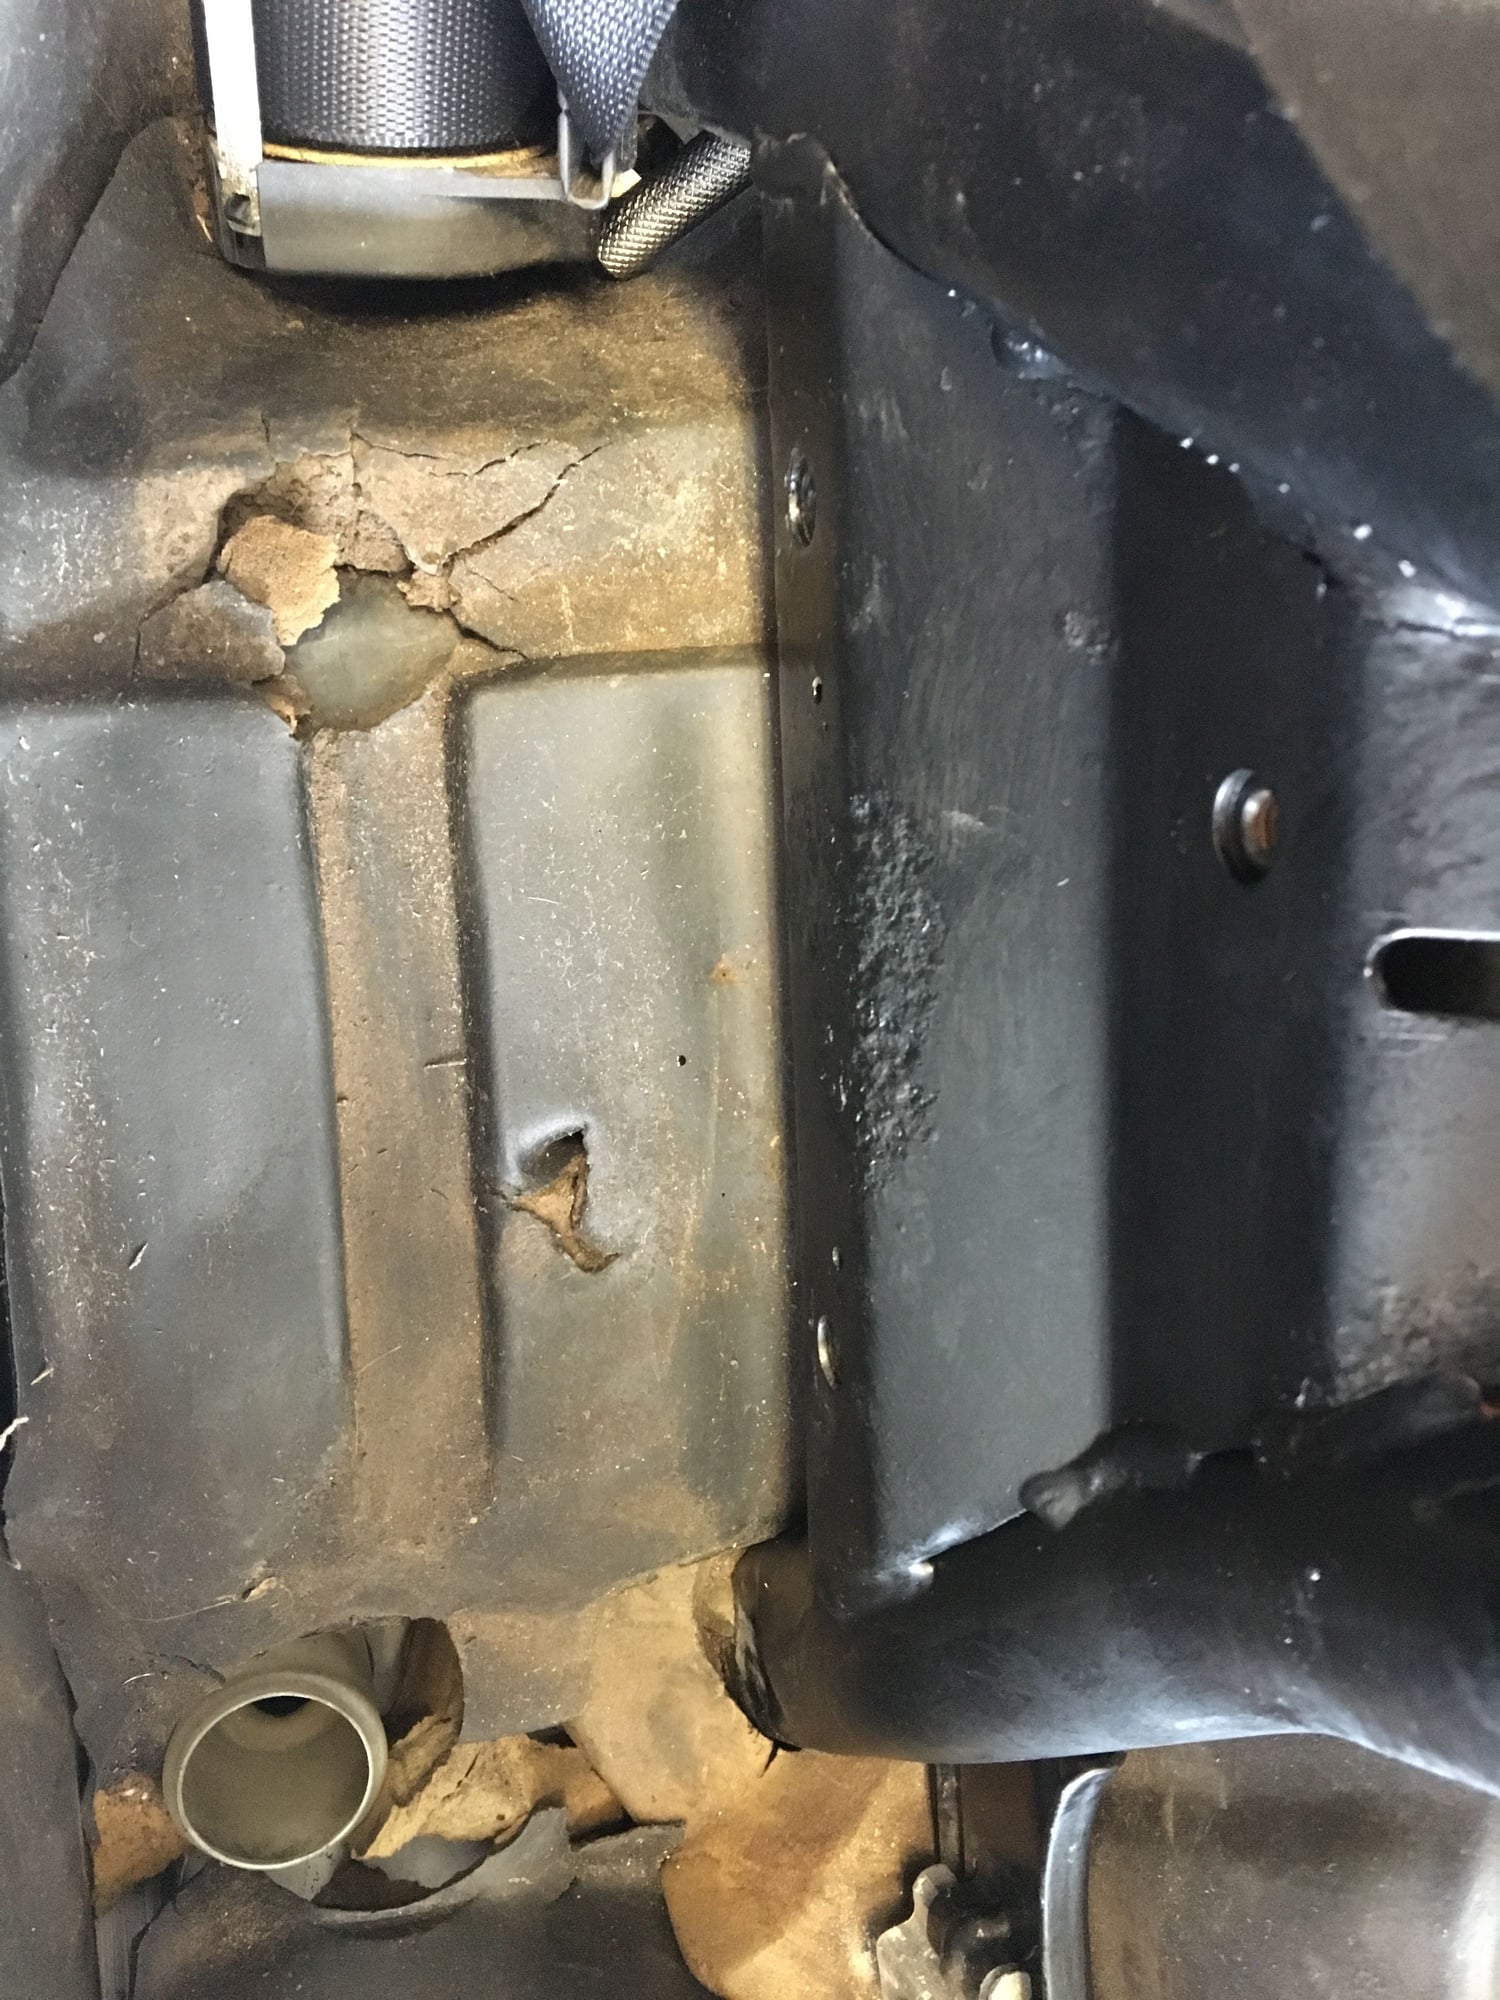
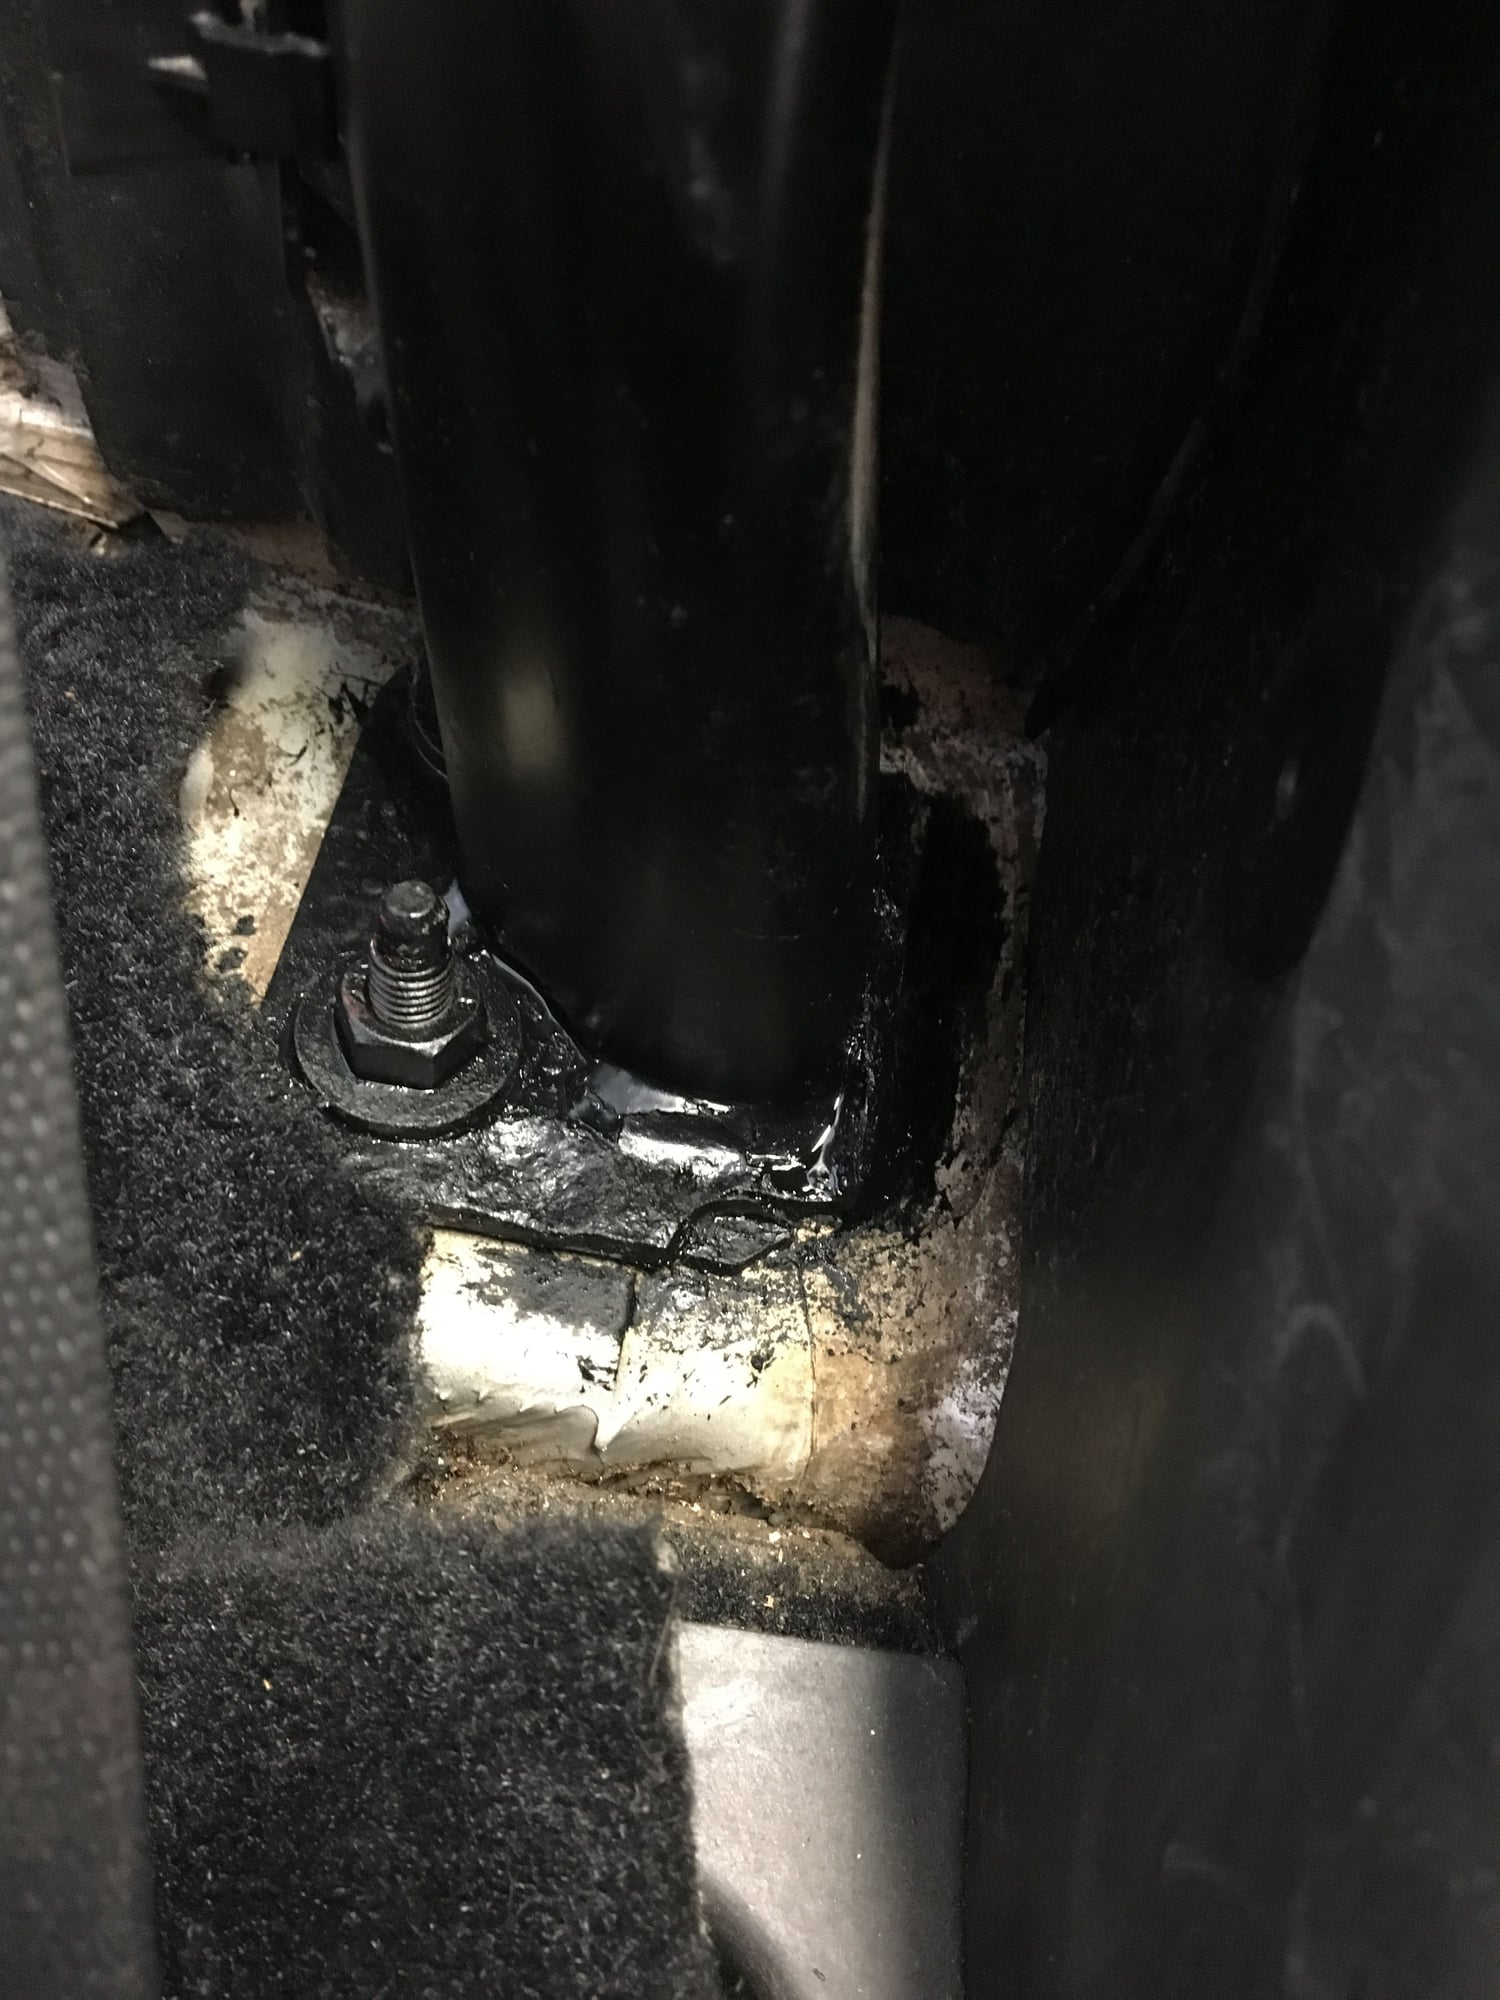
My foam drain tray liner is not in good shape, and was not well installed at some places... not under metal part... (perhaps a previous job) I fixed some hole and reinstall the foam properly under metal parts, but the main issue is show on the picture... I did not see it before... Then I was thinking of two options:
1) Put some silicon or Permatex and do a "dirty" job to seal as I can all hole and precisely the big one... and test if it works.
2) Change all foam drain tray liners. Need to remove the top frame (which I dont know how to yet...), and all top parts, clean everything and check under, then replace the foam.
Given how important it is to keep the water out of the cabin and what a significant role those water catch/drain basins play in this I'd vote for #2.
Not sure what you can use to completely seal the damaged areas of the styrofoam material that will remain water tight forever and won't further damage the styrofoam.
Maybe that flexseal stuff they advertise on tv? I know there are now competing products to be found at big box hardware stores by various manufacturers.
I did it. I follow mikefocke's link to remove the top frame.
I lost a lot of time on the 4 tiny F** screws... stuck and very difficult to access and removed. I bought a small power torque screwdriver, put W40, and was very patient to remove them slowly... You dont want to break the head f the screw. :banged:
Then I understand why people don't reinstall them... and I did not. They are useless anyway.
After removed the top, I inspected and cleaned, then I installed my "new" used $28 foam parts ( $28 each on eBay plus shipping), I think it was a good deal, here some photos, you will see some findings...
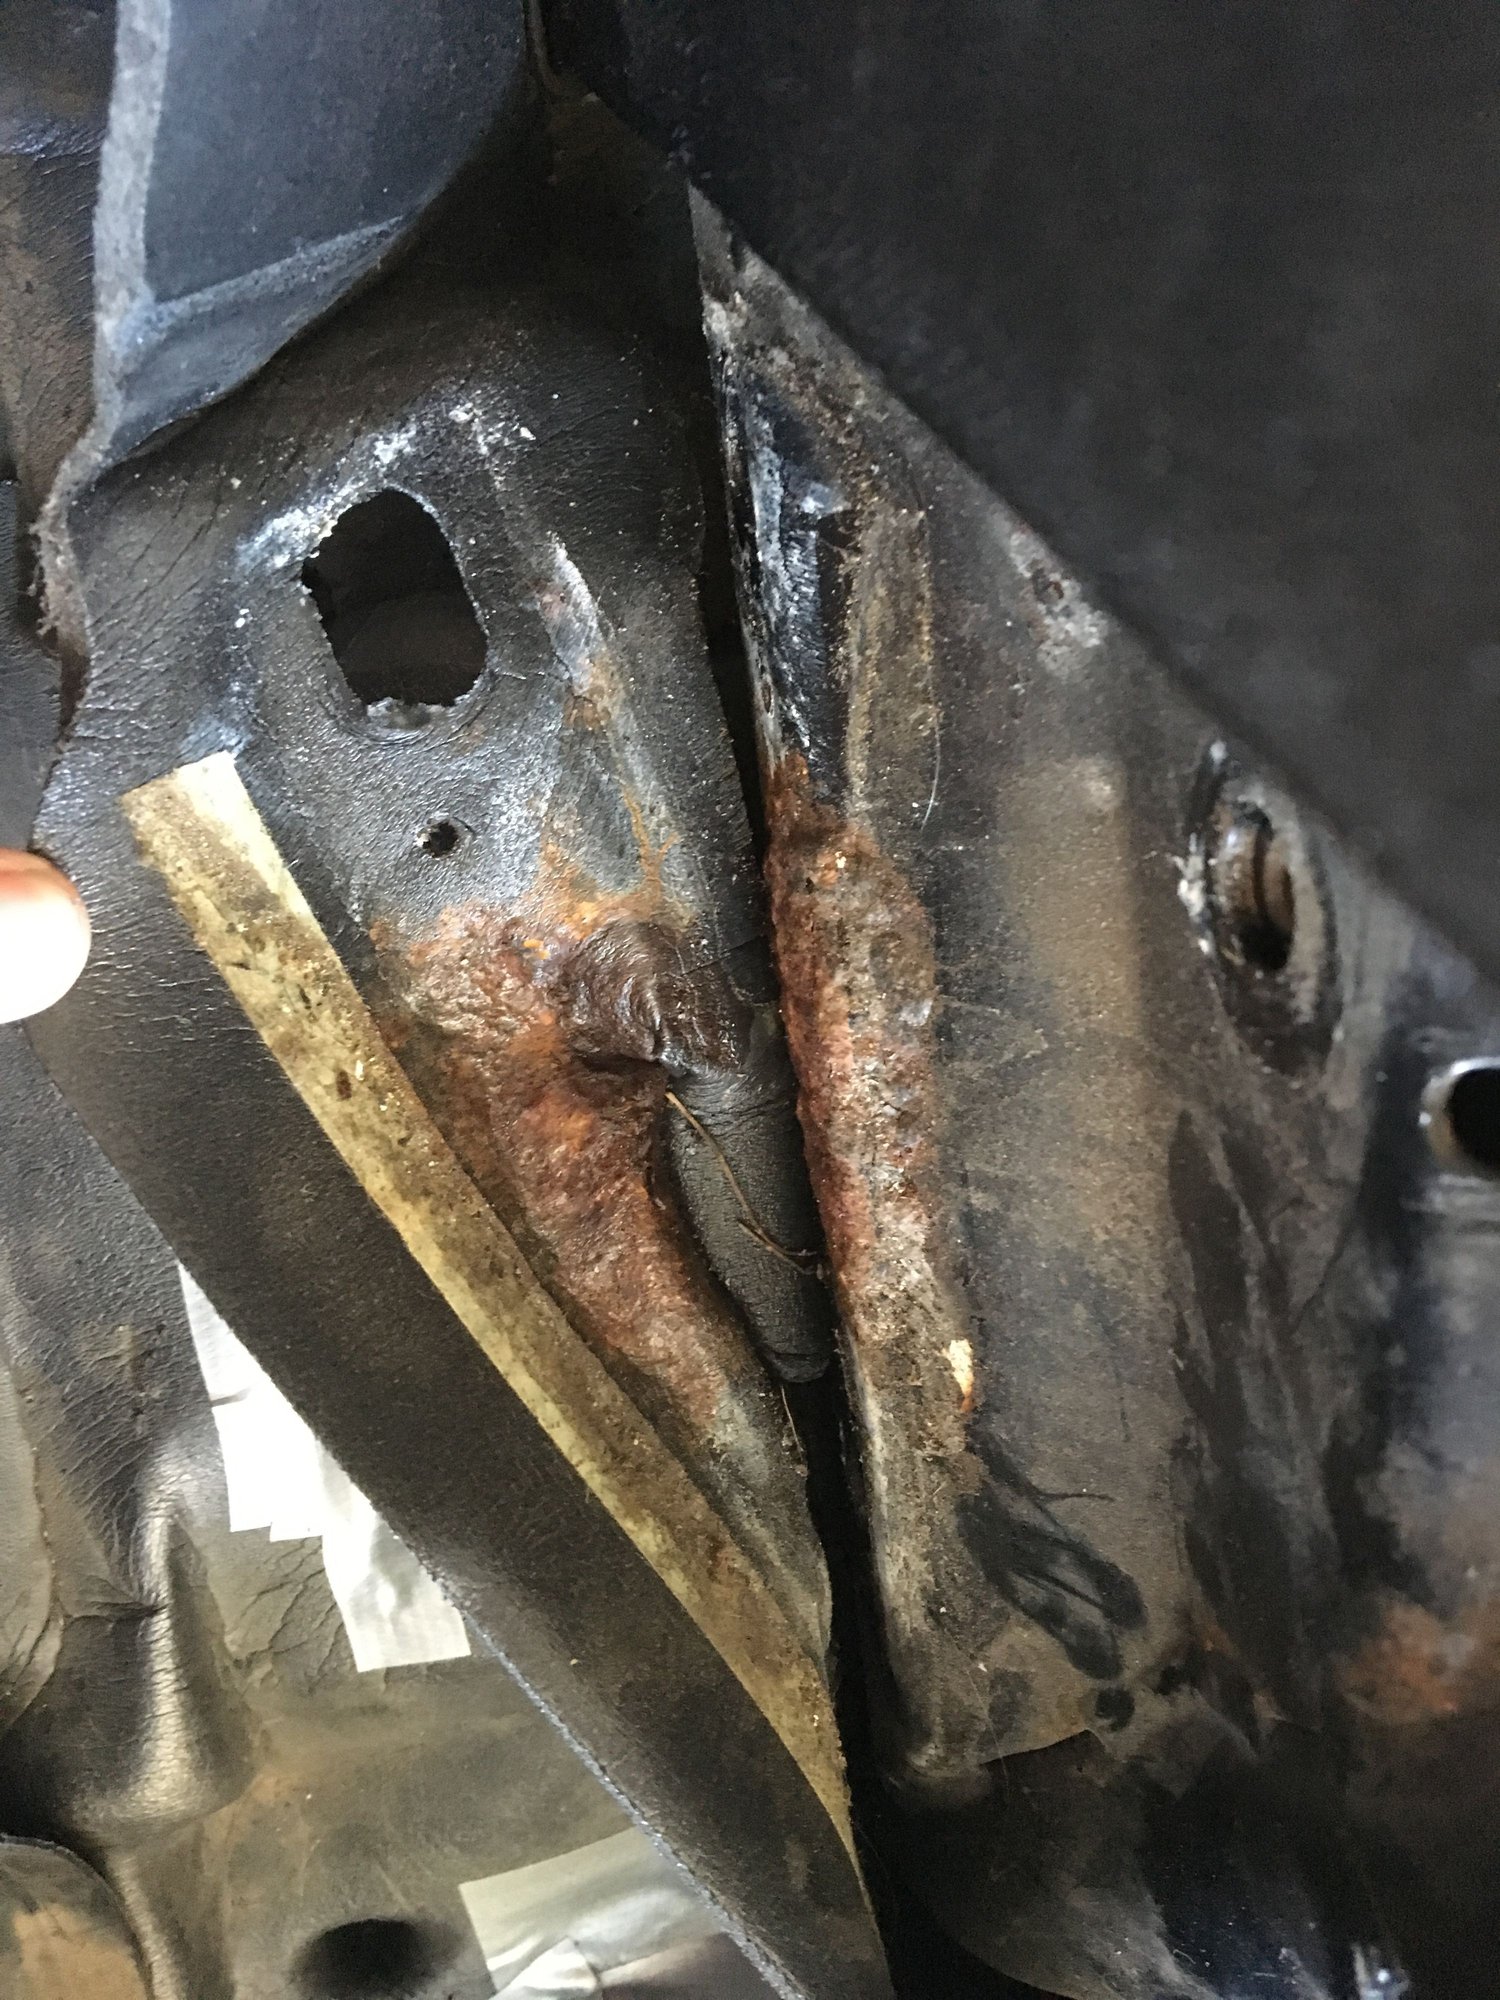
Some rust here, I restore this part... remove rust, treat and paint.
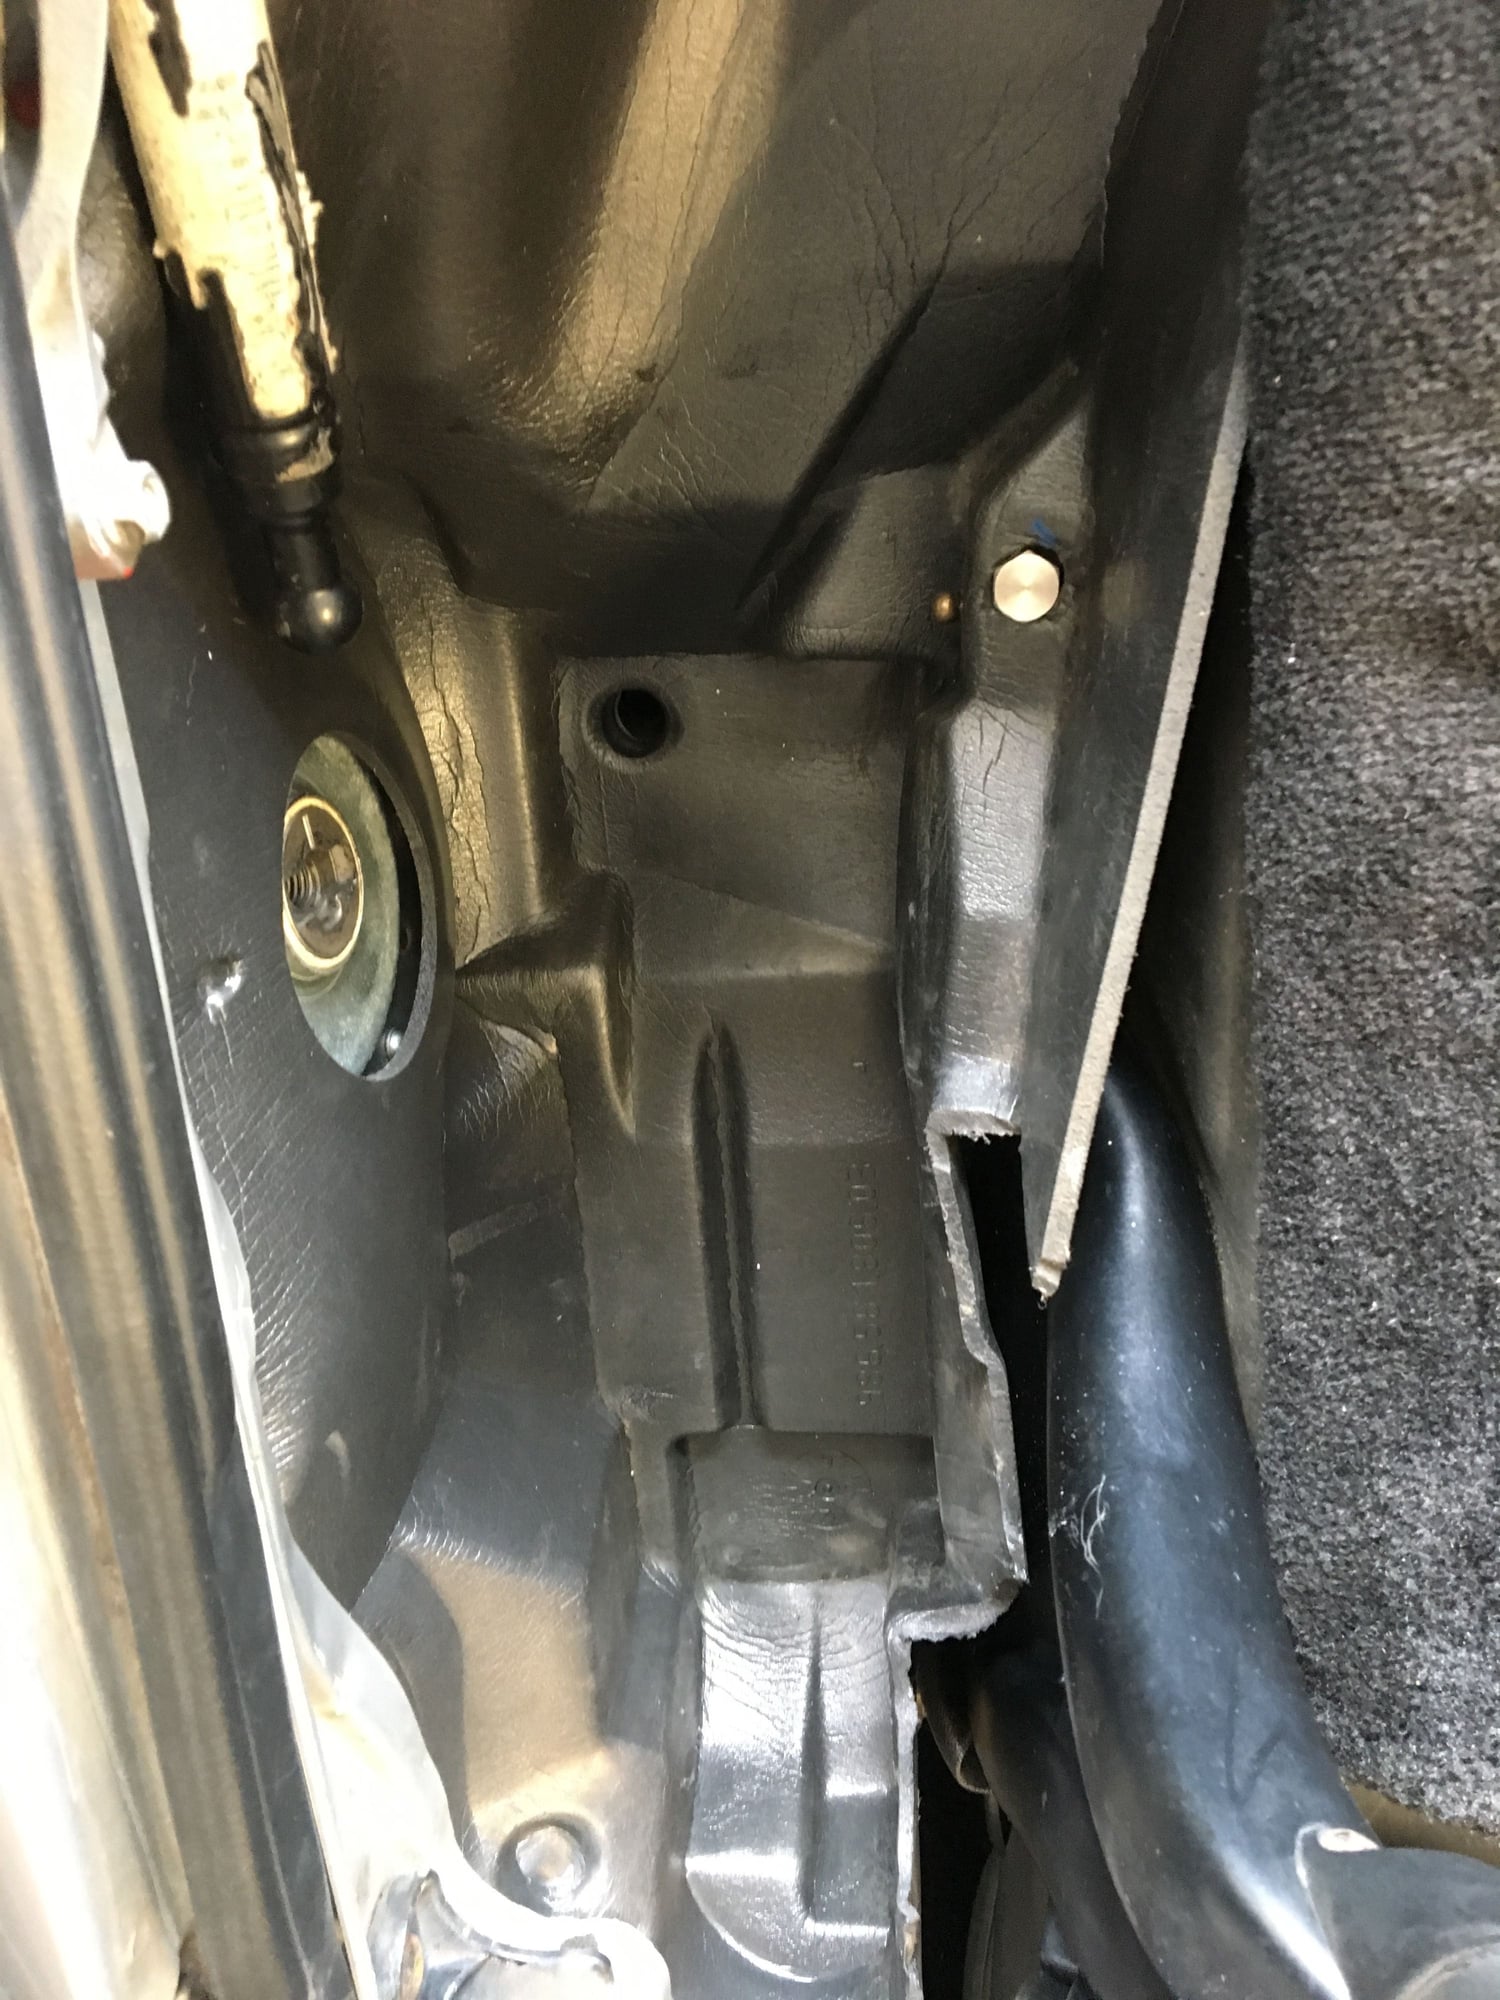
FYI, how it look like under the foam, foam again.. I clean here, but really not to much to do... except check the evacuation entrance is clean and not broken.
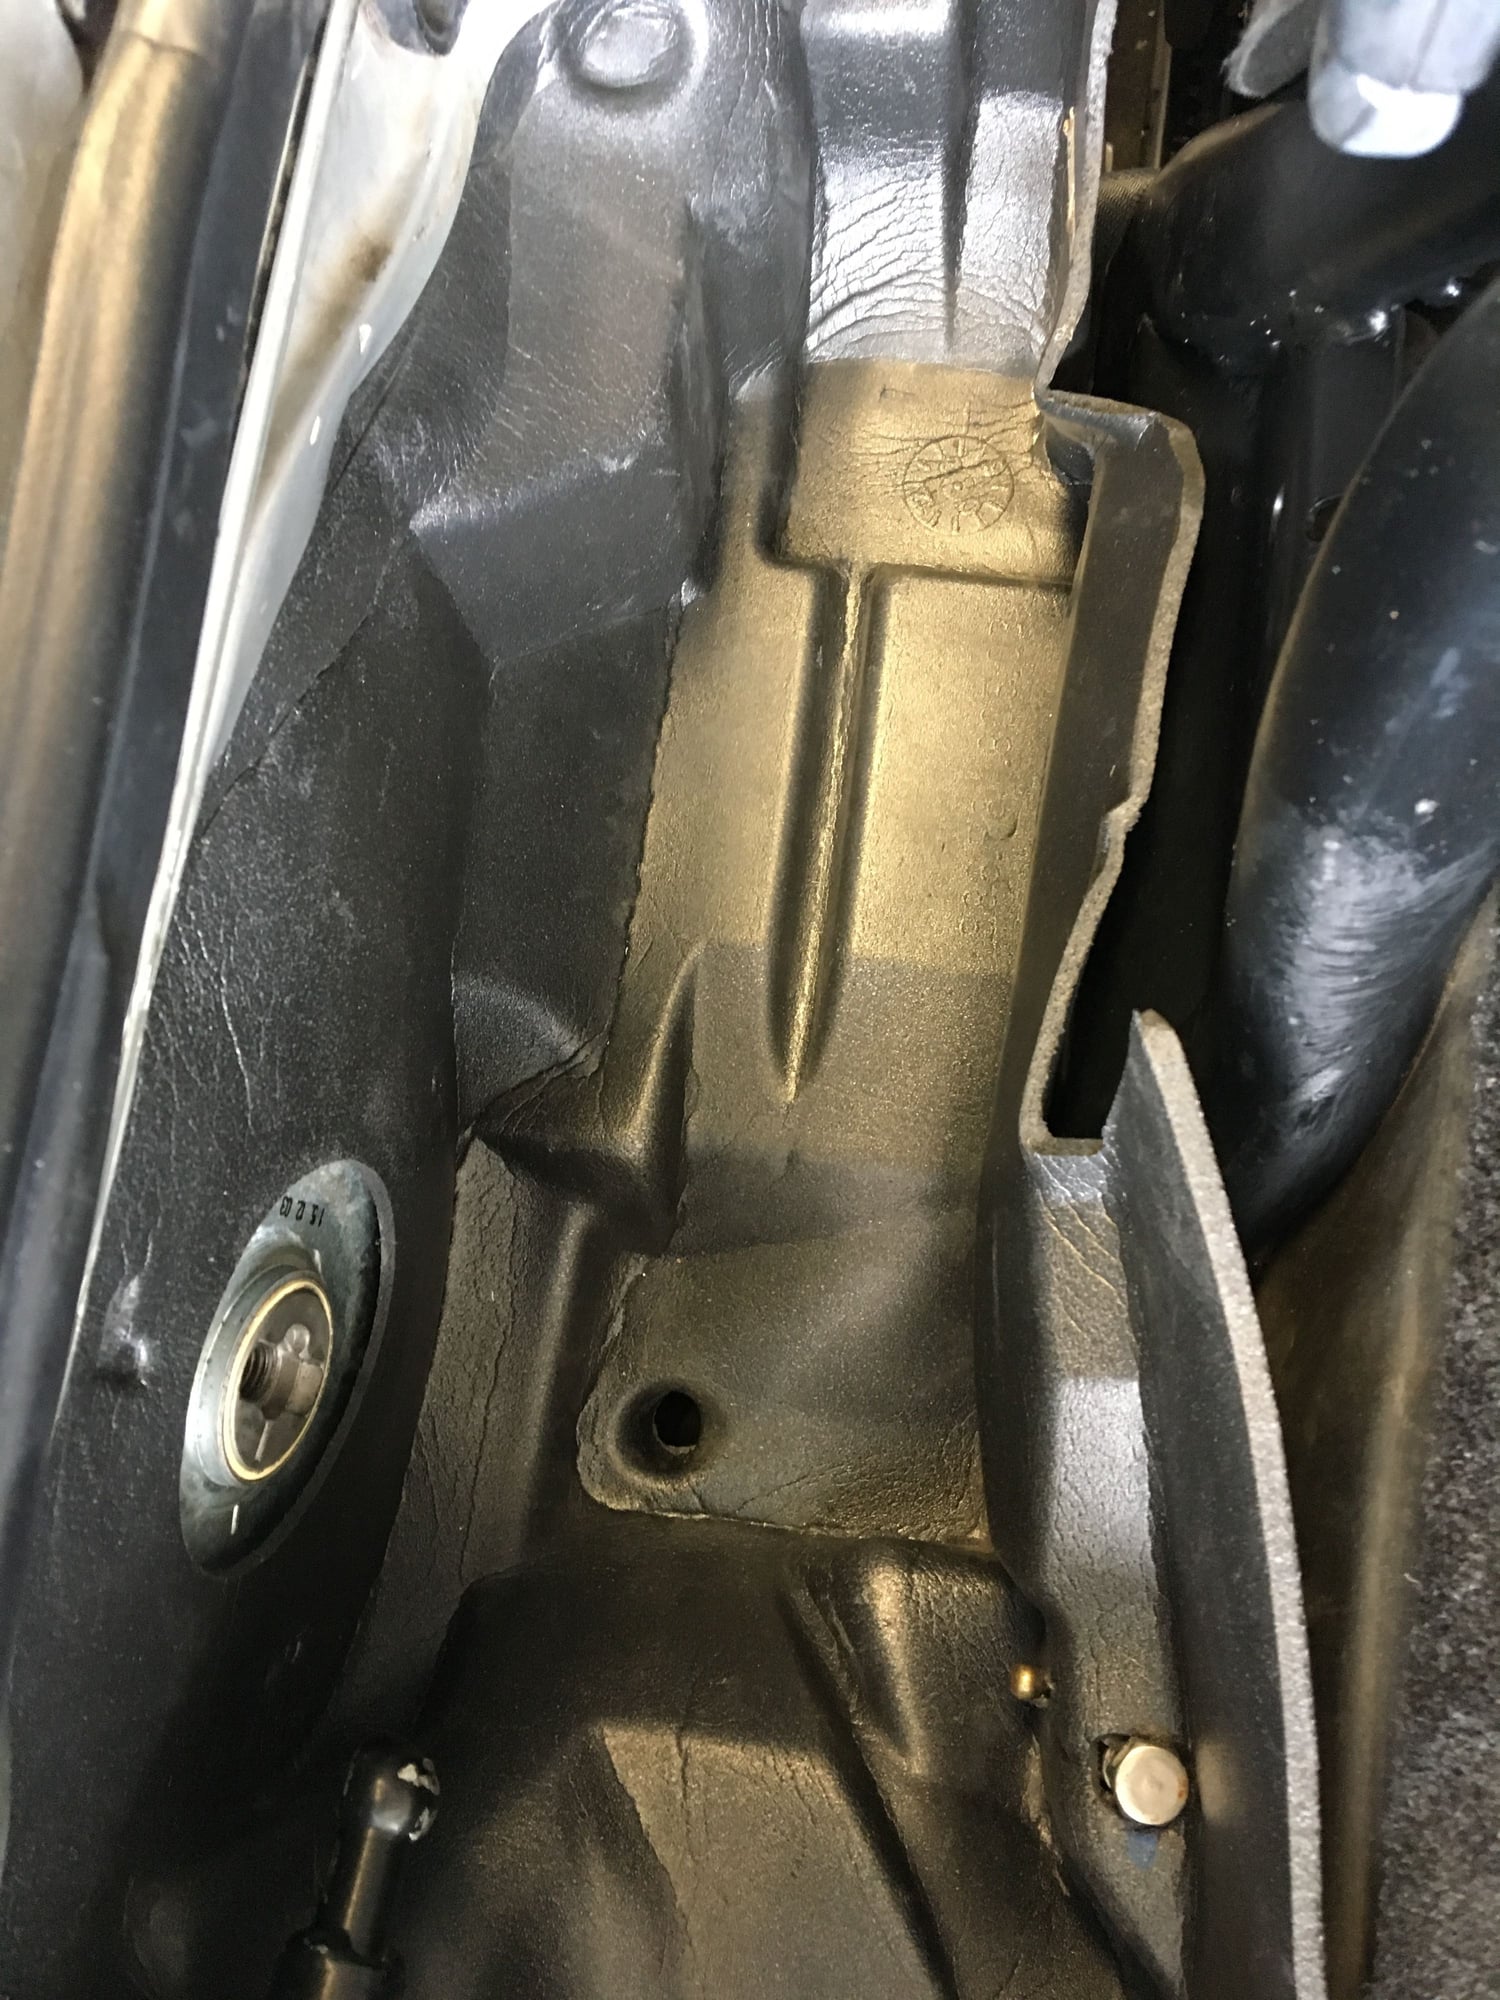
After, better, no? :-)
I installed everything and put double face tape at the same original spot to make sure that the foam will not move and stick again the metal part. (not on these photos)
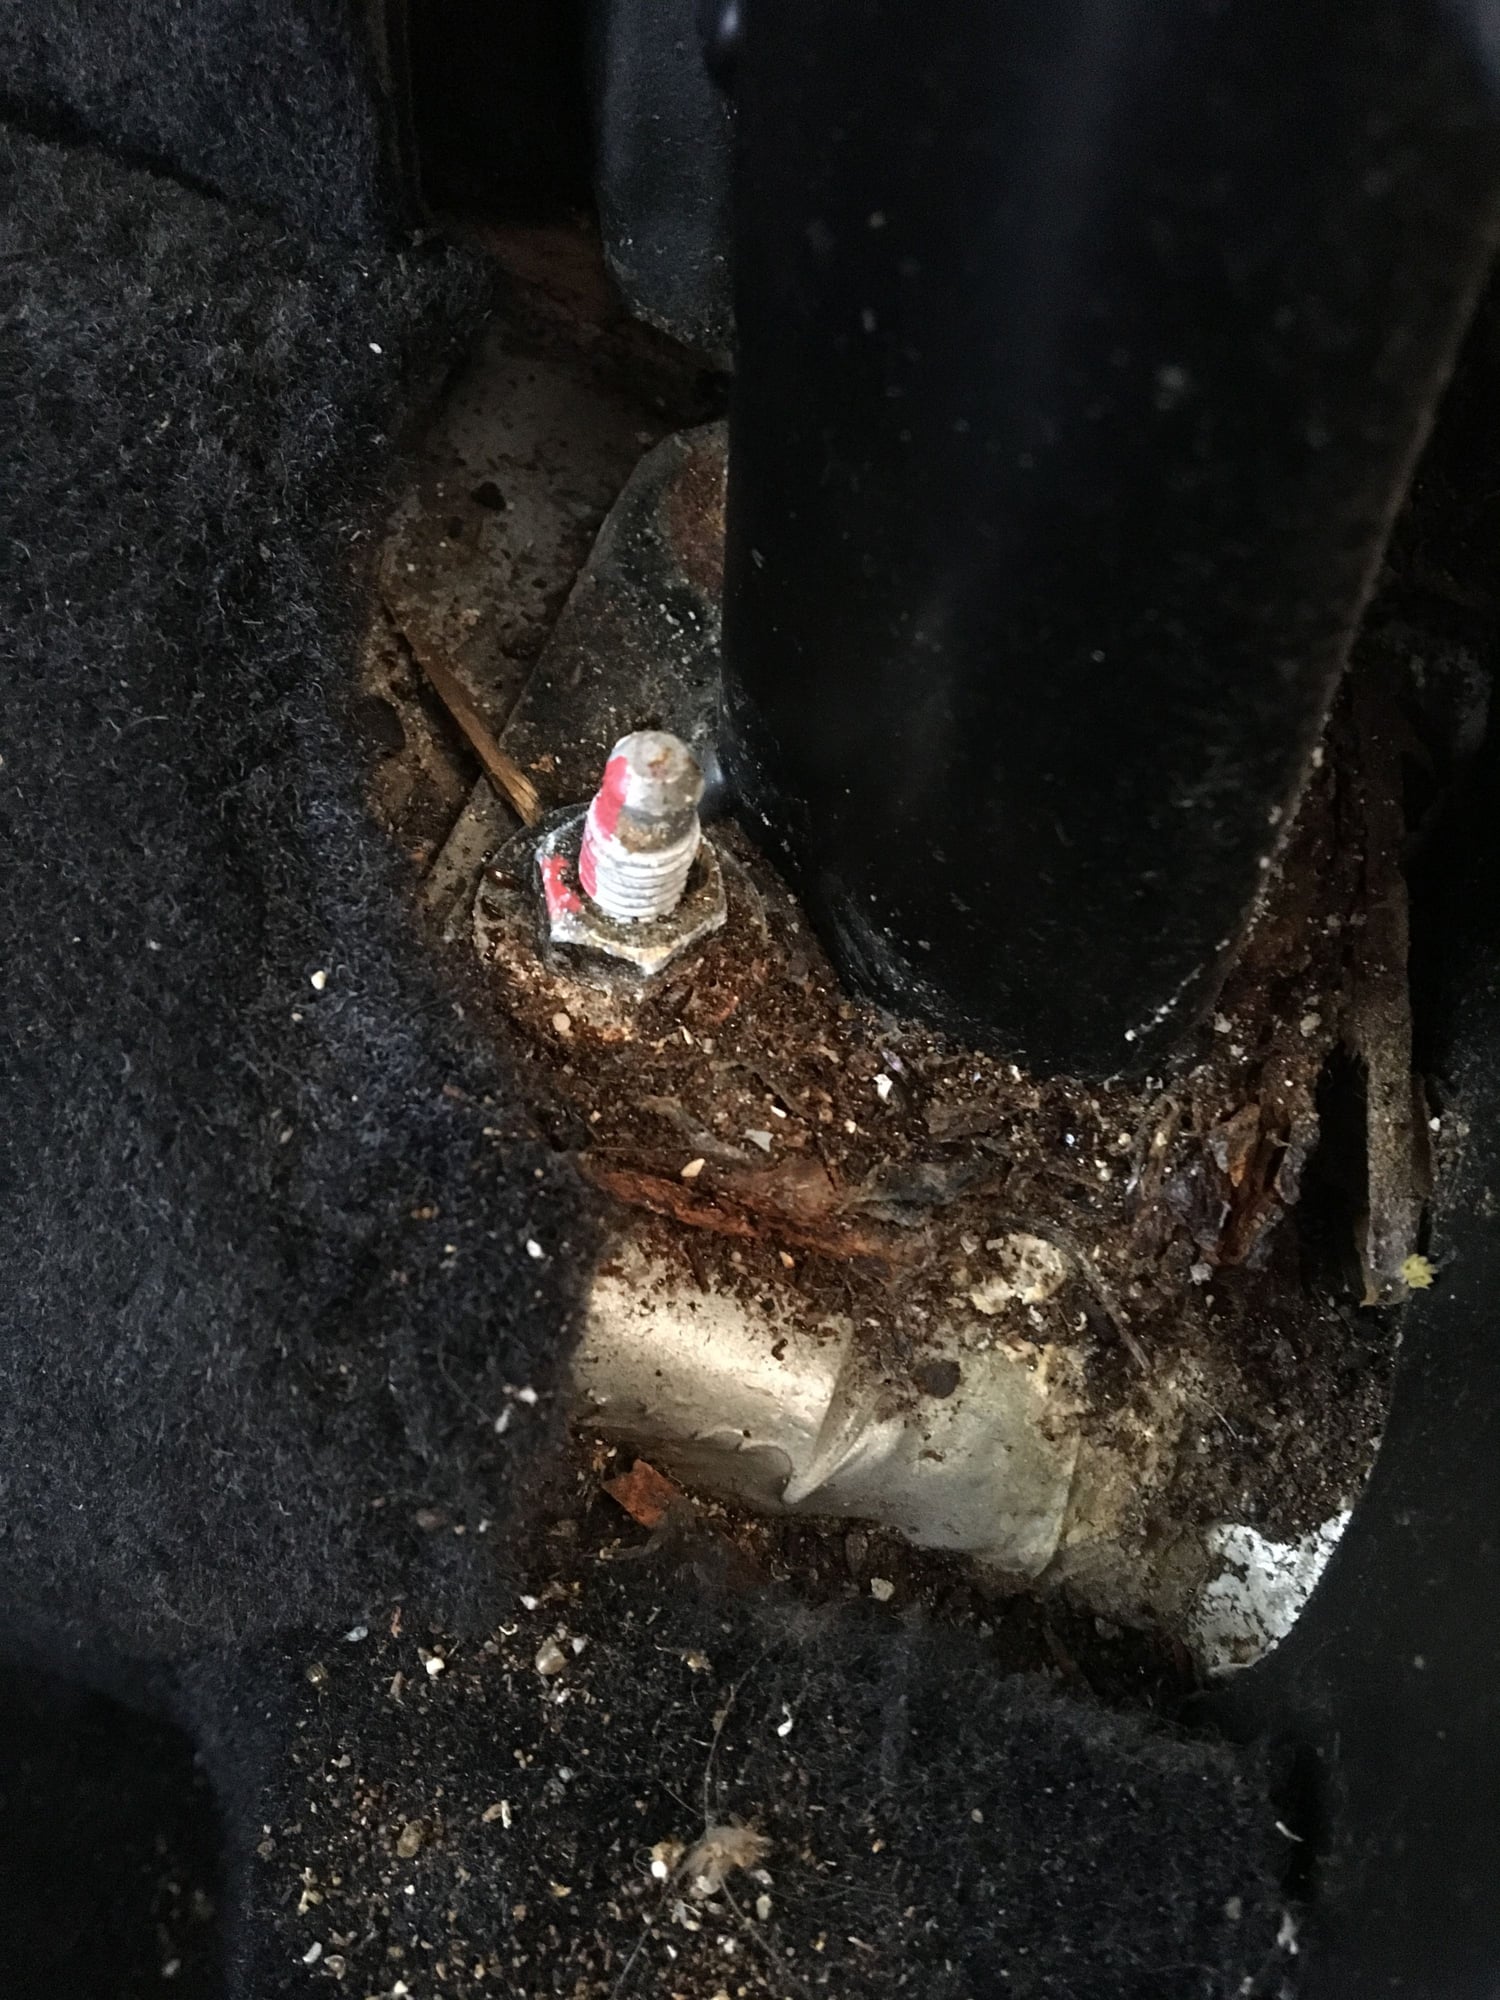
I found that too, at the bottom, behind the circular cover behind the seat:
And restore both sides (Passenger side was more affected). As it s a bit part with the point of attachment (at the rear) I am not to worry about that. It is look like horrible, but it was more superficial. Here after:
As I re-adjusted everything, my top is close better because tension is well adjusted from the right and left now.
Mission accomplished!
I should test it now :-) Next rain...
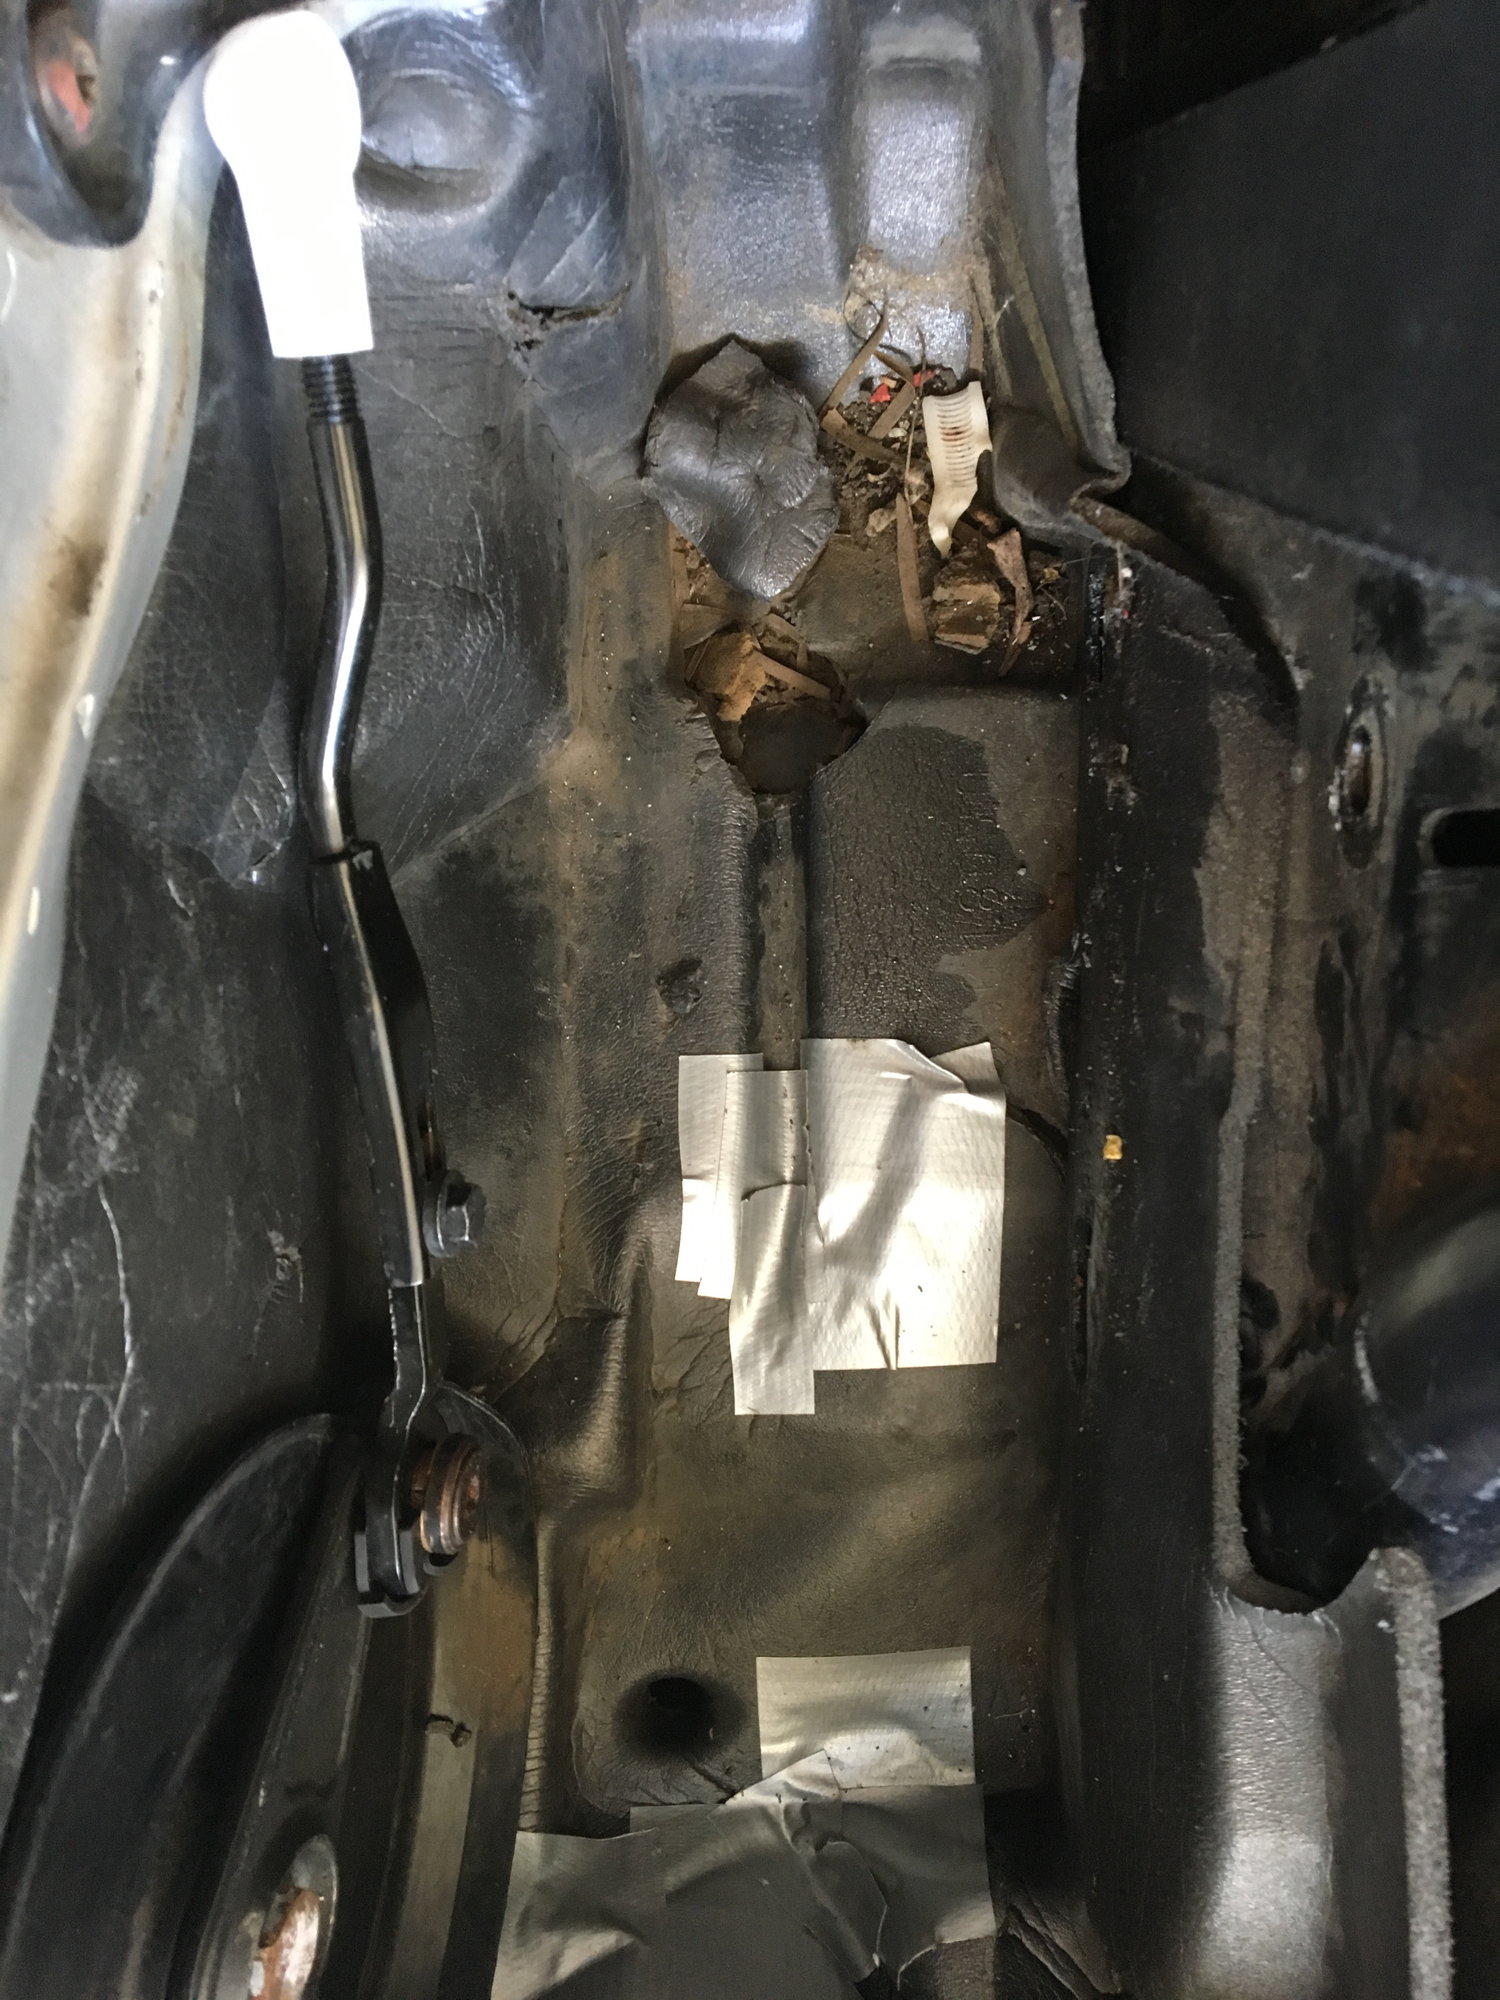
Nice to see the instructions panned out for you and you were able to fix the issue. Now there is a valuable lesson to be learned here incase this was/wasn't your doing. Do NOT continue to activate the top if you hear an audible POP or THUNK (I believe these are the technical terms). These holes are what I'd call collateral damage from the convertible top push-rod/s breaking and the convertible top being activated after. The jagged ends of the push-rod/s that are no longer attached to your convertible top frame fall down (thanks gravity ) and as the transmission rotates, it digs these push-rods down and into the foam drains. Once these holes have been made not only can water access the interior of the car but the ever important Alarm Control Unit is under the drivers seat at the lowest possible location! Cheers Mate
I think going for a expert plumber or drain cleaner can be a decent choice. These plumbers are knowledgeable with the ways and techniques to repair drain leak and clogs. To find best drain repair service NJ begin your pursuit by asking recommendations from friends, family and neighbours, who might have confronted the same problem. Going online and searching for professional plumber is also a great way.
Hi Guys, Just update: I did not have water issue anymore, even under heavy rain, then all good for this foam drain liner repair job. Good.
Thank you for your comments. GldMstr315 I got the waterproof case to protect the ECU and I have holes too... but no water issue anymore anyway.
But related to the top mechanism, actuals it broke again :-( the reason: a bolt when out from the cover mechanism... everything fo wrong... and as it happened to a friend a mine trying my car... he insisted a bit... push rods destroyed... but no damaged to my new foam...
Then, like everybody, bought again some new push rods to rebuild the top mechanism... again...
Top ajustement went well... but I discovered that I was not able to install the "rear" push rods (the one that open and close the cover.). You will tell me is not possible... But it is weird, top in close position, the minimal distance from the pivot lever and where you attached the push rods on the cover is inferior to the minimal length of the push rod itself!
Then I investigated, I believe the transmission bent inside the "chassis" because it looks like not parallel to the car... which could explain the issue with the distance between part... specially the rear push rod, as it is not adjustable. Then I remove one transmission (I have the repair kit installed, by previous owner), it came out with some difficulty (tension against 3 parts 986-561-789-02-OEM) It was difficult to say if these parts were bent but they did NOT fit easily when put back or remove the transmission... Transmission looks nice (2003) and not bent itself.
Do you think that this part could bent?
I believe that if the transmission is not aligned properly all push rods and mechanism will suffer or not work as executed and break again...
Do you think we can restore that if really it is bent on the chassis? Or check the correct position of the transmission in the chassis? I did not find anything on forums... about that.

 03-20-2017, 04:27 AM


 ) and as the transmission rotates, it digs these push-rods down and into the foam drains. Once these holes have been made not only can water access the interior of the car but the ever important Alarm Control Unit is under the drivers seat at the lowest possible location! Cheers Mate