DIY: Swapping the 997.1TT taillights to the newer 997.2TT LED taillights on my Turbo!
 06-08-2010, 11:35 PM
#1
Pro
Thread Starter

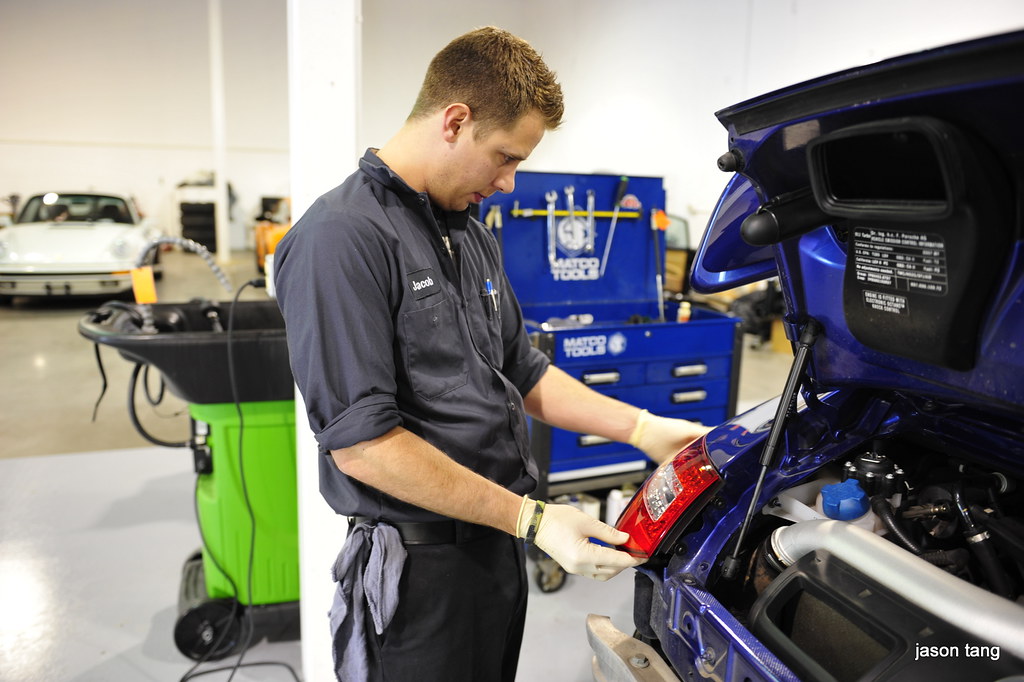
For quite some time, I have admired the newer LED taillights now offered on 2010 Turbos and was hoping to be able to make the conversion on mine. I wanted to wait until someone has already made the swap on their 2007-2009 Turbos successfully. When erazer72 (Ethan) posted that his team was able to do it successfully on a 2009 Turbo, I decided to move forward with the project. Ethan and I corresponded a few times about getting the parts needed. I had the guys at Motoring Unlimited in Issaquah, WA do the job for me. They were very thorough and persistent in getting everything installed correctly and working properly. I'd highly recommend using those guys if you're up here in the Northwest. The guys working there are Porsche technicians. Following Ethan's post here (LED swap by Ethan), we thought the swap would be relatively straightforward. As we did the installation, we found out that there were quite a few more hurdles to the swap than we originally thought. I'll elaborate a bit further as I explain the steps involved in making the switchover.
The parts needed are:
Exhaust surrounds (left & right, 997-505-651-02-01C and 997-505-652-02-01C)
LED taillights (left & right, 997-631-413-02 and 997-631-414-03)
There are actually two bumpers, one with the parking sensor holes and one without:
Mine has the parking sensors so I got this one:
997-505-941-10 (For some reason this one costs about $100 dollars more)
Without parking sensor holes
997-0505-941-09
Bumper support bracket (997-505-641-03)
Front & rear control units (I'll explain this later too)
Front (997-618-513-01)
Rear (997-618-260-08)
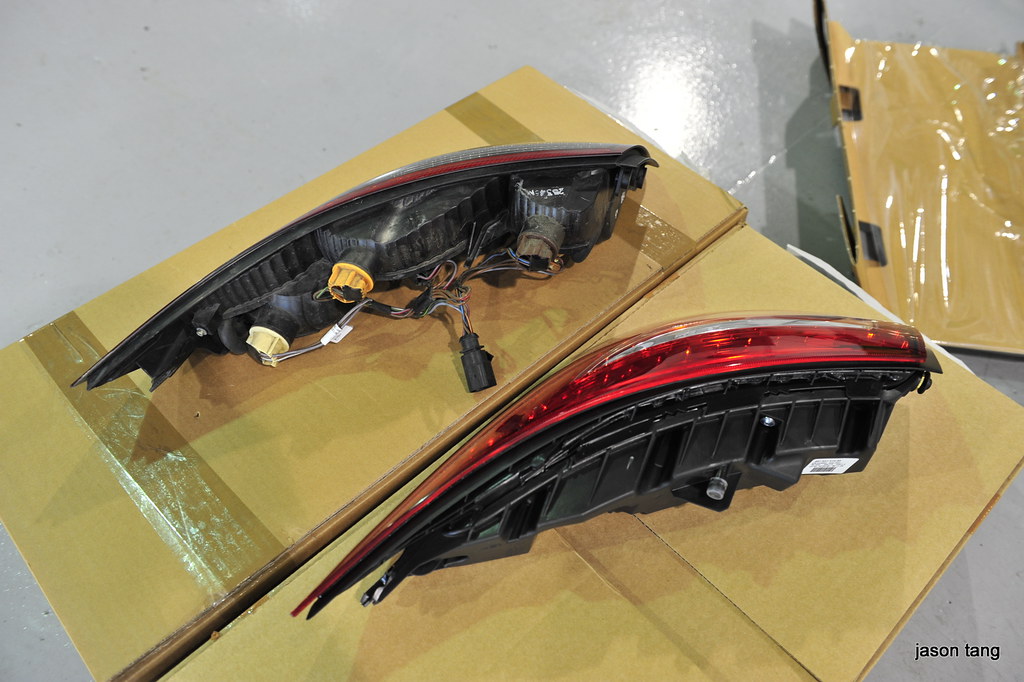
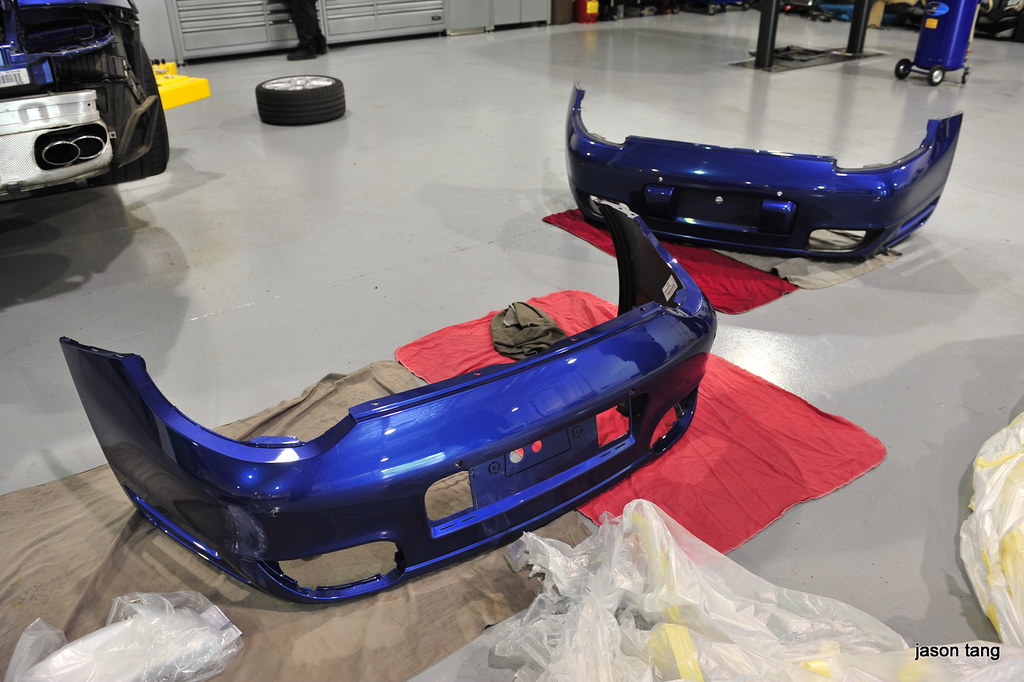
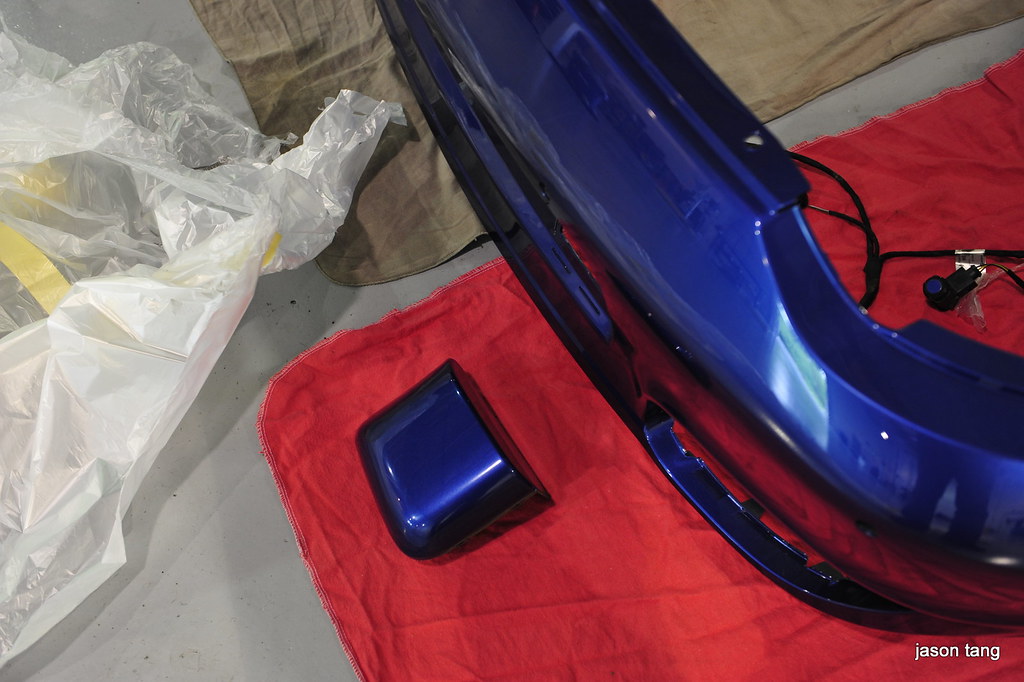
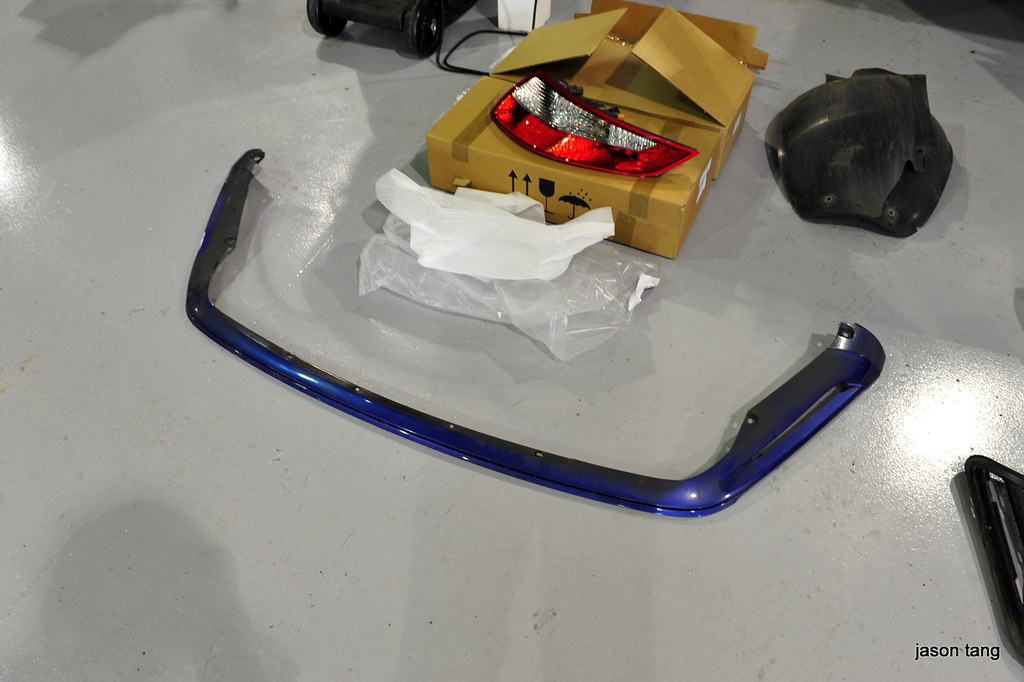
Taillights and exhaust surrounds
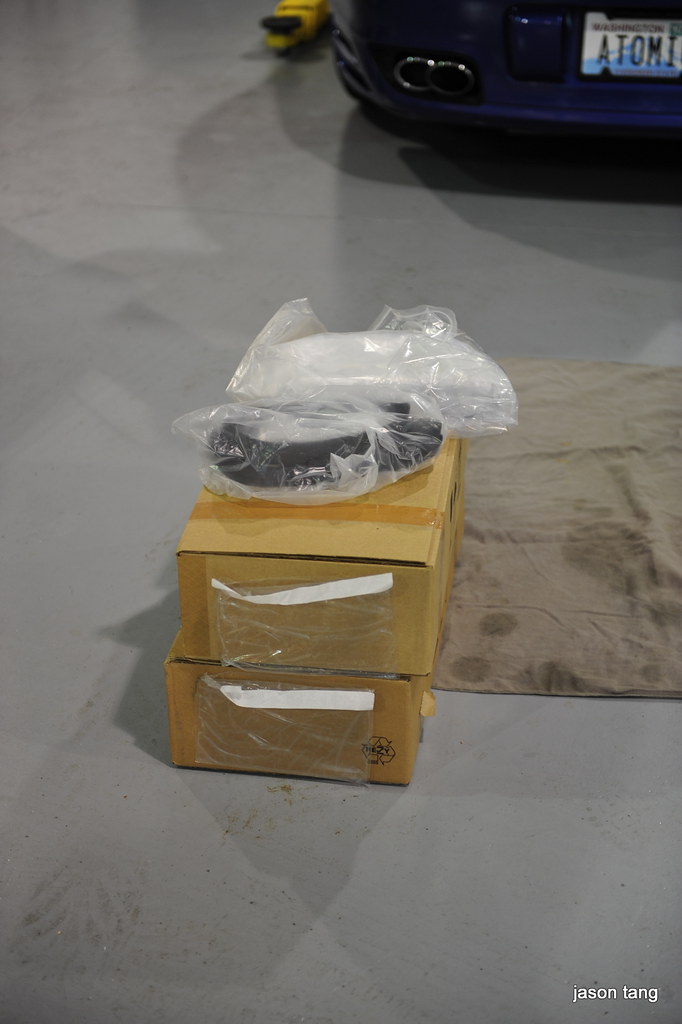
Comparing the old vs new taillights

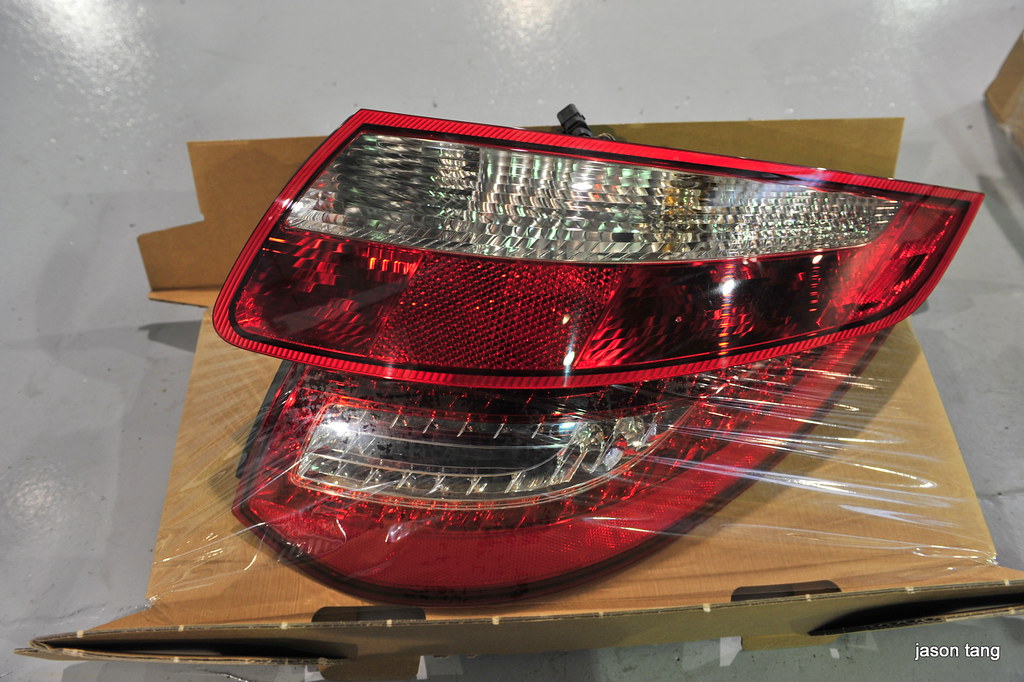
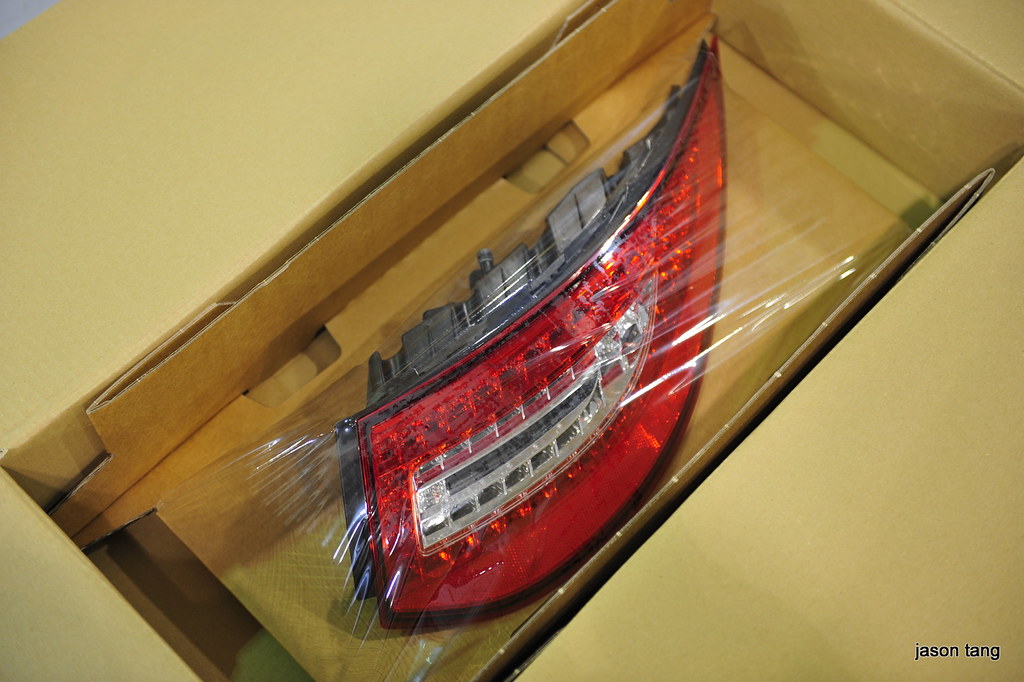
Taillights (left & right, 997-631-413-02 and 997-631-414-03)
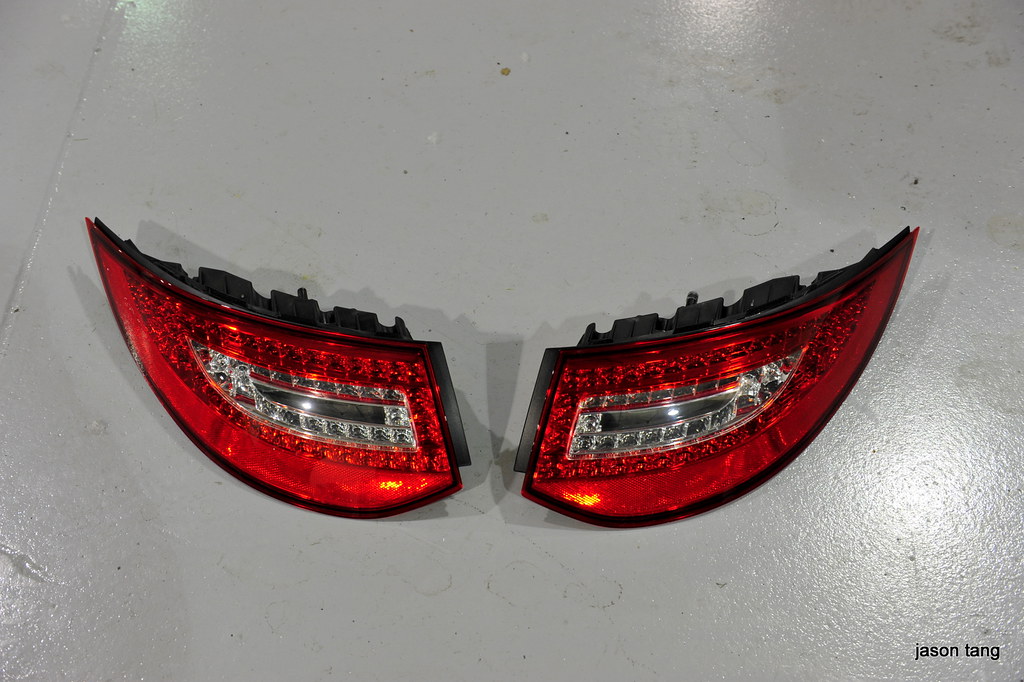
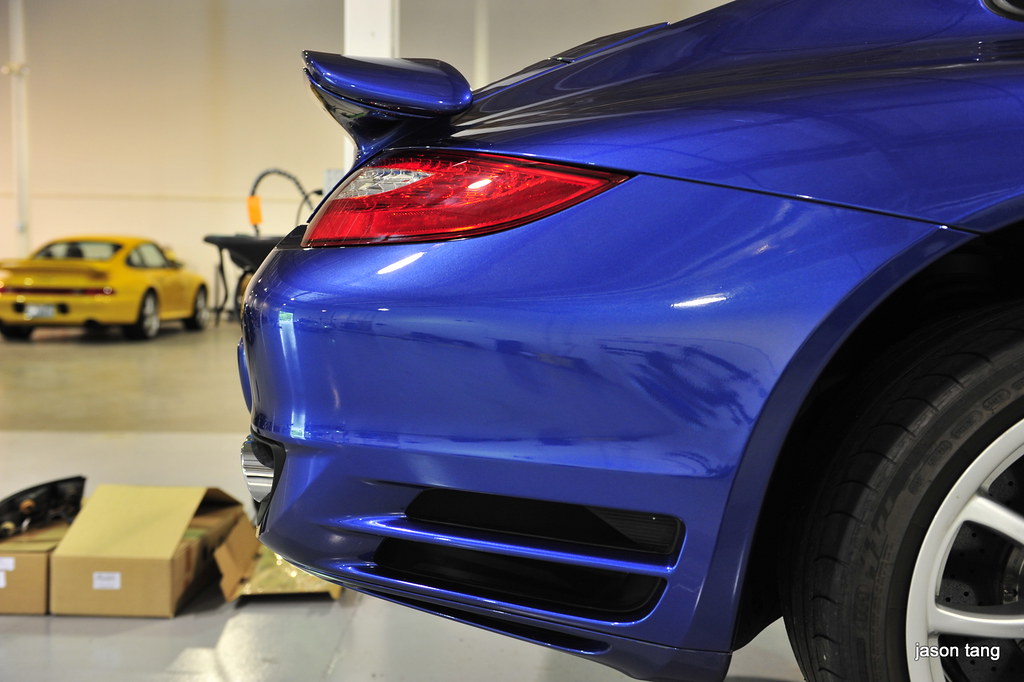
Compare the old taillights with the new. There's no exposed wiring on the new one
New bumper has a different cutout for the new taillights

Bumper support bracket since two of the screwholes are in different places on the new bumper compared to the older bumper
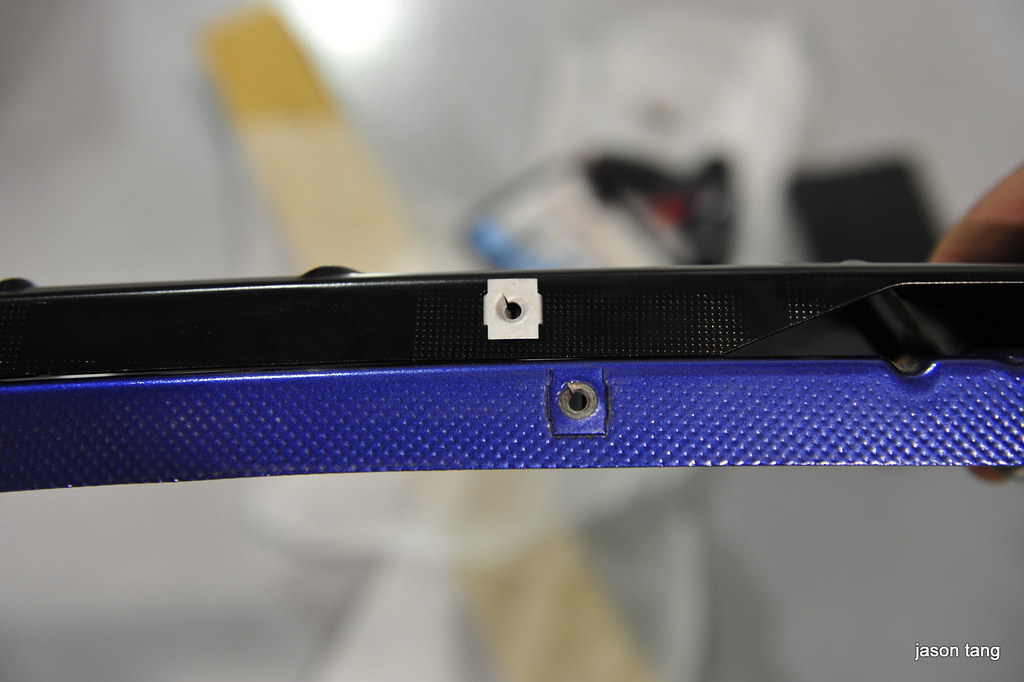
The support bracket comes in black but you really won't be able to tell since it's mostly covered by the bumper
Some of the parts ready to go
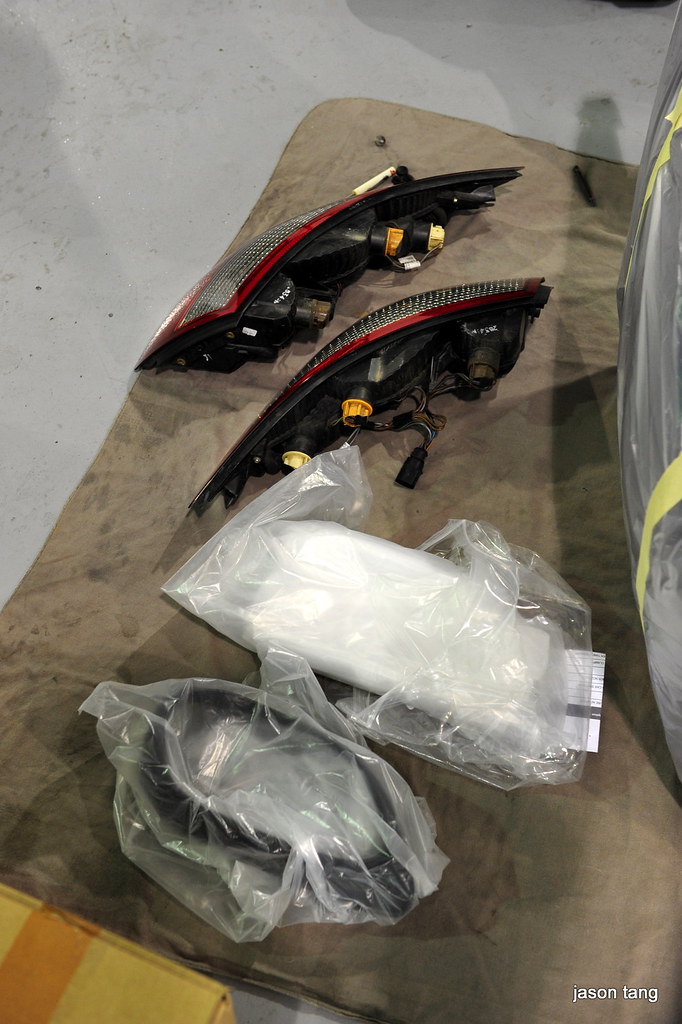
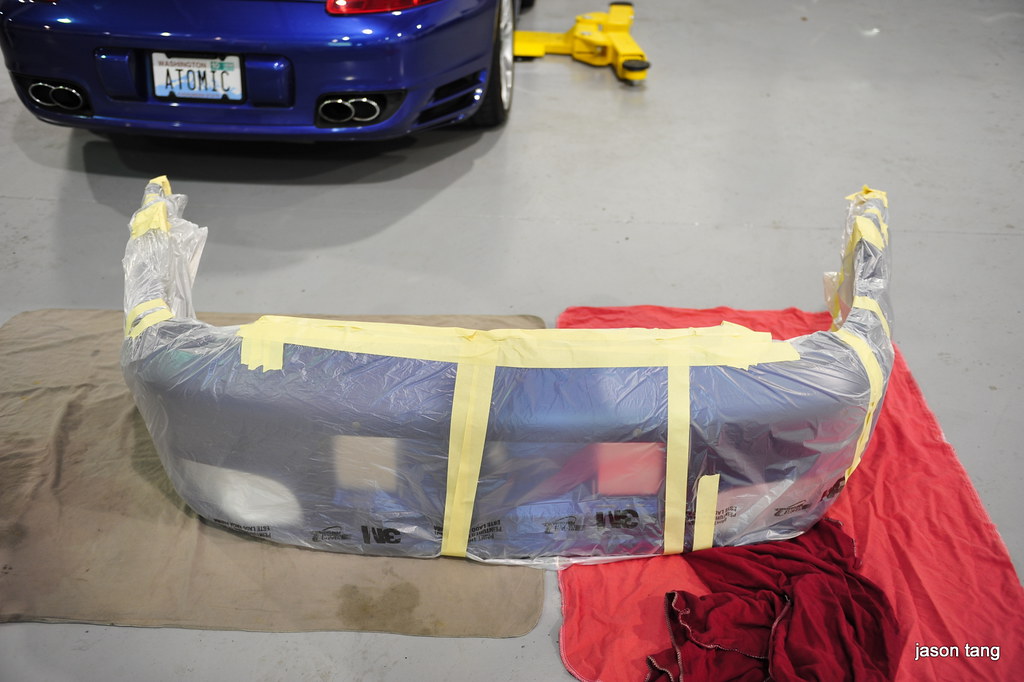
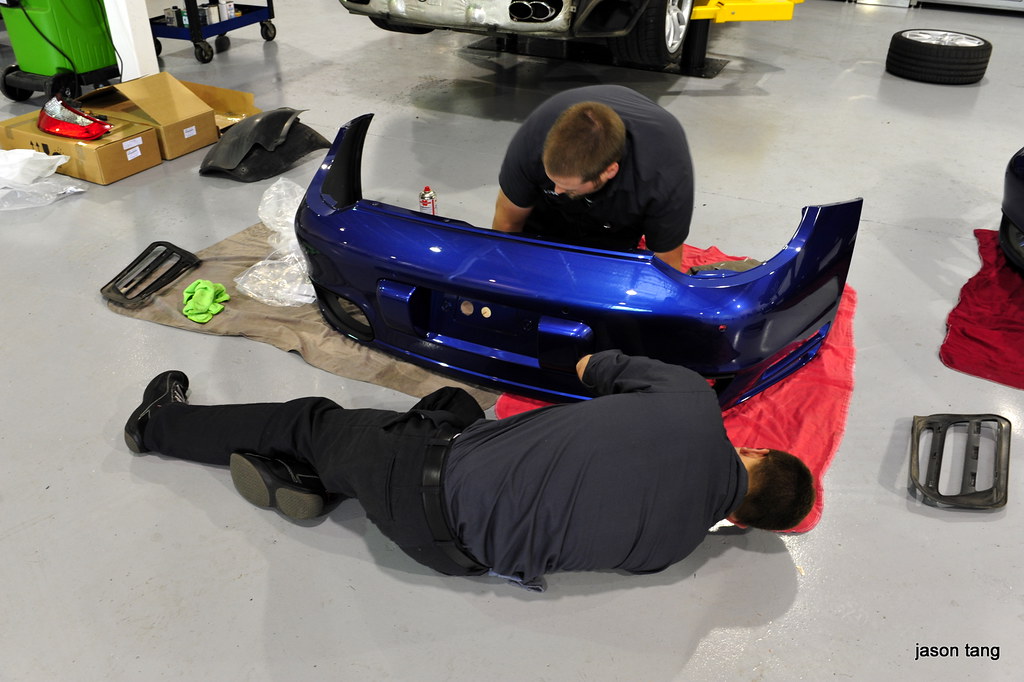
New bumper all ready to go
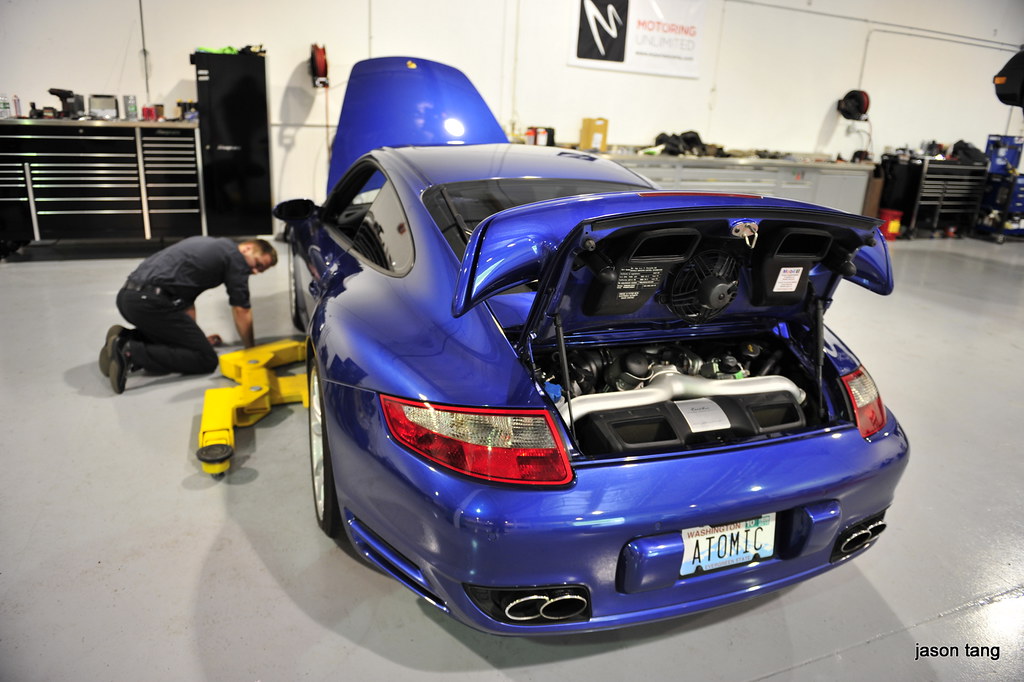
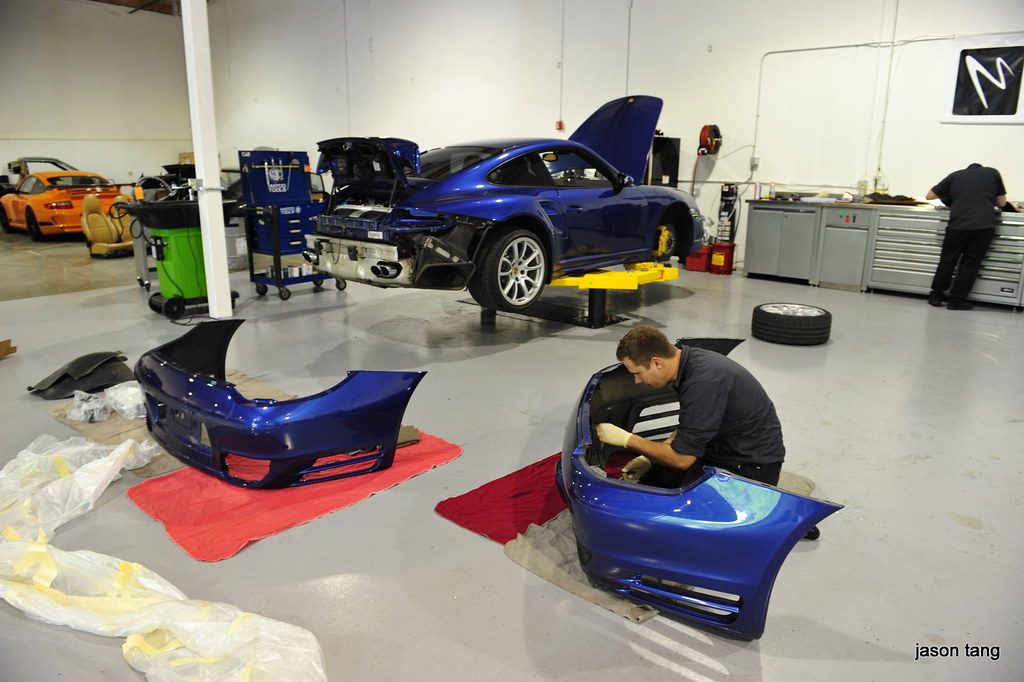
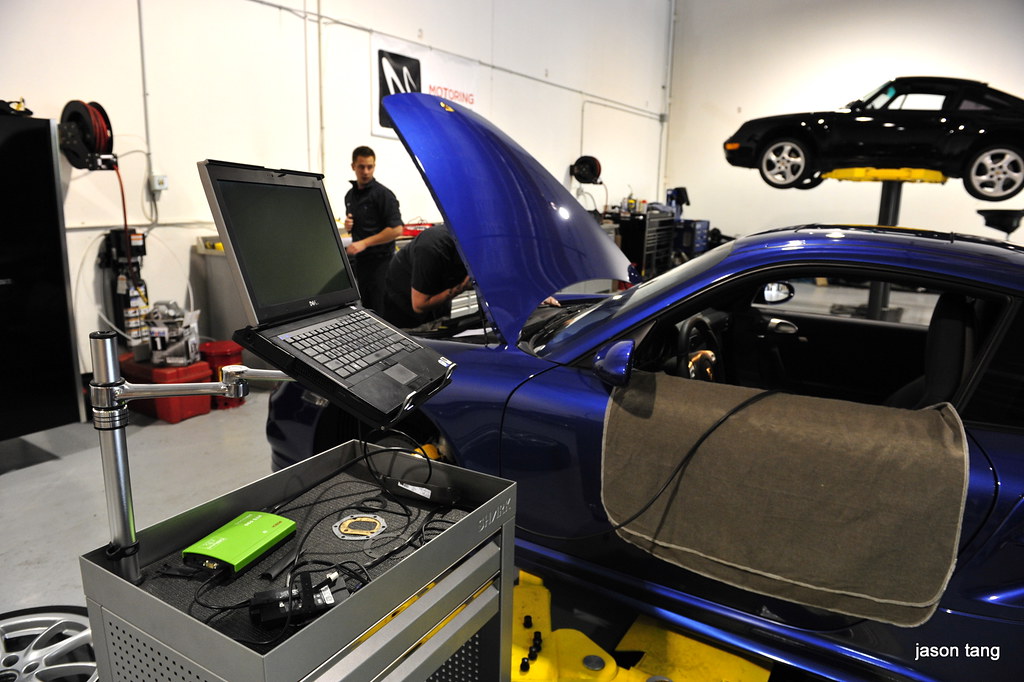
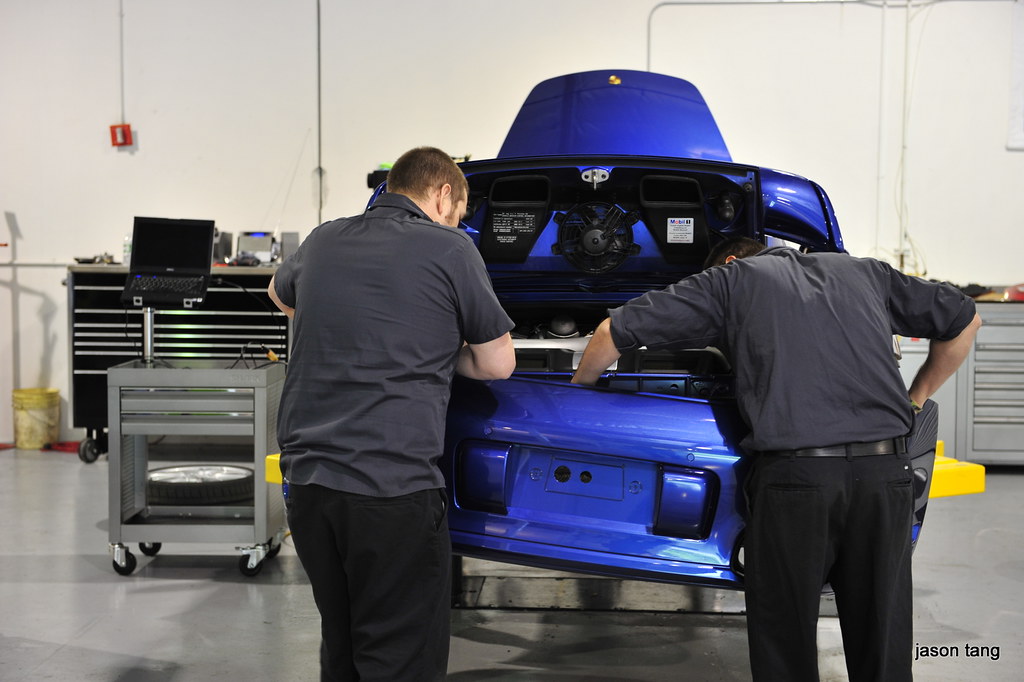
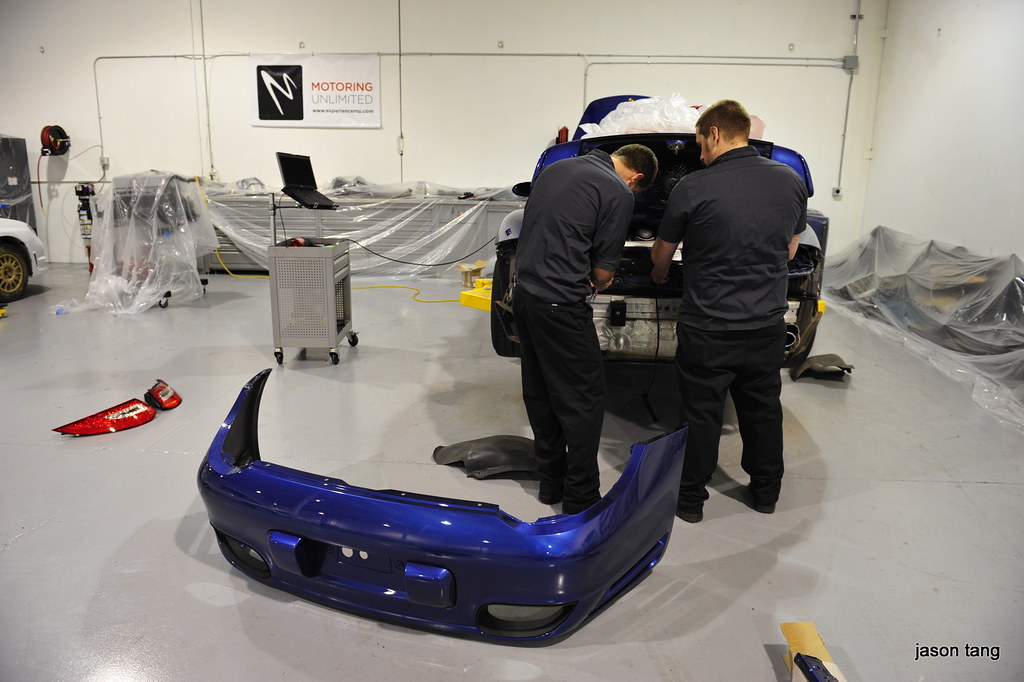
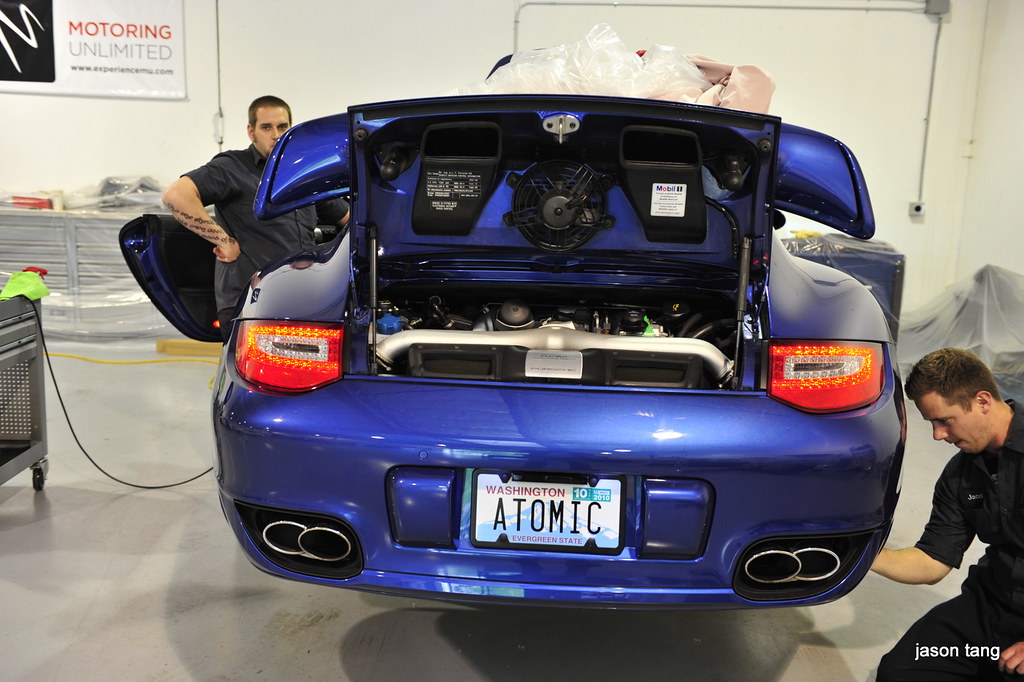
Getting my Turbo ready for the installation
They also took the time to check my tires and clean up my suspension components. These guys are very thorough!
I need new tires soon
The insides were VERY dirty. They cleaned that up for me

The last time I'll see this bumper on my car
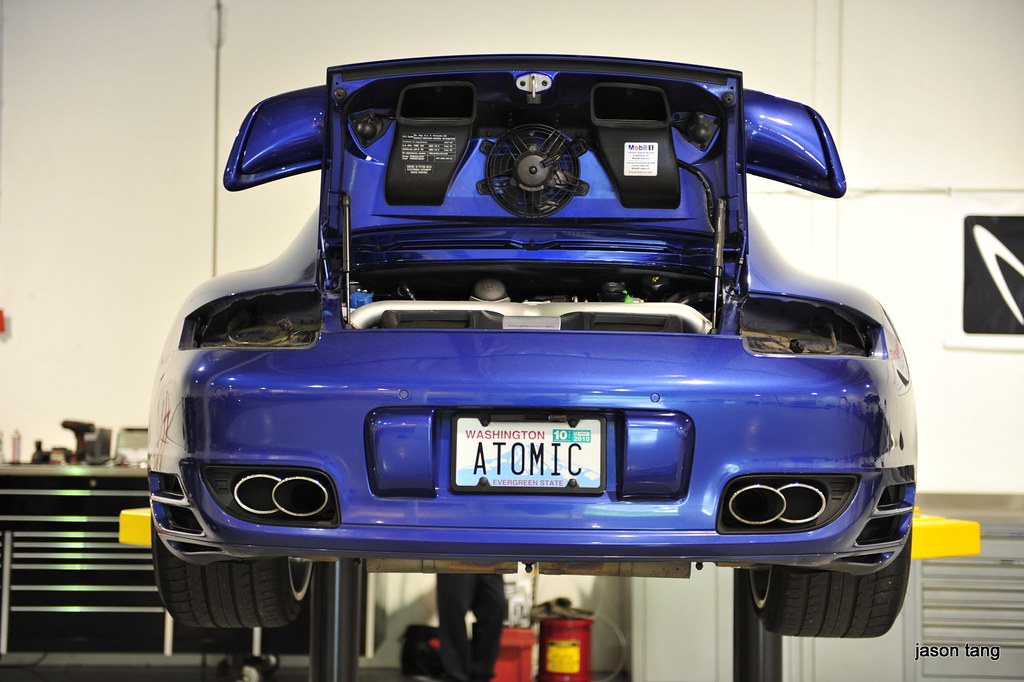
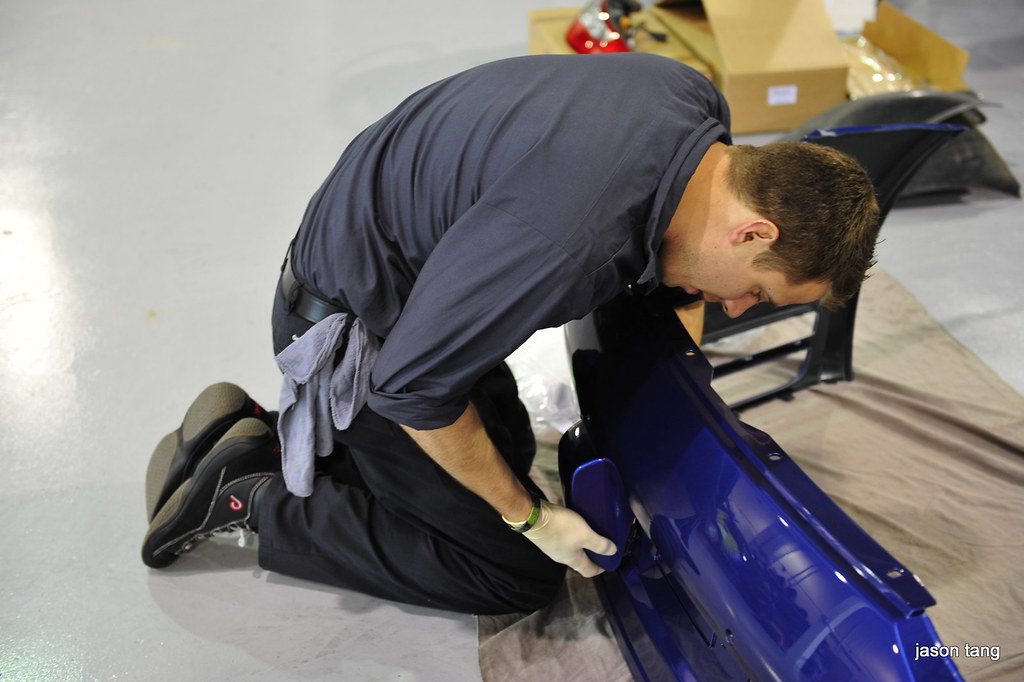
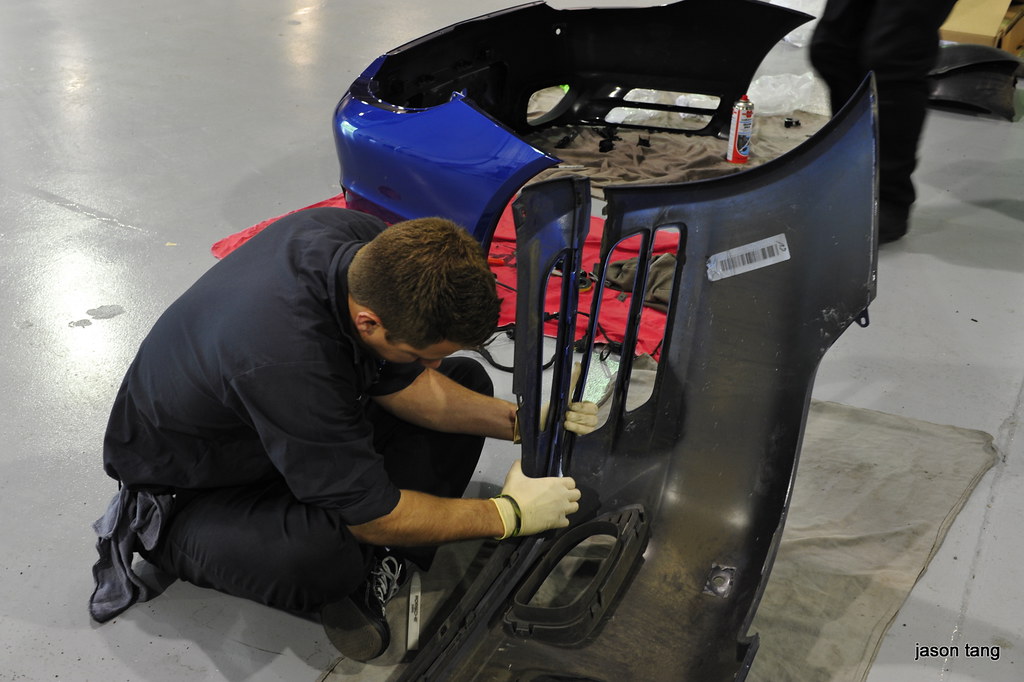
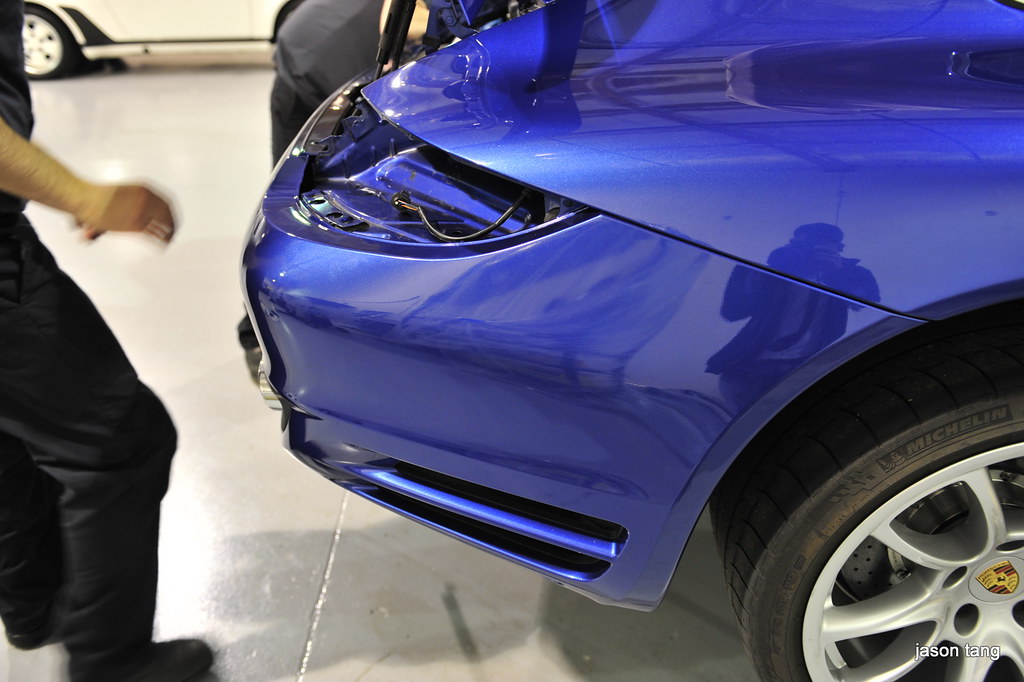
Removing my old bumper
No bumper
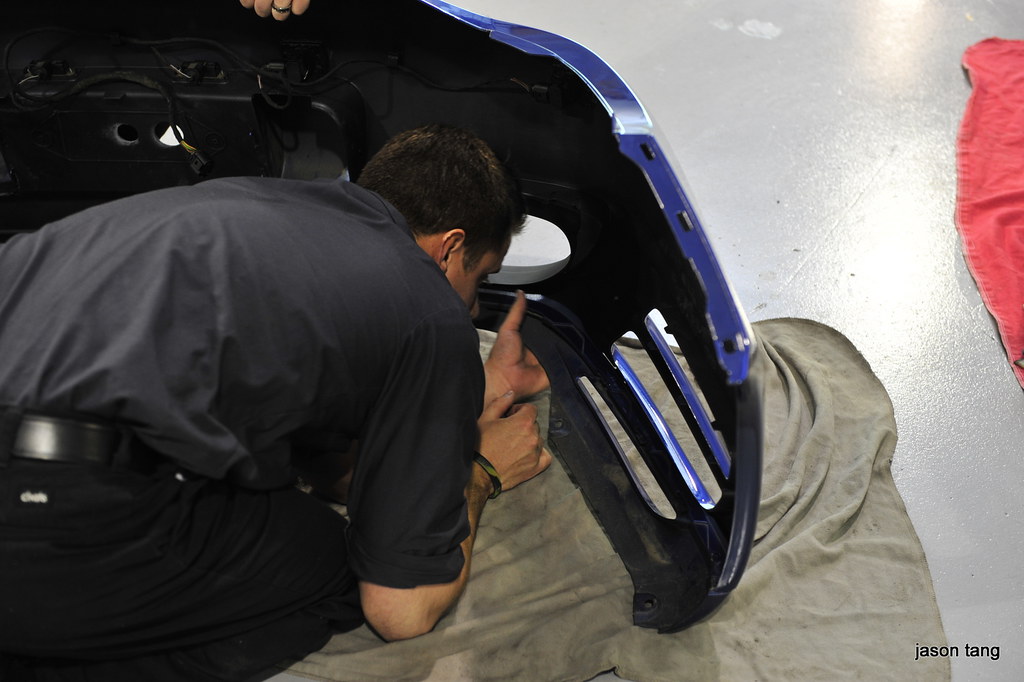
Test fitting the new taillight
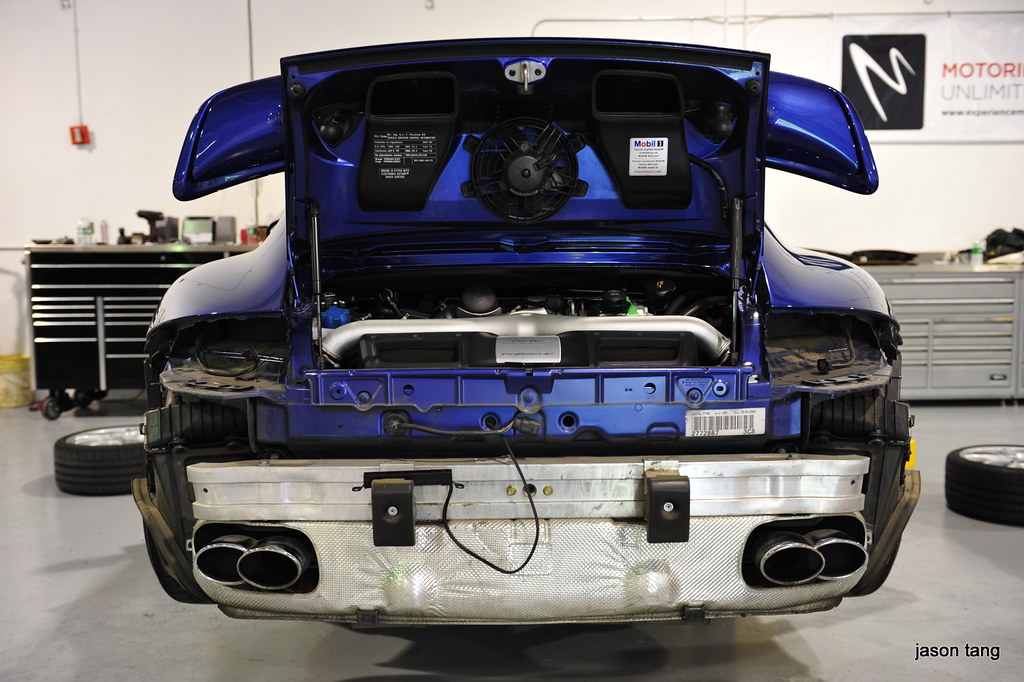
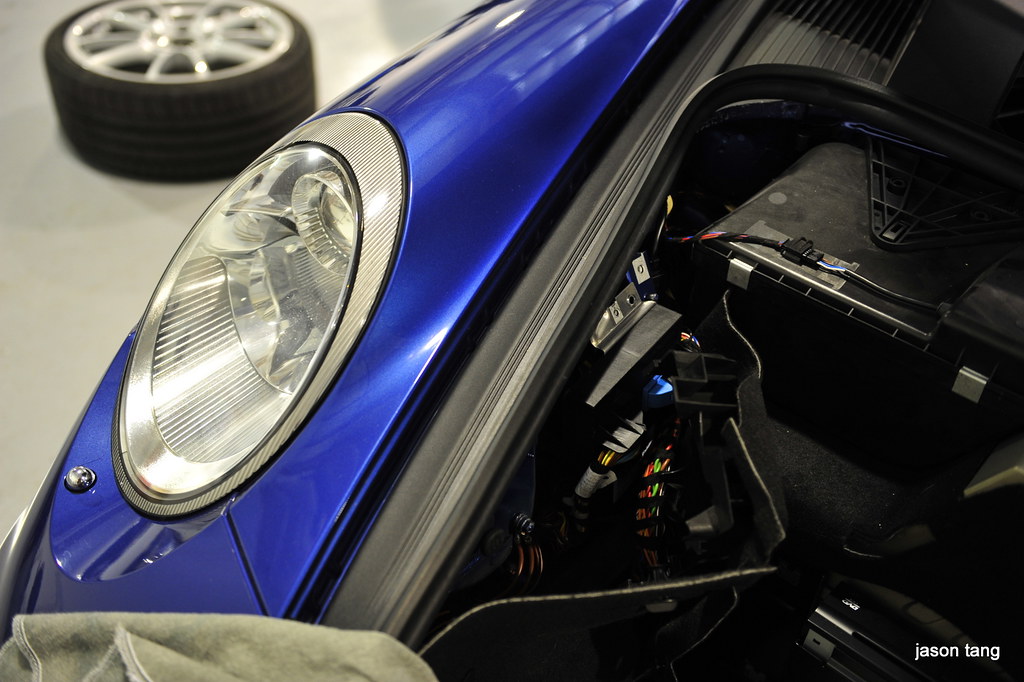
Nice to see what's behind the bumper. The intercooler! Cool!
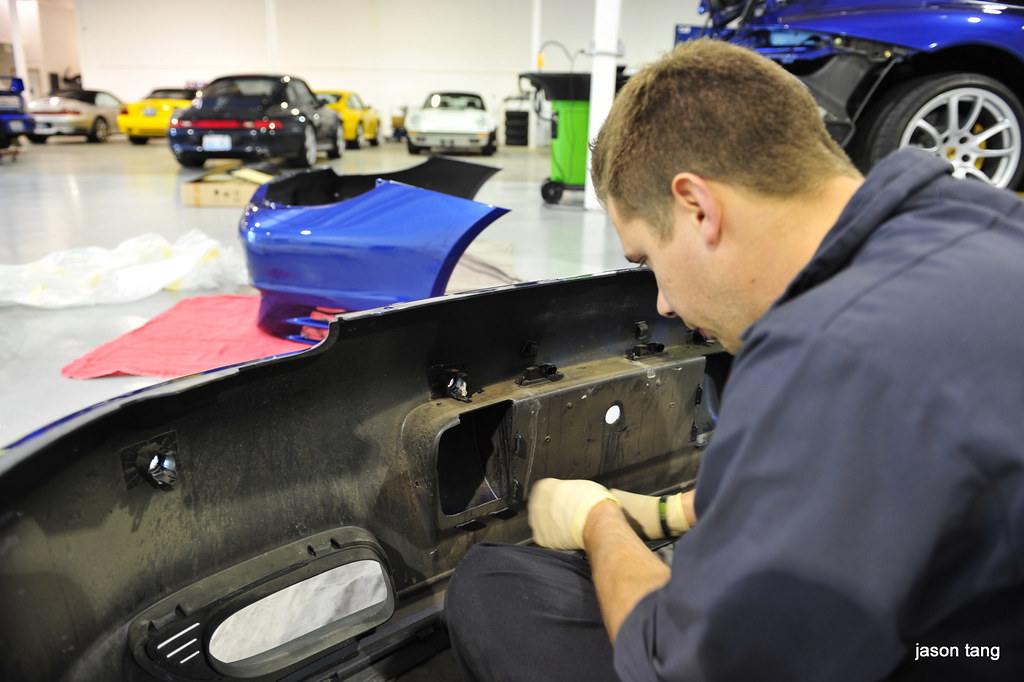
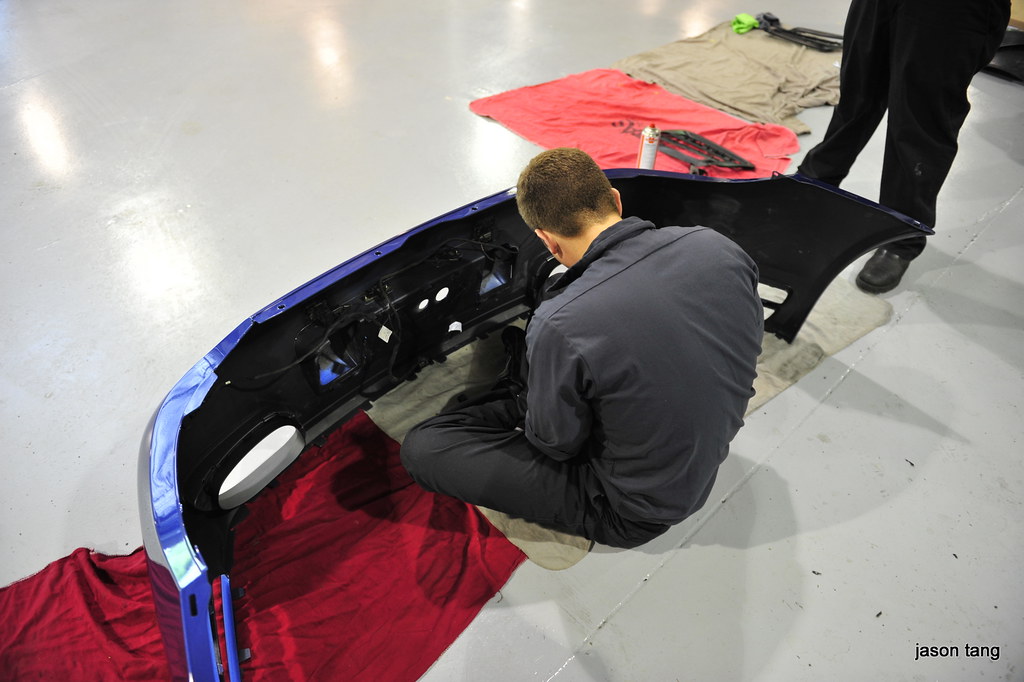
Taking the components off the old bumper
New vs old bumper
It was at this point that Jake realized that the sensor bracket on my old bumper was different than the new one

Old sensor bracket
New sensor bracket

It appeared that Porsche changed the sensor to use a longer type and it would not work with my old sensors which was a bit
too big for the bracket
We had to decide what to do. Either order new sensors or try to swap the brackets from the old to the new. We decided to swap
the brackets. We took the old brackets off.
Using epoxy resin, we put the brackets on the new bumper
Perfect fit

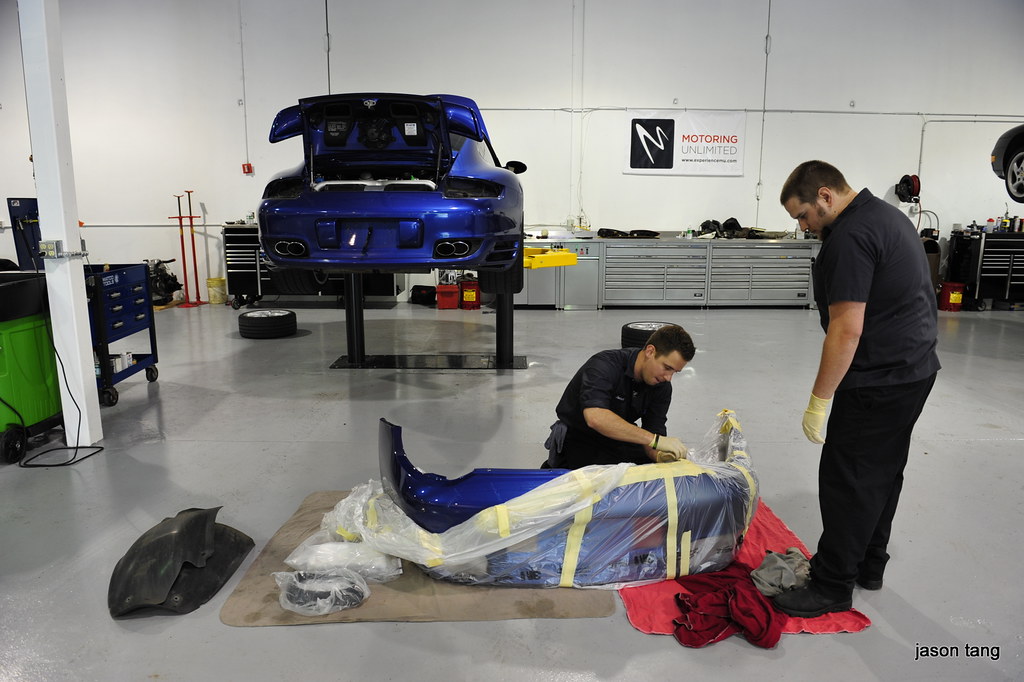
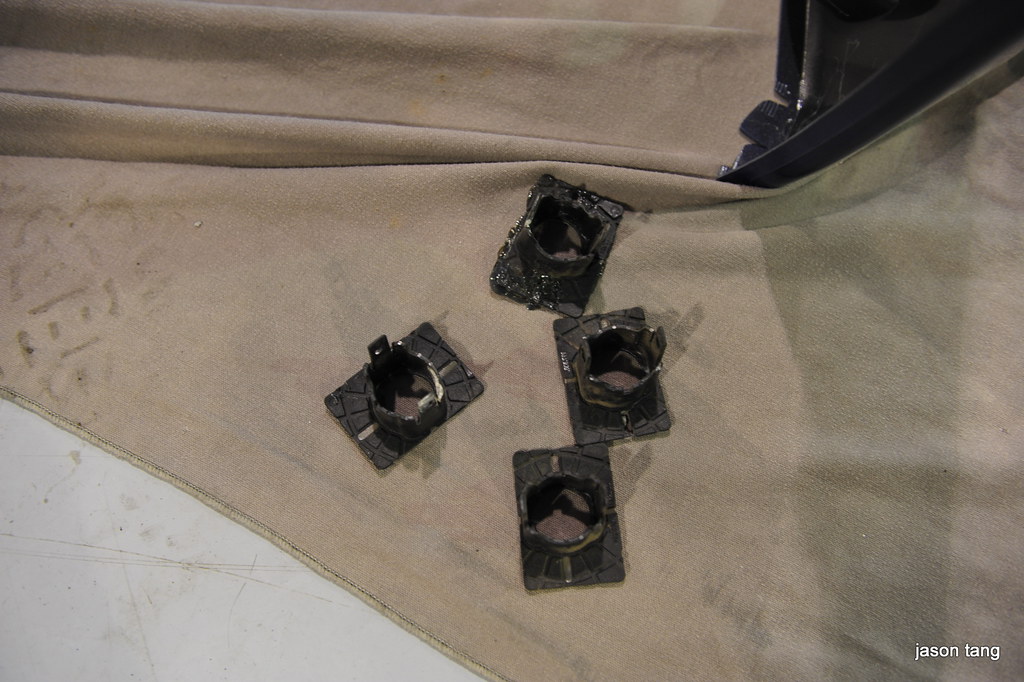
Removing the bumperettes
Installing the bumperettes on the new bumper
The old tntercooler trim had to be removed too
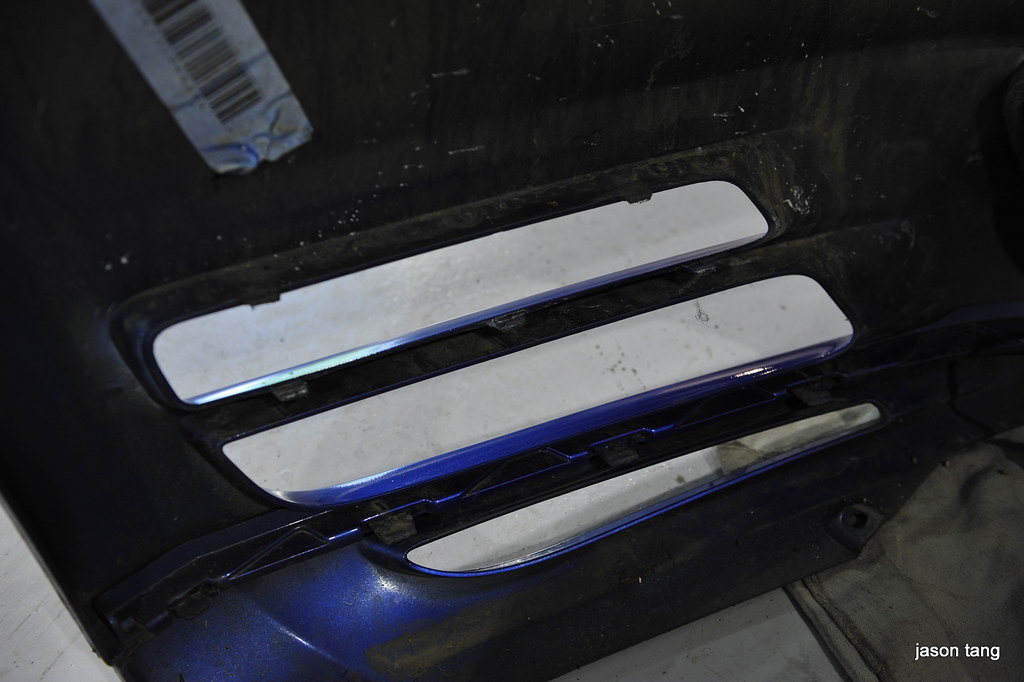
All the pieces holding the trim piece

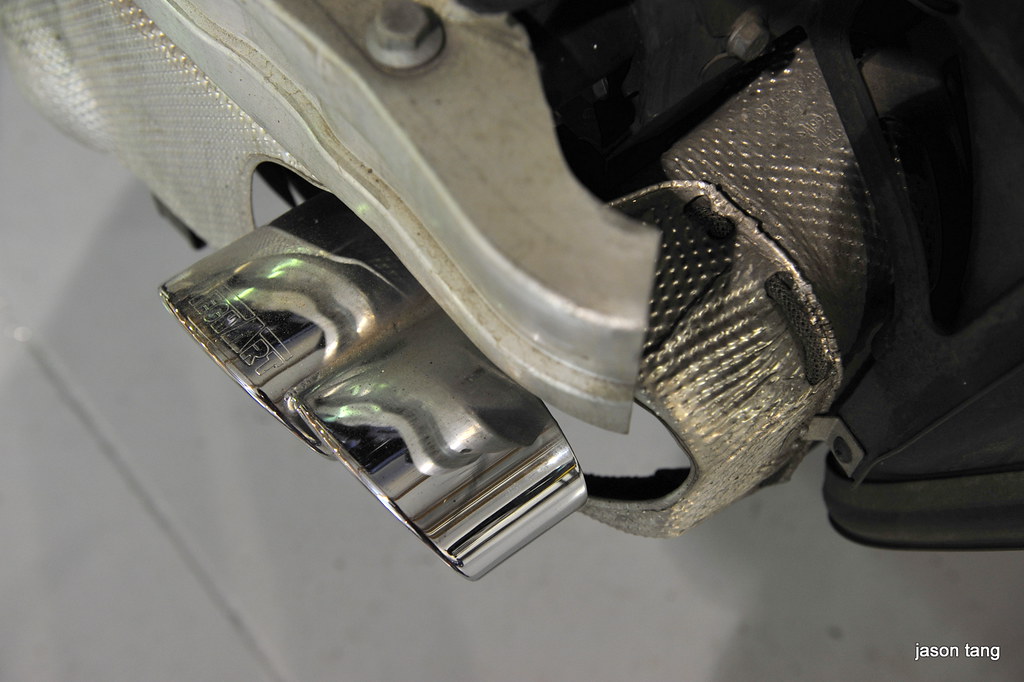
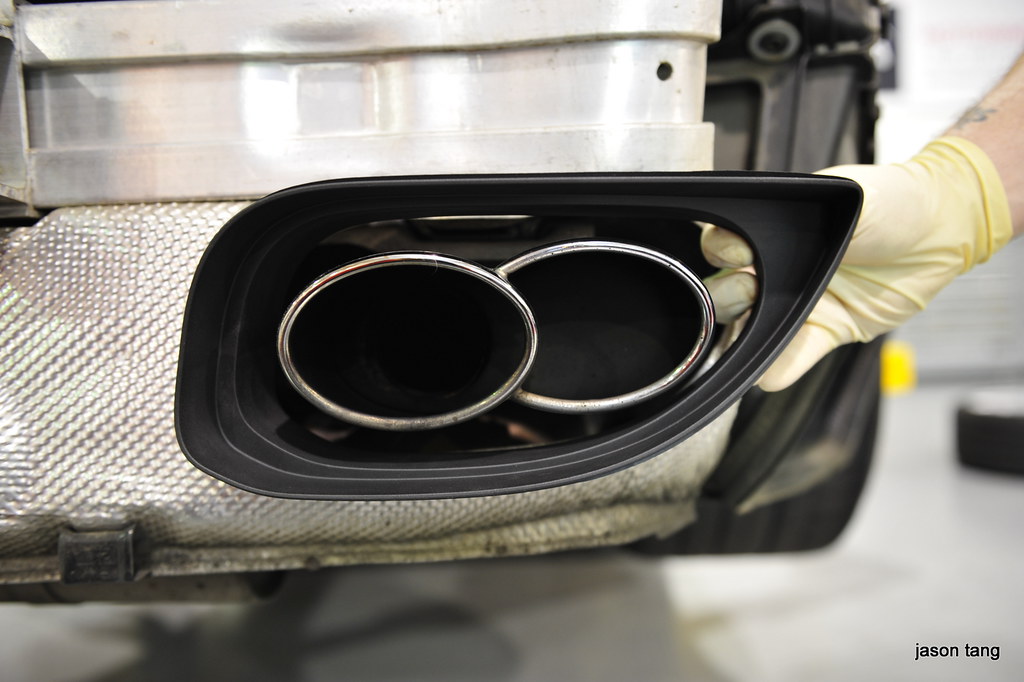
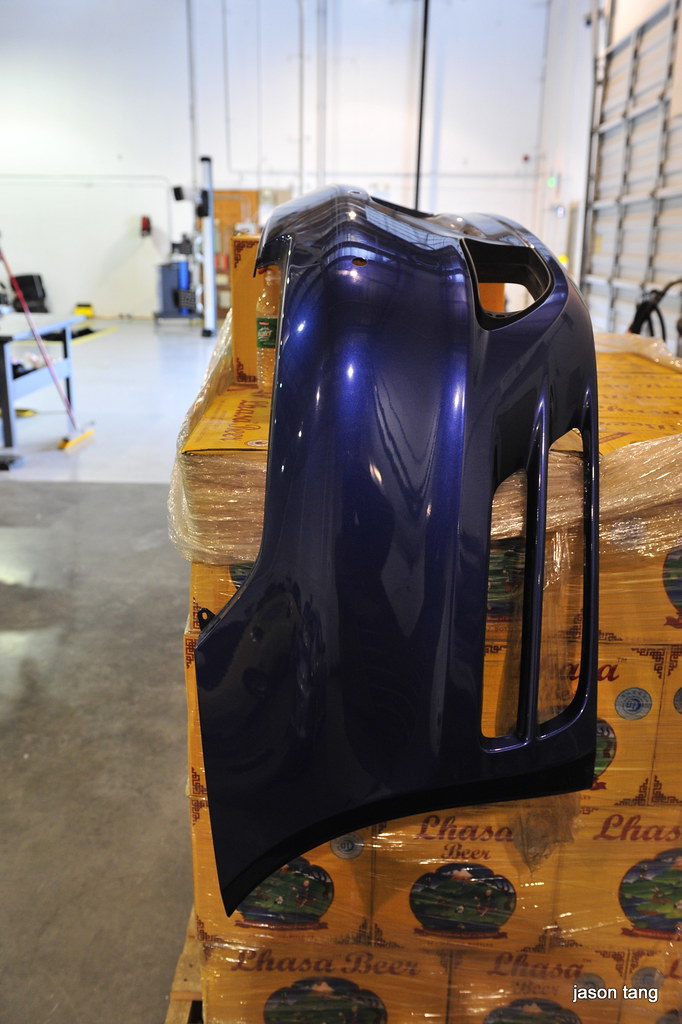
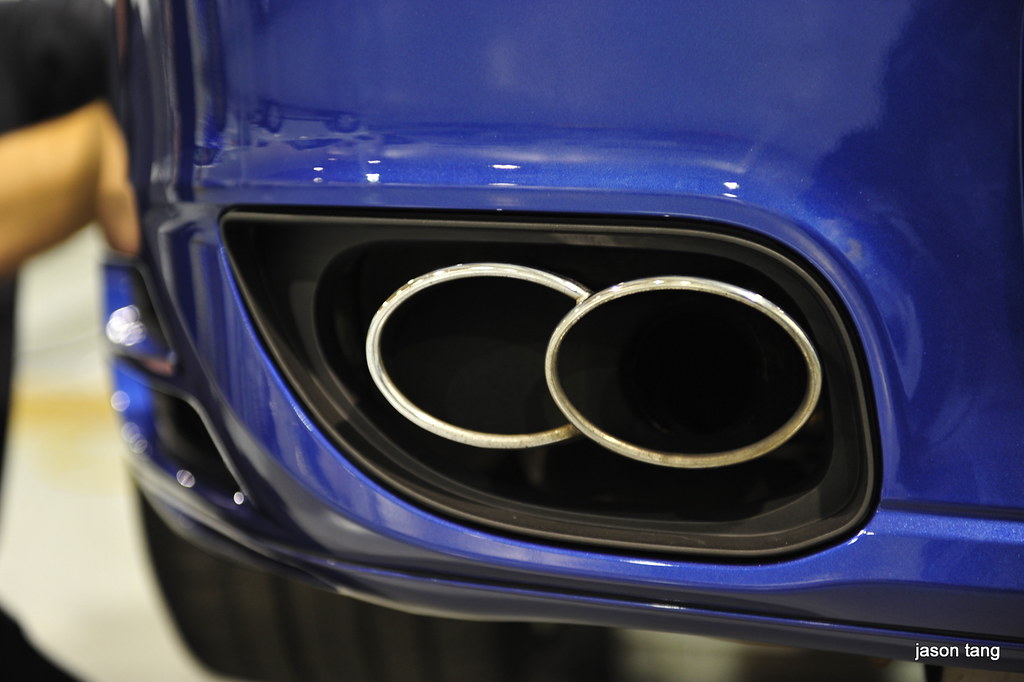
The new exhaust surround is quite a bit larger than the old one but it fit perfectly with my TechArt tips
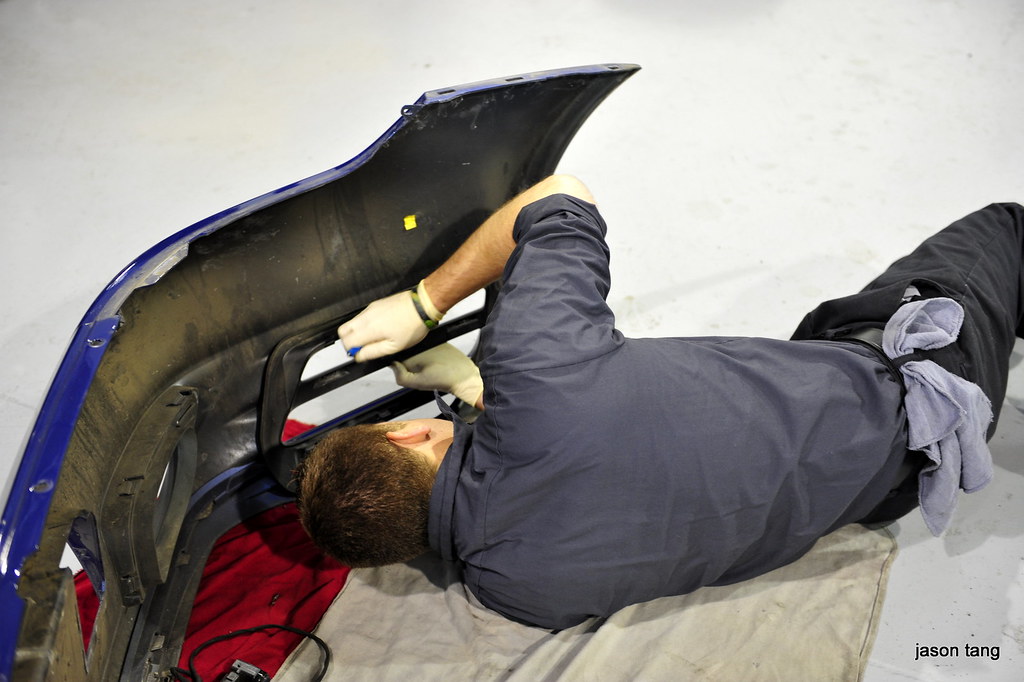
A little bit of plastic tabbing had to be cut from the LED taillights to work with the wiring harness
Removing the lower trim piece
Old bumper
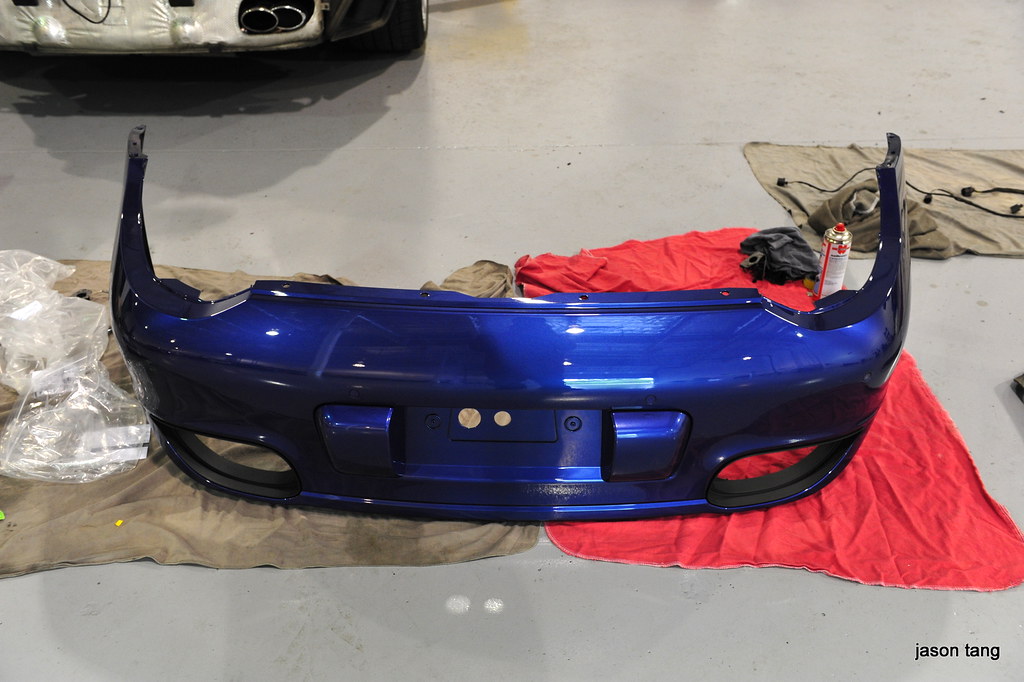
New bumper is almost ready to be put on
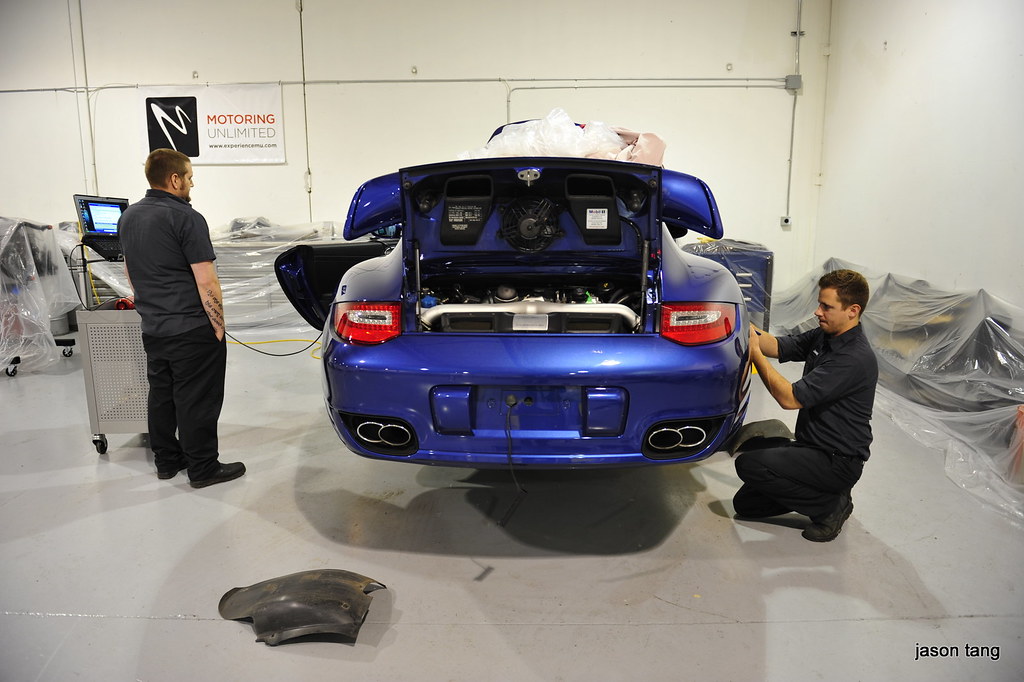
Front trunk is where the front control unit is.
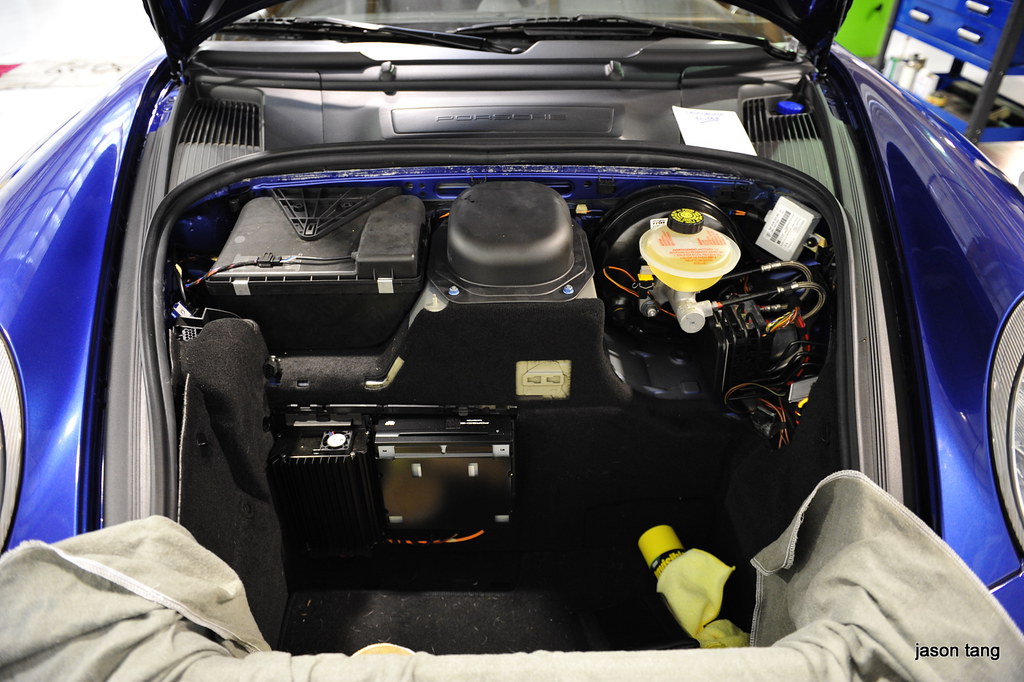
We had to remove most of the trim pieces to reach the unit. In Ethan's original posting, he mentions that it was necessary to
swap the #14 to 34 and 6 to 21 pins in the black connector of the front control unit. As we discovered when things were put
back together, there things weren't working the way they should be. There was no option in the PIWIS to turn the LED mode on.
The rear LED taillights were blinking fast, and the left driving lights were not coming on at all. Our guess was that it was
because my 2007 Turbo had an older control unit. We then ordered the front control unit from the 2009 Turbo and installed it.
At this point, the LED option showed up but things were still not working correctly. We then ordered the rear control unit
from the 2009 Turbo too. We also swapped the the pins for the front from #11 to 36 because Ethan says it'd be necessary to do
that if the lights were flashing fast. The rears were swapped from #42 to 31. So, if you have a 2007 or even a 2008, it might
be necessary to get the newer control units. You'll know for sure by looking at the part numbers on both control units. Once
we got both front and rear control units installed, the LED option was showing up in the PIWIS but the lights were still not
working correctly. The front turn signals weren't even working at all. We then switched the pins for the front control unit
back to the way it was before and but left the rear control units the way they were as specified in Ethan's original posting
and everything was finally working correctly!
PIWIS setup

The parts needed are:
Exhaust surrounds (left & right, 997-505-651-02-01C and 997-505-652-02-01C)
LED taillights (left & right, 997-631-413-02 and 997-631-414-03)
There are actually two bumpers, one with the parking sensor holes and one without:
Mine has the parking sensors so I got this one:
997-505-941-10 (For some reason this one costs about $100 dollars more)
Without parking sensor holes
997-0505-941-09
Bumper support bracket (997-505-641-03)
Front & rear control units (I'll explain this later too)
Front (997-618-513-01)
Rear (997-618-260-08)
Taillights and exhaust surrounds
Comparing the old vs new taillights
Taillights (left & right, 997-631-413-02 and 997-631-414-03)
Compare the old taillights with the new. There's no exposed wiring on the new one
New bumper has a different cutout for the new taillights
Bumper support bracket since two of the screwholes are in different places on the new bumper compared to the older bumper
The support bracket comes in black but you really won't be able to tell since it's mostly covered by the bumper
Some of the parts ready to go
New bumper all ready to go
Getting my Turbo ready for the installation
They also took the time to check my tires and clean up my suspension components. These guys are very thorough!
I need new tires soon
The insides were VERY dirty. They cleaned that up for me
The last time I'll see this bumper on my car
Removing my old bumper
No bumper
Test fitting the new taillight
Nice to see what's behind the bumper. The intercooler! Cool!
Taking the components off the old bumper
New vs old bumper
It was at this point that Jake realized that the sensor bracket on my old bumper was different than the new one
Old sensor bracket
New sensor bracket
It appeared that Porsche changed the sensor to use a longer type and it would not work with my old sensors which was a bit
too big for the bracket
We had to decide what to do. Either order new sensors or try to swap the brackets from the old to the new. We decided to swap
the brackets. We took the old brackets off.
Using epoxy resin, we put the brackets on the new bumper
Perfect fit
Removing the bumperettes
Installing the bumperettes on the new bumper
The old tntercooler trim had to be removed too
All the pieces holding the trim piece
The new exhaust surround is quite a bit larger than the old one but it fit perfectly with my TechArt tips
A little bit of plastic tabbing had to be cut from the LED taillights to work with the wiring harness
Removing the lower trim piece
Old bumper
New bumper is almost ready to be put on
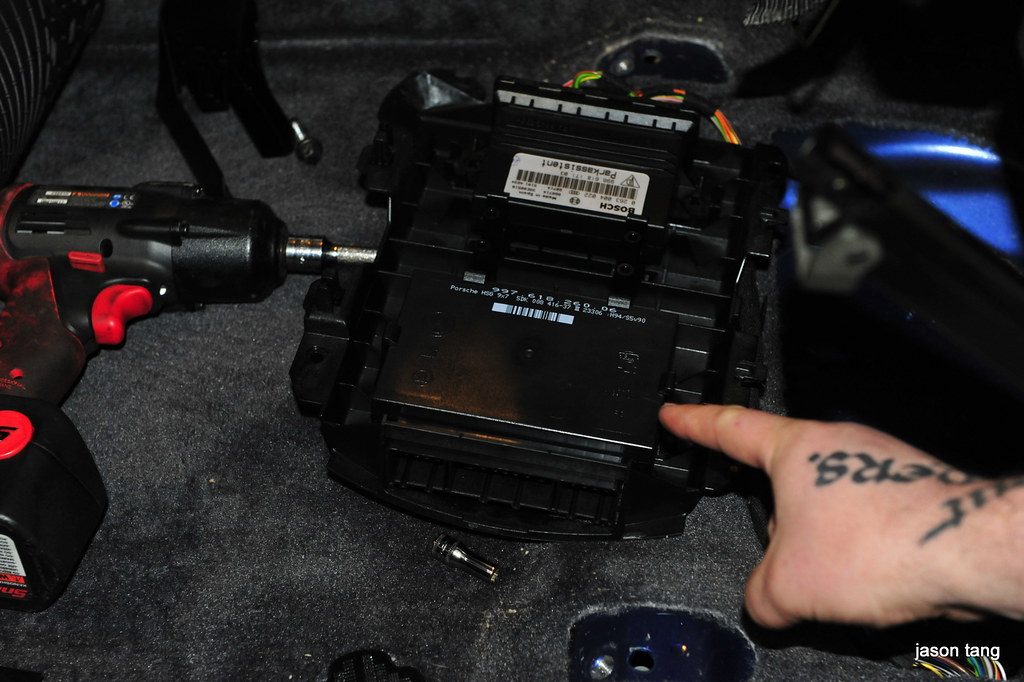
Front trunk is where the front control unit is.
We had to remove most of the trim pieces to reach the unit. In Ethan's original posting, he mentions that it was necessary to
swap the #14 to 34 and 6 to 21 pins in the black connector of the front control unit. As we discovered when things were put
back together, there things weren't working the way they should be. There was no option in the PIWIS to turn the LED mode on.
The rear LED taillights were blinking fast, and the left driving lights were not coming on at all. Our guess was that it was
because my 2007 Turbo had an older control unit. We then ordered the front control unit from the 2009 Turbo and installed it.
At this point, the LED option showed up but things were still not working correctly. We then ordered the rear control unit
from the 2009 Turbo too. We also swapped the the pins for the front from #11 to 36 because Ethan says it'd be necessary to do
that if the lights were flashing fast. The rears were swapped from #42 to 31. So, if you have a 2007 or even a 2008, it might
be necessary to get the newer control units. You'll know for sure by looking at the part numbers on both control units. Once
we got both front and rear control units installed, the LED option was showing up in the PIWIS but the lights were still not
working correctly. The front turn signals weren't even working at all. We then switched the pins for the front control unit
back to the way it was before and but left the rear control units the way they were as specified in Ethan's original posting
and everything was finally working correctly!
PIWIS setup
Last edited by atomic80; 06-08-2010 at 11:56 PM.
 06-08-2010, 11:35 PM
#2
Pro
Thread Starter
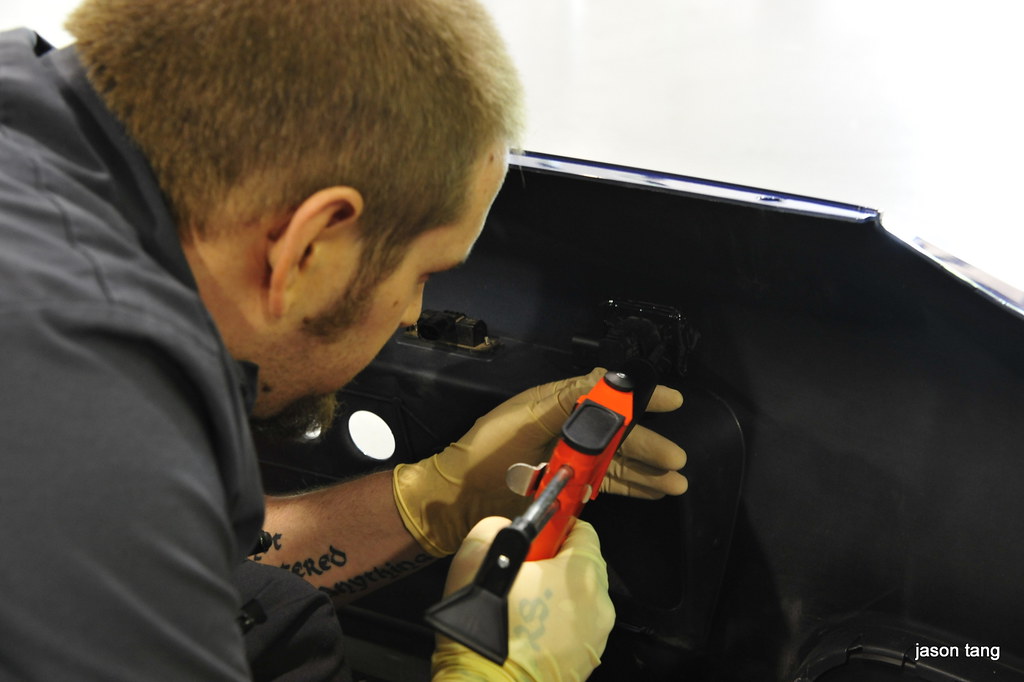
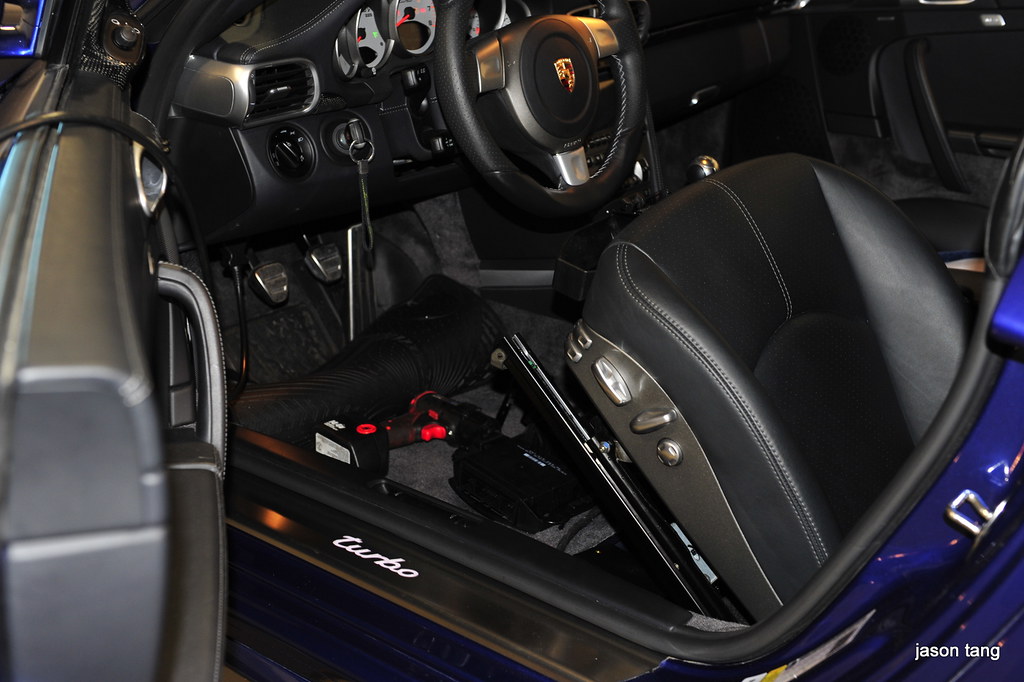
Rear control unit is under the driver's seat on my 2007 Turbo. Not sure if it's in a different places in other model years
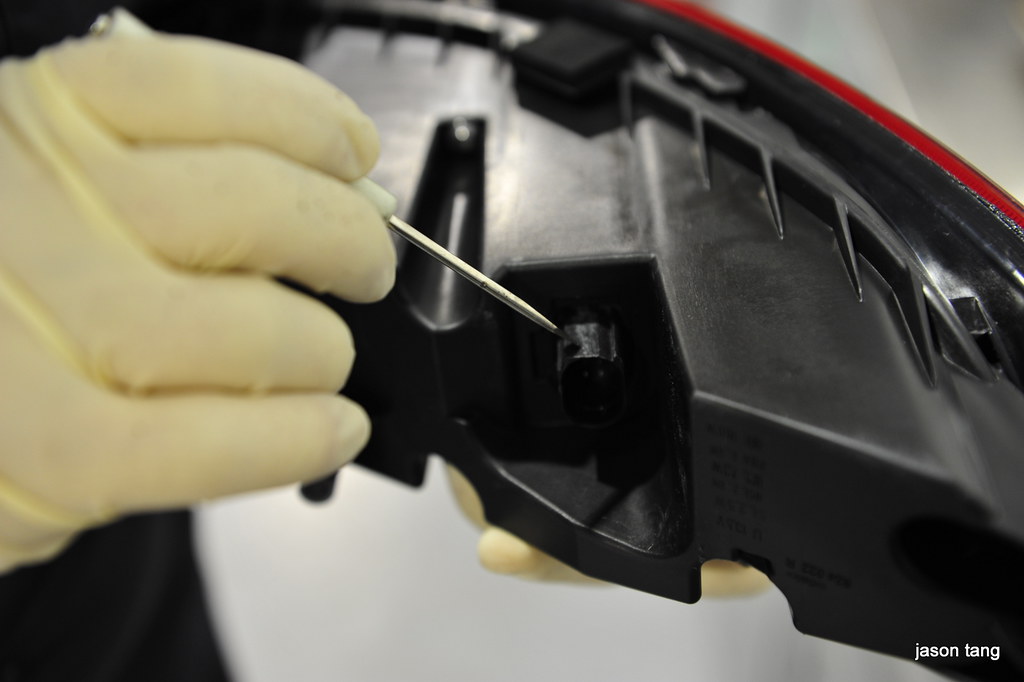
Working on the connectors
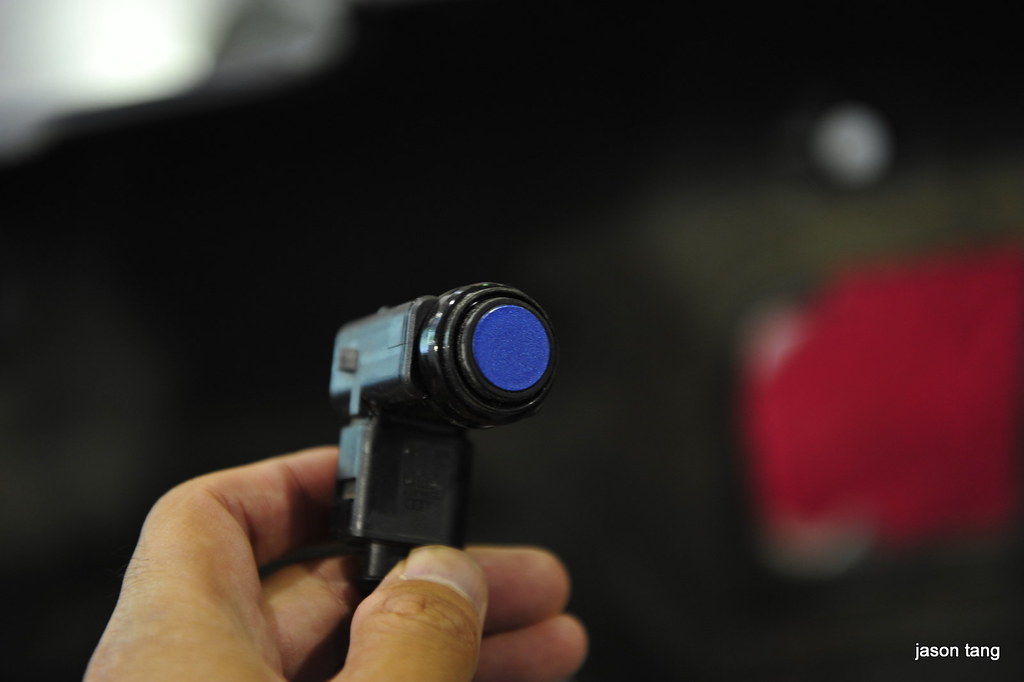
Installing the parking sensors
Installing the lower trim piece

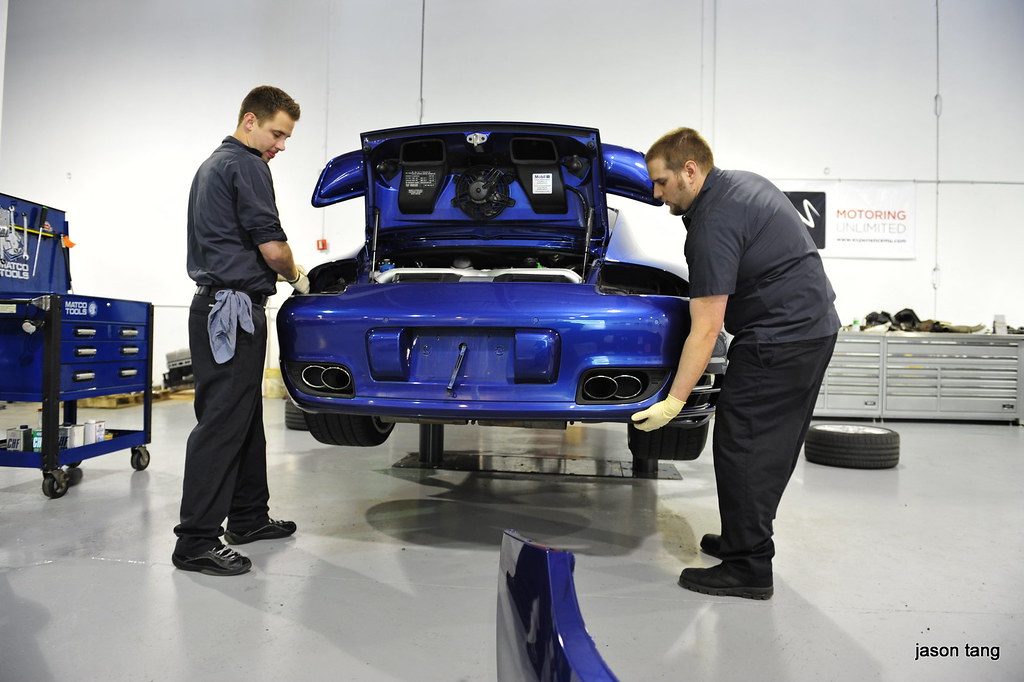
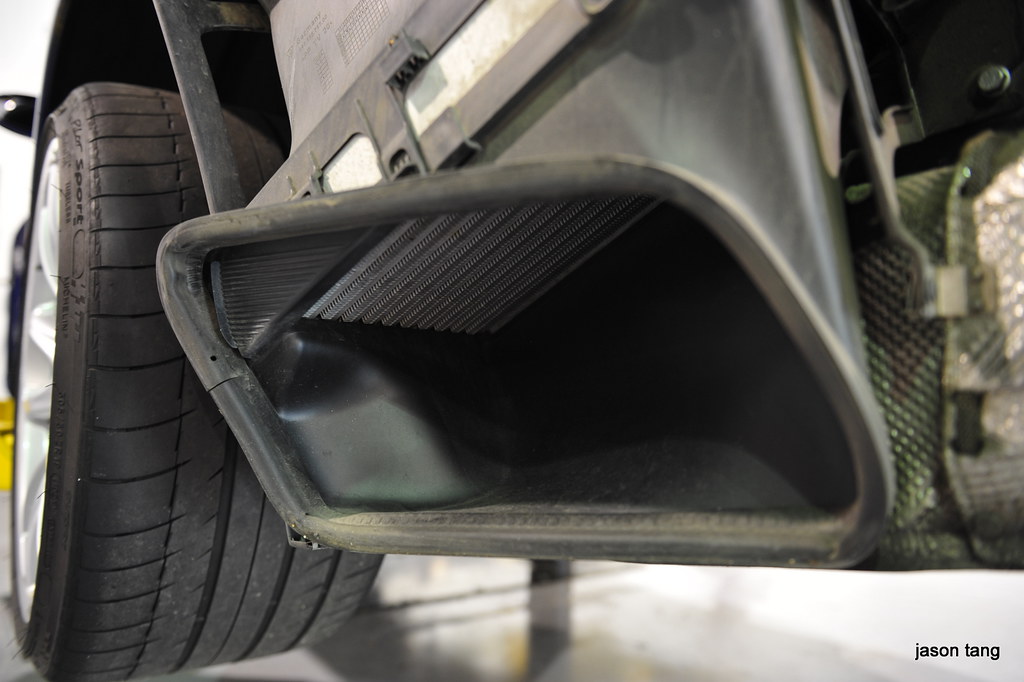
When we installed the new bumper. We discovered that the exhaust shield opening was too small because of the smaller exhaust
surrounds on the old bumper. We had to trim the shielding a bit for the new one to fit in place as a result.
Taking the bumper off again
Reattaching the bumper after trimming the exhaust shield

Missing the taillight
The discarded bumper bracket

Once on, it looked absolutely gorgeous!
This is the way it should have looked all along!
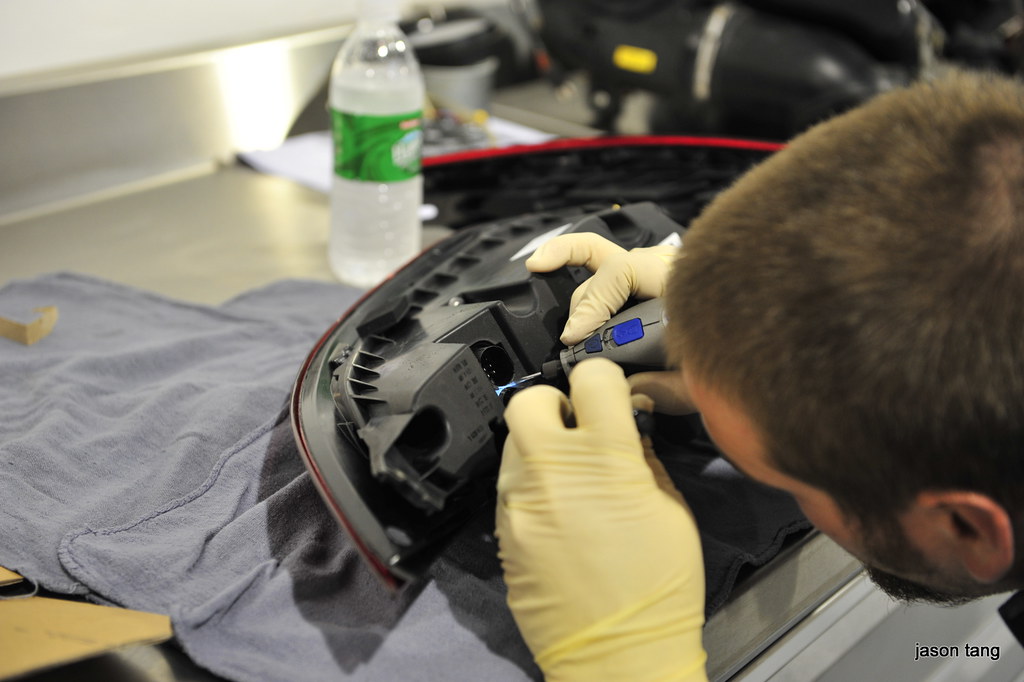
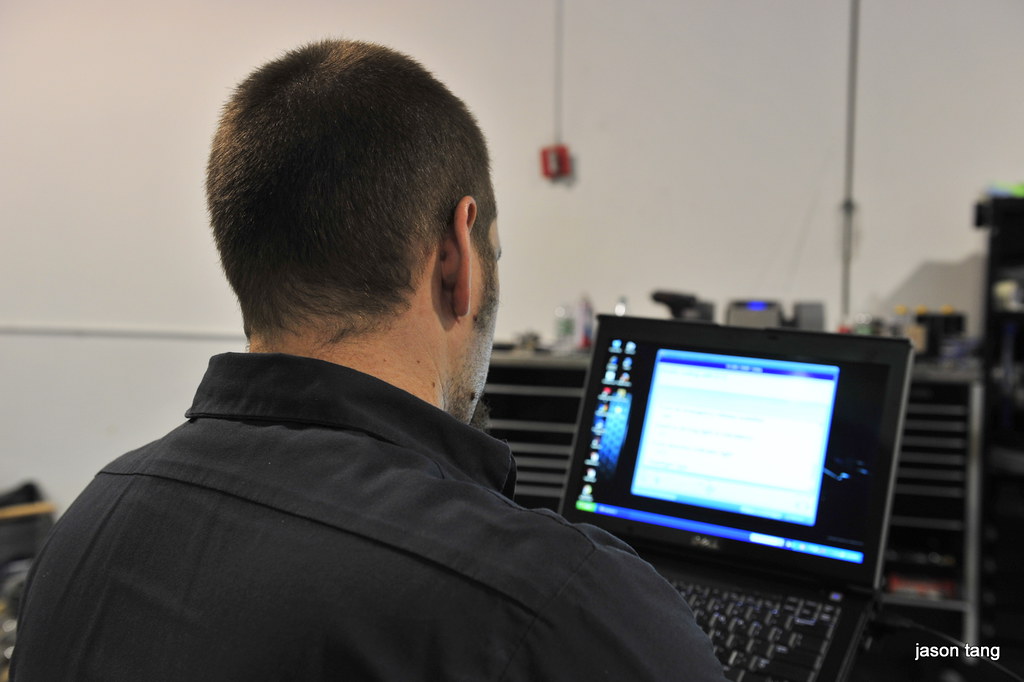
Programming the new control modules to accept the LED taillights is necessary too
Finishing things up
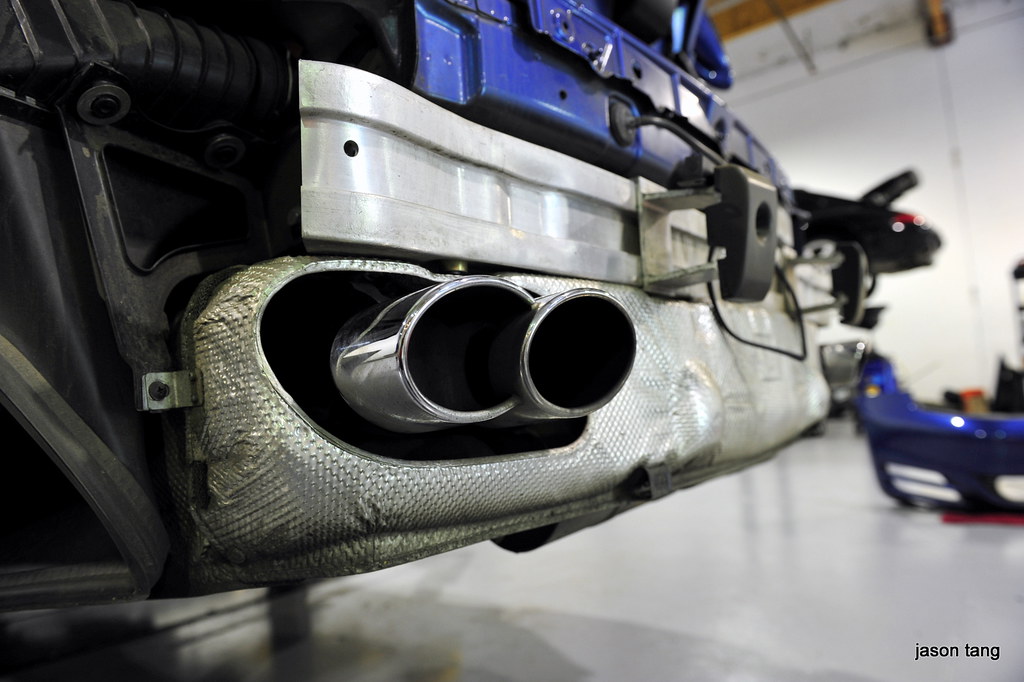
Exhaust tips looks good!
Once we got the wiring and programming all sorted out, everything finally was working!
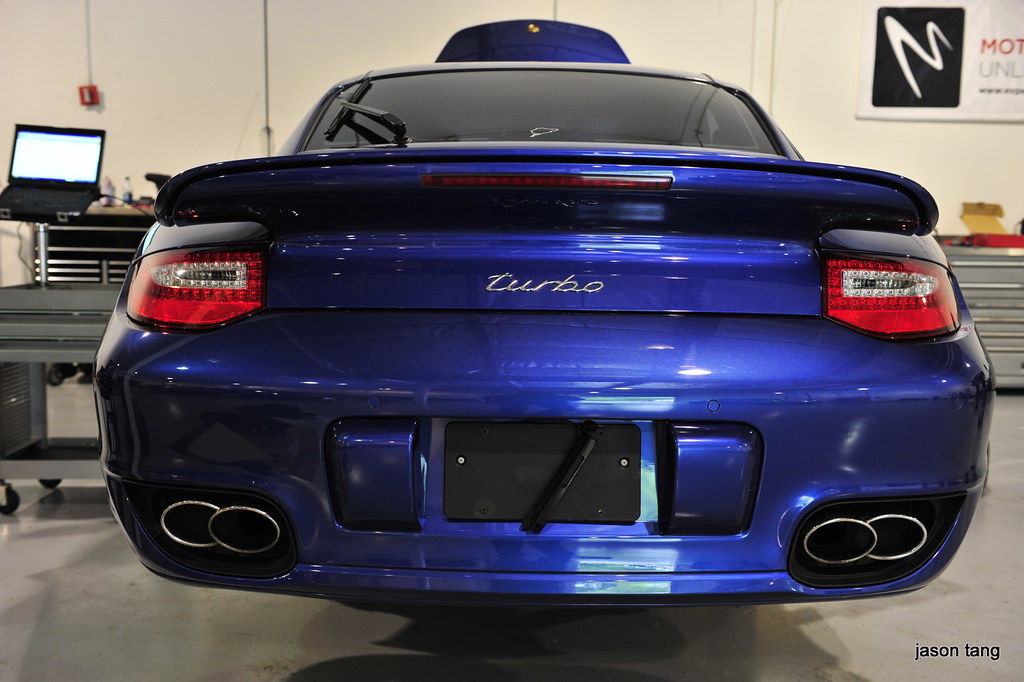
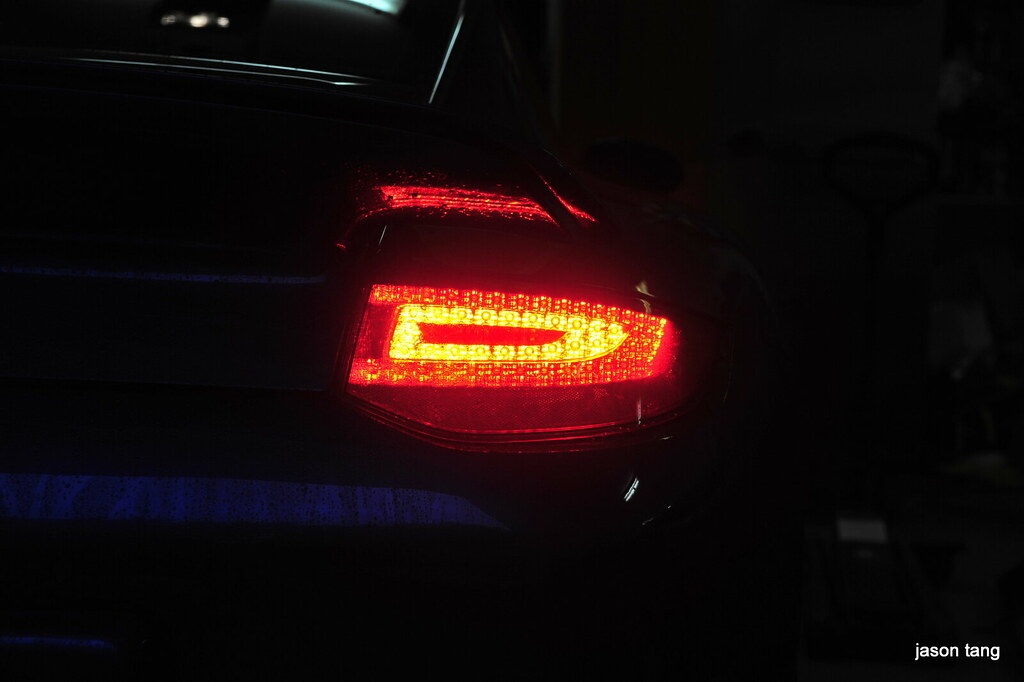
Brake lights
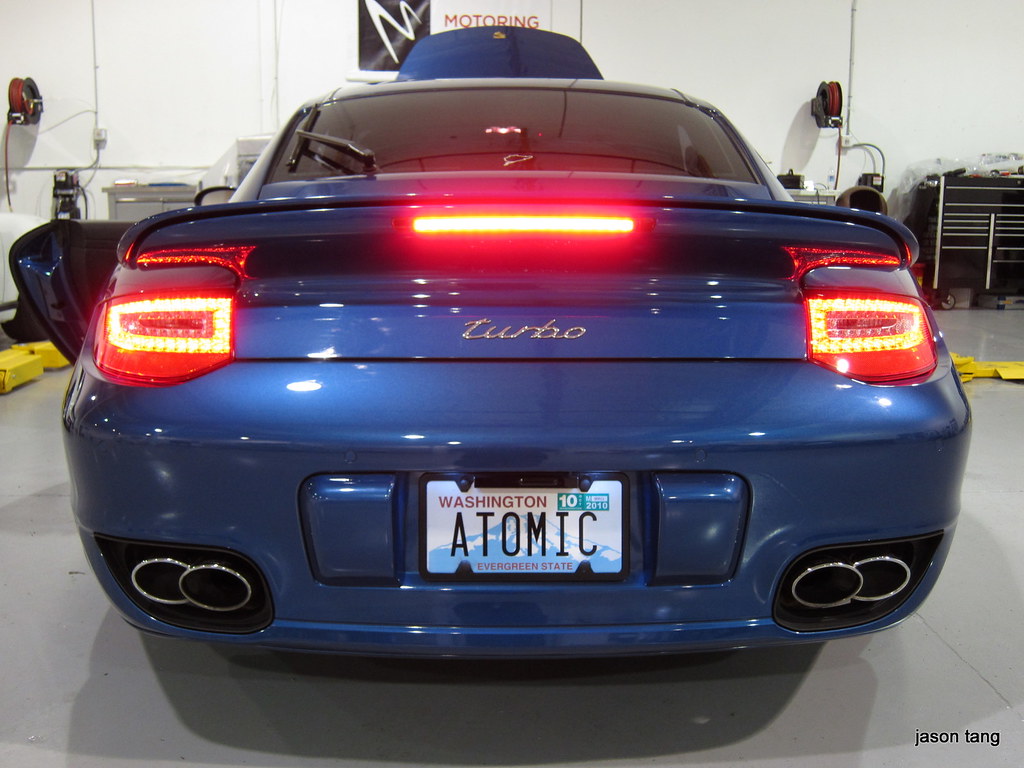
My car looks really good with the new bumper and taillights!
Home at last
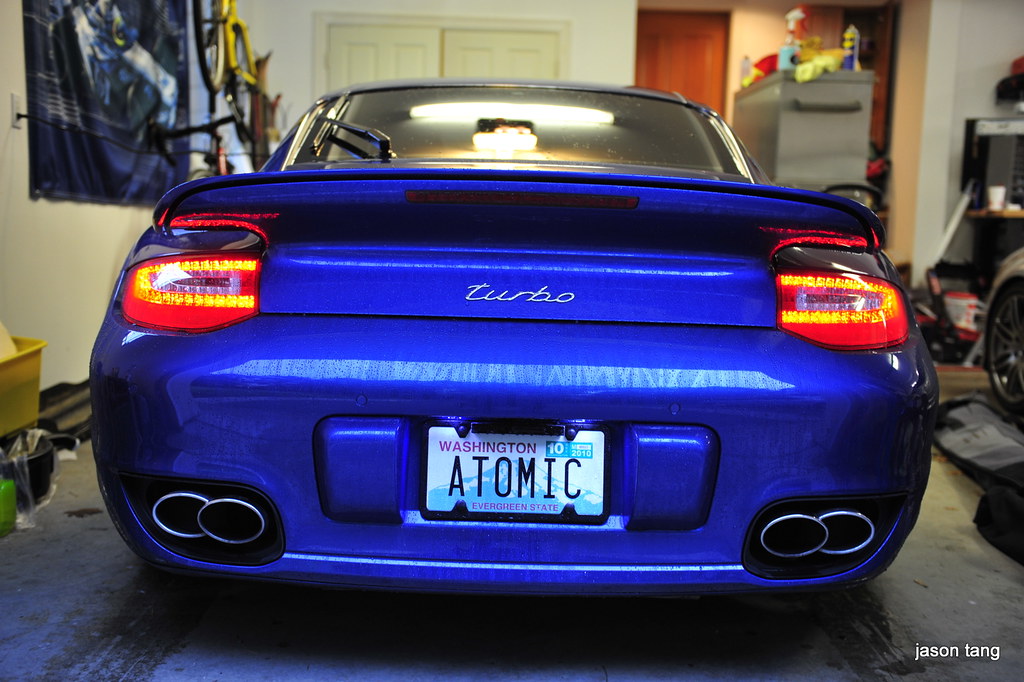
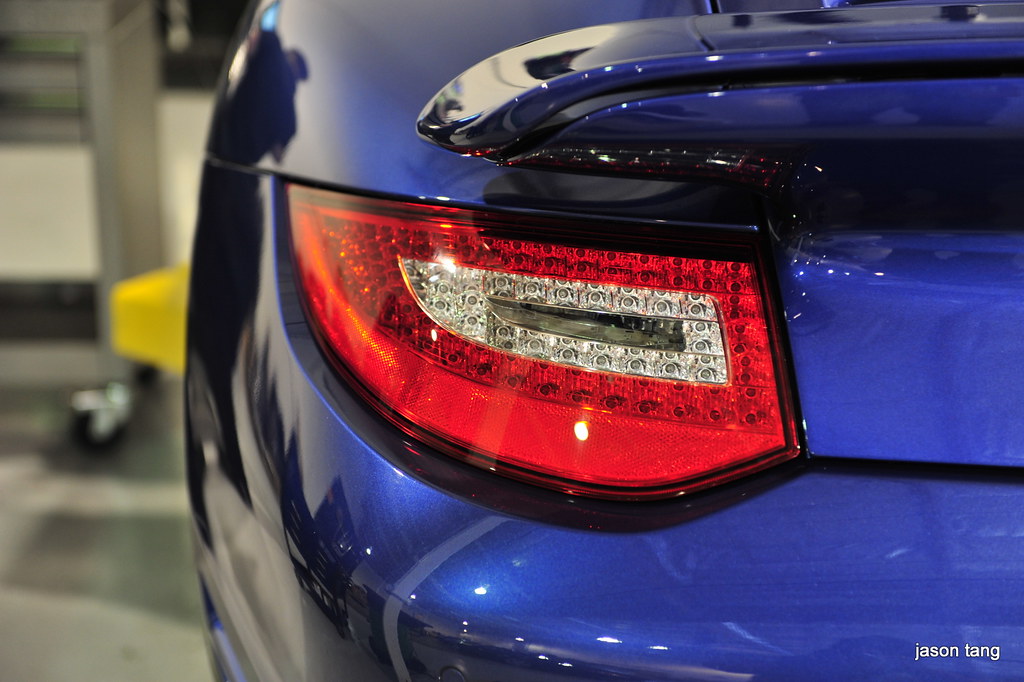
LEDs up close
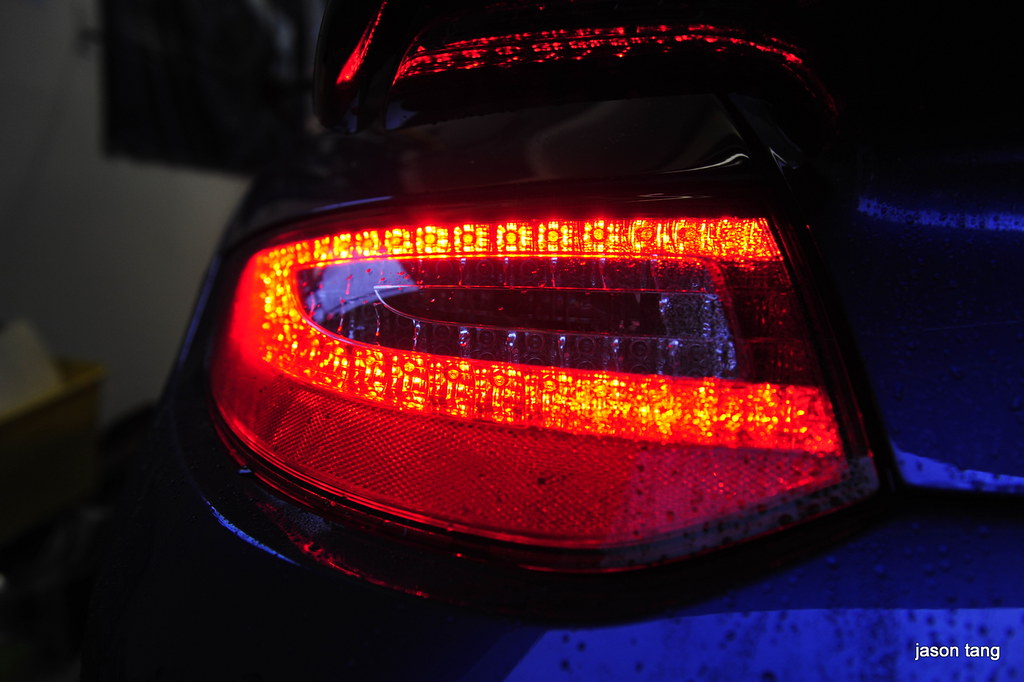
Turn signals work too
In closing, I'd like to say that I'm very happy with the end results of this whole thing. It took four days to get it done
mainly because we kept having to overnight parts from the dealership to make everything work properly. I hope that this has
been helpful for you guys and gives those of you on the fence on making the changes, reason to make the jump. In all, this
whole thing cost me about $3000 in parts, painting, labor, etc.
I'll do a photoshoot of my car with the new LED taillights soon.
Working on the connectors
Installing the parking sensors
Installing the lower trim piece
When we installed the new bumper. We discovered that the exhaust shield opening was too small because of the smaller exhaust
surrounds on the old bumper. We had to trim the shielding a bit for the new one to fit in place as a result.
Taking the bumper off again
Reattaching the bumper after trimming the exhaust shield
Missing the taillight
The discarded bumper bracket
Once on, it looked absolutely gorgeous!
This is the way it should have looked all along!
Programming the new control modules to accept the LED taillights is necessary too
Finishing things up
Exhaust tips looks good!
Once we got the wiring and programming all sorted out, everything finally was working!
Brake lights
My car looks really good with the new bumper and taillights!
Home at last
LEDs up close
Turn signals work too
In closing, I'd like to say that I'm very happy with the end results of this whole thing. It took four days to get it done
mainly because we kept having to overnight parts from the dealership to make everything work properly. I hope that this has
been helpful for you guys and gives those of you on the fence on making the changes, reason to make the jump. In all, this
whole thing cost me about $3000 in parts, painting, labor, etc.
I'll do a photoshoot of my car with the new LED taillights soon.
Last edited by atomic80; 06-08-2010 at 11:55 PM.
06-09-2010, 09:37 AM
#3
Burning Brakes
Join Date: Nov 2002
Location: Atnens Greece
Posts: 1,025
Likes: 0
Received 0 Likes
on
0 Posts
very nice job atomic80,
personally I preffer the old design for the new one , but only when speaking for designitshelf.
definetelly new rear LED Brake lights are much better for driving conditions and could really save you the money spent for the modification...
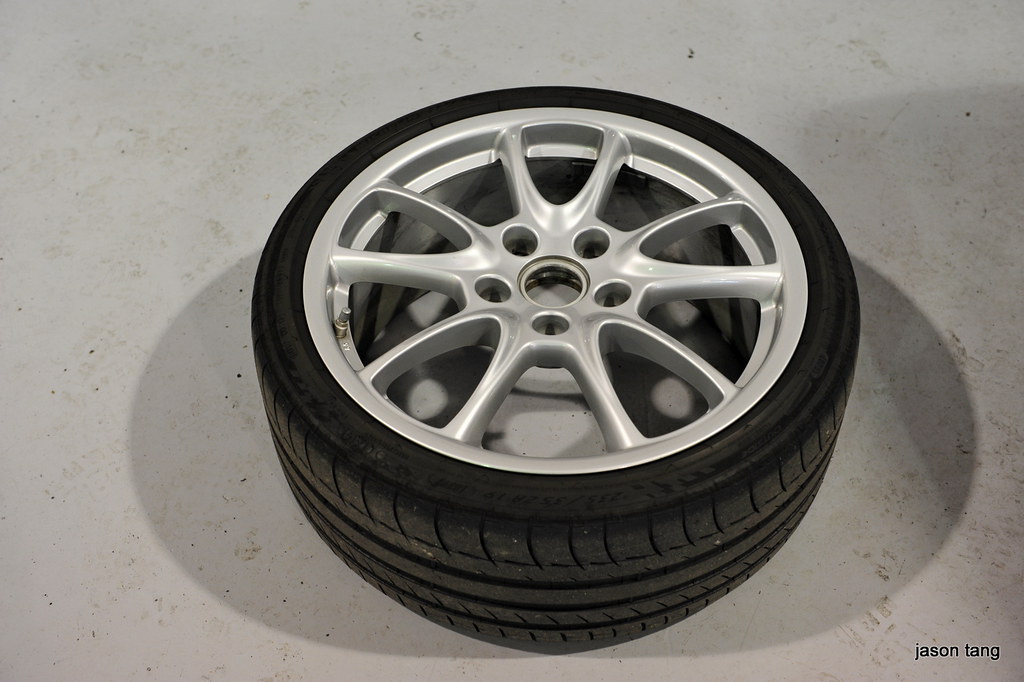
your wheels are from a GT2?
harris
personally I preffer the old design for the new one , but only when speaking for designitshelf.
definetelly new rear LED Brake lights are much better for driving conditions and could really save you the money spent for the modification...
your wheels are from a GT2?
harris
06-09-2010, 11:50 AM
#4
Pro
Thread Starter
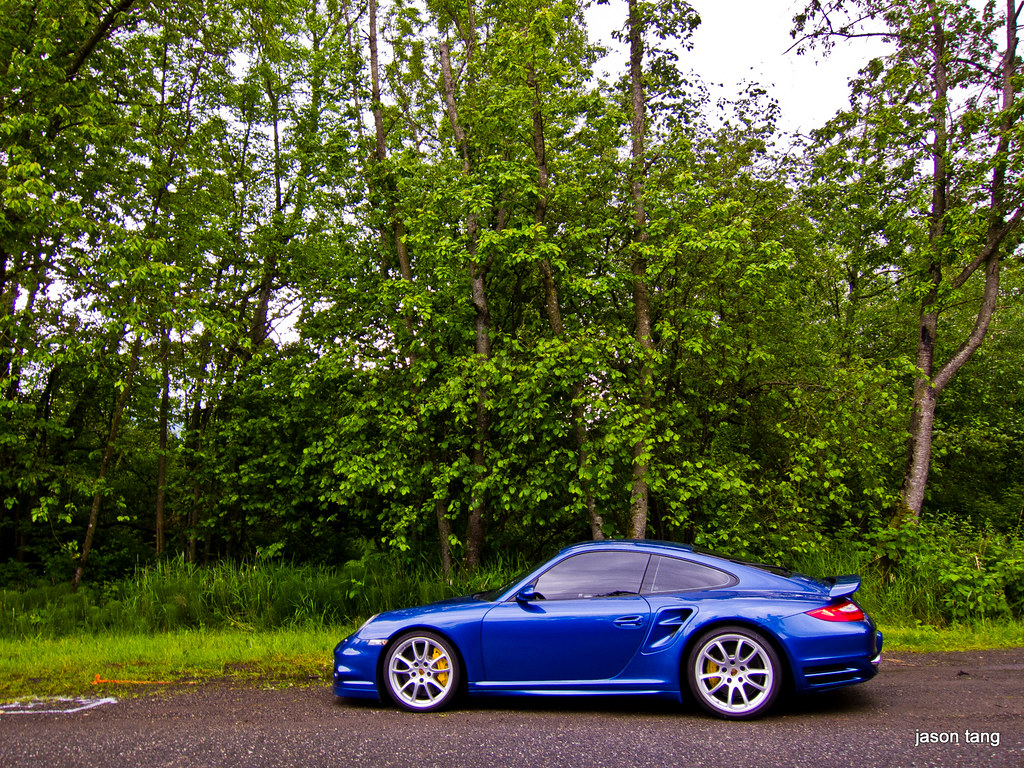
You know, I thought about this too. Do I like the design of the older lights or the new. In the end, seeing the newer one, I found myself liking it.
My wheels were actually for the GT3RS but they're also used on the GT2 too so they're the same.
My wheels were actually for the GT3RS but they're also used on the GT2 too so they're the same.
 06-10-2010, 02:48 PM
#6
Rennlist Member
Nice job Jason...seems like you've been gone forever.
Trending Topics
06-14-2010, 08:07 PM
#8
Rennlist Member
Jason,
You're a bit crazy doing all these for just the rear light changes...Glad you're happy though.
Let me know when you come to Vancouver. We can take some pictures of our cars together.
You're a bit crazy doing all these for just the rear light changes...Glad you're happy though.
Let me know when you come to Vancouver. We can take some pictures of our cars together.
06-21-2010, 07:07 PM
#10
Burning Brakes
Join Date: Jan 2007
Location: Miami, Florida
Posts: 1,241
Likes: 0
Received 0 Likes
on
0 Posts
great write-up on the modification process. to me seemed like a lot of work and money for a light change. that being said everyone has their own likes and dislikes. in the end it came out awesome. you have a beatiful car. enjoy it in good health.
 06-22-2010, 02:59 AM
#12
Pro
Thread Starter
They just got a big pallet of those Lhasa beer from a supplier. They're a brand new shop getting work done in finishing things up. That's why everything was covered up.
06-22-2010, 07:16 AM
#13
Rennlist Member
Join Date: Oct 2008
Location: South Florida and Jersey shore (Monmouth County,)
Posts: 556
Received 231 Likes
on
152 Posts
I've spent a lot of money on things that people wouldn't find valuable, but I'd never park that close to a minivan. You can almost hear the door to door clunk when the goth 14 year old hoists open that door without looking to wedge their 42 inch butt inside while cradling the box of donuts.
06-22-2010, 10:56 AM
#14
Pro
Thread Starter
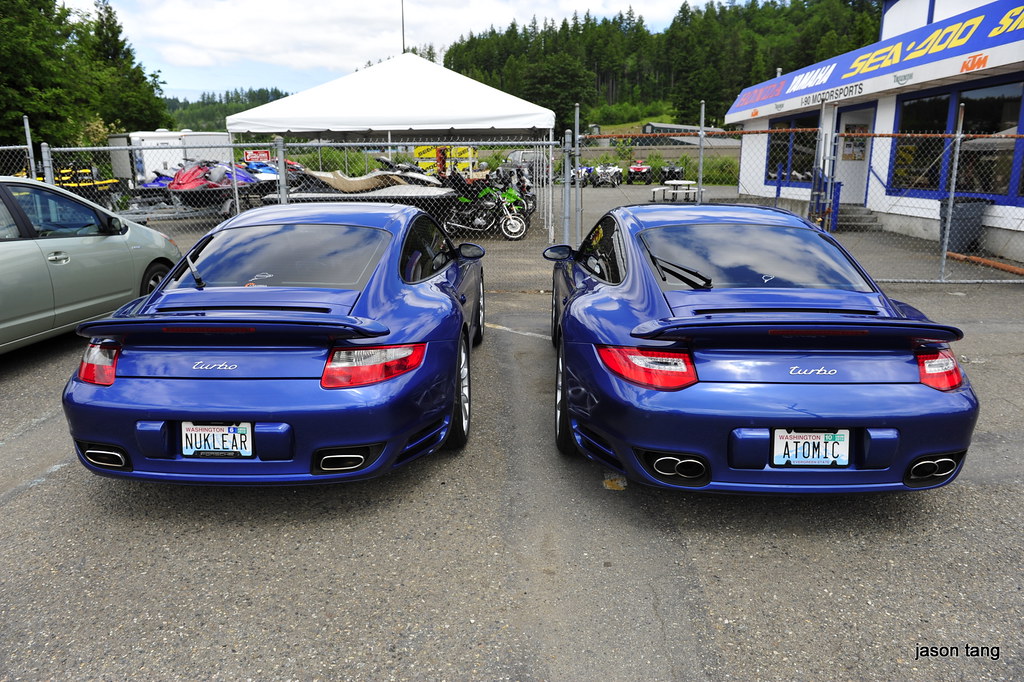
That's wasn't a minivan. That was a Prius! He was there when we arrived and still there when we left so fortunately nothing happened. That wasn't mine either. Mine is the one on the right.
06-22-2010, 02:20 PM
#15
Nordschleife Master
while i fully agree the new LED's are amazing and were a big selling factor for me to upgrade, ive never seen so much work go into a taillight upgrade... amazing!...