
DIY Coolant Fitting Fix with Motor In the Car
 11-18-2016, 08:31 PM
#136
Rennlist Member
I am having difficulty removing the power steering reservoir. I am doing this in a 7.2 GT3 and D in the photo is not a torx bolt but is a torx screw. Is there not another one on the right side of the reservoir as well? It sure looks like one is there, and if so I'm not sure how to remove it. Thanks
No reason other than I couldn't find a hex shafted #29 bit, but the 1/8" was close enough, within 0.2 mm if I remember correctly. As long as you press down on the tap to make sure it screws in properly, it wasn't a problem. If you want, you can take a 1/4" thick piece of scrap aluminum and practice on that first. I thought though I might have seen a #29 bit at Home Depot the other day? While there, I saw a new Milwaukee lithium cordless ratchet that with its 250 rpm speed and the right bits I though would have also done a pretty good job:

http://www.milwaukeetool.com/tools/c...et-kit/2457-21
Since you'll be tackling this here's some tips with respect to removing the alternator and power steering pump to get you along:
1. disconnect battery before beginning
2. remove airbox/filter assembly
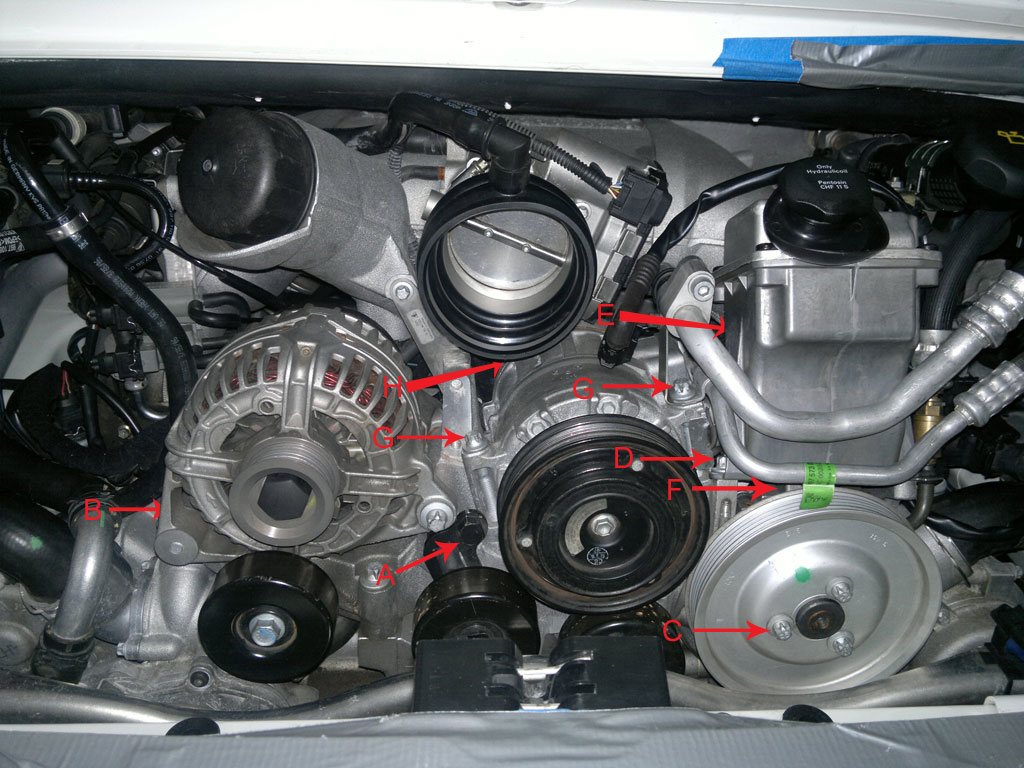
3. 15mm hex bolt (A in pic) releases tension on serpentine belt pulley to remove
4. two torx bolts hold on the alternator. The one on the left side in back (B) can be accessed with a 11mm box wrench
5. to remove power steering pump, remove the three pulley bolts (C) and the pulley. Using a 10mm wrench to leverage two of the bolts against each other, allows you to hold the pulley from turning still while loosening the third bolt. Behind the pulley, you will find three more torx bolts fastening the pump to the bracket that will also need to be removed.
6. to access the torx bolt at (D) you can use an offset 10mm wrench, or to properly get a socket on it, you will need to remove the throttle body from the intake manifold (4 torx bolts). Then you will need to loosen the three torx bolts holding down the AC compressor (G & H). Remove bolts (G) and loosen (H) which will allow you to lift the compressor off its bracket and tilt it to the side accessing (D) with a torx socket. You will only be able to loosen and not remove bolt (H) because the intake manifold is in the way. I think I used a 10mm box wrench for that.
7. The power steering pump is composed of the pump and a reservoir. The pump is the one with the pulley, The reservoir is the canister above with the cap. To remove you will need to separate the two. There is another bolt (E) on a sheet metal bracket behind the reservoir that holds the two that you remove to separate them. The pump and reservoir are joined by a finger sized slip fit connection at (F). When you pull the reservoir up, have a foam or rubber plug or plastic cap ready to plug up the nipple on the bottom from spilling out all it's power steering fluid, and have something under your car to catch any that spills.
http://www.milwaukeetool.com/tools/c...et-kit/2457-21
Since you'll be tackling this here's some tips with respect to removing the alternator and power steering pump to get you along:
1. disconnect battery before beginning
2. remove airbox/filter assembly
3. 15mm hex bolt (A in pic) releases tension on serpentine belt pulley to remove
4. two torx bolts hold on the alternator. The one on the left side in back (B) can be accessed with a 11mm box wrench
5. to remove power steering pump, remove the three pulley bolts (C) and the pulley. Using a 10mm wrench to leverage two of the bolts against each other, allows you to hold the pulley from turning still while loosening the third bolt. Behind the pulley, you will find three more torx bolts fastening the pump to the bracket that will also need to be removed.
6. to access the torx bolt at (D) you can use an offset 10mm wrench, or to properly get a socket on it, you will need to remove the throttle body from the intake manifold (4 torx bolts). Then you will need to loosen the three torx bolts holding down the AC compressor (G & H). Remove bolts (G) and loosen (H) which will allow you to lift the compressor off its bracket and tilt it to the side accessing (D) with a torx socket. You will only be able to loosen and not remove bolt (H) because the intake manifold is in the way. I think I used a 10mm box wrench for that.
7. The power steering pump is composed of the pump and a reservoir. The pump is the one with the pulley, The reservoir is the canister above with the cap. To remove you will need to separate the two. There is another bolt (E) on a sheet metal bracket behind the reservoir that holds the two that you remove to separate them. The pump and reservoir are joined by a finger sized slip fit connection at (F). When you pull the reservoir up, have a foam or rubber plug or plastic cap ready to plug up the nipple on the bottom from spilling out all it's power steering fluid, and have something under your car to catch any that spills.

The following users liked this post:
jayi836 (03-10-2020)
11-19-2016, 08:46 AM
#137
Rennlist Member
I also did the pining on my GT3 and that torx screw (D) was a PIA to be removed. I just use torx socket with 1/4 extension to remove the screw. You cannot use the 3/8 extension in that area.
 11-19-2016, 01:30 PM
#138
Rennlist Member
Rick, is there another torx screw on the right side of the reservoir? I don't see how by just removing the one that you can move the reservoir out of the way.
Thanks
Thanks
 01-10-2017, 01:05 AM
#140
Rennlist Member
Friendly 2017 bump and thank you for this thread! 
03-04-2017, 01:51 PM
#141
3rd Gear

Join Date: Mar 2017
Posts: 3
Likes: 0
Received 0 Likes
on
0 Posts
Fantastic thread!! Many thanks to all that have contributed, as it has helped me a lot in getting to the different pipes which I've now drilled and tapped on my 997.2 GT3.
One question, though - what epoxy is everyone using to re-attach the ejected pipes? Are you using the same Loctite product used for the screws, or are you using the original Porsche epoxy?
Just need to finish this last pipe and I'll be ready to start buttoning everything up.
One question, though - what epoxy is everyone using to re-attach the ejected pipes? Are you using the same Loctite product used for the screws, or are you using the original Porsche epoxy?
Just need to finish this last pipe and I'll be ready to start buttoning everything up.
03-07-2017, 04:10 AM
#142
Racer
Thread Starter
If you haven't finished your last pipe yet, I would use JB Weld to reattach pipes after the surfaces are cleaned, then pin them after it's dried with red Loctite.
03-12-2017, 12:49 AM
#145
Racer
Thread Starter
Try contacting Tom at Mistress Silverlake. The are an all Porsche workshop in L.A. and have pinned several GT3s and RSs, both with the motors in and out, including his personal GT3.
http://mistresssilverlake.com/
http://mistresssilverlake.com/
03-15-2017, 05:02 AM
#146
Genius! I don't think I would have pulled the engine on my 100k mile 996 GT3 to get the fittings done unless there was other engine or clutch work to be done. I hope to do this myself this year.
Thanks for all the detailed information.
Thanks for all the detailed information.
04-11-2017, 08:20 PM
#147
Intermediate

Join Date: May 2016
Posts: 31
Likes: 0
Received 0 Likes
on
0 Posts
I just performed this procedure on my 997.2 GT3. Many thanks to Steve W�if we ever have a chance to meet, I owe you a beer or three!
There are a few minor differences on the 997.2 versus the photos that Steve W. posted for the 997.1:
There are a few minor differences on the 997.2 versus the photos that Steve W. posted for the 997.1:
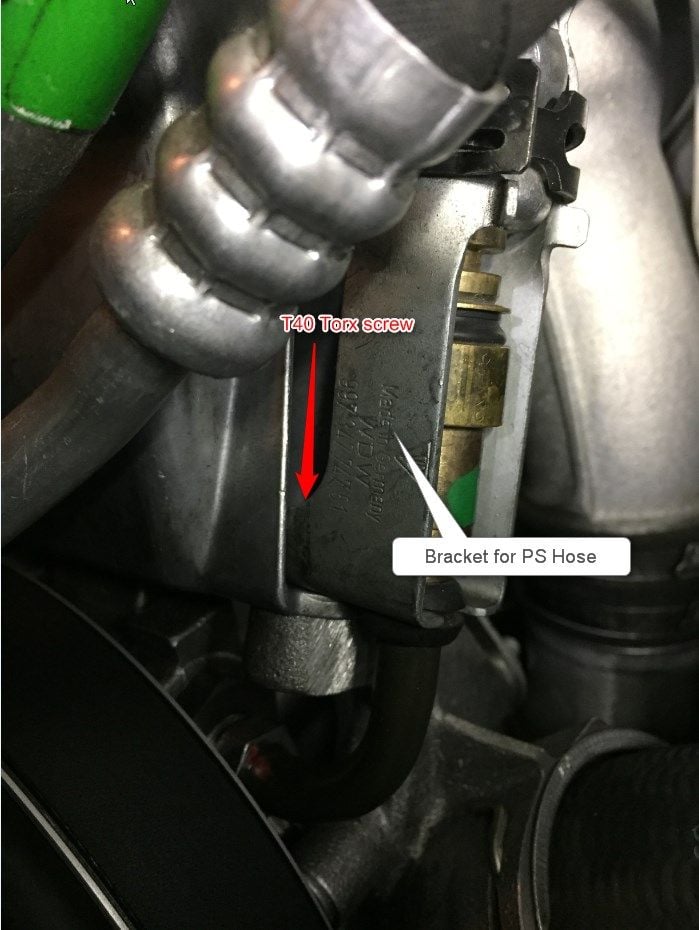
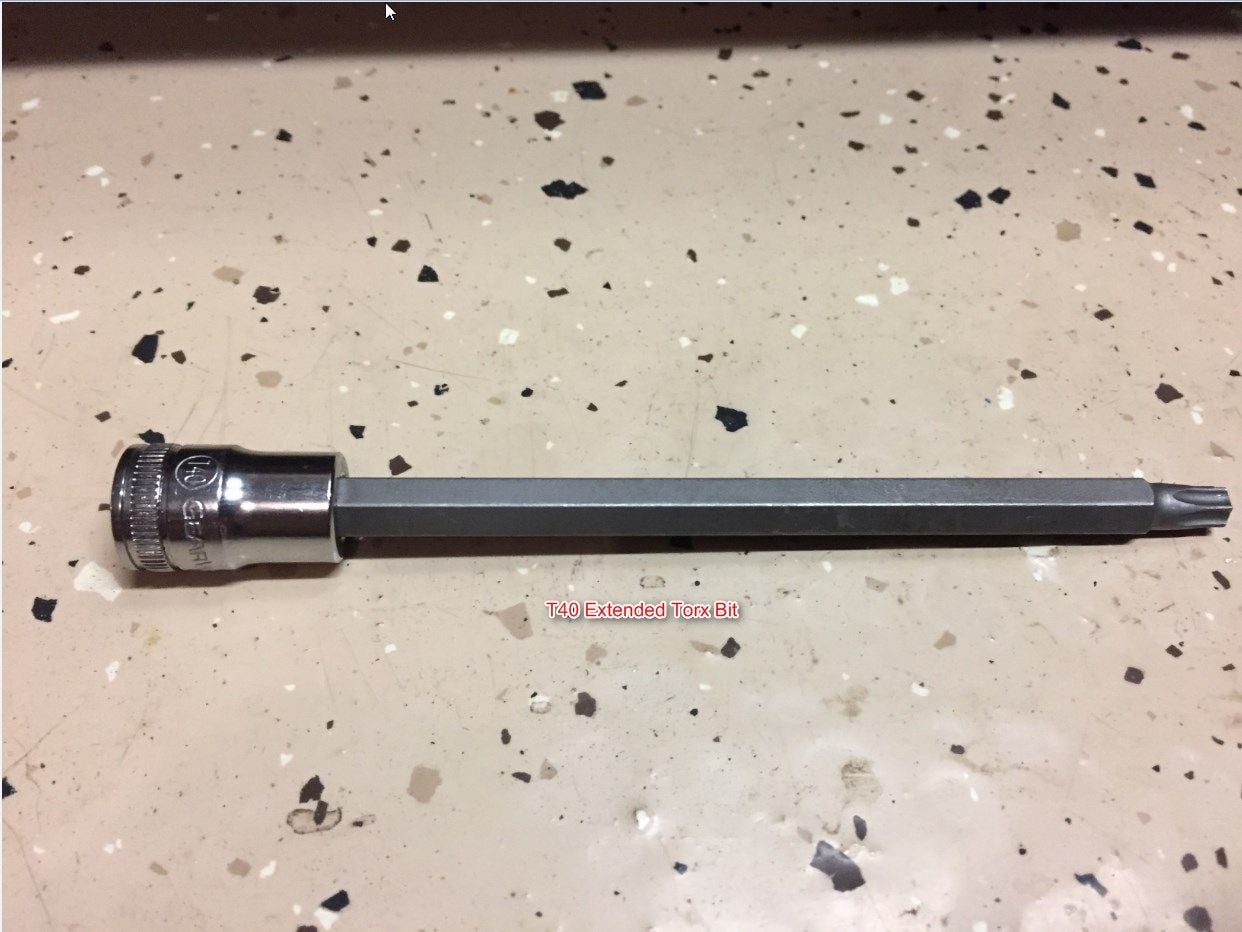
- The fasteners that hold the PS fluid reservoir to the bracket are torx screws (male torx bit required). The fastener on the right side of the reservoir is between the reservoir and a bracket that holds the PS hose (see pic). This bracket is not there on the 997.1 photos that Steve W. posted. I found a set of extended torx bits at the local Advance Auto Parts store that worked perfectly for both fasteners (note that the AC compressor still needs to be loosened to gain access to the LH PS reservoir fastener, even with the extended torx bit).
- The lower fitting behind the water pump is located lower on the casting than the pictures from the 997.1. I had to remove the idler pulley below the alternator to gain access, and use a longer drill bit and an extension for the tap. It�s still possible to reach with the right tools.
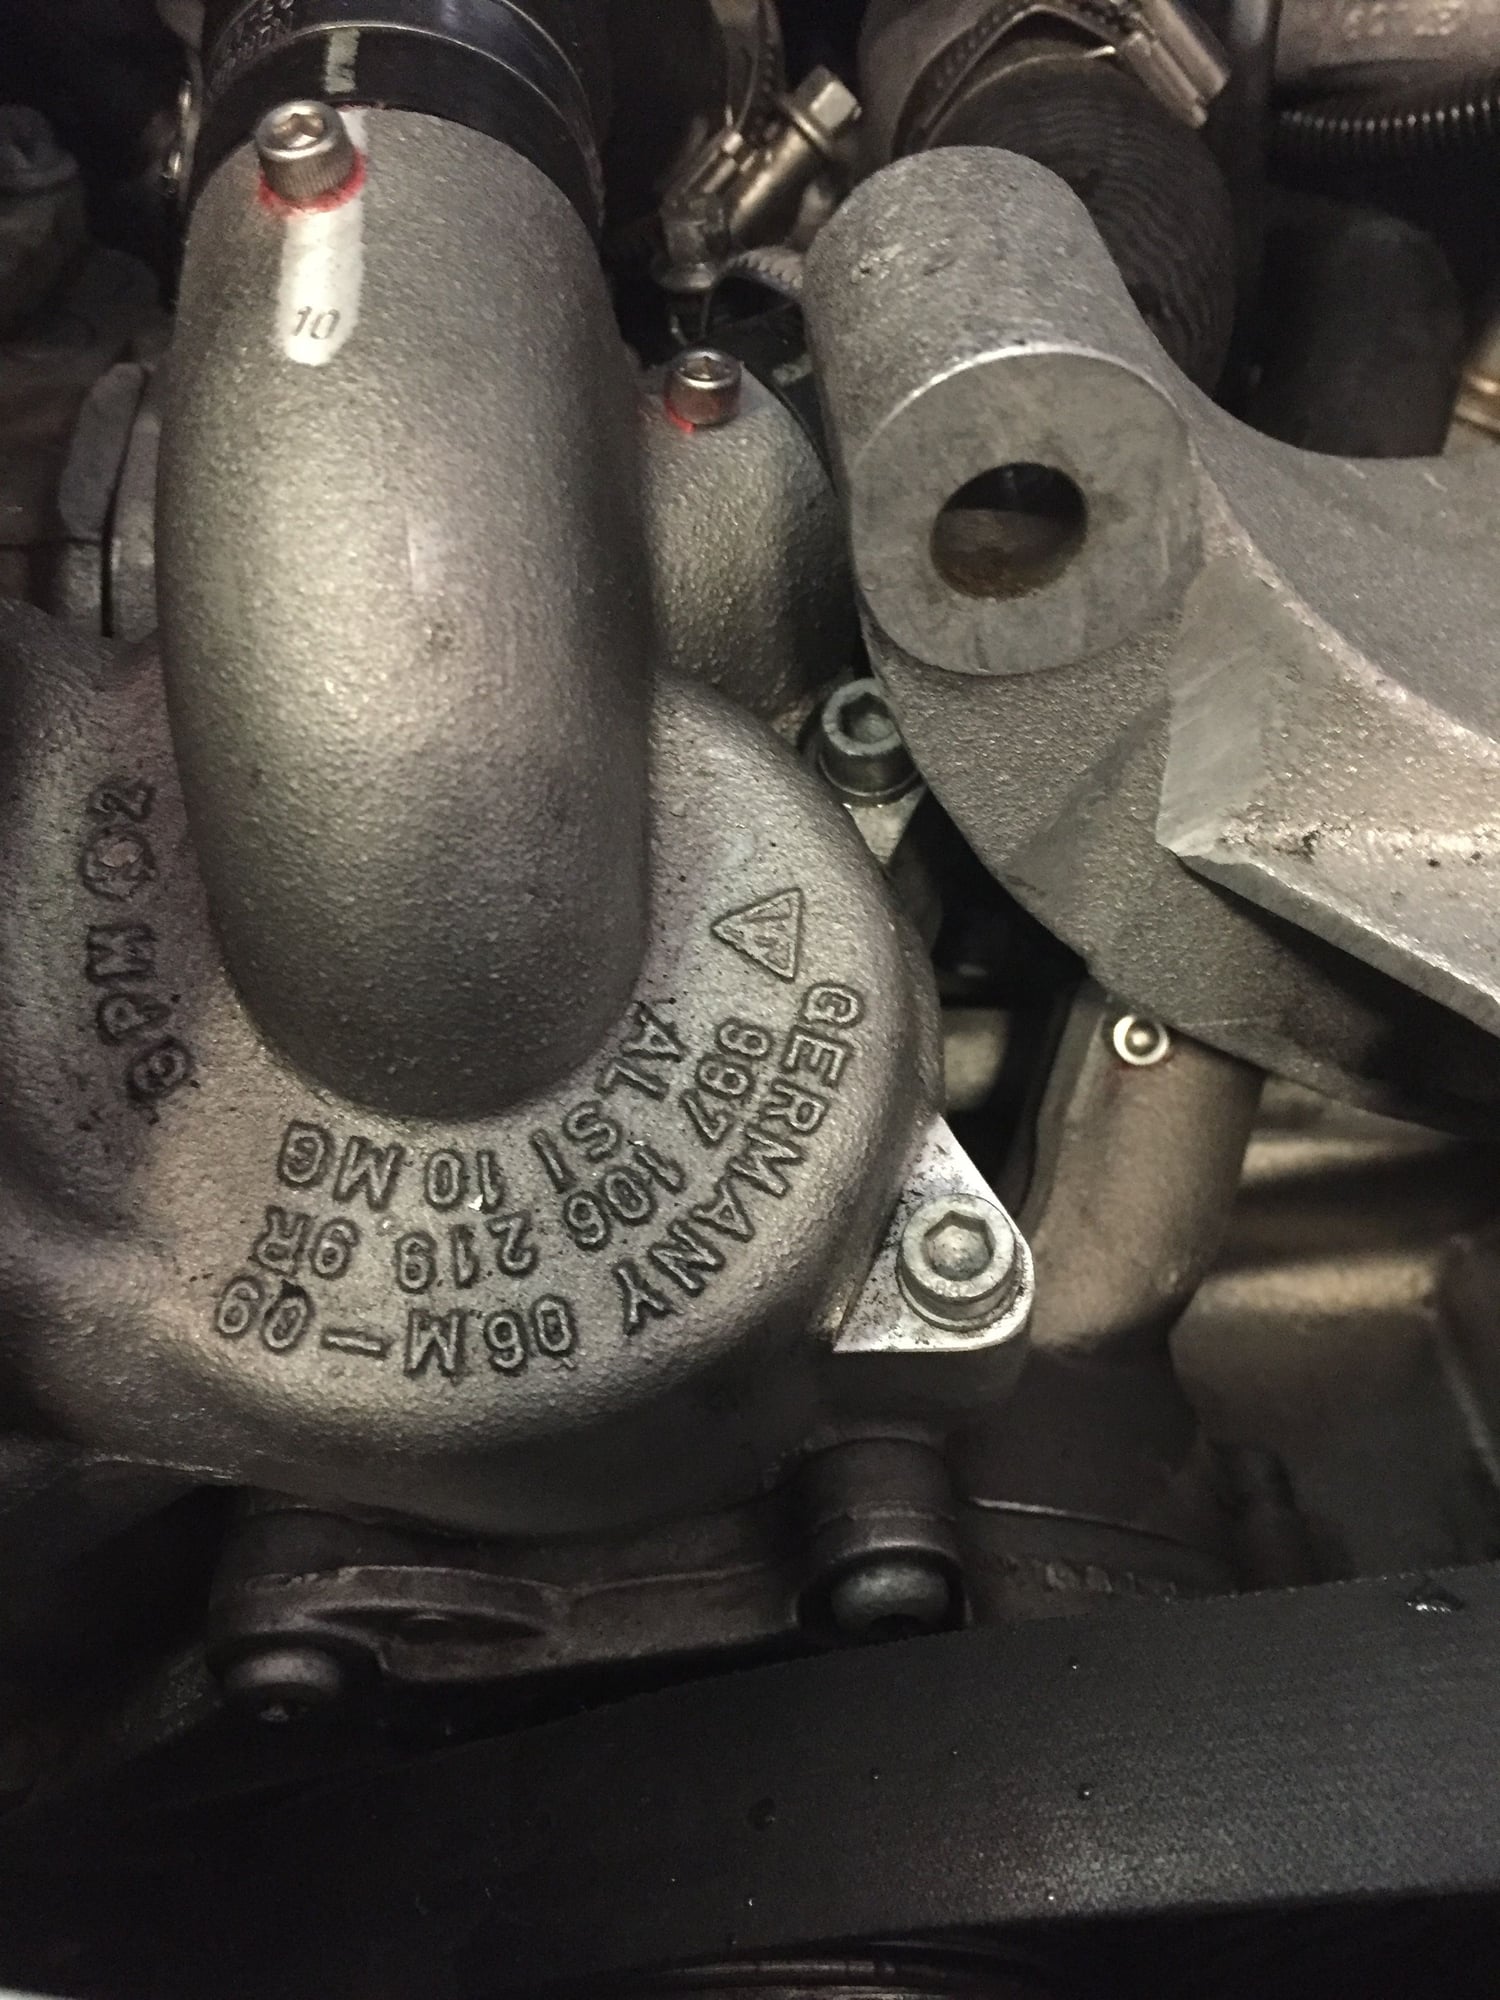
- I did not drain the coolant from the vehicle. I was very careful to clean the chips away during the drilling process, and I used grease to contain the chips from the tapping process. I also used some contact cleaner to flush the threads after tapping. However, some coolant remained in the threads when the flushing was complete. I applied the Loctite 2620 to the threads and ran each screw in, then removed it, applied more Loctite and tightened it. So far, there has been no leakage. The good news is that three of the pinned coolant fittings (top picture) can be seen just by opening the trunk lid, so it will be easy to check for leaks in the future.


 06-16-2017, 12:35 PM
#149
Three Wheelin'
JB Weld or similar 2-part epoxy if it has ejected one. If it is all tight, you don't have to take it out and epoxy it back together.. Only if necessary.
