
Cage my RS
 12-19-2010, 11:28 AM
#1
Addict
Rennlist Member
Rennlist Member
Thread Starter
As speed increase on track I became more aware of the need for added safety. I already have a roll bar but now it's time for a full cage for better sense of security. The best option for any cage is a custom made weld in cage for maximum structural rigidity and protection but I am not ready to chop up my RS. The next best option is a bolt on cage. There are several options for 997 GT3/RS and I have looked far and wide and settle with OEM cage. The reason why I chose the Porsche factory cage was
OK, first of all, there are several sources ... only two I trust to get the factory cage. You can get it through FVD Brombacher or Carnewal. Since these are Porsche motorsport parts I was told you get what they send you and no return even if they send you the wrong parts!? Best to choice a supplier that can provide additional insurance incase Porsche motorsport screw you over ... we know that never happen right? 997 factory cage now comes in two flavors - the original version with one door bar or the newest version with two door bars.
Well, here is my front and rear section from FVD. I chose to get the newer version with two door bars ....
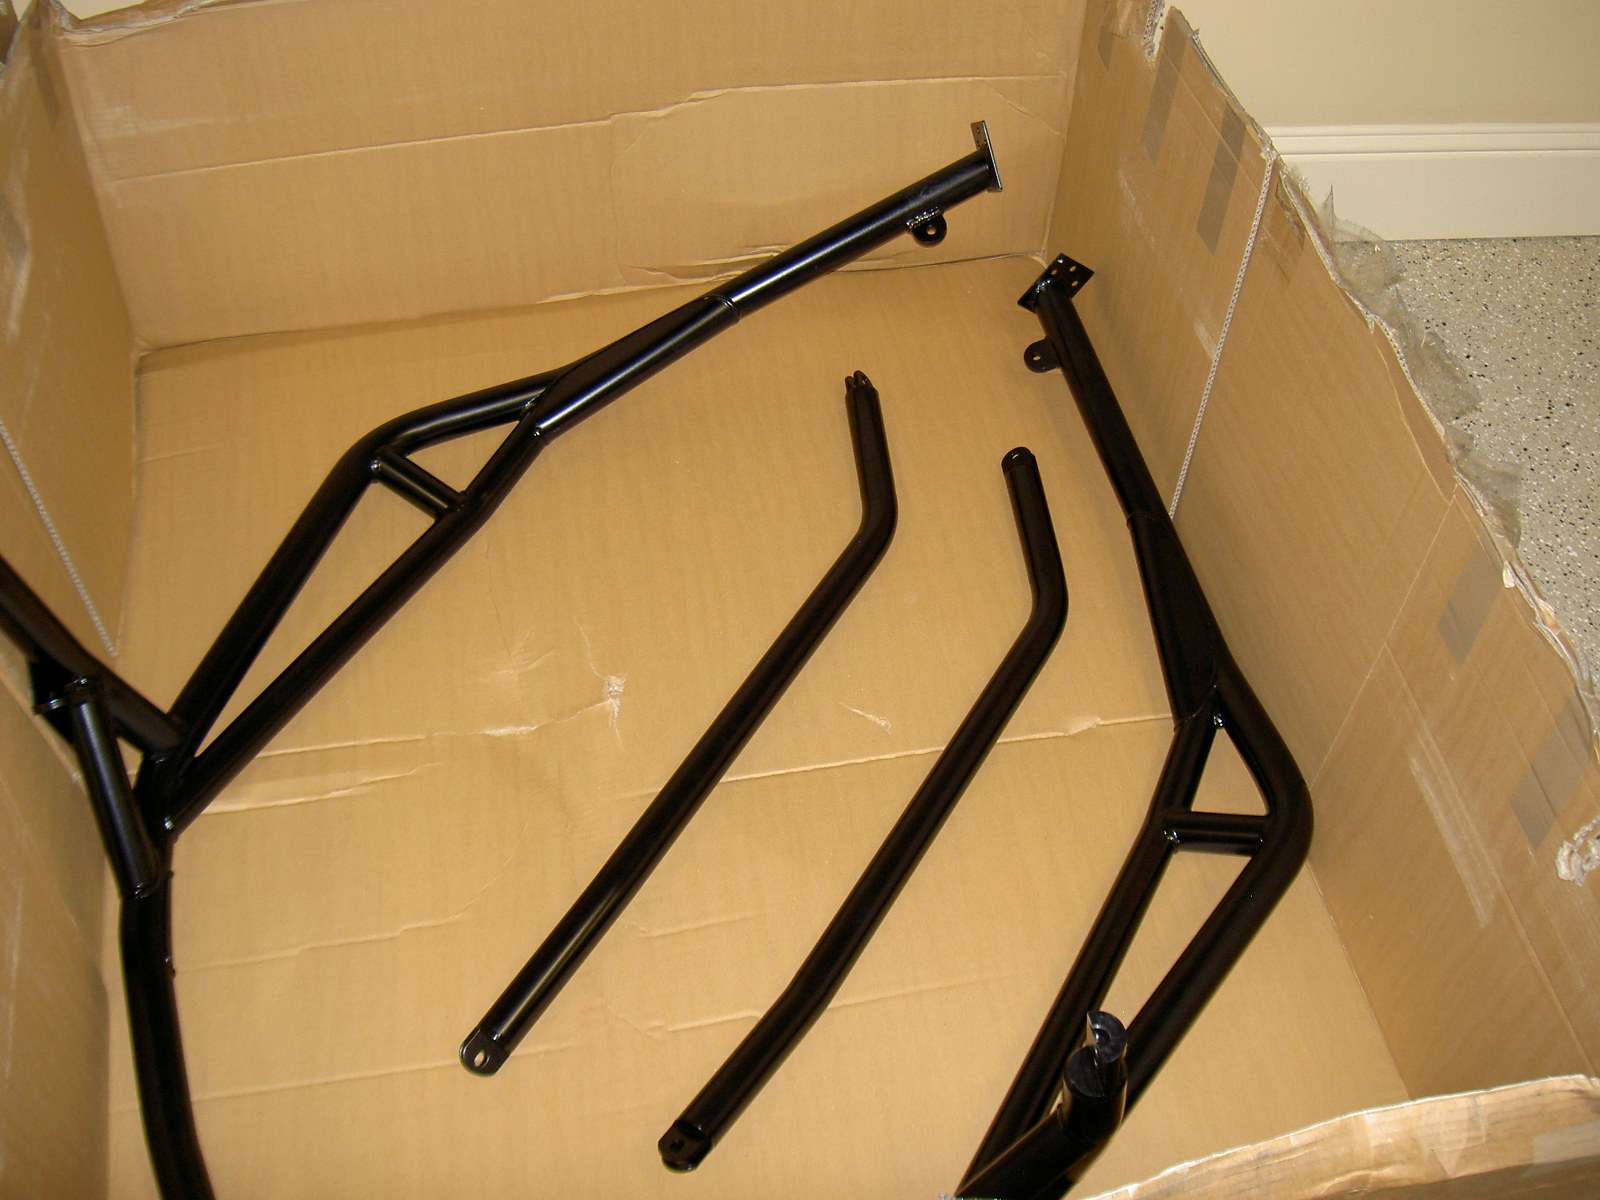
WHAT! I got the older single door bar front section!? Man! that was really irritating. It's not like I can just put a stamp on the box and ship it back to Germany for an exchange. FVD contacted Porsche motorsport and their response was "tough! Your bad luck" in heavy German accent
Luckily FVD back up their product and refund the difference for the older version. I can make an additional door bar if there is a need in the future
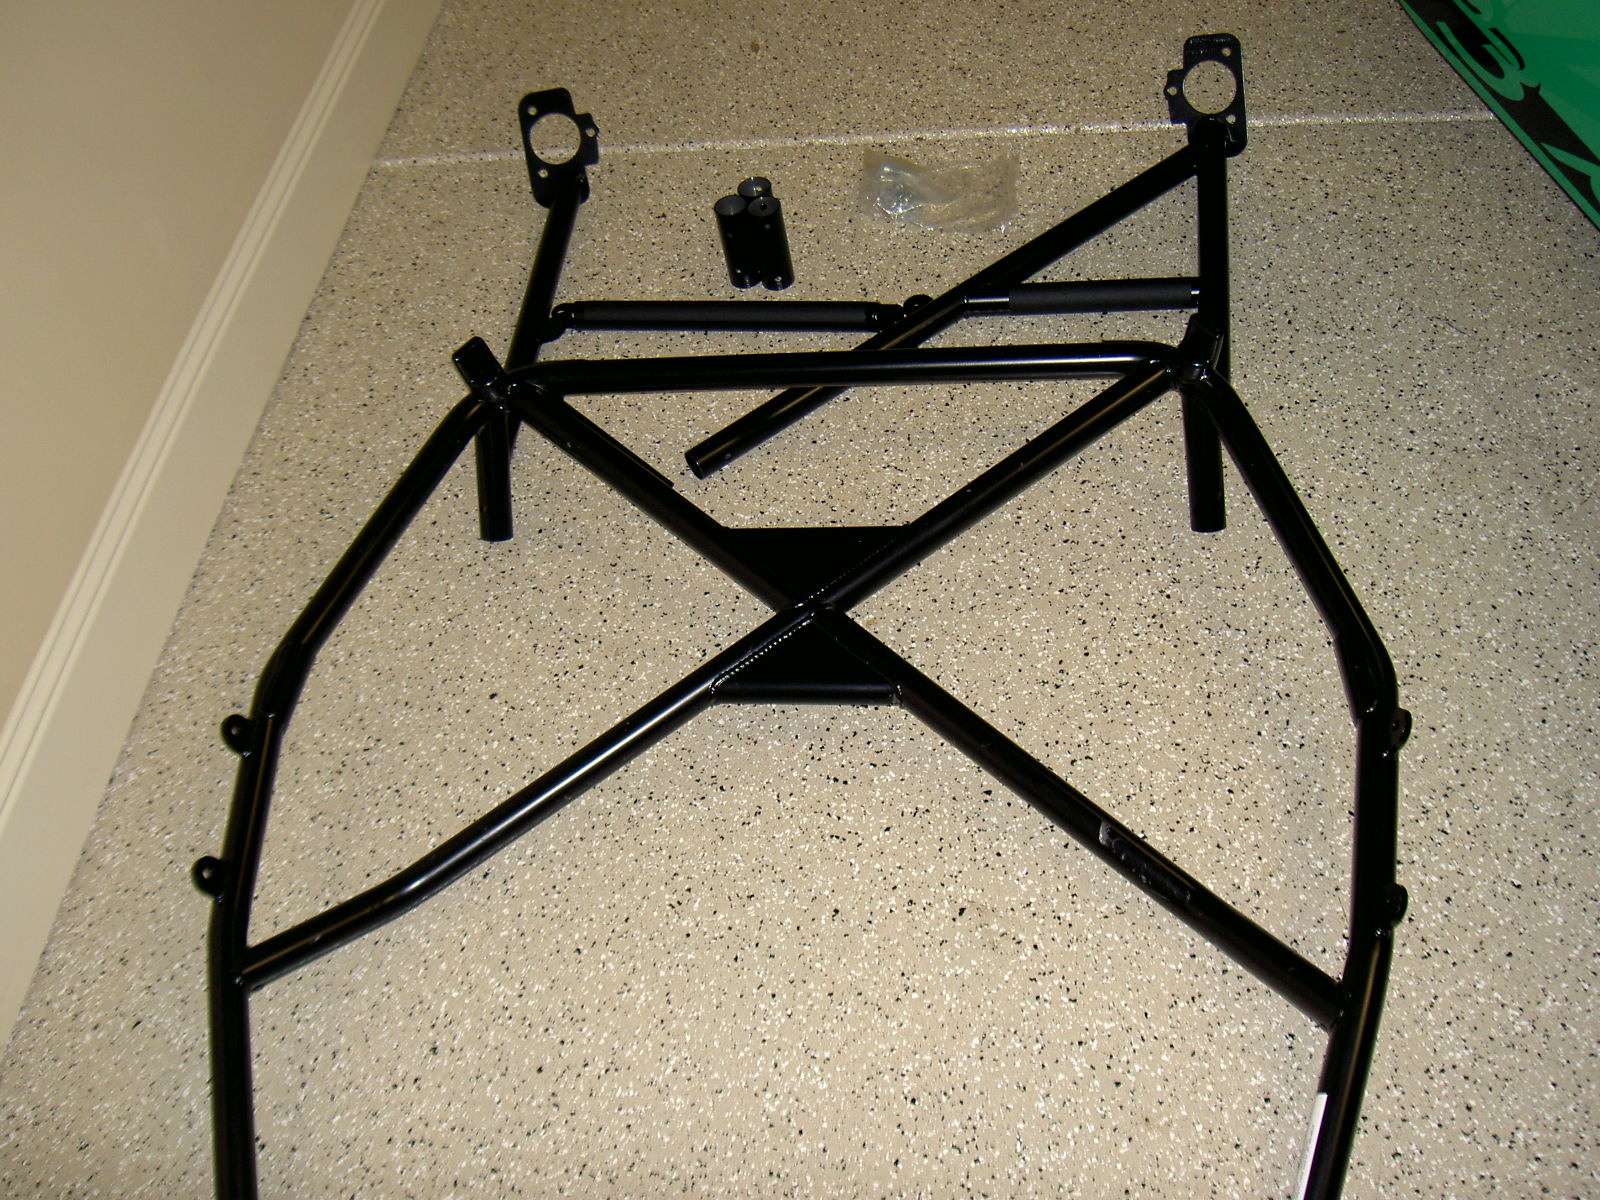
Here is my rear cage section and it has two tabs on the main hoop for the newer two door bar cage
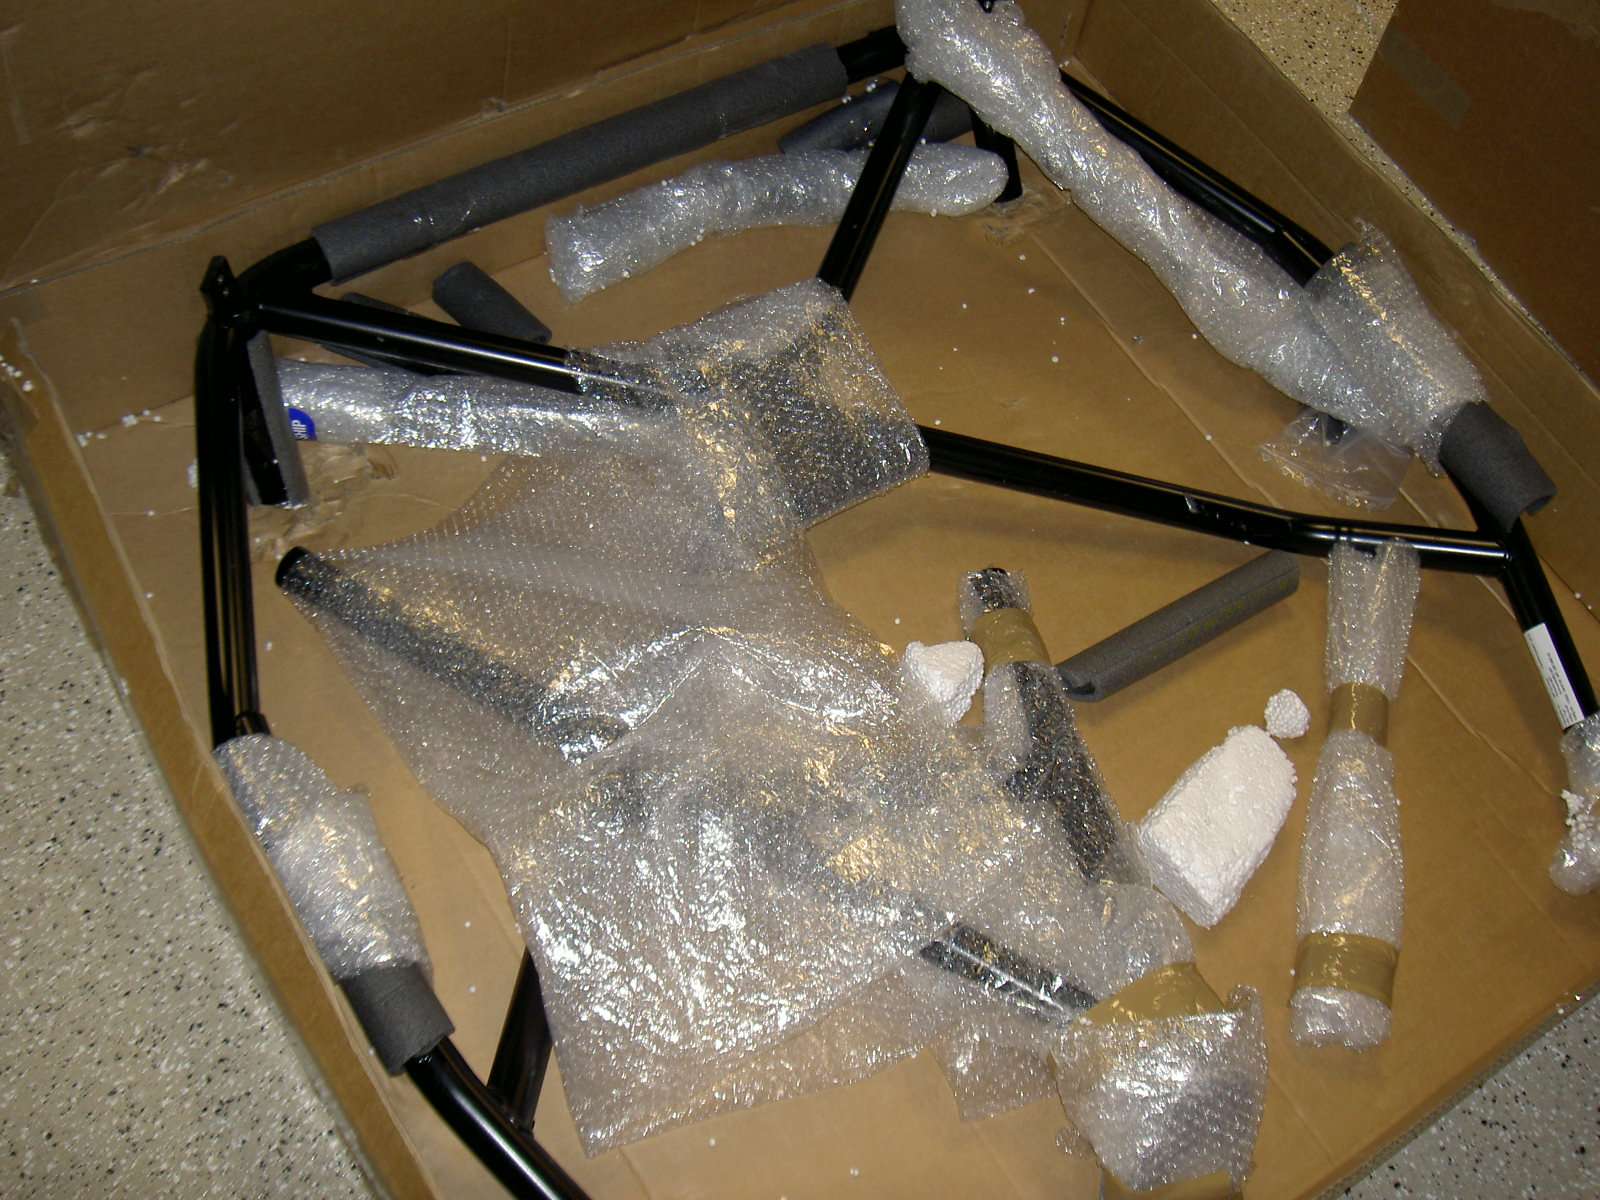
On thing I noticed right away is that they are really light. I was expecting some 150 lbs worth of steel but not so.
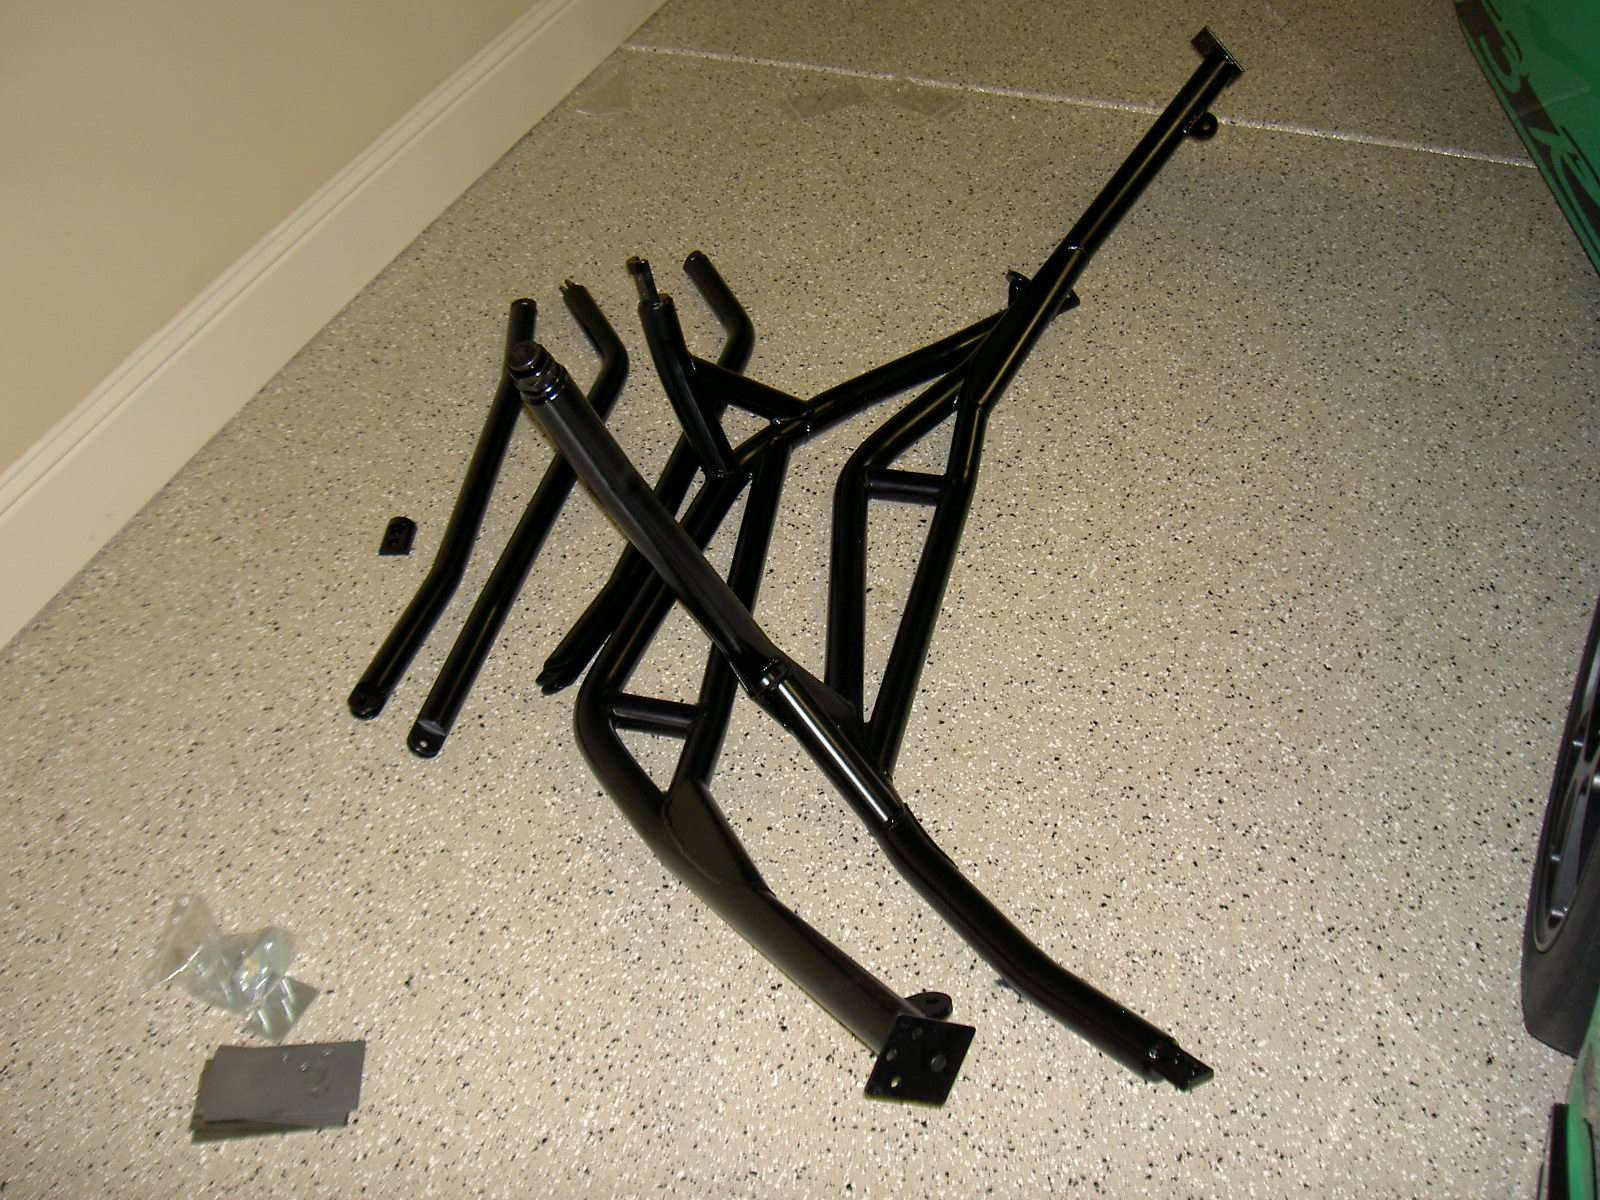
Front section including all hardware: 41 lbs
Rear section with all hardware: 39 lbs
Mounting plates and hardware: 4 lbs
Total: 84 lbs! WOW, that is light. I suspect the factory roll cage is made out of light weight high carbon steel aka chromoly.
OK, let's get busy and strip the interior (always disconnect the battery) in preparation to install the cage. First thing that need to come out is the seats and shift console. Here is a link to the DIY under my 996 Cup cable mod: http://www.6speedonline.com/forums/g...cable-fix.html
Now let's remove the rear section carpet. First you need to remove the rear "door" panels by removing a retaining screw at the front next to the seat belt opening then gently pull the panel out
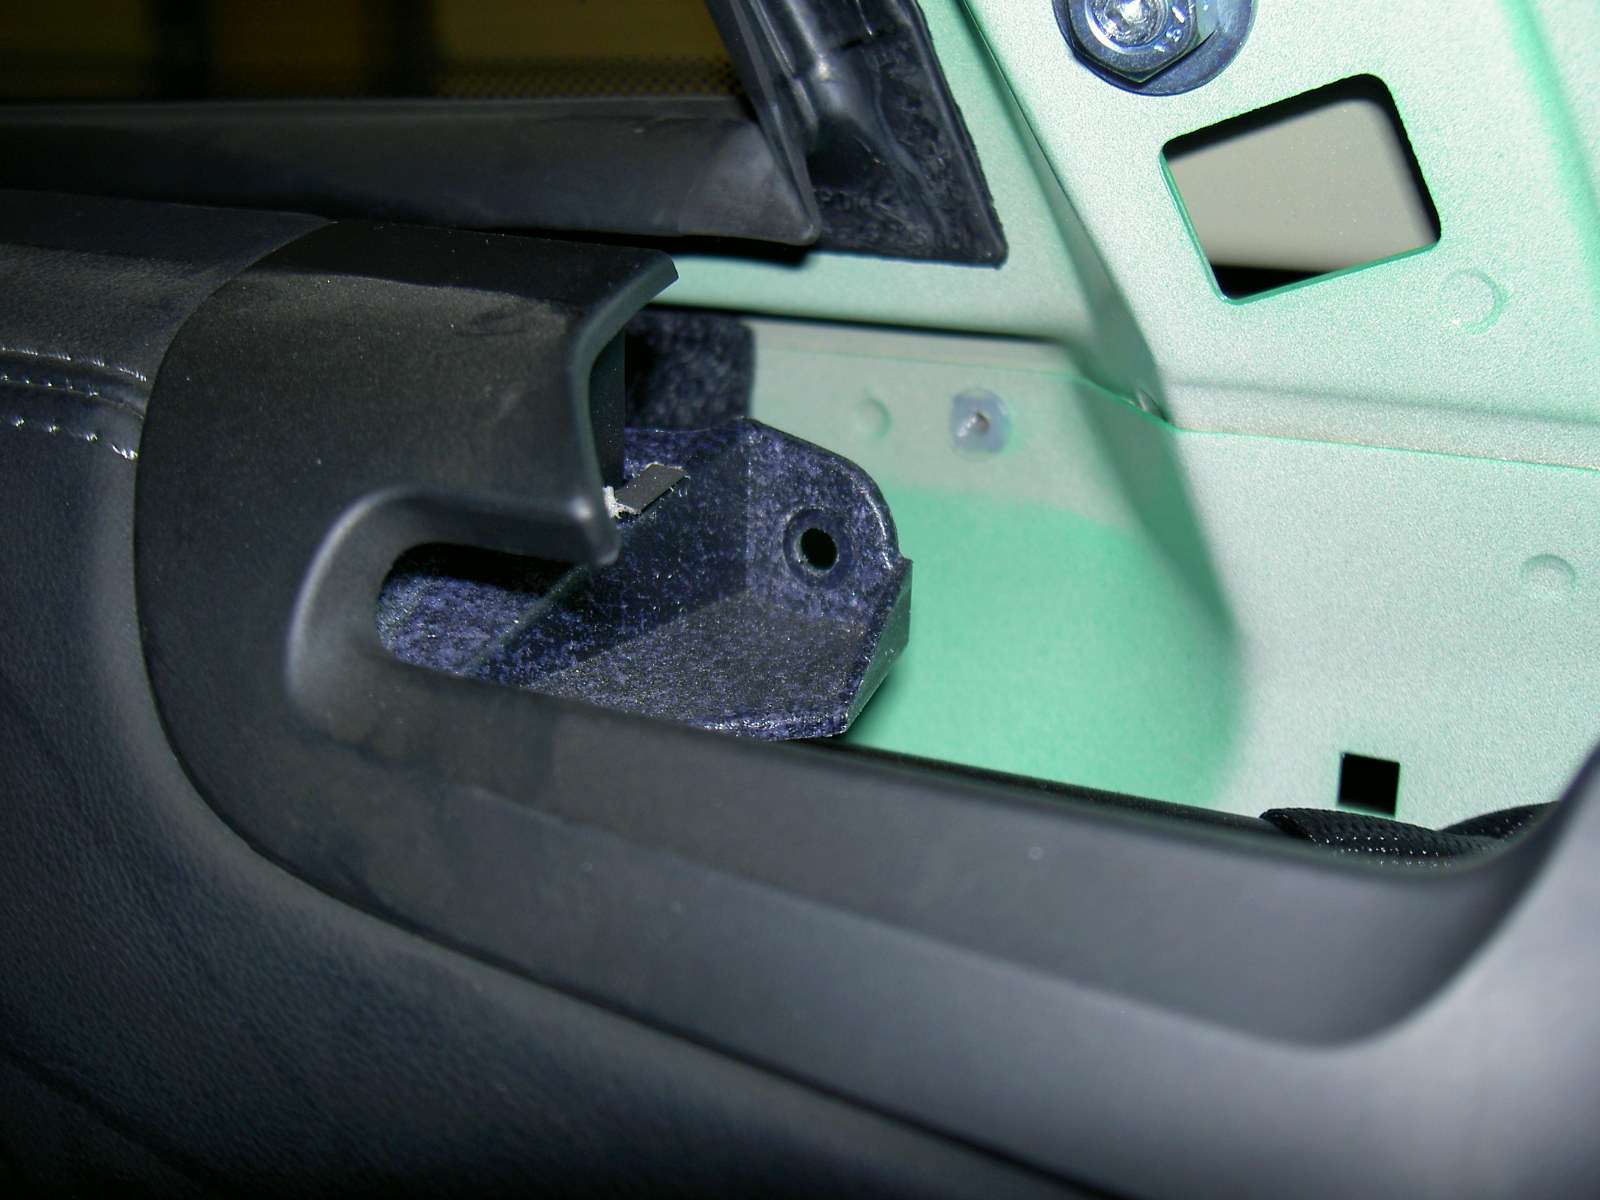
There are few insulation material behind the rear panel which you can remove if desire. I did not remove the tape on insulation
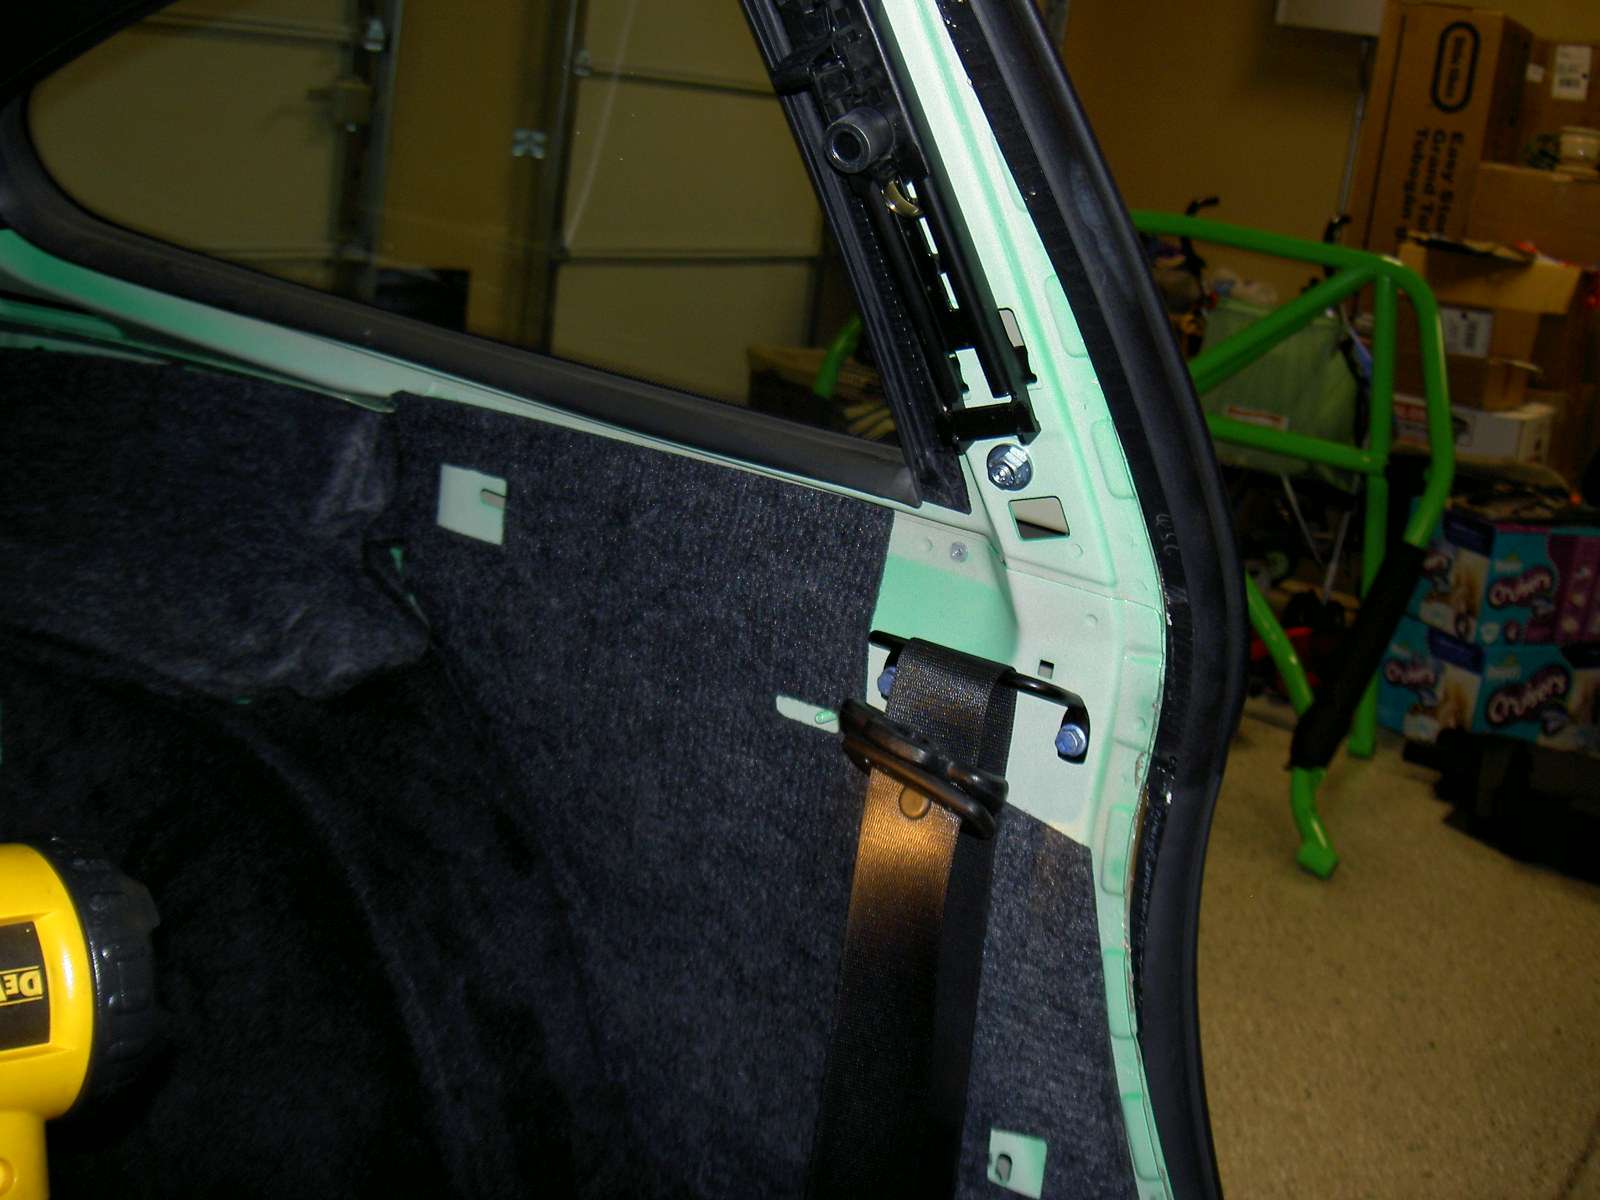
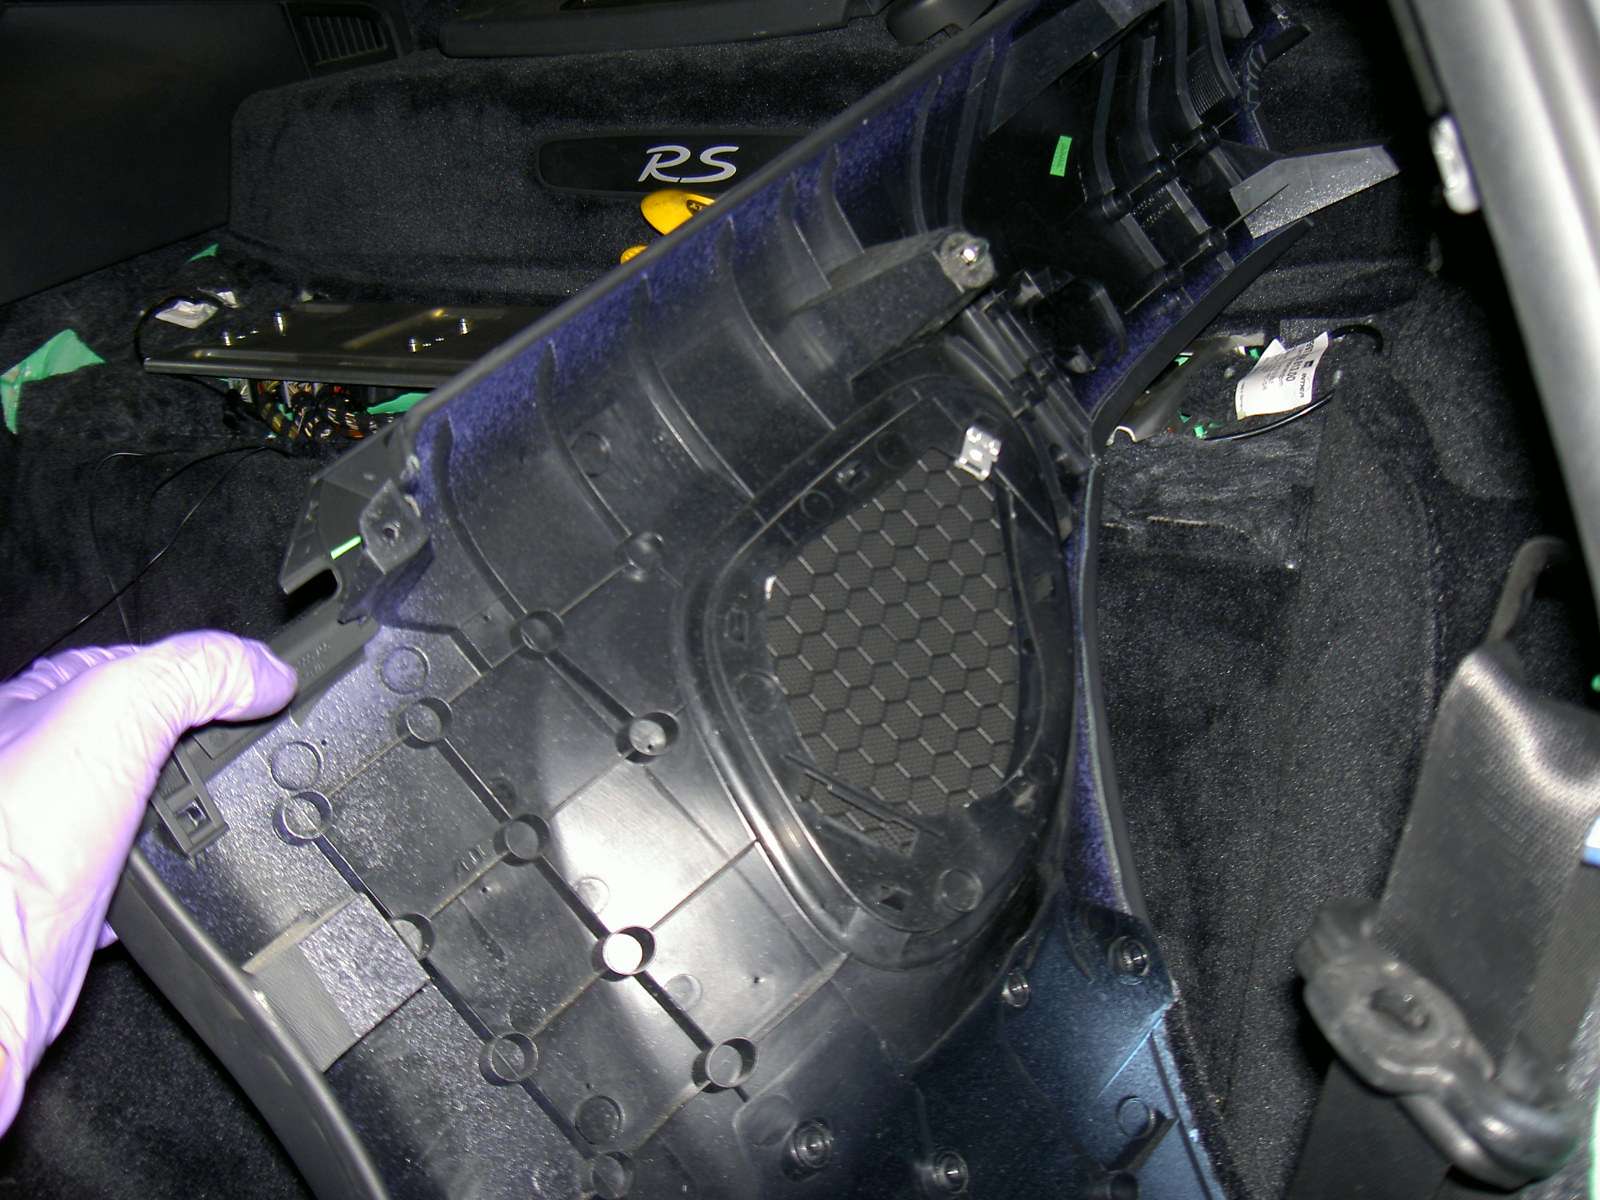
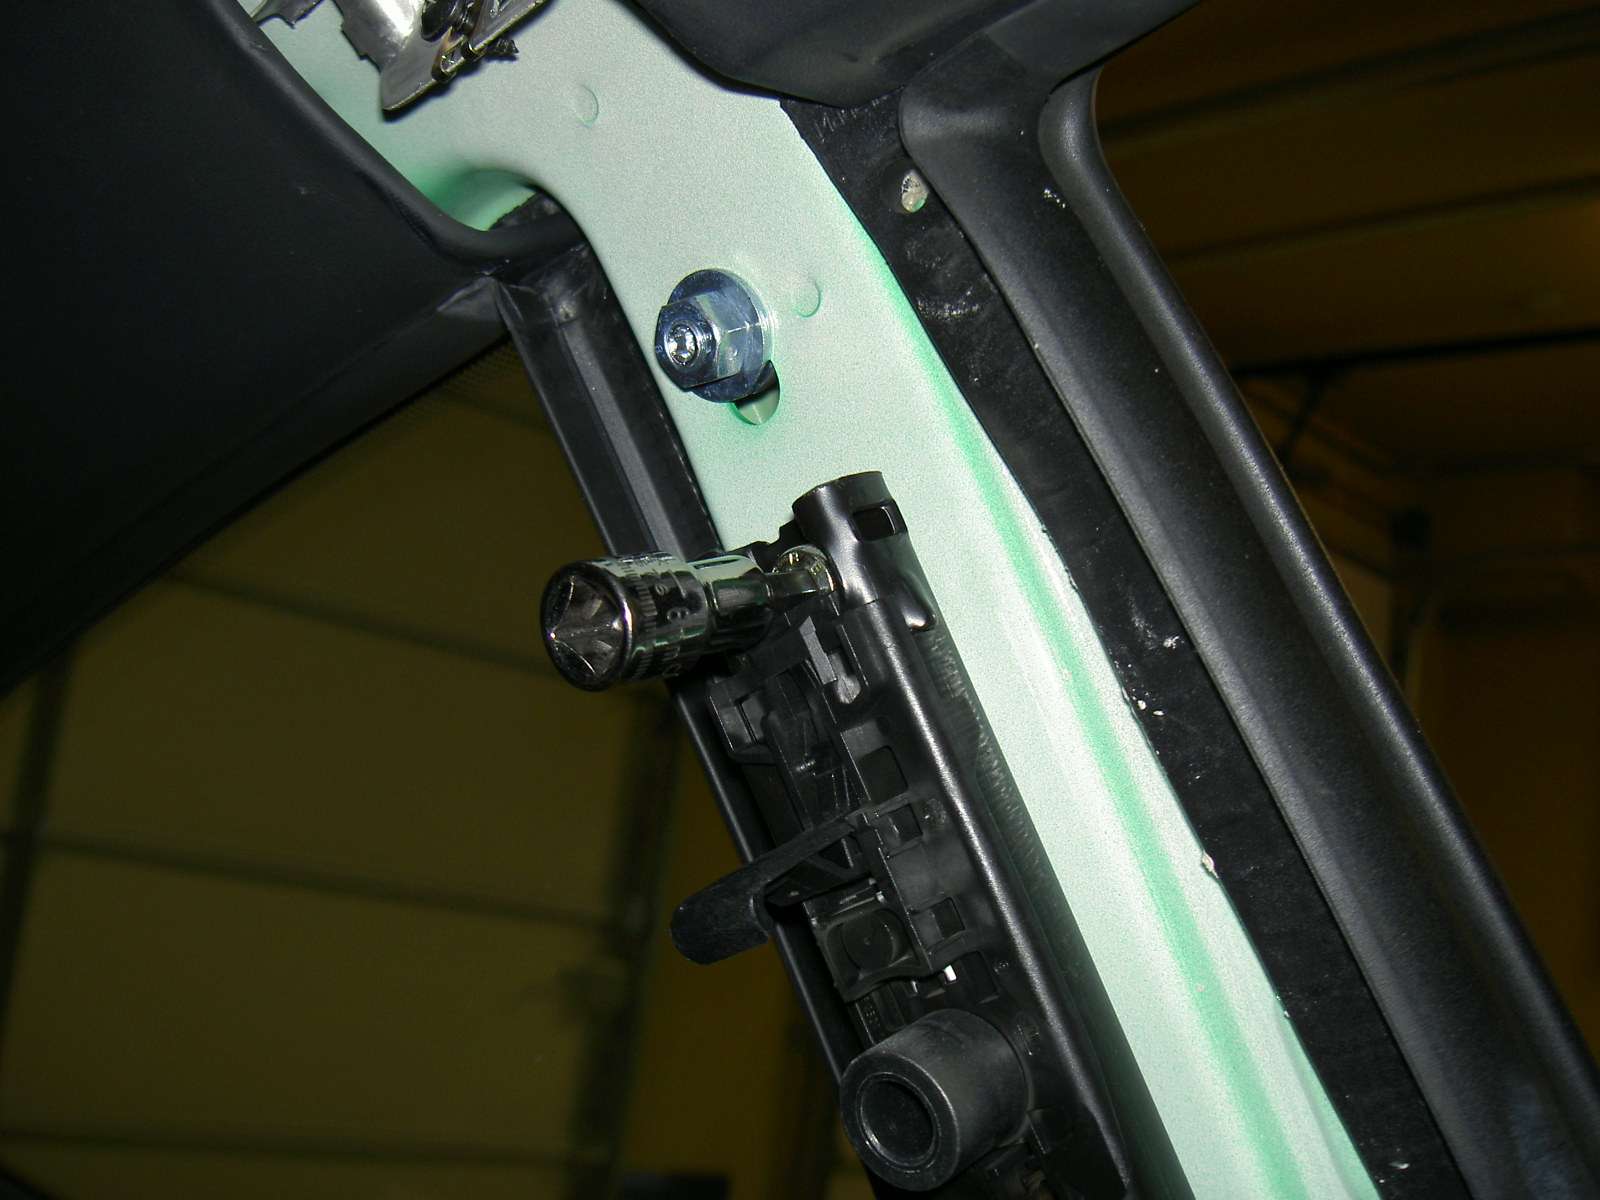
I elected to remove the seat belt assembly since I do not use them. First carefully unclip the plastic height adjuster then remove the height adjuster assembly
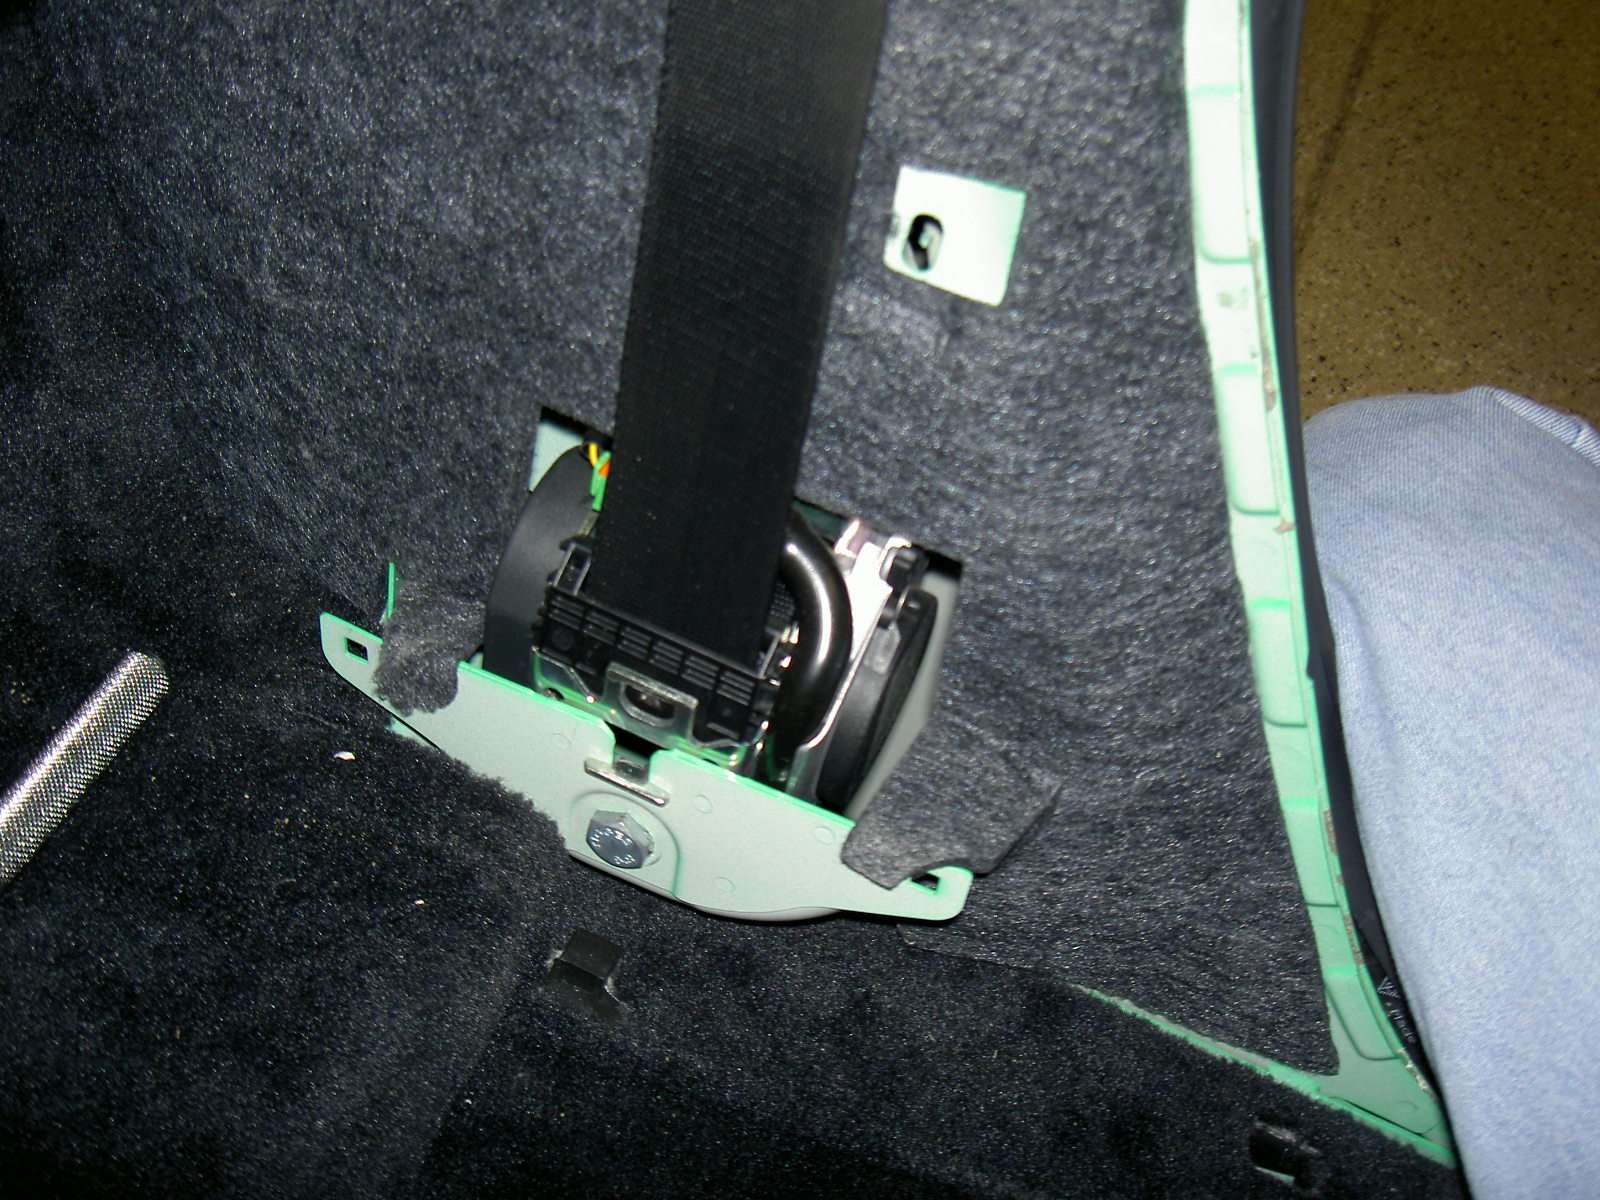
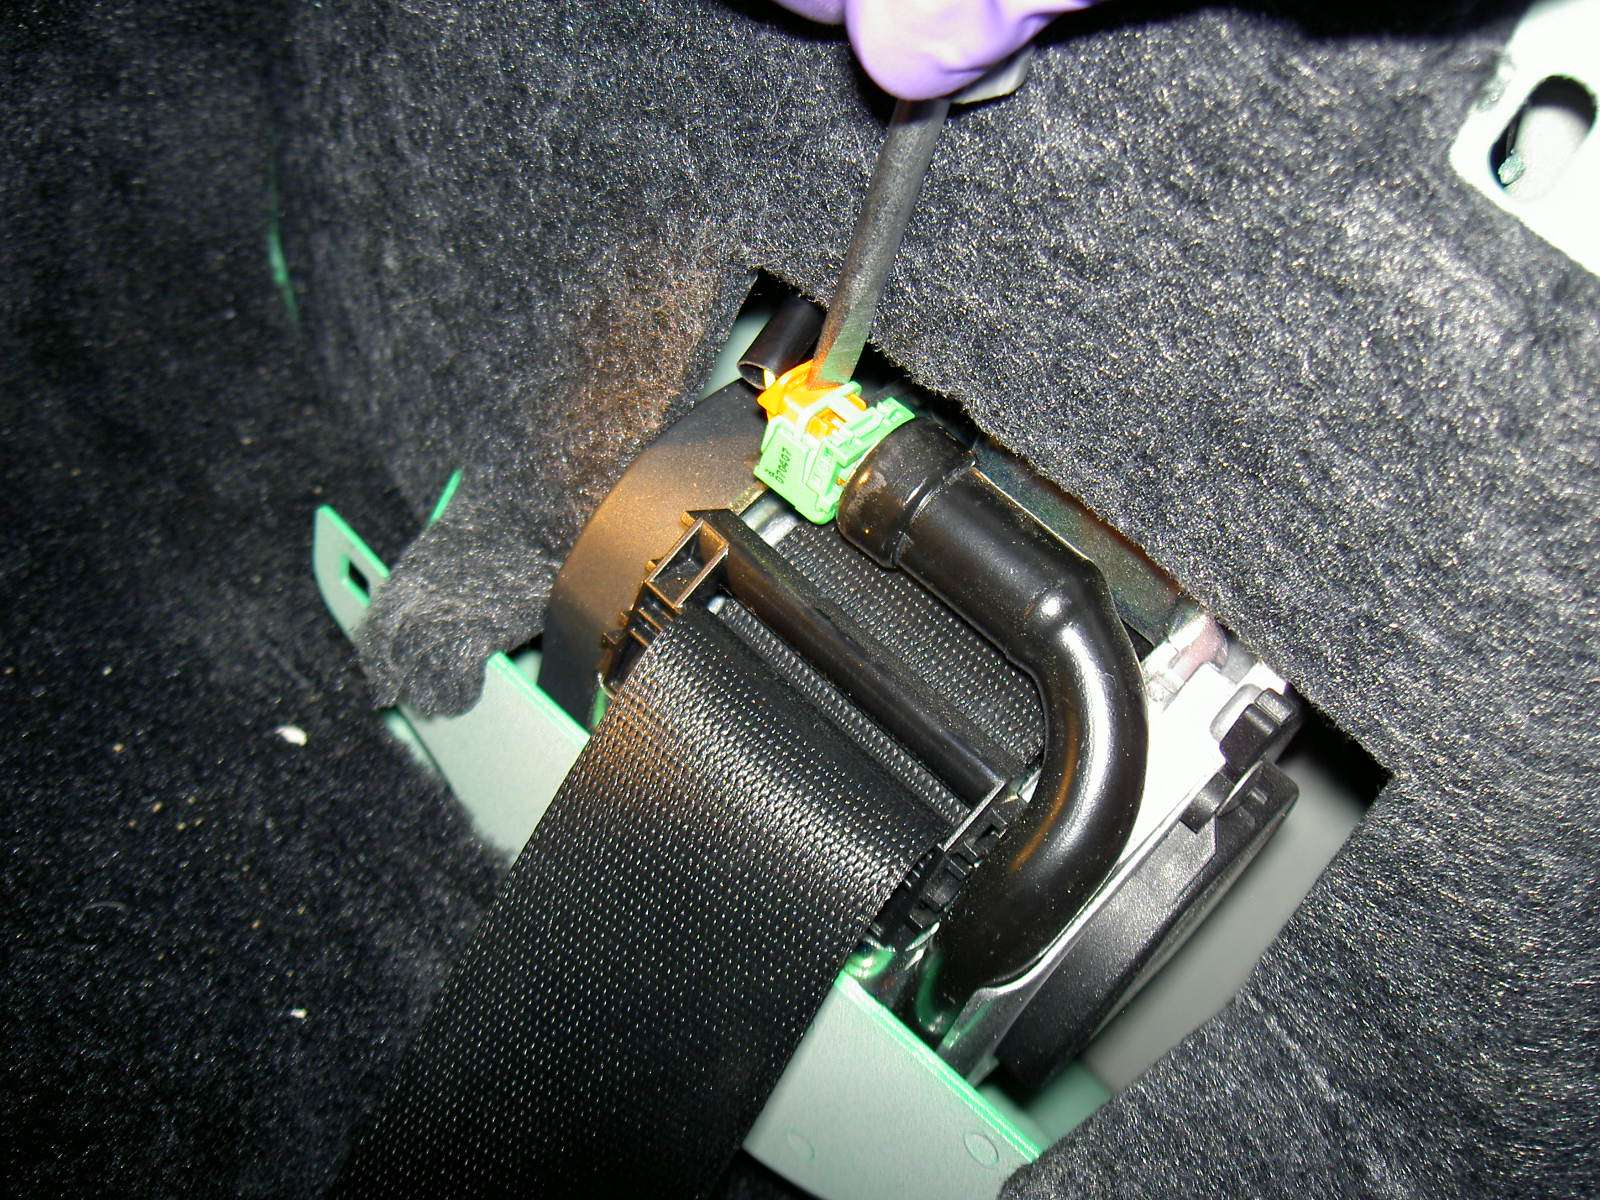
Remove the base of the seat belt assembly and unclip the pyro electric connector
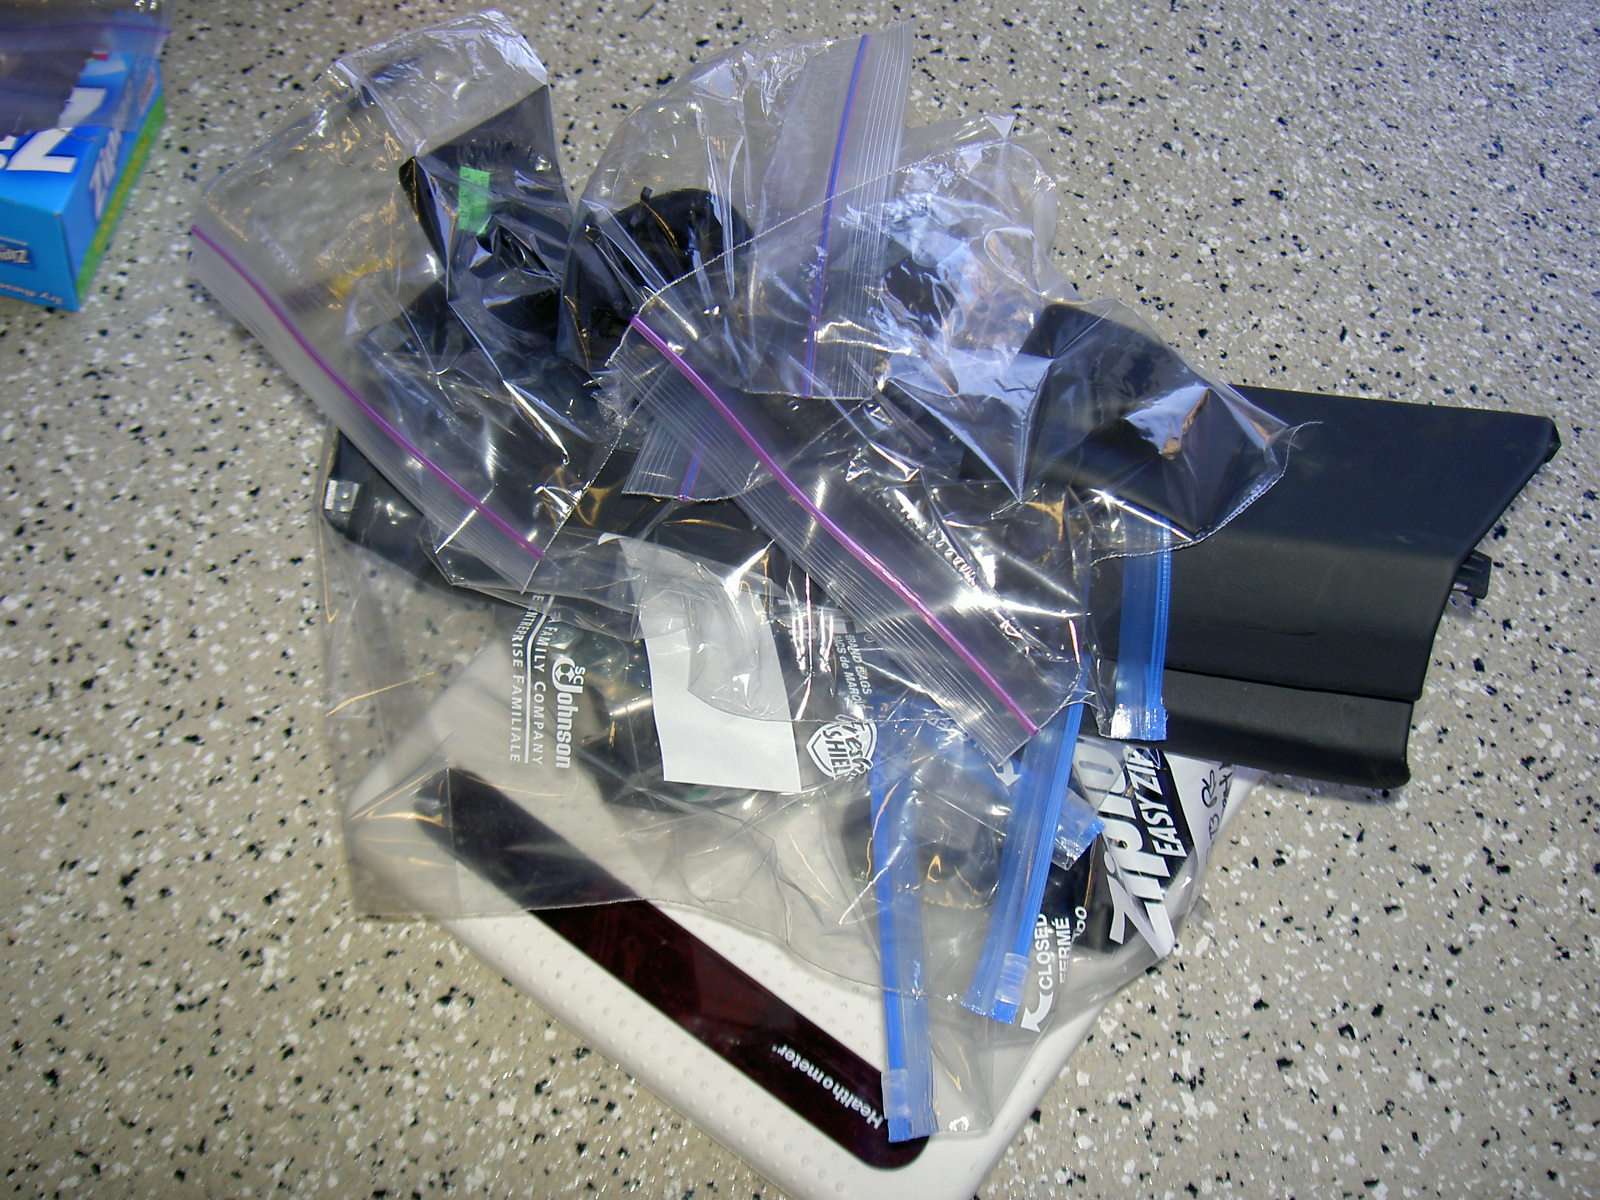
These seat belt assembly are pretty heavy. Both sides add up to 10 lbs
Now remove the rest of the rear carpet covering
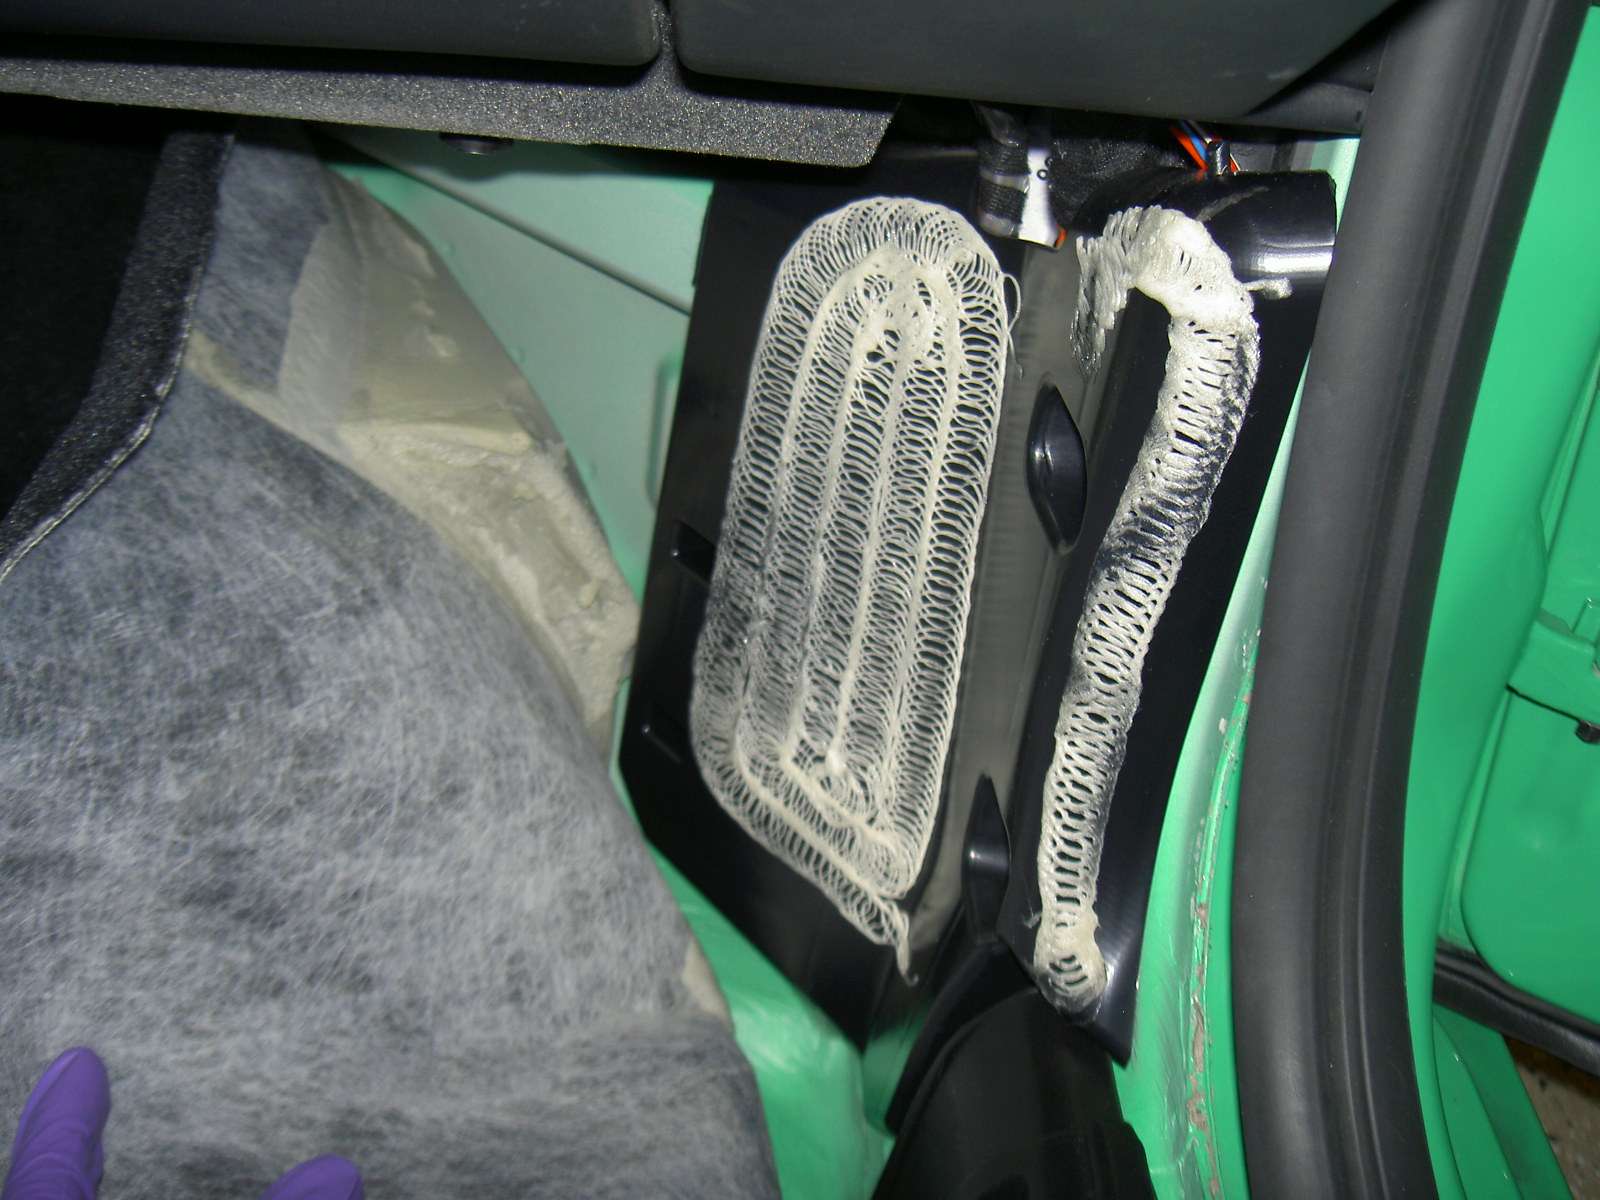
OK, let's work on the front carpets. First, remove the accelerator pedal by removing the Philip retaining screw.
Gently pull up and out the pedal and disconnect the wire connector - it's a funny wire connector with gray retaining taps at the end

Remove the fuse box and foot rest

Release the Velcro strap behind the center console

Remove the door sill cover on each side. There is a small strip of carpet under the shift and parking assembly that connect the carpet. You can either remove the shifter and parking assembly or carefully cut along the edge to separate them
Carefully peel back on the carpet (it's weakly glue down on the passenger side) and remove from cabin

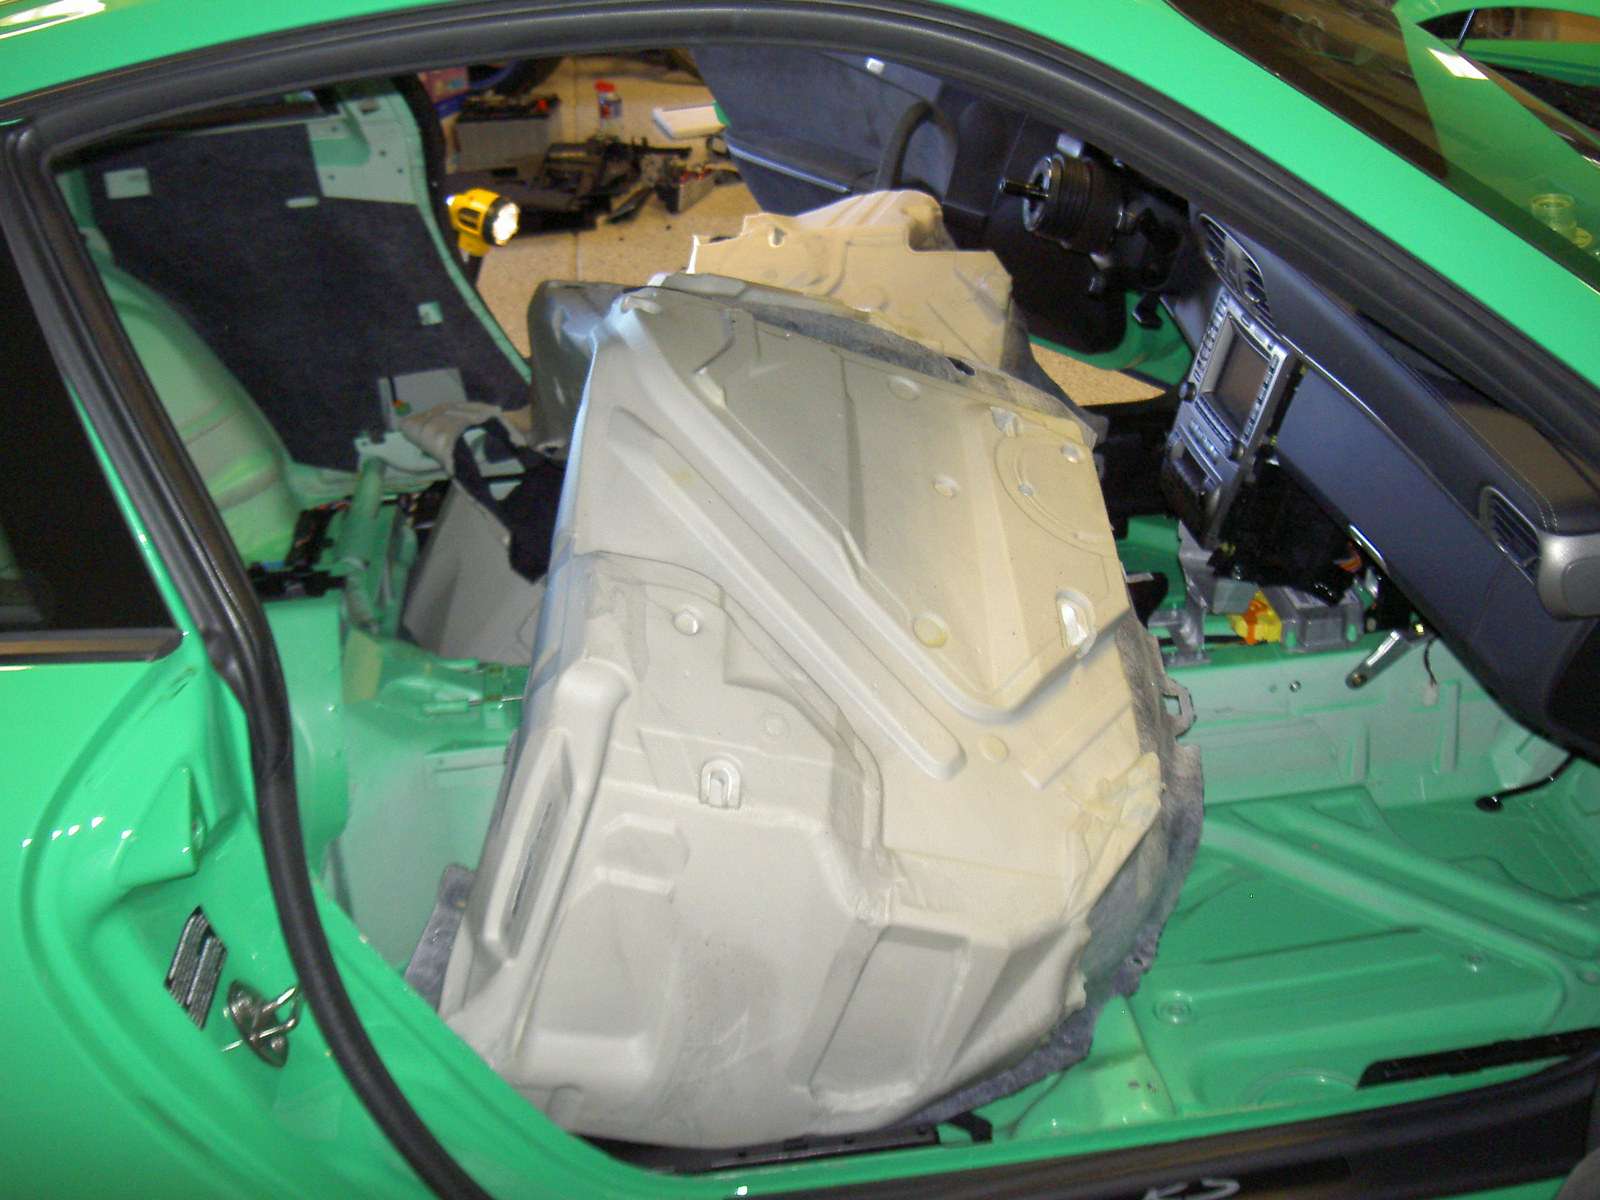
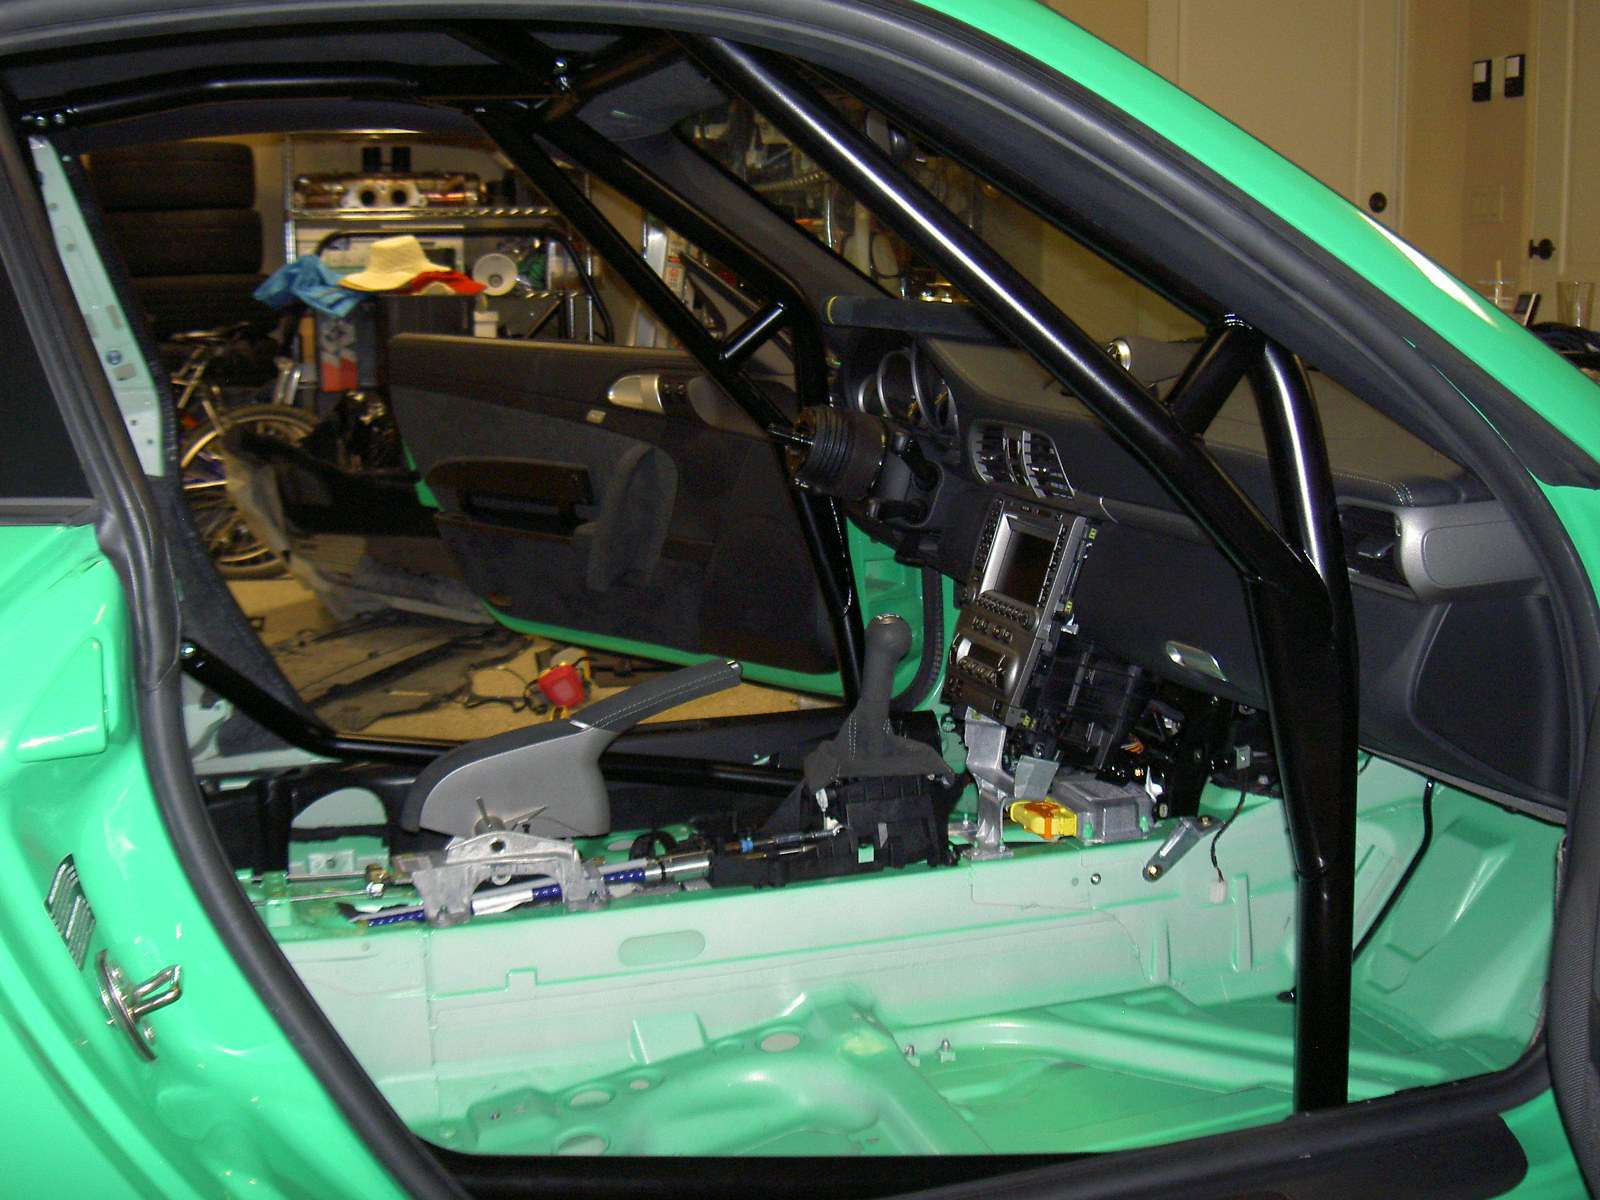
OK, so far all the carpet pieces removed add up to 20 lbs. Now you are left with an all business cabin ... I LOVE IT!
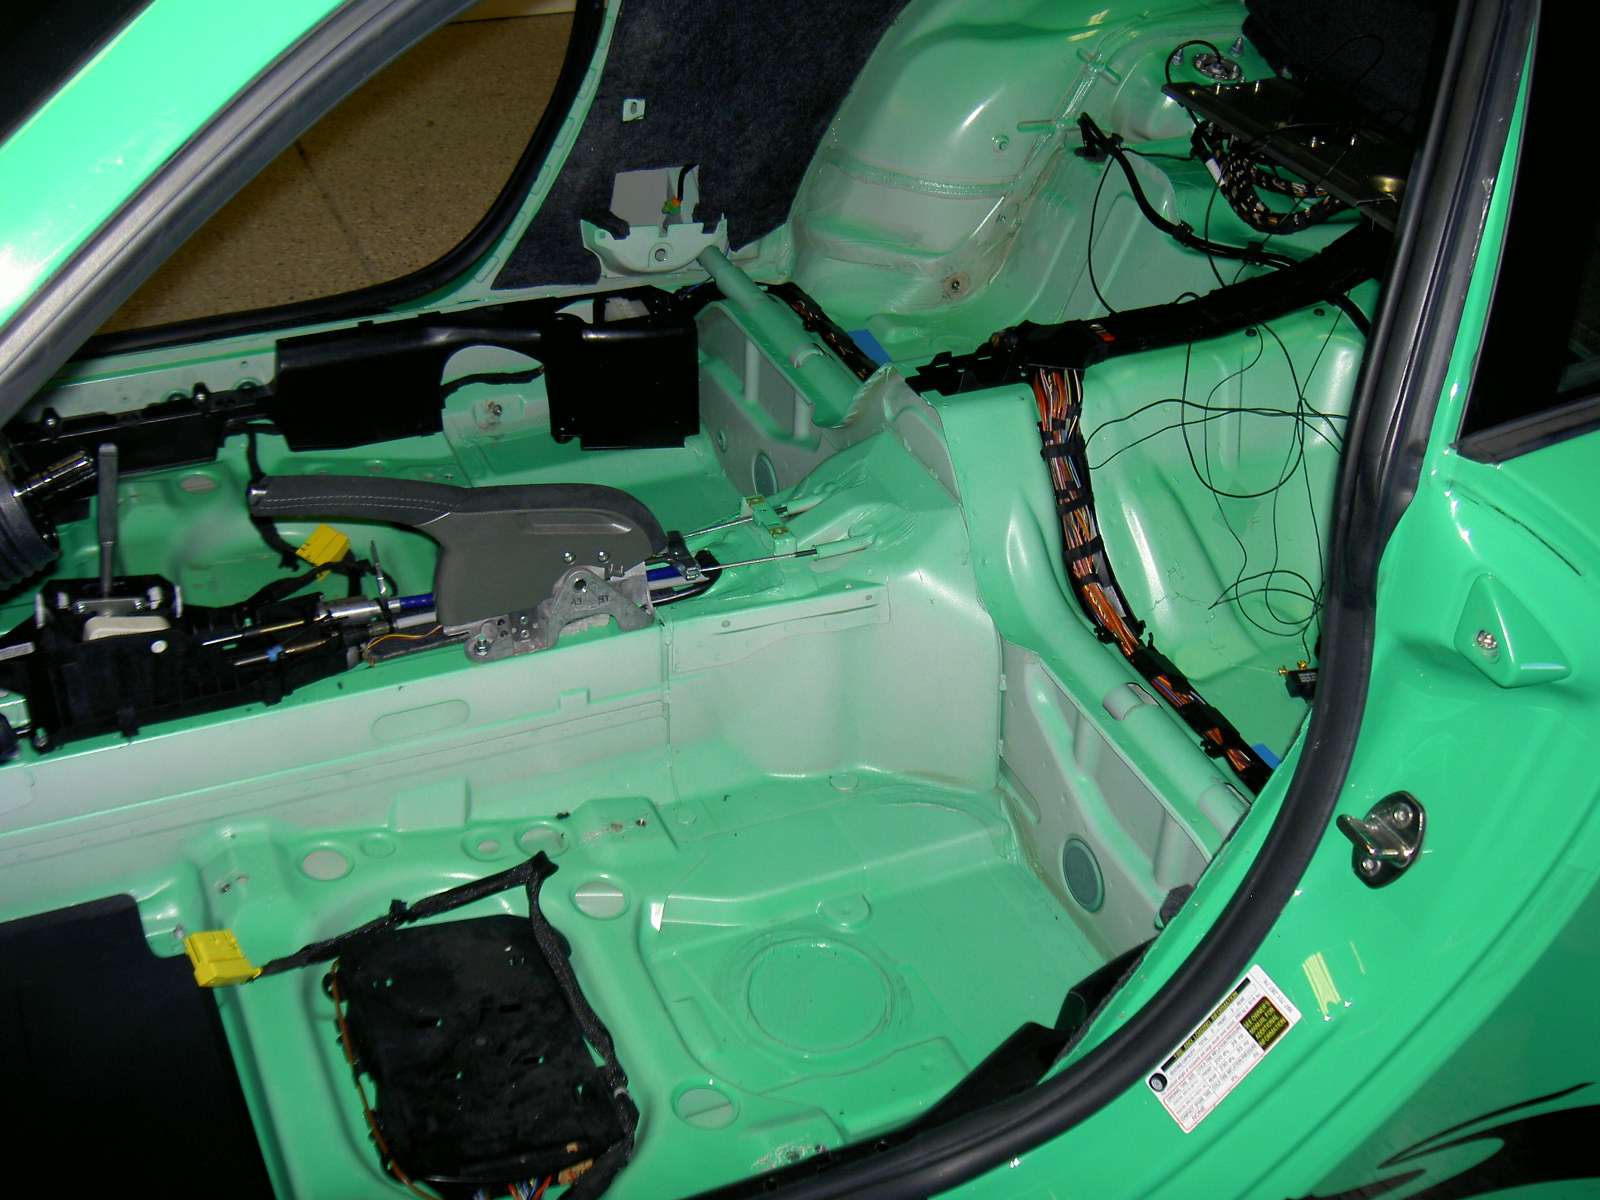
Prepping the interior was the easy part. Now comes roll cage install.
- Build quality
- Weight - it is light!
- Fit and finish
- Powder black and no need to paint
- OEM look ... just fantastic!
OK, first of all, there are several sources ... only two I trust to get the factory cage. You can get it through FVD Brombacher or Carnewal. Since these are Porsche motorsport parts I was told you get what they send you and no return even if they send you the wrong parts!? Best to choice a supplier that can provide additional insurance incase Porsche motorsport screw you over ... we know that never happen right? 997 factory cage now comes in two flavors - the original version with one door bar or the newest version with two door bars.
Well, here is my front and rear section from FVD. I chose to get the newer version with two door bars ....
WHAT! I got the older single door bar front section!? Man! that was really irritating. It's not like I can just put a stamp on the box and ship it back to Germany for an exchange. FVD contacted Porsche motorsport and their response was "tough! Your bad luck" in heavy German accent
Luckily FVD back up their product and refund the difference for the older version. I can make an additional door bar if there is a need in the future
Here is my rear cage section and it has two tabs on the main hoop for the newer two door bar cage
On thing I noticed right away is that they are really light. I was expecting some 150 lbs worth of steel but not so.
Front section including all hardware: 41 lbs
Rear section with all hardware: 39 lbs
Mounting plates and hardware: 4 lbs
Total: 84 lbs! WOW, that is light. I suspect the factory roll cage is made out of light weight high carbon steel aka chromoly.
OK, let's get busy and strip the interior (always disconnect the battery) in preparation to install the cage. First thing that need to come out is the seats and shift console. Here is a link to the DIY under my 996 Cup cable mod: http://www.6speedonline.com/forums/g...cable-fix.html
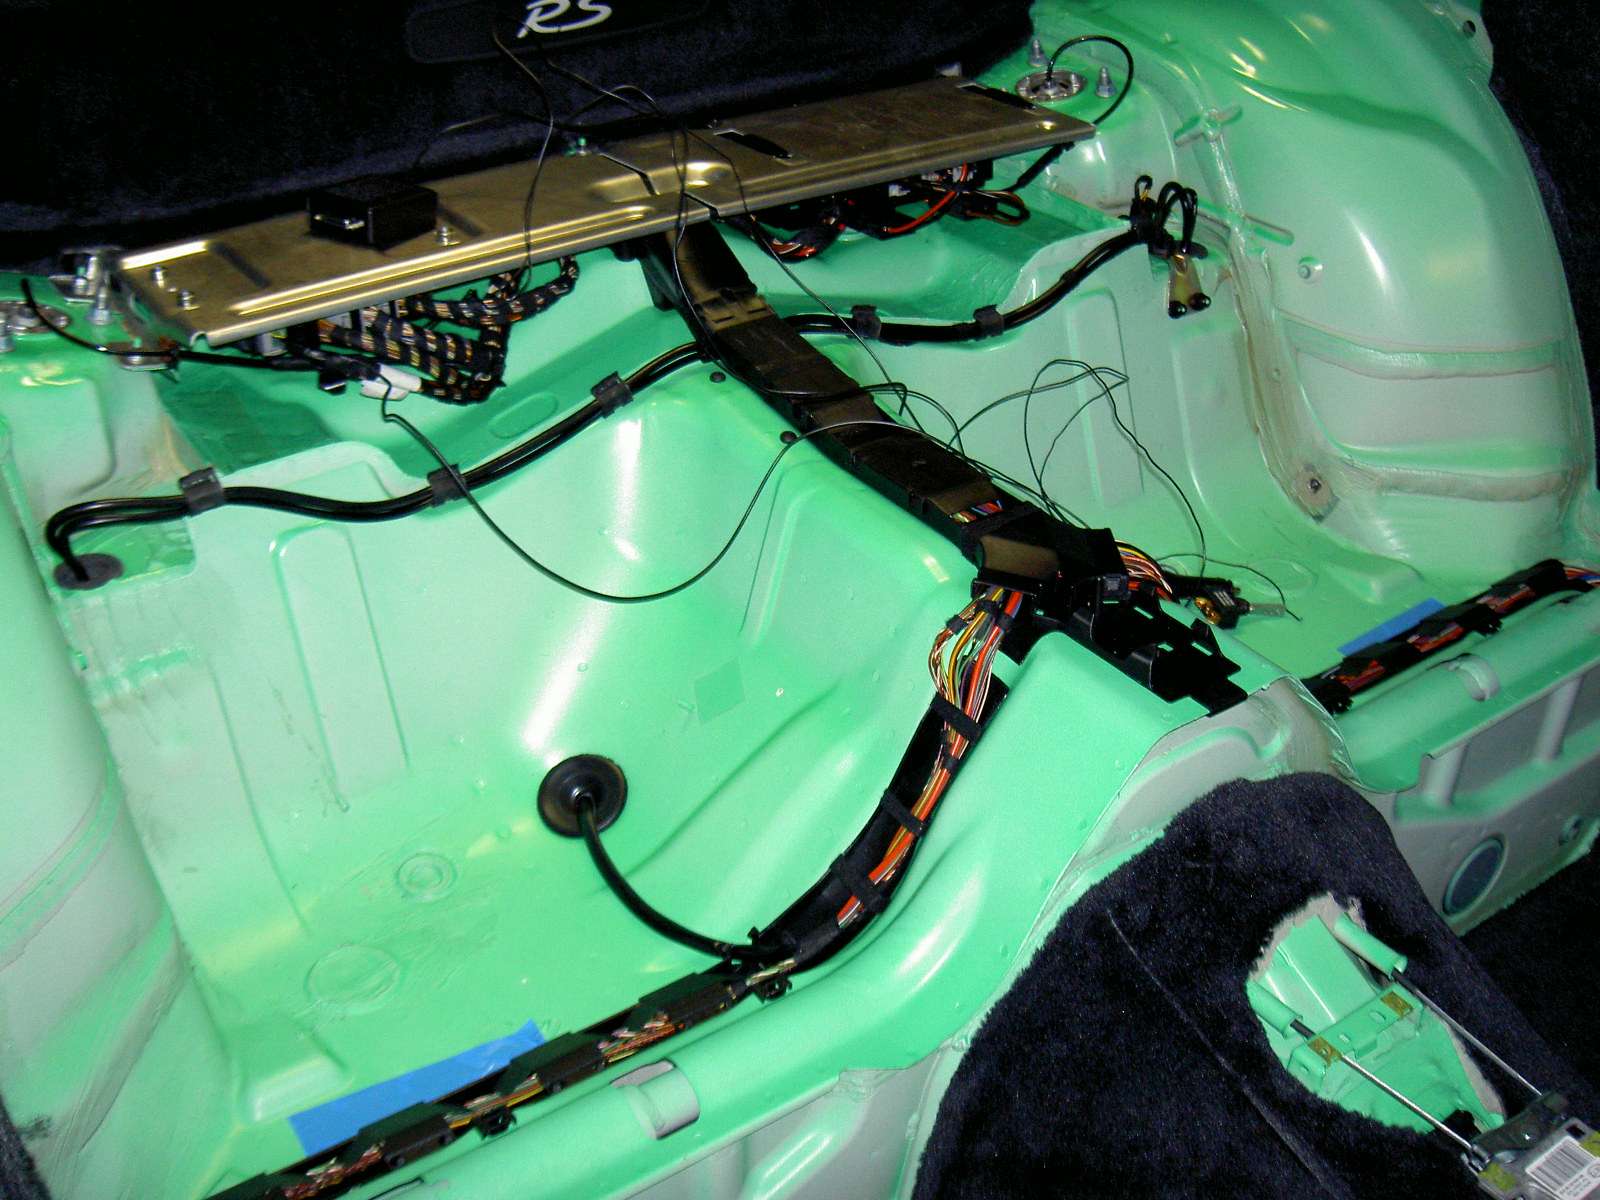
Now let's remove the rear section carpet. First you need to remove the rear "door" panels by removing a retaining screw at the front next to the seat belt opening then gently pull the panel out
There are few insulation material behind the rear panel which you can remove if desire. I did not remove the tape on insulation
I elected to remove the seat belt assembly since I do not use them. First carefully unclip the plastic height adjuster then remove the height adjuster assembly
Remove the base of the seat belt assembly and unclip the pyro electric connector
These seat belt assembly are pretty heavy. Both sides add up to 10 lbs
Now remove the rest of the rear carpet covering
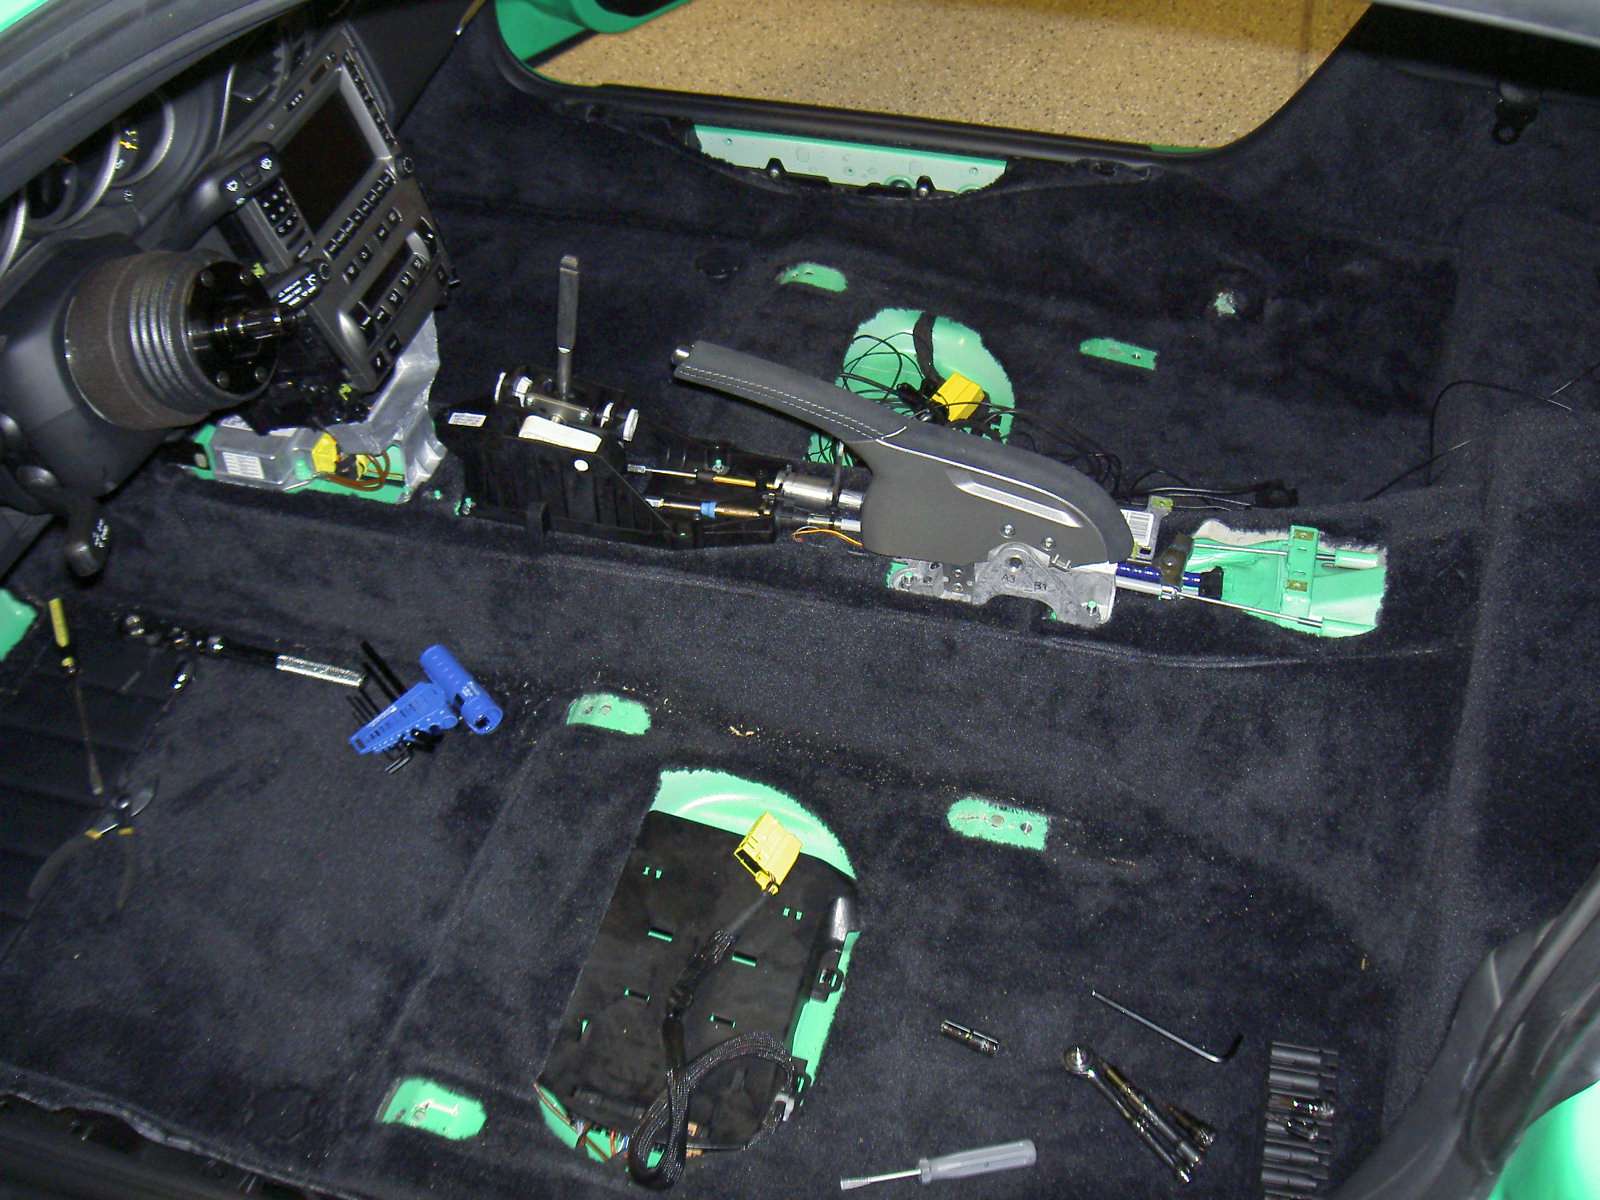
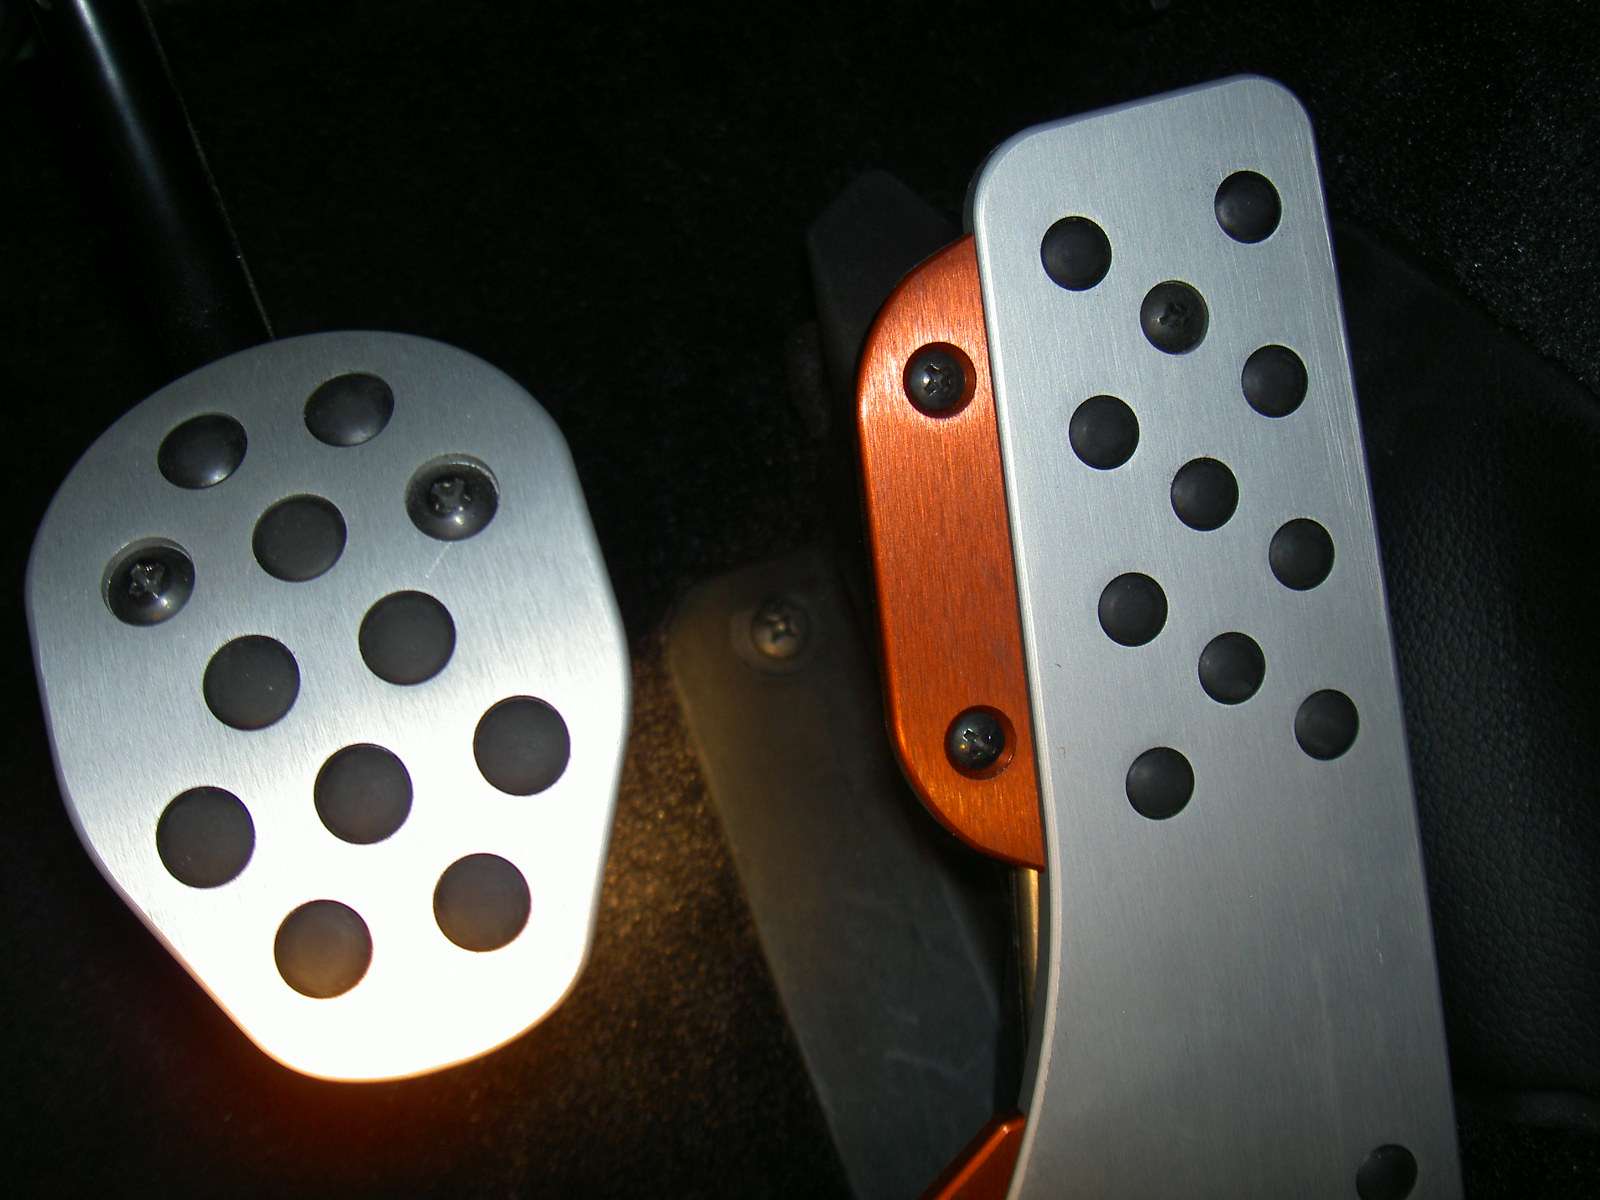
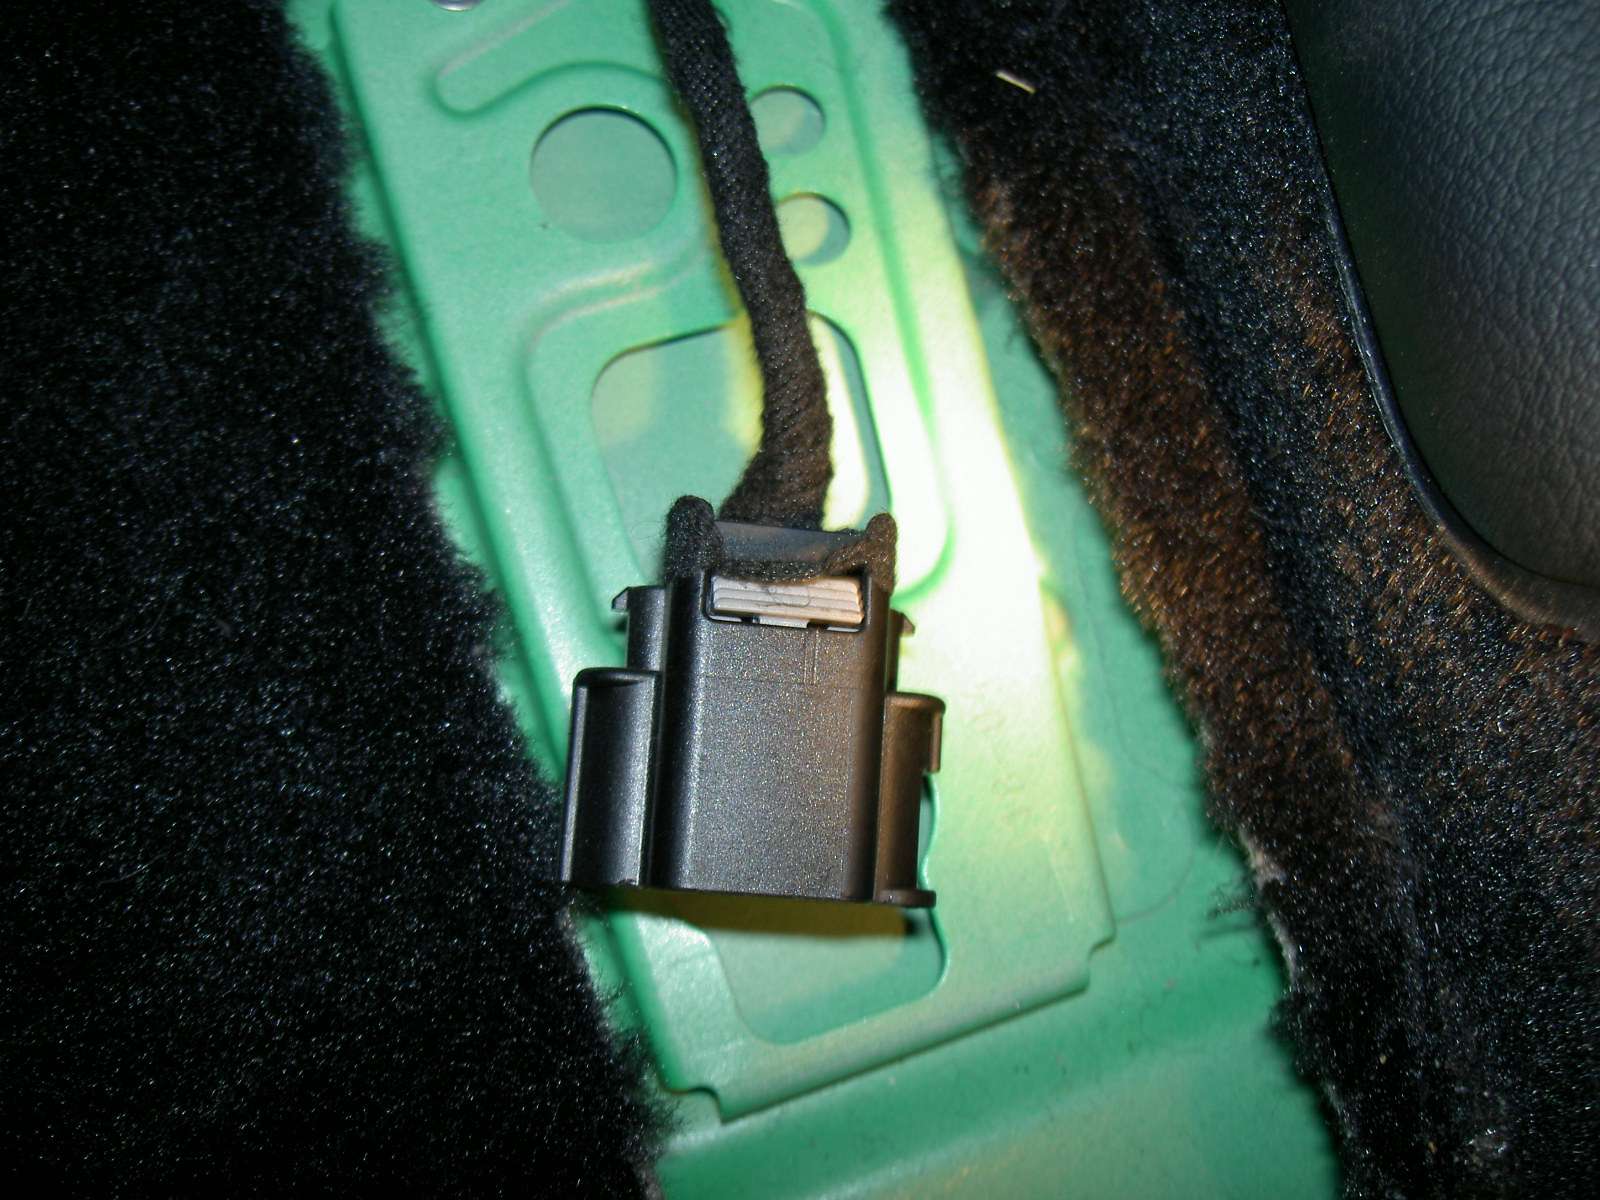
OK, let's work on the front carpets. First, remove the accelerator pedal by removing the Philip retaining screw.
Gently pull up and out the pedal and disconnect the wire connector - it's a funny wire connector with gray retaining taps at the end
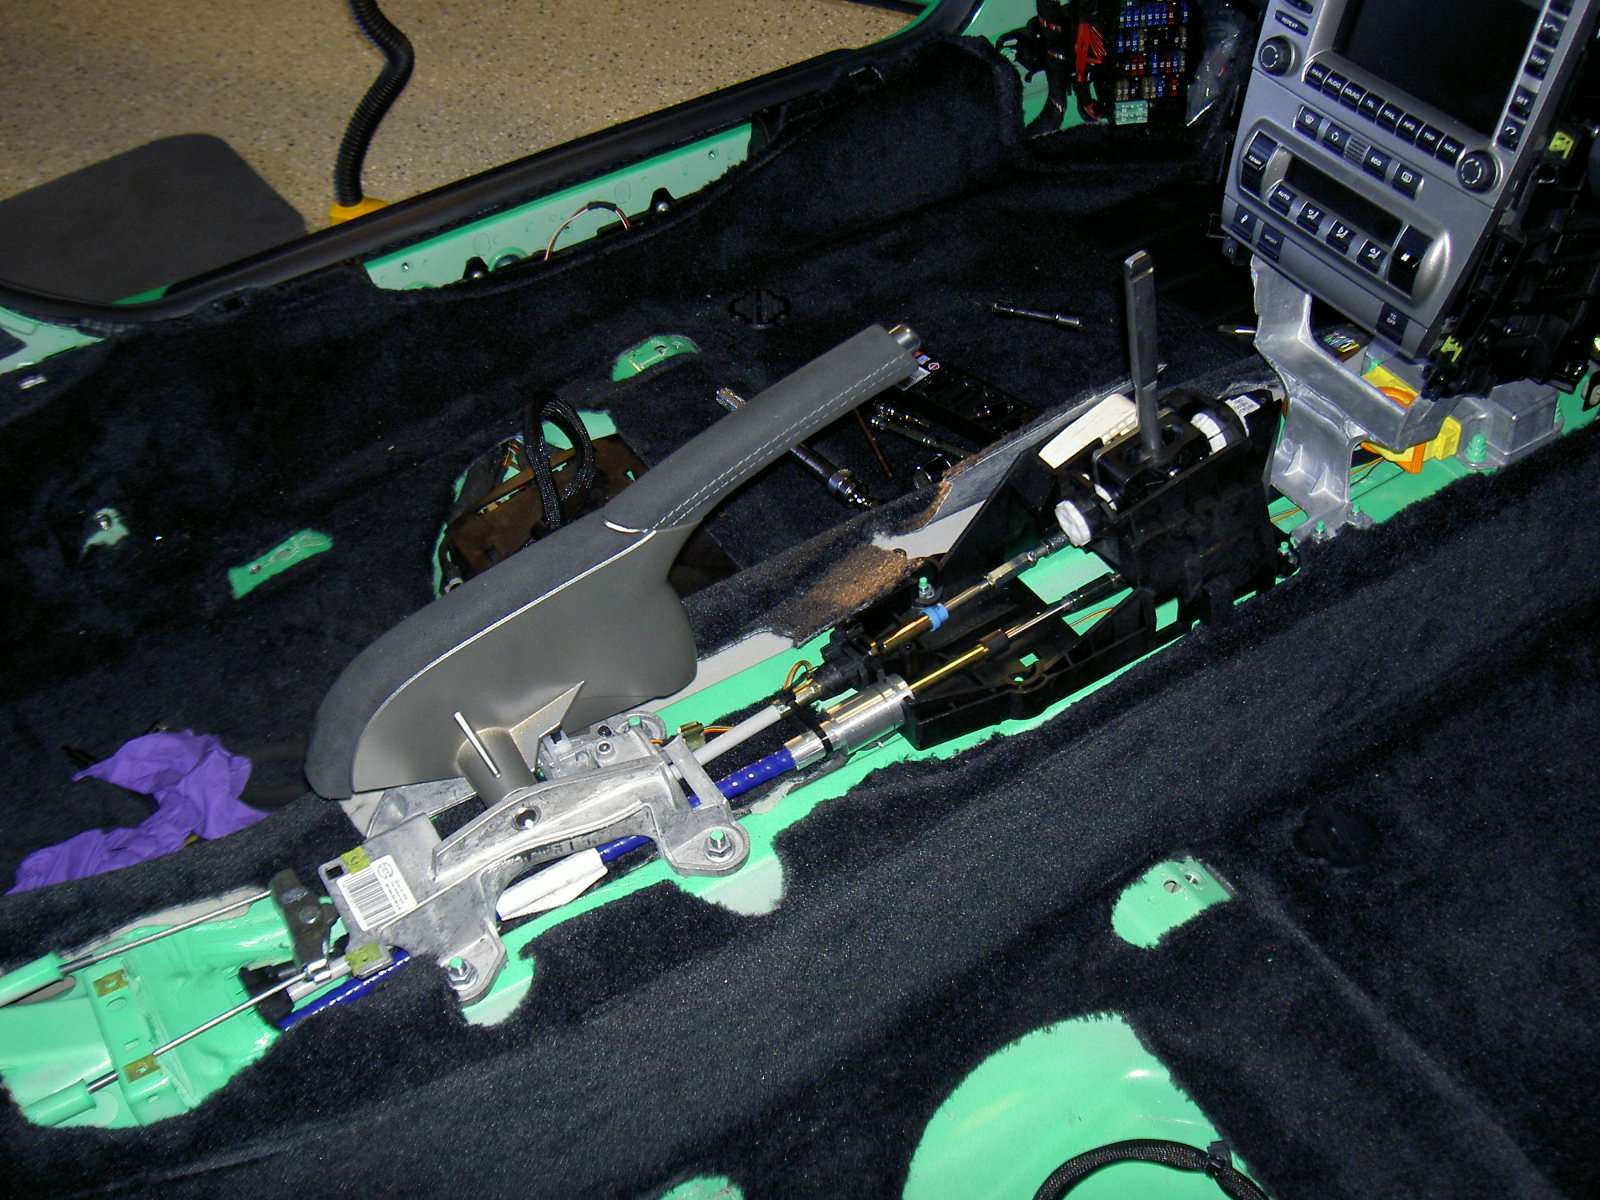
Remove the fuse box and foot rest
Release the Velcro strap behind the center console
Remove the door sill cover on each side. There is a small strip of carpet under the shift and parking assembly that connect the carpet. You can either remove the shifter and parking assembly or carefully cut along the edge to separate them
Carefully peel back on the carpet (it's weakly glue down on the passenger side) and remove from cabin
OK, so far all the carpet pieces removed add up to 20 lbs. Now you are left with an all business cabin ... I LOVE IT!
Prepping the interior was the easy part. Now comes roll cage install.
 12-19-2010, 11:30 AM
#2
Addict
Rennlist Member
Rennlist Member
Thread Starter
Cage install
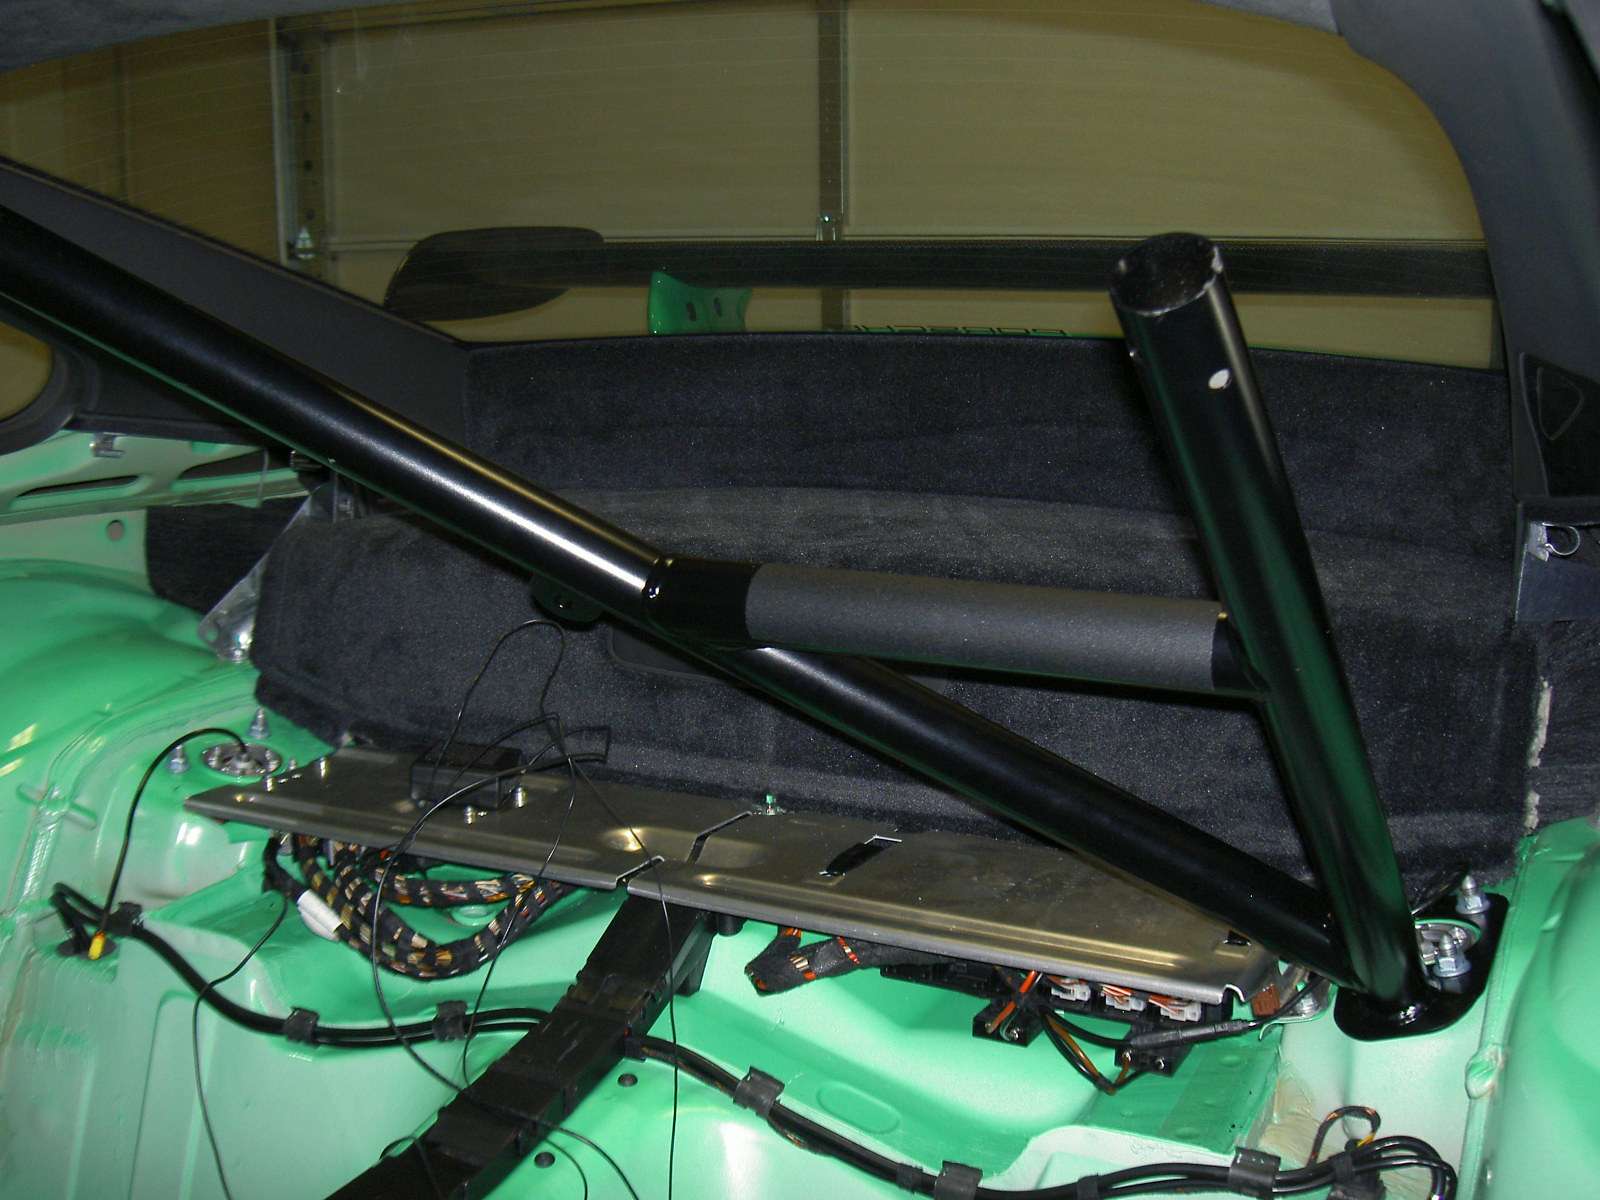
It's pretty straight forward much like a jigsaw puzzle. Start assembling from the rear section and avoid scratching the powder coat especially the small connecting pieces. DO NOT tighten until all cage pieces are assembled.
First disconnect the rear shock wire

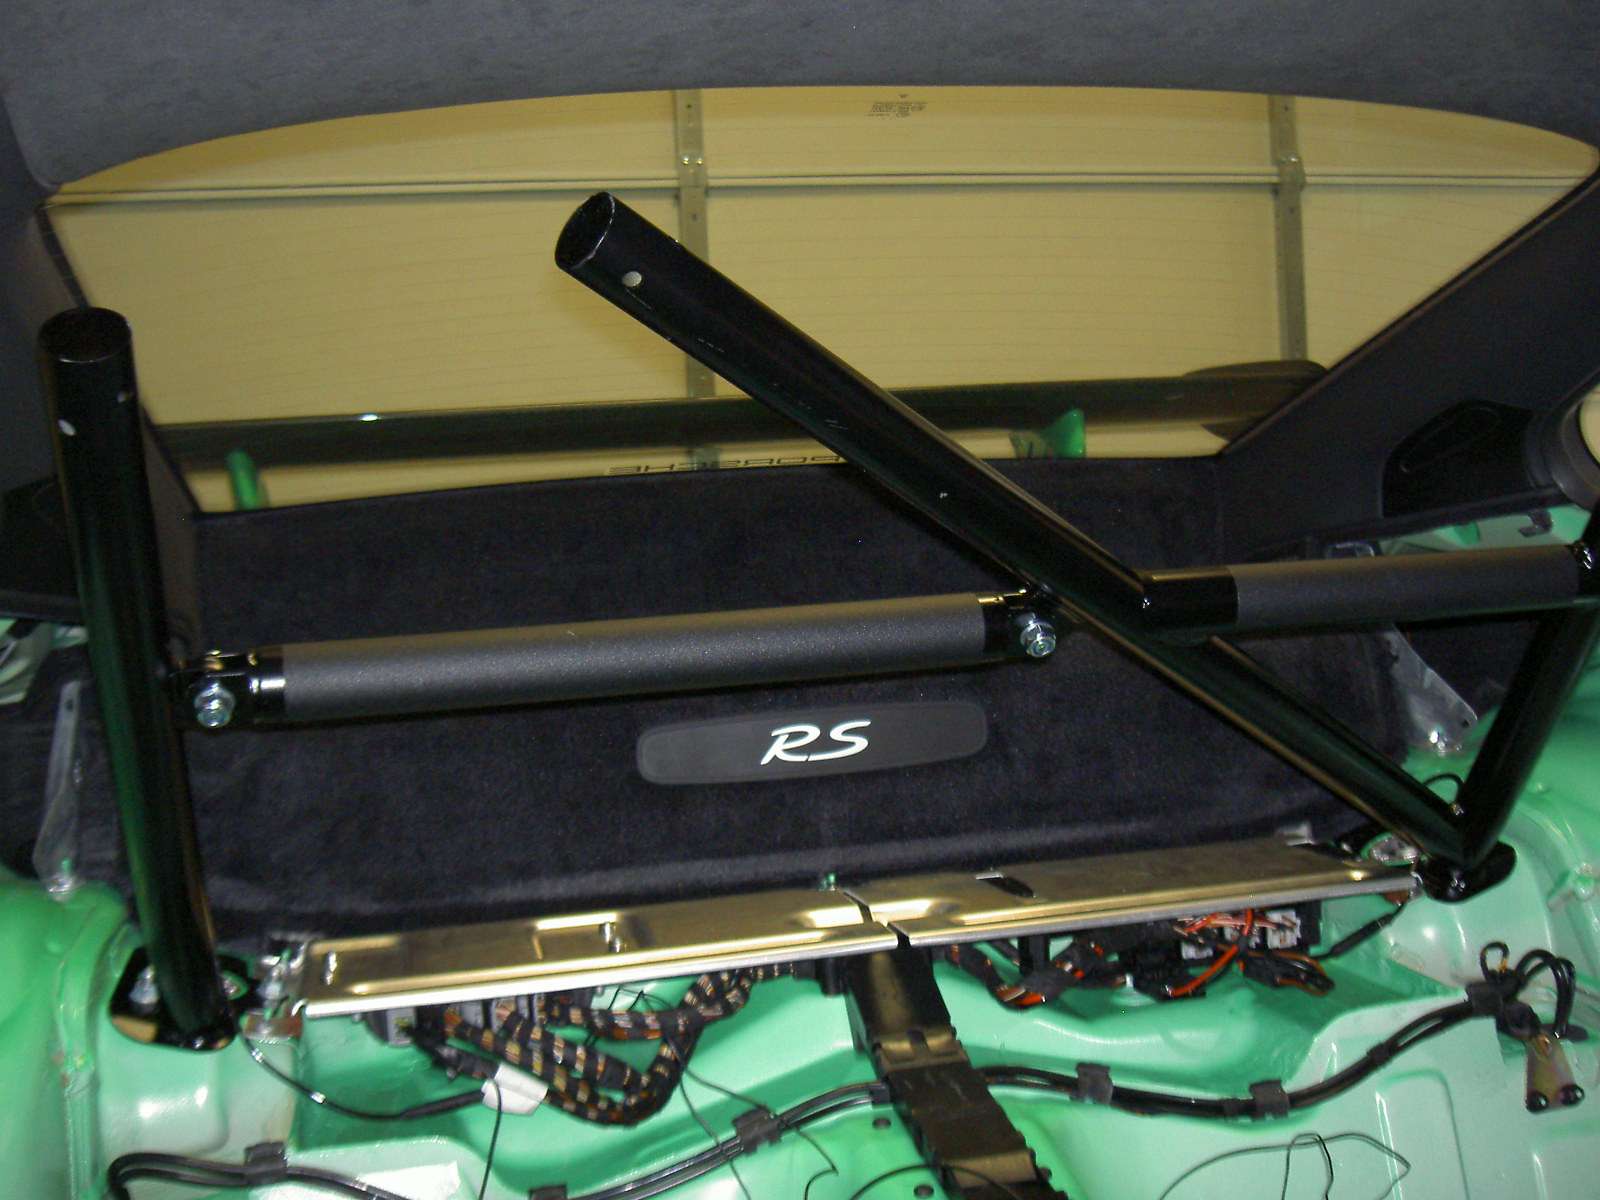
Build up the rear section
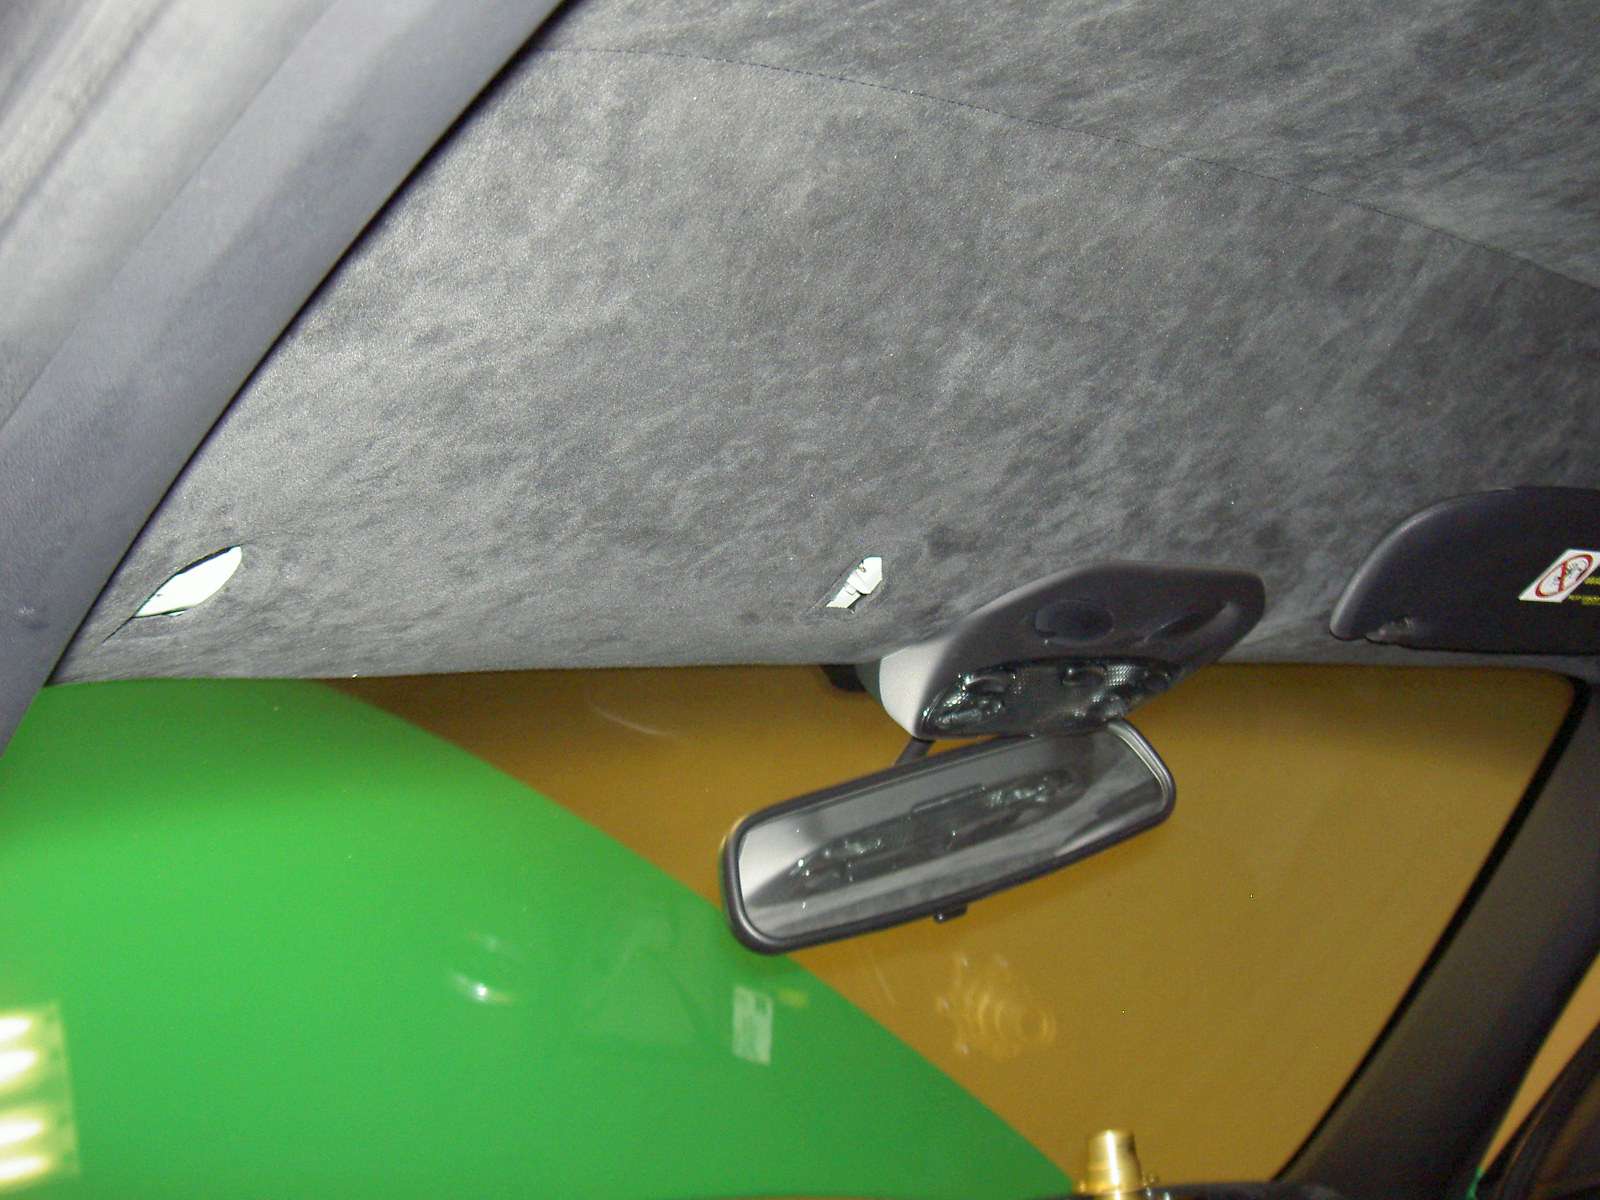
Remove the sun visor in preparation for the front section
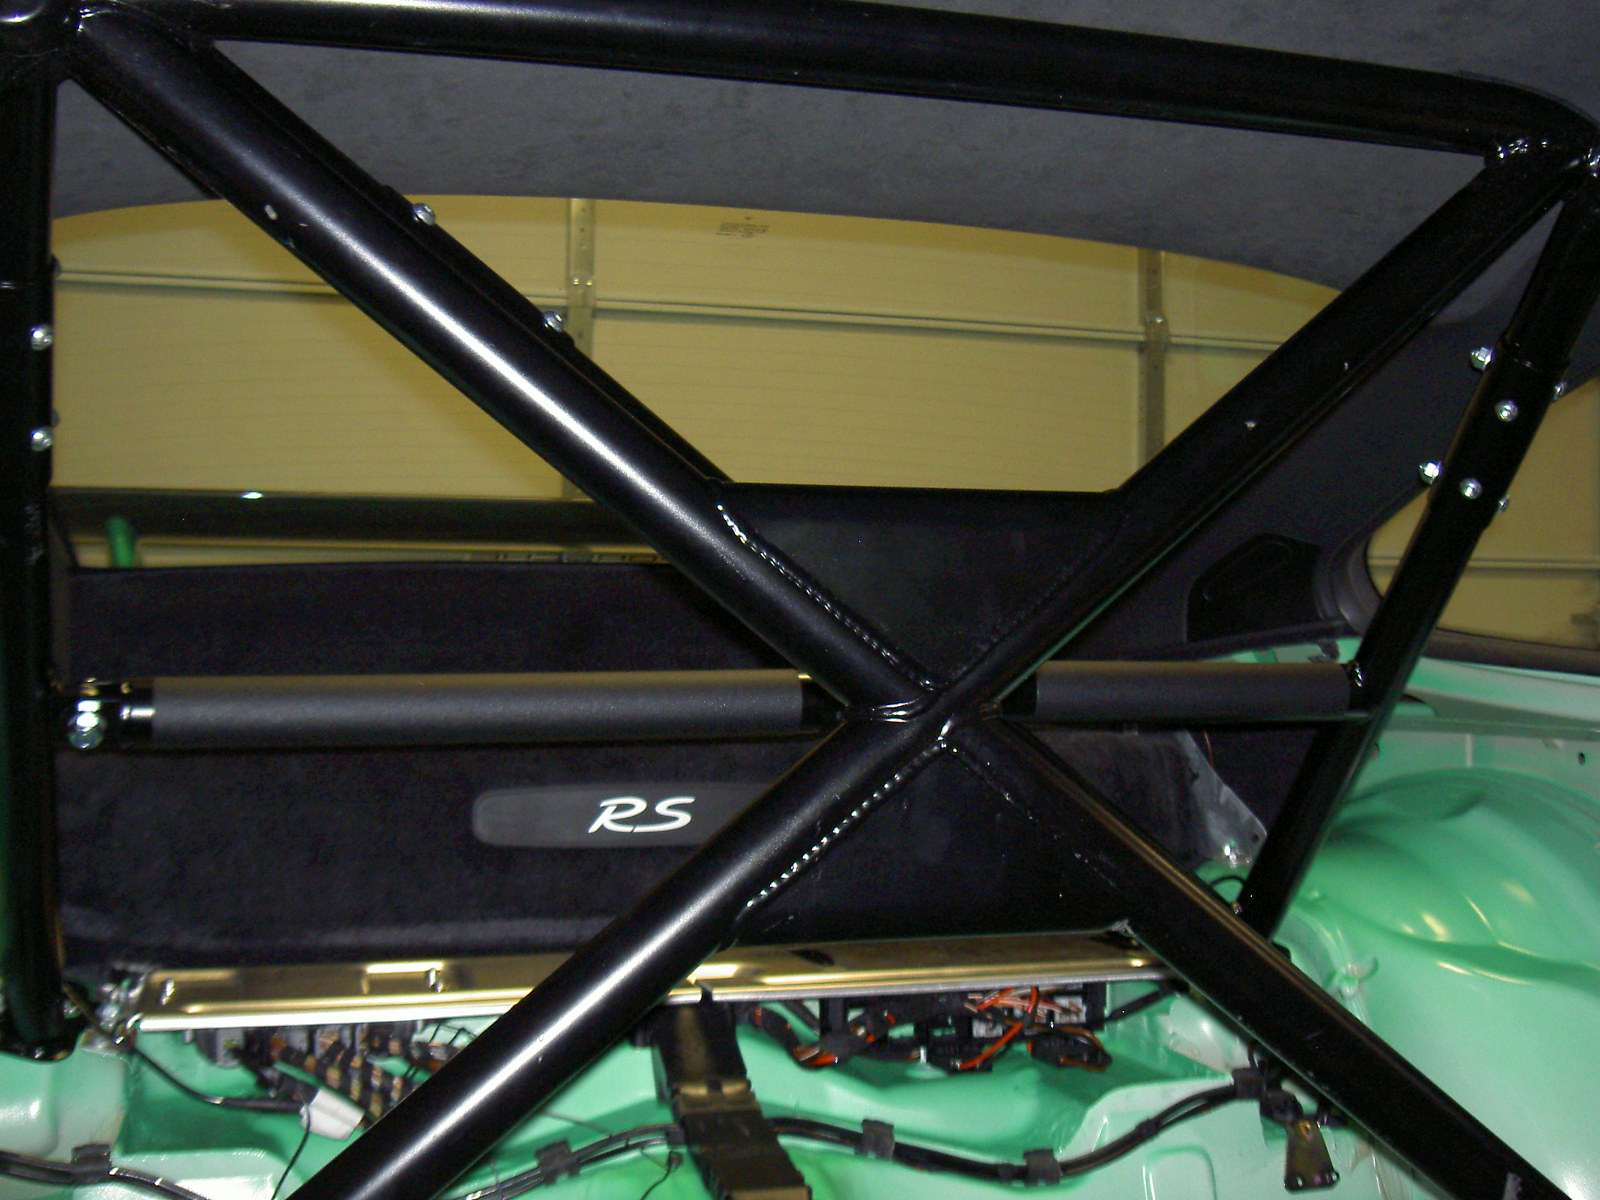
I had some problem with the connecting piece that link the front A pillar bars. It was too wide by about 0.2 mm and I had to grind it down slightly to fit
I also had difficulty fitting the diagonal roof cross bar. It took alot of elbow grease and some WD-40 with few gently tap to fit
Make sure the A pillar bar do not contact the A pillar cover or it will squeak like mad while driving ... ask me how I know lol. Now mark the location of the mounting plates on the tub and get ready to drill. If you have a lift and welding machine you can do the next step yourself. Well, I have neither so Mike at Tolle Fabrication took over the final assembly.
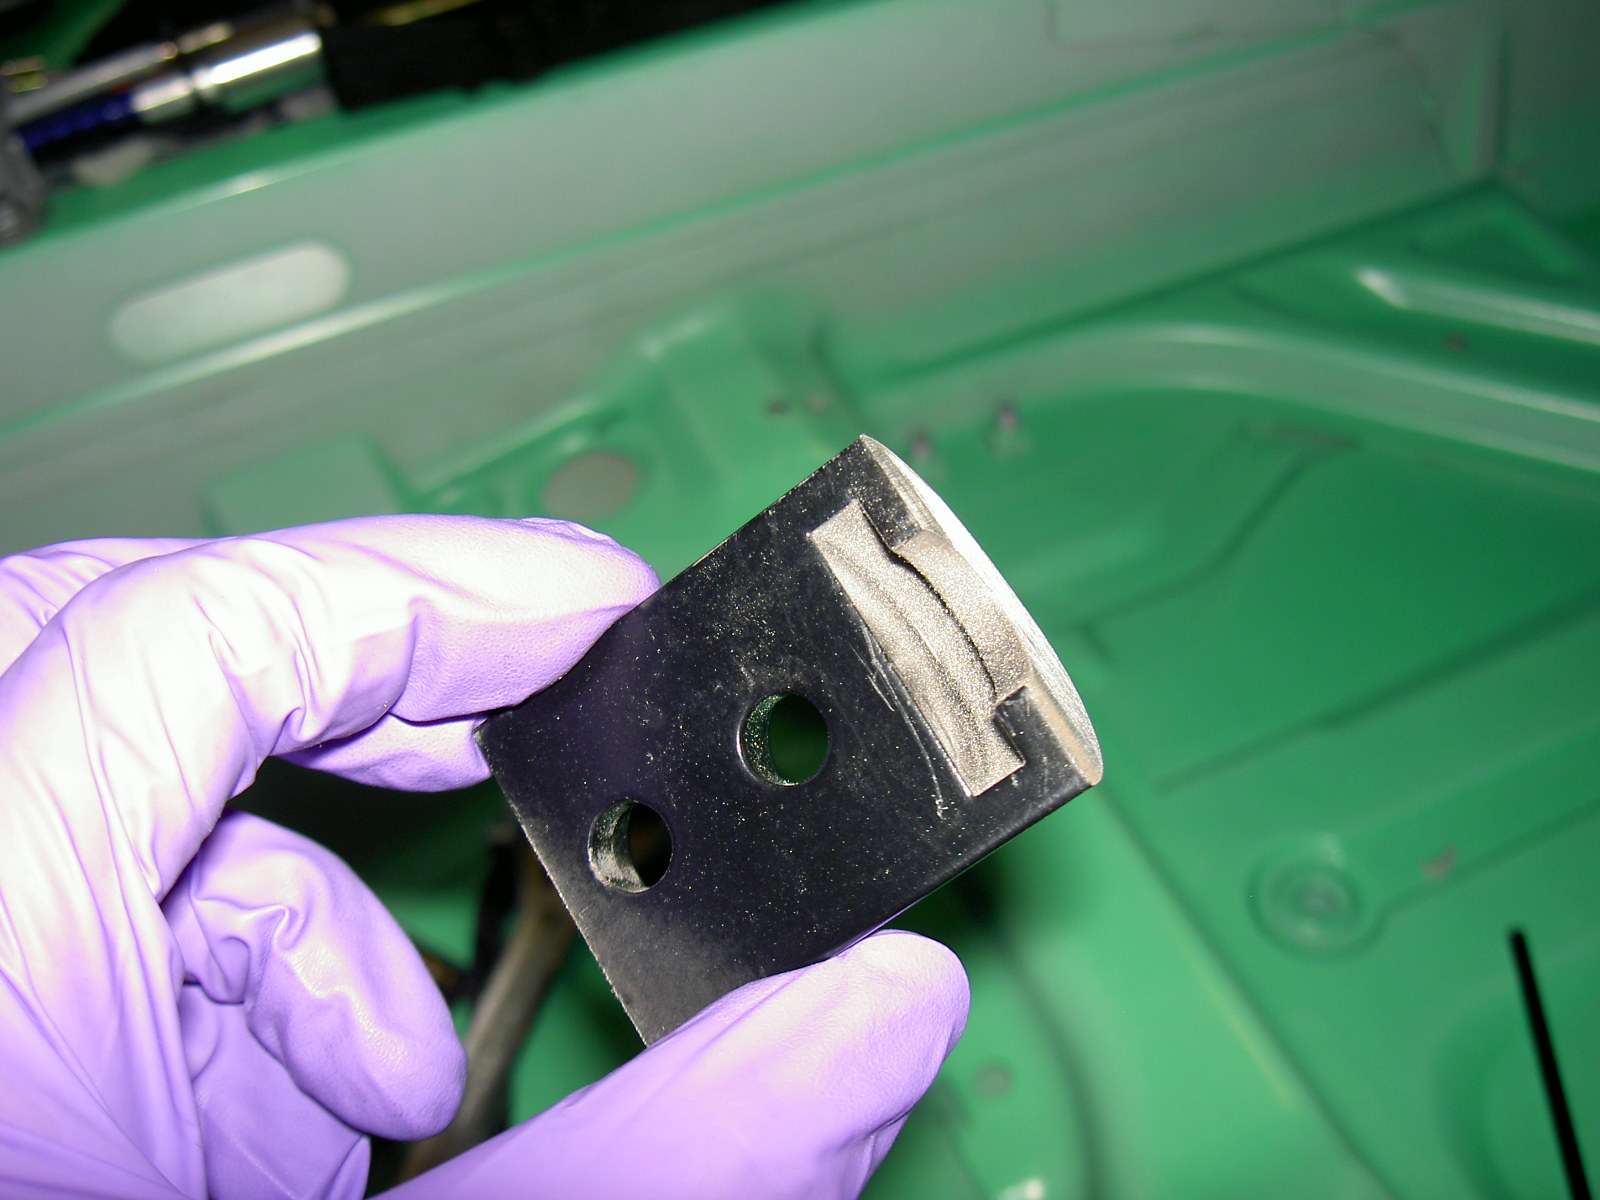
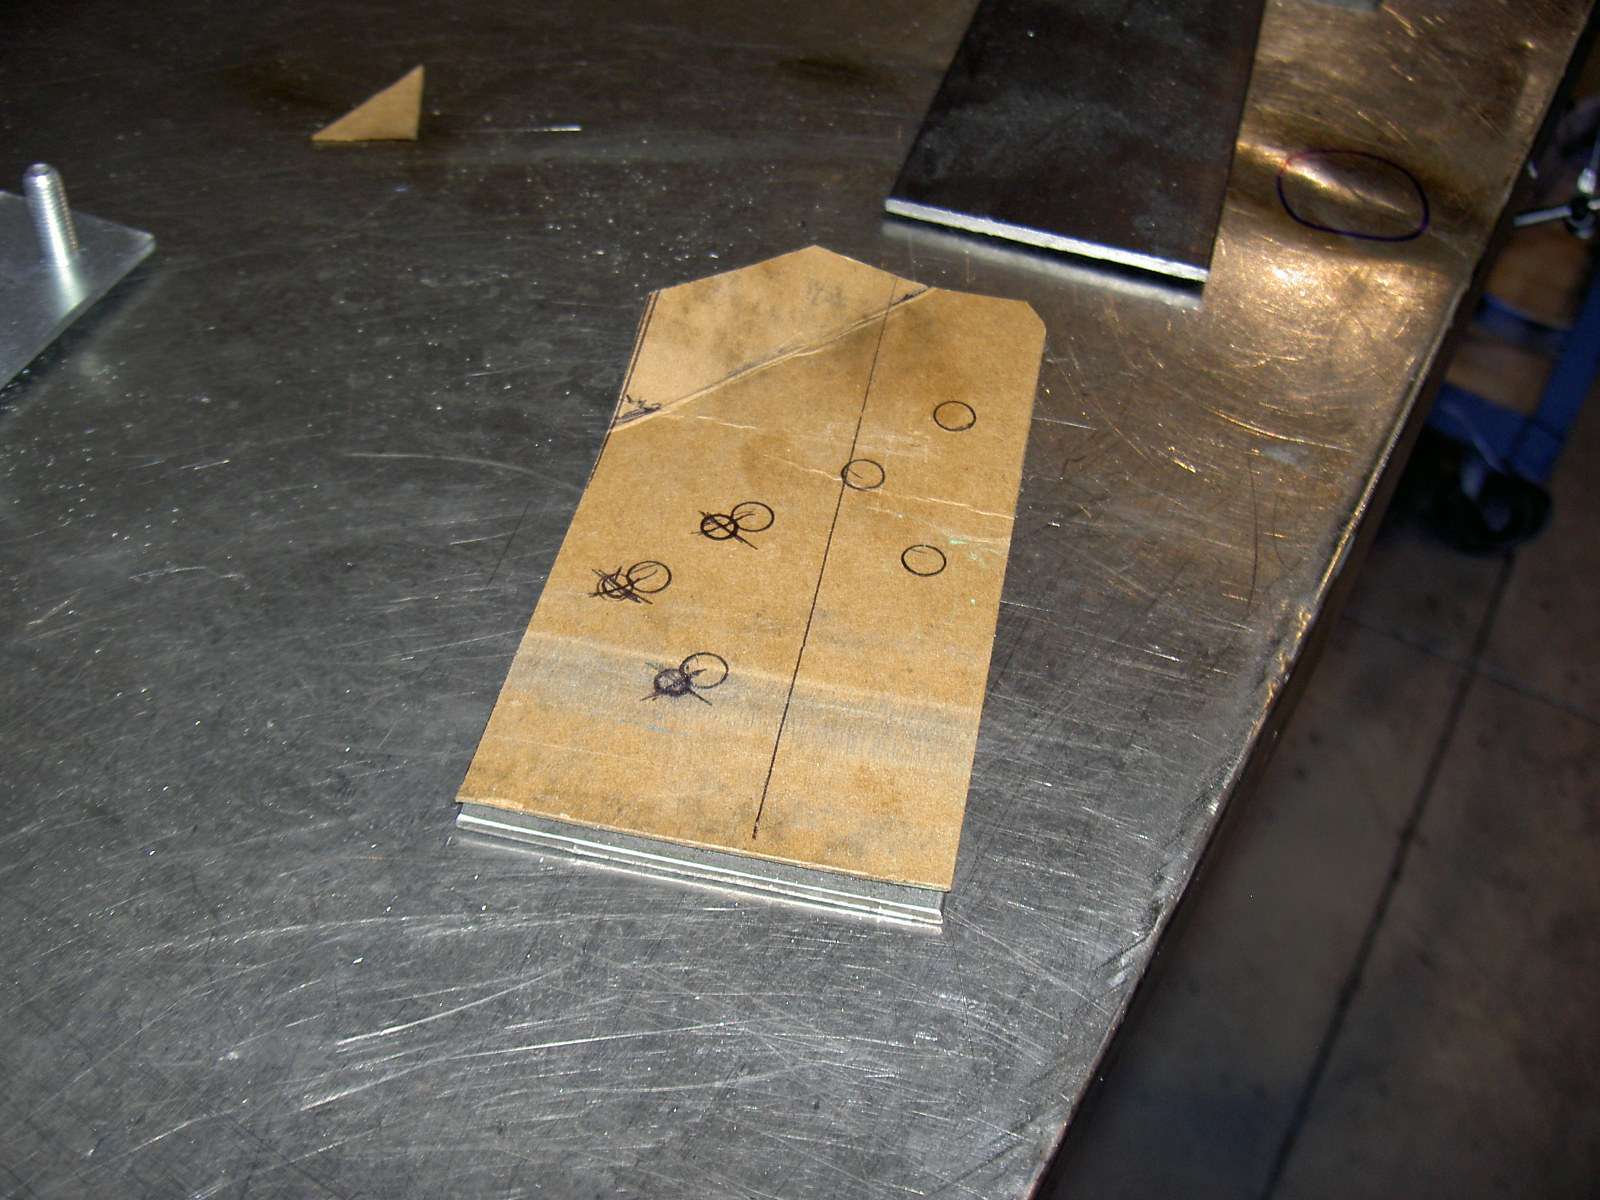
We took a close look at the Porsche factory mounting plates and realize the three holes for the front plates were stamped reversed. OMG! ... what will it take for Porsche motorsport to get things right?
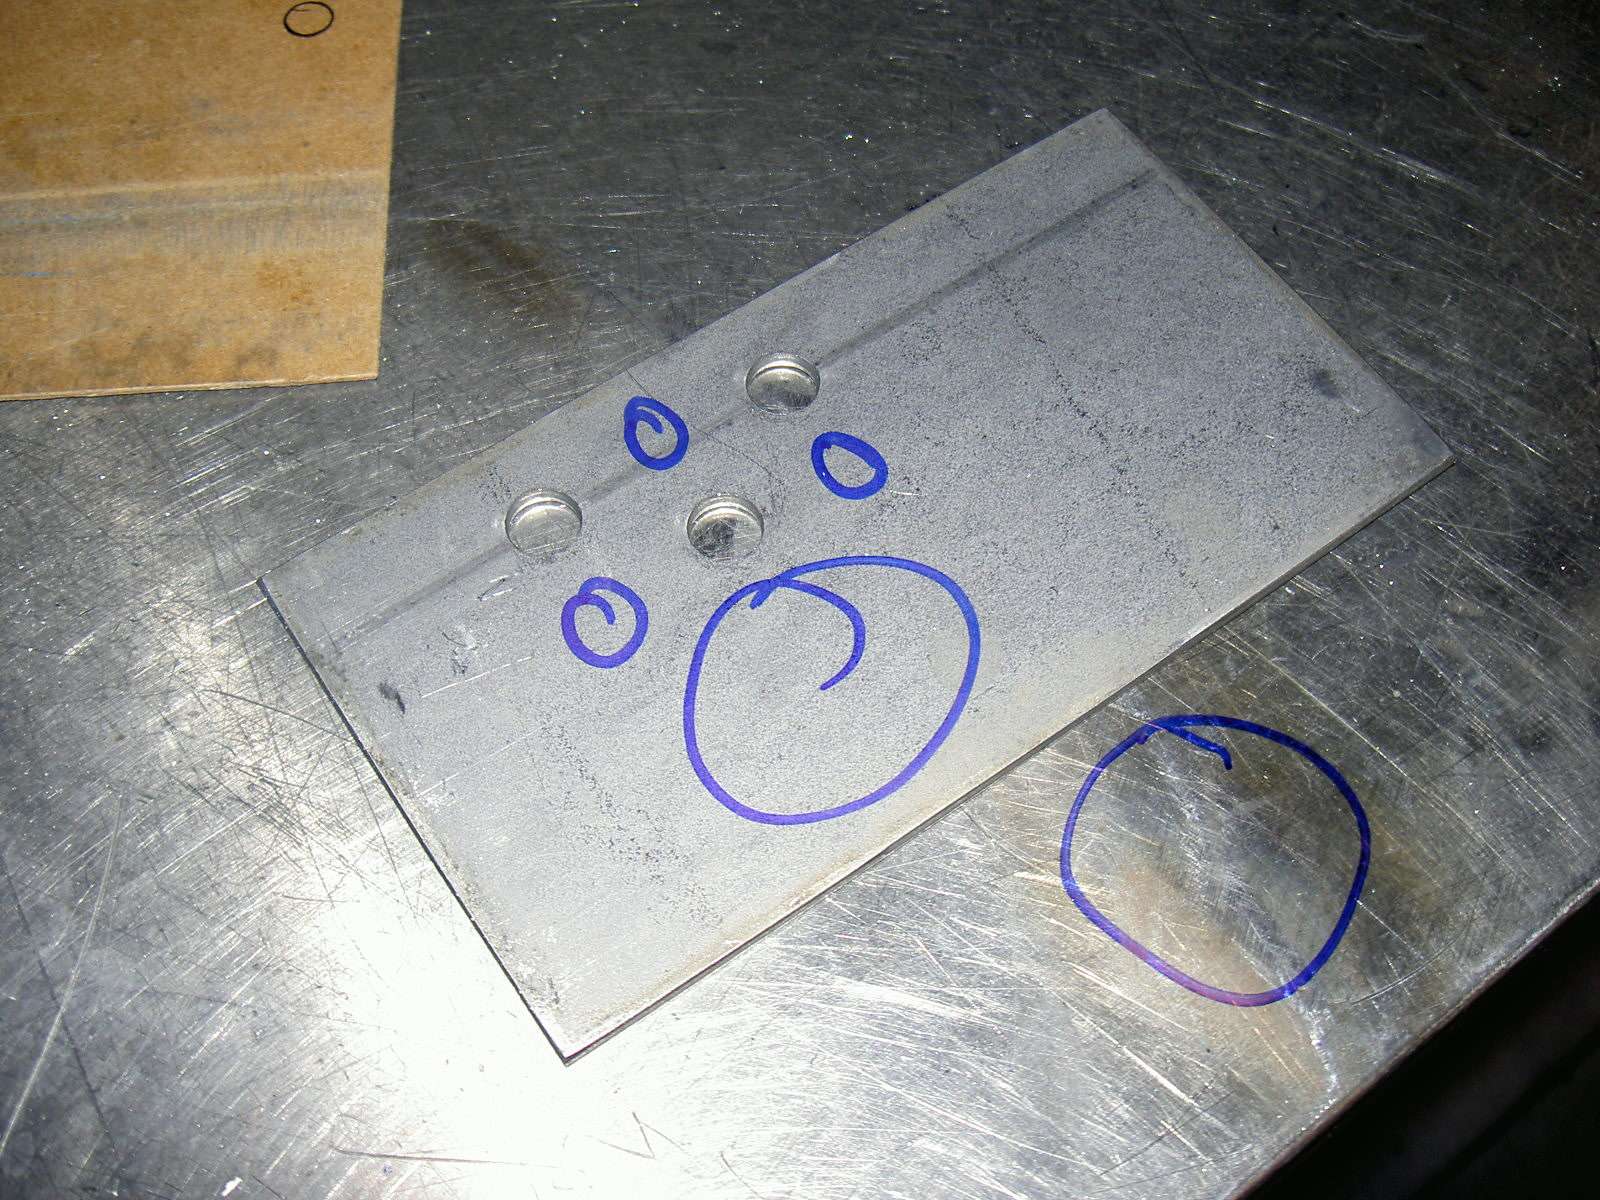
We had to fabricate two new front mounting plates
OK, time to drill ....
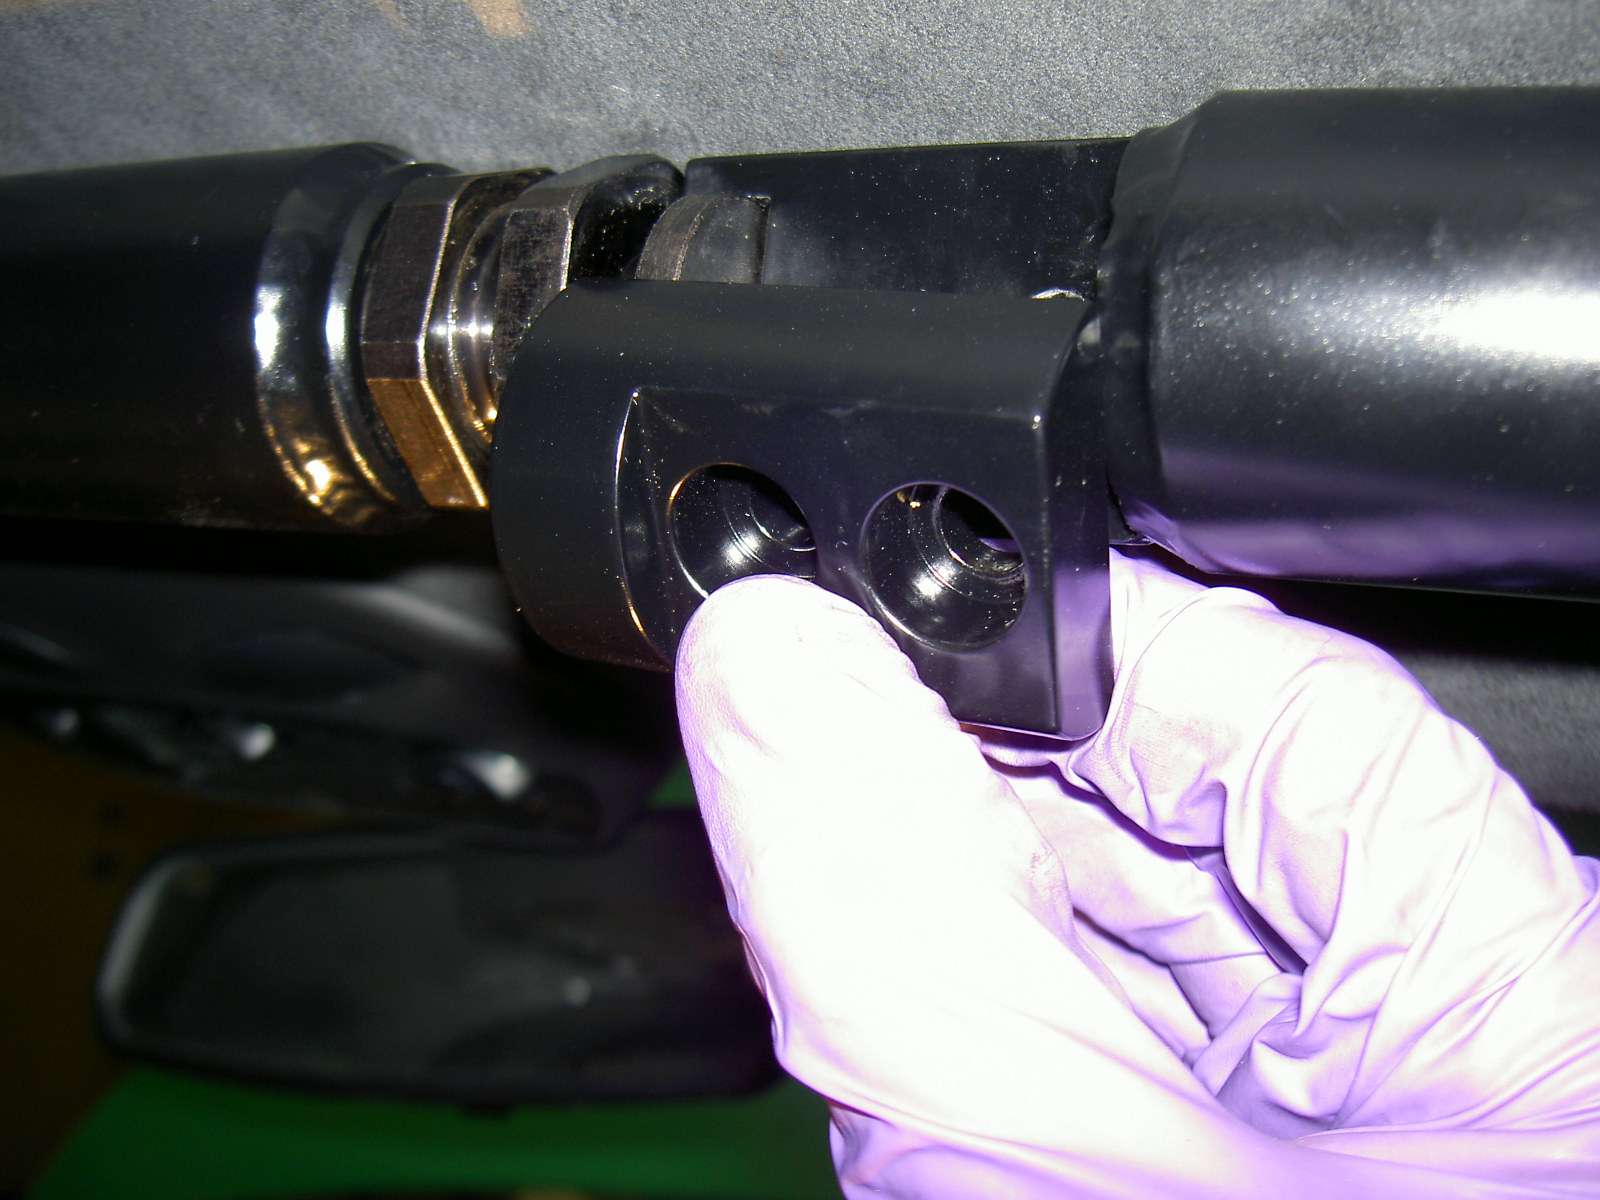
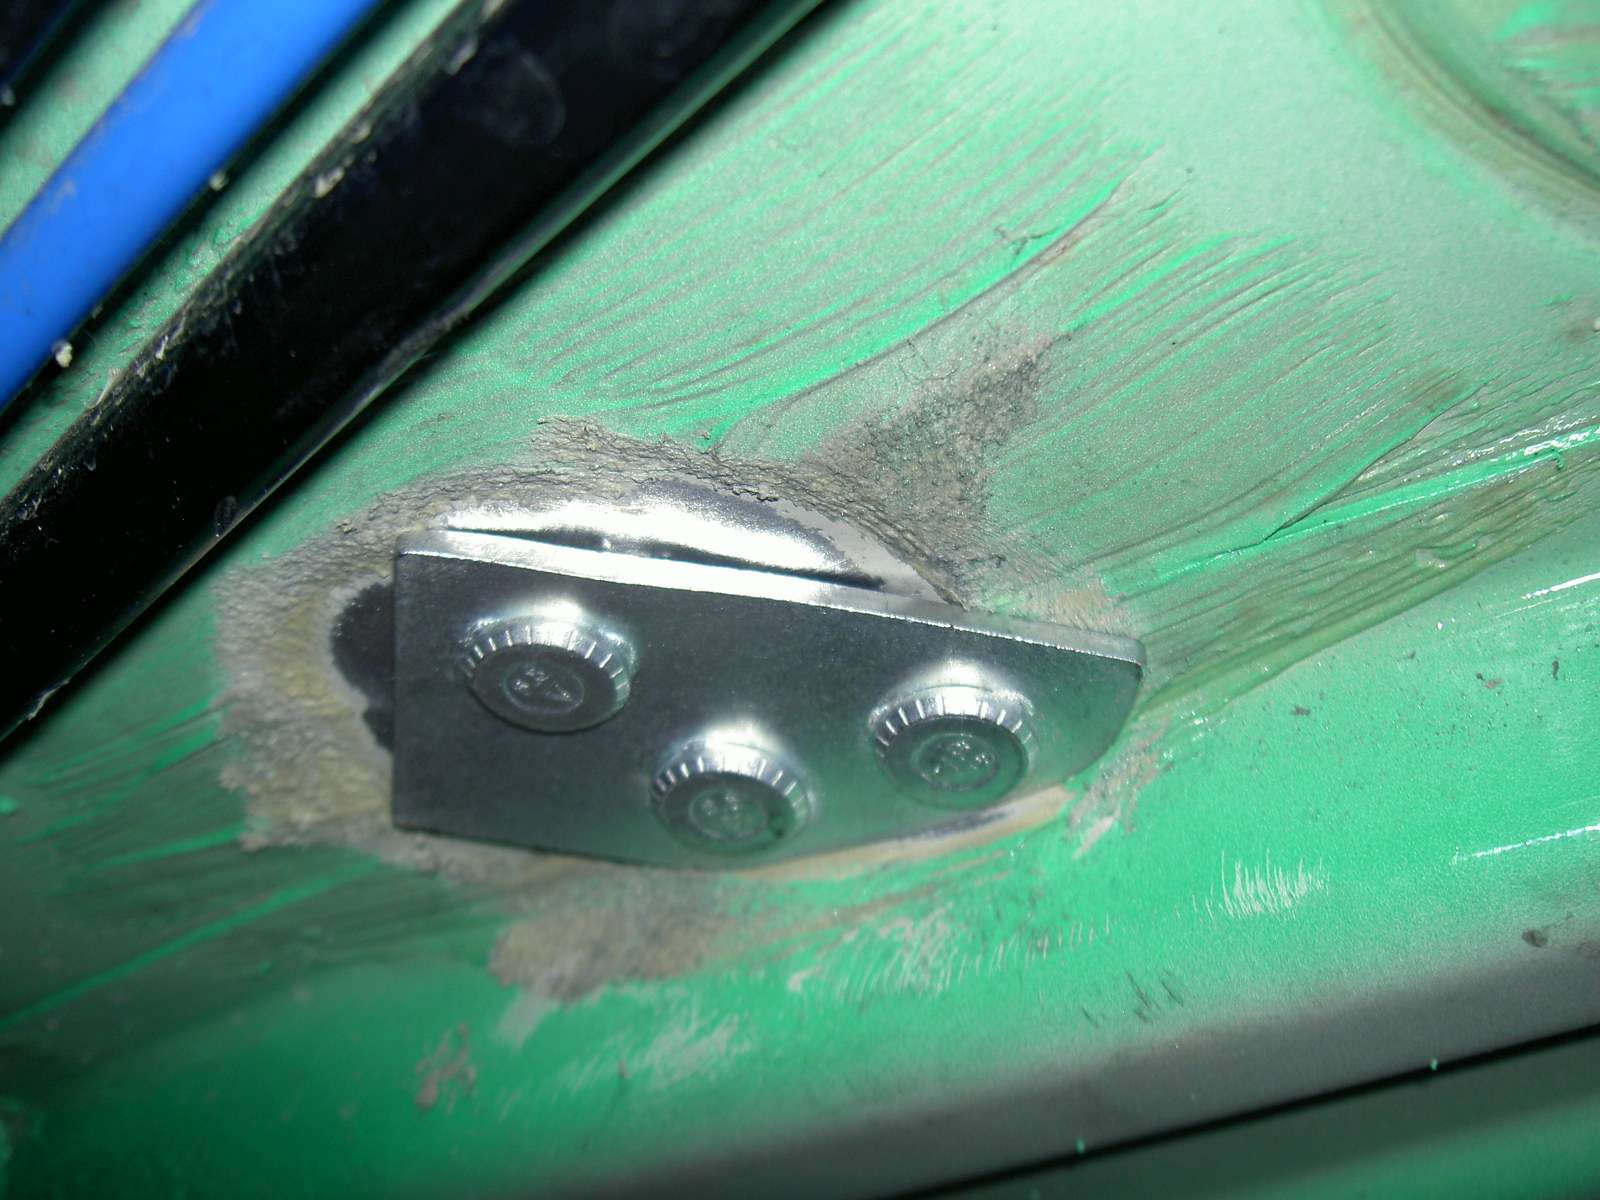
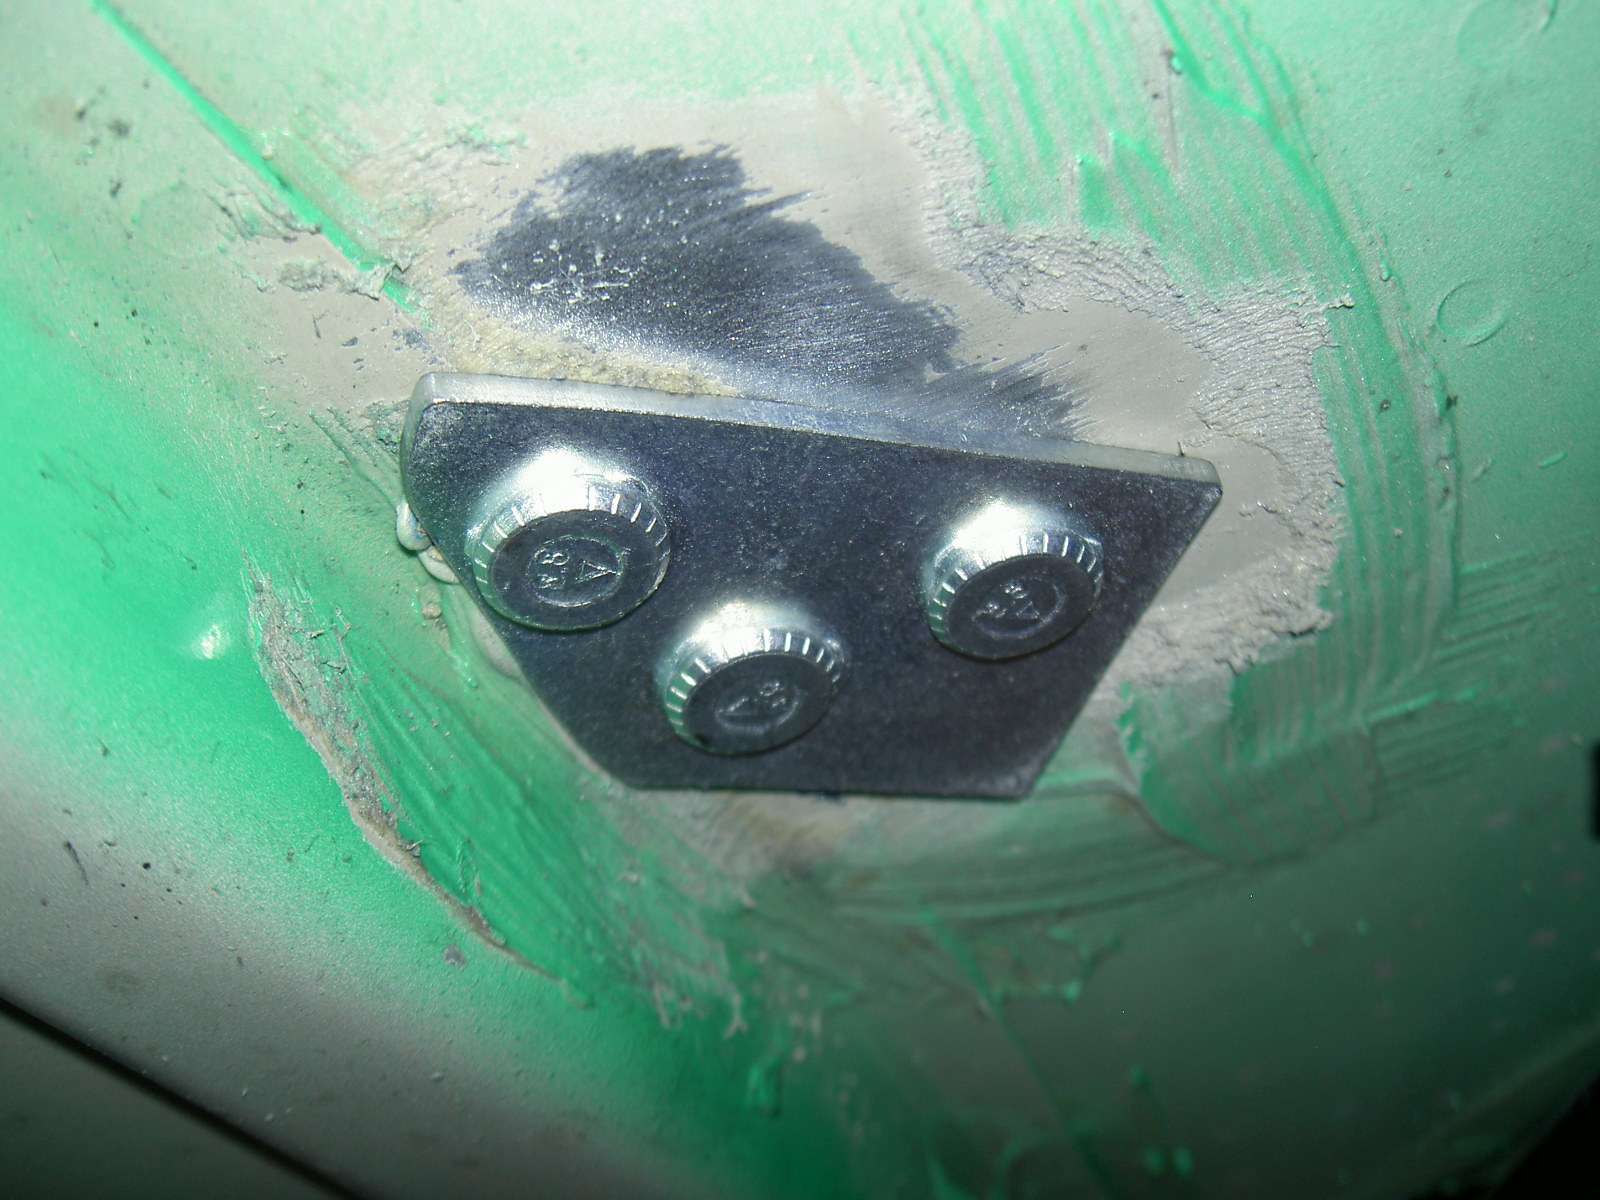
The two front mounting stud plats come in contact with the horizontal beam of the tub so you need to trim off the edge to fit
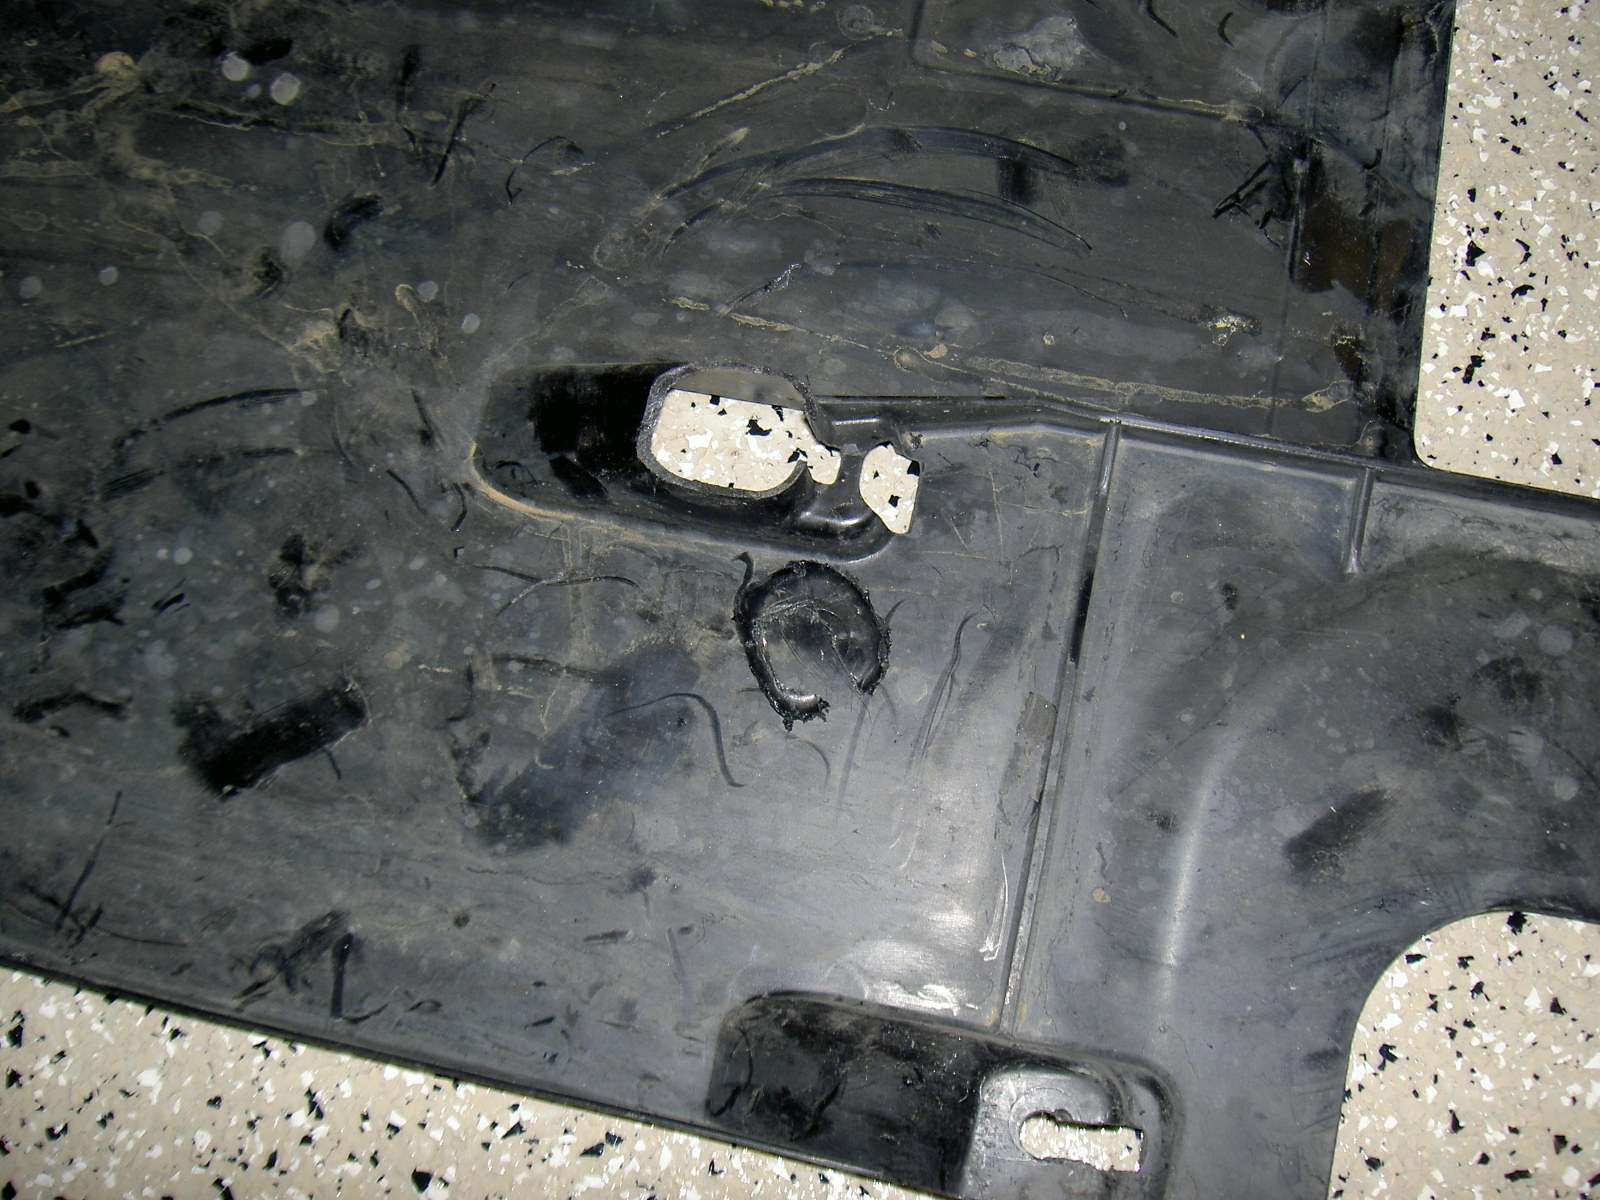
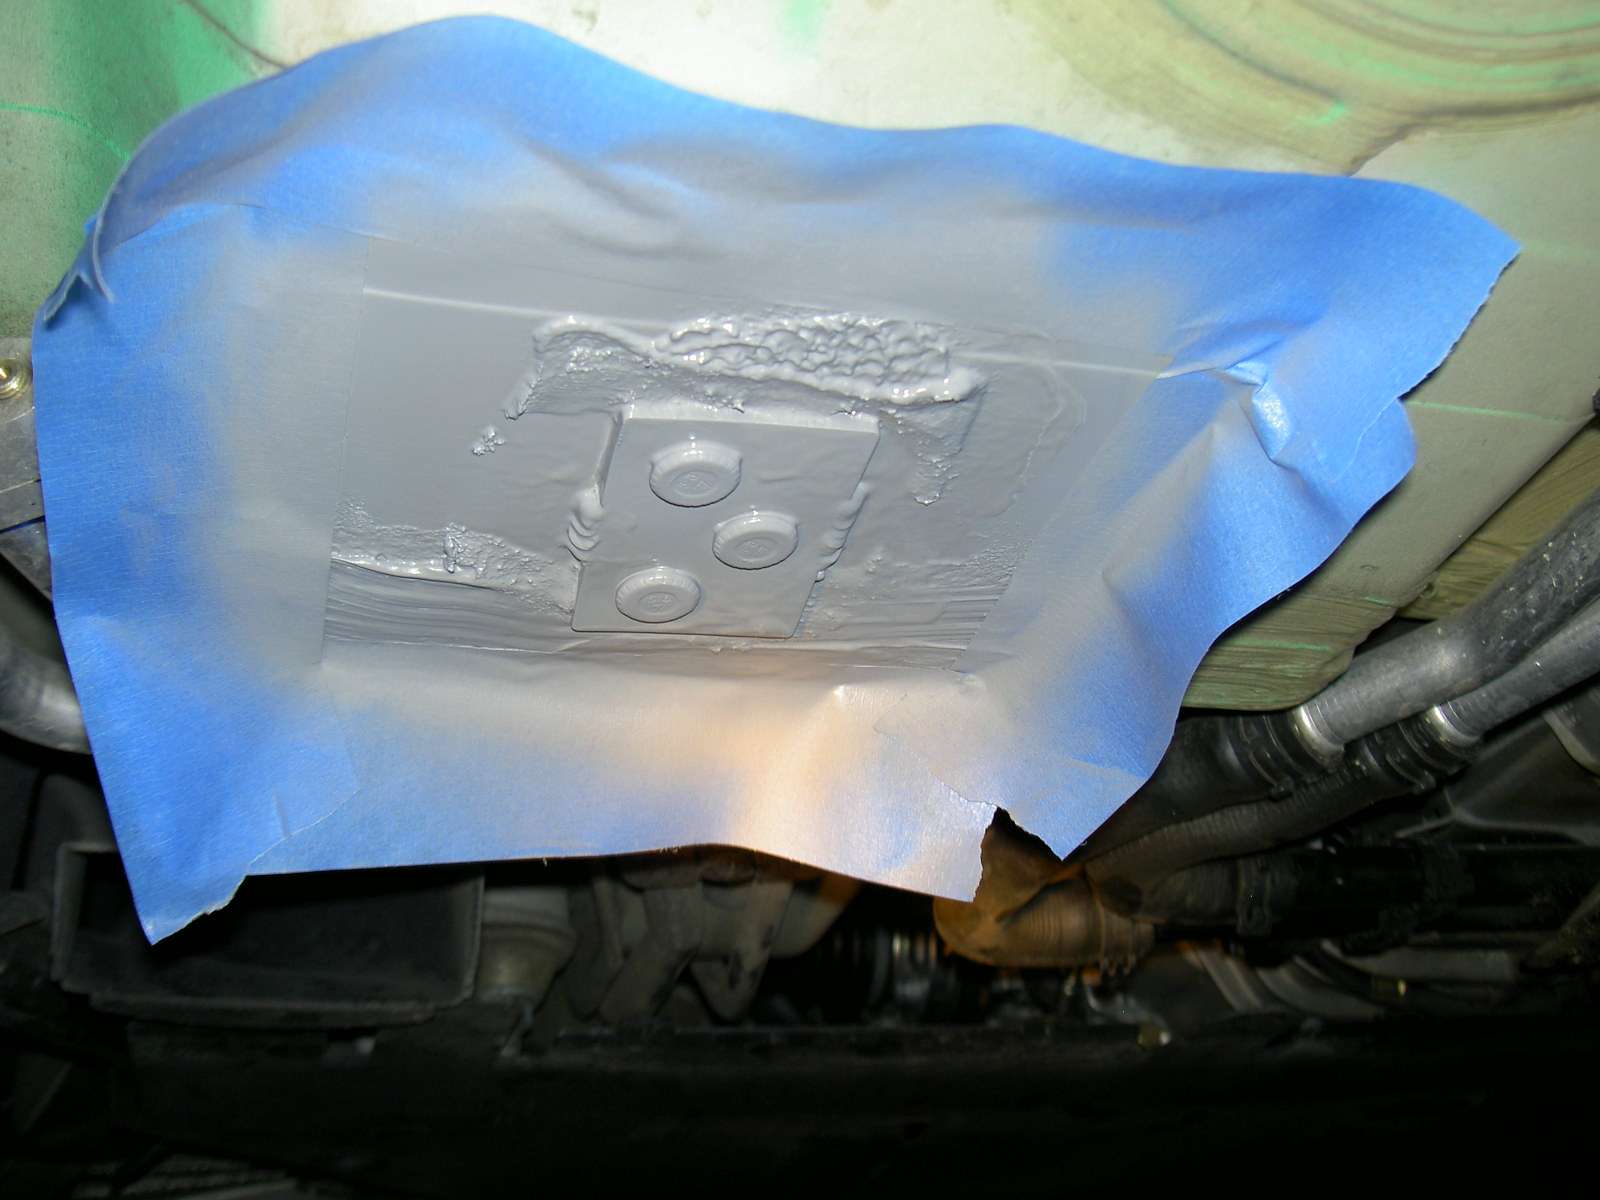
The plastic under body panels that cover the front mounting stud plate have an inward projection that comes in contact with the tub. The top of this projection need to be trimmed off since it comes in contact with the stud plate.
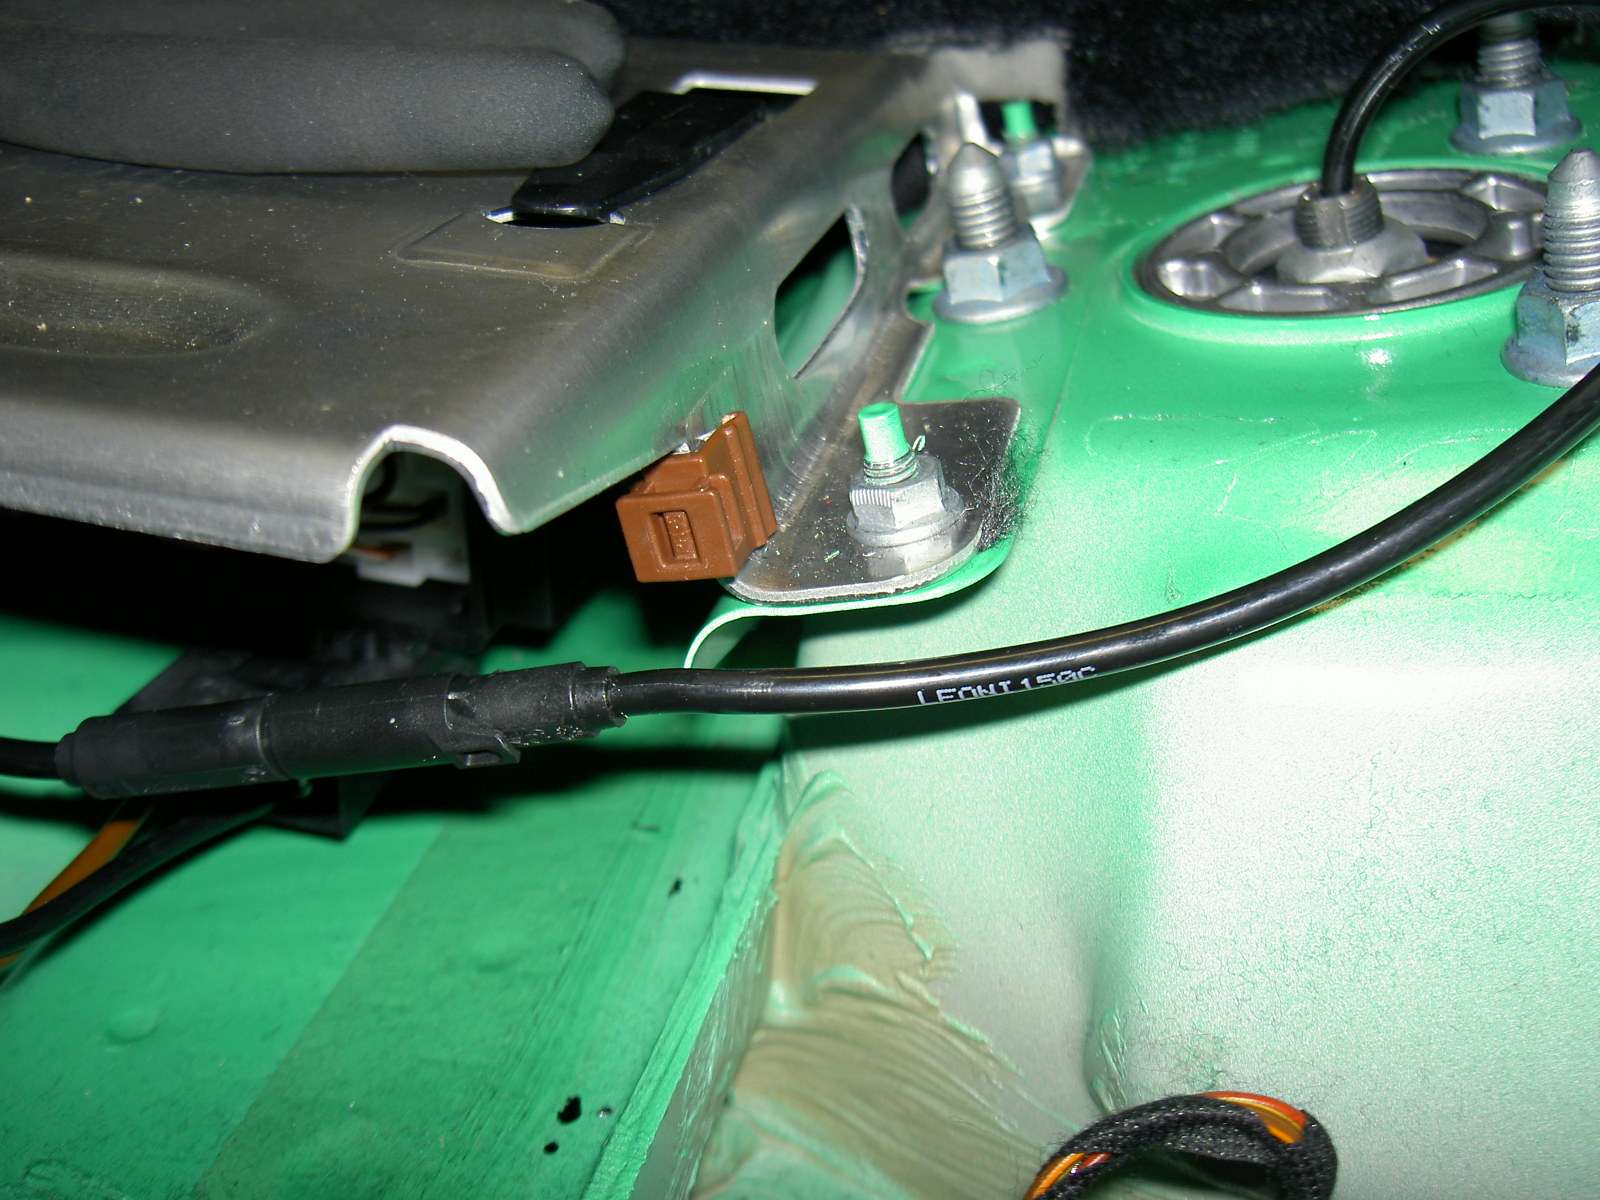
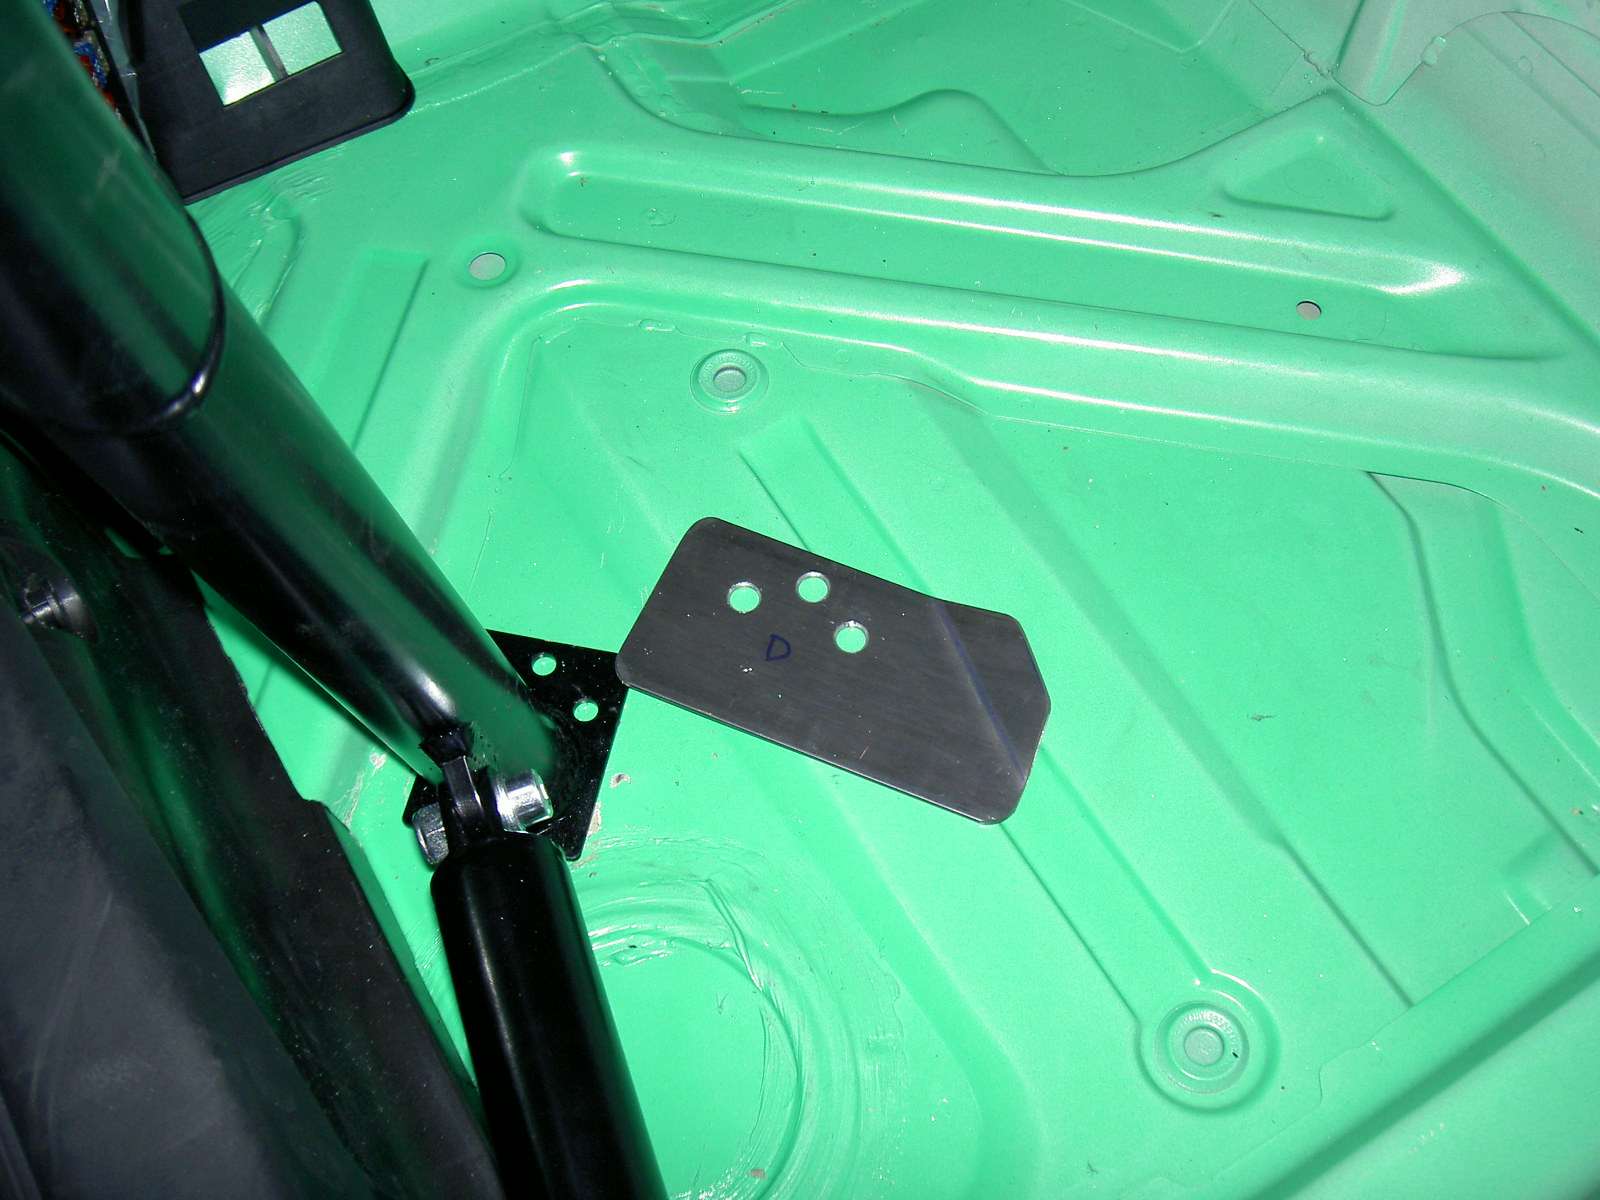
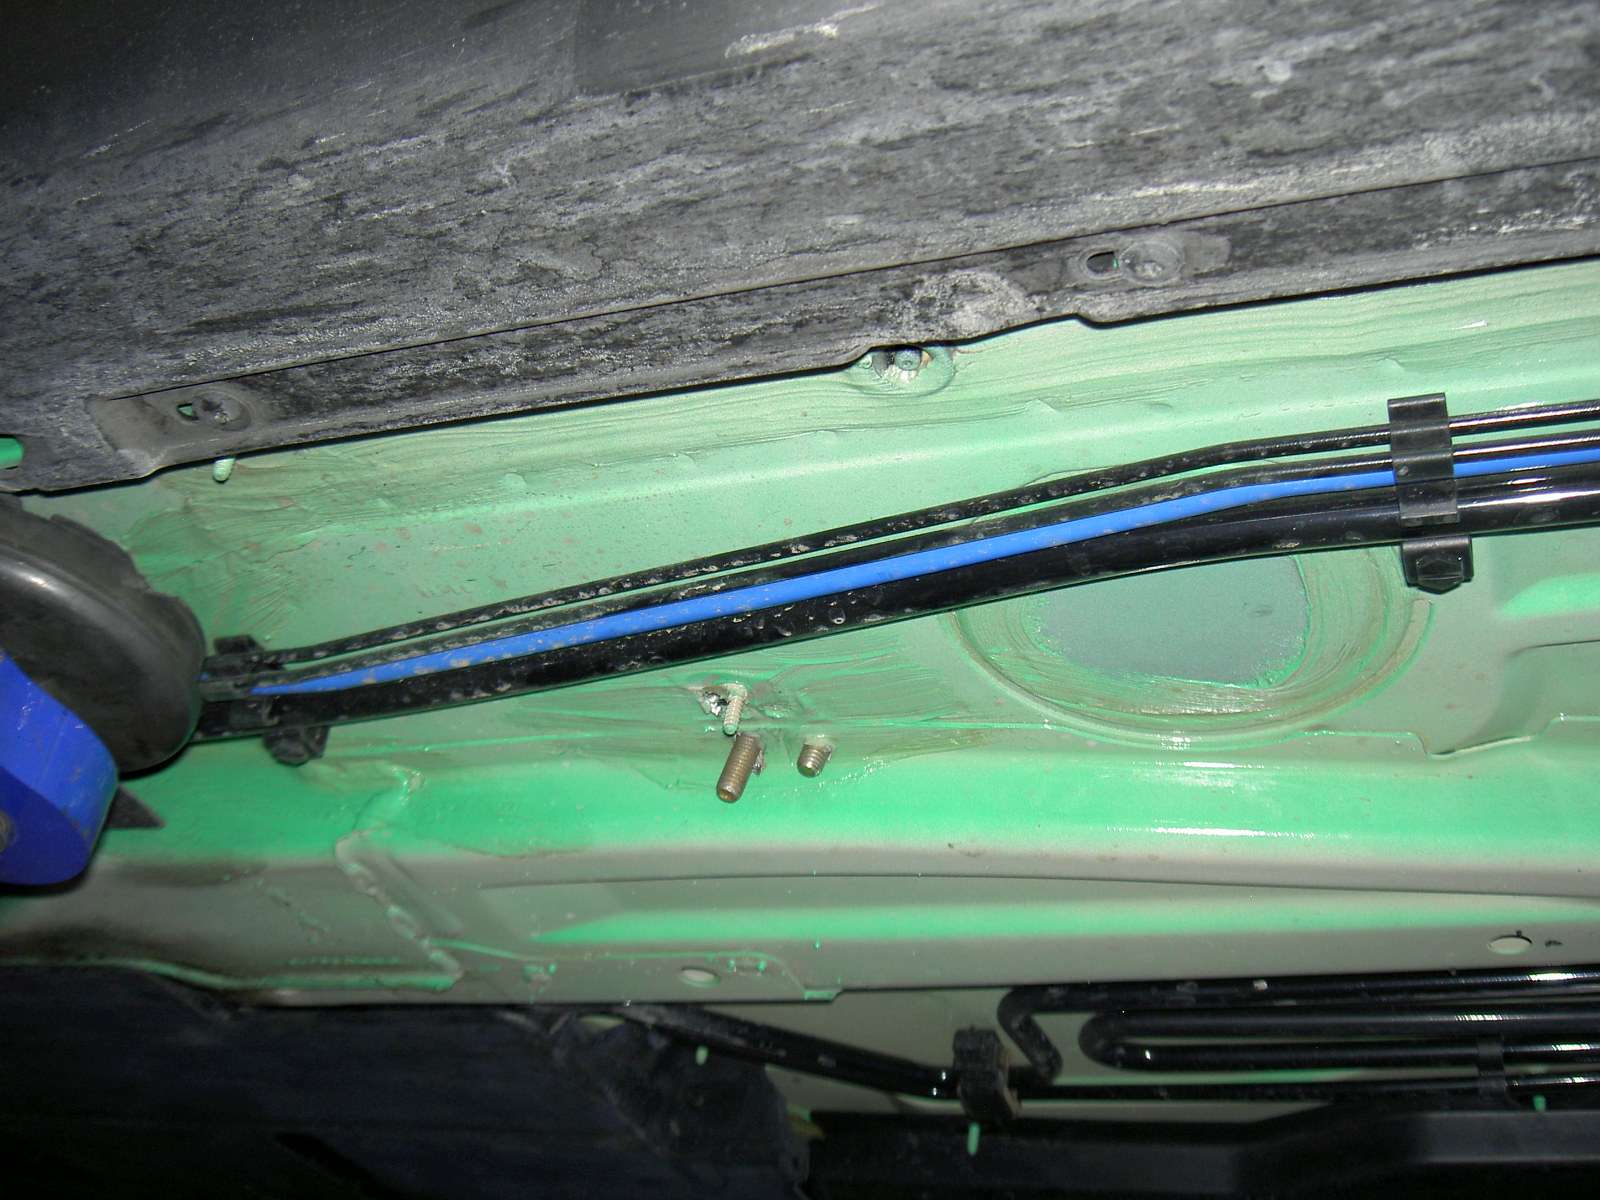
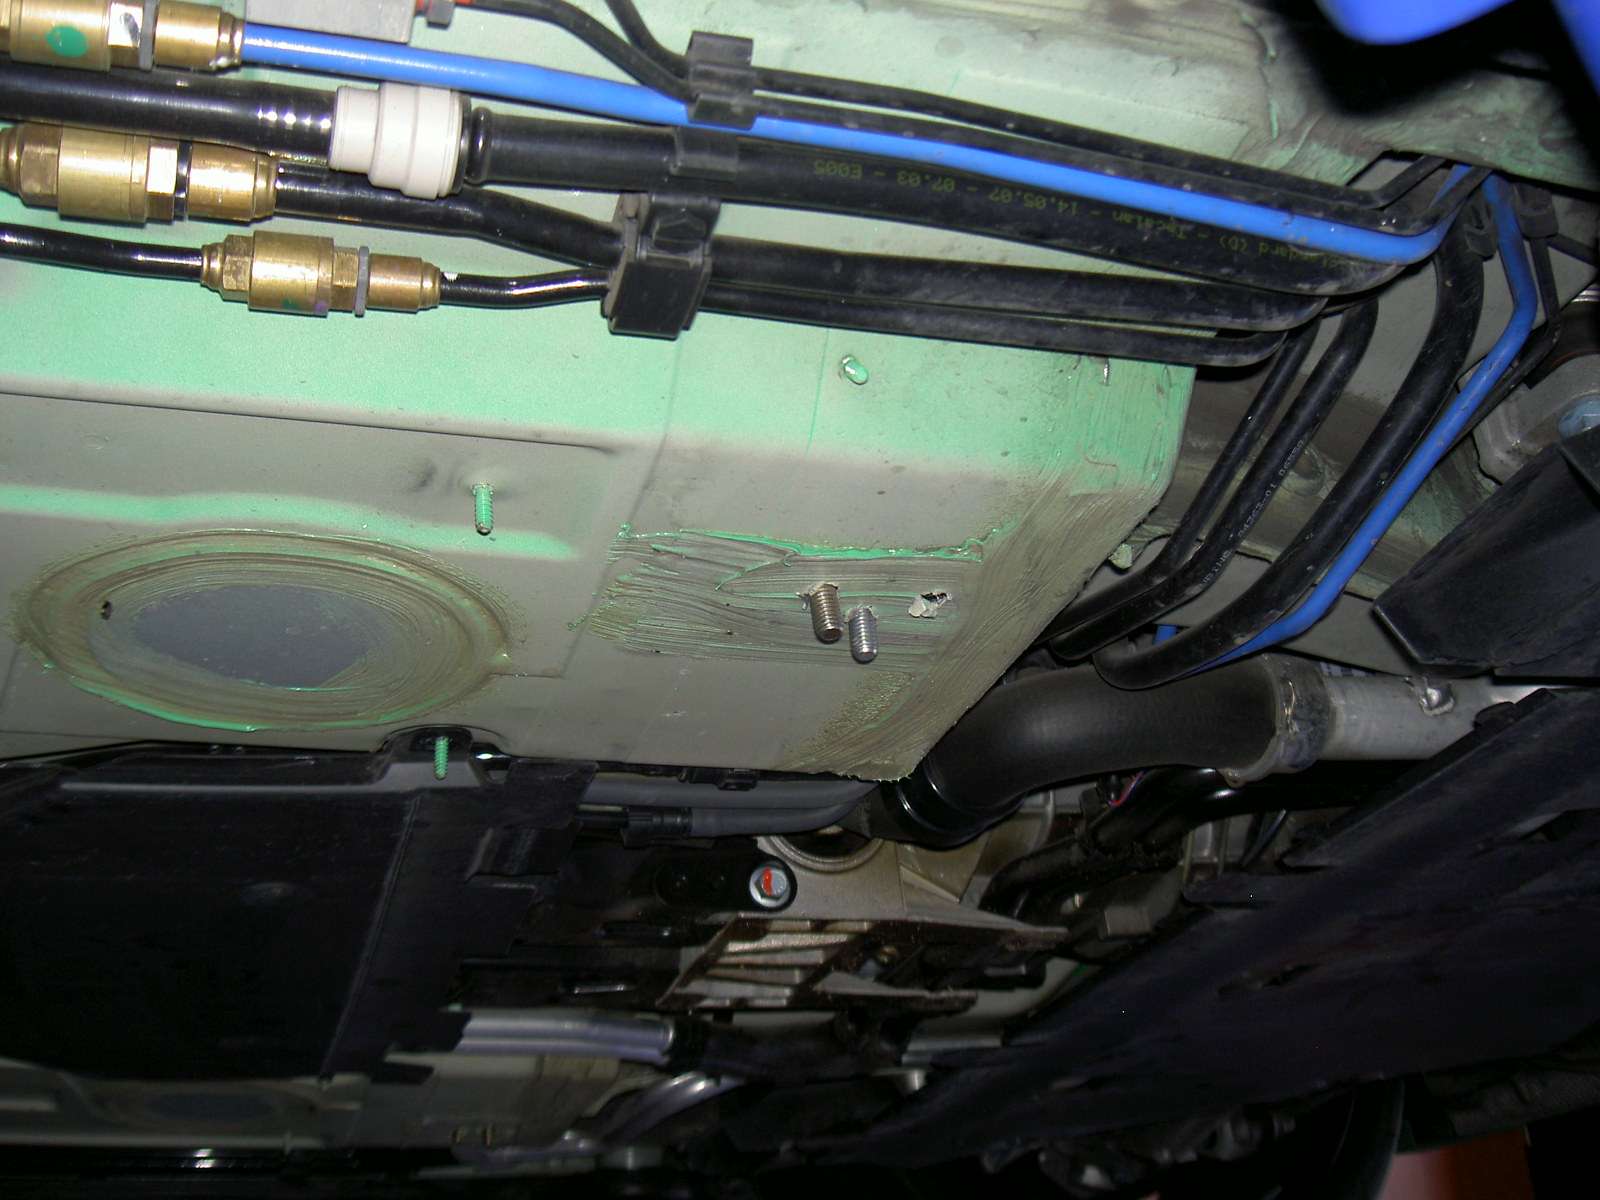
Here are the location of the rear mounting stud plats
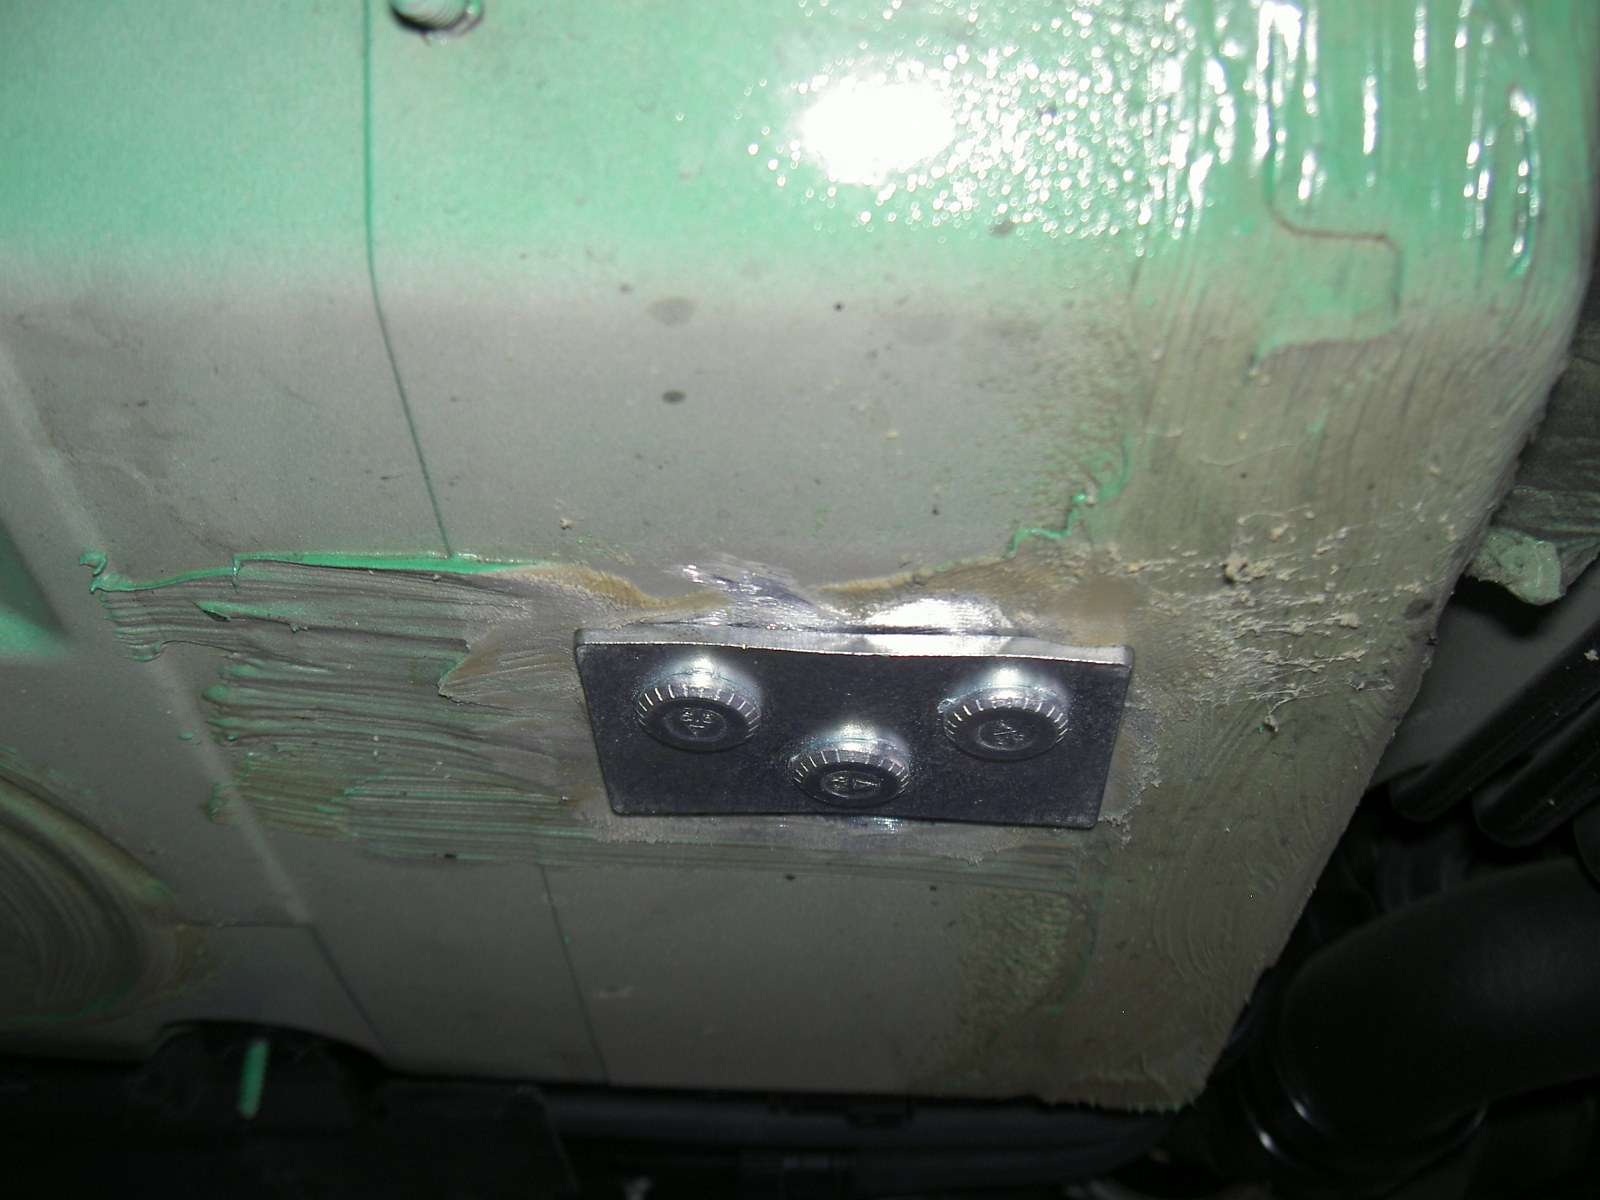
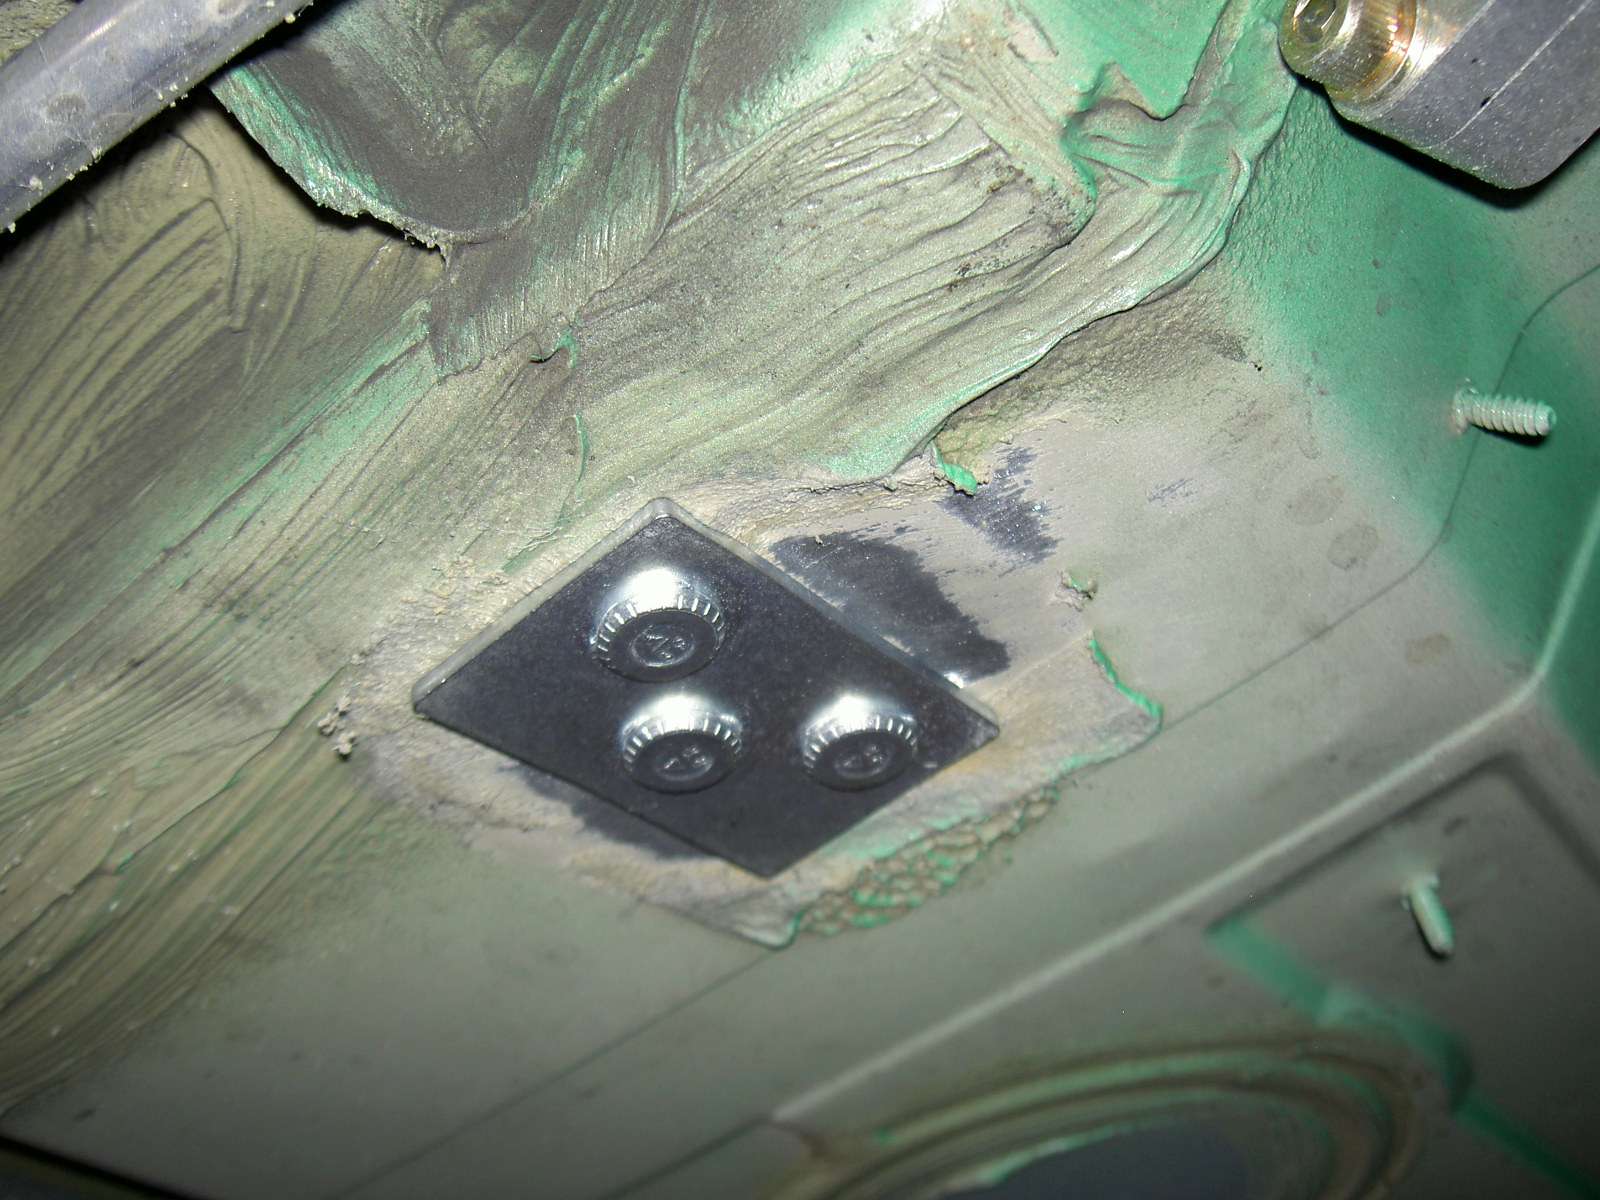
Generous spray the stud plates and surround with paint to prevent rust
Now tighten everything down and double check all connections. Reinstall the shift console and you are good to go. It's a good idea to install impact padding on the driver side to protect your head
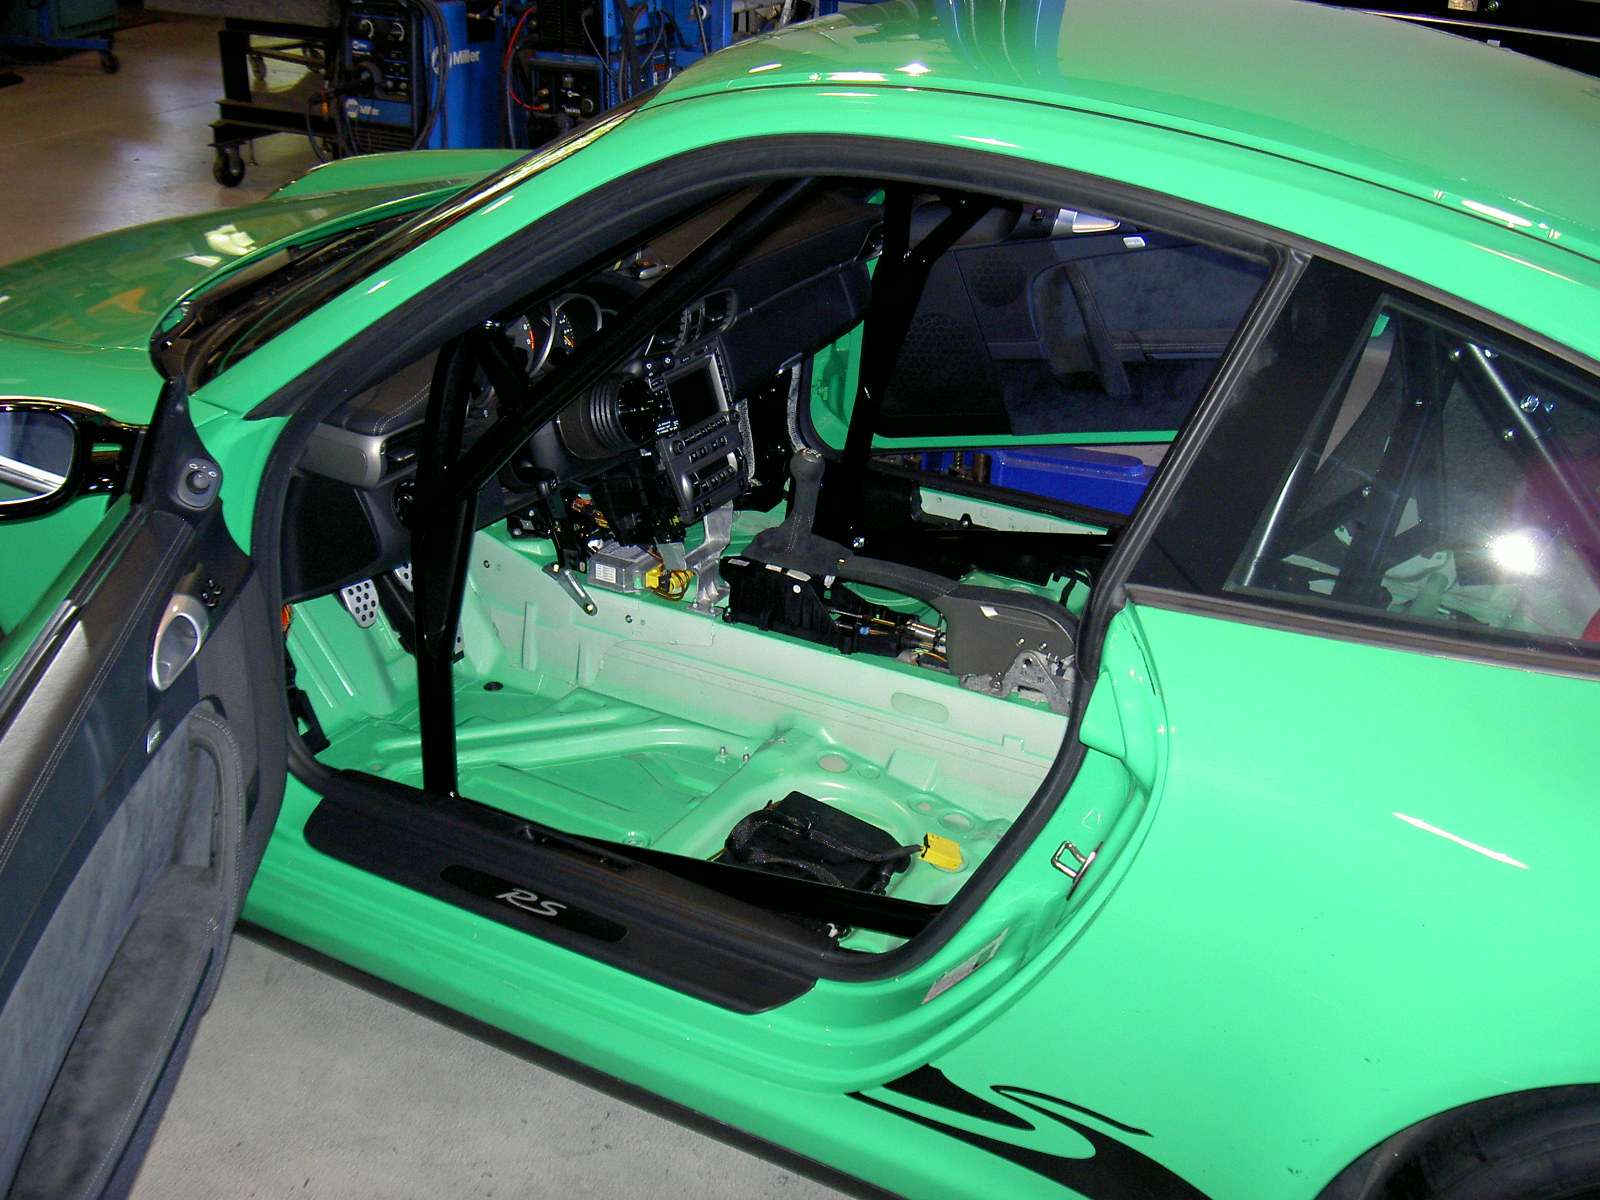
Driving impression: RS is already pretty solid and this addition makes it ROCK solid. No rattling noise at all even on the track and no problem getting in and out of the car. I love the black powder coat and match interior perfectly and minimize sun reflection.
Here is the weight breakdown:
Factory cage: +84 lbs
Weight reduction items:
Seat belts: -10 lbs
Sun visors: -2 lbs
Driver seat and front passenger air bags: -10 lbs
Passenger seat: -35 lbs
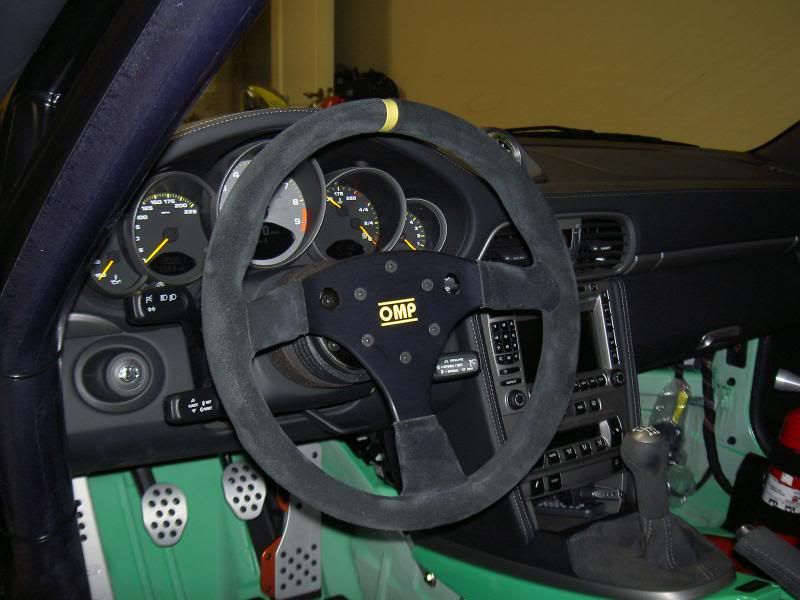
OMP steering wheel: -3 lbs
Carpets: -20 lbs
Net gain: 4 lbs
My RS now weigh 3080 lbs 1/2 tank gas without driver and move like no one's business on the track
It's pretty straight forward much like a jigsaw puzzle. Start assembling from the rear section and avoid scratching the powder coat especially the small connecting pieces. DO NOT tighten until all cage pieces are assembled.
First disconnect the rear shock wire
Build up the rear section
Remove the sun visor in preparation for the front section
I had some problem with the connecting piece that link the front A pillar bars. It was too wide by about 0.2 mm and I had to grind it down slightly to fit
I also had difficulty fitting the diagonal roof cross bar. It took alot of elbow grease and some WD-40 with few gently tap to fit
Make sure the A pillar bar do not contact the A pillar cover or it will squeak like mad while driving ... ask me how I know lol. Now mark the location of the mounting plates on the tub and get ready to drill. If you have a lift and welding machine you can do the next step yourself. Well, I have neither so Mike at Tolle Fabrication took over the final assembly.
We took a close look at the Porsche factory mounting plates and realize the three holes for the front plates were stamped reversed. OMG! ... what will it take for Porsche motorsport to get things right?
We had to fabricate two new front mounting plates
OK, time to drill ....
The two front mounting stud plats come in contact with the horizontal beam of the tub so you need to trim off the edge to fit
The plastic under body panels that cover the front mounting stud plate have an inward projection that comes in contact with the tub. The top of this projection need to be trimmed off since it comes in contact with the stud plate.
Here are the location of the rear mounting stud plats
Generous spray the stud plates and surround with paint to prevent rust
Now tighten everything down and double check all connections. Reinstall the shift console and you are good to go. It's a good idea to install impact padding on the driver side to protect your head
Driving impression: RS is already pretty solid and this addition makes it ROCK solid. No rattling noise at all even on the track and no problem getting in and out of the car. I love the black powder coat and match interior perfectly and minimize sun reflection.
Here is the weight breakdown:
Factory cage: +84 lbs
Weight reduction items:
Seat belts: -10 lbs
Sun visors: -2 lbs
Driver seat and front passenger air bags: -10 lbs
Passenger seat: -35 lbs
OMP steering wheel: -3 lbs
Carpets: -20 lbs
Net gain: 4 lbs
My RS now weigh 3080 lbs 1/2 tank gas without driver and move like no one's business on the track
Last edited by mikymu; 12-19-2010 at 07:25 PM.
12-19-2010, 11:52 AM
#3
Rennlist Member
Join Date: May 2008
Location: Somewhere in a galaxy far, far away....
Posts: 17,106
Likes: 0
Received 256 Likes
on
172 Posts
Man, i love those full caged RS porsches!
I kept my sun visors on, however there is no chance of using them.
I also kept my factory seat belts, however one should only use harness with full cage when non helemt street driving.
I noticed you drilled through the floor instead of welding the the tabs to the floor. The sandwich technique you applied here is actually the stronger way to secure a bolt in cage IMHO.
Interesting that P motorsports decided to give you the .1 front and not the newer semcon .2 front..... At least with the single bar, exit and entry is still fair. The semcom .2 front makes entry and exit like that of a cup car which sucks for sunday drives. (great for door to door contact racing though).
I kept my sun visors on, however there is no chance of using them.
I also kept my factory seat belts, however one should only use harness with full cage when non helemt street driving.
I noticed you drilled through the floor instead of welding the the tabs to the floor. The sandwich technique you applied here is actually the stronger way to secure a bolt in cage IMHO.
Interesting that P motorsports decided to give you the .1 front and not the newer semcon .2 front..... At least with the single bar, exit and entry is still fair. The semcom .2 front makes entry and exit like that of a cup car which sucks for sunday drives.
(great for door to door contact racing though).
12-19-2010, 12:25 PM
#4
Wow, another amazing installation write-up from our resident Porsche Doctor  Well done Mike! Looking forward to seeing that bad-boy in person!
But don't you have to be crazy to do this to an innocent car??

Oh PS- does the front cage prevent use of the OE sunvisors? And did you remove roof liner? Light enough to not be worth removing? Hassle?
Well done Mike! Looking forward to seeing that bad-boy in person!But don't you have to be crazy to do this to an innocent car??
Oh PS- does the front cage prevent use of the OE sunvisors? And did you remove roof liner? Light enough to not be worth removing? Hassle?


Trending Topics
12-19-2010, 01:43 PM
#8
Admin
Lifetime Rennlist
Member
Lifetime Rennlist
Member
Mike well done! Excellent!
Wise decision to choose the oem cage
I am really surprised that the upper fitting and linkage! was not a direct fitment, and that one plate had to be grind to clear the side!
It is obvious that these parts require some preparation but they could have at least pre-cut them correctly. Unless FVD messed up the order mixing in some older linkages from 996 era then this is a foul from Porsche. Not to mention that they had stamped the other plates wrongly.
The method of inverting the struts is not as per the instructions but I see nothing wrong there perhaps it’s even easier cause you just mark and drill vs setting the plates before the cage.
Another suggestion is that you buy some light thin padding cover material and fit it in the pillar touching bars so that you can actually rest them on the pillars for increased rigidity and avoid the really annoying sound of metal to plastic. (Touching the cage bars to A -pillars was a highlight in the manual of the 996 clubsport cage installation procedure and Porsche already had dressed those bars with a suitable padding. )
Also it was very clever of you to install a quality SFI/FIA approved cage padding in all close bars.
Now once you find the cup car and decide to sell this one someone is going to have a well prepared and ready track car ! : )
12-19-2010, 02:05 PM
#9
Rennlist Member
Another great post!
With all the weight-saving work you've done, why do you still have the heavy OEM CDR-24? That and speakers has to add up to another 10 pounds...
With all the weight-saving work you've done, why do you still have the heavy OEM CDR-24? That and speakers has to add up to another 10 pounds...
12-19-2010, 06:10 PM
#11
Rennlist Member
Join Date: May 2006
Location: sydney
Posts: 6,222
Likes: 0
Received 0 Likes
on
0 Posts
great post and great job!
funny how things never bolt straight in, ever!
savyboy- not sure about the 7, but in the 6 the visors can be retained, they are just set permanently in the down position with the bar sitting on top.
funny how things never bolt straight in, ever!
savyboy- not sure about the 7, but in the 6 the visors can be retained, they are just set permanently in the down position with the bar sitting on top.
12-19-2010, 06:29 PM
#12
GT3 player par excellence
Lifetime Rennlist
Member
Lifetime Rennlist
Member
12-19-2010, 06:50 PM
#13
Rennlist Member
Don't forget to subtract the carpet also... that's good for a couple lbs.
12-19-2010, 07:24 PM
#14
Addict
Rennlist Member
Rennlist Member
Thread Starter
Man, i love those full caged RS porsches!
I kept my sun visors on, however there is no chance of using them.
I also kept my factory seat belts, however one should only use harness with full cage when non helemt street driving.
I noticed you drilled through the floor instead of welding the the tabs to the floor. The sandwich technique you applied here is actually the stronger way to secure a bolt in cage IMHO.
Interesting that P motorsports decided to give you the .1 front and not the newer semcon .2 front..... At least with the single bar, exit and entry is still fair. The semcom .2 front makes entry and exit like that of a cup car which sucks for sunday drives. (great for door to door contact racing though).
I kept my sun visors on, however there is no chance of using them.
I also kept my factory seat belts, however one should only use harness with full cage when non helemt street driving.
I noticed you drilled through the floor instead of welding the the tabs to the floor. The sandwich technique you applied here is actually the stronger way to secure a bolt in cage IMHO.
Interesting that P motorsports decided to give you the .1 front and not the newer semcon .2 front..... At least with the single bar, exit and entry is still fair. The semcom .2 front makes entry and exit like that of a cup car which sucks for sunday drives.
(great for door to door contact racing though).


Wow, another amazing installation write-up from our resident Porsche Doctor Well done Mike! Looking forward to seeing that bad-boy in person!
But don't you have to be crazy to do this to an innocent car??
Oh PS- does the front cage prevent use of the OE sunvisors? And did you remove roof liner? Light enough to not be worth removing? Hassle?
Well done Mike! Looking forward to seeing that bad-boy in person!But don't you have to be crazy to do this to an innocent car??
Oh PS- does the front cage prevent use of the OE sunvisors? And did you remove roof liner? Light enough to not be worth removing? Hassle?
The front cage section will interfer with sunvisor - it will be partiall down all the time. No problem with roof liner. These cage go right up to the damn thing with 0.01mm to spare ... WOW! Great fit!
My wife will send you a hate mail when I get my Cup car lol
I ... must ... resist ... but ...
Yes, both front A pillar legs and the rear main hoop are secure to the tub floor with mounting plates and underside mounting studs
12-19-2010, 07:27 PM
#15
Rennlist Member
what a superb job!
Back in the 993 days that exactly how European club sport versions looked.
I soooooo wanted a 993 RS/CS but never managed to get one. Your car is, for me, the most perfect RS of all...
Thanks for posting this. You really made my day
JM
Back in the 993 days that exactly how European club sport versions looked.
I soooooo wanted a 993 RS/CS but never managed to get one. Your car is, for me, the most perfect RS of all...
Thanks for posting this. You really made my day
JM