When you click on links to various merchants on this site and make a purchase, this can result in this site earning a commission. Affiliate programs and affiliations include, but are not limited to, the eBay Partner Network.
I think I scored a good deal on some leather bits.
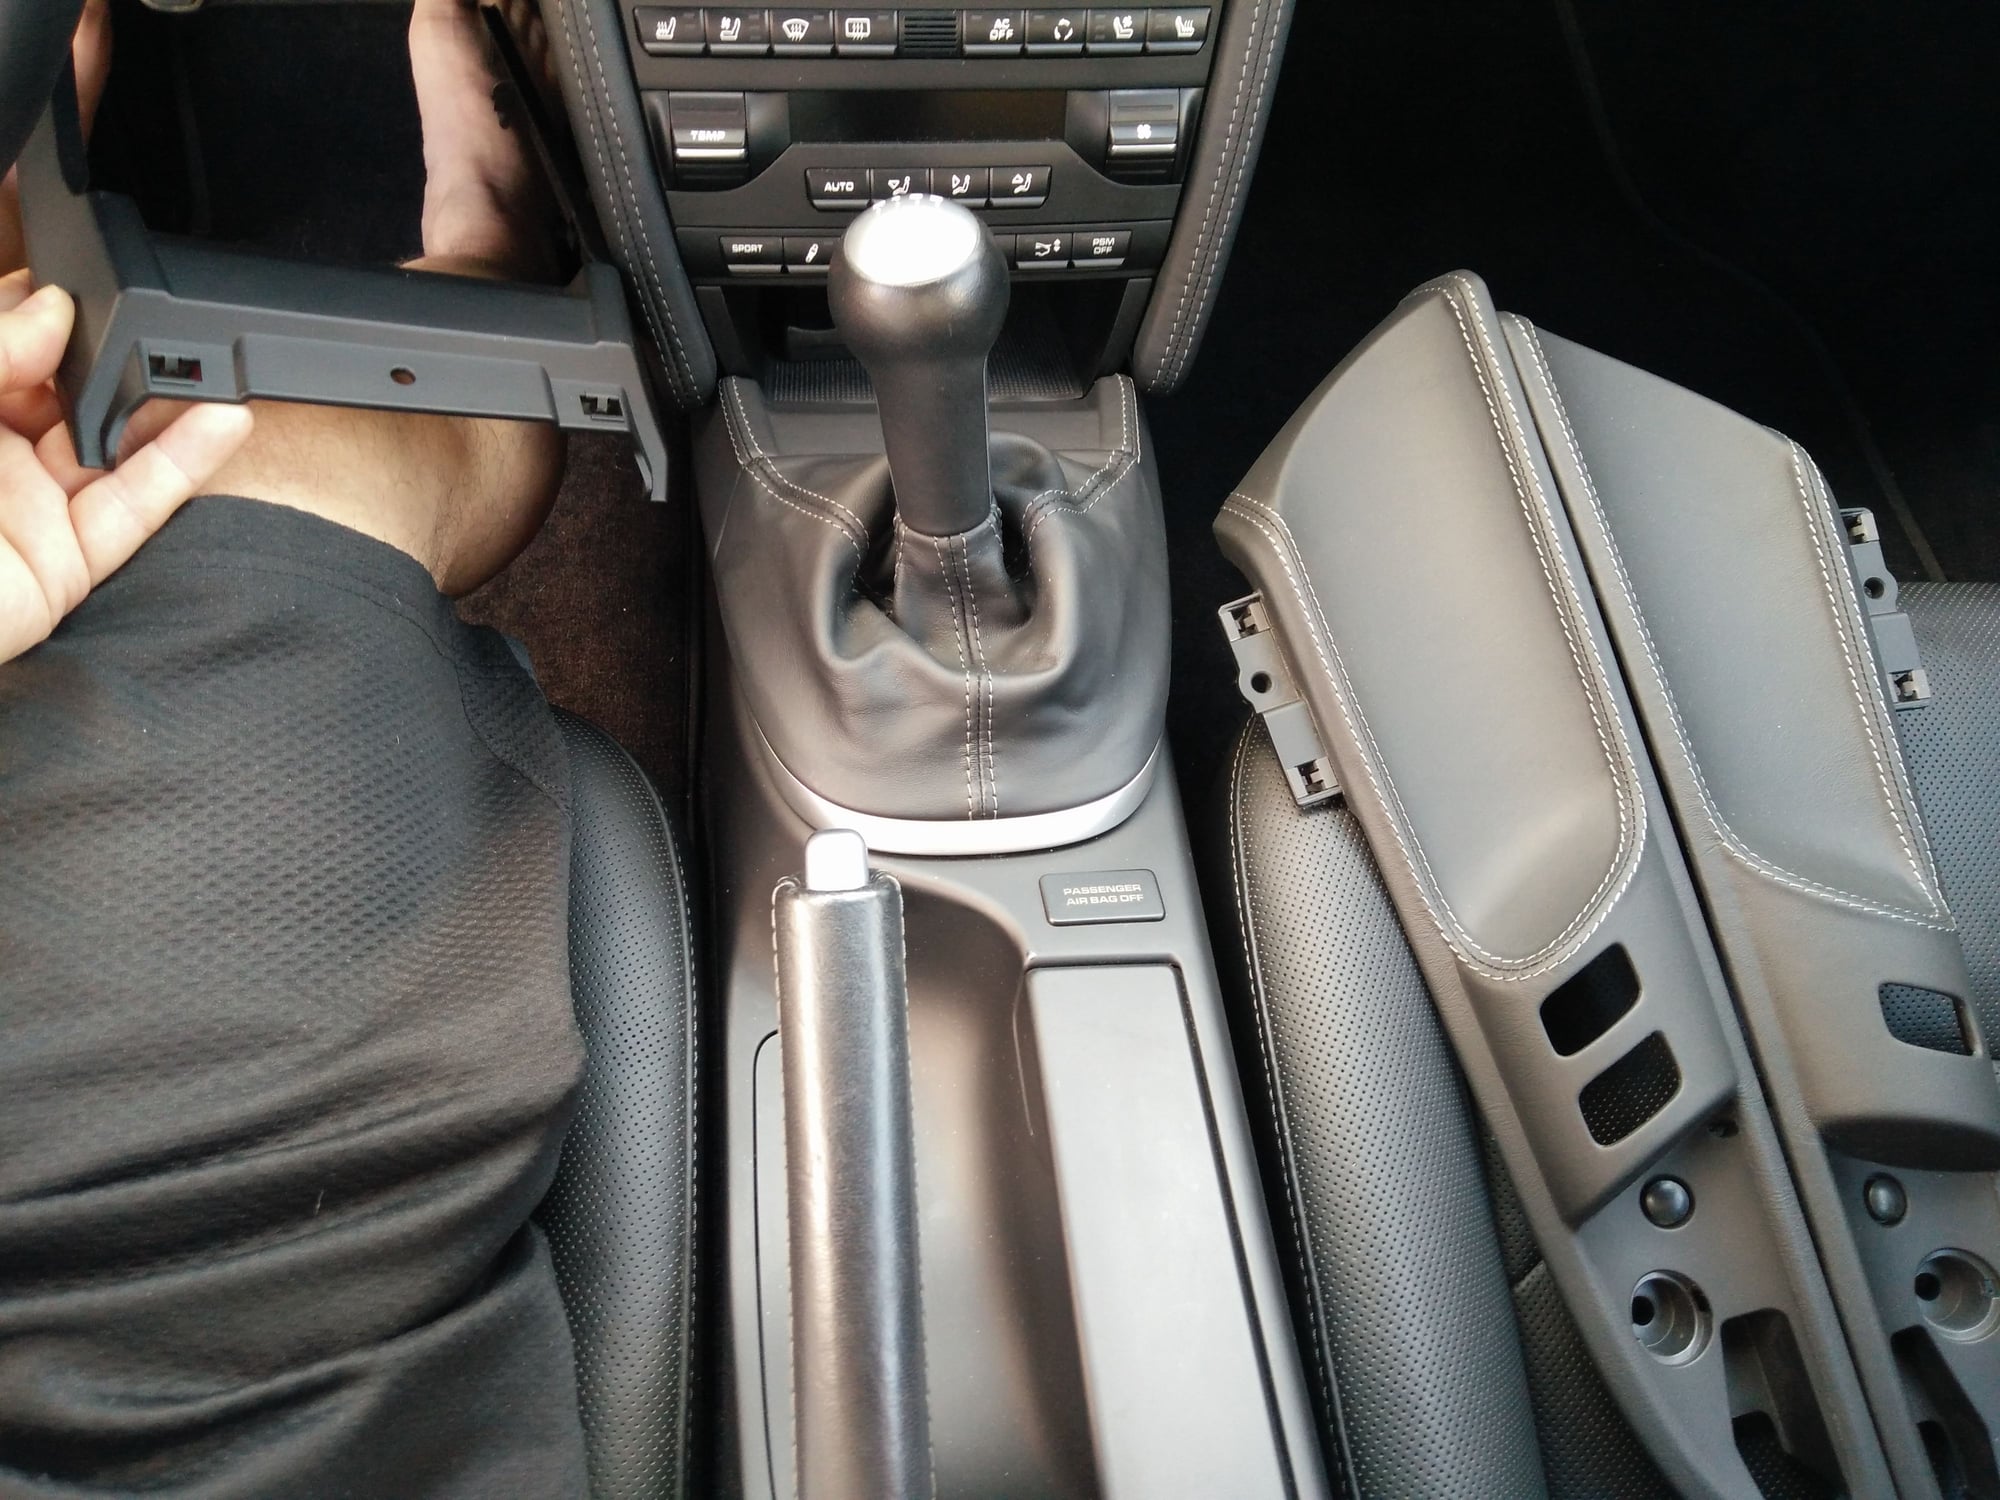
I found some new leather covered (not original) bits from Ebay a month ago, that I think I paid a very reasonable price for. I got the cubby hole frame and the 2 door handle frame for $175 shipped. Original parts would have been around $1100 or $800 for the exclusive option leather parts.
The quality is exceptional and I finally put the cubby hole frame on. The door handle parts is a lot more involving. That's why the previous owner put if off for so long in installing them. Until he finally sold the car and thus have no use for these leather bits.
I am in the market for the leather center console next. Why wasn't this included in the full leather package is beyond me.
Good for you! The "door finishers" were a little pricy from the factory but well worth it when you consider the wear and tear in those areas.
The secret to these later generation Porsches with the "slush" paint finishes used extensively now in modern Porsches is to sort out which areas see the higher wear and order them in leather. You'll appreciated it later.
Quite a while ago (like in 2013) I did a post on a simple way to upgrade the door spears using screws, making both the ones you remove reusable and resulting in a cleaner and tighter fit for the new ones without having to melt the plastic pins.
Maybe you can find it. May have also been mentioned with photos in some alcantara with silver trim door panels I sold in The Marketplace around that same time if you find that ad.
Looks like beautiful work and a terrific price! Hopefully the leather is more durable than what Porsche used OEM, which is fairly easy to scratch and fairly hard to repair (black is somewhat easier than other colors).
My door spears so far are not too bad, but when the time comes I'll remove the silver opener handles and mask the rest, do a strip/sand/repaint without removing the door cards. Seems entirely doable and the least fussy way to go about it.
Quite a while ago (like in 2013) I did a post on a simple way to upgrade the door spears using screws, making both the ones you remove reusable and resulting in a cleaner and tighter fit for the new ones without having to melt the plastic pins.
.
That's exactly what my Indy told me to do. trim the pegs a little and use screws to secure the new pc to the door. I will try to search your old post for reference.
Good for you! The "door finishers" were a little pricy from the factory but well worth it when you consider the wear and tear in those areas.
The secret to these later generation Porsches with the "slush" paint finishes used extensively now in modern Porsches is to sort out which areas see the higher wear and order them in leather. You'll appreciated it later.
I saw your old post and could not pull the trigger to buy the center console from Suncoast. It is a bit pricey to say the least. I will keep looking to see if any comes up. It like a treasure hunt every time I go to Ebay.
I really hate the rubberized paint in my car. Especially around the key hole and around the seat belt buckle, they all look worn.
I used a soldering iron to remove the old one by melting the attachment points. Then I used it again to melt the new one into place. Wasn't too hard, just made sure it was completely aligned before melting the pegs.
Good find on on the leather parts. I would love to have the door spears.
That's exactly what my Indy told me to do. trim the pegs a little and use screws to secure the new pc to the door. I will try to search your old post for reference.
That thread also includes links to another thread for black panels that includes pics, and to a Shutterfly share album on the alcantara and silver trim pieces with lots of pics.
Wow, the screw method seems a lot neater and easier. I will give it a try this weekend, and share my result with you guys.
Put some thin type of adhesive weatherstripping (like maybe the thin black silicone version from Lowe's) on top of each finished screw head when you're done. This will prevent the metal screw from vibrating against the metal door skin.
Thanks Pete, I was going to cut some washers with the rubber from an inner-tube to prevent vibrations. Any other tricks or warnings in regard to pulling the door card out? Do I need to buy some door fasteners ahead of time? would they break easily?
Thanks Pete, I was going to cut some washers with the rubber from an inner-tube to prevent vibrations. Any other tricks or warnings in regard to pulling the door card out? Do I need to buy some door fasteners ahead of time? would they break easily?
Anything that will isolate the metal screw head from the door will work fine. I used this
and yes, you'll want to have a few of these handy as a couple will likely break during removal
When you're melting the original rivets with the soldering iron, use a trim tool between the door spear and door to create a little bit of pressure. This will let you know exactly when the melted rivet releases and pull it away a little so it doesn't reattach when the plastic cools.
Also, make sure you get all the panel attachment screws out before trying to remove the panel so you don't damage it.
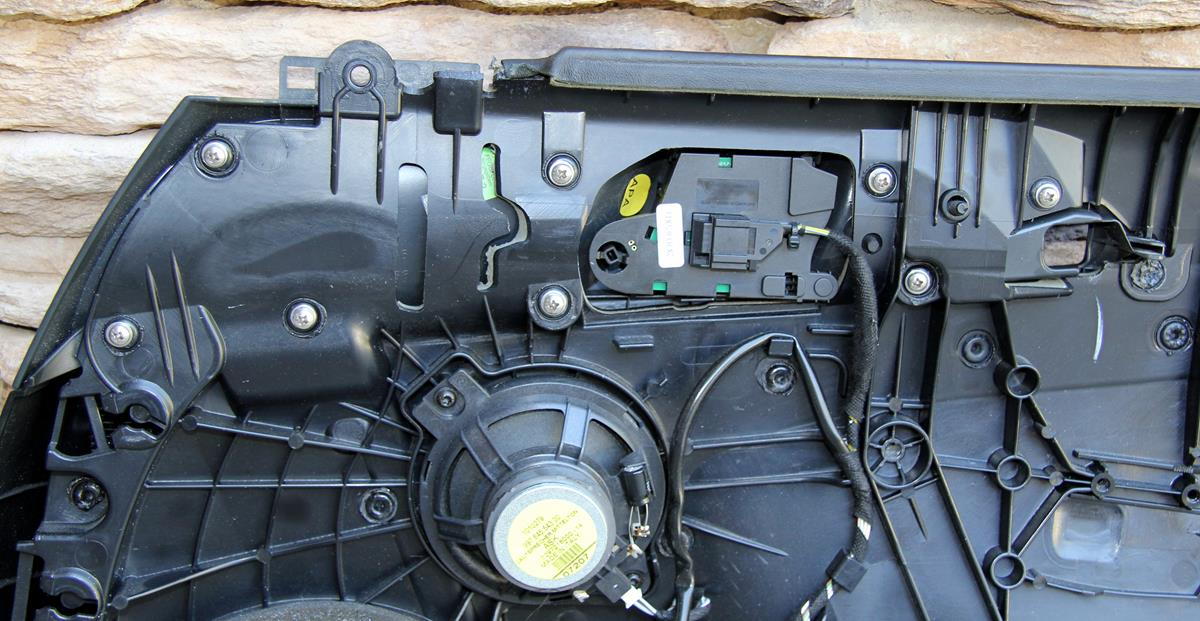
Once the panel is loose from the door, it's easier to remove the three torx screws that attach to the plastic end that the handle release cable attaches to, than to remove the actual cable end. Upon reinstallation, temporarily fit the inside door handle back onto the post that holds it so it aligns properly with the new door spear, before tightening those three Torx screws back down, as they allow for some adjustment as to how the handle fits with the door spear. Also, make sure the tiny little pin molded into the back of the handle goes into the hole in the door spear. This is where the microswitch that makes the window drop when pulling the interior handle is located.

 03-28-2017, 06:11 PM