
TranzIt BLU HF Install in a 997.1TT - PCM 2.1
 04-01-2014, 06:00 PM
#1
Agent Orange
Rennlist Member
Rennlist Member
Thread Starter
I have the TranzIt BLU in my 993 and love the integration with the period correct factory radio. I wanted to do something similar in the 997 but it's been a busy few months and just haven't had the time. Mind you I bought the unit over 4 months ago... Another member posted that he successfully installed it which prompted me to get to it.
Please use the install instructions that come with the BLU HF along with this DIY.
Along with the BLU HF you need a Motorola to Fakra antenna adapter for the PCM, found here: http://www.discountcarstereo.com/BAA2223.html
I won't explain how to remove the PCM, there are many good DIYs such as this one:
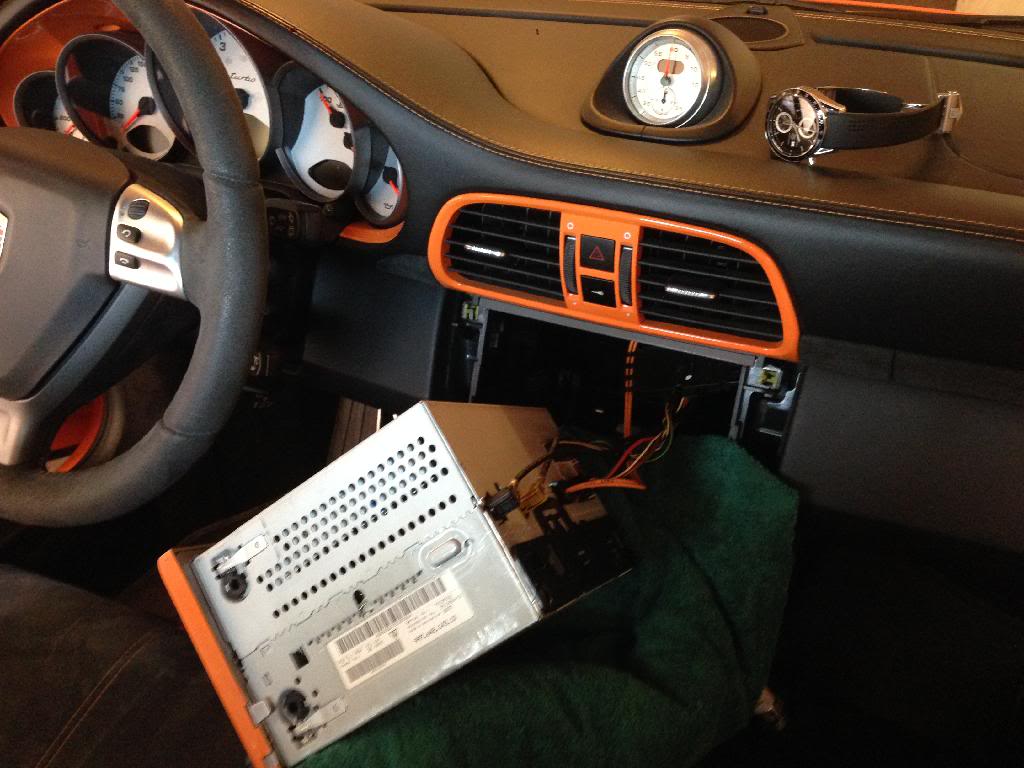
Now, once you remove the PCM you need to let it rest on a soft surface. A green towel works best:
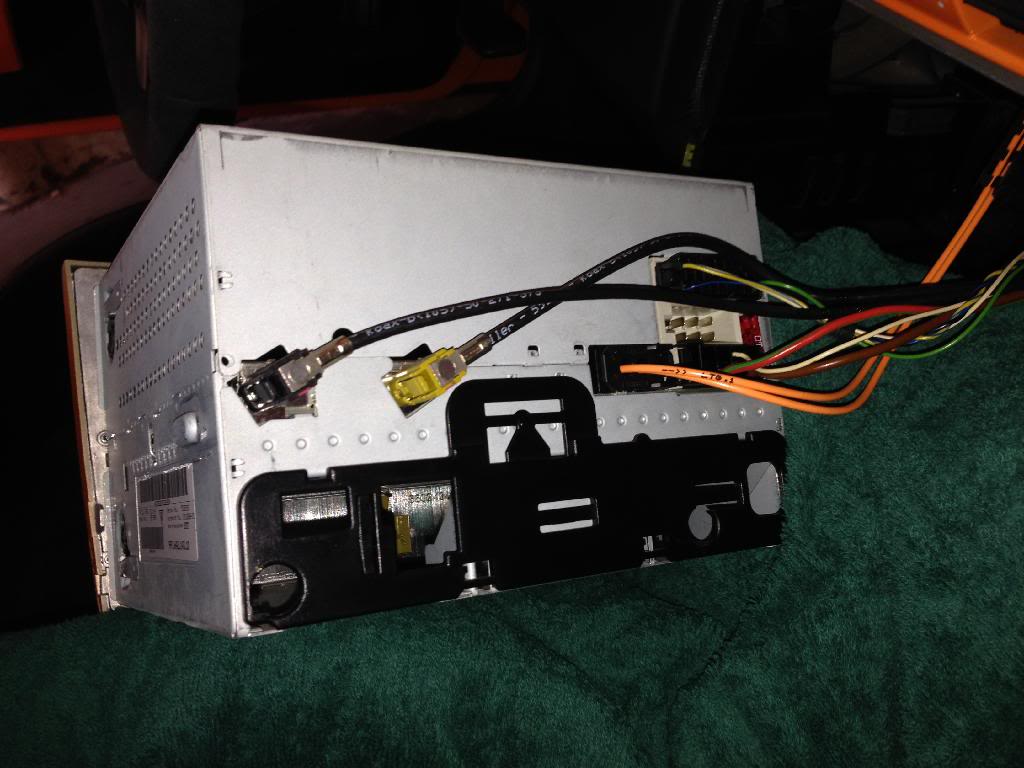
In the photo below you can see the wiring harnesses and antennae. You need to remove the black antenna on the left and then use the Motorola to Fakra adapter:
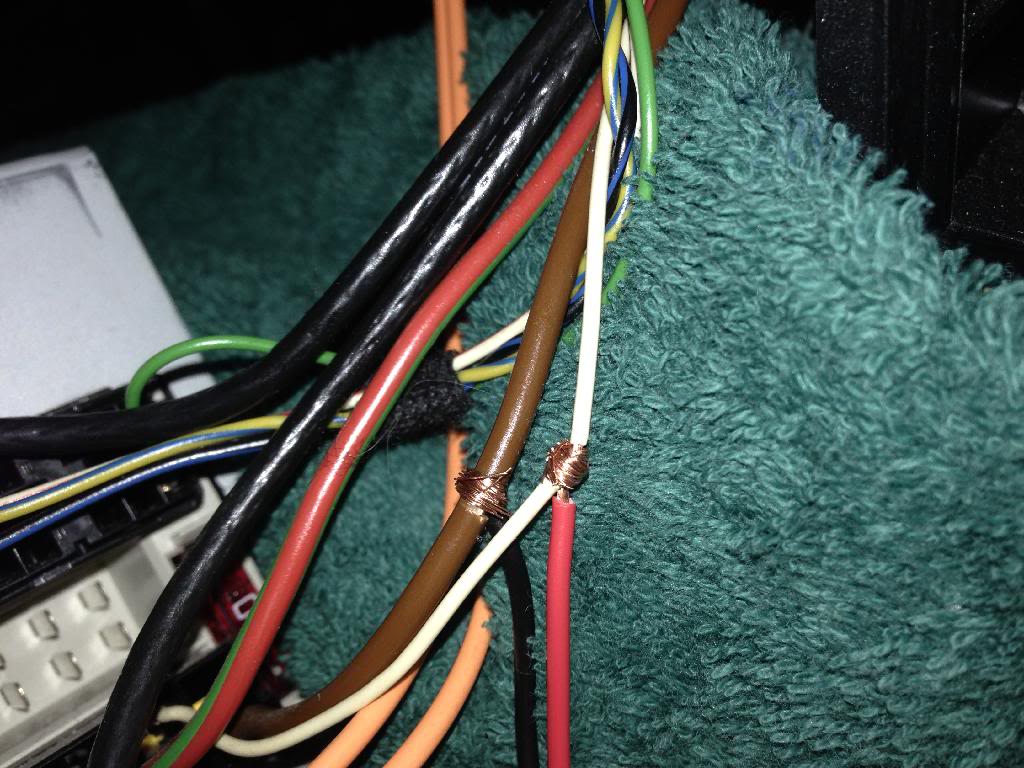
Then you need to tap into the PCM wiring harness - ground is brown, accessory power is white:
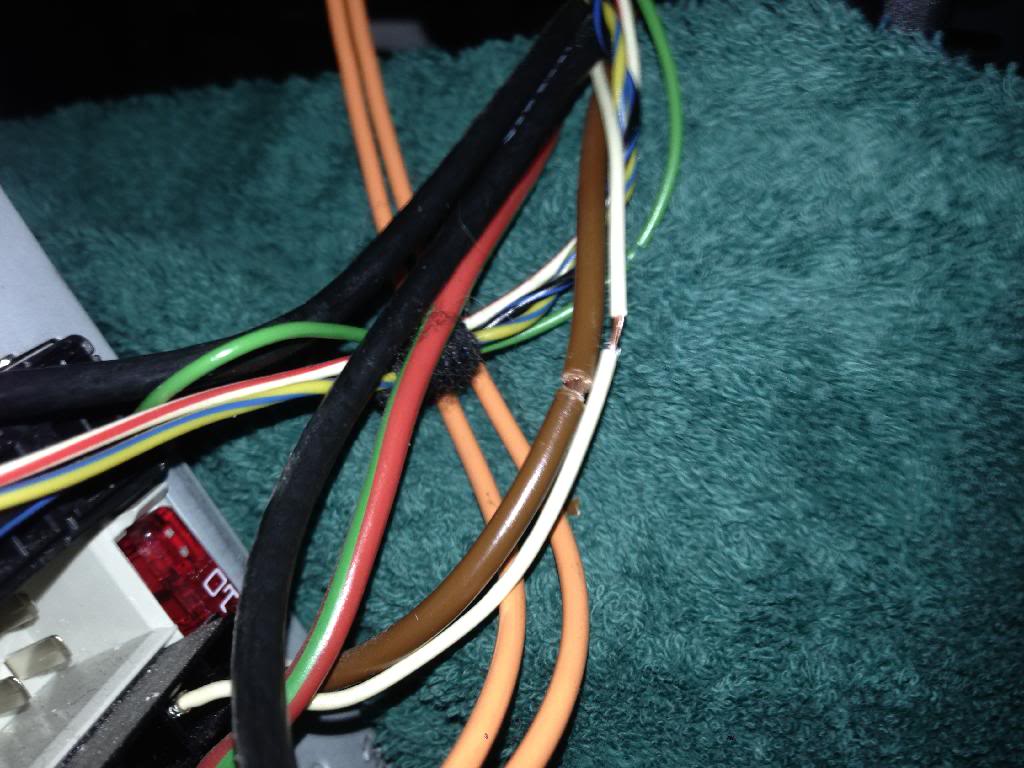
Wires connected:
And insulated:
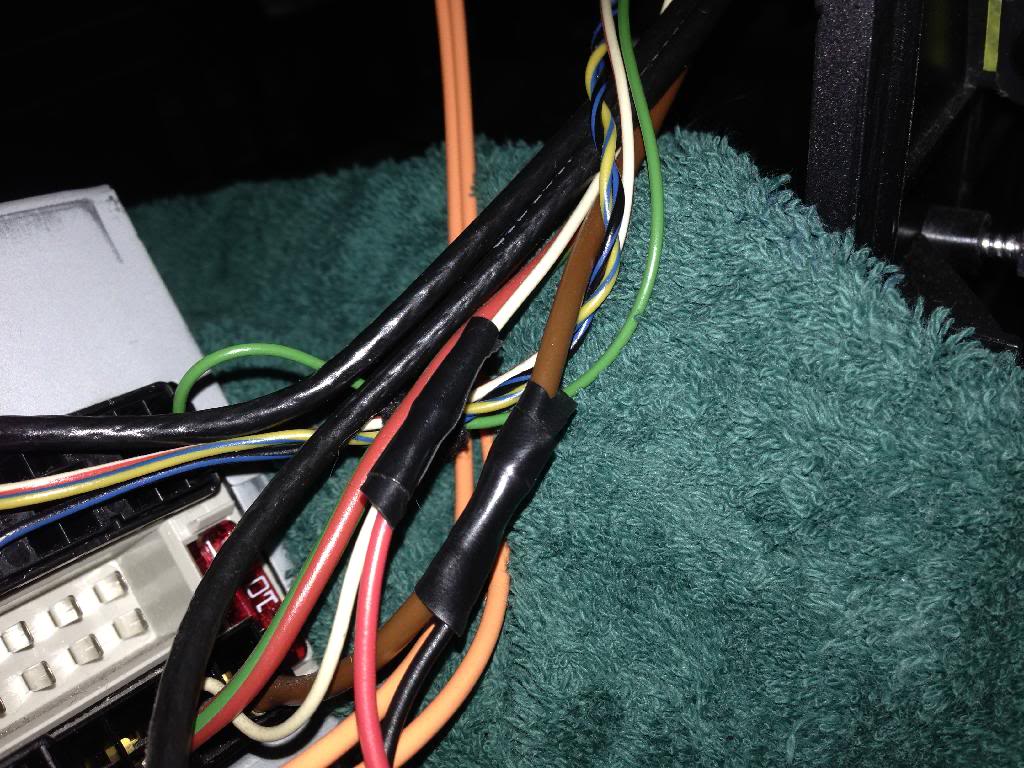
Other types of connectors also work but I prefer the above method.
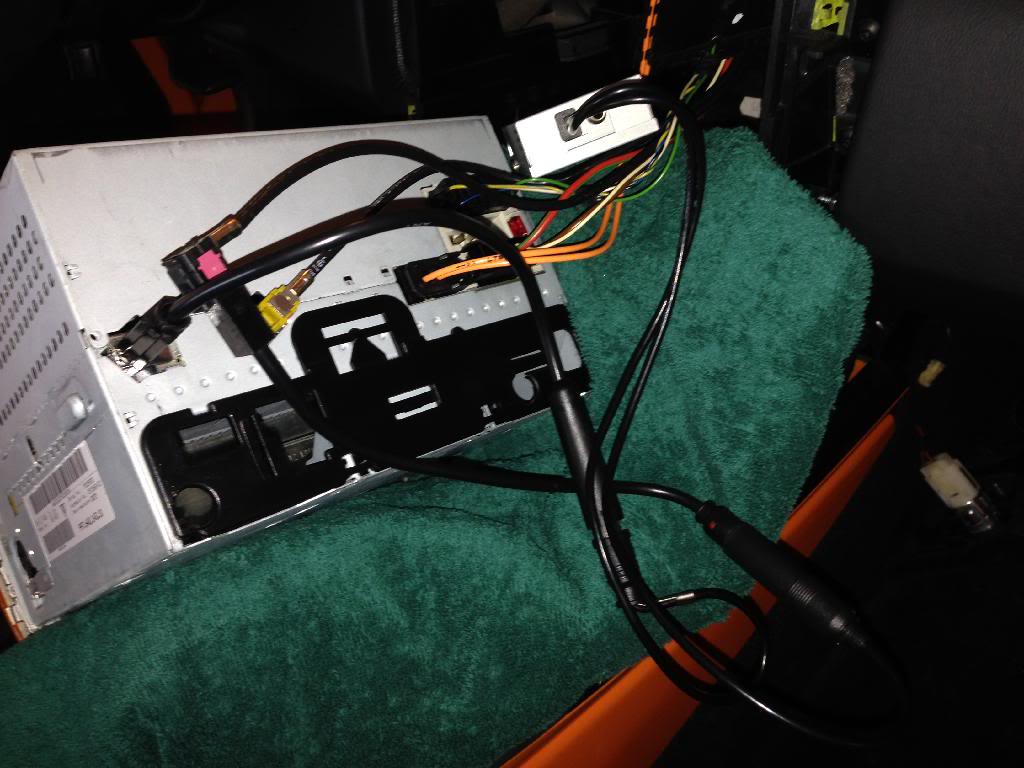
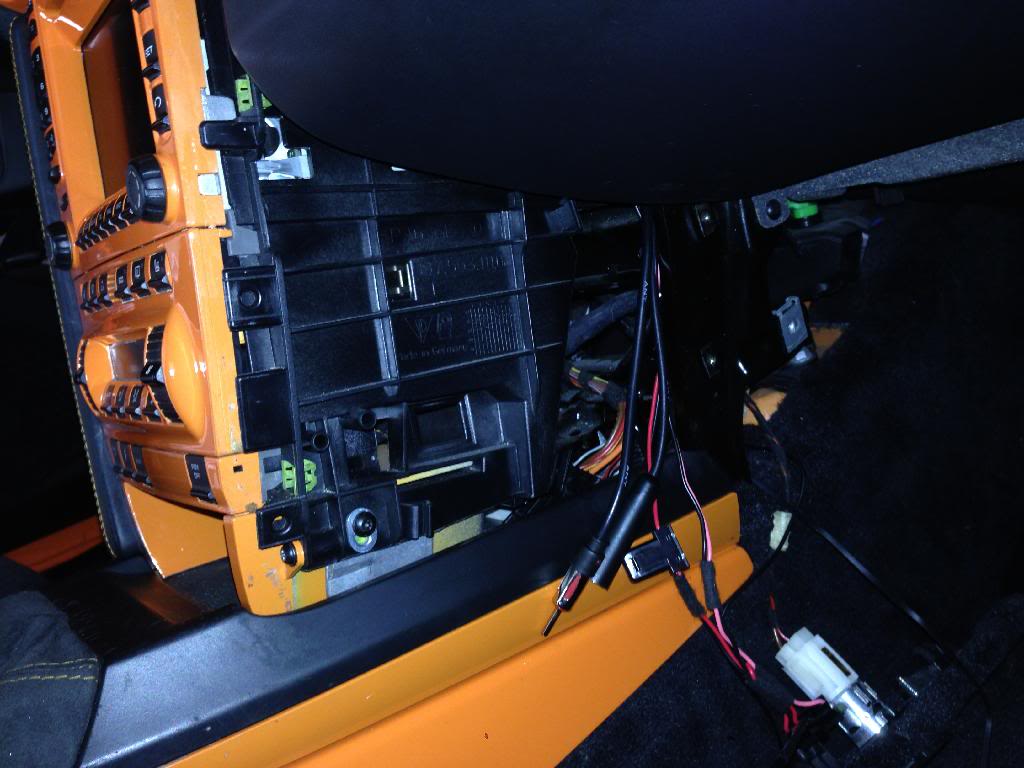
Now it's time to put the PCM back in and route the cables behind it. Thankfully there is plenty of space!
I decided to put the green button next to the steering column for a more stealthy look:
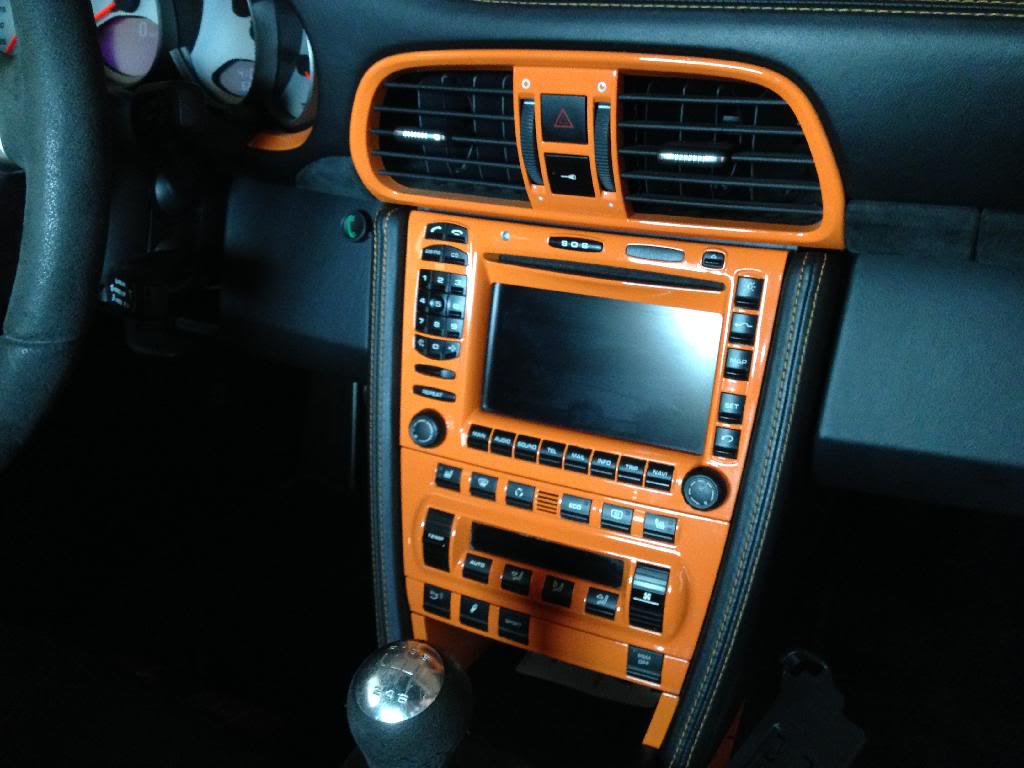
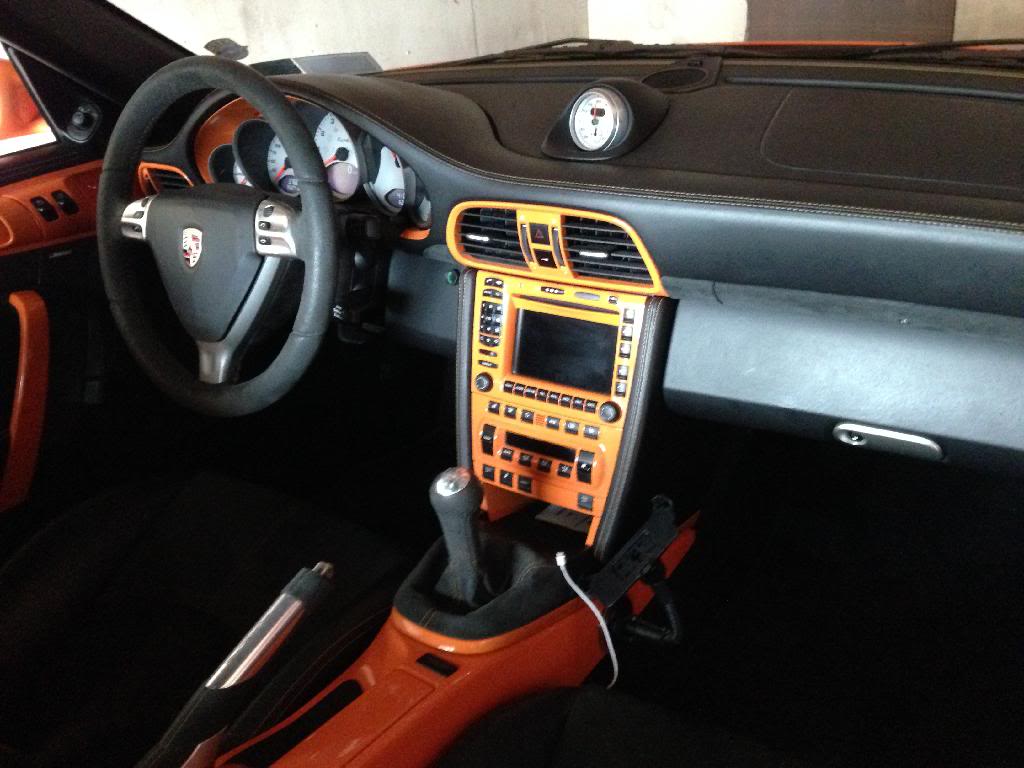
And here is the finished install:
Took me about 1.5 hours at a very leisurely pace including routing of the microphone to the sun visor.
The sound quality is good, the TranzIt is very easy to use and it doesn't require any coding, or other crazy things.
Any questions, do let me know!
Please use the install instructions that come with the BLU HF along with this DIY.
Along with the BLU HF you need a Motorola to Fakra antenna adapter for the PCM, found here: http://www.discountcarstereo.com/BAA2223.html
I won't explain how to remove the PCM, there are many good DIYs such as this one:
Now, once you remove the PCM you need to let it rest on a soft surface. A green towel works best:

In the photo below you can see the wiring harnesses and antennae. You need to remove the black antenna on the left and then use the Motorola to Fakra adapter:

Then you need to tap into the PCM wiring harness - ground is brown, accessory power is white:

Wires connected:

And insulated:

Other types of connectors also work but I prefer the above method.
Now it's time to put the PCM back in and route the cables behind it. Thankfully there is plenty of space!

I decided to put the green button next to the steering column for a more stealthy look:

And here is the finished install:
Took me about 1.5 hours at a very leisurely pace including routing of the microphone to the sun visor.
The sound quality is good, the TranzIt is very easy to use and it doesn't require any coding, or other crazy things.
Any questions, do let me know!
Last edited by ilko; 04-01-2014 at 09:59 PM. Reason: Fixed image links...
 04-01-2014, 08:23 PM
#5
8th Gear
Join Date: Jun 2011
Location: Calgary Alberta Canada
Posts: 8
Likes: 0
Received 0 Likes
on
0 Posts
Thank you very much for the install info. I`ve ordered one of these kits as well and hope to be able to do the install myself. Your tutorial will prove to be very helpful. Also ordered the antenna adapter kit so i`m properly prepared.
Now I just have to wait patiently for the car to arrive from Vancouver....
Now I just have to wait patiently for the car to arrive from Vancouver....
04-01-2014, 08:27 PM
#6
Great pics! For the life of me I couldn't fish the mic wire through my A-pillar and didn't want to pull the trim piece down so I mounted the mic inside the instrument cluster cowl. And I soldered the power wires, just because I'm a little OCD  . I put my control button on that little piece of dash trim right above where you put yours, but mine is plastic not alcantera. I agree the unit is awesome and the price can't be beat. I'd been debating a Dension forever but kept hearing about programming and glitches etc. Glad I found out about this one. There is an app you can get for your phone that lets you change the frequency input, but I haven't bothered, it works fine for me on the default. Thanks again for the pics. I don't have a photo upload account.
. I put my control button on that little piece of dash trim right above where you put yours, but mine is plastic not alcantera. I agree the unit is awesome and the price can't be beat. I'd been debating a Dension forever but kept hearing about programming and glitches etc. Glad I found out about this one. There is an app you can get for your phone that lets you change the frequency input, but I haven't bothered, it works fine for me on the default. Thanks again for the pics. I don't have a photo upload account.

Trending Topics
04-01-2014, 08:54 PM
#8
Agent Orange
Rennlist Member
Rennlist Member
Thread Starter
Snaking it up the driver side A pillar was very easy. Just tuck in the wire. The trim on the driver side was actually a little loose compared to the passenger side so that helped.
Here's the web site outlining the features: http://www.isimplesolutions.com/TranzItBLUHF/
Here's the web site outlining the features: http://www.isimplesolutions.com/TranzItBLUHF/
04-01-2014, 08:59 PM
#9
Nordschleife Master
i'll likely mount the mic dead centre of the steering column, seems (relatively) the easiest (but that probably means i would have cut the mic cable and resplice, so i'll have to re-think this).
benZ, your car being '05 do you have the 'passenger air bag off' indicator on the centre console? mine doesn't so i'll likely just drill the control button right in there.
btw guys it as 80$ on ebay + another 14$ for the motorola->euro antenna adapters. so 94$ shipped in USA.
ill update with photos by the weekend.
Great pics! For the life of me I couldn't fish the mic wire through my A-pillar and didn't want to pull the trim piece down so I mounted the mic inside the instrument cluster cowl. And I soldered the power wires, just because I'm a little OCD . I put my control button on that little piece of dash trim right above where you put yours, but mine is plastic not alcantera. I agree the unit is awesome and the price can't be beat. I'd been debating a Dension forever but kept hearing about programming and glitches etc. Glad I found out about this one. There is an app you can get for your phone that lets you change the frequency input, but I haven't bothered, it works fine for me on the default. Thanks again for the pics. I don't have a photo upload account.
. I put my control button on that little piece of dash trim right above where you put yours, but mine is plastic not alcantera. I agree the unit is awesome and the price can't be beat. I'd been debating a Dension forever but kept hearing about programming and glitches etc. Glad I found out about this one. There is an app you can get for your phone that lets you change the frequency input, but I haven't bothered, it works fine for me on the default. Thanks again for the pics. I don't have a photo upload account.
04-01-2014, 09:36 PM
#10
Agent Orange
Rennlist Member
Rennlist Member
Thread Starter
The microphone is closest to your face if mounted on the visor, so you'll get the best sound quality that way. It's also more difficult to install in the steering column IMO.
04-02-2014, 01:59 PM
#11
My trim piece (full leather) is extremely tight to the glass and wouldn't budge to hold the wire, which refused to stay tucked, kept falling out
 I suppose I could have forced it but I opted not to. Before closing up the install I test-called with the mic in several locations, while driving with the windows open, and people said there was the most clarity and least background noise where I eventually mounted it in the instrument cluster, vs clipped to the visor. It may be due to the way I sit. I'm short but with a long torso, so I sit close to the dash but low. The mic between the analog speedo and tach is in line vertically with my mouth, about 18" fore and 2" left, and the cluster shroud blocks out a lot of extraneous noise. But it does pick up the turn signal clicking pretty loudly. That's the main drawback of having the mic there. I would have liked it on the visor but I just couldn't get the trim to budge.
i'll likely mount the mic dead centre of the steering column, seems (relatively) the easiest (but that probably means i would have cut the mic cable and resplice, so i'll have to re-think this).
benZ, your car being '05 do you have the 'passenger air bag off' indicator on the centre console? mine doesn't so i'll likely just drill the control button right in there.
benZ, your car being '05 do you have the 'passenger air bag off' indicator on the centre console? mine doesn't so i'll likely just drill the control button right in there.
And no I do not have the air bag indicator on the console. I put my button on the silver plastic trim piece left of the center a/c vents and under the water temp guage. No drilling was required, it doesn't stand out visually, and I find it instinctively by feel even though it's hidden from my line of sight by the wiper stalk.
In the pic of the mic I turned on my iphone's flash so it would show up clearly. In reality it's hidden in shadow and can barely be seen. When I get time I may paint the wire sand beige that leads down into the steering column opening, just to camouflage it.
Last edited by Ben Z; 04-02-2014 at 02:17 PM.
 04-02-2014, 03:25 PM
#13
Agent Orange
Rennlist Member
Rennlist Member
Thread Starter
It's not CD quality, I'll actually try a CD of the same song and see how it differs. FM signal in general is good but not not as good as a CD. Also my songs are encoded at 128mbps AAC and from what I've read Bluetooth streaming also compresses the file. All that being said, the sound is very clear and there is no static at all. Good enough for me. And I have the Bose system.
04-02-2014, 06:19 PM
#14
Same. Bose here too. Given the acoustics and ambient noise level of the car being what they are, it's good enough for me. The sound quality is definitely a huge improvement over the FM transmitter I was using previously!


