
DIY Water Pump Replacement
 08-03-2012, 04:01 PM
#1
Instructor
Thread Starter

There is already a good walk through water pump post, but wanted to share my different spin on the job. My car has 57K miles and while the coolant level showed little to no signs of changing, after parking the car for 2 days I had one drop of red coolant at the bottom of the water pump pulley. The pump was going and wasn't worth risking trying to get more time out of it.
First, here's a very detailed run through on one way to do this. In both of these they leave the exhaust system where it is and remove other systems to help get to the pump. I was doing my 60K server and already had the mufflers off to get to the plugs, which is why I went this route.
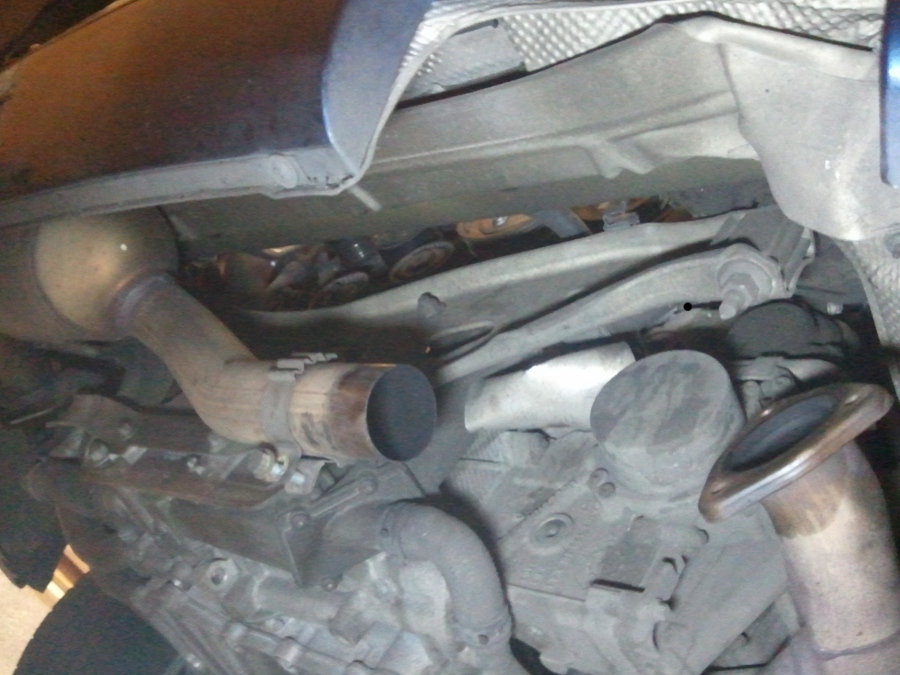
I pulled the cats off to get access to the rear engine brace.
A tip is to clean up the threads on the bolts, let some penetrating oil sit and then remove the nuts. Also, don't forget to unplug the two O2 sensors that are next to the motor mounts.
With both cats out, you're now looking at the engine brace. This is where you want to support the engine while you remove this brace. I totally removed this since it was two additional bolts and gained me a lot of working space.

You can see I already have the coolant hose off and have drained the system
Next it's easy to remove the pump and service what's needed. In my case, I had to cut the tabs on the existing gasket connecting it to another part that wasn't being removed. To do this and also to clean up the mating surface I was happy I had the additional space
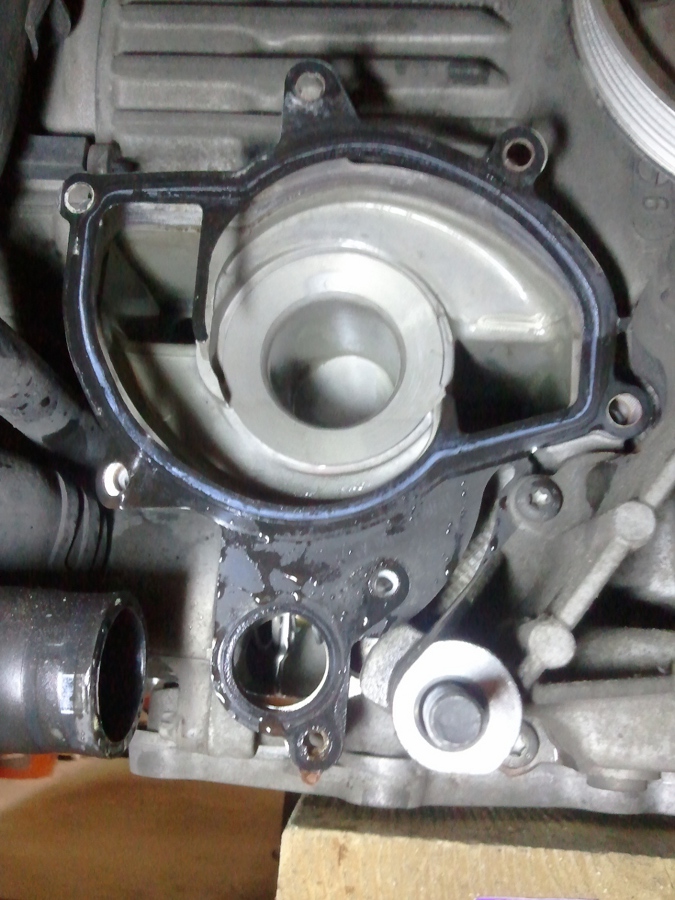
Make sure the surface is clean and smooth before you put the new pump on. You don't want to have to do this job twice!
After that, fill the system back up, burp the air out, and enjoy!
First, here's a very detailed run through on one way to do this. In both of these they leave the exhaust system where it is and remove other systems to help get to the pump. I was doing my 60K server and already had the mufflers off to get to the plugs, which is why I went this route.
I pulled the cats off to get access to the rear engine brace.
A tip is to clean up the threads on the bolts, let some penetrating oil sit and then remove the nuts. Also, don't forget to unplug the two O2 sensors that are next to the motor mounts.
With both cats out, you're now looking at the engine brace. This is where you want to support the engine while you remove this brace. I totally removed this since it was two additional bolts and gained me a lot of working space.
You can see I already have the coolant hose off and have drained the system
Next it's easy to remove the pump and service what's needed. In my case, I had to cut the tabs on the existing gasket connecting it to another part that wasn't being removed. To do this and also to clean up the mating surface I was happy I had the additional space
Make sure the surface is clean and smooth before you put the new pump on. You don't want to have to do this job twice!
After that, fill the system back up, burp the air out, and enjoy!
 08-04-2012, 05:19 PM
#2
Nice writeup and pictures! With USMC's and your DIYs it will make the job quite doable. With the brace off my big hands will have a lot more room to work! Hope they add this to the DIY index.
 10-25-2012, 11:57 PM
#4
Rennlist Member
MoneyPit, did you have to drop the engine a bit until the rear engine brace cleared the engine mount bolts, before you could pull the engine brace laterally off the studs in the engine block?
10-26-2012, 08:36 AM
#5
Instructor
Thread Starter
Hi Dave - I didn't recall having to drop the engine any significant distance. Once all the nuts on the brace are out, it will swing back on the movement of the engine mounts to clear the studs on the engine. I maybe moved the engine a little just to help with the alignment of the brace, but it came off easily.
10-26-2012, 08:57 AM
#6
Instructor
Join Date: May 2010
Location: Sunny South Florida
Posts: 184
Likes: 0
Received 0 Likes
on
0 Posts
I admire your ingenuity, Money Pit. I haven't done this repair yet but, like helispud said, between the two different write-ups I may give it a try. Thanks for posting.
10-27-2012, 09:18 AM
#7
Instructor
Thread Starter
Thank you. It's honestly not a hard job. The three nuts on the exhaust flanges are the hardest part, but soaking them with oil and waiting fixed that. It's a great money saver and really not one of the more difficult jobs. If you do try it and run into problems, I'm sure the board can help
Trending Topics
04-06-2014, 10:08 PM
#8
Finally got around to replacing the water pump today at 52227 miles and 7 years 4+ months. While I was in there I changed the serpentine belt which was original to the car and the 3 tensioner and idler pulleys which were somewhat worn.
Also put in a new air filter.
Except for the color of the impeller I couldn't see any difference between the old pump Vs. the new pump. No wear and the bearing had no play whatsoever.
The only big problem I had was with the Tension roller for the belt. The new replacement bolt needed a 16mm wrench, so when I started to remove the roller I used a 16mm wrench. all I did was loosen the bolt slightly and then couln't get it off. Fortunately I remembered a post where someone else had the same problem. The old bolt needed a 15mm wrench. Once I used that I was able to get the old roller off. I couldn't see how I could get the old bolt out so I just put a bit of Loctite on the old bolt, and put the new pulley on.
I want to thank Doug_B-928, USMC_DS1, Money Pit 951 and all the others who who taken the time to take the picturesand write up such excellent DIY's. Makes these jobs doable in the home garage rather than driving 350 miles rountrip to the closest dealer.
Last edited by helispud; 04-07-2014 at 10:50 AM.