When you click on links to various merchants on this site and make a purchase, this can result in this site earning a commission. Affiliate programs and affiliations include, but are not limited to, the eBay Partner Network.
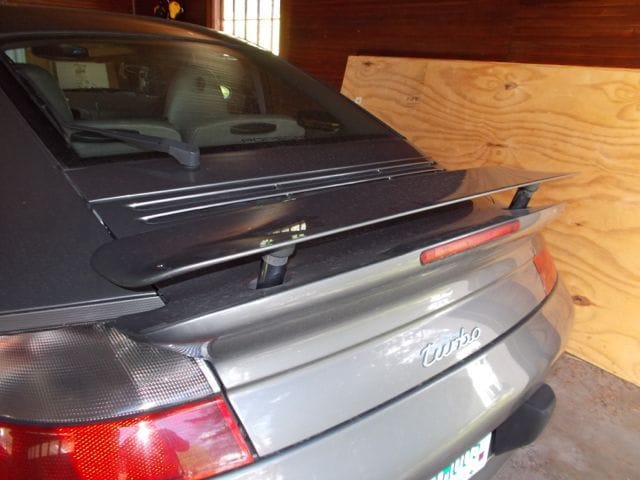
So, 5 months after taking delivery of my car, my wing has finally risen like Lazarus from the dead.
One reason I got the car for a good price, was because it had some major-cost things to be addressed. One was the clutch, and another was the fact that the wing was non-operational.
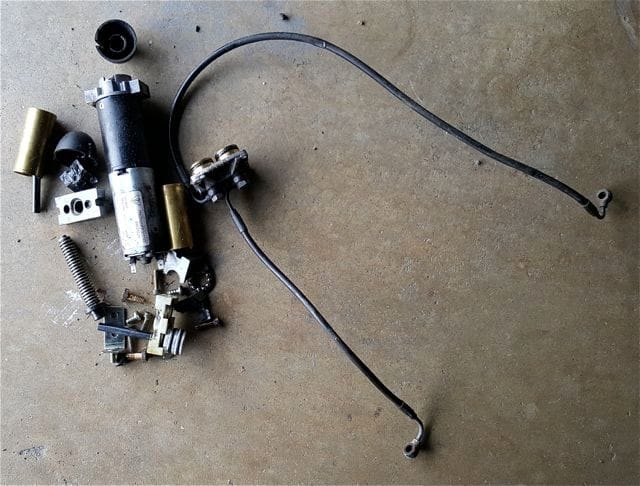
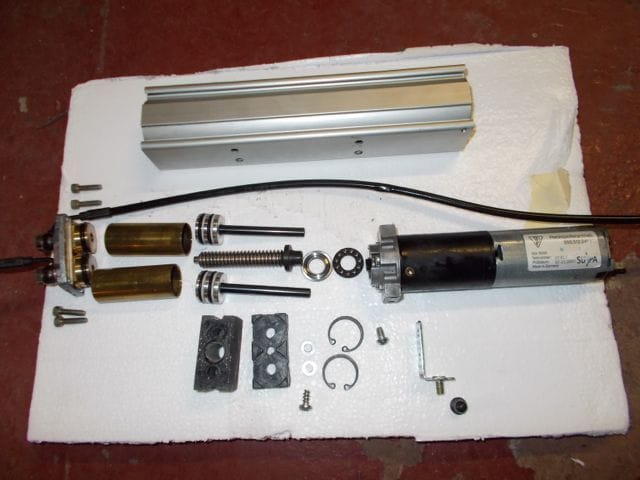
Here is a picture of what the dealer's "expert techs" left me with after they had (obviously unsuccessfully) attempted a repair:
Aside from the fact that they had managed to lose various fasteners, the main driving block was shattered, and the white support block had scary cracks in it. Not that this is any of their fault, but over the phone they told me that it might just need new seals... Oh, and they failed to realize that they had also misplaced the main housing. Fortunately, when I gave them pictures of what was missing, they were able to find that part.
There were a couple of places that could do a full rebuild (including fabricating the need plastic blocks, but all-in all of them were north of $700 to do the job, and that seemed like a lot to me. Particularly, when the only really challenging part seemed to be the broken blocks.
After musing about different possible approaches, I decided the easiest thing was just to cast new ones.
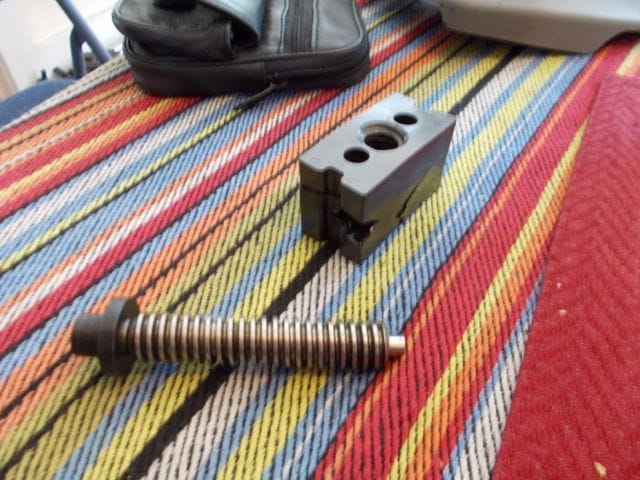
The first step was just to tack-glue all the broken bits together, and fill-in all the voids with 5-min epoxy, so that I would have a solid "master" to make a mold from:
In the above, I've not filled-in with epoxy yet. You can see the large gaps where various fragments are missing.
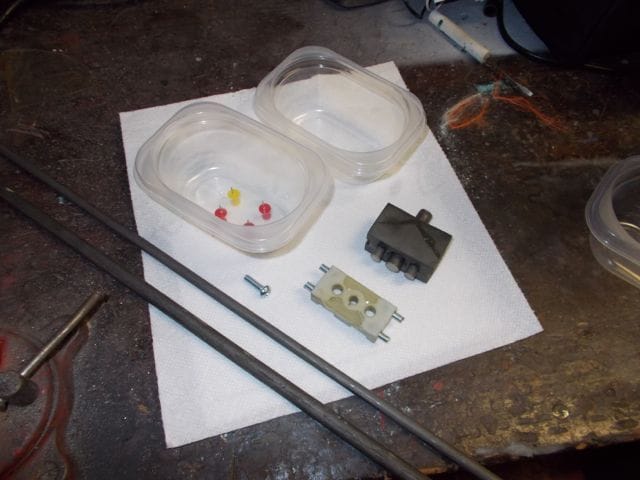
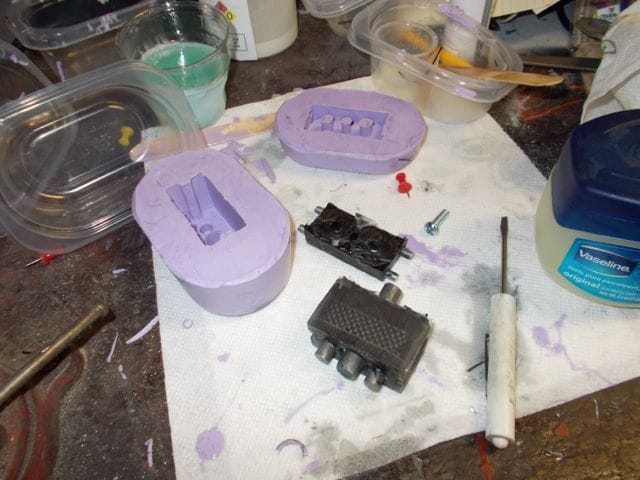
In order to get clean "bores" I decide to make the mold so that it incorporated metal slugs that would end-up being embedded in the new parts. By coating the slugs with a lubricant, it would be possible to pull them from the part, and leave clean voids. I made the slugs from a combination of metal rods and screw shafts. All from HomeDepot.
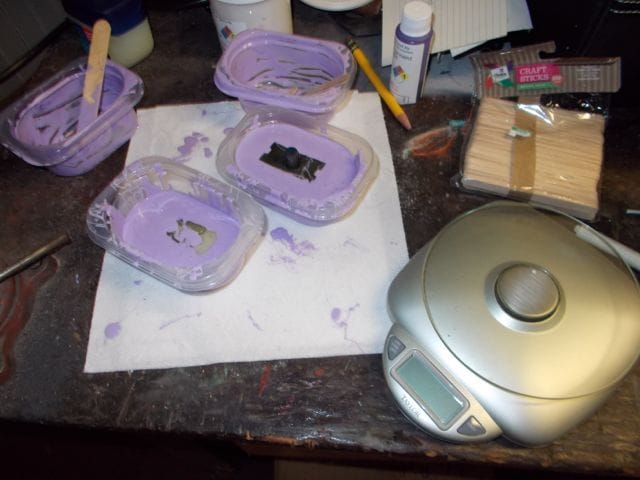
In the above, you can also see how the voids are now filled with epoxy. I also filled-in the "hollows" in the support block, so that the final part would be stronger. The plastic containers will be the form for the molds. It is a good idea for these to be a little flexible, so that it is easier to pop the molds out later.
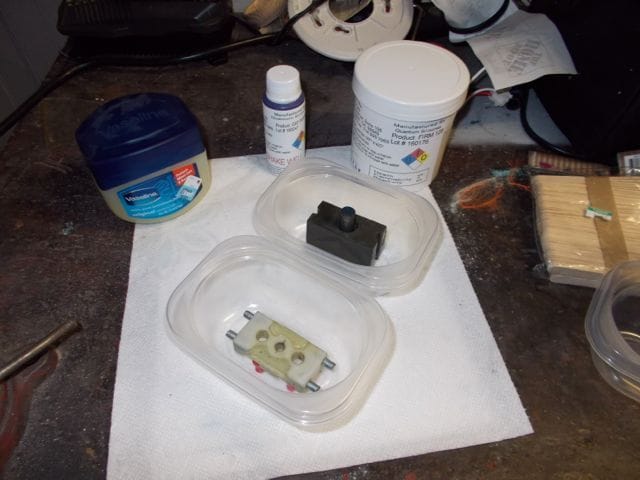
Since the parts have to be held off the floors of the containers, I pushed pins through the bottom of the container for the support block. The metal slugs on the driving block held it up already, so no pins were needed there. Important that the support block be positioned with all the complex shapes pointing down, because this is the stuff that one wants the mold to capture.
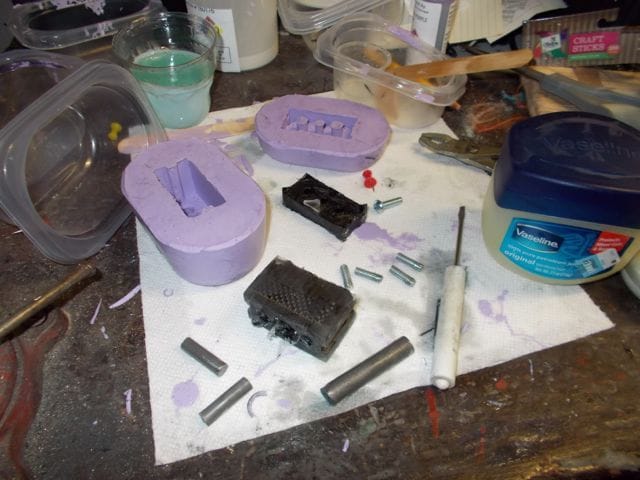
The mold will be made from a molding-rubber compound that one mixes together like epoxy and/or resin. You can see the stuff that I used above (from eBay). If you try to do this yourself, be sure the rubber is of the "firm" variety, because the final mold has to support the weight of the metal slugs when the part is cast. As you can see, I used a really high-tech lubricant for the slugs.
Since the tops of both shapes are now flat, a one-piece mold will do, and one just has to mix the rubber, and pour to the top surface of both parts.
You have to mix the rubber components by weight. Hence the little kitchen scale.
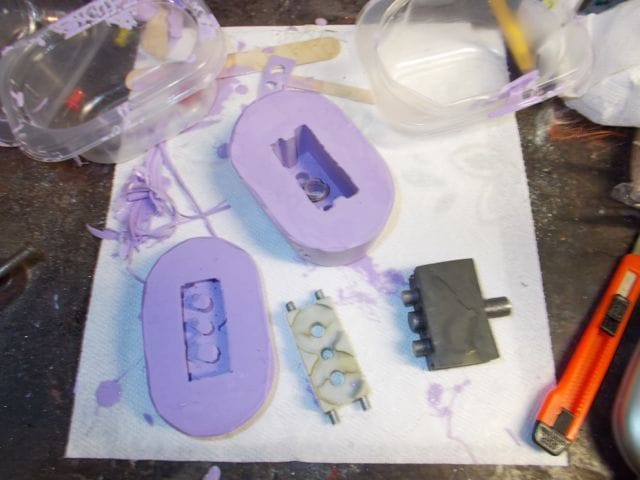
Wait a day for the rubber to set, and you can just pop-out the masters (with slugs still embedded).
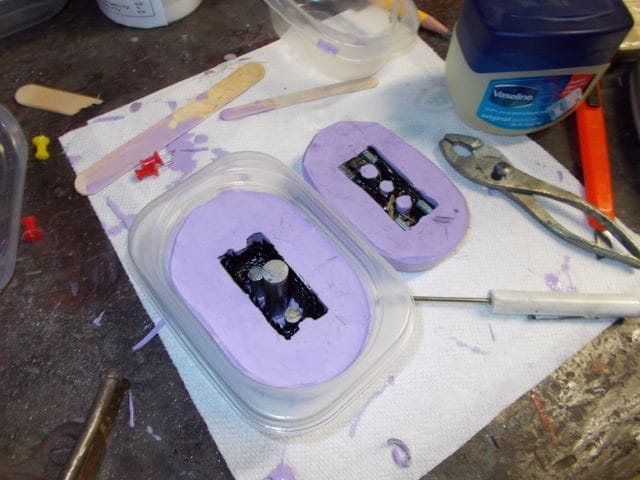
To make the new copies, one just transfers the slugs back into the molds, and fills the molds with some sort of resin. I used resin that was meant for making carbon fiber parts (again from eBay), because the strength characteristics looked good and I want to reinforce the parts with the carbon fiber, and it handily came in the kit...
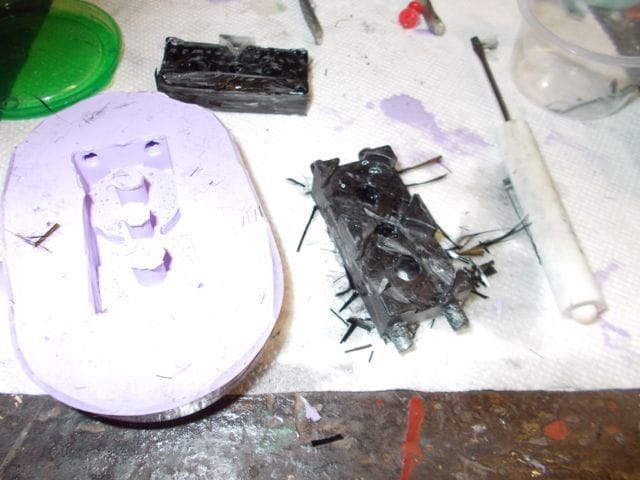
When I did the above cast, I pre-loaded the molds with carbon fiber first, and then poured in the resin. As you can see, the fibers cause the resin to trap air in the support block mold, and left me with an unusable part.
Nevertheless, pulling the slugs left me with something that looked about right.
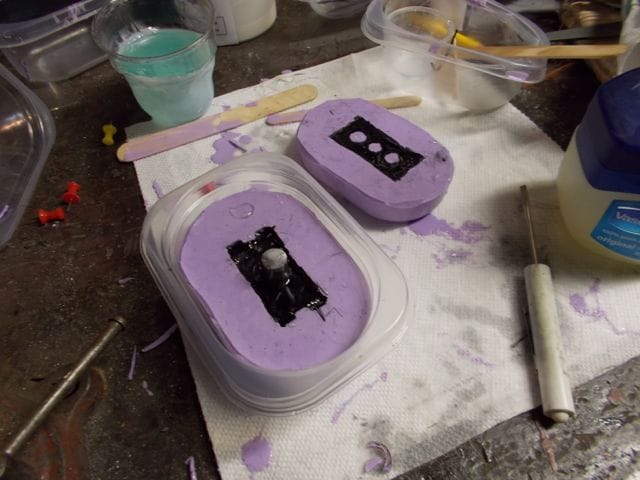
For the recast, I partially filled the mold with resin first and then stuffed carbon into all the various corners of the mold, adding resin as needed. Uglier looking, but final part was good.
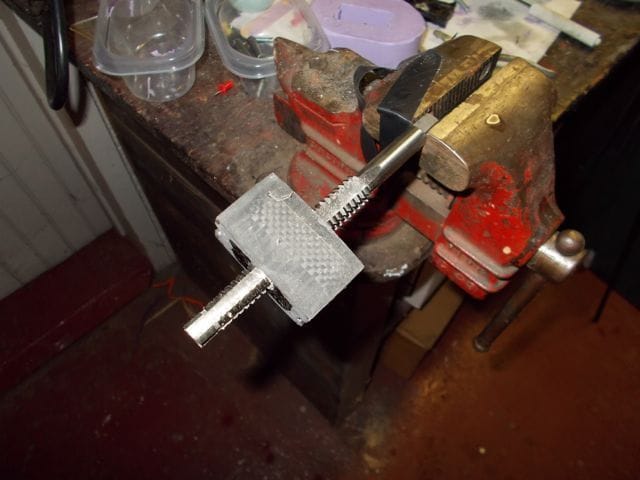
All that was left was to cut the threads in the driving block using an "economy" tap bought from China (via eBay).
Sourced the missing fasteners from Porsche (crazy expensive), changed all the o-rings, and threw-in my new parts. Some cautions if you attempt to try this yourself: be sure the thickness of the support-block is right. I cast it a little too thick, and had to sand it down to get all the screw holes to line-up right. Also do a test assembly of the parts and watch for binding. The metal slugs are heavy, and this caused them to "droop" a bit in the mold. The final result was that the bores in the driving block were a little off in position, and I had to drill-out the holes in the support block a little so that nothing would bind. Be sure to check for binding across the full range of pump motion.
All-in the repair cost me about $200, with most of that going to the cost of the Porsche fasteners. Not free, but a lot less than $700. And...
Voila!
P.S. For the historical record...
The tap that I used to cut the driver block threading was a "T14 X3"; i.e., trapezoidal threads with a 14mm diameter and 3mm pitch. Note that this type of thread shape is often referred to as "Acme threads". As I said, I got a cheap one from China ($30 if I recall right) rather than pay the $100+ for a USA made one (resin is not that hard, so I was not concerned about tool durability).
I sourced my new rubber o-rings from McMaster-Carr (www.mcmaster.com)
I bought a variety of sizes that looked plausible for the dimensions of the various parts, and after test fitting different options, settled on these two sizes:
These are claimed to be "Viton" on the website, actual manufacturer was www.usasealing.com.
One would think that the rings ought to be metric (the above are fractional inch), and in point of fact the "1 inch" guys sit in two locations with slightly different IDs, but
when all was said and done, the above seemed to me to give the best balance of sealing and moving forces; the latter tangibly stiffer than the old rings, but not so hard that assembly and testing was difficult.
I did not replace the backup Teflon(?) rings because when I took a set of calipers to them, they did not seem to dimension-out any different than the replacements that I could find.
Last edited by greencalex; 09-04-2016 at 09:53 AM.
Reason: Added parts information.
Dude! That's impressive. Having a working spoiler on these cars makes driving such a pleasure. I still check my rear view when it deploys/retracts because it's such a great feature.
Thanks to all for their high opinion of the effort.
The big bonus is that if the blocks ever break again, I still have the molds and slugs and thus can easily just make new replacements.
DaveCarrera4: yeah, it was pretty clear that the mechanics were wanting. When I asked "where is the housing and the other mounting brackets?" the response was "all the other parts were left in the car, for structural purposes"; "uh, I've looked, and those bits are not there"...
jpflip: I replaced all the rubber o-rings in the pumps, including the ones that are under the brass "tops" that are held on by the line screws. All the seals actually seemed to be pretty tight, but car has close to 150k miles on it, so it seemed like a good idea (particularly as everything was already disassembled). Did not do the rams attached to the wing, because I found it scary to try and lift the wing enough to get them off.
May plan was to fix the pump first, and then remove/reseal the rams once I could raise the wing. So far, however, I've notice no leaking from the rams, so I'm just going to leave them until some evidence of need surfaces. I did add some leak-stop to the hydraulic fluid, so maybe that has addressed any issues with the rams. I do want to mod the rams to have replaceable seals, however, so at the first sign of trouble, I'll do that.
Thanks to all for their high opinion of the effort. The big bonus is that if the blocks ever break again, I still have the molds and slugs and thus can easily just make new replacements. DaveCarrera4: yeah, it was pretty clear that the mechanics were wanting. When I asked "where is the housing and the other mounting brackets?" the response was "all the other parts were left in the car, for structural purposes"; "uh, I've looked, and those bits are not there"... jpflip: I replaced all the rubber o-rings in the pumps, including the ones that are under the brass "tops" that are held on by the line screws. All the seals actually seemed to be pretty tight, but car has close to 150k miles on it, so it seemed like a good idea (particularly as everything was already disassembled). Did not do the rams attached to the wing, because I found it scary to try and lift the wing enough to get them off. May plan was to fix the pump first, and then remove/reseal the rams once I could raise the wing. So far, however, I've notice no leaking from the rams, so I'm just going to leave them until some evidence of need surfaces. I did add some leak-stop to the hydraulic fluid, so maybe that has addressed any issues with the rams. I do want to mod the rams to have replaceable seals, however, so at the first sign of trouble, I'll do that.
keep us posted on how long this major repair lasts. When I did the refill bleed with stop leak it lasted about 2 months then spewed down my back bumper, which got me thinking...
Thanks to all for their high opinion of the effort.
May plan was to fix the pump first, and then remove/reseal the rams once I could raise the wing. So far, however, I've notice no leaking from the rams, so I'm just going to leave them until some evidence of need surfaces. I did add some leak-stop to the hydraulic fluid, so maybe that has addressed any issues with the rams. I do want to mod the rams to have replaceable seals, however, so at the first sign of trouble, I'll do that.
grenncalex, just to give you an insight of what the rams repair can be....The two actuators (rams) are a bit difficult to overhaul because the ends are swaged in place. I use a pipe cutter to cut it open, replaced the seals (which had a flat spot causing the leak) with Parker seal Viton (Pentosin resistant) Part# 2-109/V75B and reseals it with a copper ring that I found in a hardware store about one inch wide and glued it in place using JB weld (Surface area x 3900 will give the shear strength in pounds... More than sufficient!!! )
keep us posted on how long this major repair lasts. When I did the refill bleed with stop leak it lasted about 2 months then spewed down my back bumper, which got me thinking...
It seems pretty clear that stop leak is only going to slow down the leak. I only added it as some extra insurance. If one wants a lasting fix, one needs to replace the seals. Fortunately, this is not actually a hard job.
The system is actually pretty simple. Not a whole lot to go wrong. If a leak comes-up within the next 5-or-so years, I might try increasing the size of the o-rings.
The only thing that is a pain is the sealed rams, and the fragile plastic blocks. I'm disinclined to deal with the former until I know for sure that there is a leak there (so far, nothing), and with the fiber in them, it will take a lot to break the replacement blocks.
grenncalex, just to give you an insight of what the rams repair can be....The two actuators (rams) are a bit difficult to overhaul because the ends are swaged in place. I use a pipe cutter to cut it open, replaced the seals (which had a flat spot causing the leak) with Parker seal Viton (Pentosin resistant) Part# 2-109/V75B and reseals it with a copper ring that I found in a hardware store about one inch wide and glued it in place using JB weld (Surface area x 3900 will give the shear strength in pounds... More than sufficient!!! )
Thanks for the pics!
Yup, to me this job is also not that big a deal. It is just a pain to cut-open the rams.
I saw another DIY where the owner soldered threaded couplers to the cut ends of the pipe, so that in the future one could replace the seals again by just unscrewing the assembly. I probably will go that route when the time comes, as I plan to keep the car indefinitely, and such seals are a basic wear item...
Yes I saw this thread also! But I was afraid of damaging the seals with the heat produce by the welding. My welding ability is very bad ;-)
There's a couple of places in Germany that rebuild these units and sell parts. Another option is the aftermarket electric kits, unless you want to stay OEM. The oem design is over complicated IMO.
There's a couple of places in Germany that rebuild these units and sell parts. Another option is the aftermarket electric kits, unless you want to stay OEM. The oem design is over complicated IMO.
I did not break-out the molding rubber lightly...
Must have sent messages to half a dozen places, both here in the states and across the pond. Pretty much every place that I could identify as a possibility.
Queries about sourcing those blocks usually went unanswered, though in a couple of cases I did at least get the courtesy of a "no" response, or an offer to sell me complete take-off units that may or may not have had other problems.
Queries about doing some sort of rebuild or buying some sort of replacement did usually get a response, but low-bid was $700 (shipping overseas made the guys in UK/EU even more expensive).
If you know of someone who is confirmed as willing to supply parts in response to general queries (one place I corresponded with said that they had made parts for good customers, but would not do same for someone in the US), please post a link for future folks in need of them.
To me, the only things that I think Porsche should have done differently are make the system a single hydraulic circuit (though I can easily see why they went with two), and put travel switches on both rams. Other than that, everything is pretty much the min that you need for any hydraulic system.
The fact that seals are wear items is just the way things are. A lot of folks do seem to get leaks sort of early in life, but that is a quality control issue, rather than a design/complexity issue.
One could go electric of course, but I looked a few NA cars before deciding that I'd prefer a TT, and more than one of them had failed spoiler systems, so being electric does not necessarily make something more reliable. At least a hydraulic system can be easily rebuilt...
One could go electric of course, but I looked a few NA cars before deciding that I'd prefer a TT, and more than one of them had failed spoiler systems, so being electric does not necessarily make something more reliable. At least a hydraulic system can be easily rebuilt...
strongly disagree with that statement... The duty cycle of the electric ram is far beyond what the wing operation requires. They are designed for desert duty, kind of like the condition found above a turbo engine after a good run. An added benefit is repair, if a ram fails, replacement of the self contained unit takes minutes...
strongly disagree with that statement... The duty cycle of the electric ram is far beyond what the wing operation requires. They are designed for desert duty, kind of like the condition found above a turbo engine after a good run. An added benefit is repair, if a ram fails, replacement of the self contained unit takes minutes...
I was speaking more of the decisions that Porsche made regarding how to do the rams. The system that you sell might well be more reliable than the Porsche hydraulic rams, I'm just saying that the sort of electric rams that Porsche would have fitted might well have not had that advantage.
While bleeding hydraulics is a pain, it is something that one does all the time with brakes, so it is not a major problem in my mind. One could of course just replace the entire system (which is also pretty easy), but obviously that gets pretty pricey...
 09-03-2016, 09:12 AM