Forge Diverter Vales Install
 10-24-2014, 03:57 PM
#1

So I ordered some forged motorsports diverter valves through TitanMotorsports and received them yesterday. I dropped my wife off at the airport early and decided to tackle this before work today. Actually, ended up going very smoothly. Even with me taking the pictures it took about 45 minutes. I think the key is having the right tools and I used common tools that you may already have in your toolbox. I have to say that I utilized the AWE Tuning instructions that were good until the clamps on the diverter valves.
Tools:
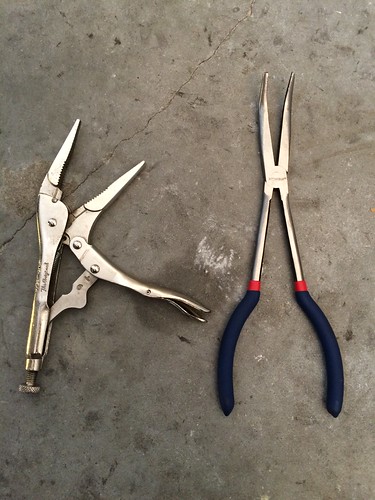
Needle Nose locking pliers (I liked these because it gave me a chance to manuever around while the clamp was loosened)
Slanted Needle nose pliers (Necessary for the diverter towards the front of the car)
10MM socket
Flathead Screwdriver
Step 1:
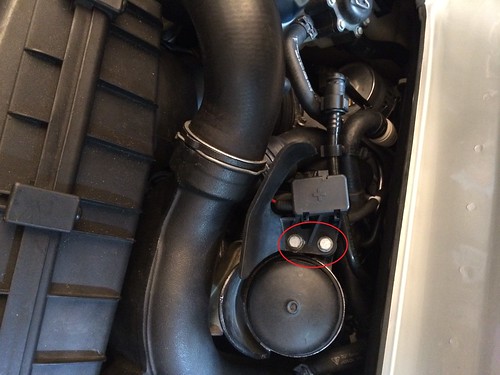
Remove the 2 10mm bolts holding the positive terminal to free up room to get at the diverter valves
Step 2:
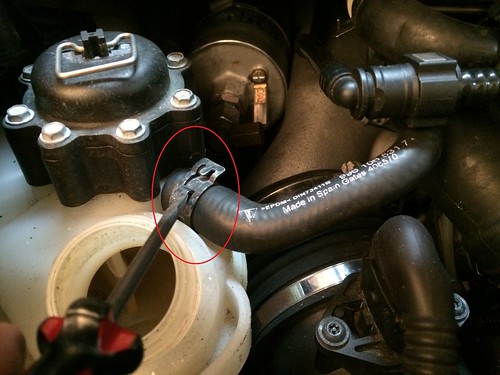
Remove the left intercooler hose by utilizing a flathead screwdriver to pry up the clip
Step 3:
Remove the coolant cap and the coolant hose
Step 4:
Unclip the vaccuum hose by pressing on the grey clip and pulling apart
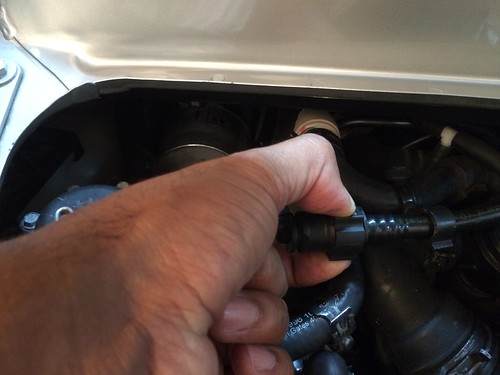

Step 5:
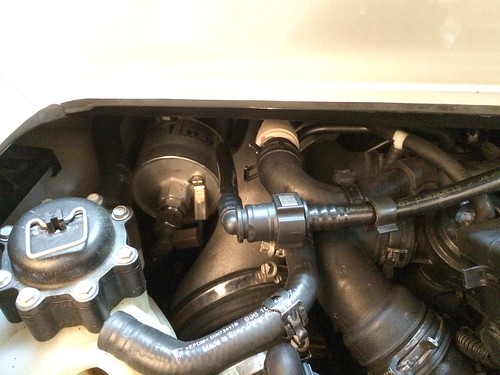
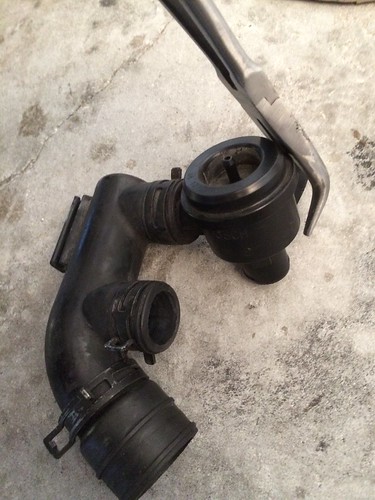
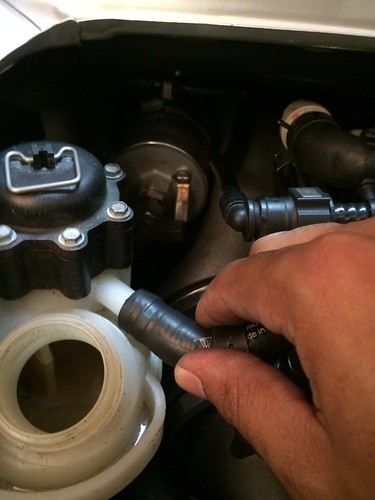
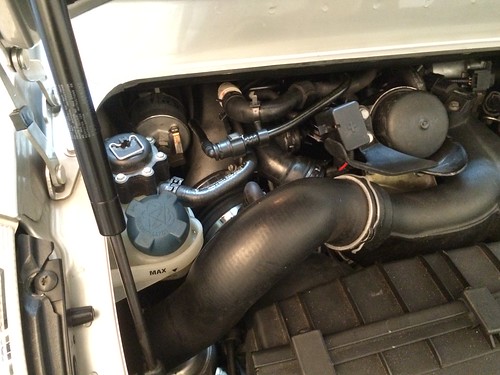
In front of the hose just removed will be a bigger hose connected to a plastic, white piece. Remove the grey C clip on the white plastic piece using a flat head screwdriver then pull back on the hose while using the screwdriver to keep the other end in position. Pull those hoses gently over to the right side of the engine bay.
Step 6:
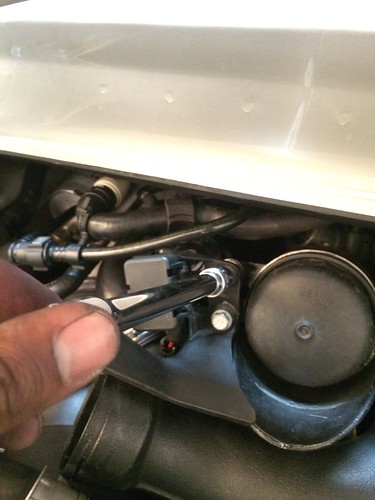
Unclip the big hose on the F pipe (I used the locking pliers here) and separate
Step 7:
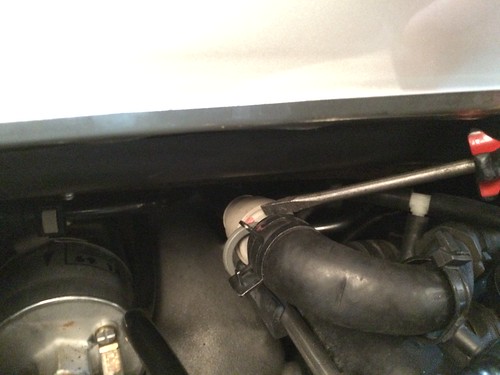
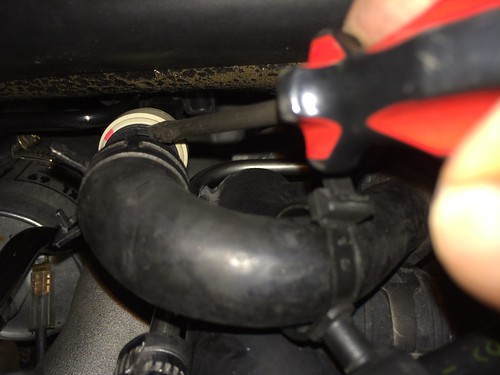
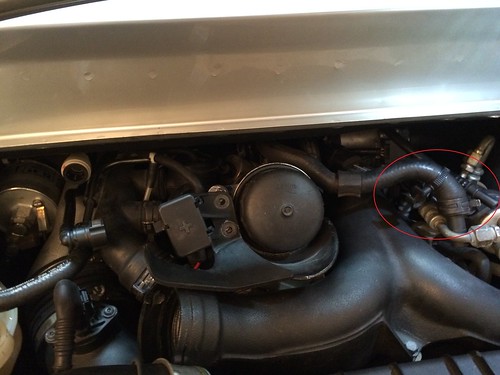
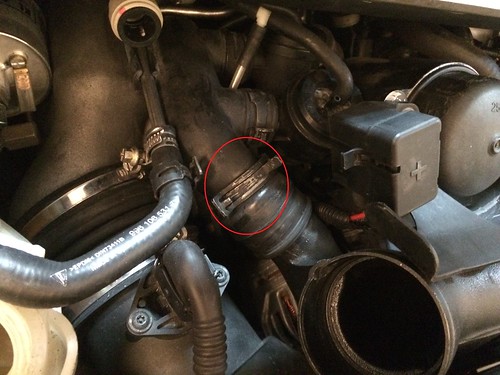
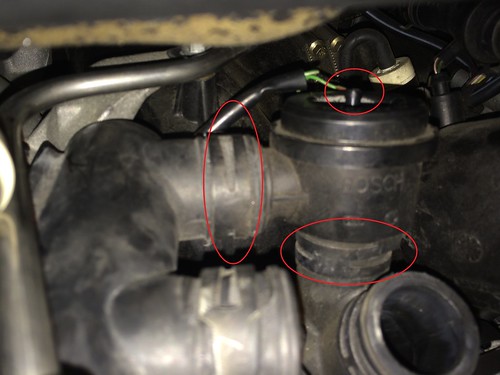
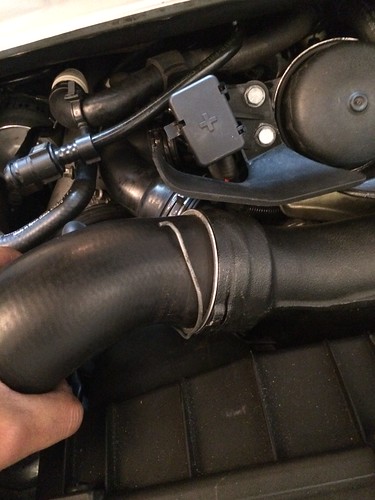
Remove the diverter valve closest to the rear by removing the top vaccuum line and the 2 clamps
Step 8:
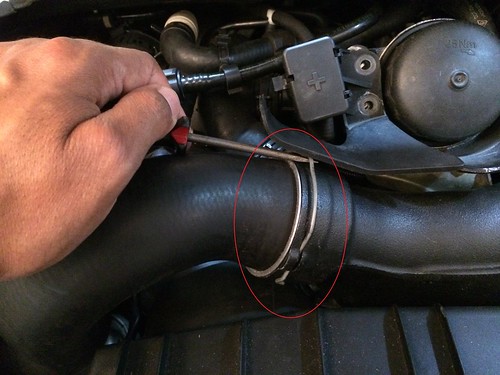
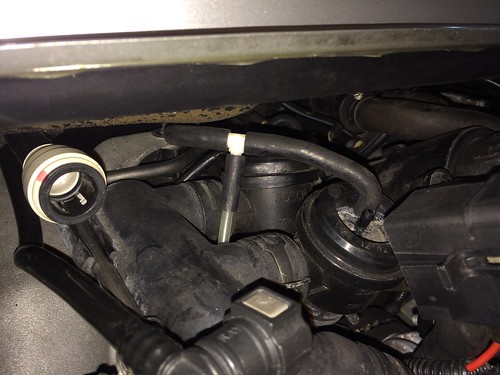
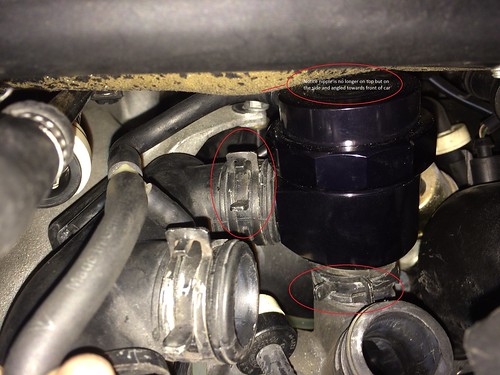
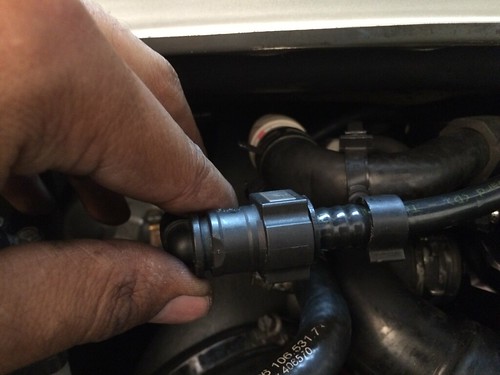
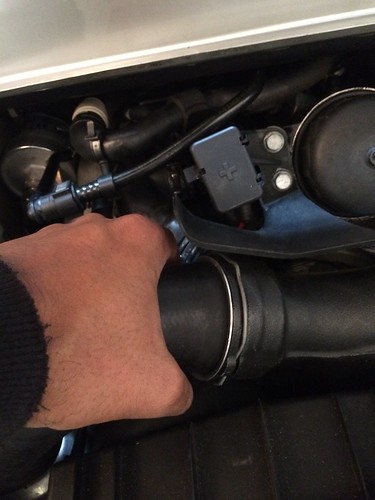
Removal of the diverter valve closest to the front of the car is hardest. The clip releases are facing the front of the car and here is where it gets tricky. Remove the bottom clip so you can pull the F pipe and diverter assembly out of the car. To do so I used the angled pliers with slight pressure on the diverter valve pulling it to the rear of the car gently. The goal here is not to remove the clamp at first but swing it to the rear of the car where you can get a better grip on the clamp. I included a picture of how I used the angled pliers to get the clamp towards the rear of the car
Step 9:
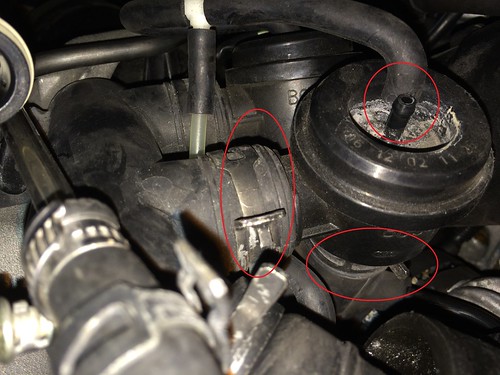
Replace with the new Forged diverter valves and follow backwards to install. Note the placement of the nipples on the new valves. The one closest to the front of the car will be in a 10 o'clock position and the one in the rear of the car will be in a 9 o'clock position. I zip tied the nipple vacuum hoses. Also, when placing the diverter valve in the front of the car you now have the opportunity to place the clamps in a better position to be reached. One final word of advice is to yank a little on the intercooler hose to make sure that clip is secure.
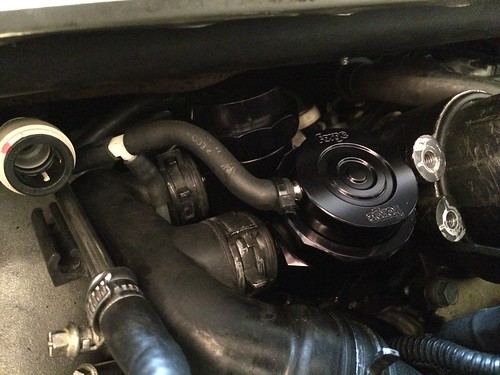
I have to say that I am very happy with the Forge Diverter Valves. I notice quicker response between shifts. Just overall better performance. I also am happy that they included stiffer springs for when I move towards turbo upgrades.
Some people stated having to drop the engine a little bit. I know that takes a little bit of time but I could have this job almost done in the time it would take me to place the car on jackstands and drop the engine. This job can easily be done using these steps. The key is having the right tools to get at the clamps.
Ping me if you have questions.
Hope this helps,
Omar
Tools:
Needle Nose locking pliers (I liked these because it gave me a chance to manuever around while the clamp was loosened)
Slanted Needle nose pliers (Necessary for the diverter towards the front of the car)
10MM socket
Flathead Screwdriver
Step 1:
Remove the 2 10mm bolts holding the positive terminal to free up room to get at the diverter valves
Step 2:
Remove the left intercooler hose by utilizing a flathead screwdriver to pry up the clip
Step 3:
Remove the coolant cap and the coolant hose
Step 4:
Unclip the vaccuum hose by pressing on the grey clip and pulling apart
Step 5:
In front of the hose just removed will be a bigger hose connected to a plastic, white piece. Remove the grey C clip on the white plastic piece using a flat head screwdriver then pull back on the hose while using the screwdriver to keep the other end in position. Pull those hoses gently over to the right side of the engine bay.
Step 6:
Unclip the big hose on the F pipe (I used the locking pliers here) and separate
Step 7:
Remove the diverter valve closest to the rear by removing the top vaccuum line and the 2 clamps
Step 8:
Removal of the diverter valve closest to the front of the car is hardest. The clip releases are facing the front of the car and here is where it gets tricky. Remove the bottom clip so you can pull the F pipe and diverter assembly out of the car. To do so I used the angled pliers with slight pressure on the diverter valve pulling it to the rear of the car gently. The goal here is not to remove the clamp at first but swing it to the rear of the car where you can get a better grip on the clamp. I included a picture of how I used the angled pliers to get the clamp towards the rear of the car
Step 9:
Replace with the new Forged diverter valves and follow backwards to install. Note the placement of the nipples on the new valves. The one closest to the front of the car will be in a 10 o'clock position and the one in the rear of the car will be in a 9 o'clock position. I zip tied the nipple vacuum hoses. Also, when placing the diverter valve in the front of the car you now have the opportunity to place the clamps in a better position to be reached. One final word of advice is to yank a little on the intercooler hose to make sure that clip is secure.
I have to say that I am very happy with the Forge Diverter Valves. I notice quicker response between shifts. Just overall better performance. I also am happy that they included stiffer springs for when I move towards turbo upgrades.
Some people stated having to drop the engine a little bit. I know that takes a little bit of time but I could have this job almost done in the time it would take me to place the car on jackstands and drop the engine. This job can easily be done using these steps. The key is having the right tools to get at the clamps.
Ping me if you have questions.
Hope this helps,
Omar
 10-26-2014, 08:07 PM
#4
Rennlist Member
Great writeup! I had my mechanic replace mine, but I likely would've been more inclined to do this myself with the instructions you wrote. I'm sure many will find this very useful!
 10-29-2014, 12:06 AM
#6
Drifting
Join Date: Mar 2011
Location: Bastrop By God Texas
Posts: 2,255
Likes: 0
Received 2 Likes
on
2 Posts
Great DIY post. It looks like you got the 007PA with the adjustable side nipple. Did you have to do anything different with the vacuum hose since the stock DVs have the nipple on top?
03-14-2020, 02:47 PM
#7
Those who changed their DV themselves, in my attempt to remove all these rubber hoses, most of seem stuck. Any tips to separating the hoses, Im sure the hoses are old and hard
Trending Topics
03-14-2020, 02:52 PM
#8
Drifting
03-14-2020, 03:26 PM
#9
Three Wheelin'
There is a snap on tool called a hose hook. Funny bent end tool that you can slide in between the hose and nipple to get it un-stuck so you can slide it off
The following users liked this post:
Carlo_Carrera (03-14-2020)
03-14-2020, 06:26 PM
#10
Drifting
get some locking long nose vice grips too.