When you click on links to various merchants on this site and make a purchase, this can result in this site earning a commission. Affiliate programs and affiliations include, but are not limited to, the eBay Partner Network.
I had a slight oil leak on the left side of my engine towards the front of the car.
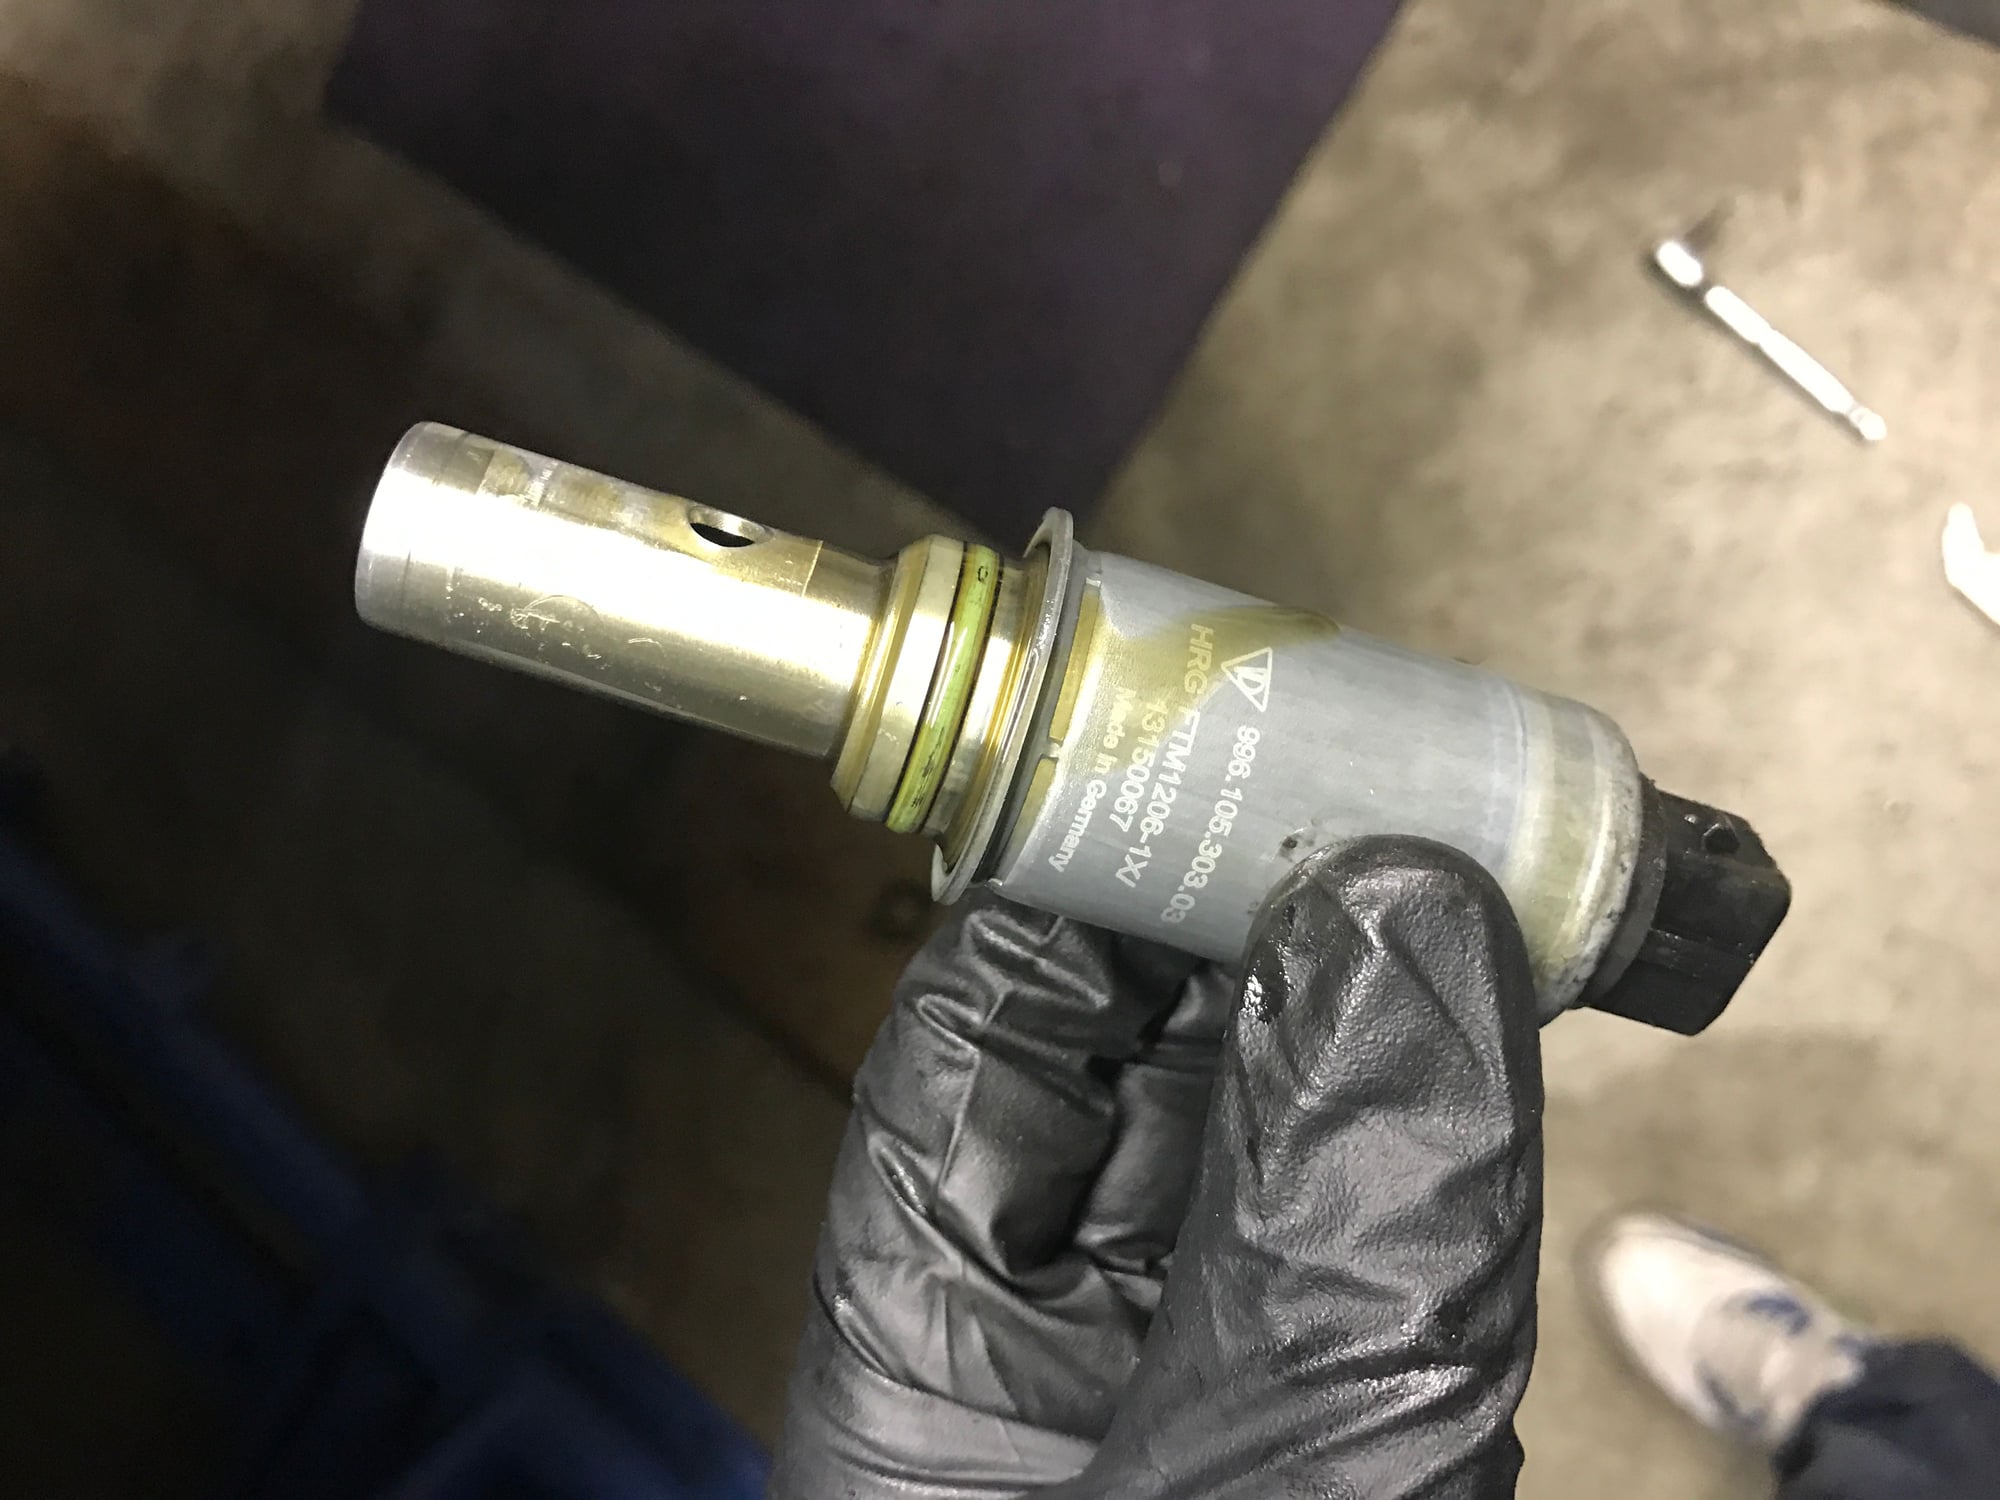
Pulled the spark plug heat shield down and found that it was oil seeping through the wiring harness on my VarioCam Plus Actuator.
Most of the information on here relates to the 3.4L in which you have to crack open the case in order to replace as it is bolted inside the engine.
For 3.6L, its a really simple job that can be done in 20 minutes.
Actuator Part Number: 996-105-303-06 (Supercedes 996.105.303.03)
Seal: 996-105-244-03
1. Wait for engine to cool down completely
2. Lift the rear of the car and remove the driver's side rear wheel
3. Remove the 2x 10mm bolts and remove the spark plug heat shield
4. Remove the wiring boot and plug on the actuator and slip it out of the way
5. Remove the 2x 5mm allen bolts
6. Remove the retaining bracket
7. Shimmy and remove the oval seal
8. Use a large set of pliers to pull the actuator out (there will be a small amount of oil. Throw it away
9. Dip new actuator tip in oil so that it has a light coating
10. Insert the new actuator firmly with the connector T pointed straight down
11. Install new oval seal in line with bolt holes
12. Install retaining bracket
13. Install 5mm allen bolts
14. Replug in the wiring connector and insert the wires in the retainer arm
15. Bolt the heat shield back in
16. Put the wheel back on
17. Lower the car
18. Open a beer
19. Drink beer
Nice write up and it is very convenient that the 3.6L VarioCam Plus is made that way, it surely saves a lot of time and effort not having to drop the valve cover like us 3.4L.
Great write-up and pics, i have a feeling these may come in handy in the next few months. One question, do you foresee any ill effects in shifting steps 18,19 between 1 and 2, or perhaps adding 1a and 1b. I feel this may help complete step 1.
Thanks for the write-up. Like others, I am only familiar with the older engines - For Variocam Plus solenoid replacement you don't need to lock the cams ?
Forgive my ignorance - just curious.
"For 3.6L, its a really simple job that can be done in 20 minutes.
Actuator Part Number: 996-105-303-06 (Supercedes 996.105.303.03)
Seal: 996-105-244-03
1. Wait for engine to cool down completely
2. Lift the rear of the car and remove the driver's side rear wheel
3. Remove the 2x 10mm bolts and remove the spark plug heat shield
4. Remove the wiring boot and plug on the actuator and slip it out of the way
5. Remove the 2x 5mm allen bolts
6. Remove the retaining bracket
7. Shimmy and remove the oval seal
8. Use a large set of pliers to pull the actuator out (there will be a small amount of oil. Throw it away
9. Dip new actuator tip in oil so that it has a light coating
10. Insert the new actuator firmly with the connector T pointed straight down
11. Install new oval seal in line with bolt holes
12. Install retaining bracket
13. Install 5mm allen bolts
14. Replug in the wiring connector and insert the wires in the retainer arm
15. Bolt the heat shield back in"
Bank 1 is very easy to replace. Bank 2 not as easy. You have to work around the muffler mount. I think you should be able to get it out with a swivel joint or maybe if you have an L shaped torx wrench (like a standard allen key wrench).
 01-24-2017, 01:43 AM