When you click on links to various merchants on this site and make a purchase, this can result in this site earning a commission. Affiliate programs and affiliations include, but are not limited to, the eBay Partner Network.
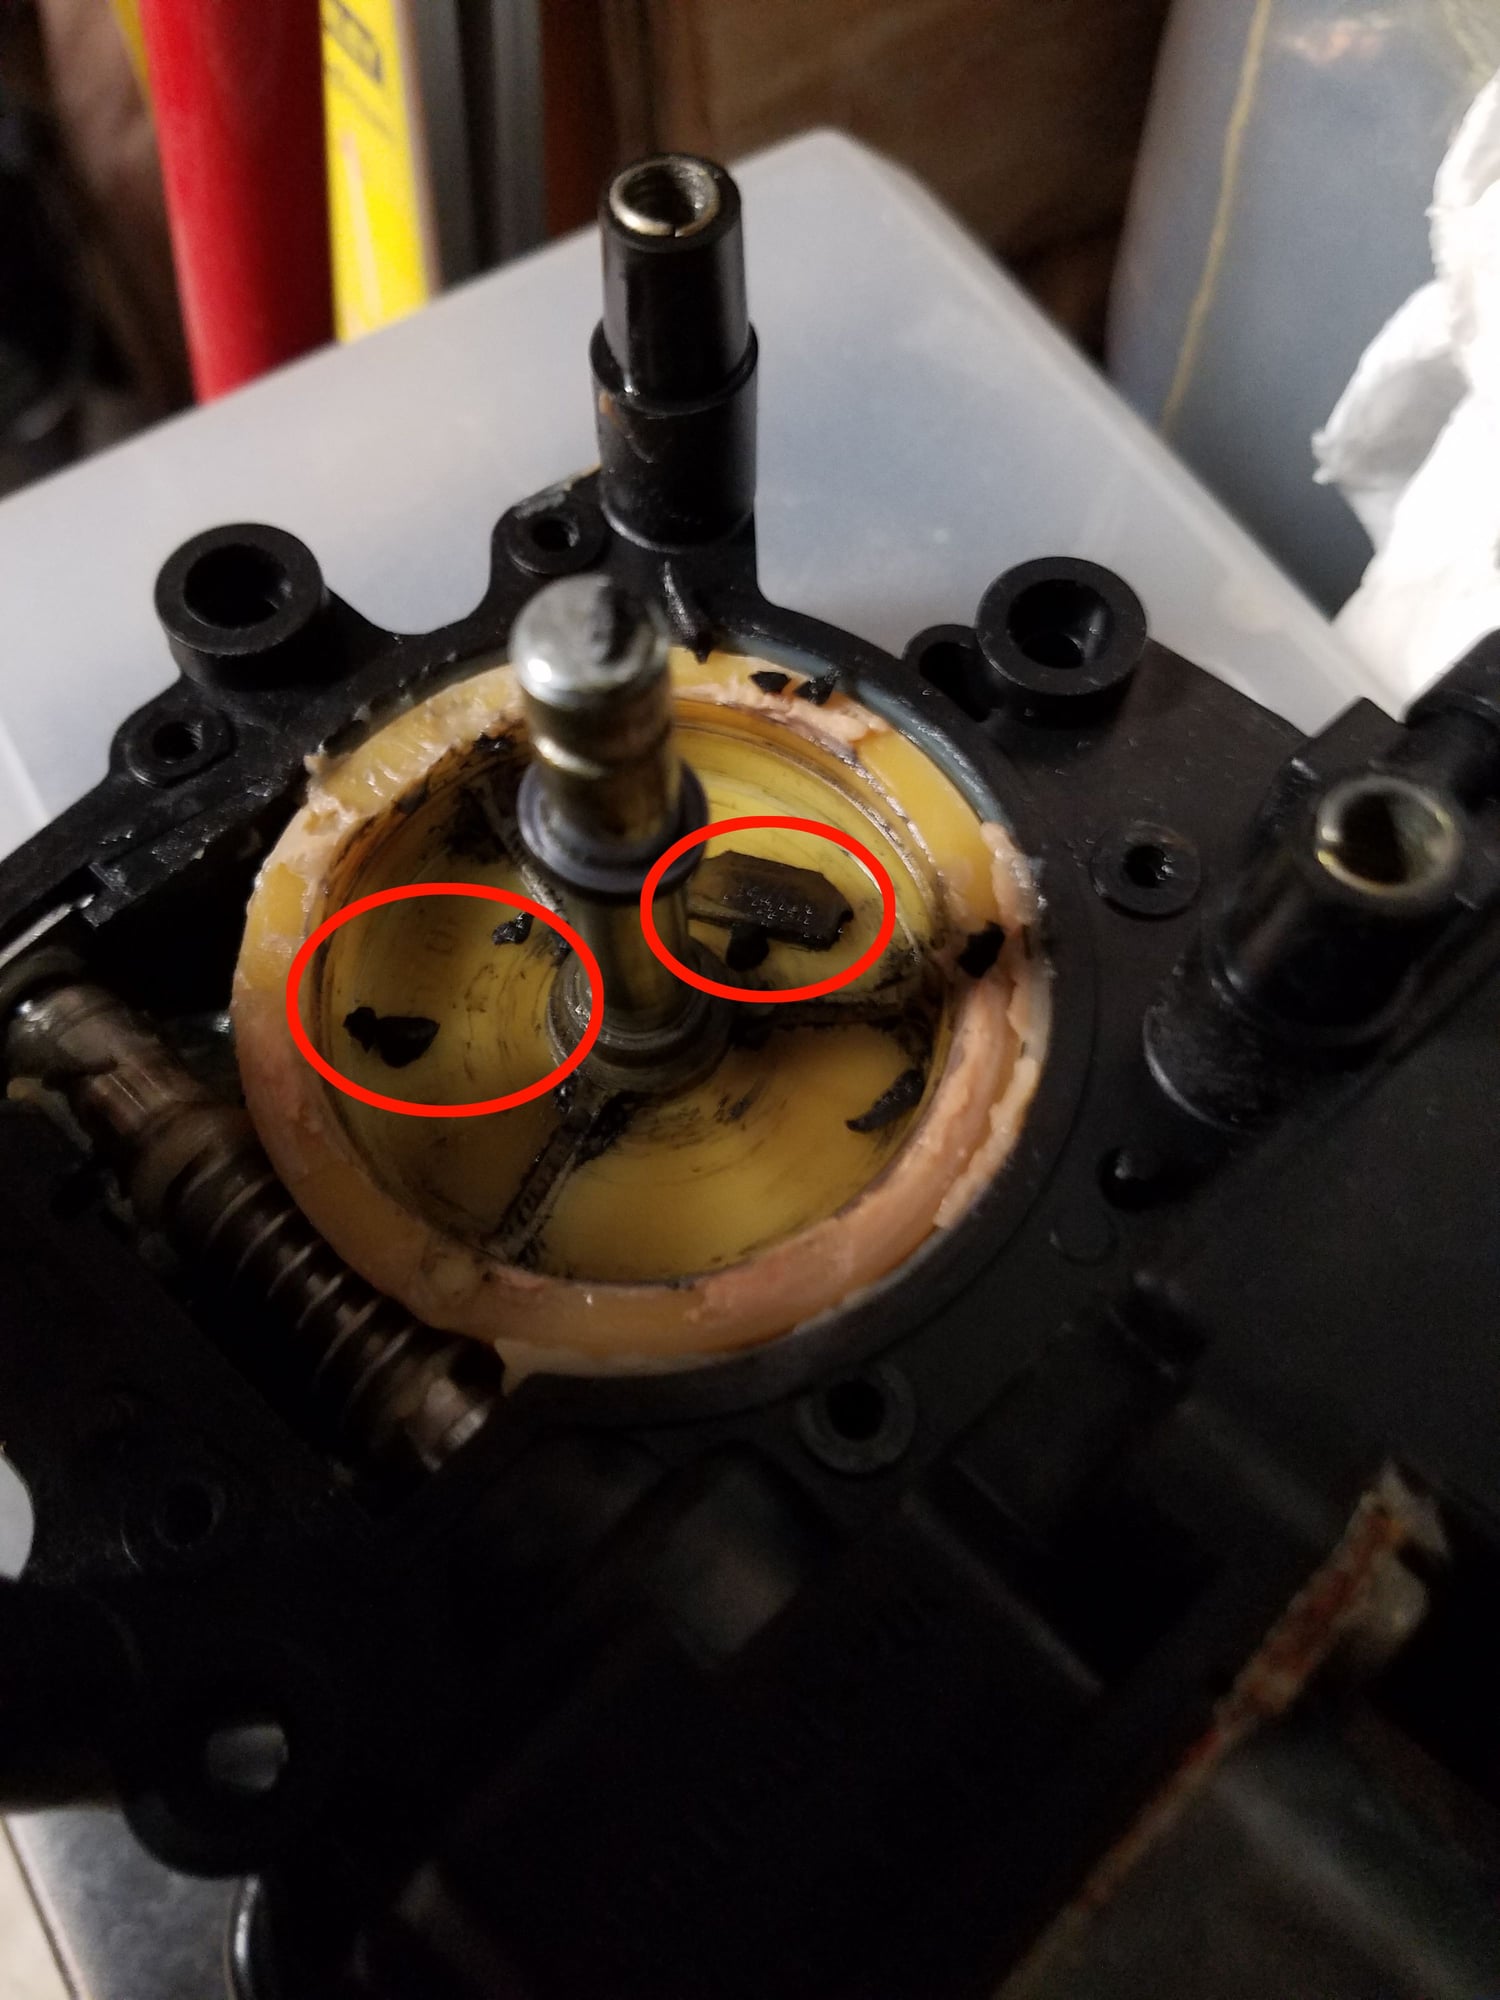
So my window stopped going up or down every time I would hit the switch. The motor still made noise so I know it wasn't a power issue, if the motor went out completely then it wouldn't make any noise which was a dead giveaway to me that it was a mechanical issue. Also I knew it wasnt the window regulator because if I had someone press the switch and I pulled or pushed the window with my hands it would move up and down. So I decided to remove the motor and thus begin this fine DIY guide on repairing it.
(BTW I wont go into detail about socket or tool sizes because you can figure that out yourself....its very easy.)
PLEASE NOTE: This isnt a permanent fix, only a temporary. The pieces that you will see that broke off are purposefully put in place by Porsche to break if the window motor senses any resistance while turning. They break so easily so that the whole motor assembly doesn't instead. With this fix if there is any resistance to the window while the motor is winding it will most likely destroy the whole motor so be cautious if your going to do this. I will eventually replace mine with a new one and only did this as a fun experiment since my window didn't work anyway.
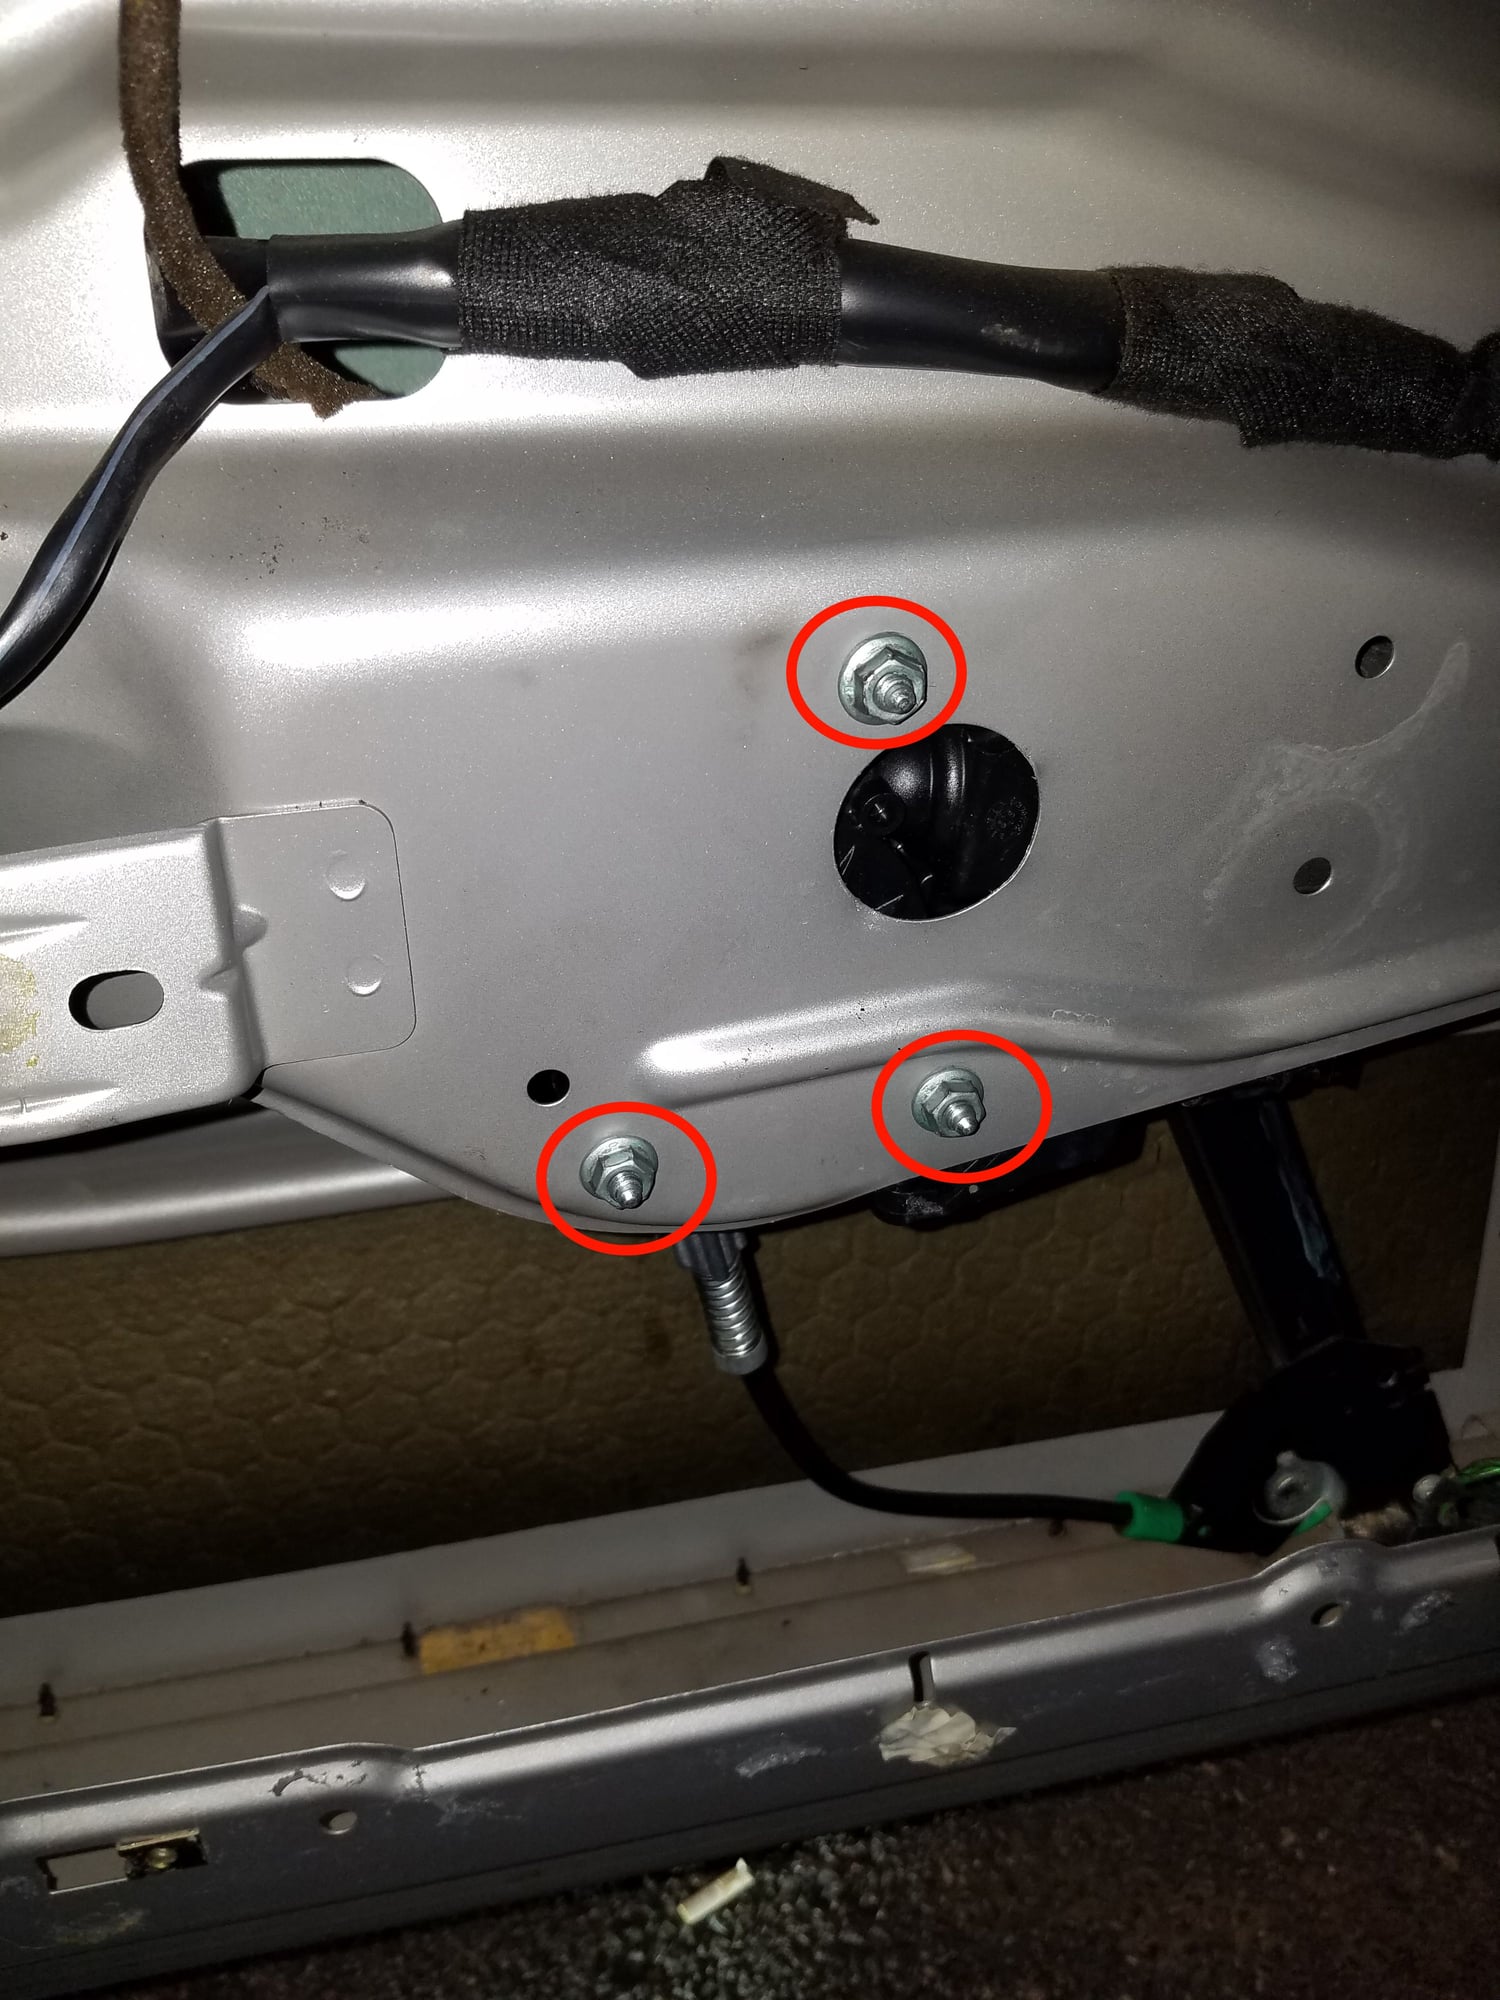
First Remove those 3 nuts
Once those 3 nuts are removed then you remove these 3 nuts
(2 already removed in picture)
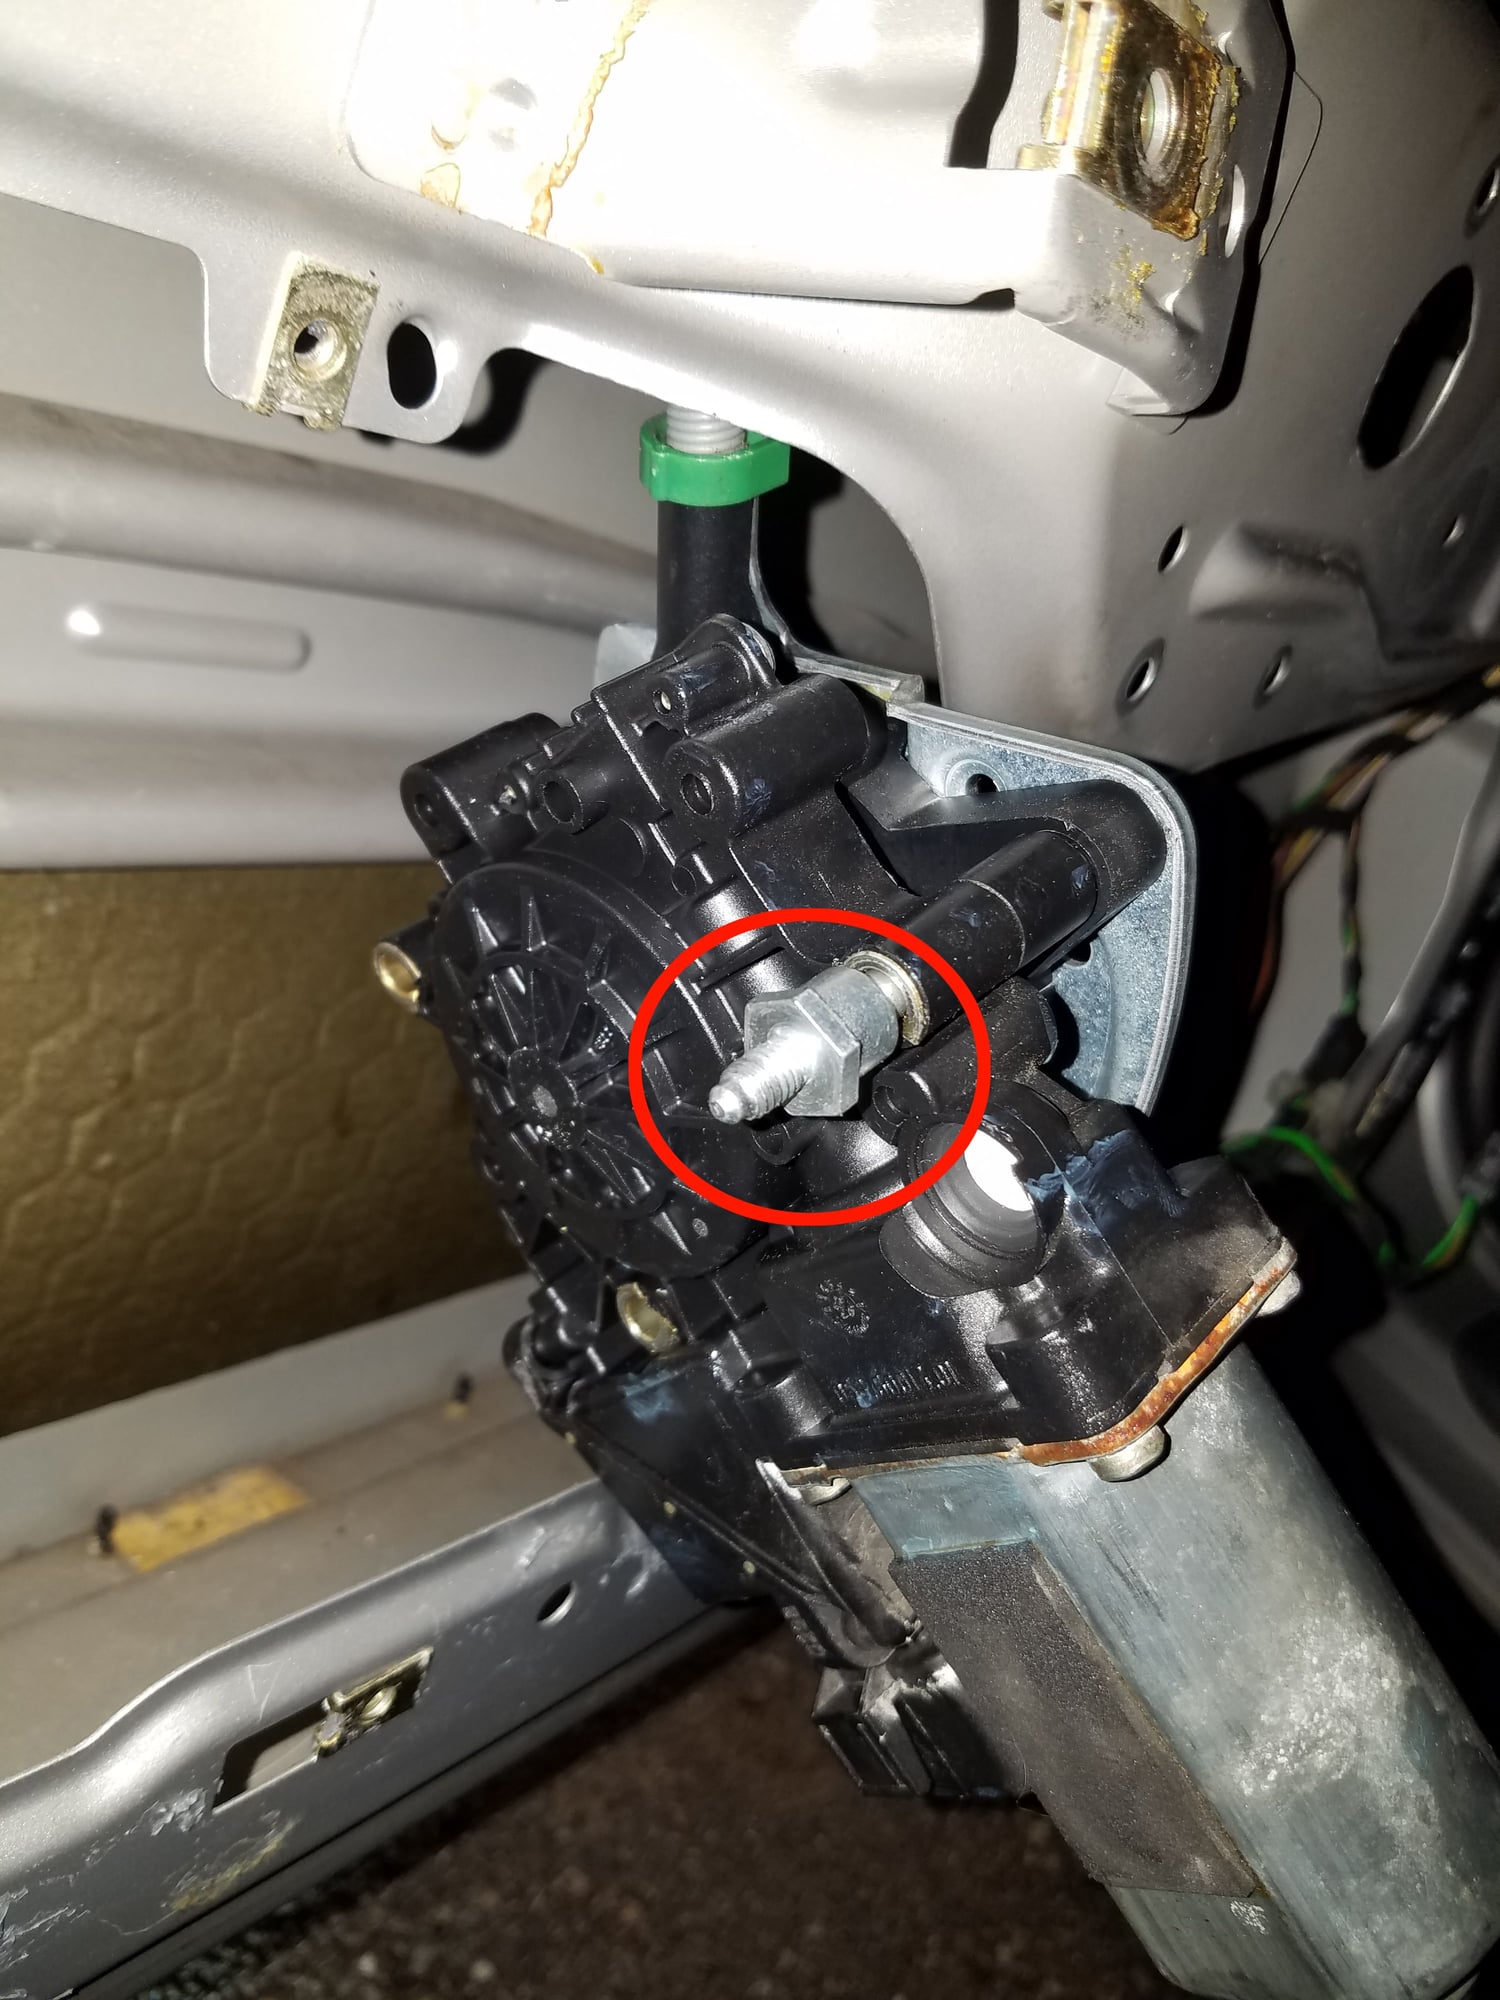
These attach the motor to the regulator cables, once they are removed the window motor should detach fairly easily from the regulator and you'll be able to remove the motor from the door right away.
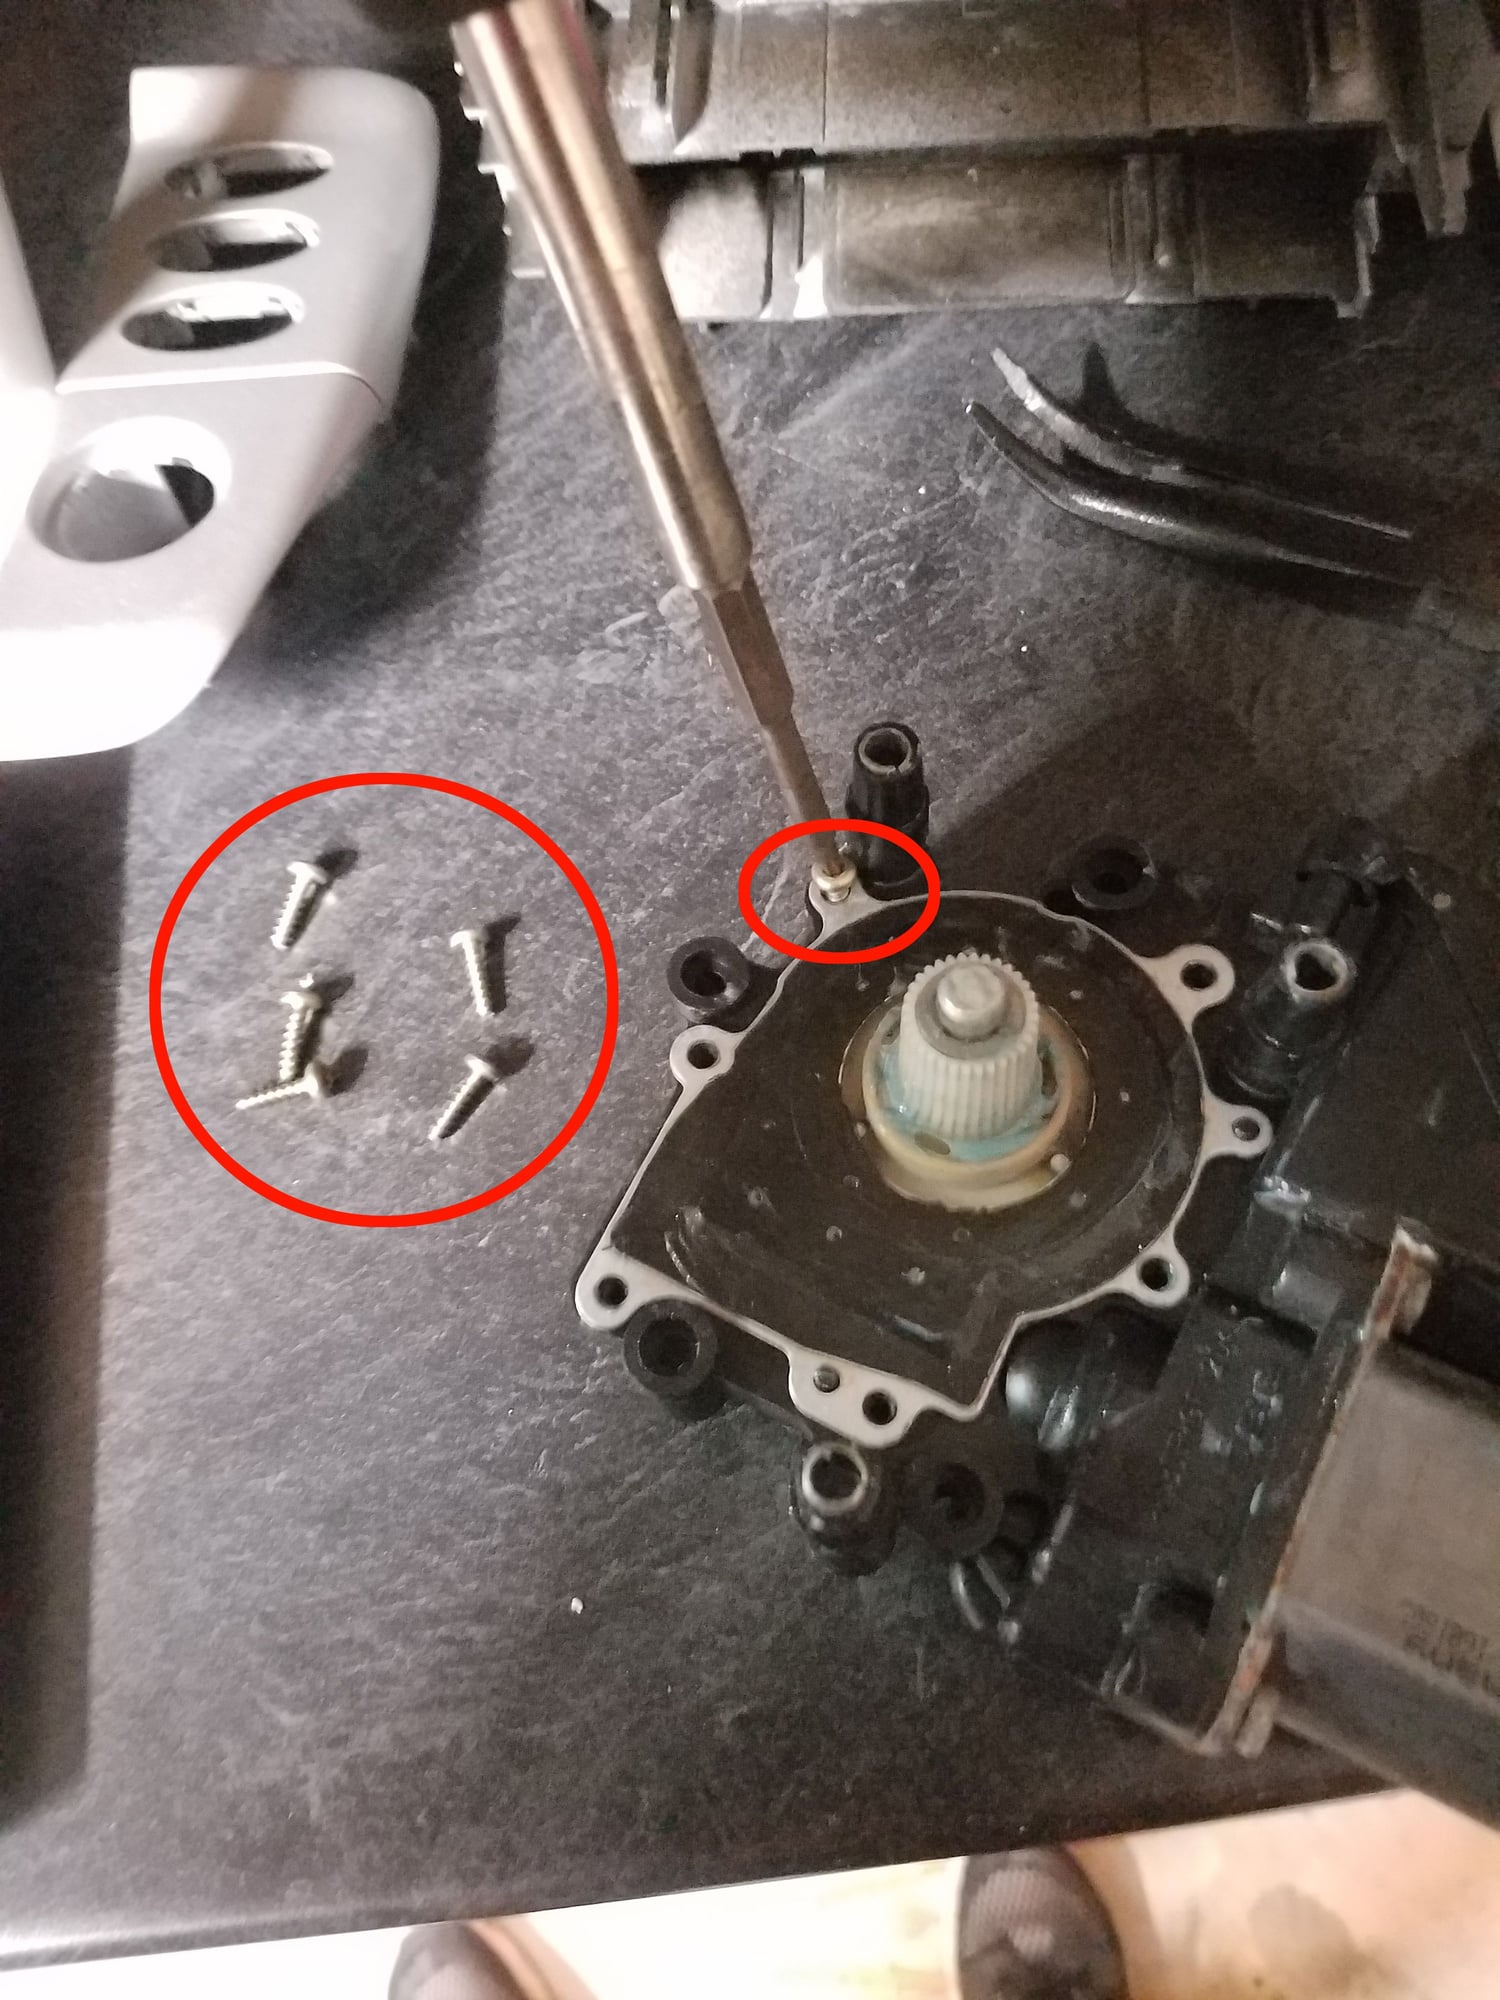
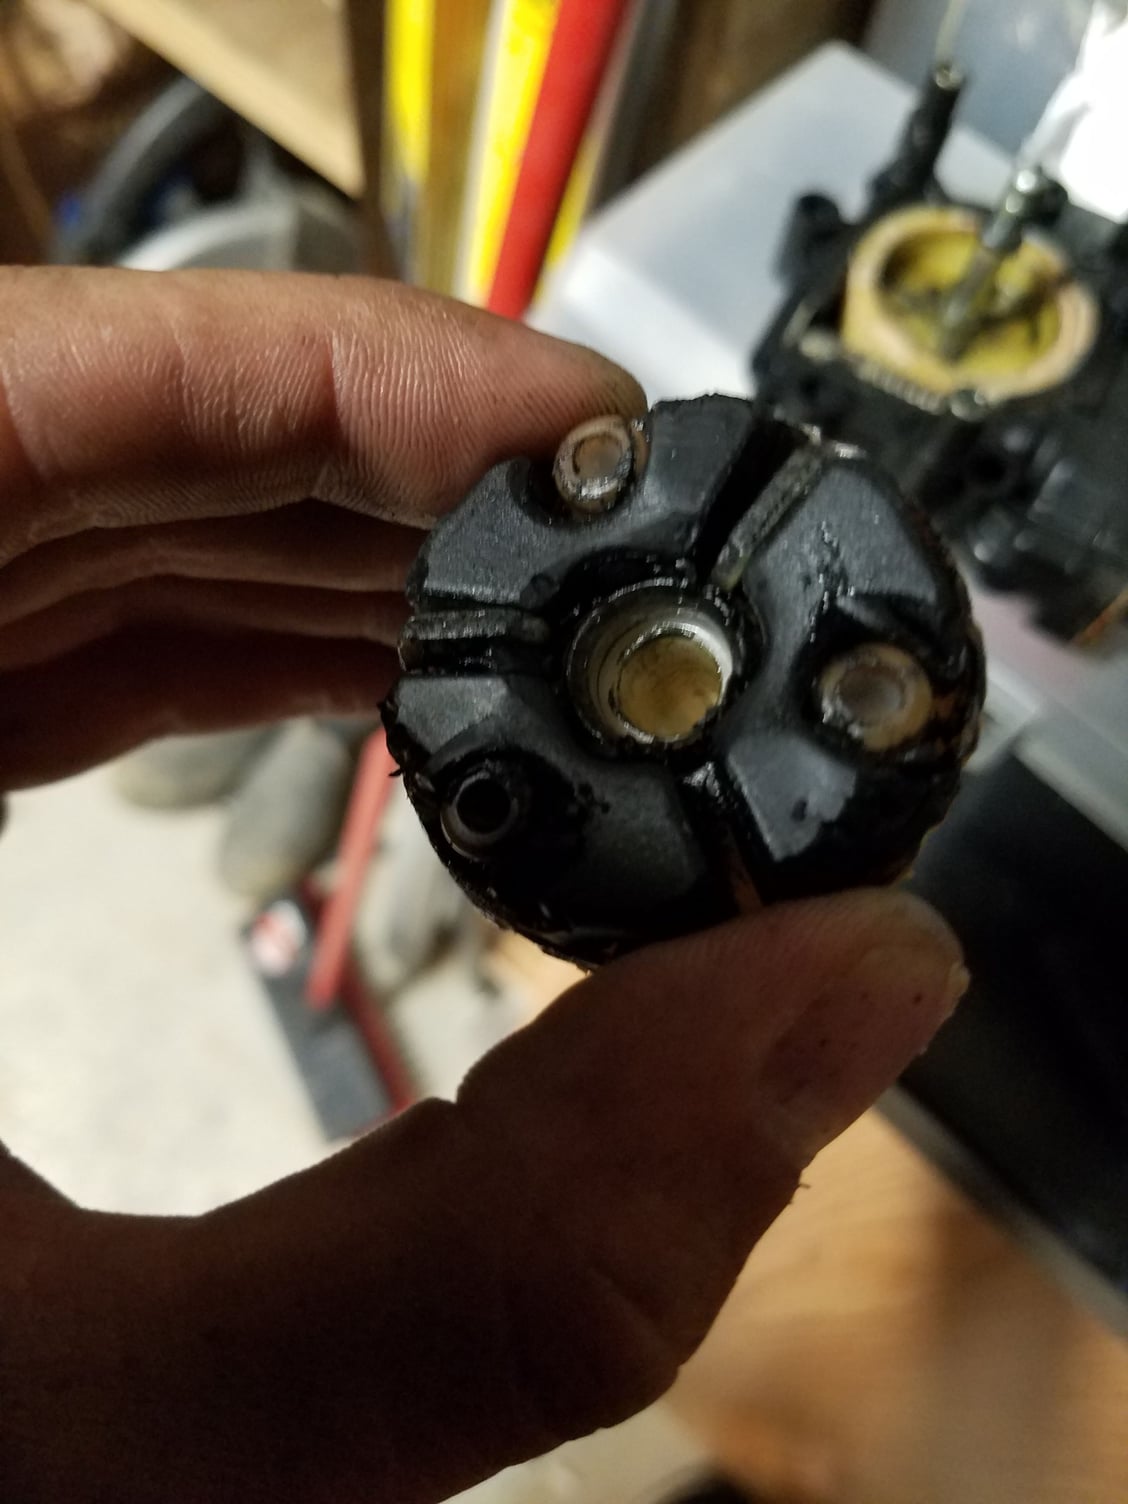
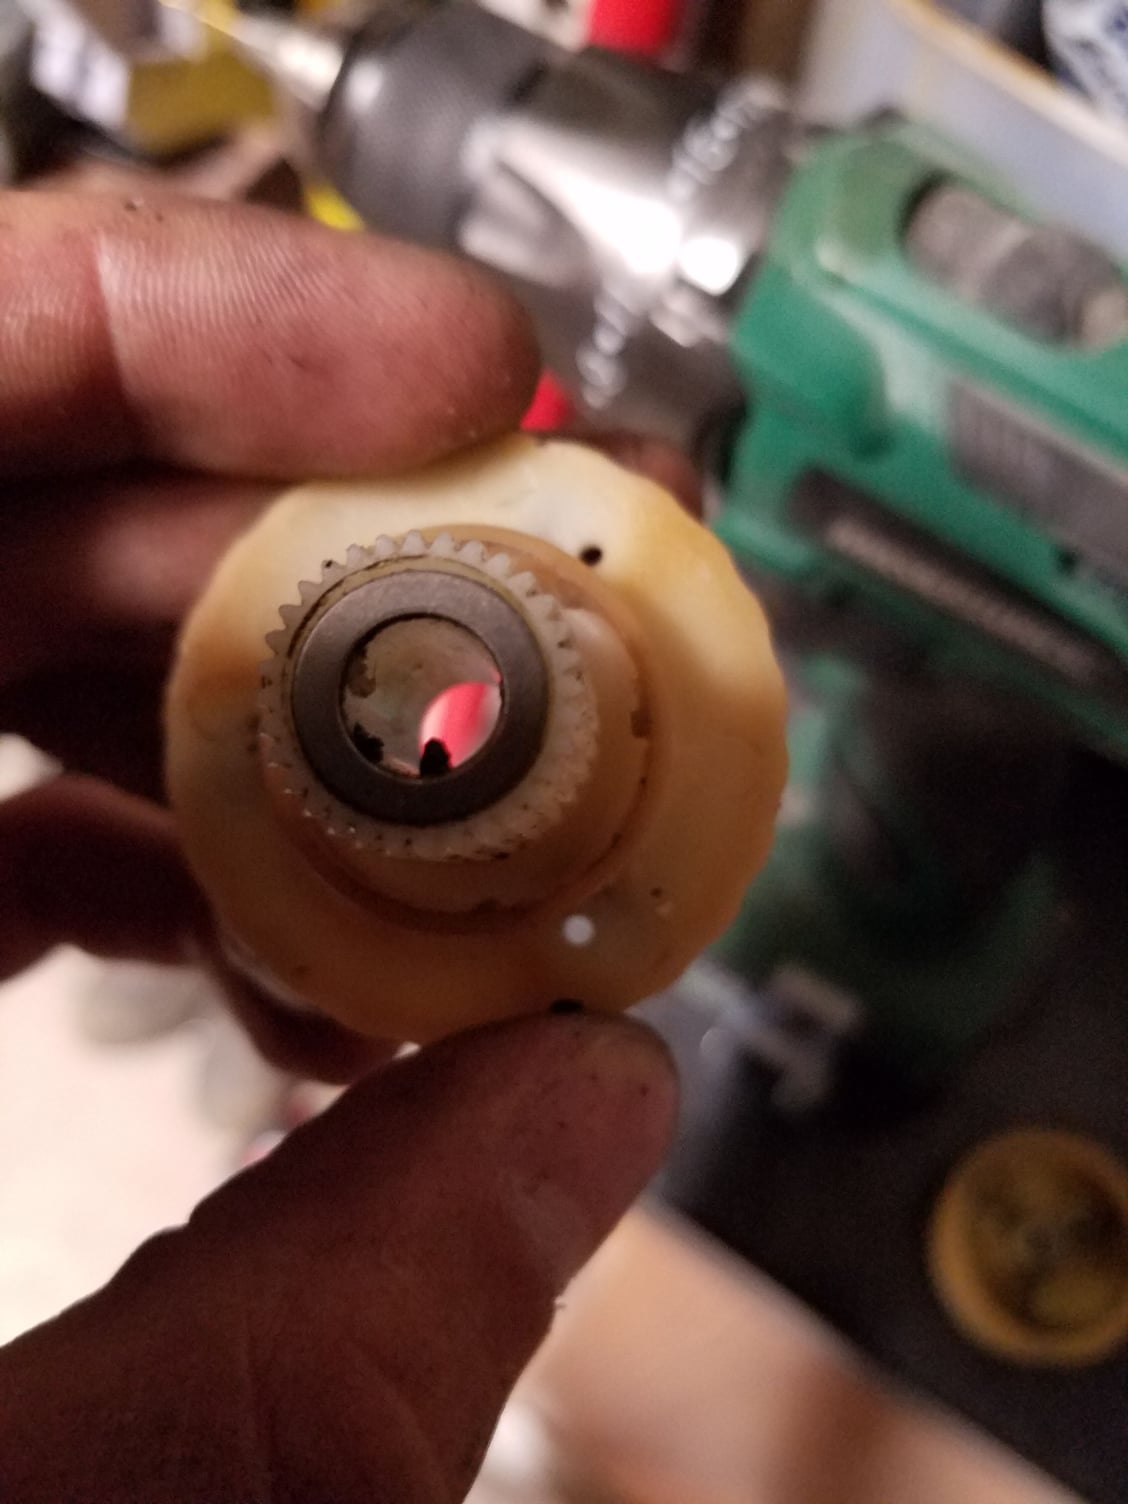
Once you have the motor in hand, place it on a table and remove these 6 screws with a screwdriver.
After you remove the screws, lift the black cover off the motor and set it aside. Next push off this clip with a similiar tool, whatever works easiest for you. It should slide out without much trouble.
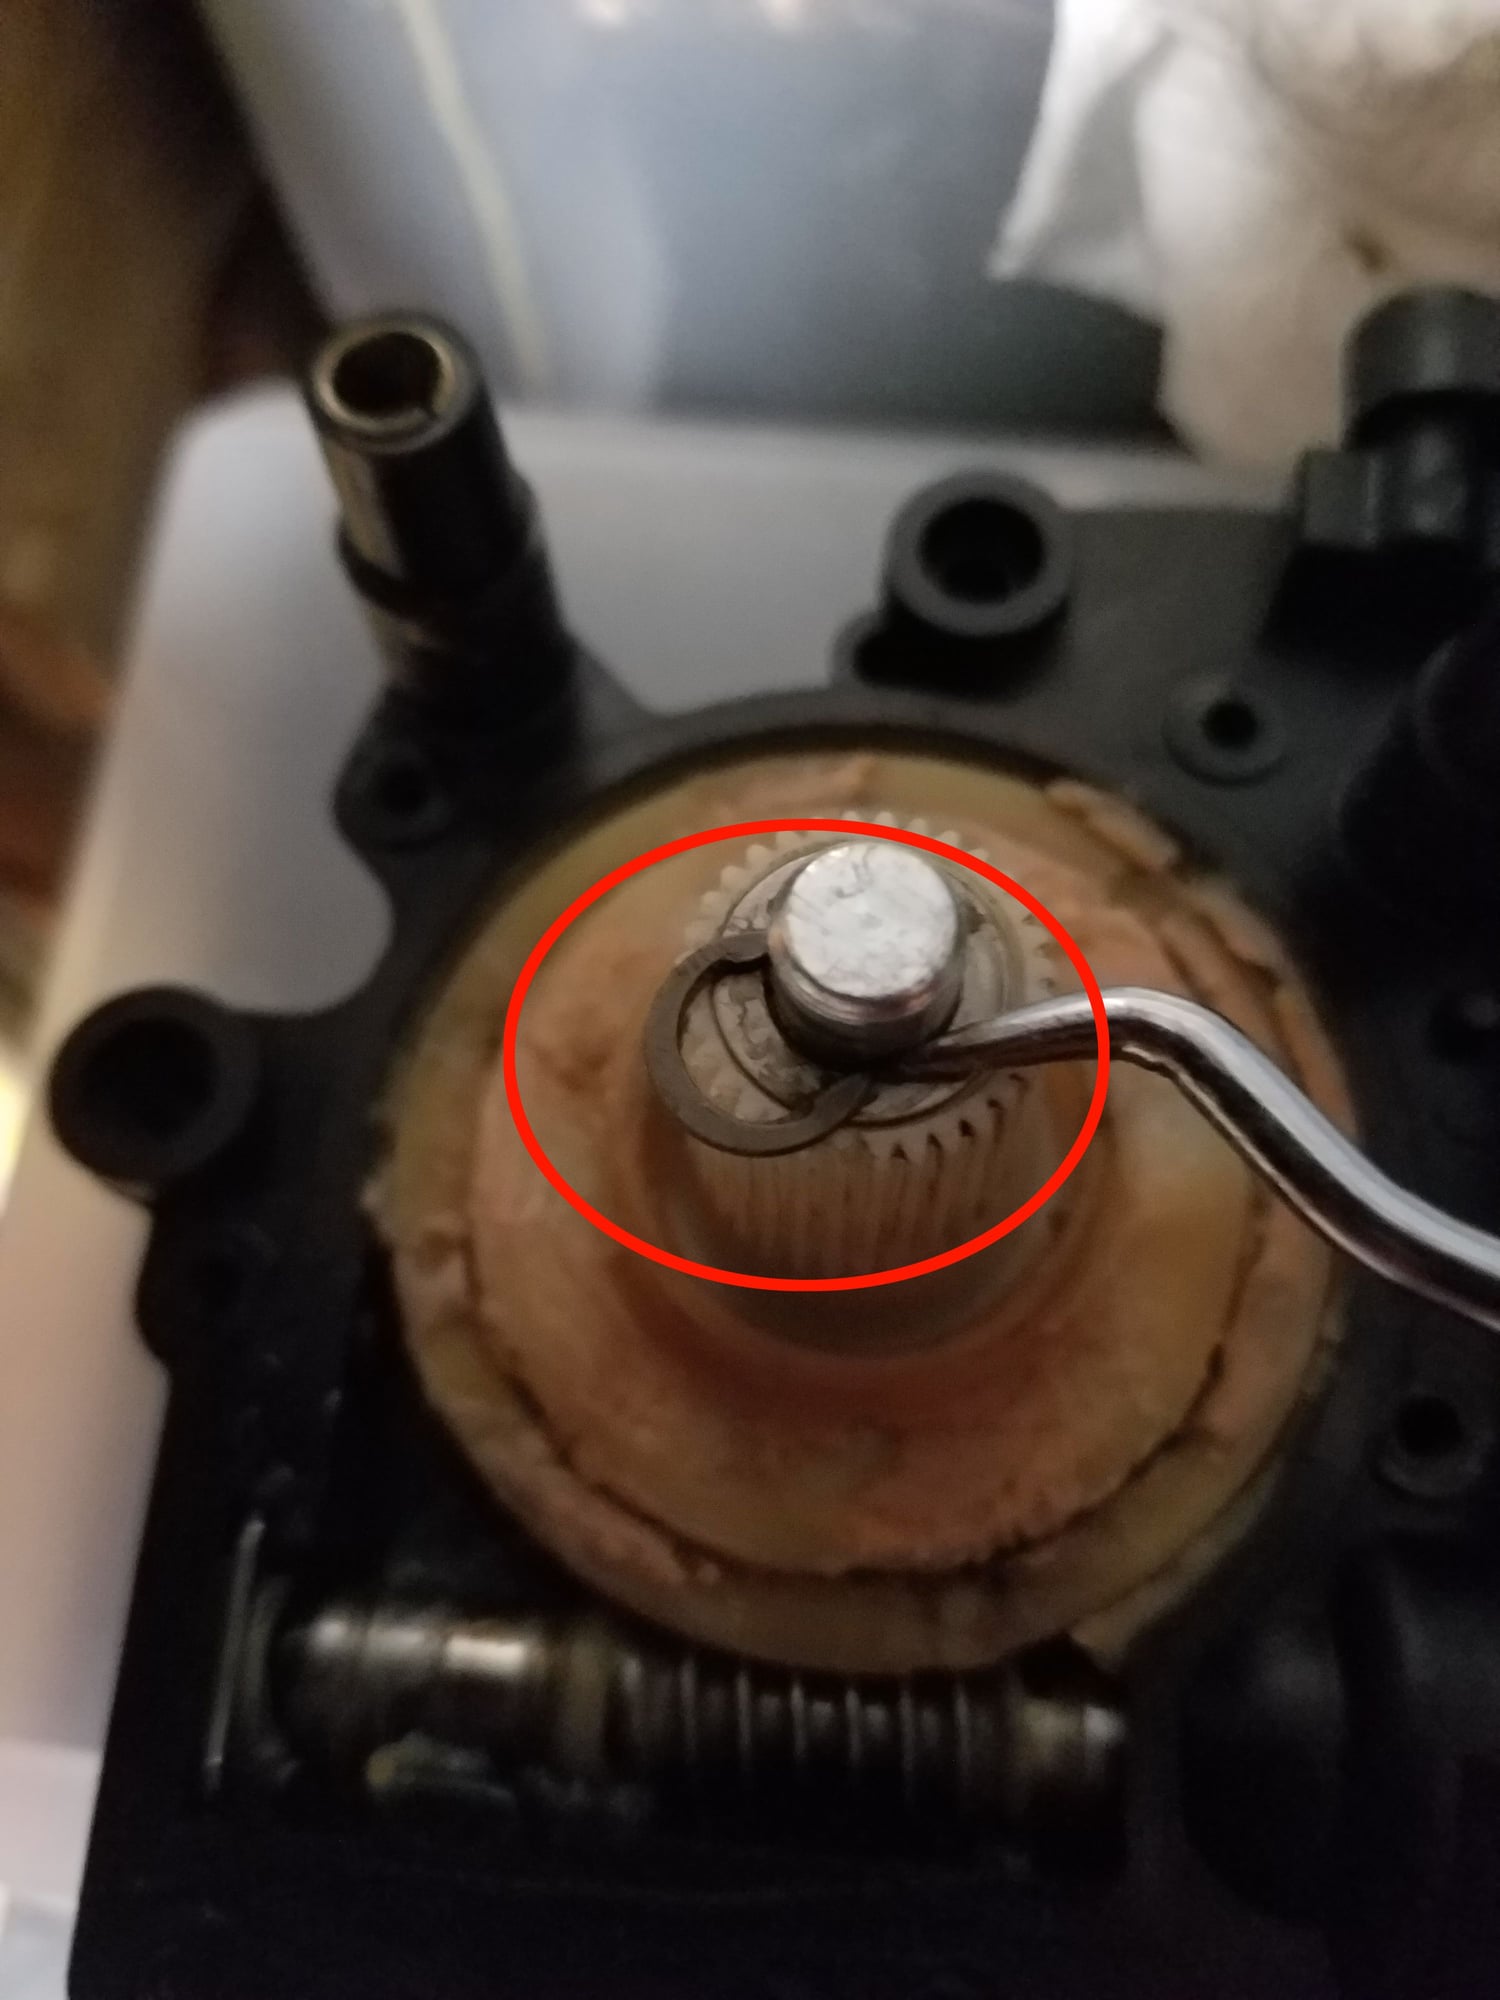
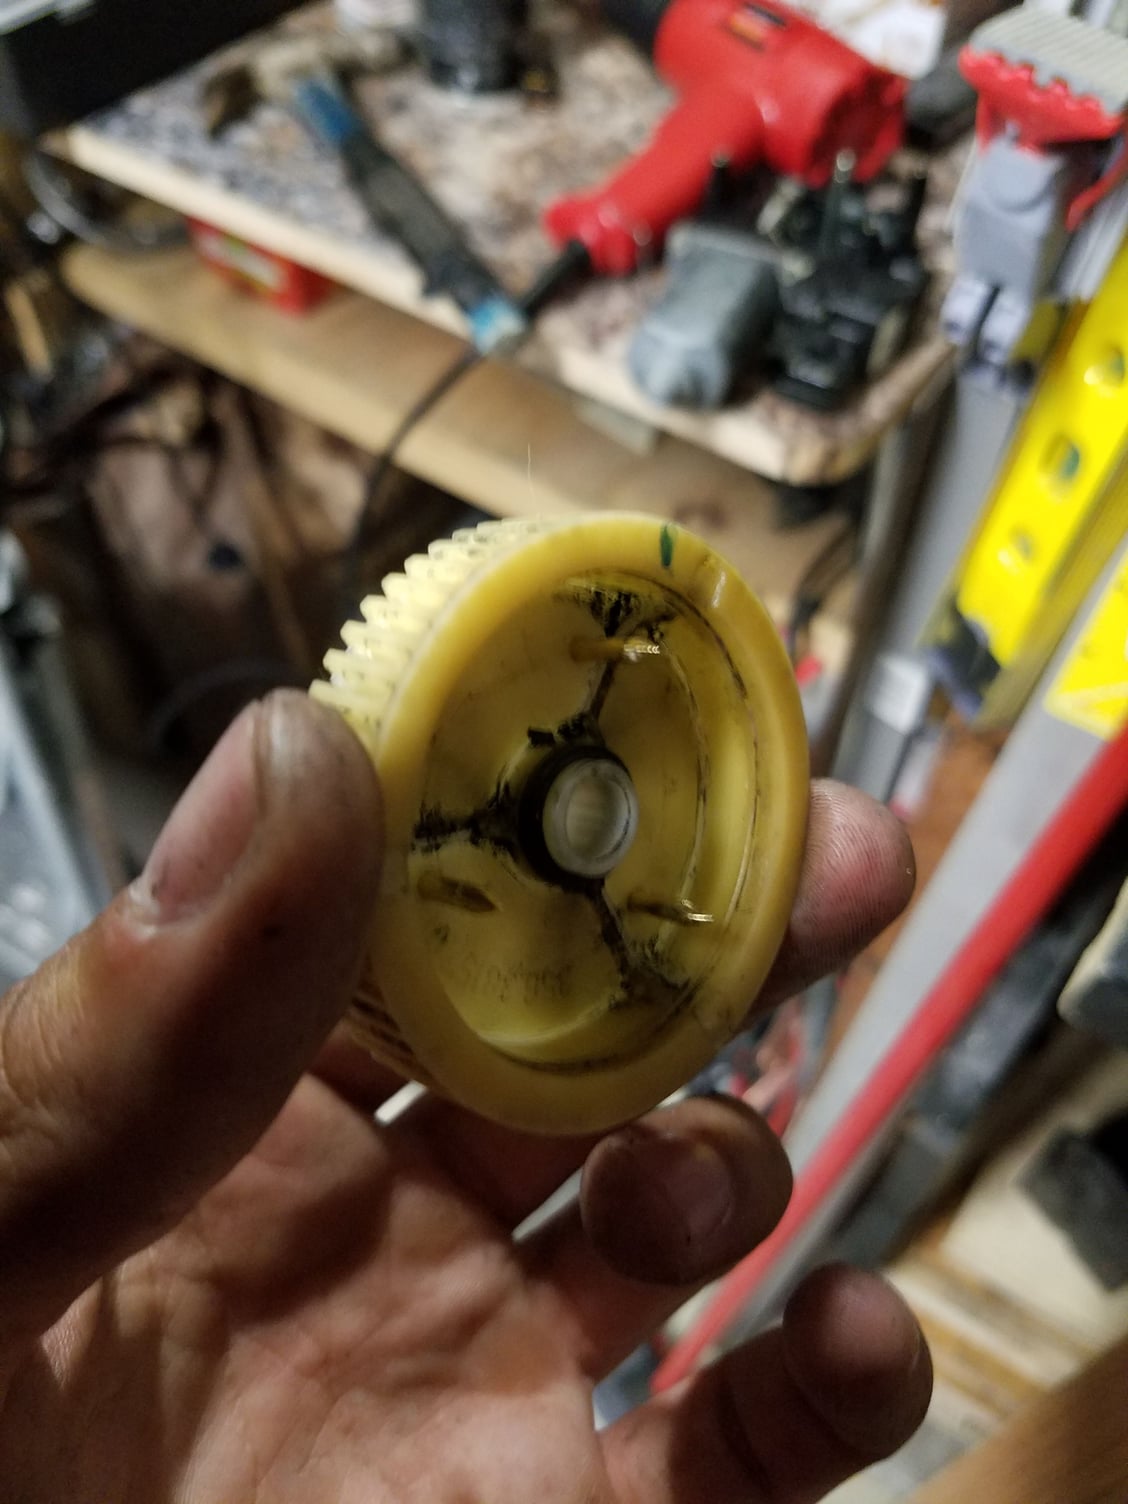
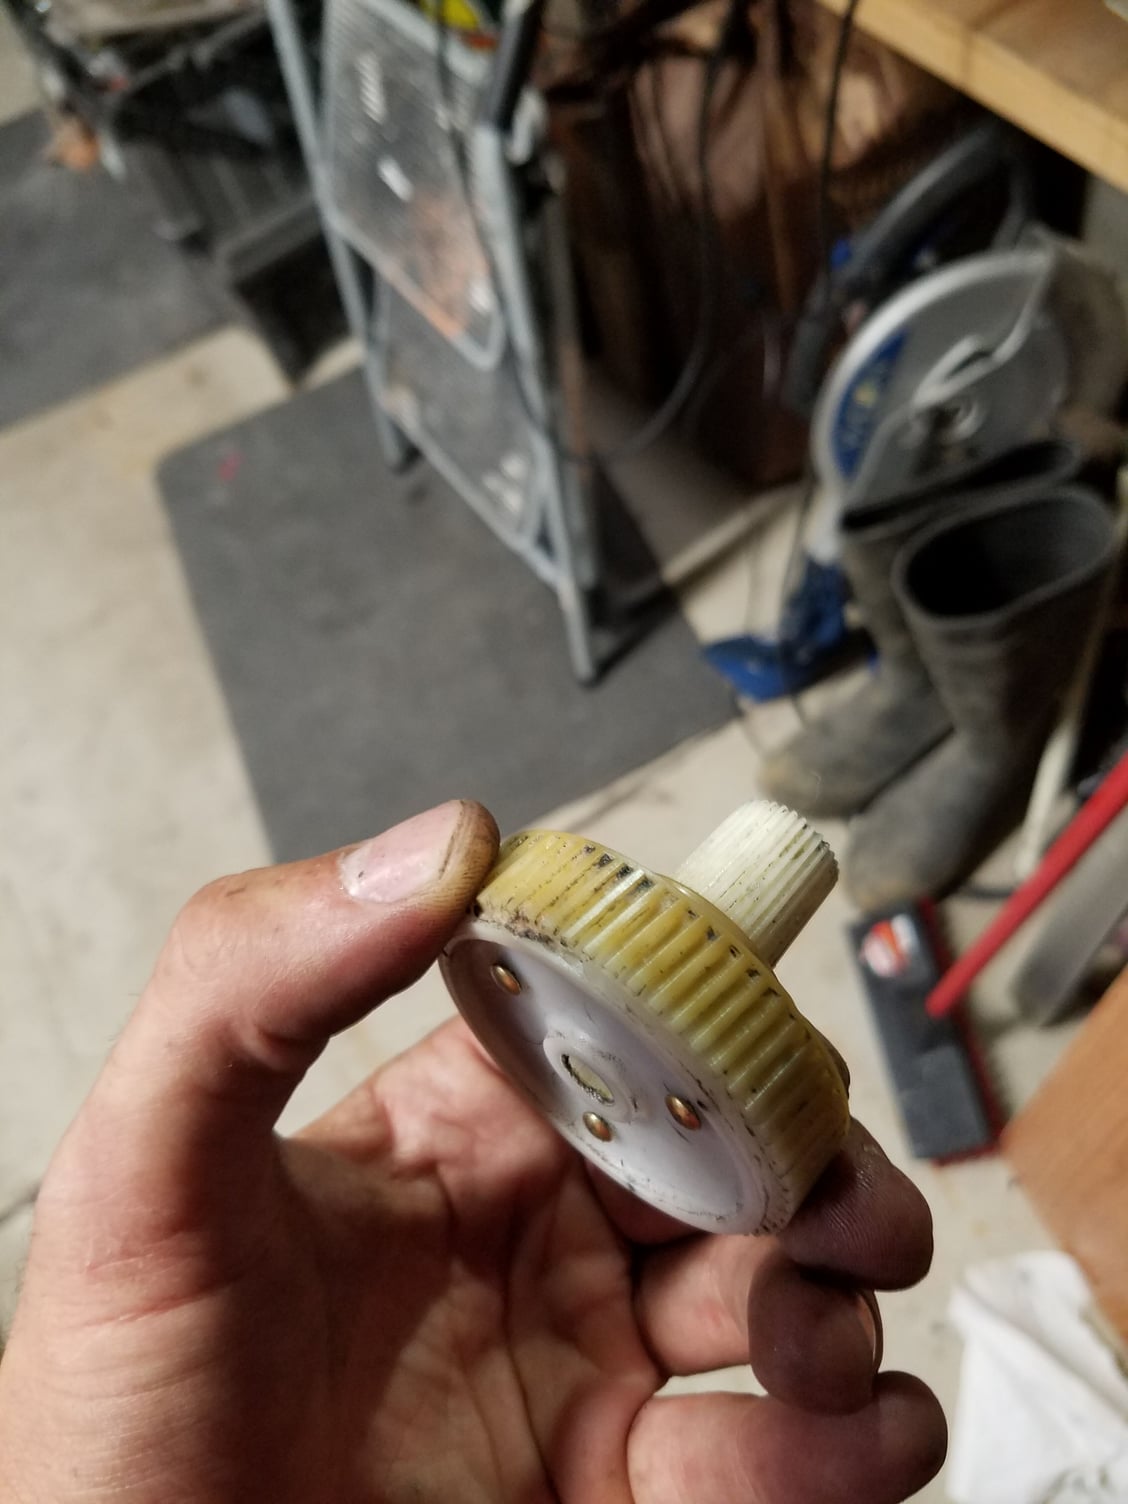
Once the clip is off you will be able to lift the top plastic gear off the bottom gear that connects to the motor.
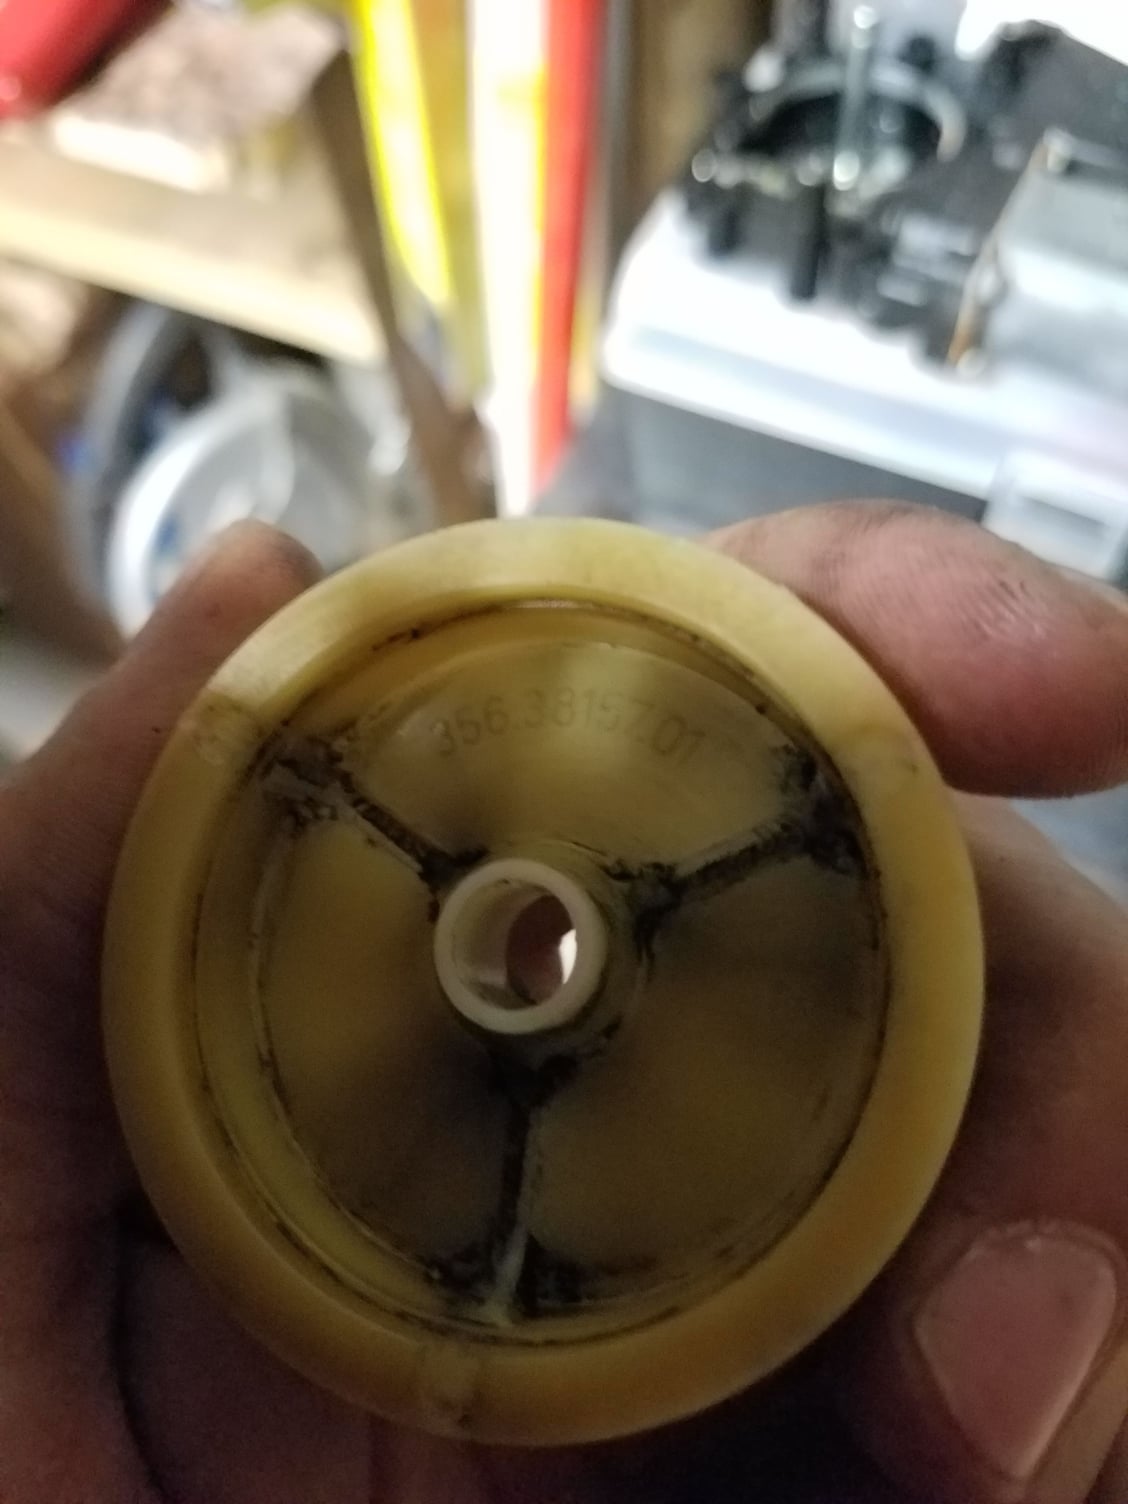
Once that top gear is removed you will see that the plastic walls inside the lower gear have broken off due to whatever reason and they don't connect to the top gear anymore allowing the window to raise or lower.
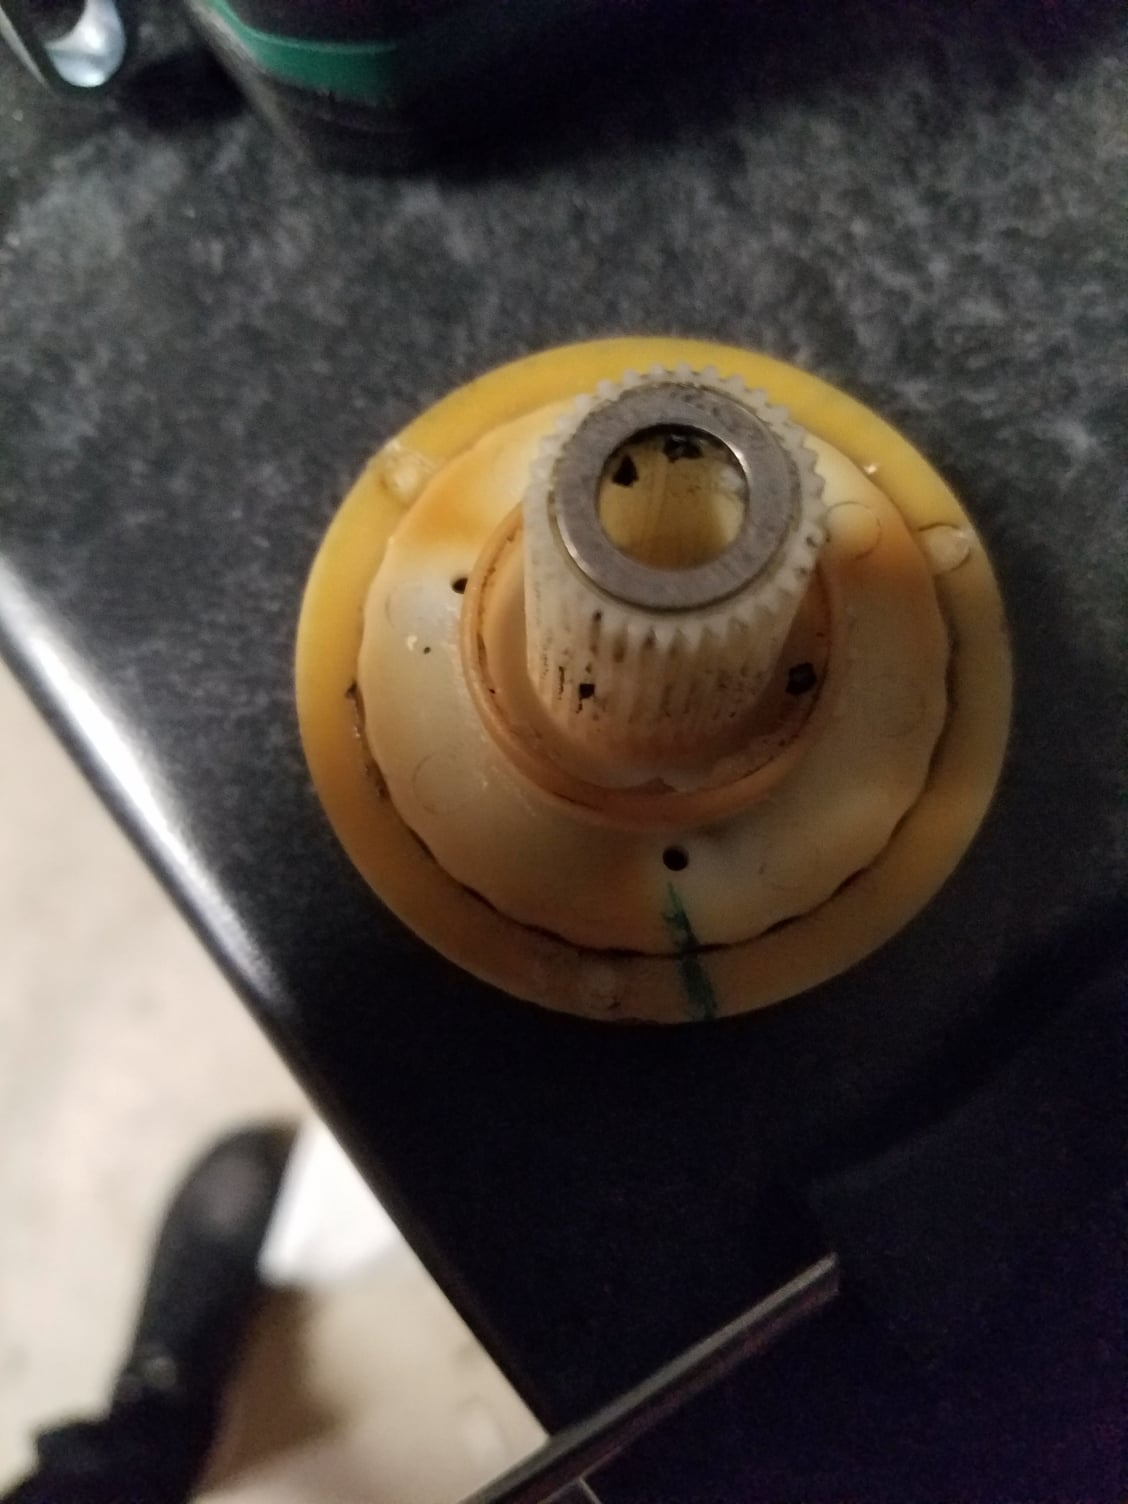
Pull the bottom gear out next, it isn't held in by anything so you can just lift it straight up.
I took both gears and gave them a really good cleaning removing most of the old grease and debris.
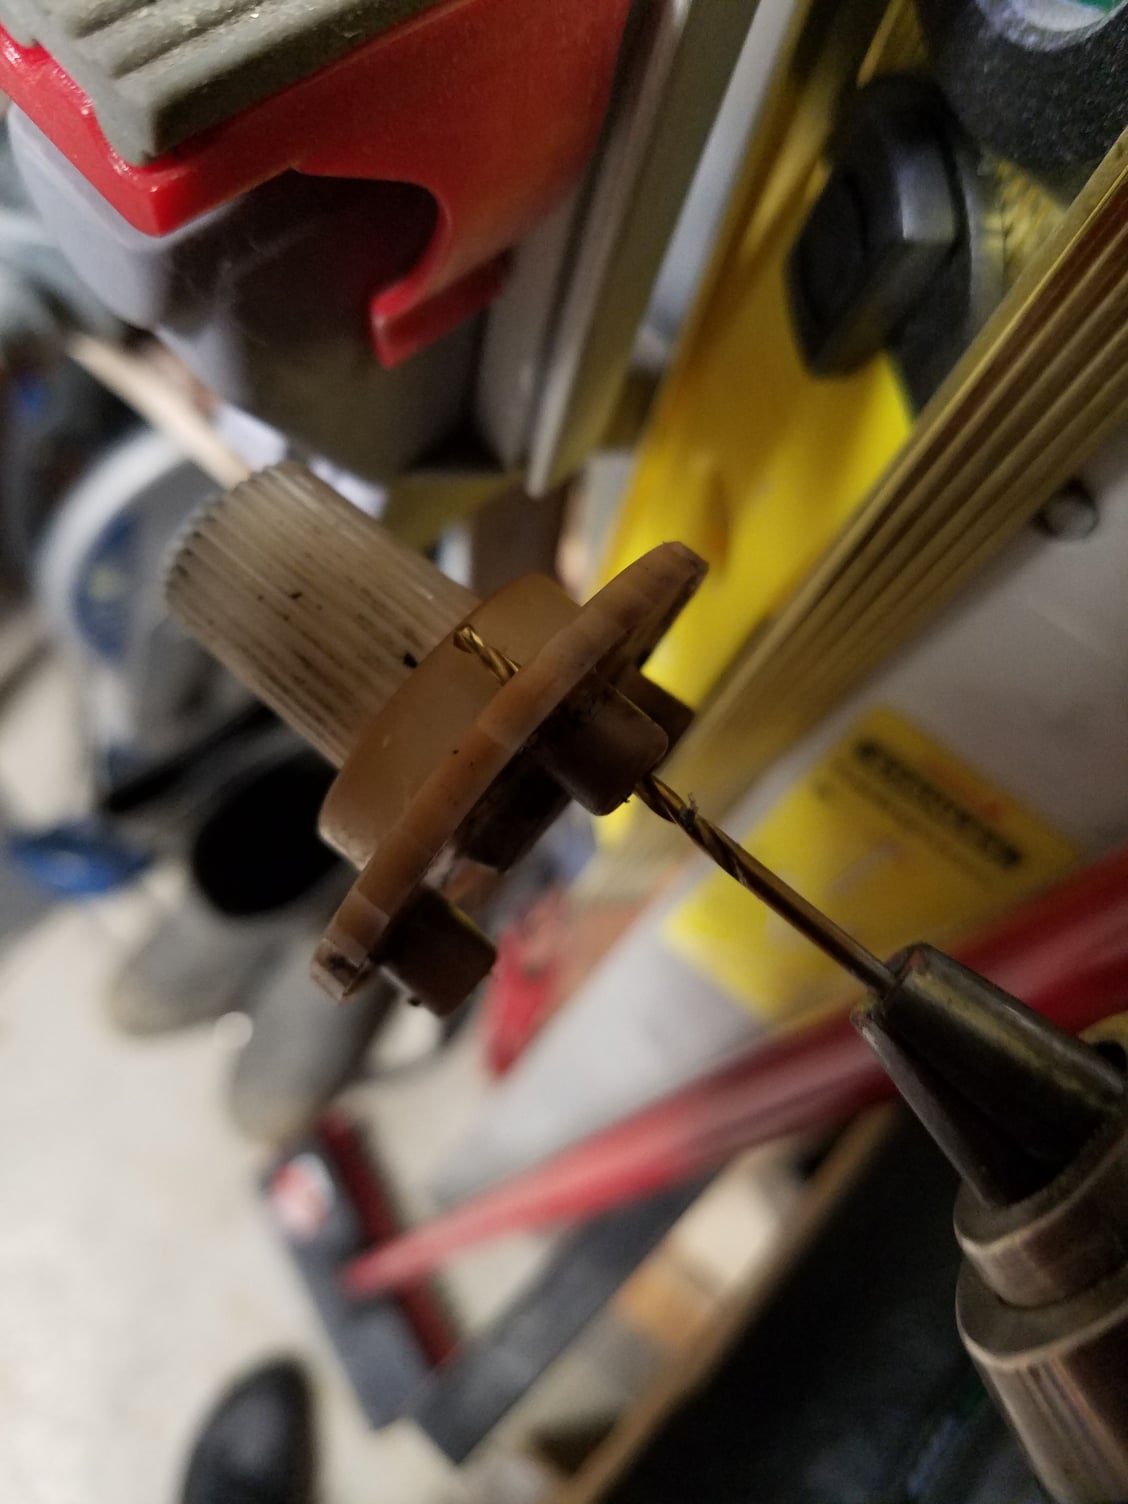
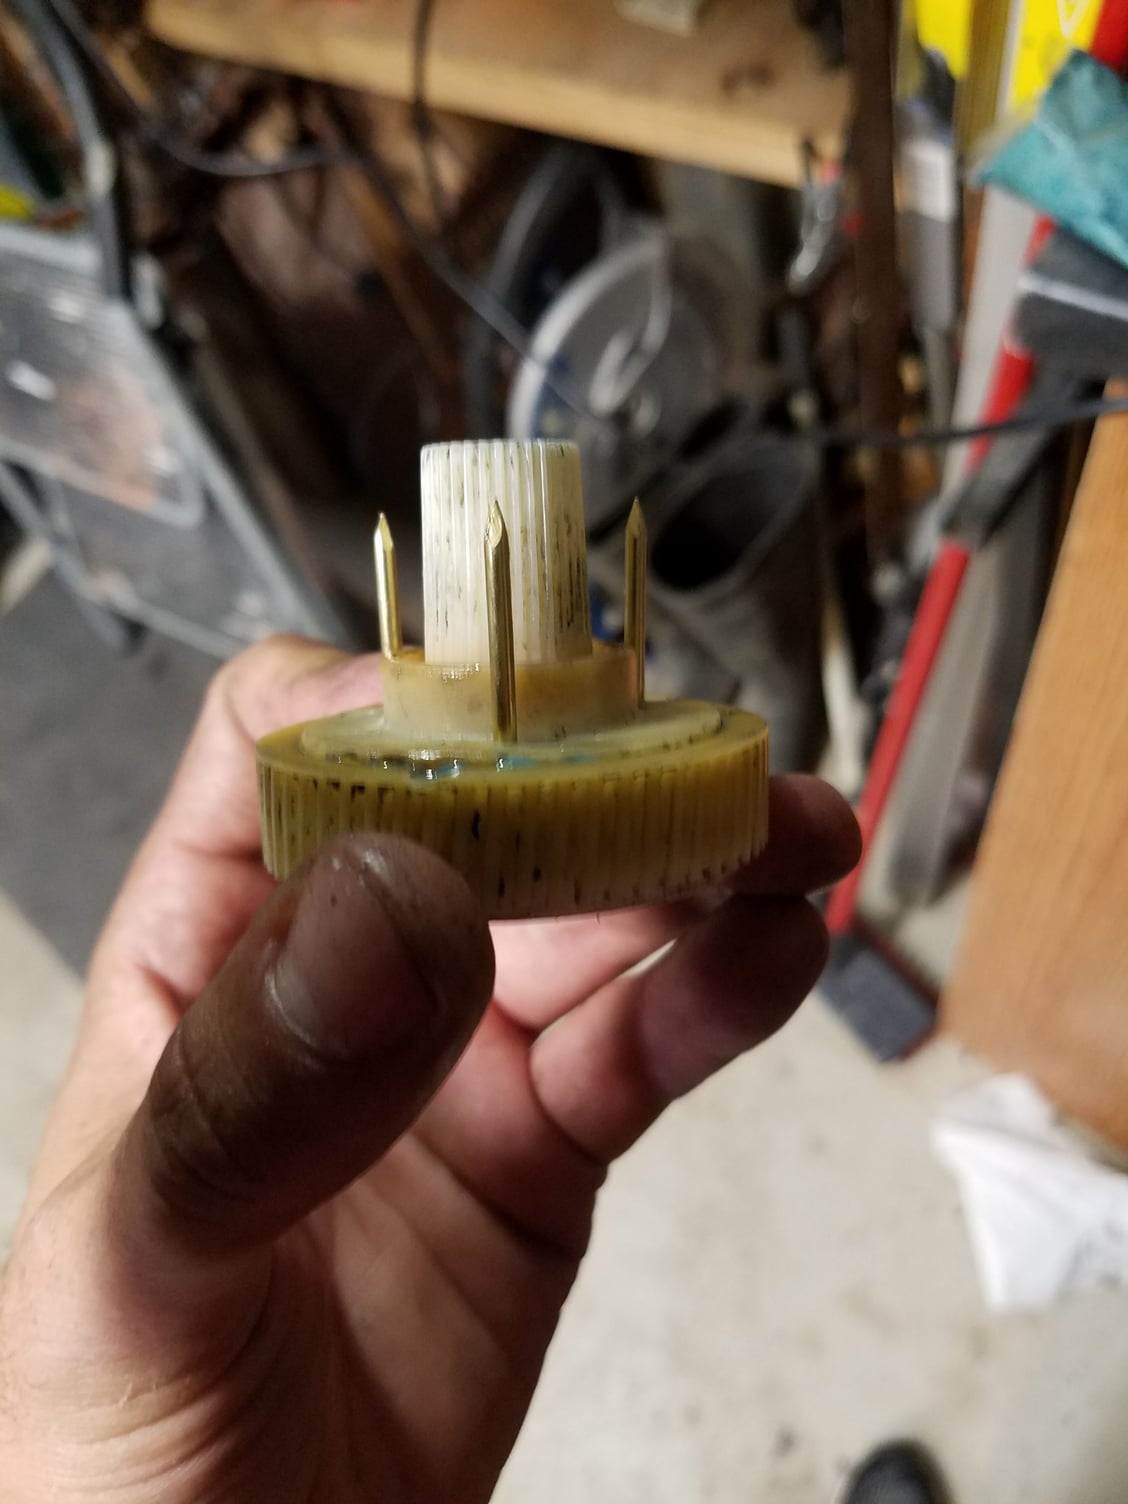
After the cleaning is finished, take the top gear and drill a small whole as shown in the picture. You can use any size drill bit as long as it fits within the dimensions of the tubes that stick out from the bottom of the gear.
There are 3 tubes underneath so I drilled a whole through each. Make sure that the screw or nail you choose is larger than the diameter of the whole so that it fits very snug and wont fall out at anytime
Once you have the 3 holes drilled out as such, connect the top gear back onto the lower gear as they normally sit then make a small marking across both gears as shown.
After you mark them, with the two gears still connected, take the drill and now drill through the same holes again but this time go all the way down through the bottom gear so that both gears have matching holes.
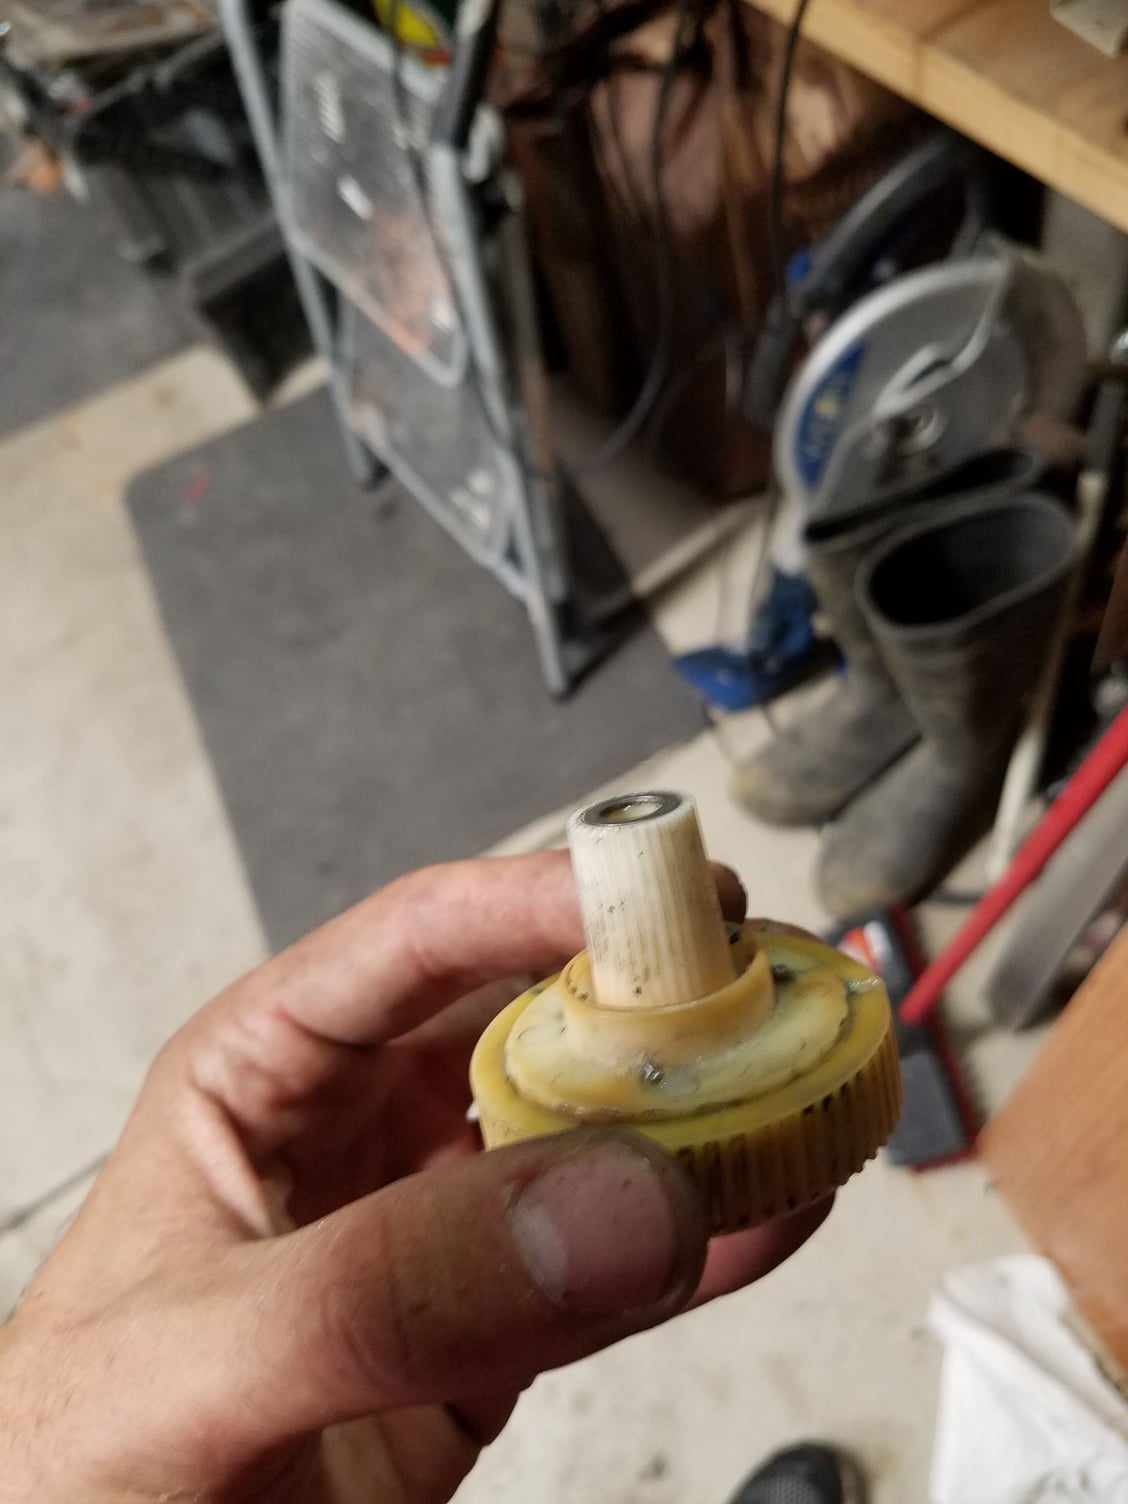
It should look like this
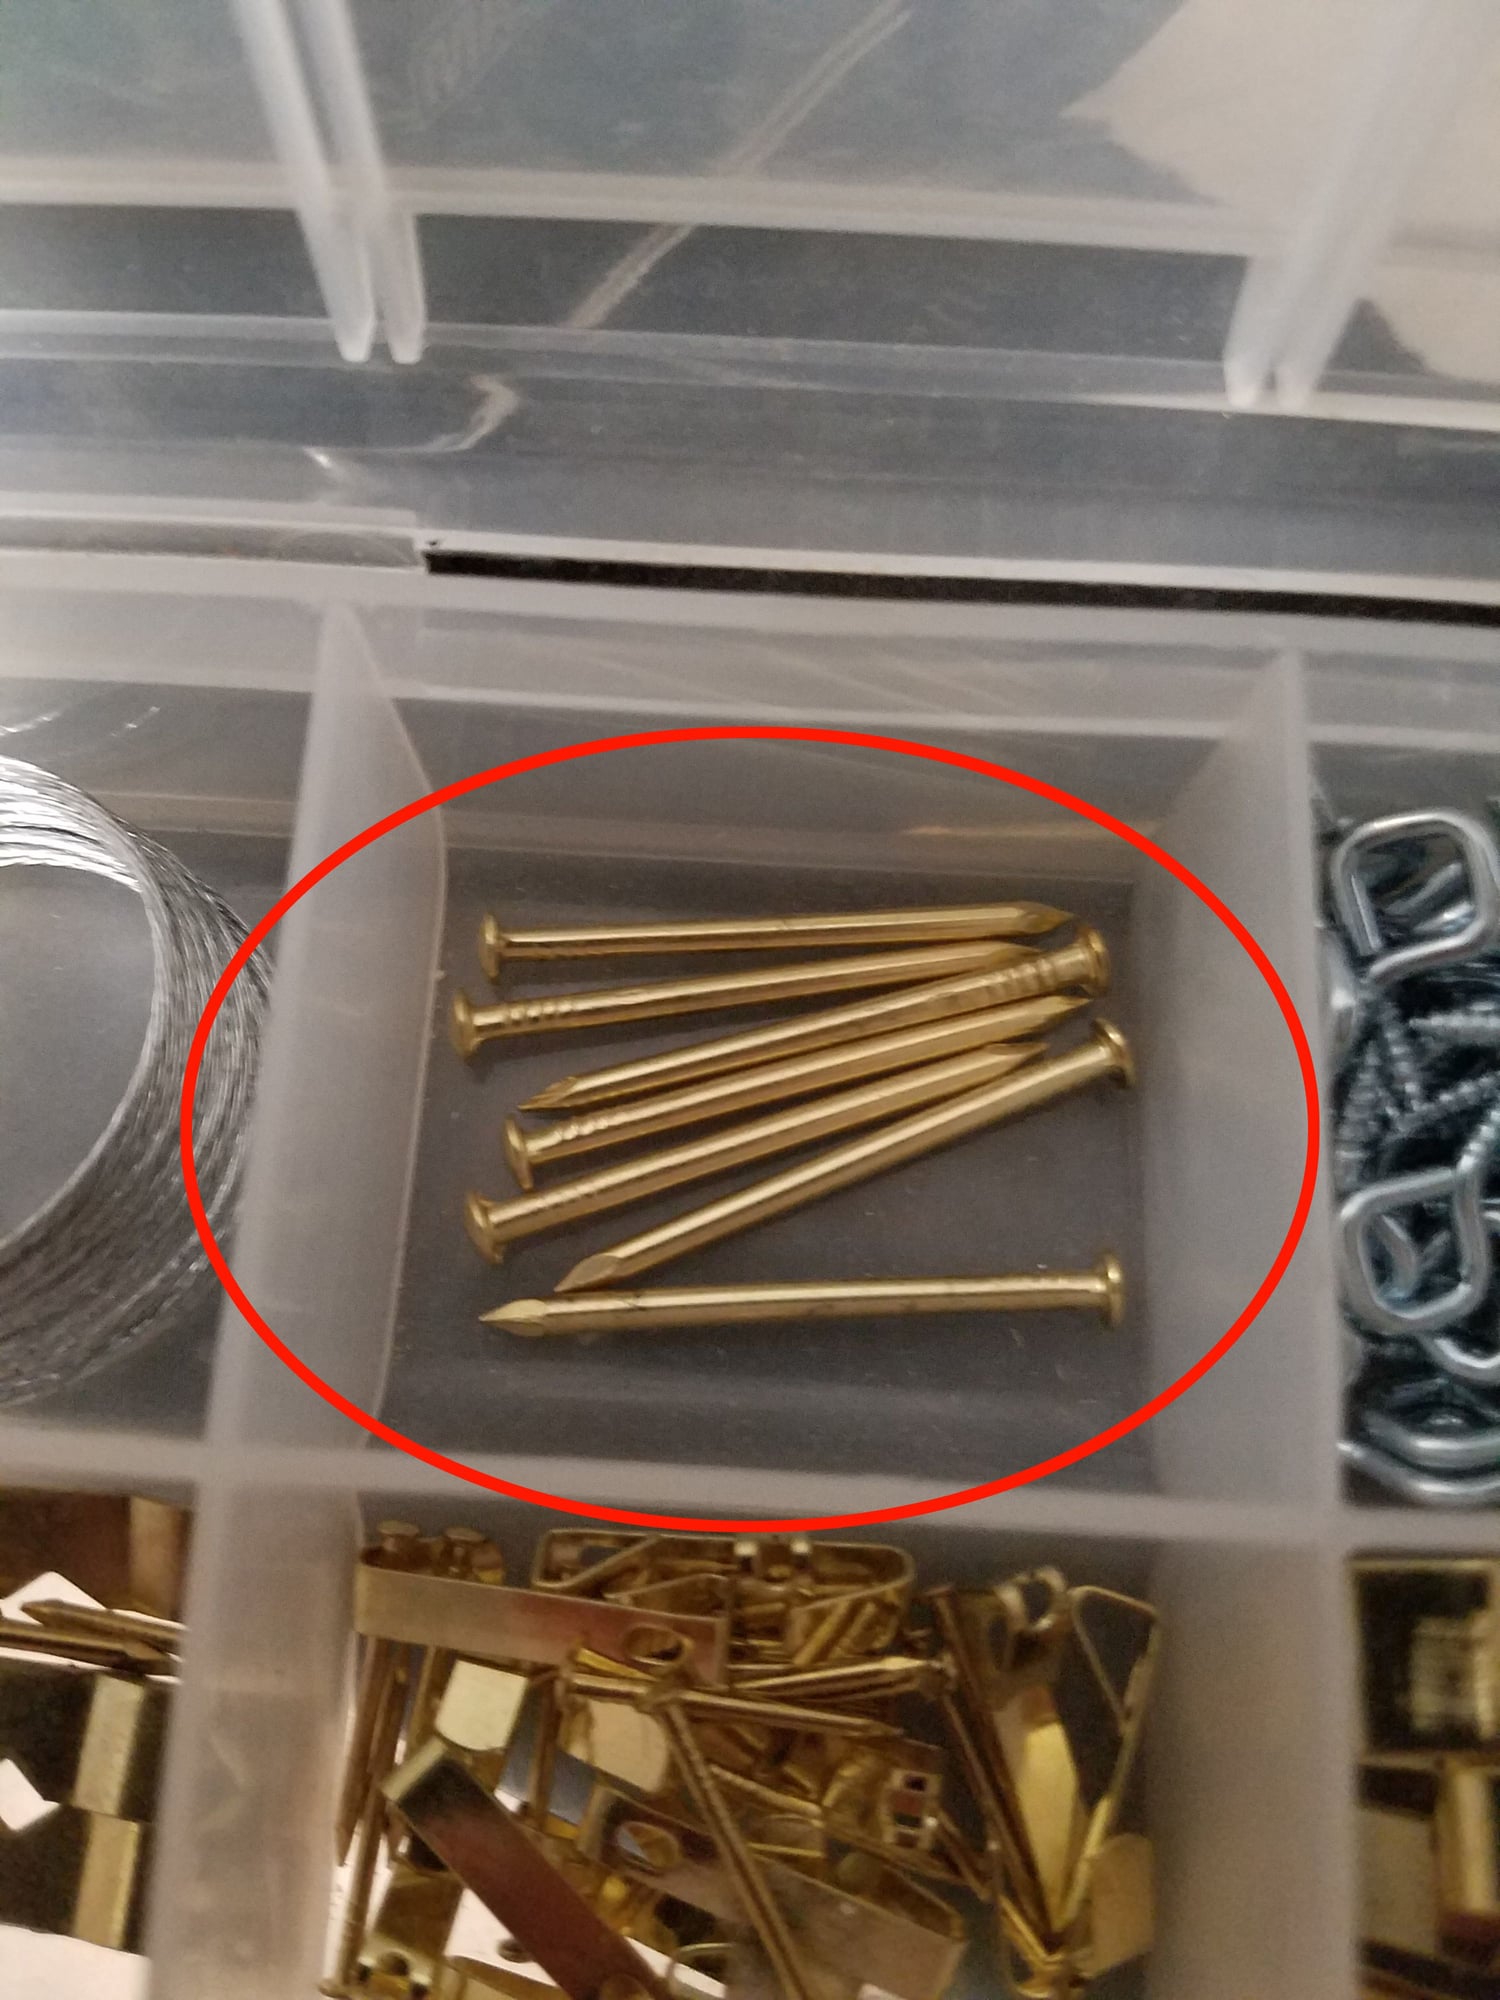
These are the nails I used for the next part, you can find them anywhere or you can find something similar that will fit better...
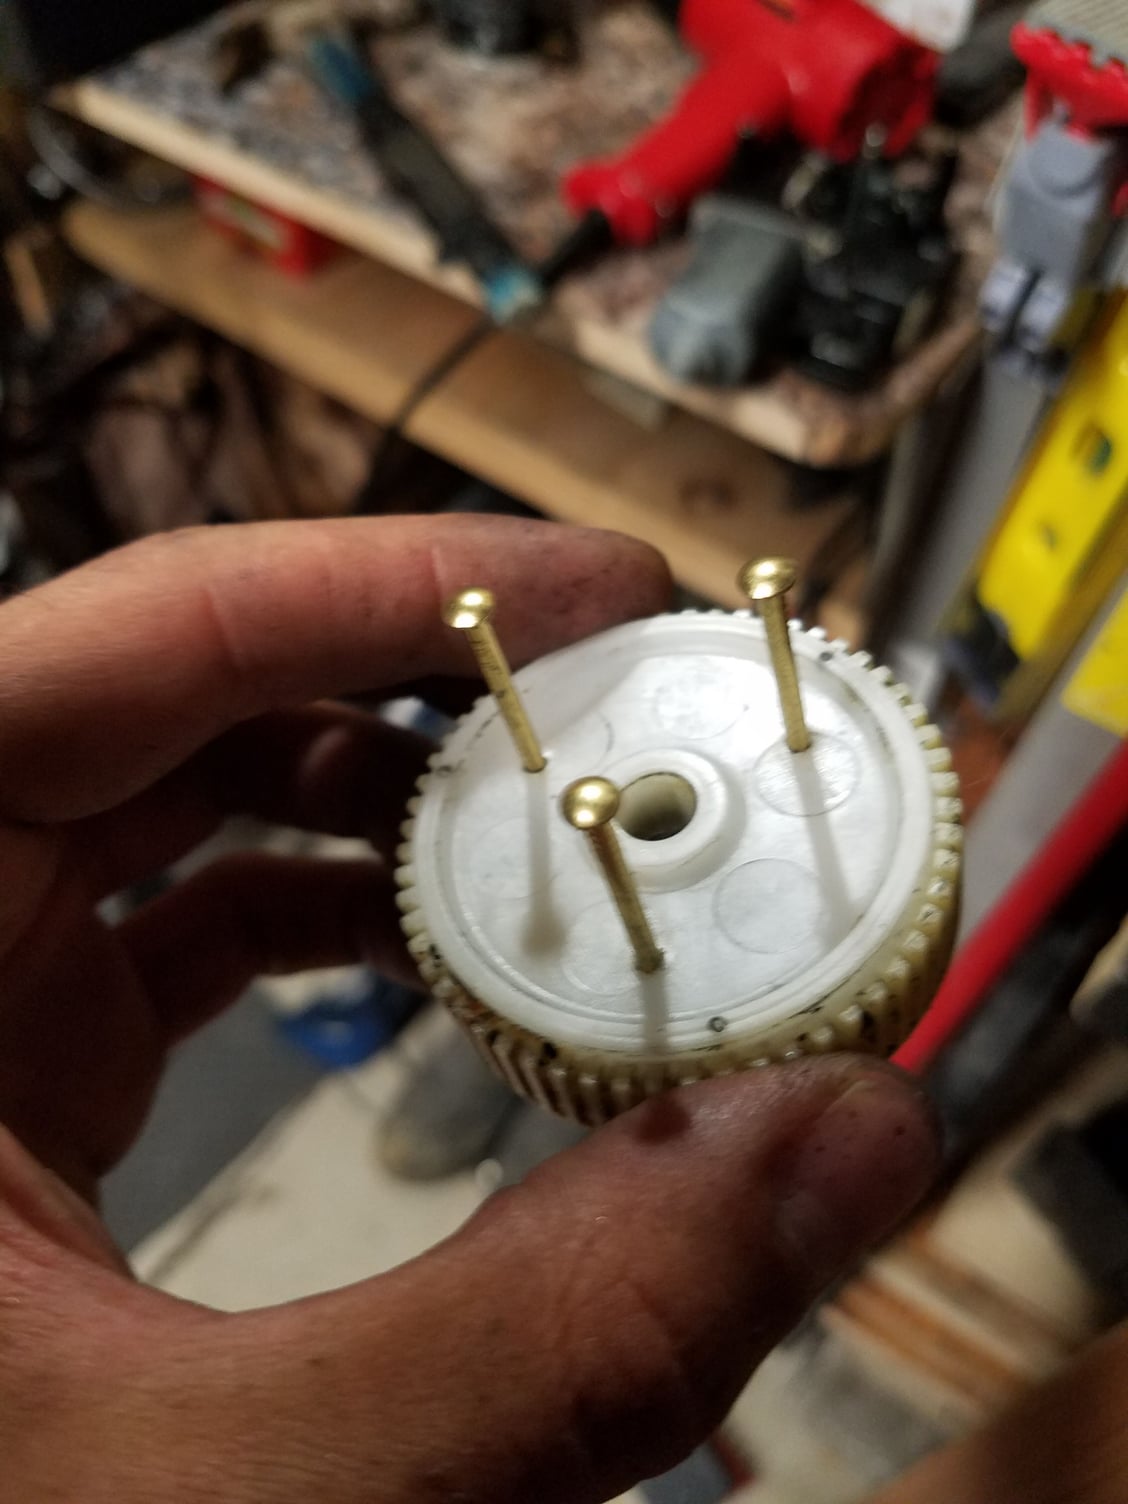
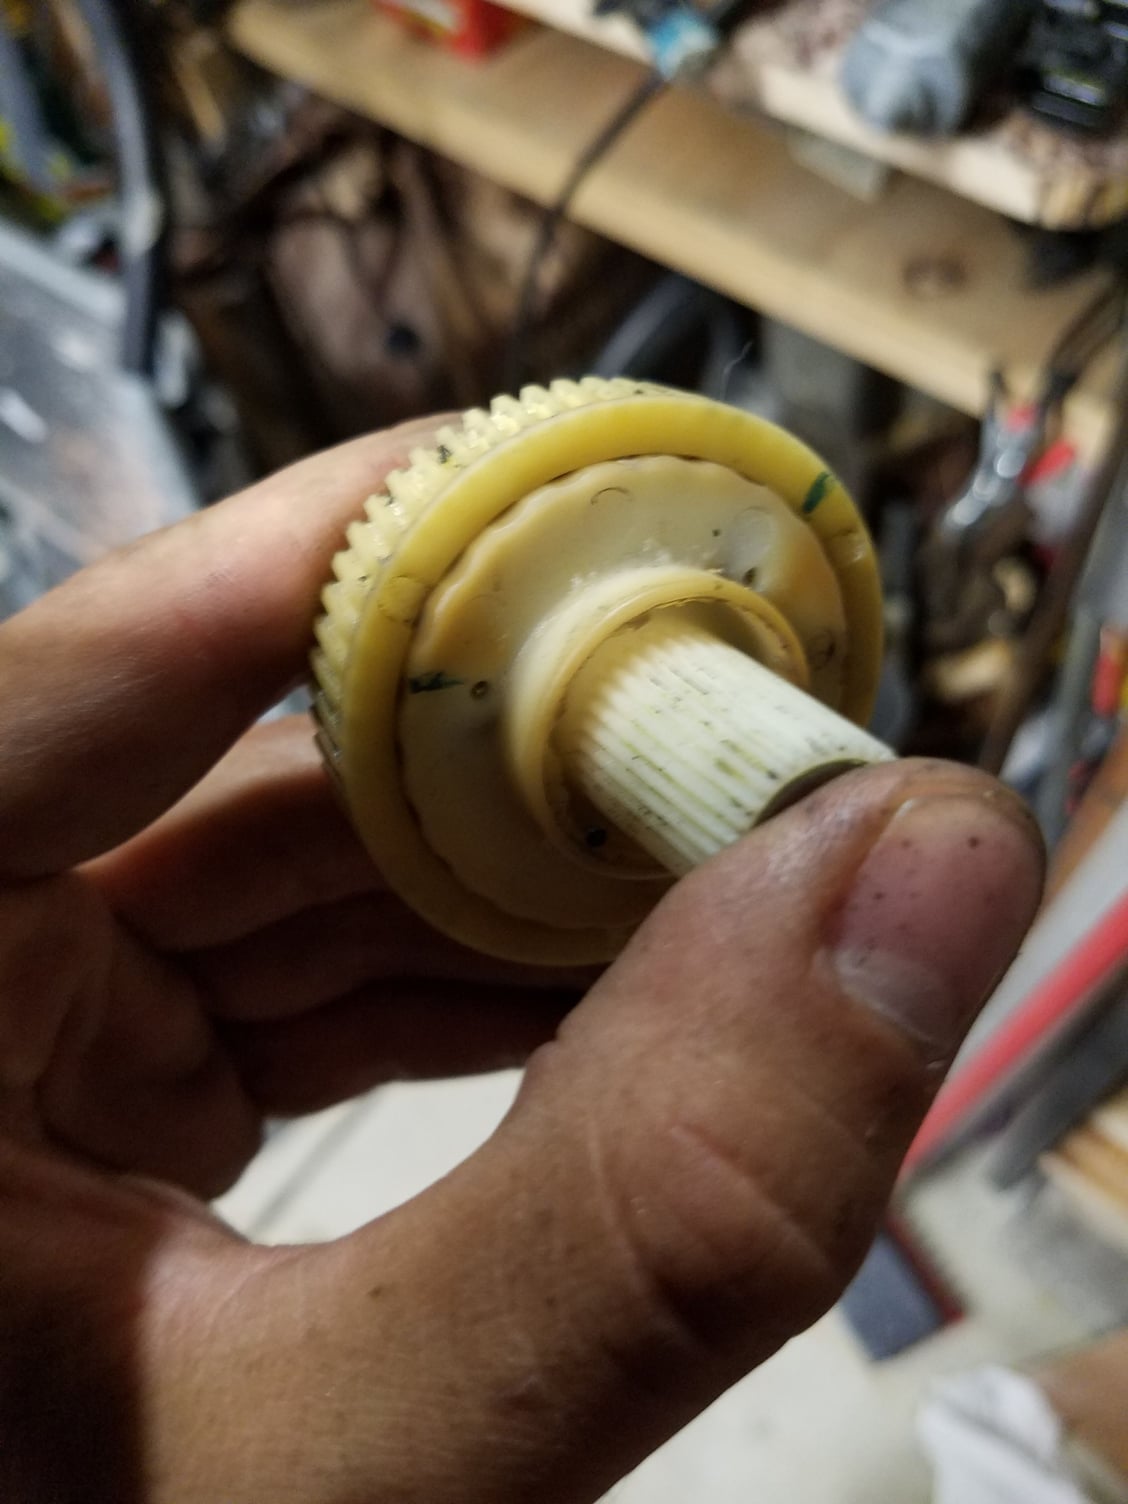
Next you lightly tap them in through the bottom of the lower gear
Once you get them through enough you take the top gear and align the holes so the nail can go all the way through both gears
Once those steps are done you take a dremel and attach the sanding dish to it and simply sand each nail until its almost flat to the plastic. Careful not to damage the gears. It doesnt have to be exact but the closer the better
Notice how the nail head clears the bottom of the gear, make sure the screw or nail you use does exactly the same or better or else it will hit the plastic that the gear sits on while the motor turns the gears.
Now grease the gears back up along with the motor where the gears sit and put everything back together following the steps in reverse.
One thing I messed up on is not recording how the window motor sounded and acted before I decided to rebuild it. By then I had everything apart and it was too late. After this repair my window does work 100% in both directions along with it opening slightly when I pull the door handle to open or close the door.
Hopefully this can save a few of you some money in the future...these things are expensive
That looks to me like a breakaway clutch where the ribs are intended to fail if the assembly is subjected to excessive load. The repair job should do the trick, but the window is no longer immune from whatever damage that device was included to prevent.
The southern engineering aspect of this DIY appeals to me (confession: there is a 2' section of ABS pipe jammed into the A/C system on my 'Vette to "fix" an issue with the flap actuators), but in this case if a replacement piece for the ribbed gear can actually be sourced and it isn't prohibitively expensive, it would be worth using.
im all for doing a manual repair, but the entire window regulator is pretty cheap. By the time I factor in my time to dig into the broken regulator I could have replaced the entire thing with a brand new one with (claimed) better designed internals. they are less than 150 per side...
Some of us don't consider time spent DIYing as an expense - and "free" vs. $150 helps keep the money in the 911 repair kitty when something unavoidable comes up.
You can go broke in short order replacing 911 parts that are "only" $150.
Originally Posted by RngTrtl
im all for doing a manual repair, but the entire window regulator is pretty cheap. By the time I factor in my time to dig into the broken regulator I could have replaced the entire thing with a brand new one with (claimed) better designed internals. they are less than 150 per side...
Once you deem your time too valuable to mess with fixing parts, it's generally also time to buy a car with a warranty. But where's the fun in that? Most folks are probably too young to remember the days when every town had a fixit shop where you could take your TV, or your vacuum, or your adding machine - and some ancient guy named Sam or Al would tell you to come back in a week. Throwaway stuff is convenient, but man it was nice to just be able to buy something ONCE.
Wow... our conveniences really cost us these days don't they? I remember when you really "rolled up" windows. Aside for lubricating those things, they were maintenance free and always worked. We still have trucks in the family that are over 40 years old and still have original windows and manual regulators... and they still work like a charm.
The regulators are only $125, but the motors are much more expensive. Motors are not included. It would have been just as easy to use nylon screws instead on the metal ones use, and provide some kind of safety release.
That looks to me like a breakaway clutch where the ribs are intended to fail if the assembly is subjected to excessive load. The repair job should do the trick, but the window is no longer immune from whatever damage that device was included to prevent.
That's an astute observation, I hadn't thought of that. If you're switch was stuck or something, you probably would want those tabs to break.
Agree $125-$150 is not much in the overall scheme...but for those 3 dinky broken plastic bits, that's when it seems a tad ridiculous.
Very creative ! Thanks for sharing.Do you think these alternatives would work?
1. use 3, #6 bolt+nut+loctite. Instead of 3 nails ?
or 2. use 3 plastic POM rivets
im all for doing a manual repair, but the entire window regulator is pretty cheap. By the time I factor in my time to dig into the broken regulator I could have replaced the entire thing with a brand new one with (claimed) better designed internals. they are less than 150 per side...
I see your point but this is for the motor not the regulator, it cost me about an hour of time and no money out of pocket. Im all for doing things the right way but if I can use my creativity to fix a problem rather than order a new part, wait a few days to recieve it and then have to spend the same amount of time replacing it anyway then to me it comes out more beneficial to do it my way
Originally Posted by 5CHN3LL
That looks to me like a breakaway clutch where the ribs are intended to fail if the assembly is subjected to excessive load. The repair job should do the trick, but the window is no longer immune from whatever damage that device was included to prevent.
The southern engineering aspect of this DIY appeals to me (confession: there is a 2' section of ABS pipe jammed into the A/C system on my 'Vette to "fix" an issue with the flap actuators), but in this case if a replacement piece for the ribbed gear can actually be sourced and it isn't prohibitively expensive, it would be worth using.
You are correct, it prevents damage to the motor. Ill have to be cautious when closing the window ��
Heres a picture of part number for the broken piece...at least I think its a part number. Maybe someone can look into it, it reads 3563815201
Originally Posted by mrjonger
Pretty clever, thanks for taking the time. I think I'm going to have to do this in the near future, it'll save me a few bucks.
Its definitely a good way to save some dough. Window motors are expensive
Originally Posted by Schnell Gelb
Very creative ! Thanks for sharing.Do you think these alternatives would work?
1. use 3, #6 bolt+nut+loctite. Instead of 3 nails ?
or 2. use 3 plastic POM rivets
You dont necessarily have to do this the exact way I did,I used the first thing I could find in the garage but if you have better ideas I say do it!
I know I posted this 2 days ago but since I did the motor repair its been about a week and the window still runs strong
That looks to me like a breakaway clutch where the ribs are intended to fail if the assembly is subjected to excessive load. The repair job should do the trick, but the window is no longer immune from whatever damage that device was included to prevent.
5CHN3LL brings up a good point. I wonder if this (i.e. breakaway clutch) is not a safety mechanism to prevent little fingers from being crushed in the window?
 08-23-2016, 04:46 AM