Bluetooth and Aux Input Install – 996 with Becker Radio
 11-30-2014, 07:09 PM
#1
Rennlist Member
Thread Starter
This procedure covers the installation of a Yatour aux input and bluetooth system in the Porsche 996, I put the same system in my 968 with a Porsche Traffic Pro radio, it actually works with any Becker radio. This system is available for many different type of OEM radios.
This system WILL NOT WORK with a MOST bus radio, from my understanding this was in the 2003+ cars with the Bose option.
You can stream radio from your phone into the system or you can talk hands free over the car speakers and supplied microphone. You have to be selected to external CD player for this to occur.
This is the second Porsche that I have put this in and it’s great. It is super simple and will take about two hours if you’ve never done it before. Maybe four if you are slow, but that’s just a Saturday morning. I would say anybody could do this regardless of skill level with these instructions.
What you’ll need:
I got my Yatour aux input on ebay, just put “Yatour Becker” in your ebay search for the main module and “Yatour Bluetooth” for the Bluetooth module. You’ll need both. I got them from China, expect to pay about $140.00 for both shipped, they usually arrive in 7 – 10 days.
You can also get the radio removal tools on ebay if you don’t have them already.
There is NO HARD WIRING required, i.e. it uses the power, ground, etc. all from the CD changer connections. Just plug and play.
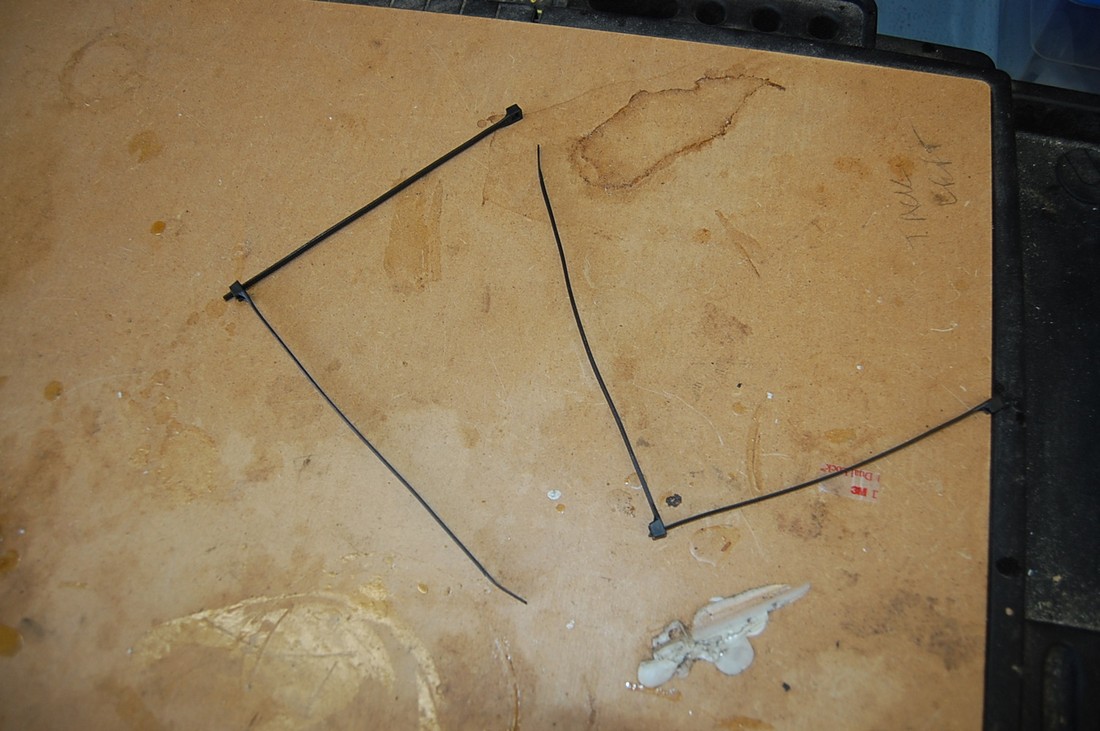
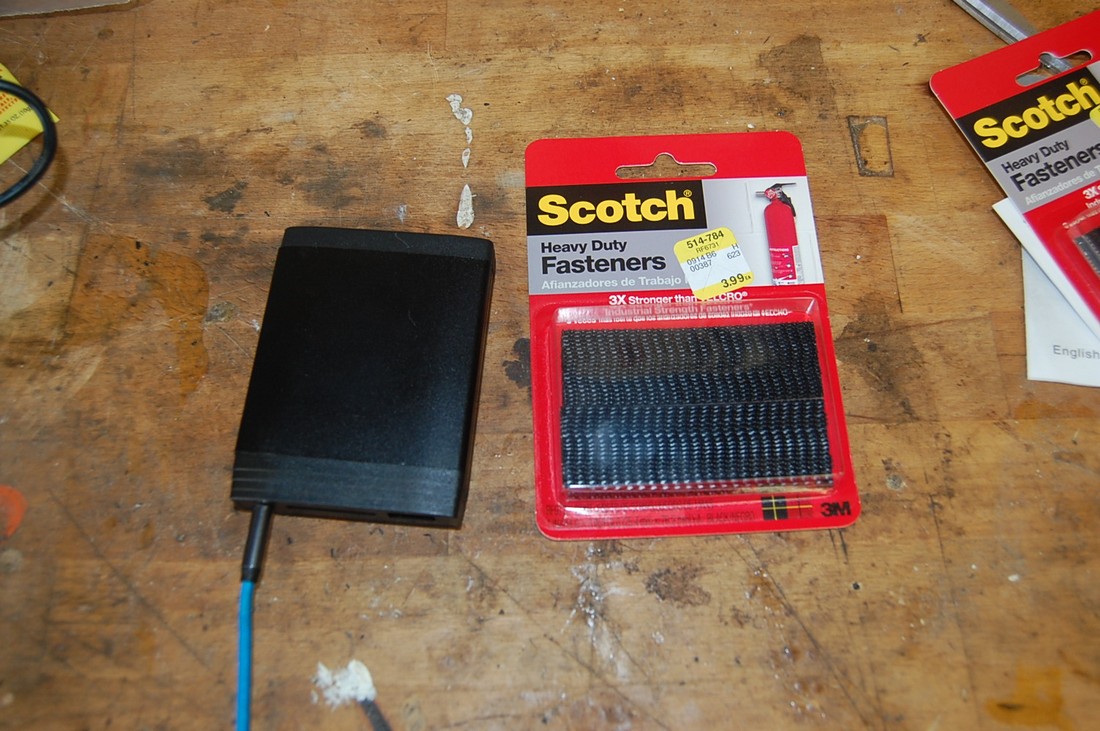
Here are some pictures of the units:
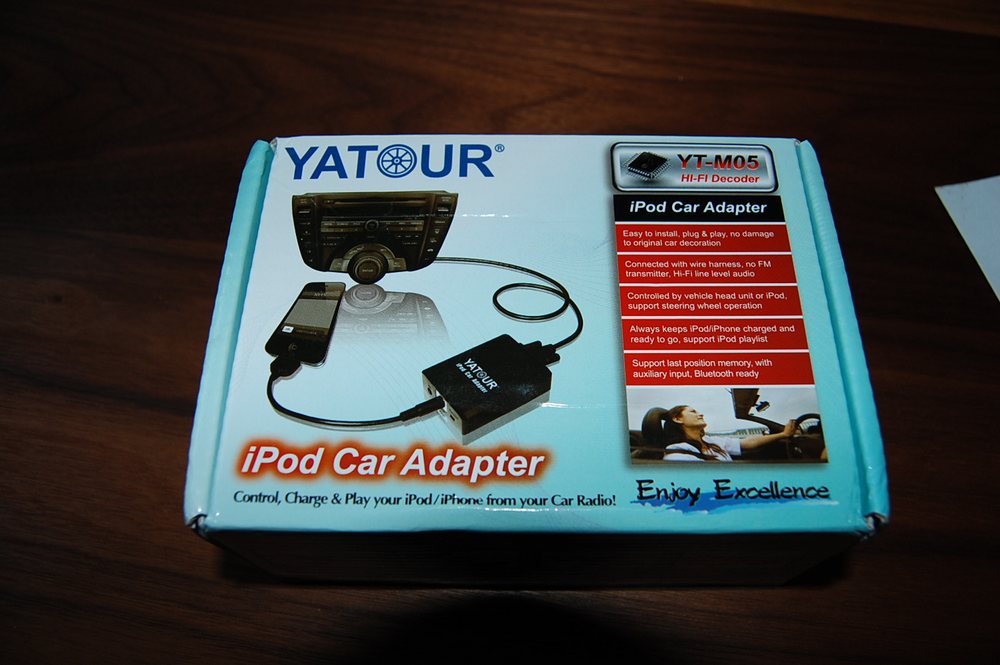
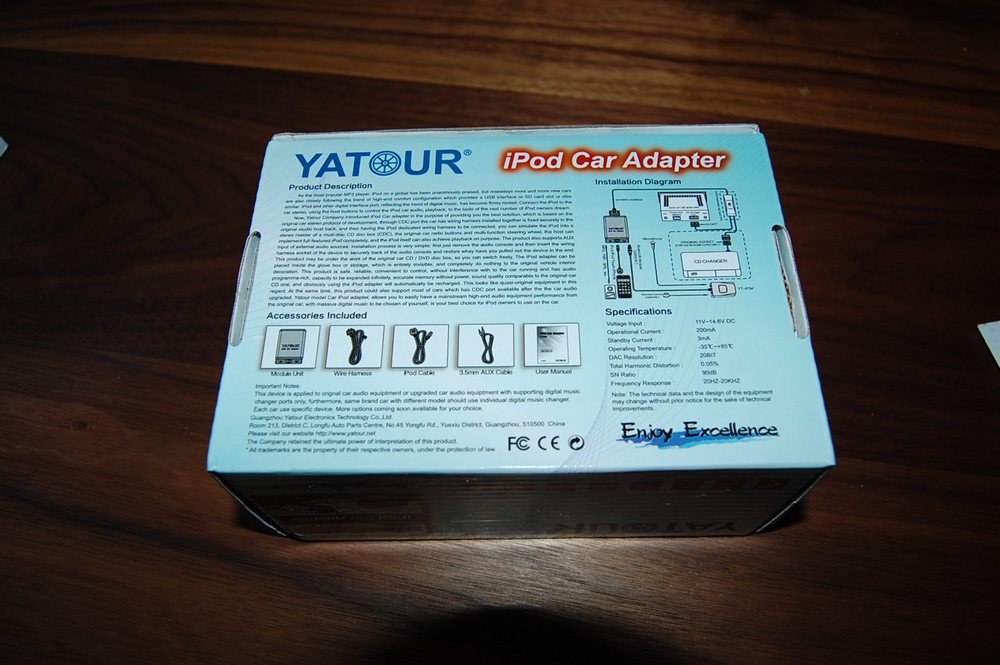
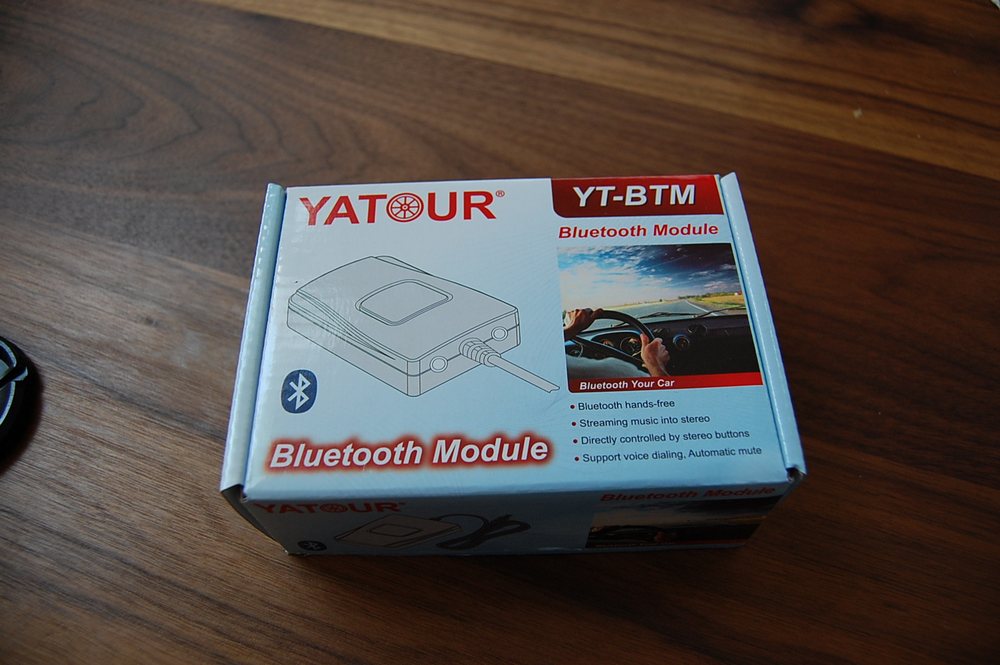

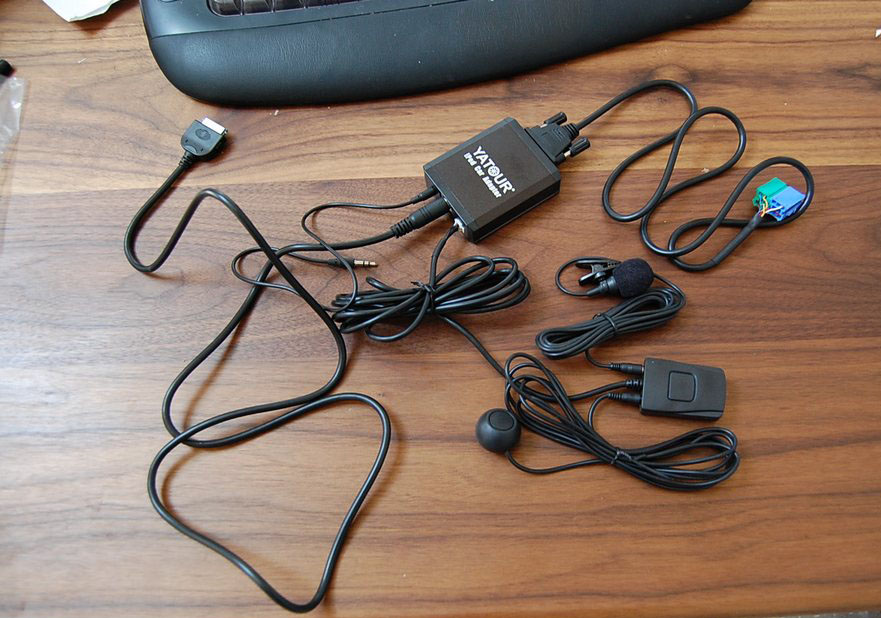
The pictures above are of the one I put in my 968 (long live that car, one of my all-time favorites). The module I got for my 996 did not have the iPod input, and considering that they are changing all the time, and that I use the aux input only, it did not seem to be anything that I missed.
Another thing that you might see in the last picture above is the addition of one module with a button. I did not get that with my present kit (or I threw it out), it just extends the module that it is plugged into and based on this procedure, you don’t need it.
Now to start. Get a six pack and make sure it’s cold. Pop the top on the first one…okay, you might want to skip this step.
Here are the radio removal tools, you just put one in each slot on the bottom of the radio until it engages, then pull the radio out by pulling on each tool.

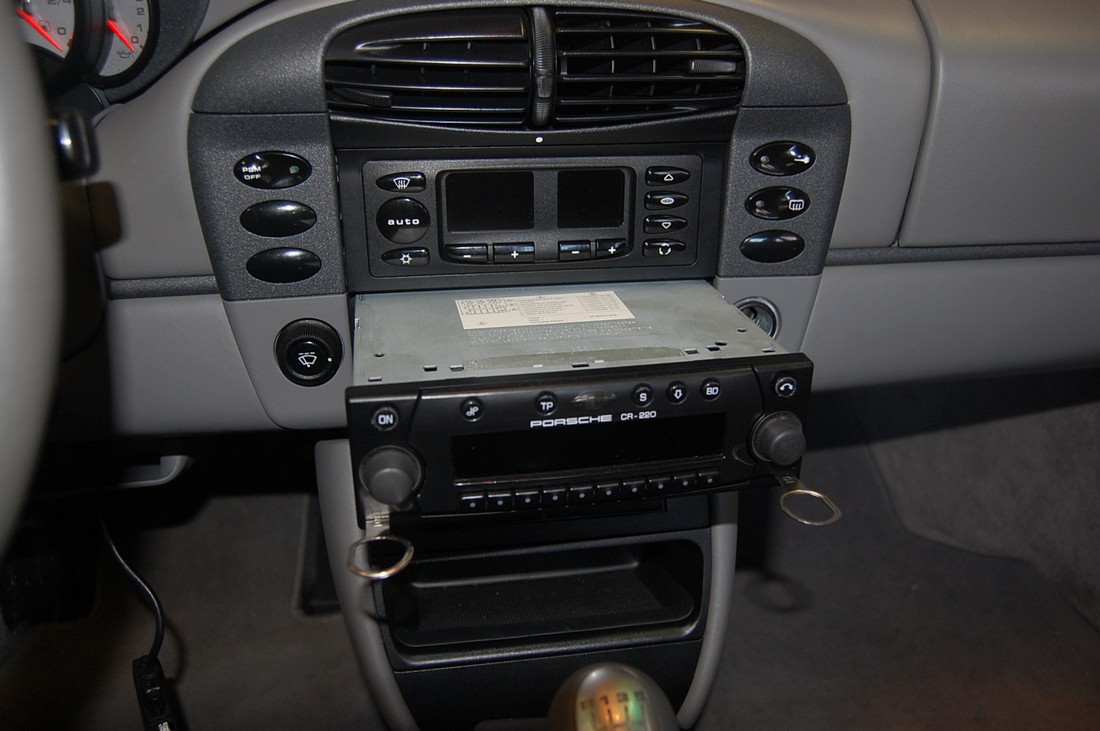
After the radio it released, release the radio removal tools by pushing on the tabs on the side of the radio that are now exposed and take the tools out. Put a towel over the opening of the radio/shifter during this part of the procedure.
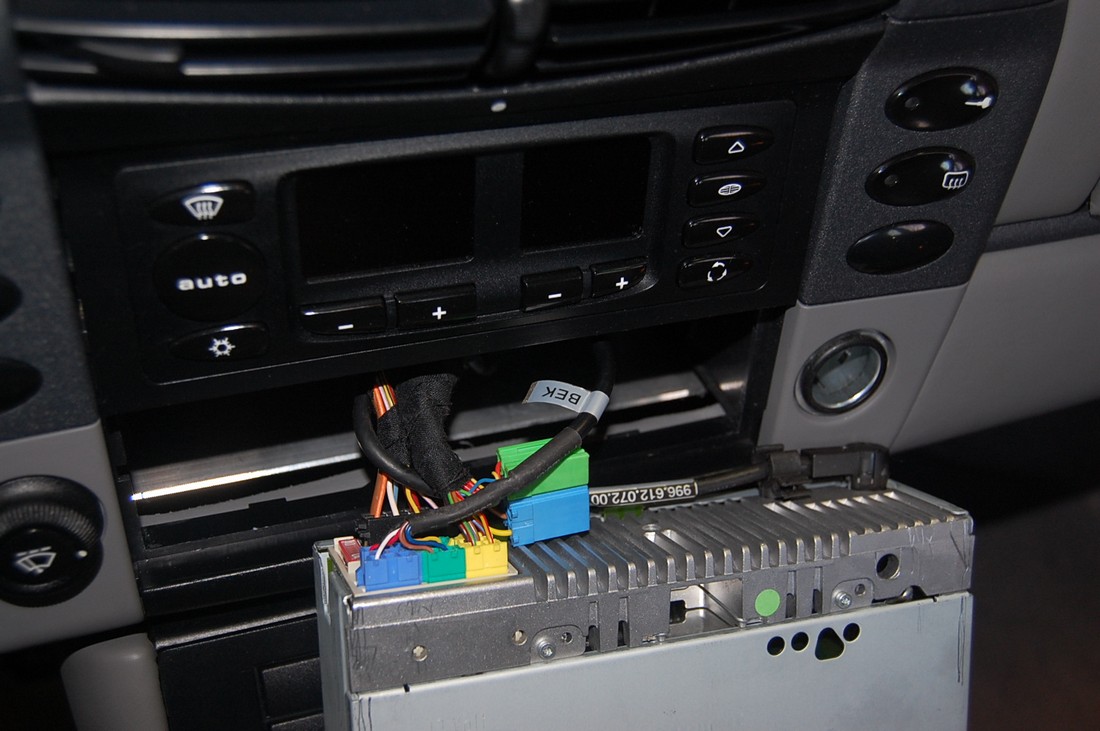
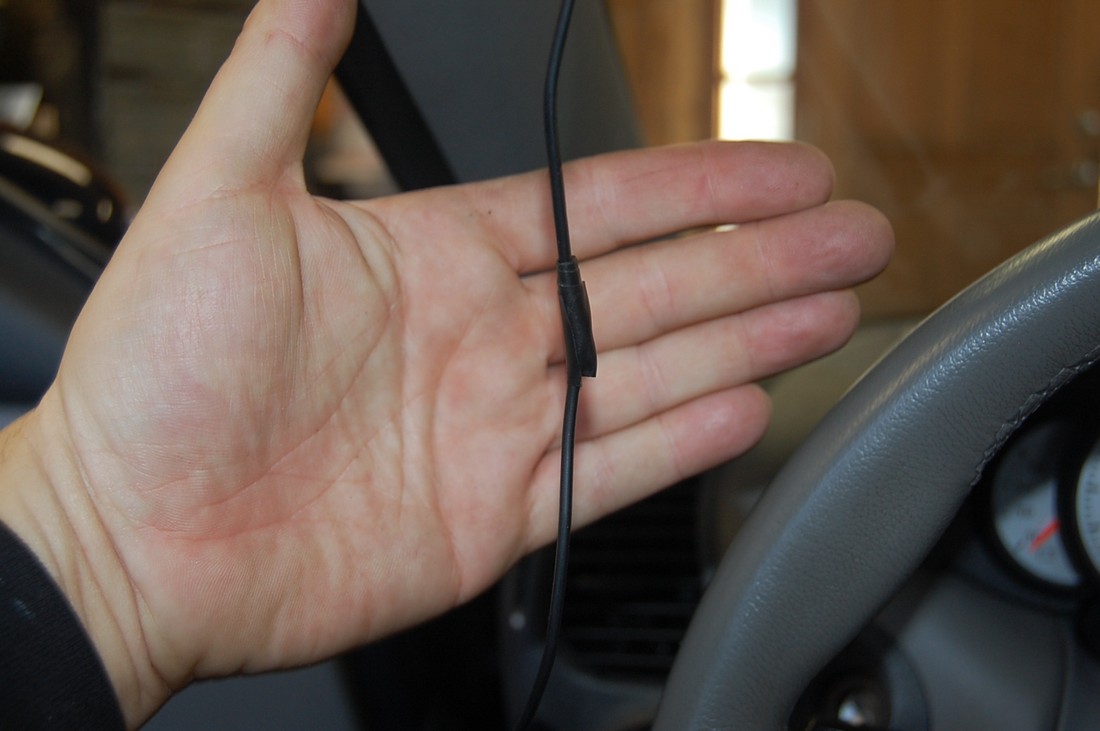
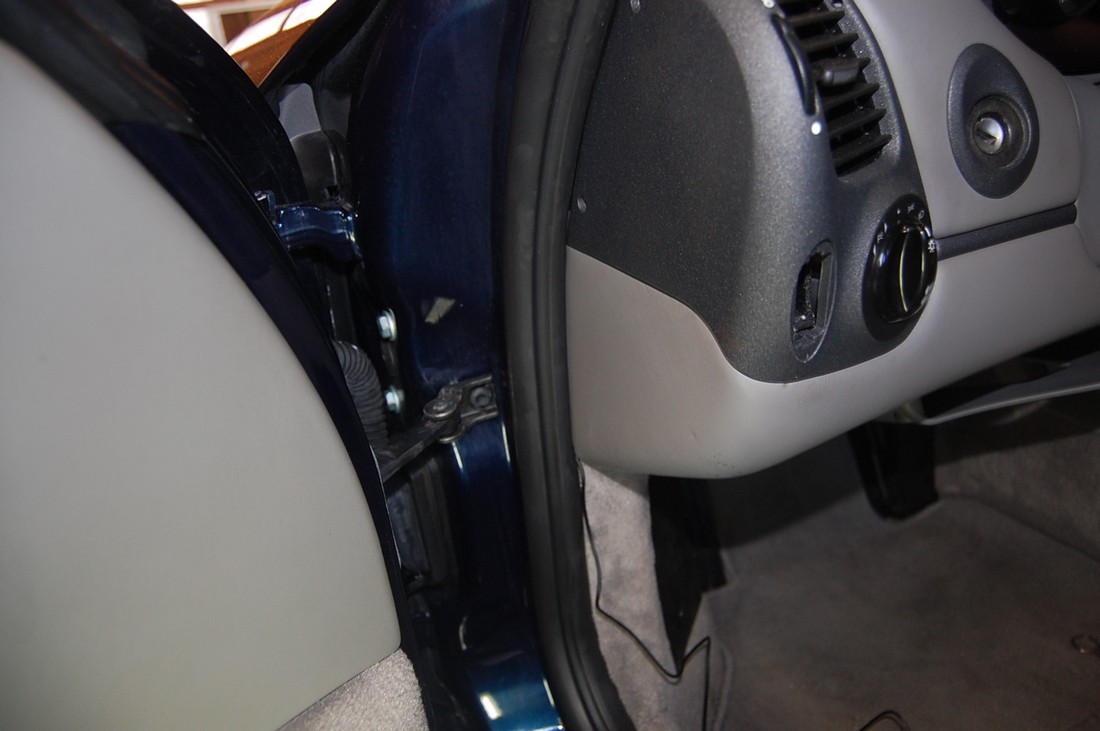
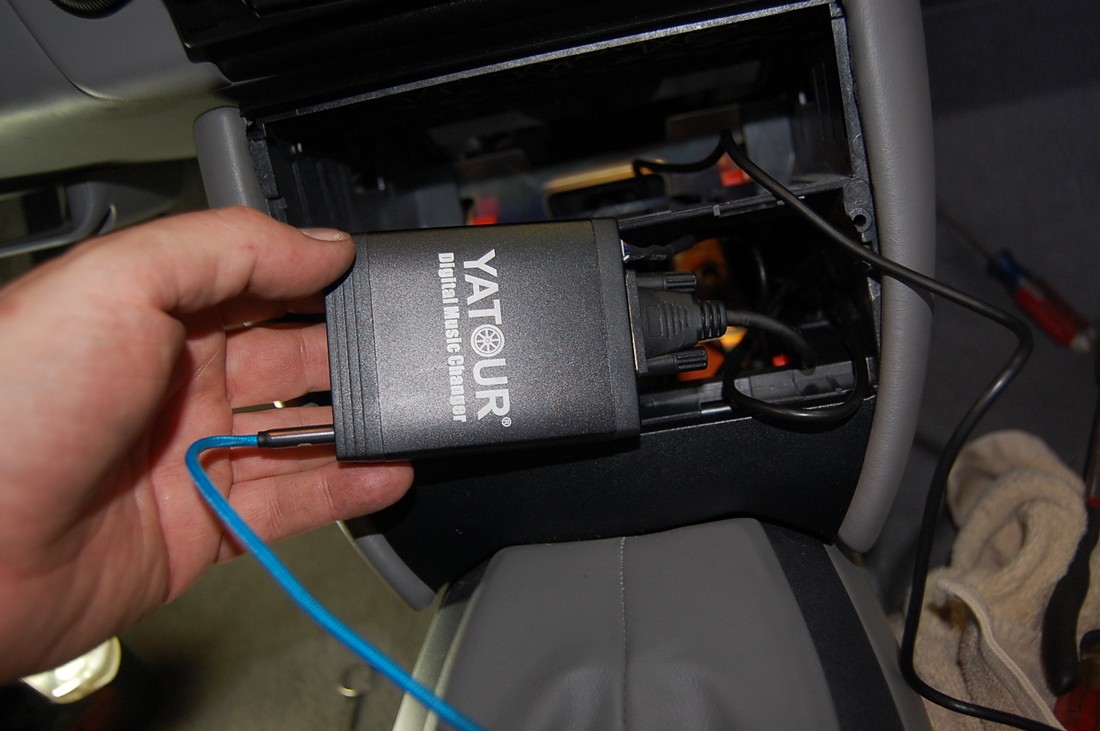
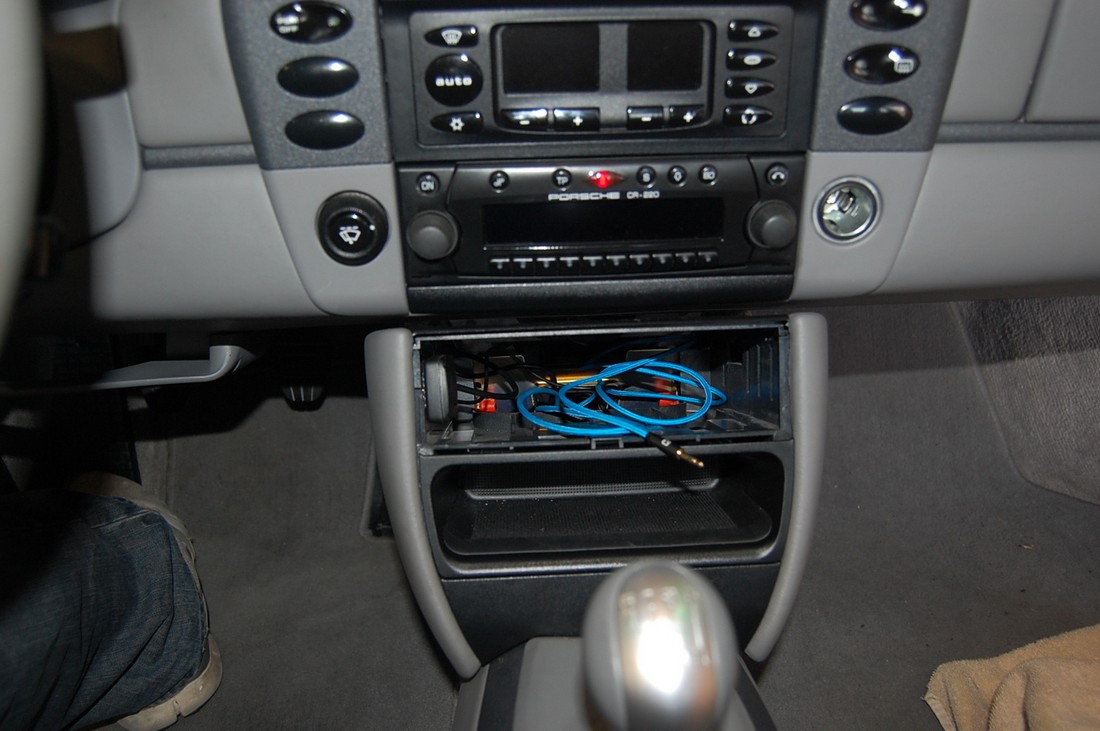
Snake the Yatour cable in from the back left opening in the radio slot. You might want a hanger or other suitable snake for this. The cable will drop down to the center console.
After the radio is out, depress the two tabs on the yellow, green and blue connector, it will disconnect all in one piece. Separate the yellow connector from the green connector. My car has the CD player in the frunk, so if you don’t have the CD player in the frunk, you might not have the green and blue connector. The yellow is the speaker outputs and is needed. The blue and green connectors are the CD player connections and will be disconnected, and the Yatour is connected to this and emulates the CD changer.
Put the Yatour blue and green connector back into the radio and then insert the existing yellow connector in, it will slide right in and click in place. Place the radio back in the opening. See that the Yatour is now connected, it’s the cable with the “BEK” label on it.
Put the radio half way back into the opening so it doesn’t scratch anything.
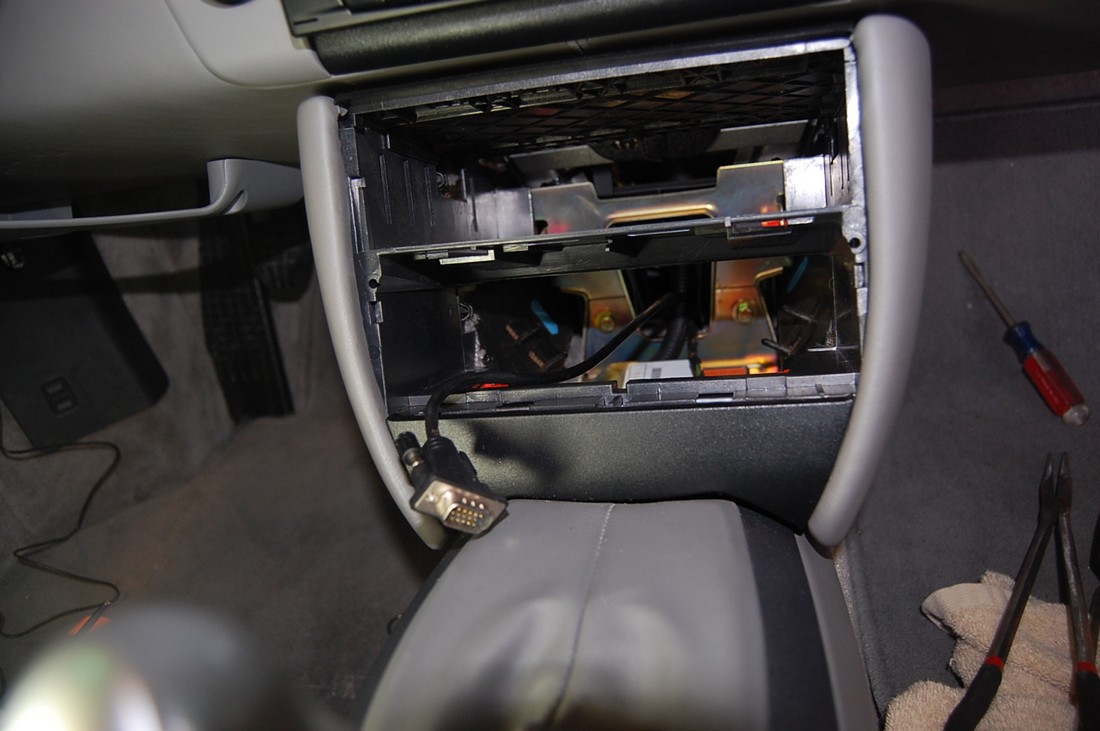
Remove both cubbies on the center console. A trim removal tools is all that is needed. Just pop a corner out and then pull straight out. Take out both the cassette or CD unit and the low storage bin.
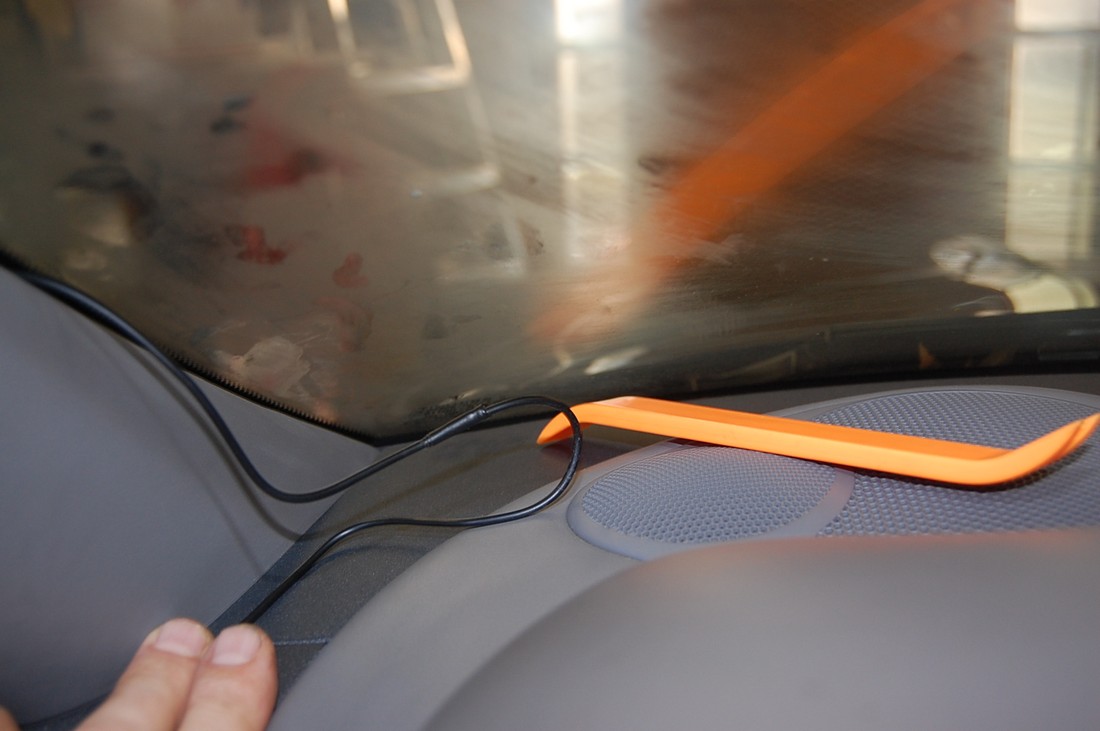
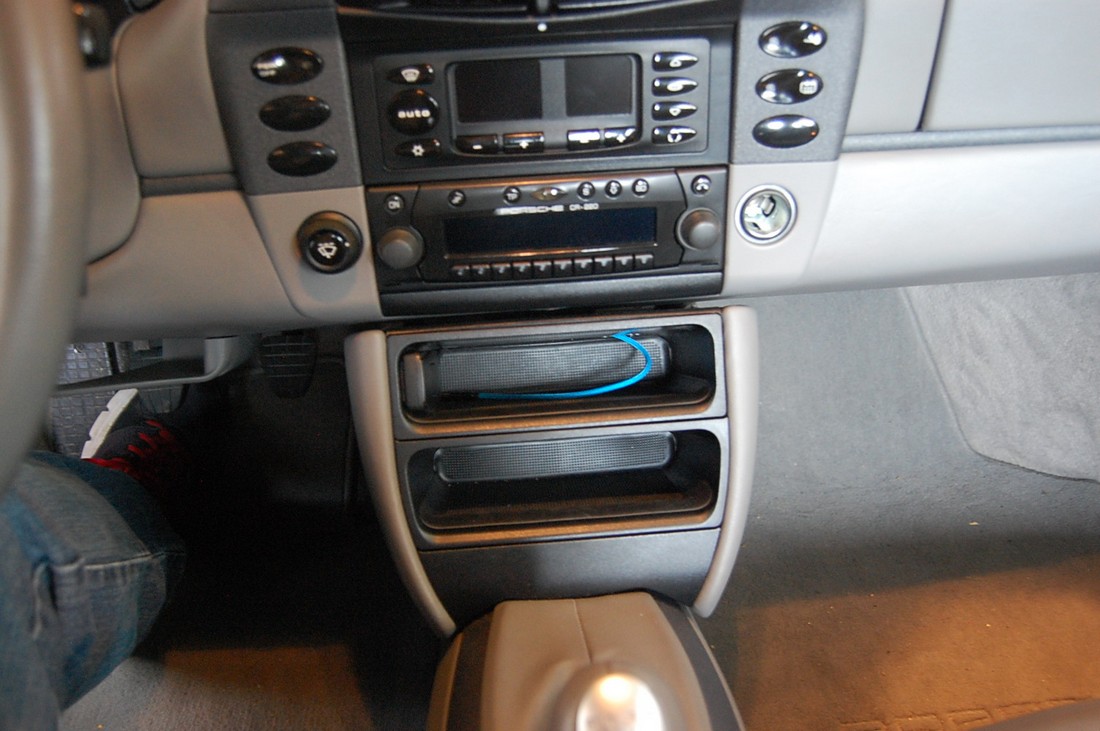
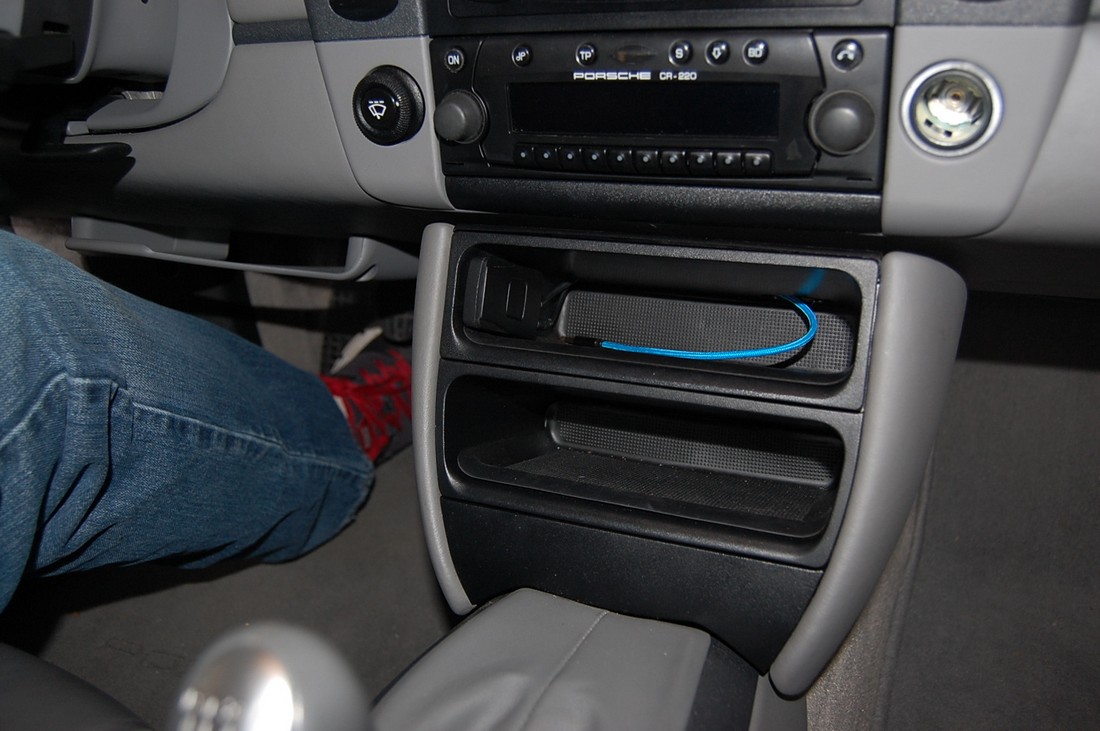
Now drop the cable from behind the dash down and route it into the lower center opening as shown before:
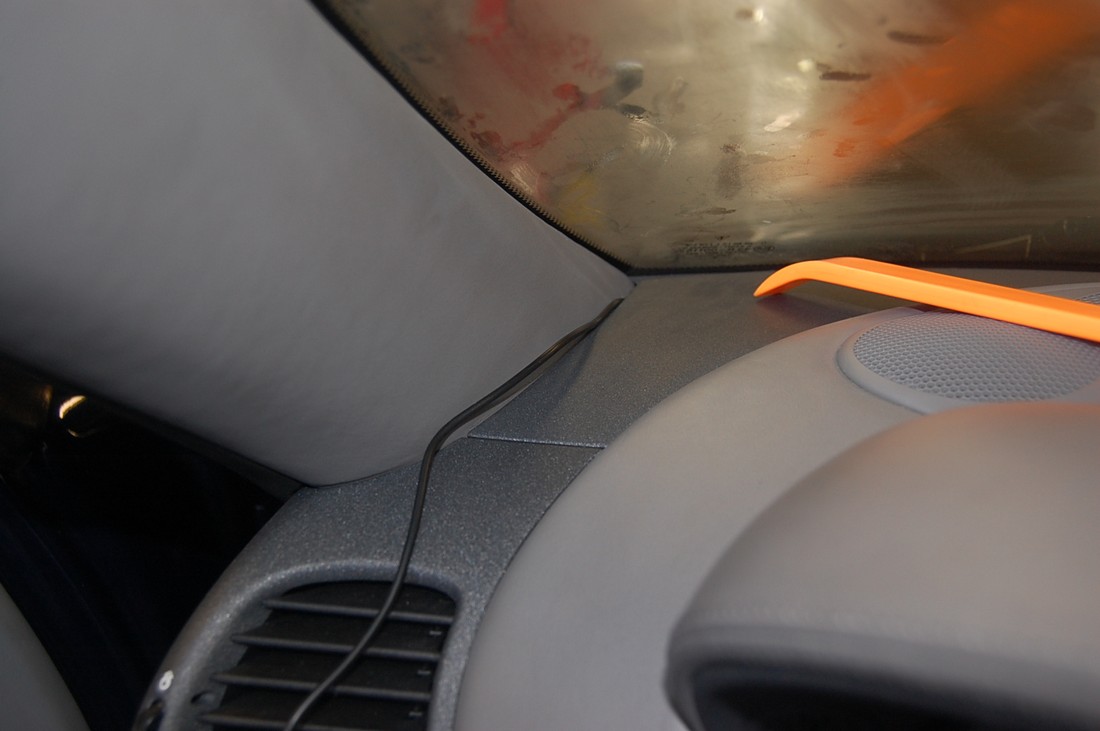
You can now install the microphone for the Bluetooth phone function. I attached mine to the top part of the “A” pillar. It’s easy to route it without removing anything.
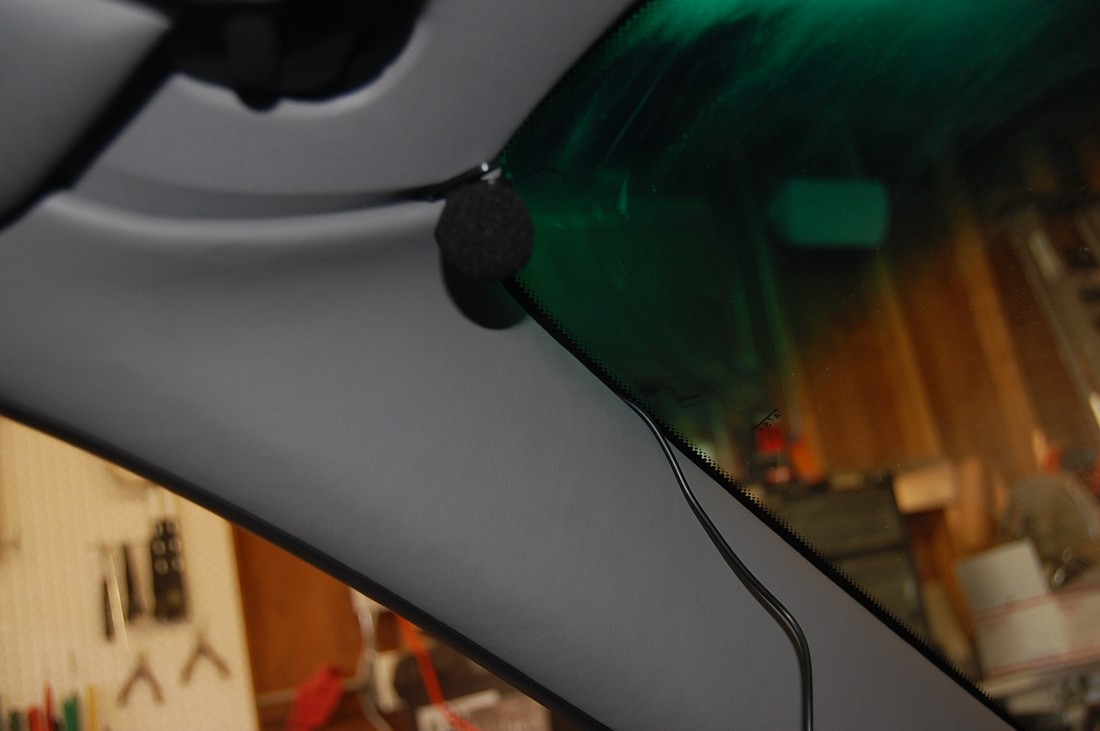
In order to make it stay behind the A pillar trim, take a small piece of electrical tape and wrap it around the wire to increase the diameter. A 3” piece will be just about right. Do that three of four times until it gets to the windshield. Using a trim removal tool, push it behind the A pillar trim. Once it’s past the windshield, you don’t need any tape, just push it in and follow it down the side and to the OBD-II connector.
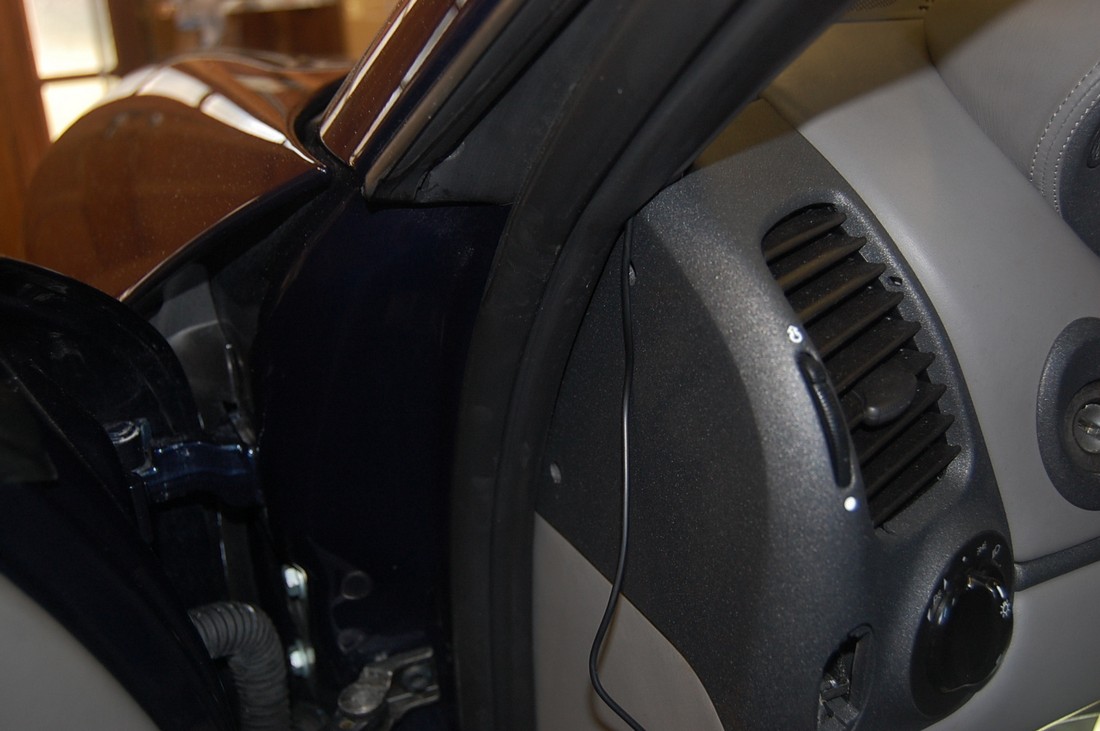
Route the mic wire over the OBD-II connector wires. From here, I connected two black tie wraps so they would fit around the HVAC piping and just connected them at the left and right side, then over to the center console.
You can see the one on the right side in the picture below, there is one more near the OBD-II connector on the left side.
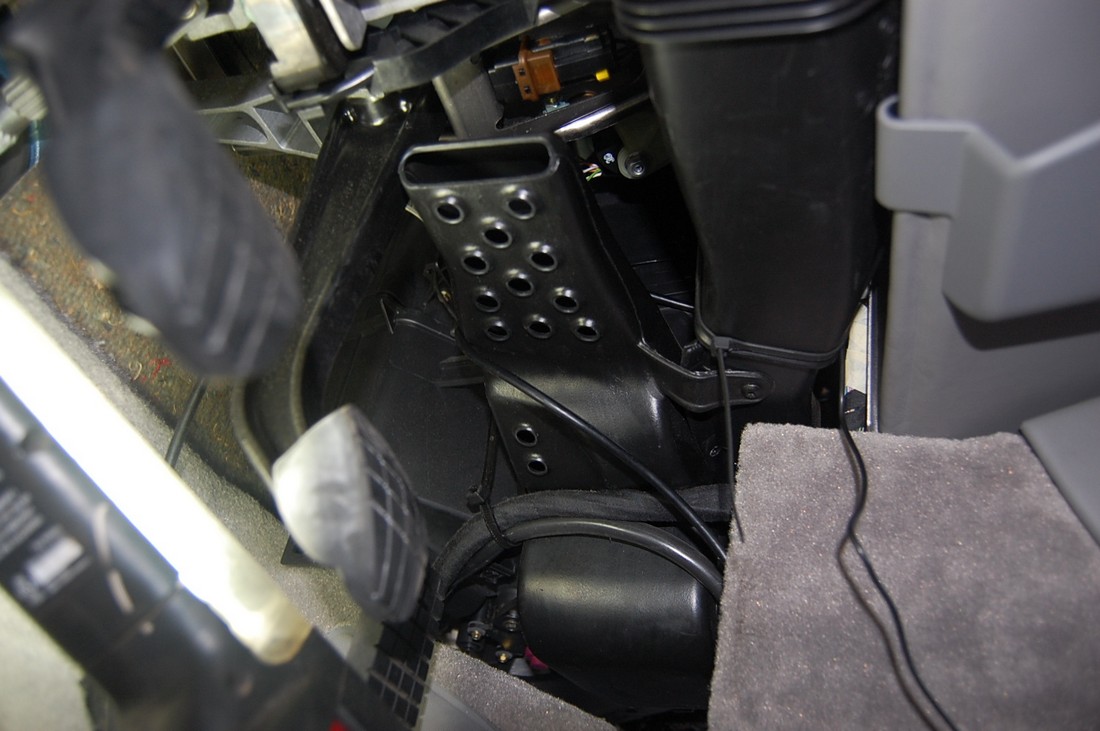
Route the mic wire to the same place in the center console as the Yatour cable shown above. Tie wrap them as they go into the center console to something so they don’t sag.
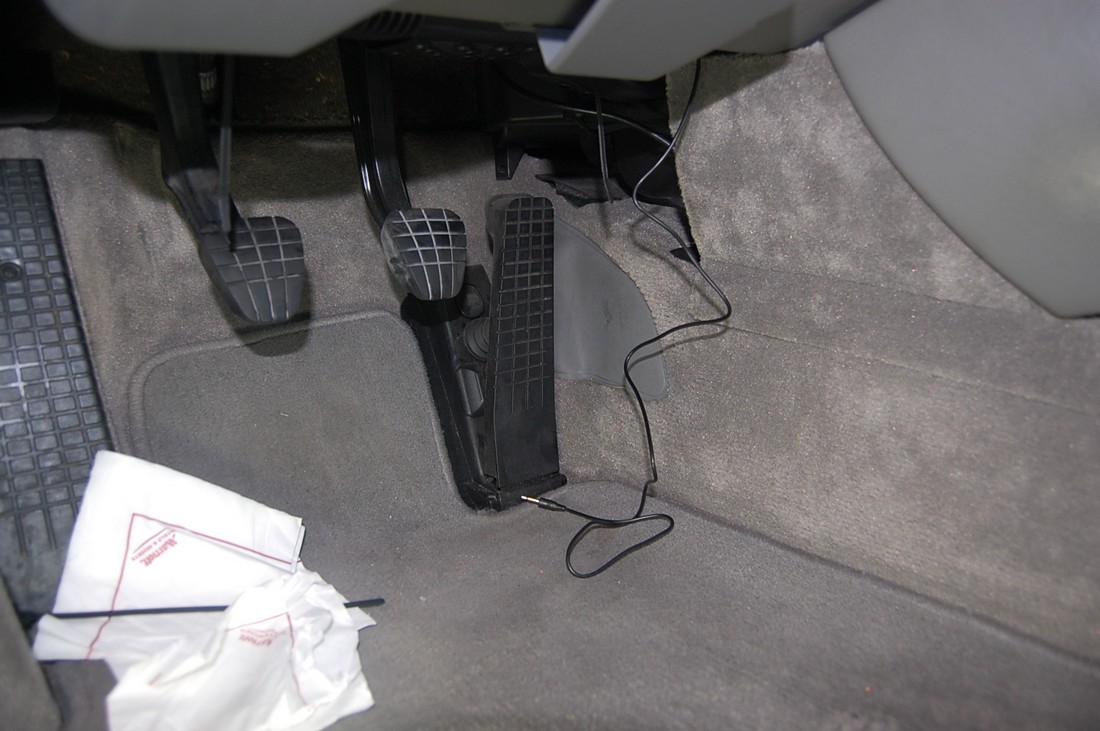
Drill the back of the cubby that you will be installing the Bluetooth button and aux cable in. I will be using the cassette area, I have not yet ordered the replacement cubby, I will update the procedure when I do. After drilling, pass the cables through the cubby.
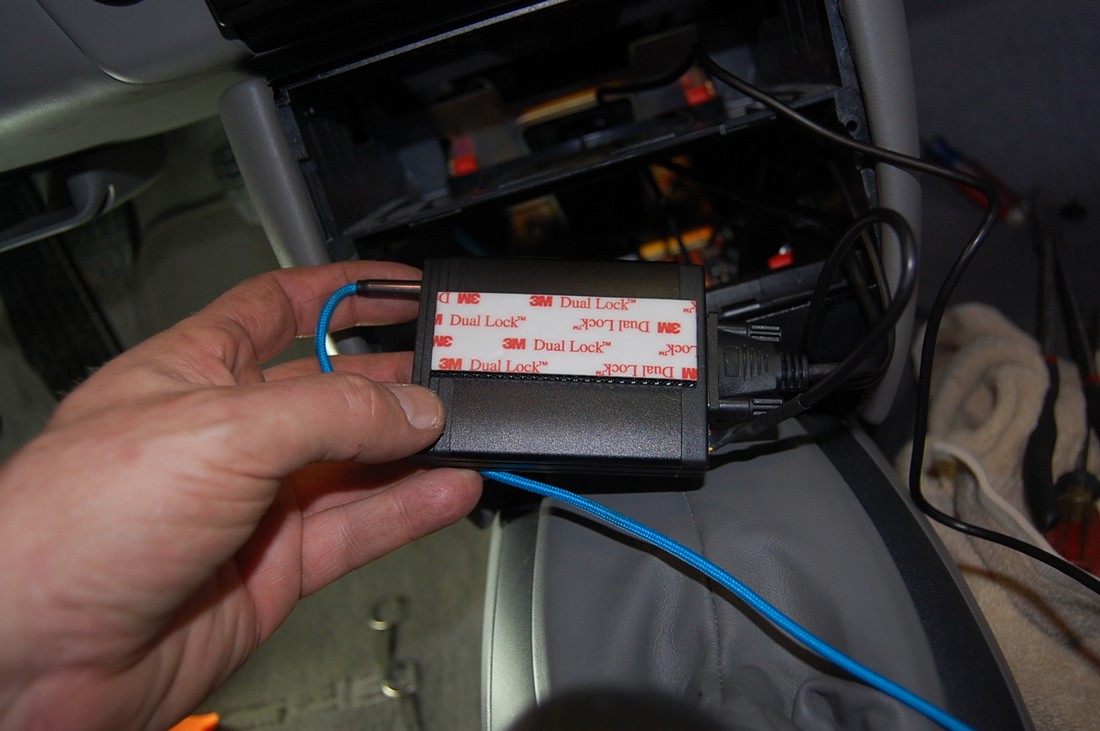
Plug the Bluetooth module and mini jack cable into the module. Using Velcro, attach it the Velcro to the Yatour module, and then stick it down on the bottom of the center console. Press hard to ensure it will stay in place.
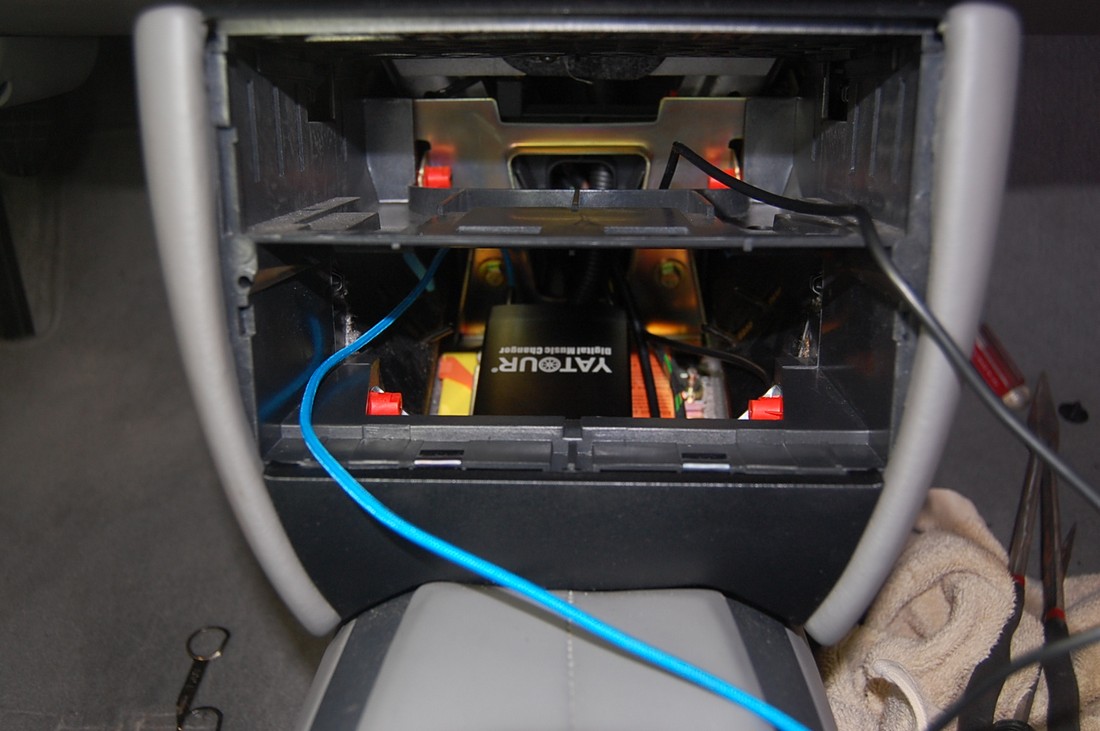
Here is a picture of my completed installation, I will need to get a cubby for the cassette holder, I will then drill it out and have the button inside the side or top of it along with the cable.
BEFORE you re-install the radio, make sure it works, and pair your phone with it. Follow the Yatour instructions, it’s a no brainer. Once complete, insert the radio back into the opening. It can be difficult, when you push it back in, push the front of the radioDOWN to push the back of the radio up, this will allow it to slide back in.
The button in the cubby is what you use to answer or hang up the phone. You will also need to be selected to CD to have it enabled, i.e. if the phone is in your pocket and the radio on, you’ll need to know the phone is ringing, then switch the radio source to CD, then hit the Yatour answer button. It’s very easy to get used to.
However, if you are listening to your iPod or Pandora via streaming on the phone, the head unit will already be on CD and it will just mute the radio and you will hear the phone ringing over the car speakers.
Have fun!
This system WILL NOT WORK with a MOST bus radio, from my understanding this was in the 2003+ cars with the Bose option.
You can stream radio from your phone into the system or you can talk hands free over the car speakers and supplied microphone. You have to be selected to external CD player for this to occur.
This is the second Porsche that I have put this in and it’s great. It is super simple and will take about two hours if you’ve never done it before. Maybe four if you are slow, but that’s just a Saturday morning. I would say anybody could do this regardless of skill level with these instructions.
What you’ll need:
- Yatour aux input for the Becker radio
- Yatour Bluetooth add on
- Aux Input Cable (mini jack to mini jack)
- Radio removal tools
- Trim removal tool
- Black zip ties
- Electrical Tape
- Velcro
- Towel
I got my Yatour aux input on ebay, just put “Yatour Becker” in your ebay search for the main module and “Yatour Bluetooth” for the Bluetooth module. You’ll need both. I got them from China, expect to pay about $140.00 for both shipped, they usually arrive in 7 – 10 days.
You can also get the radio removal tools on ebay if you don’t have them already.
There is NO HARD WIRING required, i.e. it uses the power, ground, etc. all from the CD changer connections. Just plug and play.
Here are some pictures of the units:
The pictures above are of the one I put in my 968 (long live that car, one of my all-time favorites). The module I got for my 996 did not have the iPod input, and considering that they are changing all the time, and that I use the aux input only, it did not seem to be anything that I missed.
Another thing that you might see in the last picture above is the addition of one module with a button. I did not get that with my present kit (or I threw it out), it just extends the module that it is plugged into and based on this procedure, you don’t need it.
Now to start. Get a six pack and make sure it’s cold. Pop the top on the first one…okay, you might want to skip this step.
Here are the radio removal tools, you just put one in each slot on the bottom of the radio until it engages, then pull the radio out by pulling on each tool.
After the radio it released, release the radio removal tools by pushing on the tabs on the side of the radio that are now exposed and take the tools out. Put a towel over the opening of the radio/shifter during this part of the procedure.
Snake the Yatour cable in from the back left opening in the radio slot. You might want a hanger or other suitable snake for this. The cable will drop down to the center console.
After the radio is out, depress the two tabs on the yellow, green and blue connector, it will disconnect all in one piece. Separate the yellow connector from the green connector. My car has the CD player in the frunk, so if you don’t have the CD player in the frunk, you might not have the green and blue connector. The yellow is the speaker outputs and is needed. The blue and green connectors are the CD player connections and will be disconnected, and the Yatour is connected to this and emulates the CD changer.
Put the Yatour blue and green connector back into the radio and then insert the existing yellow connector in, it will slide right in and click in place. Place the radio back in the opening. See that the Yatour is now connected, it’s the cable with the “BEK” label on it.
Put the radio half way back into the opening so it doesn’t scratch anything.
Remove both cubbies on the center console. A trim removal tools is all that is needed. Just pop a corner out and then pull straight out. Take out both the cassette or CD unit and the low storage bin.
Now drop the cable from behind the dash down and route it into the lower center opening as shown before:
You can now install the microphone for the Bluetooth phone function. I attached mine to the top part of the “A” pillar. It’s easy to route it without removing anything.
In order to make it stay behind the A pillar trim, take a small piece of electrical tape and wrap it around the wire to increase the diameter. A 3” piece will be just about right. Do that three of four times until it gets to the windshield. Using a trim removal tool, push it behind the A pillar trim. Once it’s past the windshield, you don’t need any tape, just push it in and follow it down the side and to the OBD-II connector.
Route the mic wire over the OBD-II connector wires. From here, I connected two black tie wraps so they would fit around the HVAC piping and just connected them at the left and right side, then over to the center console.
You can see the one on the right side in the picture below, there is one more near the OBD-II connector on the left side.
Route the mic wire to the same place in the center console as the Yatour cable shown above. Tie wrap them as they go into the center console to something so they don’t sag.
Drill the back of the cubby that you will be installing the Bluetooth button and aux cable in. I will be using the cassette area, I have not yet ordered the replacement cubby, I will update the procedure when I do. After drilling, pass the cables through the cubby.
Plug the Bluetooth module and mini jack cable into the module. Using Velcro, attach it the Velcro to the Yatour module, and then stick it down on the bottom of the center console. Press hard to ensure it will stay in place.
Here is a picture of my completed installation, I will need to get a cubby for the cassette holder, I will then drill it out and have the button inside the side or top of it along with the cable.
BEFORE you re-install the radio, make sure it works, and pair your phone with it. Follow the Yatour instructions, it’s a no brainer. Once complete, insert the radio back into the opening. It can be difficult, when you push it back in, push the front of the radioDOWN to push the back of the radio up, this will allow it to slide back in.
The button in the cubby is what you use to answer or hang up the phone. You will also need to be selected to CD to have it enabled, i.e. if the phone is in your pocket and the radio on, you’ll need to know the phone is ringing, then switch the radio source to CD, then hit the Yatour answer button. It’s very easy to get used to.
However, if you are listening to your iPod or Pandora via streaming on the phone, the head unit will already be on CD and it will just mute the radio and you will hear the phone ringing over the car speakers.
Have fun!


 12-07-2014, 07:47 PM
#3
Rennlist Member
Thread Starter
Here is the final pictures with the cubby that had the cassette holder replaced with the storage compartment. I bought it used, it actually had the hole in it already that the blue aux cable goes through, and then I drilled one more hole for the Yatour switch. The hole with the aux cable is large, I can pull the cable out, and also push it back behind the cable due to its size.
The switch also has a red LED inside it that is very dim, but lights up solid when Bluetooth is established.
You actually don't even need the switch within reach, it just answers/hangs up the phone without touching the phone. You can also do the same thing with the fast forward button on the CD changer, but that's on the second menu (change to the CD changer, then hit the arrow button next to the source button) to get to that menu, so I figured I would just have it easy to touch. I used 3M double sided tape to mount it.
I really like this better than a double DIN setup....and I thought I wanted one of those before I bought the car. Baller!
The following users liked this post:
peterp (10-13-2021)
12-07-2014, 09:33 PM
#5
Out of curiosity, why this as opposed to a new headunit? Just to keep it looking completely oem? At $140 in parts, you're basically at the same cost of a single-din radio which will give you these features and much more.
12-07-2014, 09:45 PM
#6
Rennlist Member
Thread Starter
Plus the OEM Becker units are MUCH easer to operate.
Not to mention, there is no wiring changes at all. Just unplug one connector, and plug a new one of same configuration in.
The following users liked this post:
peterp (10-13-2021)
12-08-2014, 01:39 AM
#7

I just installed an alpine and it has a whole bunch of display color options and the dull Amber is very very close to the rest of the dash. Looks perfect at night. You would have to really know what you were look for to notice if this is not oem. FWIW.
Trending Topics
12-08-2014, 11:23 AM
#8
Rennlist Member
What about during the day? I'm not crazy about a lot of tacky chrome **** or weird button designs that don't go well with the rest of the interior. My thinking is more in line with Paul on this one. But which way I'll go at the end will require more research on my part.
12-08-2014, 12:13 PM
#9
Looks rather factory to me. It's all black with one large volume button. Very simple design, clean and elegant. Hardly looks like an aftermarket deck.

 12-18-2014, 04:53 PM
#12

Paul,
Thanks so much for such and informative an helpful discussion.
I wonder if an iphone 5 lightning USB cable can be plugged into the Yatour module USP port so that you would be able to keep your phone charged? Or would the phone have to be charged separately?
Thanks so much for such and informative an helpful discussion.
I wonder if an iphone 5 lightning USB cable can be plugged into the Yatour module USP port so that you would be able to keep your phone charged? Or would the phone have to be charged separately?
01-20-2015, 12:18 PM
#13
Paul,
I purchased the Yatour YT M06 off Ebay thinking it was the same as the unit you have. I didn't notice the YT M05 label on the box in your pictures.
Do you know if this will work the same as your unit? My main wish is to Bluetooth my phone to the stereo. I purchased the Yatour Bluetooth adapter also.
Thanks
Rick
02-24-2015, 10:10 PM
#14
Rennlist Member
Hi Paul,
I came across your post regarding the Yatour unit, and was wondering what your long-term thoughts are on it now that you've had it for a while? I'm looking at doing the exact same install as yours, though it looks like Yatour now has the YT-M07 available. Not sure what exactly the new unit includes, but higher number = better, right?
Anyway, I'm curious if you've used the Bluetooth music streaming functionality much yet? I've used a similar unit in an Audi that did A2DP streaming, and it wasn't great. Lots of cutting out, drops, etc that ruined listening to music. I'm curious if you've had better luck. Also, wondering if you can advance/go back with songs via head unit controls as you would with a CD/Changer?
Any feedback would be greatly appreciated. Thanks in advance.
-Don
Last edited by dwhitlow; 02-24-2015 at 10:52 PM.
02-25-2015, 09:54 AM
#15
Rennlist Member
Thread Starter
It works great, along with the phone working great, don't have issues with the BT dropping out from the phone. I don't know if you can control it with your head unit. I think you can for next and last song, but not sure.

