Alternator Removal Help.
 08-13-2014, 04:35 PM
#1
Three Wheelin'
Thread Starter
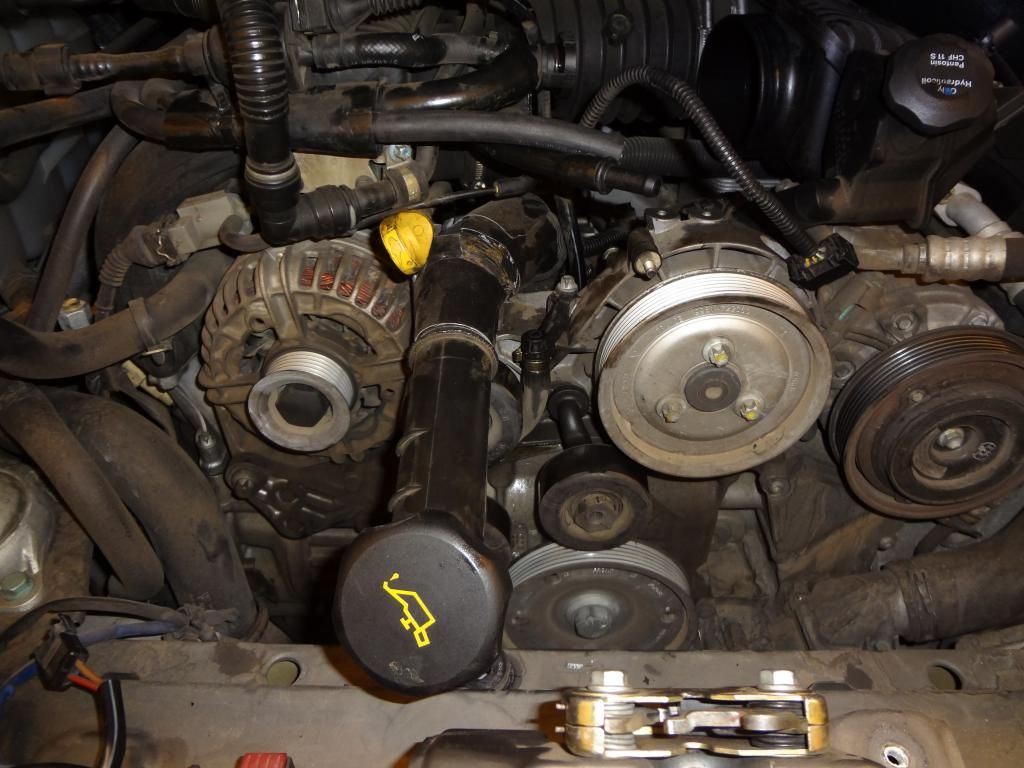
Alright, I started doing the work today to replace the oil filler tube and coolant tank.
All was going well until I got to the alternator. I read the DIYs, and I followed them to the T. I turned the right bolt three turns and hammered it until I got tired, took the bolt out, took the left alternator bolt out...dead stuck on the right side. The metal bushing on the right side of the alternator looks 100% frozen. I used the penetrating oil on it, and hammered it directly with a tap and a rubber mallet- still no go.
I am not at a loss here. I am scared to use the pry bar on the alternator, but that seems like the only remaining option.
I already broke the POS Connection Piece for Oil Separator Hoses while removing the intake plenum. The plastic inside the connector was brittle and pretty much disintegrated when I tried to remove the broken plastic from the hose.
Any ideas or suggestions are welcomed.

 08-13-2014, 06:13 PM
#2
I had the same issue.. If I recall, I used some sort of extension (maybe a piece of wood) so that I could hammer on the bolt from outside the engine bay. Its really hard to get a full swing from inside the engine bay. Mine went all at once when it finally loosened. When it does go, the bolt head will move inward so that it is flush (having taken up all of the "slack" from your loosening the bolt).
08-13-2014, 06:32 PM
#3
Three Wheelin'
Thread Starter
Thanks sjg.
I will call it a day for now and go grab few beers, I've been hammering at it for 5 hours in AZ heat and high humidity today.
I will start pounding the bolt and bushing tomorrow after work.
I will call it a day for now and go grab few beers, I've been hammering at it for 5 hours in AZ heat and high humidity today.
I will start pounding the bolt and bushing tomorrow after work.
08-13-2014, 08:04 PM
#4
Rennlist Member
Get one of these. Take out the chisel and put a brass/aluminum/wood/steel rod in it and pull the trigger for about 3 seconds.
http://www.harborfreight.com/air-imp...kit-92037.html
http://www.harborfreight.com/air-imp...kit-92037.html
08-14-2014, 02:15 AM
#5
I soaked it with Kroil and used a 1 foot round aluminum bar to hammer it outside the engine bay like Steve did. However, be careful though since the anchor is part of the engine case and you really don't want to break it.
08-14-2014, 10:22 AM
#6
Rennlist Member
Join Date: Apr 2010
Location: Ormond Beach, FL
Posts: 5,800
Likes: 0
Received 1,085 Likes
on
697 Posts
Same experience, same advice. Soaked the rear alternator bushing with WD-40 for two days. I still had to give that bolt head more of a whack then I really thought necessary. Used a brass boat prop shaft about 2 feet long and a heavy ball peen hammer, tapped and tapped, and tapped, and tapped, then finally gave it a really hard whack and it moved just enough to get the alternator out. In the end even that was not enough to get it back in. Tried many times to get the alternator to mount on the right side, no way. Set alternator on bench with support under the bracket/bushing and drove that bushing in almost flush with the bracket. Piece of cake installing. Then when you tighten that bolt, POP, the bushing reseats and you got it. I was replacing my oil filler tube as well. Pretty simple when the alternator is out. Make sure you observe the routing of the coolant hose in relation to the oil filler pipe. It goes to the right. Your fitting is broken so that won't be a problem. Please resolve that broken plastic fitting with a better fix...get a brass nipple and two SS clamps from the hardware store. Make a bracket from the existing piece to hold it in place with a zip tie.
08-14-2014, 12:00 PM
#7
Three Wheelin'
Thread Starter
Thanks Joe, appreciate your comment. It seems that sticky alternator is a very common issue. And +1 on the brass fitting, I went to the NAPA Auto Parts yesterday and bought 3/8" quick connect brass fitting, it is a perfect fit.
Trending Topics
08-14-2014, 02:34 PM
#8
I found it very difficult to tell when it had loosened. I used a long metal rod I had so I was able to swing the mallet outside the engine bay. Be careful it does not slip and hit anything else. Even though I had rags in place, the rod slid a bit and wore a touch of paint off the black trim piece on the bottom lip inside the engine bay. After a few good wacks I couldn't tell if I had done anything. I removed the left bolt and wiggled / pried until it came free. If you are following the directions from Pelican which have you remove less components than the factory manual, you will discover that there is exactly one way the alternator will come in and out, but about 1 million ways it won't. It's kind of like the two twisted nails puzzle.
08-16-2014, 06:48 PM
#9
Three Wheelin'
Thread Starter
Update, after an application of penetrating oil and an hour of pounding I was able to get the alt out.
Pounding the bolt was not doing anything, so I removed it and started hitting the bushing directly. I used a 3/8" 5 inch long extension to reach the bushing and hammered the extension.
Thanks for the suggestions everyone. I should have the new tube in tomorrow and will move on to the coolant tank.
Pounding the bolt was not doing anything, so I removed it and started hitting the bushing directly. I used a 3/8" 5 inch long extension to reach the bushing and hammered the extension.
Thanks for the suggestions everyone. I should have the new tube in tomorrow and will move on to the coolant tank.
08-18-2014, 12:26 AM
#10
Three Wheelin'
Thread Starter
Installed the new oil tube today.
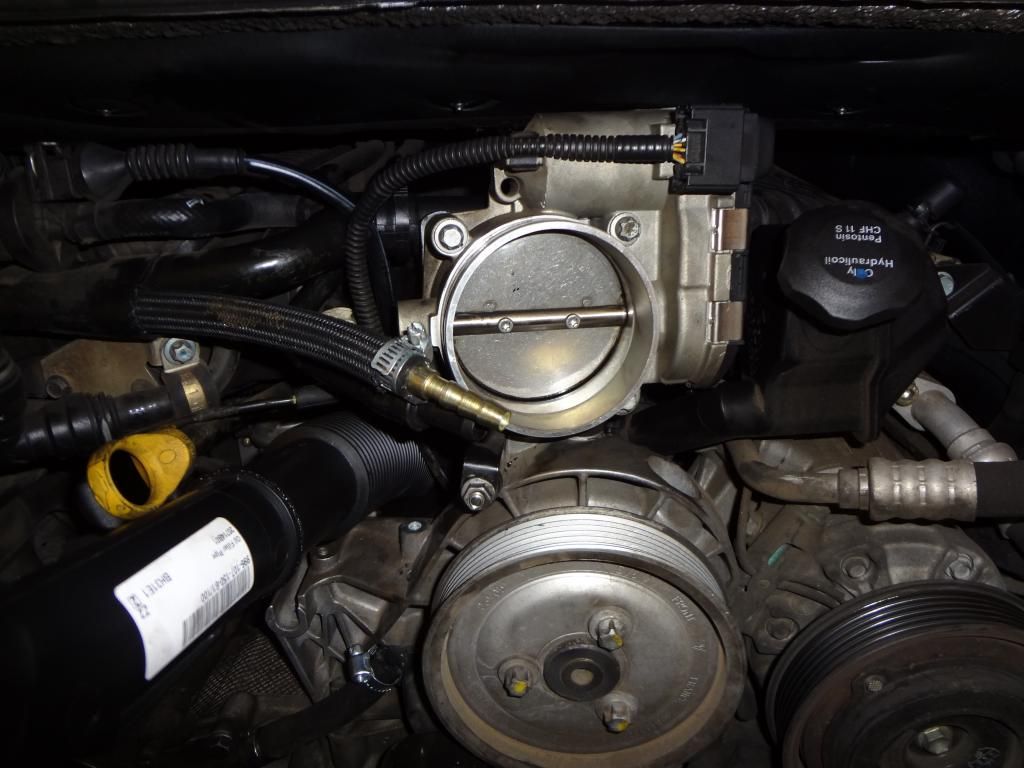
Every DIY on the subject has been completely off regarding the removal of the TB and intake plenum. There is absolutely no need to remove either item and that saves a huge amount of time and frustration when it comes to re-installing the intake plenum. Both bolts that secure the oil filler neck to the block are accessible when alternator is removed, removing the intake plenum and TB is a complete waste of time.
One bolt holding the filler tube is on the back of the alternator bracket, the second bolt is directly behind the filler tube.


 08-18-2014, 08:03 PM
#11
Three Wheelin'
Thread Starter
Re-installed the alternator today.
My bushing was still in the fully "out" position, so I had to improvise. I took the bushing and a 25MM socket to Harbor Freight and used one of their big bench vises. You put the 25MM socket on the back side of the bushing and start squeezing. 25MM is wider than the bushing and it allows it to retract, while it is pushing against the alternator mounting bracket. With bushing fully retracted it took me 15 seconds to re-install the alternator.
My bushing was still in the fully "out" position, so I had to improvise. I took the bushing and a 25MM socket to Harbor Freight and used one of their big bench vises. You put the 25MM socket on the back side of the bushing and start squeezing. 25MM is wider than the bushing and it allows it to retract, while it is pushing against the alternator mounting bracket. With bushing fully retracted it took me 15 seconds to re-install the alternator.
08-19-2014, 04:02 PM
#13
Three Wheelin'
Thread Starter
Joe, alternator has no impact on the coolant tank replacement. Driver's side intake manifold and fuel/AOS hoses are the items that restrict the coolant tank "maneuvering".
08-21-2014, 07:08 PM
#14
Three Wheelin'
Thread Starter
Reassembled everything and test drove. All systems go.
PS. I really grew to hate the ****ing clamps and connectors Porsche uses everywhere. The spring clamps on every hose and connectors that require squeezing specific parts (parts that for some reason are all ****ing pointing down or away from you) had me using many many curse words. Alternator removal which in theory should take 5 minutes took me hours.
PS. I really grew to hate the ****ing clamps and connectors Porsche uses everywhere. The spring clamps on every hose and connectors that require squeezing specific parts (parts that for some reason are all ****ing pointing down or away from you) had me using many many curse words. Alternator removal which in theory should take 5 minutes took me hours.

Last edited by Kalashnikov; 08-21-2014 at 07:27 PM.

