HID wiring insulation brittle
 04-25-2014, 12:57 PM
#1
Pro
Thread Starter
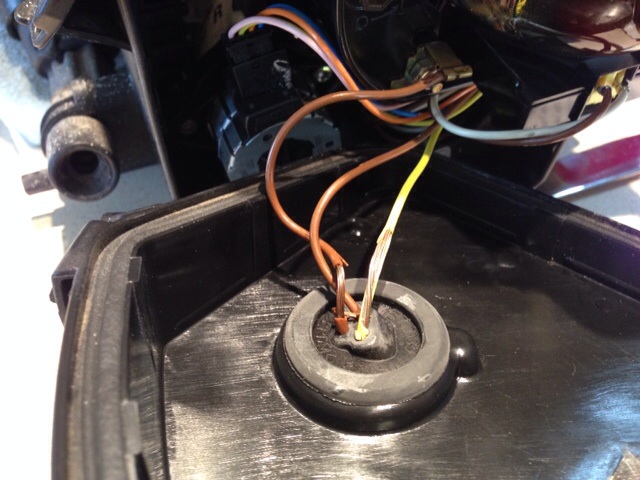
So a bulb burned out and I went to change it and noticed the insulation on the wiring is brittle and has fallen off. Also it appears the entire rear cover of the housing is newer than the light housing. I guess at some point it was replaced. I'll tape up the wires with electrical tape before I reassemble. One would think the wiring insulation would be rated for the temps encountered but perhaps it's just age related.


The following users liked this post:
tbrodeur421 (09-10-2022)
 04-25-2014, 03:40 PM
#5
Pro
Thread Starter
04-25-2014, 04:29 PM
#6
I see...either way, they carry the same amount of power in watts and personally, I would replace rather than risk fire. The problem with electrical tape is that it doesn't actually hold long term. This is further compounded by the fact that the wires are inside headlight where they will get warm and the electric tape will let go even more. At the very least, if you use electrical tape, secure it with zip ties or something that won't fall off.
If they are the low voltage wires, then they have between 3 and 6 amps running through them depending on your bulb wattage.
If they are the low voltage wires, then they have between 3 and 6 amps running through them depending on your bulb wattage.
Trending Topics
04-27-2014, 05:21 PM
#8
Burning Brakes
Maybe mice if the insulation were just frayed or missing, but OP mentioned that it is also brittle. FWIW, I had a set of halogen headlights with wiring that was trashed from heat ... looked a lot like this, only worse. Best bet is to replace it -- either rewire it or get replacement harness wiring from a dismantler.
04-27-2014, 08:20 PM
#9
Drifting
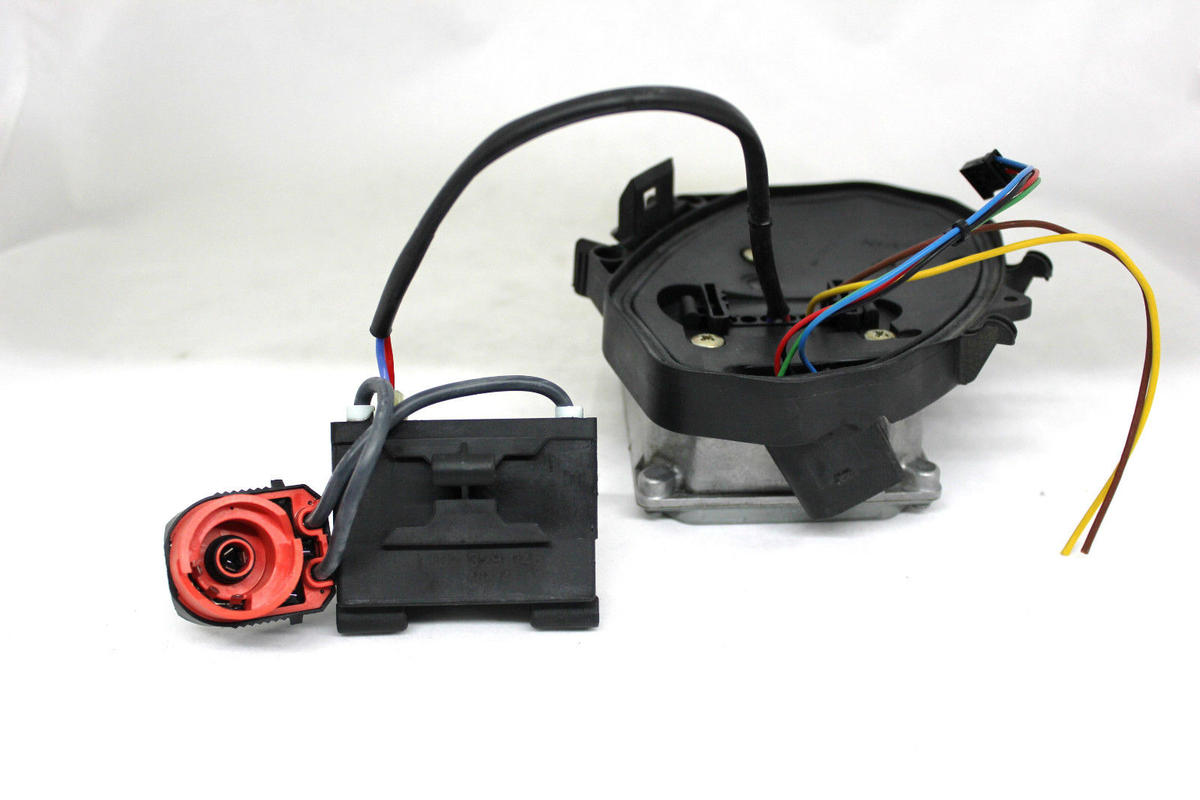
This is the wiring going to the HID capsule? If so it would be the high voltage wires from ballast stepped up from 12VDC.
These wires usually have higher quality insulation material to resist arcing.
These wires usually have higher quality insulation material to resist arcing.
04-27-2014, 08:49 PM
#10
Pro
Thread Starter
I appreciate all the concerns with the electrical tape but after further research I think it will work fine. Here is the pertinent data from 3M's web site: (view the pdf)
Applications:
Once again these are not the high voltage cable to the HID bulb - that is a single cable, very large diameter with thick insulation and plugs directly into the back of the bulb. I'm also not sure these wires can be replaced - spliced perhaps. I didn't dissemble the unit any further than the pics show but I imagine the wires from the ballast emerge from a hole in the metal housing as opposed to attached to a contact or post. Again, I've never disassembled one so I'm guessing based on experience with other transformers and ballasts.
Something like this:
I think the deterioration is most likely due to a combination of heat and age. As I mentioned in a previous post the rear sections of the housing where the ballast is attached look newer than the bulb housing. Perhaps they were replaced at some point. They look like OEM replacement parts but I didn't search for a part number stamped on the housing. I don't know if anyone makes aftermarket replacements with inferior quality wiring insulation but perhaps that is one possibility.
Applications:
- Primary electrical insulation for all wire and cable splices rated up to 600 volts and up to 105�C (220�F).
- Primary electrical insulation for 600 volt bus applications, and protective jacketing for low and high voltage bus.
- Protective jacketing for high voltage cable splices and repairs.
- Harnessing of wires and cables.
Once again these are not the high voltage cable to the HID bulb - that is a single cable, very large diameter with thick insulation and plugs directly into the back of the bulb. I'm also not sure these wires can be replaced - spliced perhaps. I didn't dissemble the unit any further than the pics show but I imagine the wires from the ballast emerge from a hole in the metal housing as opposed to attached to a contact or post. Again, I've never disassembled one so I'm guessing based on experience with other transformers and ballasts.
Something like this:
I think the deterioration is most likely due to a combination of heat and age. As I mentioned in a previous post the rear sections of the housing where the ballast is attached look newer than the bulb housing. Perhaps they were replaced at some point. They look like OEM replacement parts but I didn't search for a part number stamped on the housing. I don't know if anyone makes aftermarket replacements with inferior quality wiring insulation but perhaps that is one possibility.
Last edited by sandersd; 04-27-2014 at 09:07 PM.
09-19-2014, 01:05 PM
#12
Rennlist Member
Join Date: Apr 2010
Location: Ormond Beach, FL
Posts: 5,800
Likes: 0
Received 1,085 Likes
on
697 Posts
I hate to resurrect an old post, but just ran into the same problem. Bulb out, so remove headlight assembly, pop the cover and found that most of the wiring had brittle insulation and the wiring is exposed. I have searched the part suppliers and I cannot find a replacement headlight wiring harness. So I'm left with either using electrical tape to patch up the exposed wiring, trying to figure out how to re-wire all the connectors, or replace the headlights with new at major $$$. Does anyone know where to find a headlight wiring harness for a 1999 996 C2 with standard original headlights?
09-19-2014, 03:05 PM
#13
90% of the headlights that I retrofit are this way. Even if you could get a harness, you will need to remove the outer lens in order to replace it all.
There were some used harnesses on eBay, but they probably aren't much better than yours.
I always just replace all of the wiring with new by removing the lens and soldering new wires in.
There were some used harnesses on eBay, but they probably aren't much better than yours.
I always just replace all of the wiring with new by removing the lens and soldering new wires in.
09-19-2014, 03:49 PM
#14

Electronic Techs sometimes uses "liquid electrical tape". They sell this at various electronic places. Just another alternative if you don't wanna do a full rewire. You could also try the liquid plasti-dip but not sure how well that is rated for electrical duties, or how easily it applies when brushing on.
09-19-2014, 05:08 PM
#15
Drifting
Join Date: Sep 2011
Location: Ephrata, PA, USA now. Originally from the UK
Posts: 3,075
Likes: 0
Received 19 Likes
on
15 Posts
I would go for a Harness in preference to my suggestion. However, if you are struggling to find the correct harness for the job and you need to make it safer than using tape and you arte not good with a soldering iron, then a bank of about 12 small plastic connectors with the 2 little screws in each, could be cut individually and one used right at the end of each corroded wire (If there is room). What is left of the old wire going into one end of the connector and the new wire going out to the other connector at the other end. You can buy the same colored and strength wire at any electrical store and use it cut to the same length. That way no tape is used. Cut out the bad part and replace with the new wire. Then you can keep looking for a harness for the job and go about the DIY at your leisure if you find one. At least there will be no chance of a fire from corroded or split covering. There is more than one way of skinning a cat in your situation.