
Thanks for being patient...my 993 GT2 Evo buiild...
 03-28-2012, 12:09 AM
#1
Pro
Thread Starter
You guys deserve a build thread. So here it is…how to take a perfectly good 993 turbo, strip it down, chop it into pieces, weld a bunch of metal into it, bolt on some fiber, slap on more of everything else, paint it white, and then pray all the wings and splitters work like they do in those awesome car movies.
I’ve had a long relationship with Kelly Moss Motorsports in Madison, Wisconsin, they have always been trusted to setup my car up for the track and I absolutely trusted them when it came time to tear down and rebuild my 993 into a GT2 Evo. Huge risk on my part I know…Kelly Moss only built and raced every 993 variant ever made so what the hell would they know about putting my janky GT2 together? I was surprised to hear that even around all of those cup cars, rsr’s daytona prototypes, and lemans prototypes, the shop guys love having these old 993’s around and all took a special interest in my build, poking around and telling old war stories as it was being stripped down and put back together. Pretty cool stuff.
So let’s take a few steps back and talk about the parts that went into this build. I’d like to highlight the finer points for those who are thinking of doing this…I’ll outline the parts involved and the specific decisions made to help make this one a little bit special.
Parts:
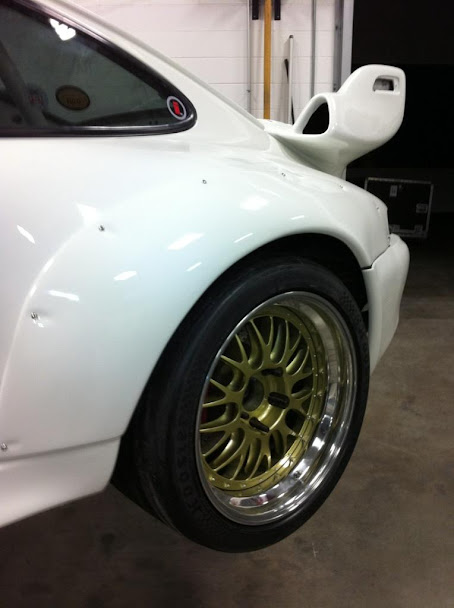
1. Front/Rear Bolt On Fenders - Cargraphic
2. Front Evo 1 Bumper – GT Racing
3. Front Evo 1 Splitter – GT Racing
4. Rear Decklid – Getty (already on the car)
5. Banana Wing – GT Racing
6. Motorsport Cage – Factory Replacement (new old stock)
7. Rear Bumper – Stock 993 Turbo
8. Wheels – BBS Motorsport E88 – 18x10 & 18x12.5 (2” x 8” & 3.5” x 9”)
9. Sunroof Delete – Factory Non-Sunroof Replacement
Details:
1. Front/Rear Bolt On Fenders: These fenders required ZERO molding to achieve perfect fitment, don’t listen to the stories about 10hrs per panel. Two tricks where utilized. They added a custom bracket to the bumper support to which held the stock bumper out wide enough and allowed for a better mounting point and contour for the fender. Also added a mount point for the front of the rear fender to keep it tight to the wheel well.
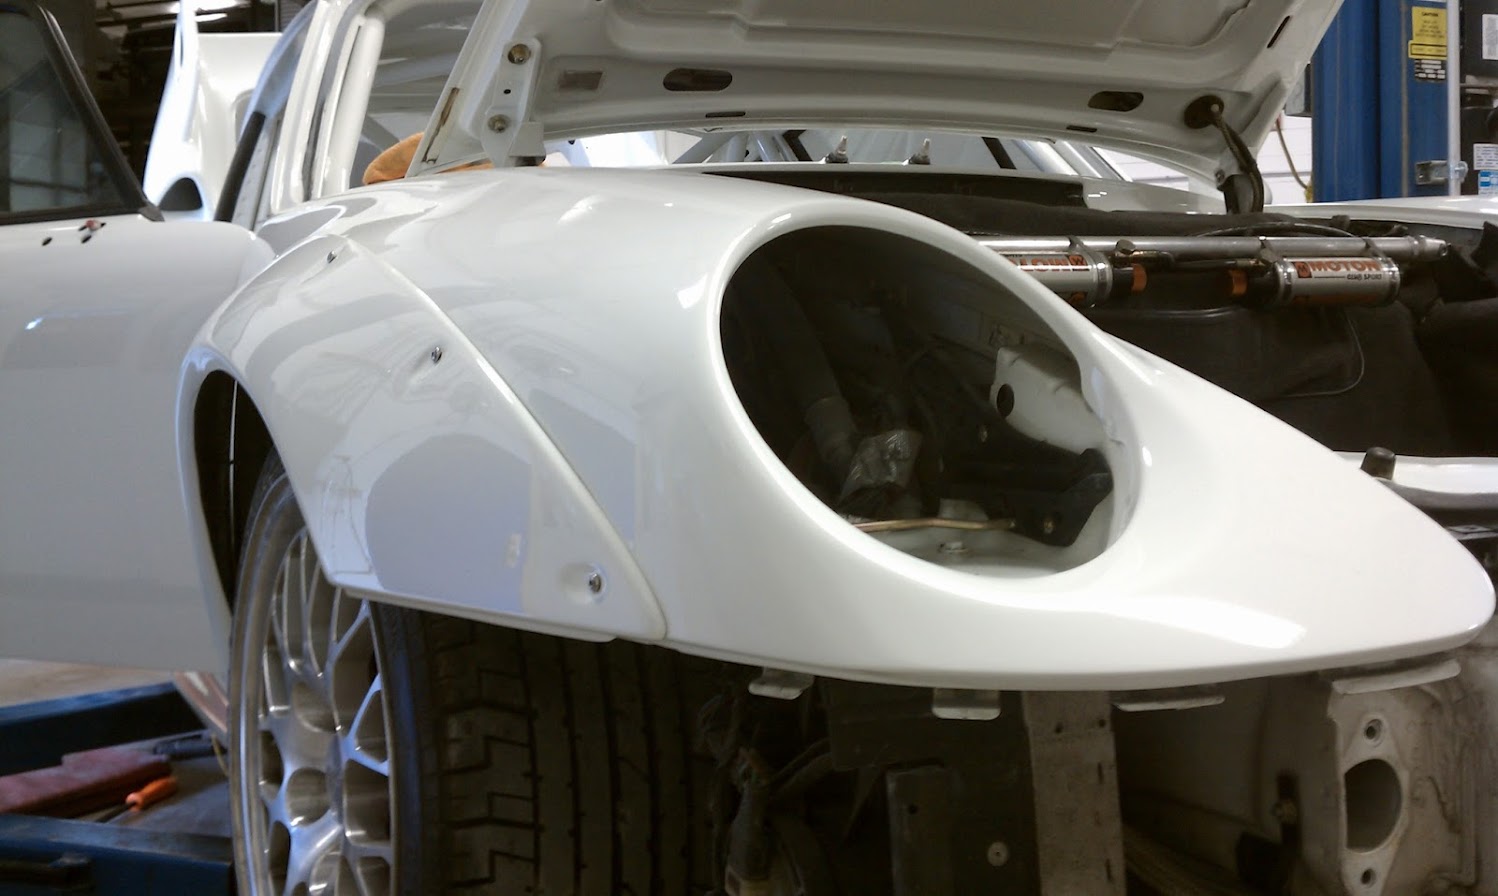
2. Front Evo 1 Bumper: These are race parts so the fitment is ****. So they needed to modify the bumper to fit the stock 993 body, most of the race cars had the body modified to allow for better airflow management. I chose to modify the fiberglass bumper instead of the car’s body of course. Four mounting holes were added to the fenders to keep the bumper fitment tight. A tow hook was added for convenience.
3. Front Evo 1 Splitter: Technically this attaches directly onto the front of the Evo bumper. Thankfully Spartan and I both had the same idea to make the splitter removable so we asked Kelly Moss to modify them to allow for slip on fitment with the only mounting points hidden in the wheel wells. Perfect fitment and clean to boot.
4. Rear Deck lid: No modification required. I replaced the grill section with a new OEM piece as mine had a crack in it.
5. Banana Wing: The classic 993 look! I chose to have it color matched to hide the carbon fiber. I really like this look vs. exposed carbon. Left the endplates exposed. I haven’t installed the wicker bill yet. I had the wing brackets made by a friend’s shop…funny story, they actually ran the stress loading tests through their computer models and determined that I needed a thicker aluminum bracket that I asked for. They cut and bent it to my measurements.
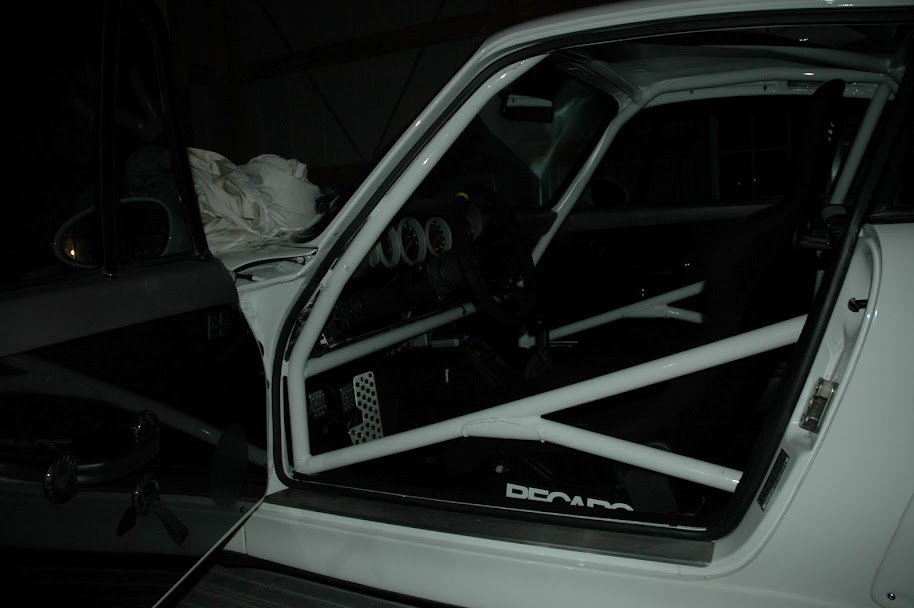
6. Motorsport Cage: Long story short. The cage builder at Kelly Moss happened to know the guys that made all of the factory cage replacements for guys who crashed their factory race cars and needed replacements for the new tubs. He calls this guy up and sources one of the original replacements that were leftover from the late 90’s. It included all of the bended pieces from the original jigs…we had to measure and cut all of the straight pieces. Thankfully Kelly Moss happened to have a factory GT2 Evo parked at the shop at the time of my build and they were able to measure all of the straight sections and plates to the exact factory specifications. They also measured all of the welds the factory made between the cage and the chassis and replicated all of them for my cage. I chose to add the knee bar under the dash and omit the upper section of the door “X” for ease of entry. It really was a work of art and something special when it was completed. One of my favorite parts of the car to tell you the truth. The cage is also the catalyst for the sunroof delete…more on this later.
7. Rear Bumper: As mentioned above, the stock bumper is the same as the factory GT2 piece; all they do is heat it and mold it to fit the new wider fenders. They made some custom brackets to hold the bumper to the correct width. I also had the rear bumperettes removed using pieces from another 993 bumper and plastic welding. It turned out seamless and required very little fill.
8. Wheels: Spartan did all the hard work here. I merely copied his wheel sizes and found perfect fitment the first time around. You can spend hours and hours and hundreds and hundreds of dollars making mistakes here. DO YOUR HOMEWORK.
9. Sunroof Delete: After reading all of the rain gutter delete horror stories I was very worried about this undertaking…however if you want your cage fully welded you need to either pop the top of cut holes in the floors to drop the cage down to be welded and the cover the holes up with the mounting plates. I chose to kill two birds with one stone by cutting the factory roof off and replacing it with a non-sunroof replacement. Apparently, Kelly Moss does this all the time and I was told that replacing the roof was nothing to worry about. WELL I WORRIED A LOT! I have to say, the end result as unbelievable. I won’t go into the process so much here but please follow up with me if you want the details. All in all, it saved 30-40lbs and made room for an extra 2-3” of headroom. Big win.
10. Headlight Washers: I had them welded closed and deleted.
Okay Matt, shut the hell up and show us the pictures…
How she looked before I cut her fender off
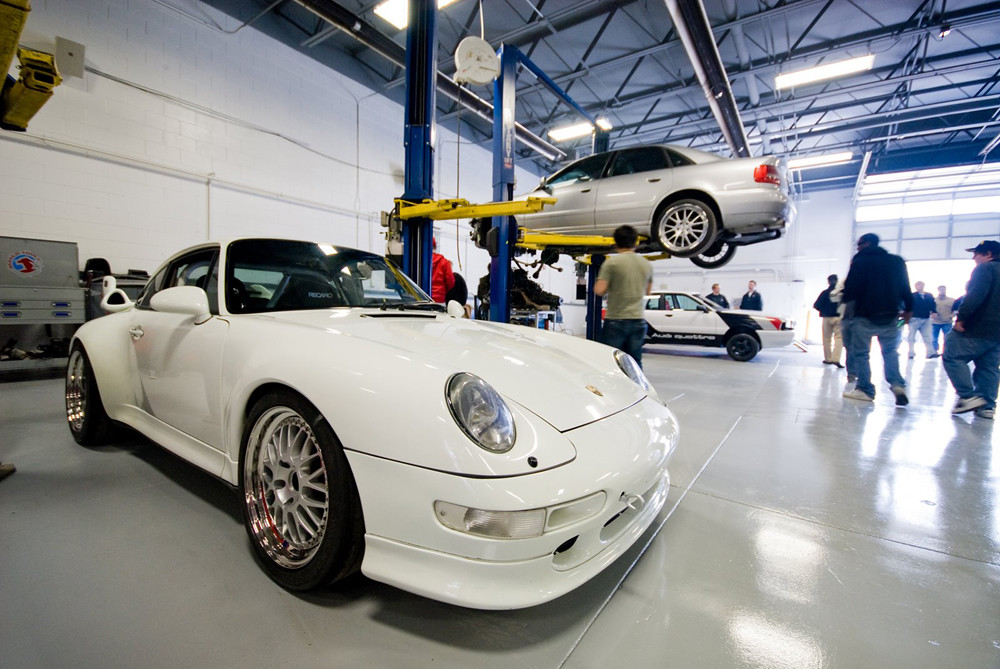

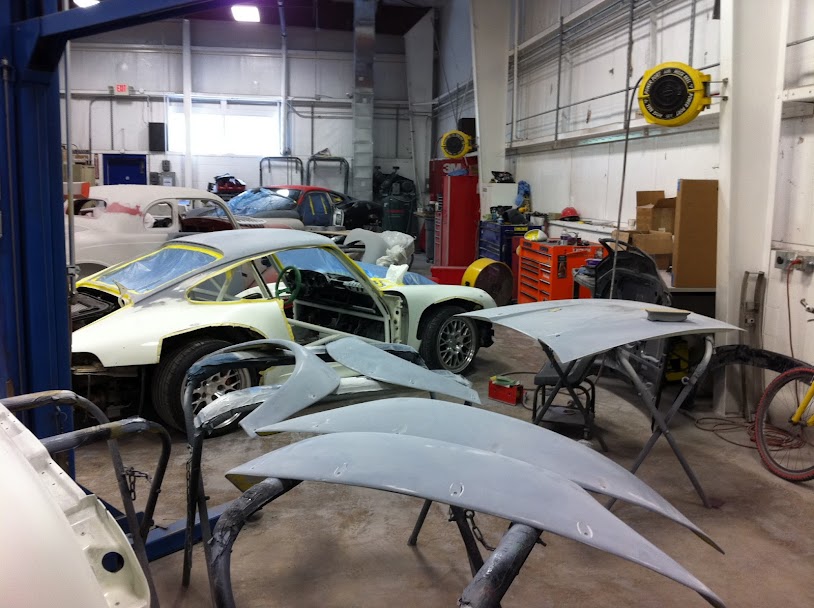
How I delivered her to Kelly Moss. Interior completely stripped and all accessory exterior pieces removed.
Some other cool toys lying around the shop
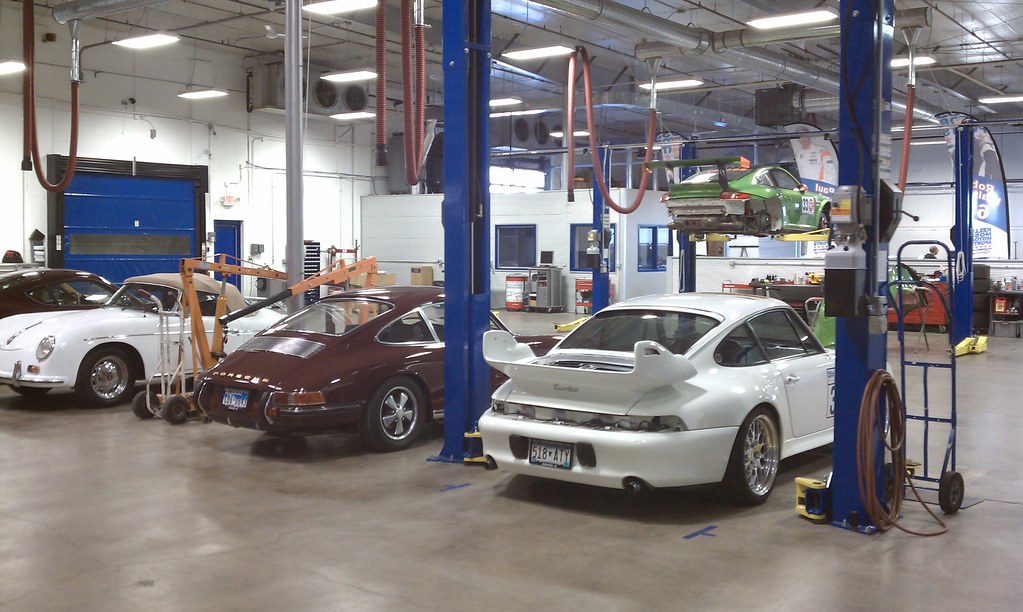
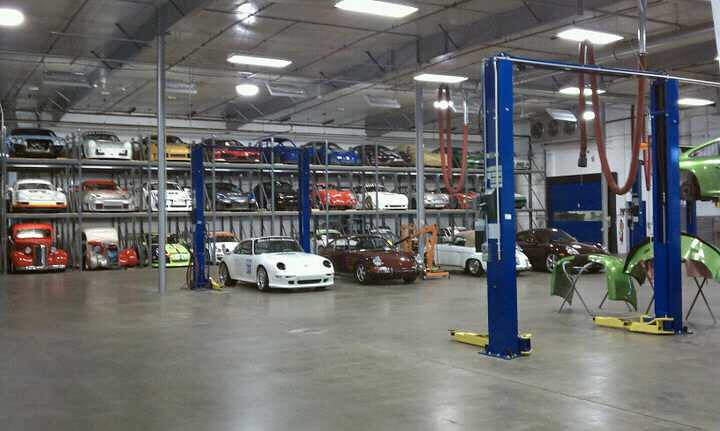
The rack of race cars…
Who cuts off perfectly good widebody fenders? I’ve still got the cutouts…any narrow body guys interested?

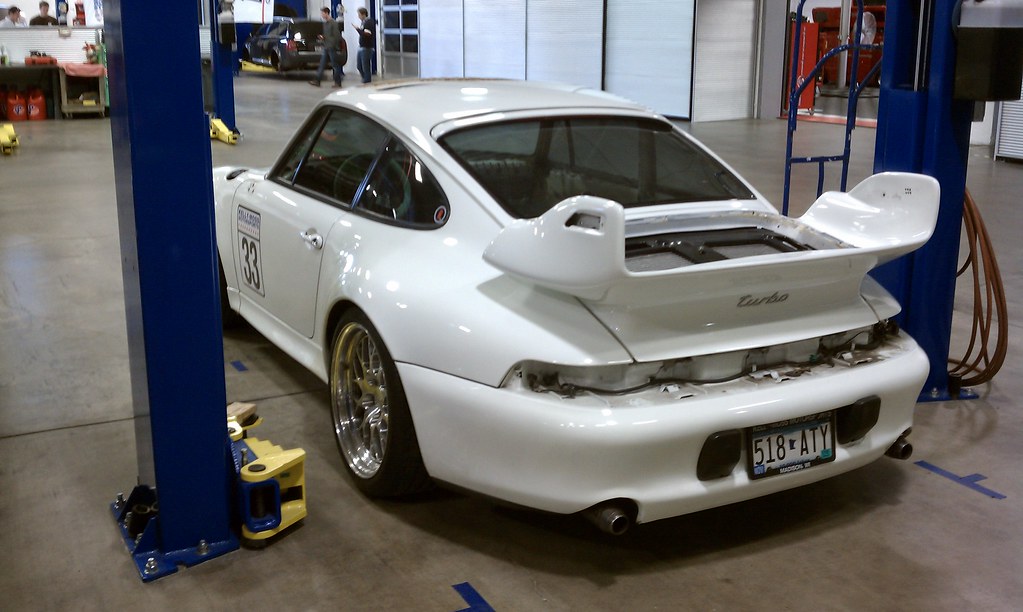
Fenders installed, headlight washers deleted, roof still on.


And there goes the roof…she looks like a dam theft recovery right? No worries though…

This is why you want to cut off the roof of cut holes in the floorboards

Time to paint the cage…its so dam pretty!

MUCH BETTER!!!

Roof installed…welded and panel bonded, stronger than ever!

Roof Installed and primed. She’s ready to be prepped for paint. Nice Nogaro GT2 behind me

Getting all primed up and ready for paint!
West Coast Customs eat your heart out. Spray spray spray…

So fresh! She’s still Grand Prix White. NOT that ugly Glacier stuff

*** SHOT!

I love the exposed hardware. And a surprise moton cameo…
Never going to be this clean ever again…

Seamless roof replacement. Seriously, it’s incredible.

Spotless. Nice ductail in the background. And cup.

Biggest wheel studs this side of the Mississippi. 100mm!

Big wheel test fit w/ 335 hoosiers…
Getting there!

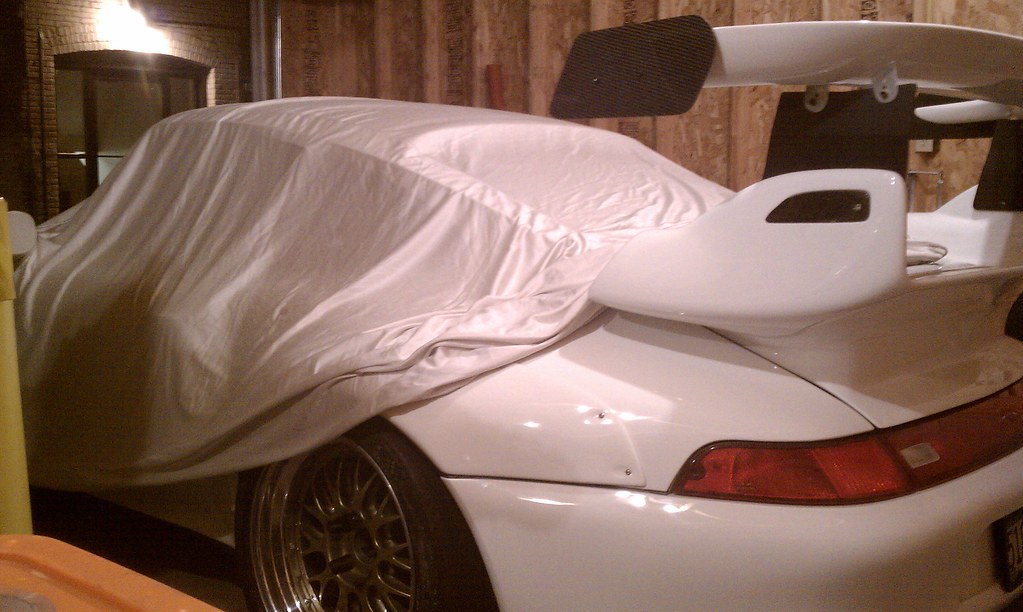
And ready for pickup!!! Next stop…Road America

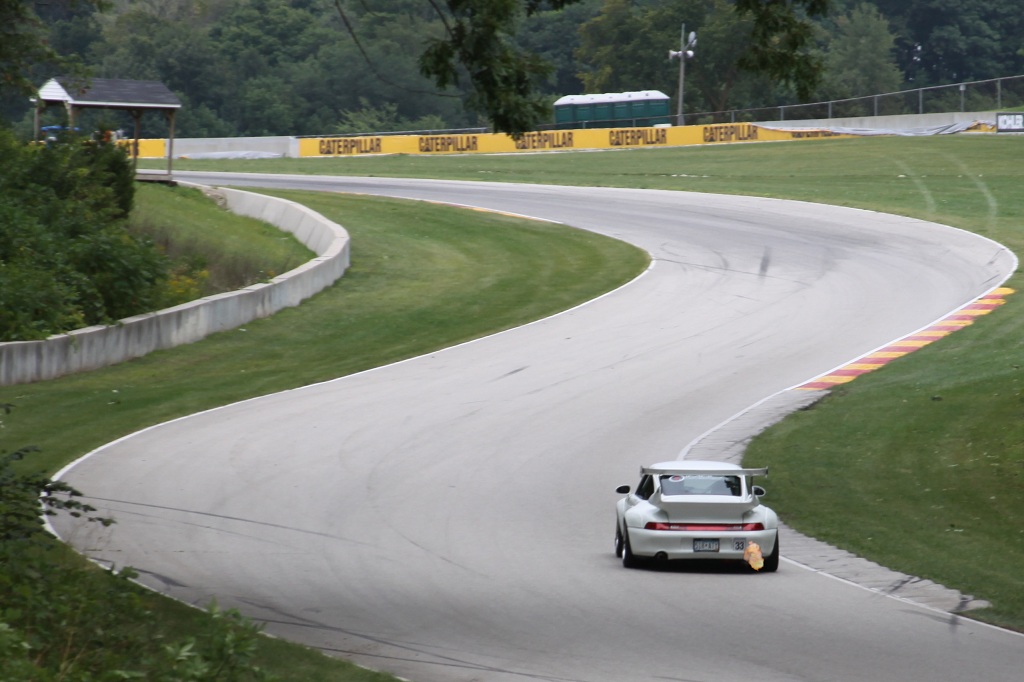
Proper stance coming down into 5…

Up into 6

Out of Canada…
Hanging with a close friend…

Back straight at VIR chasing down Spartan

Going around some cones before the front straight.

Running away from this fire breather. Yes we passed it

With her skirt up in the garage. Don’t stare…
Frolicking in nature on a weekend starbucks run

Hell of a process from start to finish. 100% happy with the results…too many thanks to my good friend Spartan for all the advice., part sourcing, and coaching me through the process. No excuses not do to it now guys…WHO’S NEXT?
I’ve had a long relationship with Kelly Moss Motorsports in Madison, Wisconsin, they have always been trusted to setup my car up for the track and I absolutely trusted them when it came time to tear down and rebuild my 993 into a GT2 Evo. Huge risk on my part I know…Kelly Moss only built and raced every 993 variant ever made so what the hell would they know about putting my janky GT2 together? I was surprised to hear that even around all of those cup cars, rsr’s daytona prototypes, and lemans prototypes, the shop guys love having these old 993’s around and all took a special interest in my build, poking around and telling old war stories as it was being stripped down and put back together. Pretty cool stuff.
So let’s take a few steps back and talk about the parts that went into this build. I’d like to highlight the finer points for those who are thinking of doing this…I’ll outline the parts involved and the specific decisions made to help make this one a little bit special.
Parts:
1. Front/Rear Bolt On Fenders - Cargraphic
2. Front Evo 1 Bumper – GT Racing
3. Front Evo 1 Splitter – GT Racing
4. Rear Decklid – Getty (already on the car)
5. Banana Wing – GT Racing
6. Motorsport Cage – Factory Replacement (new old stock)
7. Rear Bumper – Stock 993 Turbo
8. Wheels – BBS Motorsport E88 – 18x10 & 18x12.5 (2” x 8” & 3.5” x 9”)
9. Sunroof Delete – Factory Non-Sunroof Replacement
Details:
1. Front/Rear Bolt On Fenders: These fenders required ZERO molding to achieve perfect fitment, don’t listen to the stories about 10hrs per panel. Two tricks where utilized. They added a custom bracket to the bumper support to which held the stock bumper out wide enough and allowed for a better mounting point and contour for the fender. Also added a mount point for the front of the rear fender to keep it tight to the wheel well.
2. Front Evo 1 Bumper: These are race parts so the fitment is ****. So they needed to modify the bumper to fit the stock 993 body, most of the race cars had the body modified to allow for better airflow management. I chose to modify the fiberglass bumper instead of the car’s body of course. Four mounting holes were added to the fenders to keep the bumper fitment tight. A tow hook was added for convenience.
3. Front Evo 1 Splitter: Technically this attaches directly onto the front of the Evo bumper. Thankfully Spartan and I both had the same idea to make the splitter removable so we asked Kelly Moss to modify them to allow for slip on fitment with the only mounting points hidden in the wheel wells. Perfect fitment and clean to boot.
4. Rear Deck lid: No modification required. I replaced the grill section with a new OEM piece as mine had a crack in it.
5. Banana Wing: The classic 993 look! I chose to have it color matched to hide the carbon fiber. I really like this look vs. exposed carbon. Left the endplates exposed. I haven’t installed the wicker bill yet. I had the wing brackets made by a friend’s shop…funny story, they actually ran the stress loading tests through their computer models and determined that I needed a thicker aluminum bracket that I asked for. They cut and bent it to my measurements.
6. Motorsport Cage: Long story short. The cage builder at Kelly Moss happened to know the guys that made all of the factory cage replacements for guys who crashed their factory race cars and needed replacements for the new tubs. He calls this guy up and sources one of the original replacements that were leftover from the late 90’s. It included all of the bended pieces from the original jigs…we had to measure and cut all of the straight pieces. Thankfully Kelly Moss happened to have a factory GT2 Evo parked at the shop at the time of my build and they were able to measure all of the straight sections and plates to the exact factory specifications. They also measured all of the welds the factory made between the cage and the chassis and replicated all of them for my cage. I chose to add the knee bar under the dash and omit the upper section of the door “X” for ease of entry. It really was a work of art and something special when it was completed. One of my favorite parts of the car to tell you the truth. The cage is also the catalyst for the sunroof delete…more on this later.
7. Rear Bumper: As mentioned above, the stock bumper is the same as the factory GT2 piece; all they do is heat it and mold it to fit the new wider fenders. They made some custom brackets to hold the bumper to the correct width. I also had the rear bumperettes removed using pieces from another 993 bumper and plastic welding. It turned out seamless and required very little fill.
8. Wheels: Spartan did all the hard work here. I merely copied his wheel sizes and found perfect fitment the first time around. You can spend hours and hours and hundreds and hundreds of dollars making mistakes here. DO YOUR HOMEWORK.
9. Sunroof Delete: After reading all of the rain gutter delete horror stories I was very worried about this undertaking…however if you want your cage fully welded you need to either pop the top of cut holes in the floors to drop the cage down to be welded and the cover the holes up with the mounting plates. I chose to kill two birds with one stone by cutting the factory roof off and replacing it with a non-sunroof replacement. Apparently, Kelly Moss does this all the time and I was told that replacing the roof was nothing to worry about. WELL I WORRIED A LOT! I have to say, the end result as unbelievable. I won’t go into the process so much here but please follow up with me if you want the details. All in all, it saved 30-40lbs and made room for an extra 2-3” of headroom. Big win.
10. Headlight Washers: I had them welded closed and deleted.
Okay Matt, shut the hell up and show us the pictures…
How she looked before I cut her fender off
How I delivered her to Kelly Moss. Interior completely stripped and all accessory exterior pieces removed.
Some other cool toys lying around the shop
The rack of race cars…
Who cuts off perfectly good widebody fenders? I’ve still got the cutouts…any narrow body guys interested?
Fenders installed, headlight washers deleted, roof still on.
And there goes the roof…she looks like a dam theft recovery right? No worries though…
This is why you want to cut off the roof of cut holes in the floorboards
Time to paint the cage…its so dam pretty!
MUCH BETTER!!!
Roof installed…welded and panel bonded, stronger than ever!
Roof Installed and primed. She’s ready to be prepped for paint. Nice Nogaro GT2 behind me
Getting all primed up and ready for paint!
West Coast Customs eat your heart out. Spray spray spray…
So fresh! She’s still Grand Prix White. NOT that ugly Glacier stuff
*** SHOT!
I love the exposed hardware. And a surprise moton cameo…
Never going to be this clean ever again…
Seamless roof replacement. Seriously, it’s incredible.
Spotless. Nice ductail in the background. And cup.
Biggest wheel studs this side of the Mississippi. 100mm!
Big wheel test fit w/ 335 hoosiers…
Getting there!
And ready for pickup!!! Next stop…Road America
Proper stance coming down into 5…
Up into 6
Out of Canada…
Hanging with a close friend…
Back straight at VIR chasing down Spartan
Going around some cones before the front straight.
Running away from this fire breather. Yes we passed it
With her skirt up in the garage. Don’t stare…
Frolicking in nature on a weekend starbucks run
Hell of a process from start to finish. 100% happy with the results…too many thanks to my good friend Spartan for all the advice., part sourcing, and coaching me through the process. No excuses not do to it now guys…WHO’S NEXT?
Last edited by wagongotya; 03-28-2012 at 01:04 PM.
 03-28-2012, 12:28 AM
#3
Rennlist Member
wow. great work. you guys know how to have fun! thanks for sharing. what kind of lap times around VIR?
the pic with the roof installed and primed with Spartan's car in back ground, his wing looks like it is floating in thin air.
the pic with the roof installed and primed with Spartan's car in back ground, his wing looks like it is floating in thin air.
03-28-2012, 12:31 AM
#4
Pro
Thread Starter
Nothing too special in the interior...definitely need to replace the original leather with alcantara or custom stitching.


Last edited by wagongotya; 04-10-2012 at 01:21 AM.

Trending Topics
 03-28-2012, 10:50 AM
#11
Pro
Thread Starter
The car's mechanicals were already fully rebuilt and track prepped before the aero work. Nothing too crazy, just rod bolts, k16/24s, and protomotive. Some tial alpha 28's, ev14 injectors, and a new tune is all she needs to hit 500whp. Okay maybe some crack...i mean meth.
 03-28-2012, 02:11 PM
#15
Dave, this post was 93% directed towards you
The car's mechanicals were already fully rebuilt and track prepped before the aero work. Nothing too crazy, just rod bolts, k16/24s, and protomotive. Some tial alpha 28's, ev14 injectors, and a new tune is all she needs to hit 500whp. Okay maybe some crack...i mean meth.
The car's mechanicals were already fully rebuilt and track prepped before the aero work. Nothing too crazy, just rod bolts, k16/24s, and protomotive. Some tial alpha 28's, ev14 injectors, and a new tune is all she needs to hit 500whp. Okay maybe some crack...i mean meth.