When you click on links to various merchants on this site and make a purchase, this can result in this site earning a commission. Affiliate programs and affiliations include, but are not limited to, the eBay Partner Network.
I tackled a couple of projects on my 96 993 Targa. Walrod front lower control arm bushings and PSS10 installation. The information available on the Walrod busing was excellent and that project went as expected.
Information available on shock/spring removal was also excellent in this Pelican DIY.
Not so much info available on PSS10 install. Bilstein instructions are very poor. I wanted to pre-order tools I needed but there is nothing on Renlist or in the instructions on shock shaft and nut sizes. Renlisters scolded me to search which I did for hours but the info is sketchy and focuses on specific issues. So here is my chance to give back and provide some comprehensive information.
Comments on tools:
I live 2 hours from a decent tool store. So everything was ordered on Amazon. The lack of info caused a few frustrating delays. Here are some general recommendations:
� To get at all required bolts you cannot have too many varieties of box wrenches. Straight and offsets in sizes 15, 16, 17, 18, 19, 21 & 22. My toolbox was not well represented in 18mm category (which is popular) and that changed.
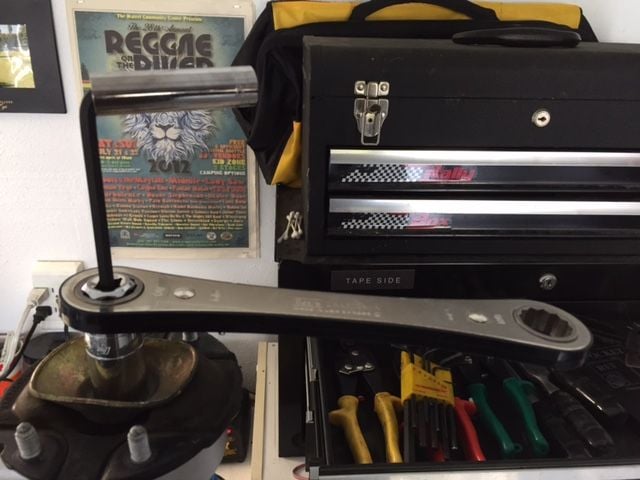
� If you�re working off ground jacks getting enough torque to remove nuts can be challenging. A lot of nuts in the rear shocks do not have clearance for a socket or impact gun. I bought a box wrench extension which was excellent. http://toolguyd.com/wrench-extender-cheater-bar/
� You cannot use a socket torque wrench on all bolts. A torque wrench that uses box wrench attachments is necessary. For me I had the alignment shop check torque on those bolts.
Following the Pelican shock replacement DIY taking the shocks off is pretty straightforward. The fronts are easiest due to better access of the 13 mm top hat bolts. Once you get the assembly out I compressed the spring and used an impact wrench to remove the 19 mm nut on top of the shock shaft. The shaft will spin but since you are not re-using you can hold the shaft with a channel locks. You can buy the Hazet open 21 mm ($80) socket which allows you to hold the shaft. However this size is not usable for the PSS10�s. You can also use an offset box wrench which will allow you to hold the shaft with an allen. Once you get the front apart there are some OEM parts that are re-used and some that are pitched. The Bilstein diagram concerning this subject is adequate. There is also a highlighted version on Renlist that is excellent. When you re-assemble the PSS10�s make sure there you exactly follow the Bilstein diagram. Also make sure the same amount of shaft threads are visible above the nut. You have to hold the shaft to tighten the top nut. The shaft is a 7 mm Allen and the nut is 22 mm. I ordered the Hazet 22 mm open wrench. Don�t use an impact wrench. Once assembled it�s pretty easy for a second person to guide from the bottom while someone on the top aligns the top hat bolts. Make sure the red mark on the top hat faces front (the same as before you dis-assembled). Put the 2 bottom bolts in and your done except for replacing the wires and break lines per the Pelican DIY. The Bilsteins were a perfect match for all the break line and wiring attachments. You have to re-use the plastic pieces that hold wires from the old shocks. . All those pieces have a round center plastic piece that fixes the plastic piece to the metal shock frame. To remove you have to push out from the back which is tricky. I simply cut the old shock metal with a Dremel and bent for access. I saw someone who used a small Allen to get behind the bracket.
The backs are a bit trickier because of access and the attachments for the role bar. The Pelican DIY is pretty good. Here are some enhancements. The lower suspension arm must be removed from the frame attachment. The head of the bolt facing rear will not turn. It is concentric and used for wheel alignment. The 18mm nut facing the front must be removed. This is very tough access and a offset box with just the right angle is very helpful. I found a ratcheting offset box wrench helpful. Also the nut on the lower shock bolt will spin freely unless the ball joint is held with a T40 Torx. You can probably get it off with an impact gun but you will need to hold to tighten and torque.
Assembling the PSS 10 rears once again requires using some OEM parts and some new parts. Use the diagram from Renlist that is highlighted. It�s a bit confusing when the instructions say not to use the original bumper and dust cover. Its 2 parts that fit together under the top hat. When those are both out you can tighten the shock assembly without compressing the spring.
The back shocks assemblies really need to be tightened and torqued before they go in the car. Once again you need to hold the shock shaft but these are different size nuts/shaft then the front. The shaft is a 6 mm Allen and the nut is a 19mm. You can actually turn the nut with an offset 19mm box wrench while you hold the shaft. You would need to use the before mentioned box wrench torque wrench to actual set. Good luck trying to torque once it is the car.
Installing the new PSS10 assembly is pretty straightforward. Again someone guides up fr the bottom and a top person places in the holes. Its tight access to the 13 mm top hat bolts but not impossible. Torque on the top hat bolts is 25 ft-lbs. One mistake I made is ensuring sure the shock dampening adjusters are facing out (toward the inside of the car. If they are facing in you can�t read the settings. Just turn the shock 180o to get the right orientation.
The most confusing part of the rear install is the angle of the role bar drop link attachment. There are three locking rings on the shock. The top two lock the height adjustment. The bottom locking ring locks the role bar attachment for the drop link. There is a useless diagram in the Billstein instructions that shows an angle offset. It has no reference (front, rear, etc) so I found it not helpful. I just dropped the car on the suspension and tightened the drop link attachment where it lined up. The alignment shop said it was pretty close. Mentioned on reenlist this locking ring has to be very tight. I believe the alignment shop used a mallet to set it. One other thing about the drop ink attachment is the height you set it at. It needs to be significantly lower that the height locking rings to allow height adjustments. If you are using the stock Billstein nonadjustable drop link you are sort of guessing on the height. It�s not impossible to adjust once the top hat bolts are secured but it�s difficult to get clearance to spin the drop link attachment. The bottom shock bolts have to be removed and a lot of stuff in the way that needs to be removed.
Finally I relied on a good Porsche Shop (Eurosport � Bensenville, Il) for final height adjustment, wheel alignment, and torque checking. Money well spent IMO.
Great tips. Thank you for taking the time to write up your experience with the PSS10. That is my next project and I am gathering all the info I can get my hands on. Any pictures?
Thanks for sharing. I plan doing the same work on mine in a month or so. PSS10's and walrod bushings are on their way from Carnewal. While I installed Damptronics myself on my 06 C2S a couple of years ago, I wiill have MikeJ install them on his lift, then have a local good alignment shop do a corner balance and alignment. Curious what height you used, and if you installed adjustable toe arms like Taretts, which are typically a good idea if the car is lowered, according to my alignment shop. I'm likely going to go with RS+10 height.
Probably the same height as you are planning. I used the stock Bilstein drop links which worked ok because you can adjust the height of the bracket on the shock.
That being said this is classic driver no track time anticipated. Set shocks at 4 rear 3 front. A little stiff for bumpy roads. Perfect for smooth roads.
Thanks. Good to know, as I'll not be tracking my car either.
Hey Ken, I met you at the BBQ. I was driving the Turquoise coupe. I'm not sure if we talked about it but my car is set to euro height because I found the car extremely unpleasant to drive when Mike and I originally ball parked the ride height...which was too low. I would term it "squirelly". At euro she's good now. Cheers
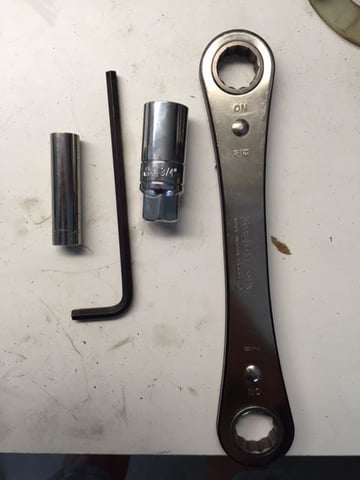
I did the PSS10 install last weekend. For removing and installing the top shock nut there is no need to buy that expensive, single use Hazet tool. I tried two alternative methods and they both worked but I prefer option 2.
1) Spark plug socket with open top. It worked fine, but you need a few different sizes and I could only find SAE not metric.
2) The better option I found was a Craftsman socket wrench set called the "Craftsman 19pc Universal Max Axess Socket and Ratchet Set 3/8” Drive" http://www.craftsman.com/craftsman-1...4&blockType=G4 The set had all the necessary sizes to work on the nuts...plus I can see it coming in useful for other projects.
 09-01-2015, 01:37 PM