When you click on links to various merchants on this site and make a purchase, this can result in this site earning a commission. Affiliate programs and affiliations include, but are not limited to, the eBay Partner Network.
Question...finishing touches on carpet install, plastic sill strip issues
I recently completed the removal and installation of new carpet and sound proofing in my '95 993 (do not ever do this...), and the last step is to replace the plastic carpet edge covers that run along the door sill.
Unfortunately I broke the plastic pieces on the original part that fits over the white tabs, and ordered new ones. The original part number is 964.551.419.00, and what I received was part 993.551.219.00. This didn't concern me as I thought the interiors between the 964 and 993 were virtually identical. However, as you can see there are some differences in this part (the clips) where it fits over the white tabs on the body.
The clips on the old part all face the same direction, so you can slide the piece in one direction and it clips into place for all tabs...the new part has three of the clips facing one direction, and two facing the other...meaning I have no idea how to keep them all in position since some tabs will not line up as you slide it in the opposite direction.
Am I missing something here in my advanced age? Or do I need to track down on of the "964" version parts? Do I just beat on this with a rubber mallet instead of sliding it into place?
IIRC, the trick was to bend the strip a bit so the two slots going one way are engaged against their ends (top two arrows in your diagram and their direction to engage) then push down on the other end of the strip to engage the 3 slots going the other way and move in direction of their arrows on your diagram to engage those 3 with the central short slot bottomed against its stud as final locator.
Another thing you could try is this. Remove the posts, install into sill and then position the sill over the holes and push down. You might have to carefully tap down with a rubber mallet to seat the posts.
I haven't done this but it seems it might work. If you try this, let us know if it worked
EDIT: the one downside to this is that the posts might break when trying to pry them out.
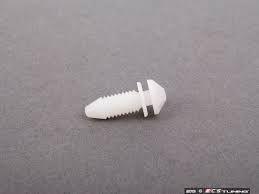
The slots are for the fasteners to slide into place. Position them and push the black trim straight down into place. A smack with your fist will do it. A mallet is overkill. The plastic fasteners are a one time use item if you want a snug fit. So get new ones.
I replaced one of mine. Install the fasteners on the sill strip piece first and then locate each fastener into each hole working towards the front or back. Then keep pressing down to secure in place. The fasteners I used are displayed in post #5.


 04-26-2015, 01:35 PM