WTT: 3-Spoke Leather Airbag w/standard crest for silver crest
 01-31-2015, 03:25 PM
#31
Pro
Thread Starter


 01-31-2015, 08:18 PM
#32
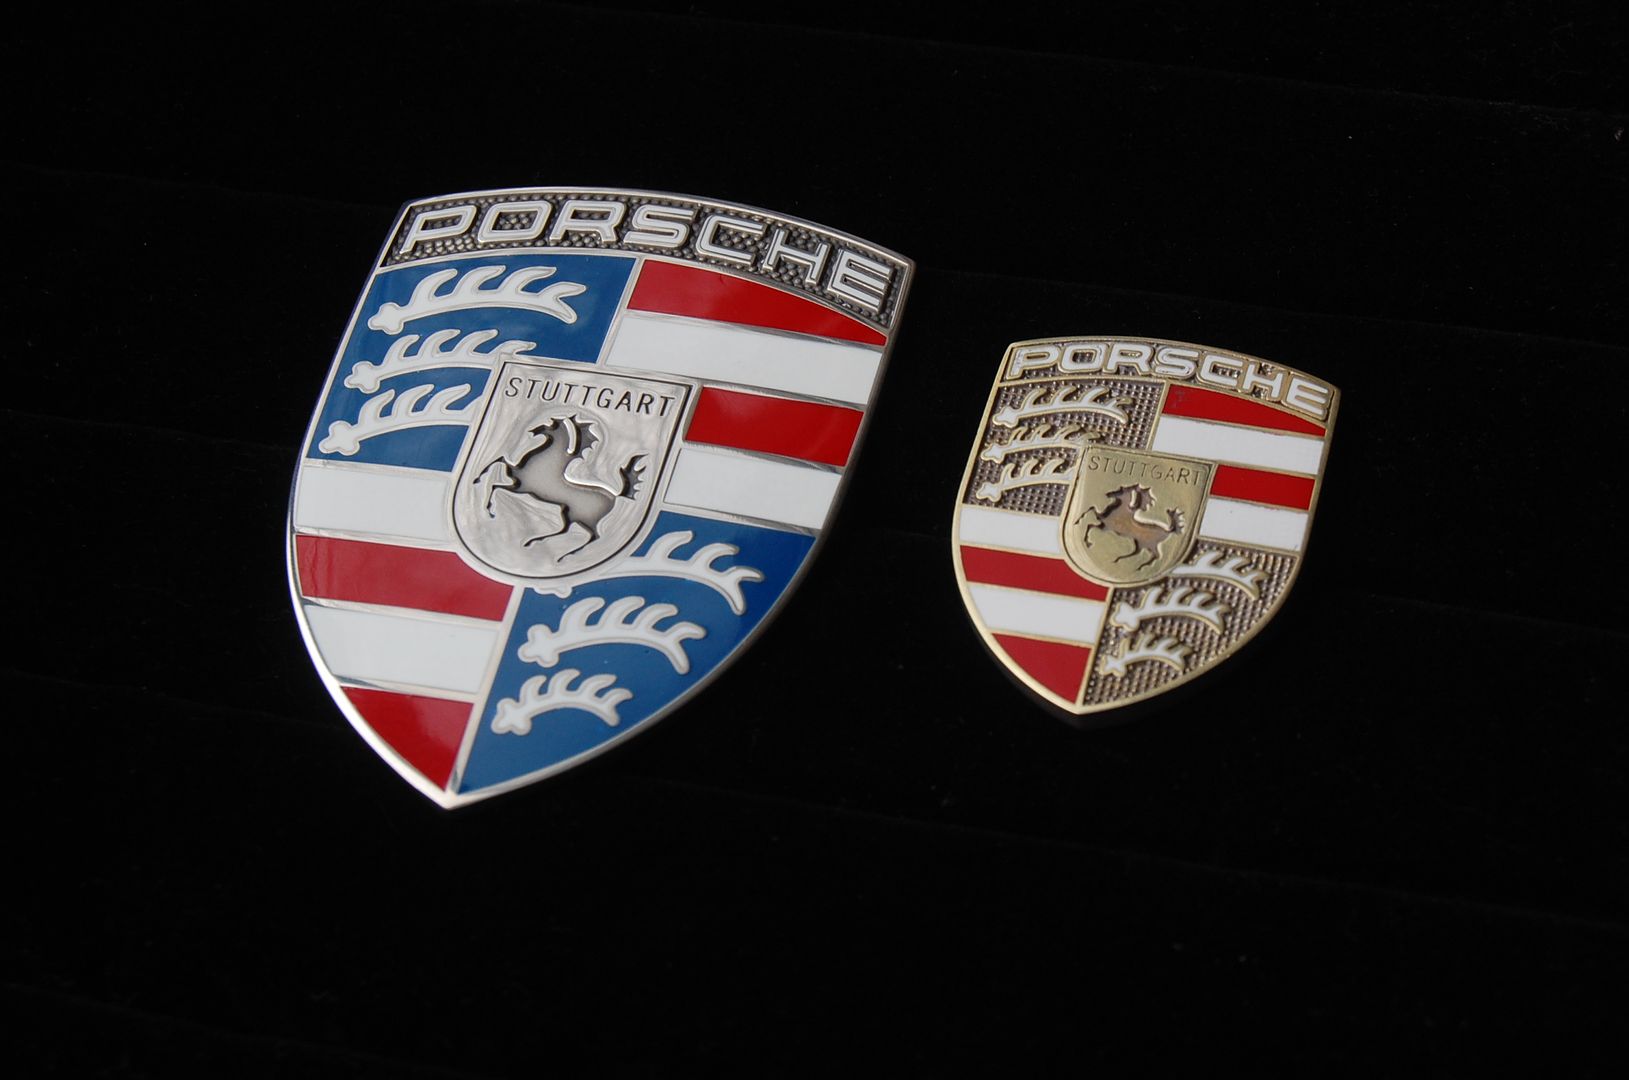
Just curious, the silver crest you showed in your original post was silver, with only black bars, like mine below, but the one you ended up with was silver with red and black bars. Are any of the silver variants original equipment - and if so which ones?
01-31-2015, 08:51 PM
#33
Pro
Thread Starter


 02-07-2015, 02:35 PM
#36
Former Vendor

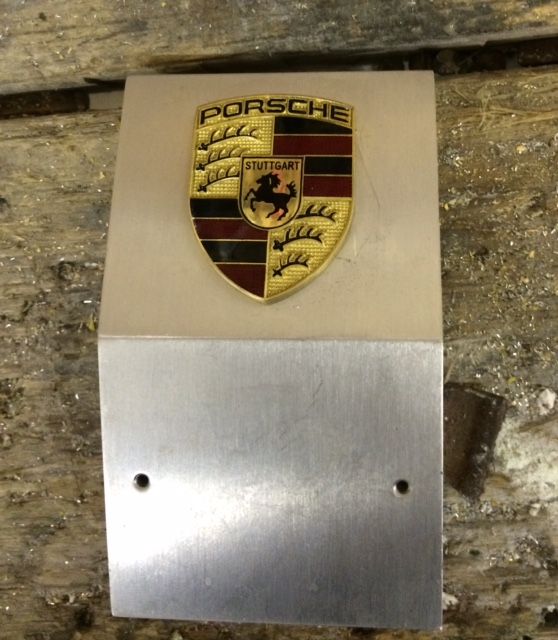
The silver and red Wheel Dynamics pieces with the solid PORSCHE lettering are 356 hood handle crests. They're 30mm wide by 40mm tall, the same size as the OEM airbag piece. If you'd like your hood crest to match the 356 crest you need a refinished "old style" 901 piece with solid lettering as well.
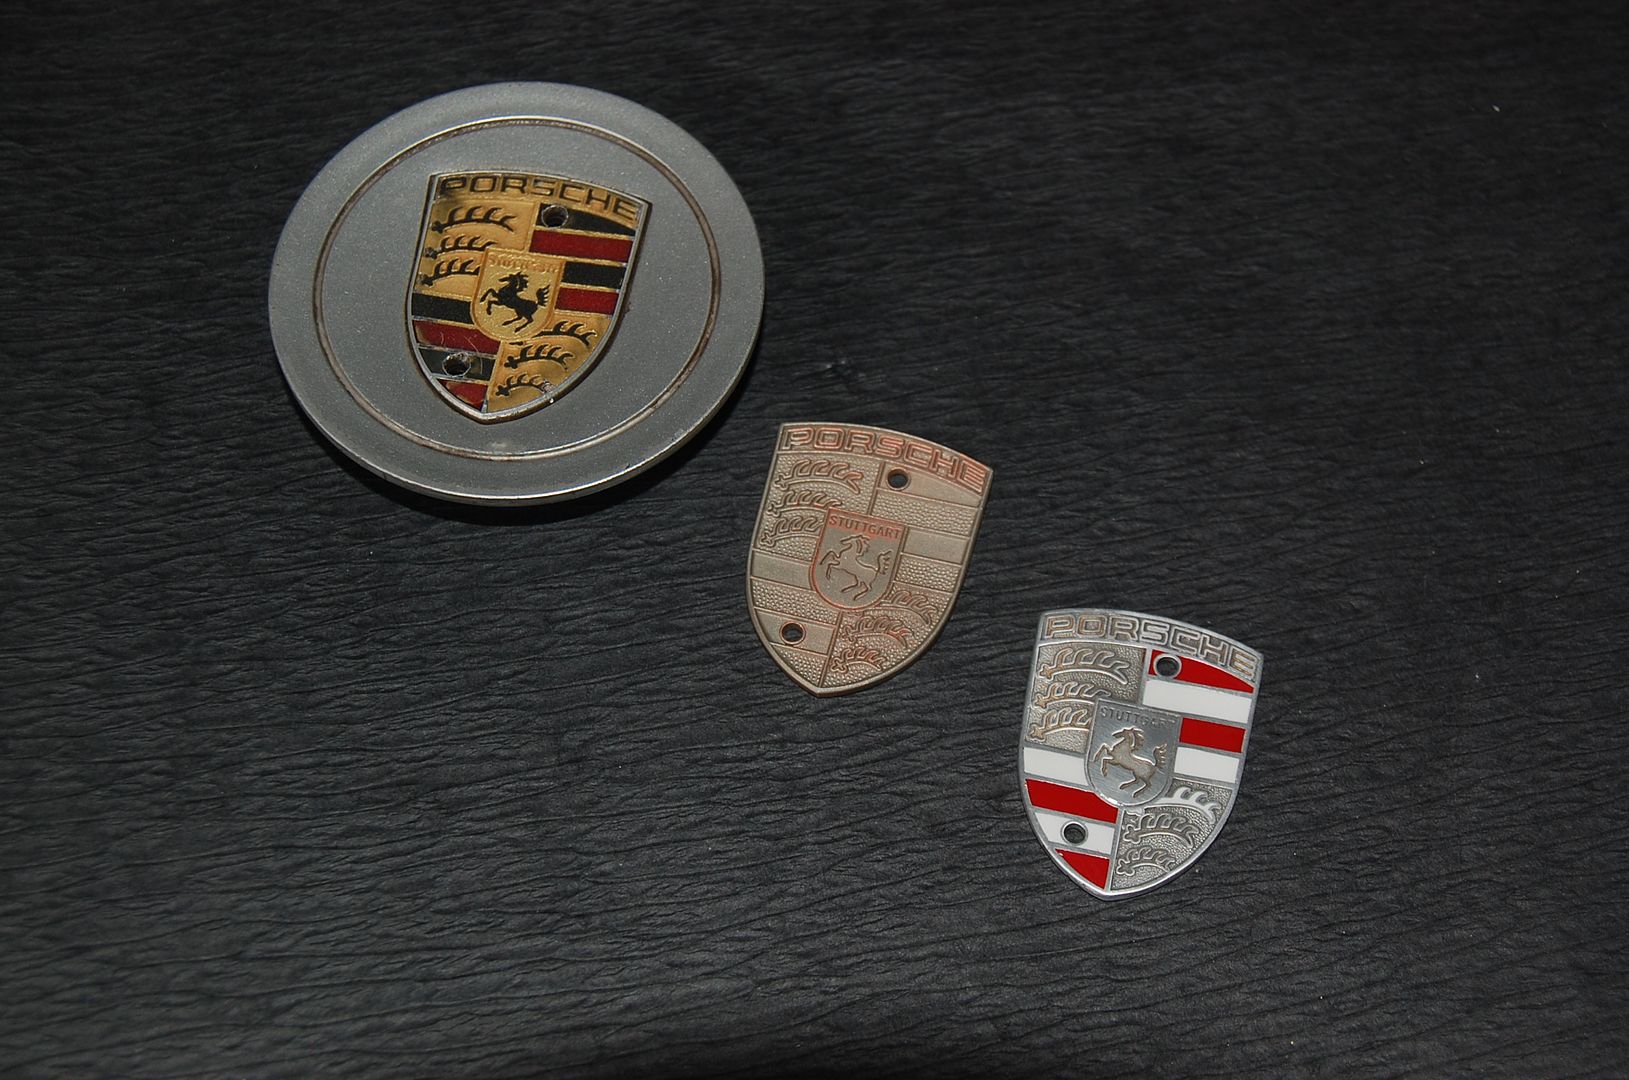
Another option for the steering wheel crest is the one from a dealership VIN paperweight. These were sent by PCNA following the purchase of a car as a thank you gift and have a deeply stuck pattern which makes resin filling easier. The VIN plaque on this one had been unscrewed before I picked it up at the Hershey Swap Meet last year:
I'm currently refinishing a matched set of red, white and blue pieces for a customer (hood, steering wheel and wheel center resin filled crests) and utilizing the piece from a VIN paperweight for the steering wheel.
A little heat and it's off the pylon:

After the original fill is media blasted out it's given a utilitarian nickel plate, and the quadrants are sequentially filled with Marine Resin and wet sanded.
Here's a pic of the customers completed Hood Crest, with the steering wheel crest still needing blue resin, wet sanding and polishing as well as a final (polished) nickel plating:
And just for good measure here's the wheel center cap crests in various stages of refinishing, from L to R - Original worn cap, media blasted crest, partially filled crest awaiting additional resin fill, wet sanding, polishing and plating:
Another option for the steering wheel crest is the one from a dealership VIN paperweight. These were sent by PCNA following the purchase of a car as a thank you gift and have a deeply stuck pattern which makes resin filling easier. The VIN plaque on this one had been unscrewed before I picked it up at the Hershey Swap Meet last year:

I'm currently refinishing a matched set of red, white and blue pieces for a customer (hood, steering wheel and wheel center resin filled crests) and utilizing the piece from a VIN paperweight for the steering wheel.
A little heat and it's off the pylon:


After the original fill is media blasted out it's given a utilitarian nickel plate, and the quadrants are sequentially filled with Marine Resin and wet sanded.
Here's a pic of the customers completed Hood Crest, with the steering wheel crest still needing blue resin, wet sanding and polishing as well as a final (polished) nickel plating:

And just for good measure here's the wheel center cap crests in various stages of refinishing, from L to R - Original worn cap, media blasted crest, partially filled crest awaiting additional resin fill, wet sanding, polishing and plating:

Last edited by intrepidagent; 02-07-2015 at 03:10 PM.
03-10-2015, 03:07 PM
#37
Addict
Lifetime Rennlist
Member
Lifetime Rennlist
Member
Jim ^^ I have always admired your work 
Gents ^^ Seems all I did was enable another parts hoarder? 
 03-10-2015, 03:12 PM
#38
Addict
Lifetime Rennlist
Member
Lifetime Rennlist
Member
From my experience, the red/silver steering wheel crest on my OEM bag referenced below is as installed stock.
My leather airbag has a silver crest with the red bars, which I think looks great. Believe it was an option on one of the special edition 996s.
 12-12-2015, 05:33 PM
#39
Rennlist Member
Join Date: Jul 2014
Location: Toronto, Canada
Posts: 1,075
Likes: 0
Received 0 Likes
on
0 Posts
TIA
12-12-2015, 06:27 PM
#40
Burning Brakes

Yep. Take off the four screws and lift off the retaining ring. I got a set of plastic pry bars like these http://www.harborfreight.com/nylon-p...-pc-69668.html.
You can push out the cover from each of the silver tabs so that they are free of the plastic cover.. I place some hard cardboard between the cover and the tabs as I move around - it makes it easier. It's a bit awkward the first time. After you free one set and try a second it seems the first set snaps back into the holes.without the cardboard. I used the cardboard to keep the metal tabs from snapping back into the holes as I free each part. Once all the tabs are free you can gently remove the cover. I keep the air bag in a zip-lock while working inn the cover.
I dremel-ed off enough of the rivet to free the badge/crest. If the new silver crest has a post you can use retaining screws like those on the hoods crest; or you can glue on a new crest; or both. I use my go-to product ShoeGoo from which no crest will escape.
You can't hurt anything if you are gentle in prying out the tabs. After the first time you are a pro.
BTW, one can purchase new gold crests from Porsche ( 356 hood crest) but the post is higher on the crest and a new hole in the airbag cover is needed. Not a problem, but be aware. No one is going to see the second hole in any event.
Let me know if you have questions. I could do some pix if the explanation is lacking.
Also, Paul, let's see some new pix!
12-12-2015, 10:19 PM
#42
Rennlist Member
Join Date: Jul 2014
Location: Toronto, Canada
Posts: 1,075
Likes: 0
Received 0 Likes
on
0 Posts
Yep. Take off the four screws and lift off the retaining ring. I got a set of plastic pry bars like these http://www.harborfreight.com/nylon-p...-pc-69668.html.
You can push out the cover from each of the silver tabs so that they are free of the plastic cover.. I place some hard cardboard between the cover and the tabs as I move around - it makes it easier. It's a bit awkward the first time. After you free one set and try a second it seems the first set snaps back into the holes.without the cardboard. I used the cardboard to keep the metal tabs from snapping back into the holes as I free each part. Once all the tabs are free you can gently remove the cover. I keep the air bag in a zip-lock while working inn the cover.
I dremel-ed off enough of the rivet to free the badge/crest. If the new silver crest has a post you can use retaining screws like those on the hoods crest; or you can glue on a new crest; or both. I use my go-to product ShoeGoo from which no crest will escape.
You can't hurt anything if you are gentle in prying out the tabs. After the first time you are a pro.
BTW, one can purchase new gold crests from Porsche ( 356 hood crest) but the post is higher on the crest and a new hole in the airbag cover is needed. Not a problem, but be aware. No one is going to see the second hole in any event.
Let me know if you have questions. I could do some pix if the explanation is lacking.
Also, Paul, let's see some new pix!
You can push out the cover from each of the silver tabs so that they are free of the plastic cover.. I place some hard cardboard between the cover and the tabs as I move around - it makes it easier. It's a bit awkward the first time. After you free one set and try a second it seems the first set snaps back into the holes.without the cardboard. I used the cardboard to keep the metal tabs from snapping back into the holes as I free each part. Once all the tabs are free you can gently remove the cover. I keep the air bag in a zip-lock while working inn the cover.
I dremel-ed off enough of the rivet to free the badge/crest. If the new silver crest has a post you can use retaining screws like those on the hoods crest; or you can glue on a new crest; or both. I use my go-to product ShoeGoo from which no crest will escape.
You can't hurt anything if you are gentle in prying out the tabs. After the first time you are a pro.
BTW, one can purchase new gold crests from Porsche ( 356 hood crest) but the post is higher on the crest and a new hole in the airbag cover is needed. Not a problem, but be aware. No one is going to see the second hole in any event.
Let me know if you have questions. I could do some pix if the explanation is lacking.
Also, Paul, let's see some new pix!


