When you click on links to various merchants on this site and make a purchase, this can result in this site earning a commission. Affiliate programs and affiliations include, but are not limited to, the eBay Partner Network.
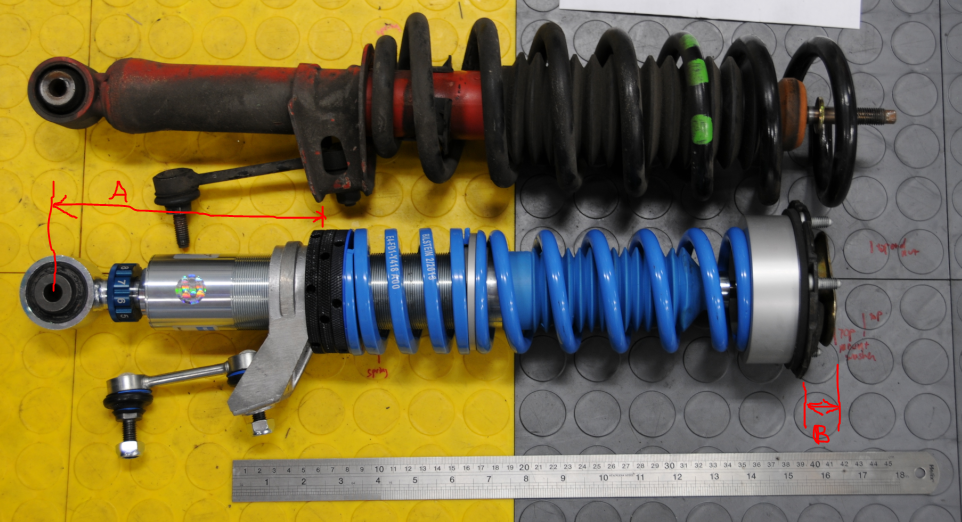
I am in the process of installing new PSS10's. I have removed the rear strut/spring assembly and transferred the 2 OEM parts over to the new PSS10 coilover. (See photo).
Per the Bilstein manual, I have set the Centerline of the bolt through bottom of the strut to the top of the drop link retaining ring to 175mm (Marked as "A" in the photo.)
I tightened the strut top nut to 1-2 threads exposed (per manual) until I get it into the car to apply final torque. I intend to raise the spring retaining rings about an 1" to get to the ROW sport ride height- but will do that once I get the assembly into the car.
Here is my problem, though: the new PSS10 is about 25mm (about 1") shorter than the original strut. So when I put it into place, the wheel carrier is way off and I can't get the bolt through. This doesn't seem right. I feel like there is an easy answer here but its eluding me. Can anyone spot anything obvious that I am overlooking or doing wrong?
*** UPDATE: After I posted this I went back out to the garage and had one of those moments. Even though it's shorter than OEM I was able to raise the wheel carrier (and rotor) vertically to meet up with the PSS10 strut. Simple- and the toe arm bolt slid right in. Seems to be working just fine. Now I need to torque down the new fasteners and raise the spring height rings to lower the car to ROW Sport. ***
Thanks,
-Jeff
Last edited by SeaJeff; 11-09-2014 at 07:04 PM.
Reason: answered own question
Never mind- I sometimes think I over analyze. I was able to simply raise the wheel vertically and the strut aligned with the wheel carrier and the toe arm bolt slid right in perfectly.
You'll need to raise the carrier to attach the new, shorter shock.
Other tips:
Tighten the top mount nut 'B' now while access is clear. No benefit in waiting to tighten it once installed.
Tighten the right rear shock sway bar bracket off the car or before installing the toe arm - the clearances make this side difficult to tighten in situ. It needs to be _TIGHT_ to prevent loosening later & busting the drop link, or worse. Adjust the left side to eliminate any preload on the sway bar once the ride height is set.
Depending on who's doing alignment & corner balance, consider leaving the rear sway bar off & driving for a couple days to let things settle. Once you have the car back (after alignment or corner weights are set), adjust the left rear mount so that the sway bar isn't preloaded & tighten everything up.
I want to confirm something that I'm scratching my head on a bit.
The factory workshop manual specifies 58 NM to tighten the top nut. However, the PSS-10 piston w/ threaded rod at the top doesn't seem to have a stop to tighten the top nut against. And the Bilstein spacer is able to move freely up and down the piston rod. So, it seems that tightening the top nut would draw the piston up into the car until it runs out of threads on the rod. In other words, it's just the force of the spring pushing against the top nut and will never approach 58 NM. That doesn't seem quite right. Can someone set me straight? I feel I need to tighten the top nut against -something-.
Maybe the photos help explain what I'm experiencing.
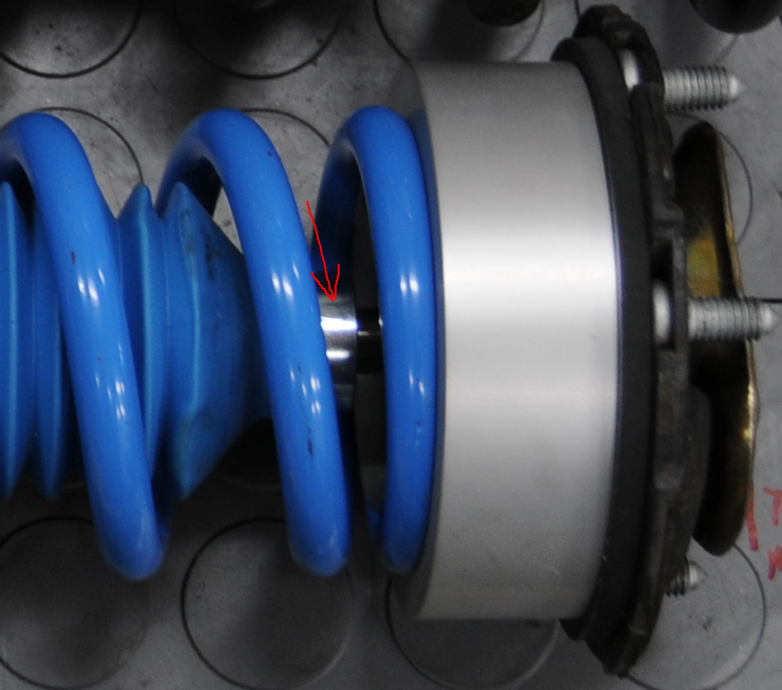
Below shows the piston rod. The arrow points to the Bilstein spacer. Should it be able to freely move up and down the piston rod? I assume when the car is weighted down the springs will compress and the space will tighten up.
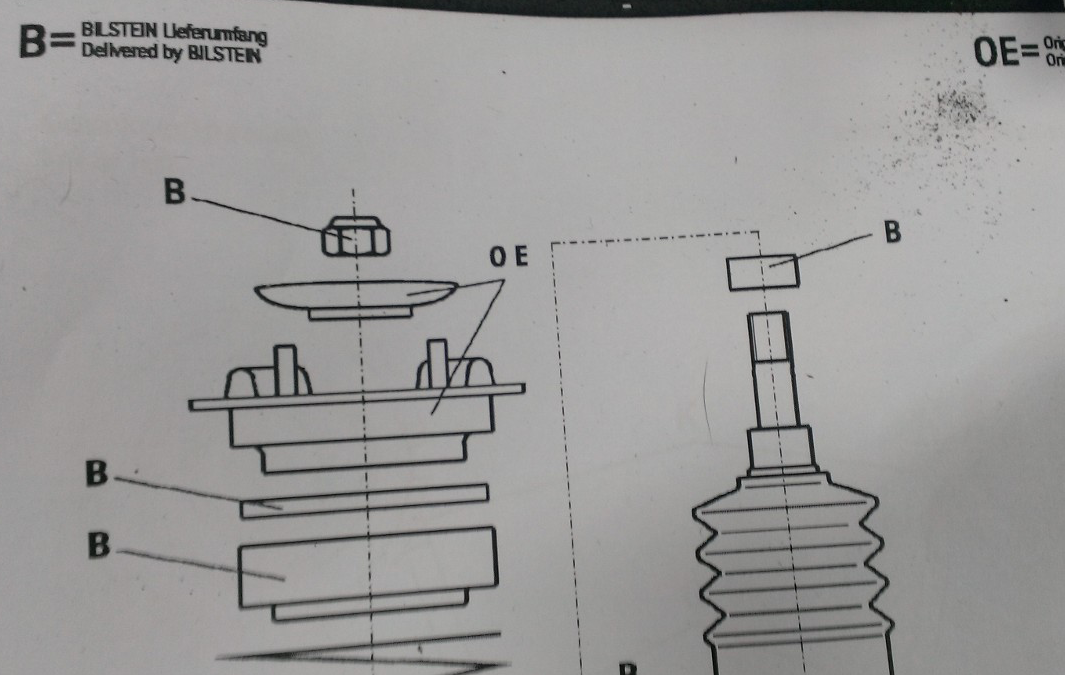
The Bilstein manual showing the OEM and Bilstein parts. This seems to validate that the spacer just "floats" on the piston rod. But what does the TopNut tighten against?
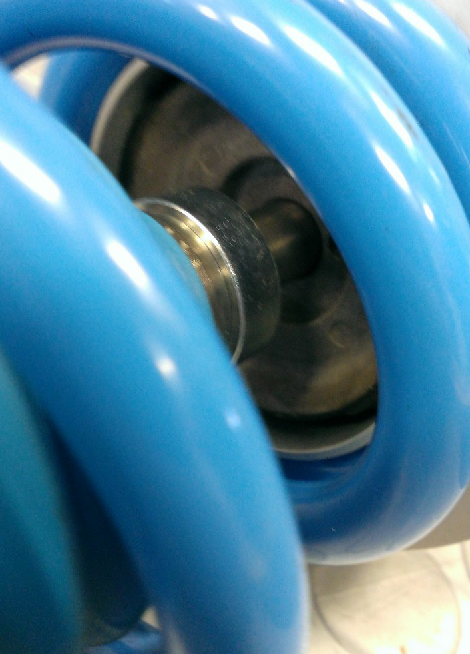
Another shot of the piston rod. You can see the Bilstein silver cover, and above that is the OEM mount. But both of those slide on the piston rod. So when tightening the top nut, it seems it's only compressing the springs from the top and pulling the rod up.
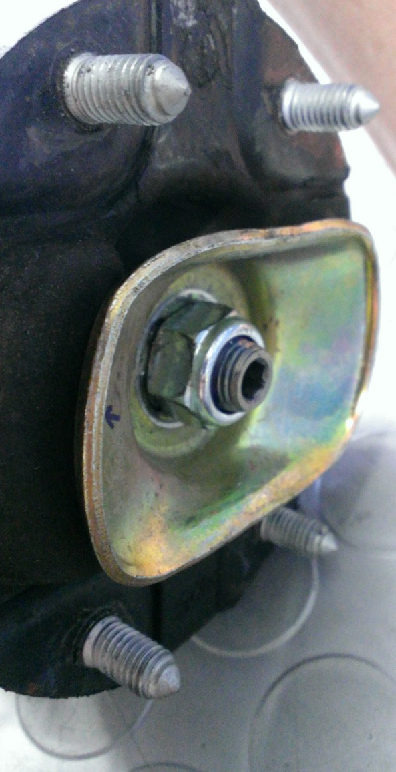
Photo of top nut. It only takes about 20 NM of force to turn the top nut against the spring force. If I keep turning the top nut, it seems the piston rod will just pull up more until the piston rod threads end.
I hope I'm again overthinking this- but I would love any validation or correction of how I have this setup.
I hope I'm correct on this. The Bilstein spacer will just float with the OEM top mounts. If you put rear monoball camber plates, then the spacer sits btwn the top of those hats and the camber plate. Not sure but that's how mine went in when I put the rear camber plates in. The camber plate hats sit inside of top of coil as opposed to sitting over the outside when retaining OEM top mounts
That spacer should be tight up against the hat
When done, another 3/4 inch (or more) of thread will show above nut
The center piston/rod is spinning
You need a socket with a cutout so the shaft can be held while tightening the nut
Or there is a tool that is made for torquing these that has on open center
Hard to explain, I will look for a link
Mark- thank you. That does make sense, and I wondered about that. I do have a socket w/ cutout tool. (Like the hazet but I made it myself). So I can easily spin down the top nut while retaining the piston rod from turning. I just wasn't sure how far down to spin it- eyeballing it looked like it would run out of threads before the top hat hit the spacer. But from what you are describing, it sounds like it should not, and goes all the way until the threads end or spacer hits and then the top nut (and assy) tightens against the spacer/top of piston... you mentioned approx. 3/4". Yes?
Mark- thank you. That does make sense, and I wondered about that. I do have a socket w/ cutout tool. (Like the hazet but I made it myself). So I can easily spin down the top nut while retaining the piston rod from turning. I just wasn't sure how far down to spin it- eyeballing it looked like it would run out of threads before the top hat hit the spacer. But from what you are describing, it sounds like it should not, and goes all the way until the threads end or spacer hits and then the top nut (and assy) tightens against the spacer/top of piston... you mentioned approx. 3/4". Yes?
Yes, you've got it
But when tight you will have approx 1" of thread exposed
3/4 +what you already have
I am going off of memory, please don't measure it
In any case, you want it tight... Torque to spec if possible with tools you have
You need a socket with a cutout so the shaft can be held while tightening the nut
I used a regular old spark plug socket head with hex faces on its barrel where I could put the tool to hold the rod down the barrel of the spark plug socket tool and a wrench on the flats of the body of the spark plug socket tool.
An option on ride height is to measure the height of those standard cement parking place stops under the front edge of your car and set you ride height just above this. It will still be lowered but you avoid damaging the lower bumper covers/splitters when parking. See the attached for ideas.
 11-09-2014, 06:18 PM


 ...Made me smile!