project M003

 05-14-2014, 04:02 PM
#32
Rennlist Member
Fantastic thread. Been a fan of your site for a long time and it only gets better....
I actually had a RS tribute like yours planned for my non-sunroof/non wiper C2 but decided it was to good to modify. Maybe I will follow your lead eventually...
I actually had a RS tribute like yours planned for my non-sunroof/non wiper C2 but decided it was to good to modify. Maybe I will follow your lead eventually...
05-14-2014, 07:38 PM
#34
Rennlist Member
Saw your site last nite your car is very cool , I'm starting a similar build MOO3 shortly
as we speak the car is getting body mods now ,sunroof delete and front and rear CS spoilers
It has PSS10 already and calipers from my TT.
I have recently come upon the holy Grail a M64/70 Cup motor and I have had a RS Cup
ECU for some time .
My Motorsport source has offered another set of center lock hubs and waiting to pay for
A set of no hole mag Speedline even more rare than what's on my GT2!
Hope to post picks soon ,sold a set of Pole positions slated for this build so looking for those
if anyone has some spares...Bert
05-15-2014, 04:25 PM
#35
Racer
Thread Starter
Join Date: Apr 2009
Location: London
Posts: 427
Likes: 0
Received 0 Likes
on
0 Posts
hey thanks Guys, glad some of you enjoy the site
i dont update it much these days as im a lot busier than i used to be but this project will definitely get some good coverage on there
______
Today I completed another 2.5 hours. I suppose it feels like its dragging now. A part of me thinks i'm close to home but truth be told there is still a fair bit to do. When you're expeting to make fast headway you never do.
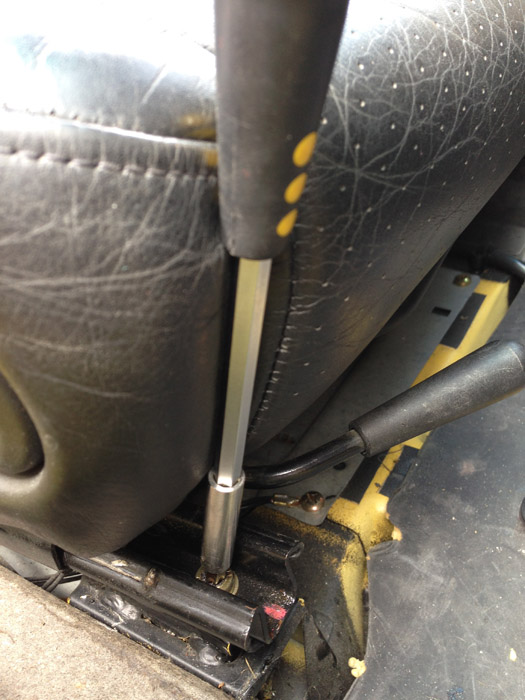
First job was to get the drivers seat out. Ran into a major stumbling block here as one of the cap heads was on so tight and it ended up getting nice and chewed and rounded. Took me 20 minutes or so but I had to hammer all sorts of stuff in there to force it round. Also had to remove all the other seat screws and rotate the whole seat around a little to help the thing budge.
Today I refrained from getting into the mask and equipping the Xylene, just was not in the mood to get into all that and besudes I am running low on the solvent and need to order some more.
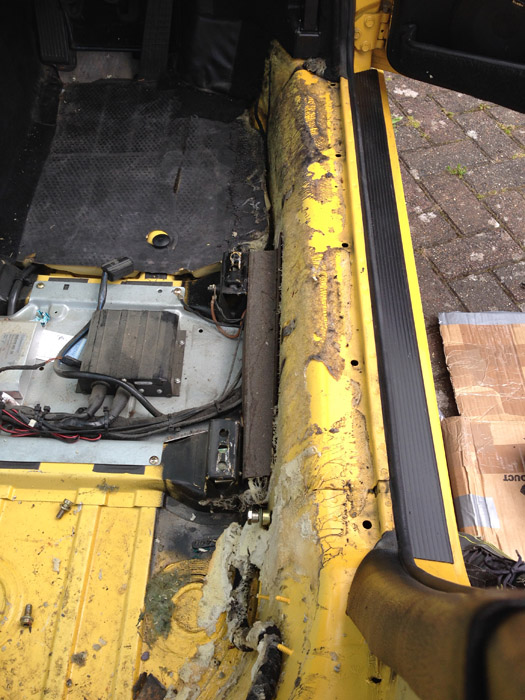
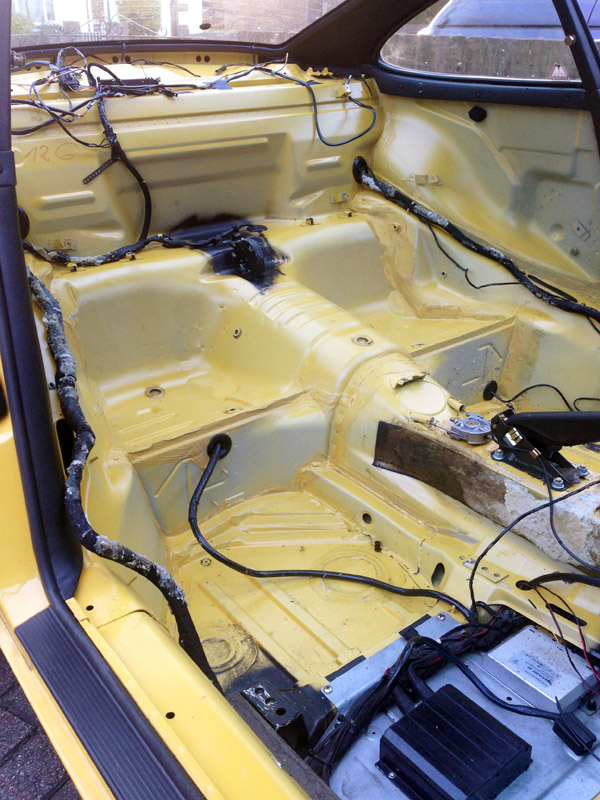
I did what I could with the ball rolling technique, starting with the offside sill. I then did some ball rolling on the vertical panel of the offisde rear seat which did lift quite a bit of the thick glue.
After most of the glue was gone, I wiped the sill down with a product called Tardis (made by autosmart). Its very similar to a lot of these bespoke 'glue removers' and contains about 40% Xylene and then some hydrocarbons mostly. It isn't nearly as powerful as Xylene though so i'll just be ordering some more of what I was using beforehand.
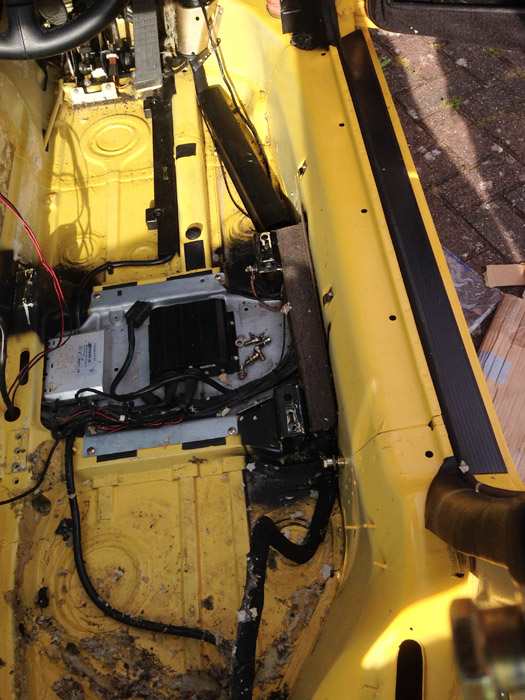
Also removed the carpet and sound deadening around the tranmission tunnel and in the front footwells.
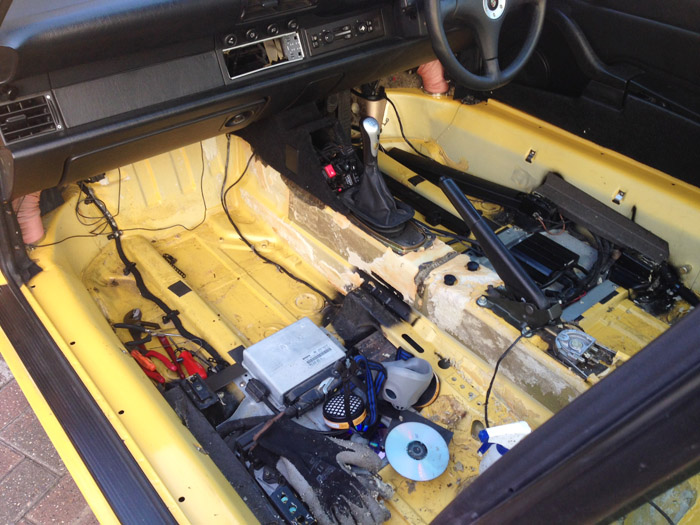
So not too long to go now. Just need a really good session on those rear footwells and then attack the tranmission tunnel and we're done.
Incidentally, I've been told to not bother with the loom as that will be unwrapped and re-wrapped in any case as the plan is to strip it back to an RS loom. There are a lot of things that won't need power anymore .... rear speakers, rear wiper assembly, rear spoiler, rear bootlid light, sunroof, central locking, electric windows, rear window heater element etc.
i dont update it much these days as im a lot busier than i used to be but this project will definitely get some good coverage on there
______
Today I completed another 2.5 hours. I suppose it feels like its dragging now. A part of me thinks i'm close to home but truth be told there is still a fair bit to do. When you're expeting to make fast headway you never do.
First job was to get the drivers seat out. Ran into a major stumbling block here as one of the cap heads was on so tight and it ended up getting nice and chewed and rounded. Took me 20 minutes or so but I had to hammer all sorts of stuff in there to force it round. Also had to remove all the other seat screws and rotate the whole seat around a little to help the thing budge.
Today I refrained from getting into the mask and equipping the Xylene, just was not in the mood to get into all that and besudes I am running low on the solvent and need to order some more.
I did what I could with the ball rolling technique, starting with the offside sill. I then did some ball rolling on the vertical panel of the offisde rear seat which did lift quite a bit of the thick glue.
After most of the glue was gone, I wiped the sill down with a product called Tardis (made by autosmart). Its very similar to a lot of these bespoke 'glue removers' and contains about 40% Xylene and then some hydrocarbons mostly. It isn't nearly as powerful as Xylene though so i'll just be ordering some more of what I was using beforehand.
Also removed the carpet and sound deadening around the tranmission tunnel and in the front footwells.
So not too long to go now. Just need a really good session on those rear footwells and then attack the tranmission tunnel and we're done.
Incidentally, I've been told to not bother with the loom as that will be unwrapped and re-wrapped in any case as the plan is to strip it back to an RS loom. There are a lot of things that won't need power anymore .... rear speakers, rear wiper assembly, rear spoiler, rear bootlid light, sunroof, central locking, electric windows, rear window heater element etc.
05-15-2014, 05:27 PM
#36
Banned

Join Date: Aug 2011
Location: 6feet under snow of CANADA
Posts: 3,665
Likes: 0
Received 0 Likes
on
0 Posts
its not dragging, to be honest I have not seen much documentation on the rs interior or 003 projects.
I love the quality of your thread so far. thanks for posting.
One thing that's forsure from what Ive seen is that your a lucky duck the yellow inside the car looks great, many of the other colour cars it looks as if they didn't paint the interior as well but with the yellow it looks as if its almost fully painted in under the carpets, atleast from the pictures perspective.
I know what you mean about the seat bolts, soft as hell. Glad to hear you got it turning.
keep it going mate.

 05-16-2014, 04:44 PM
#38
Racer
Thread Starter
Join Date: Apr 2009
Location: London
Posts: 427
Likes: 0
Received 0 Likes
on
0 Posts
A good 3 hours today gents.
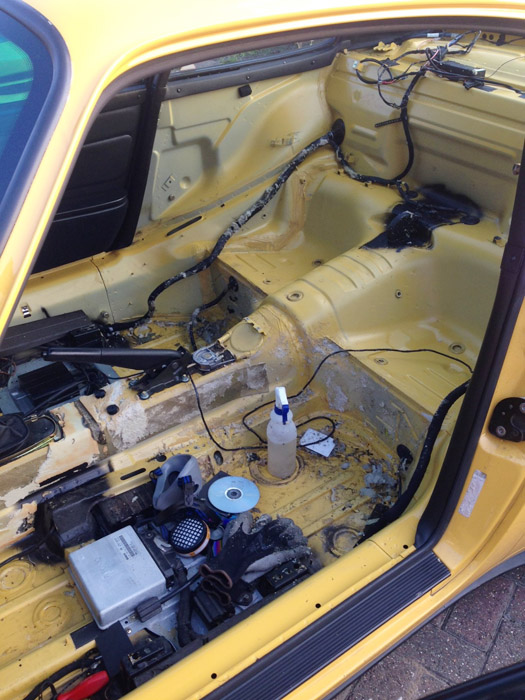
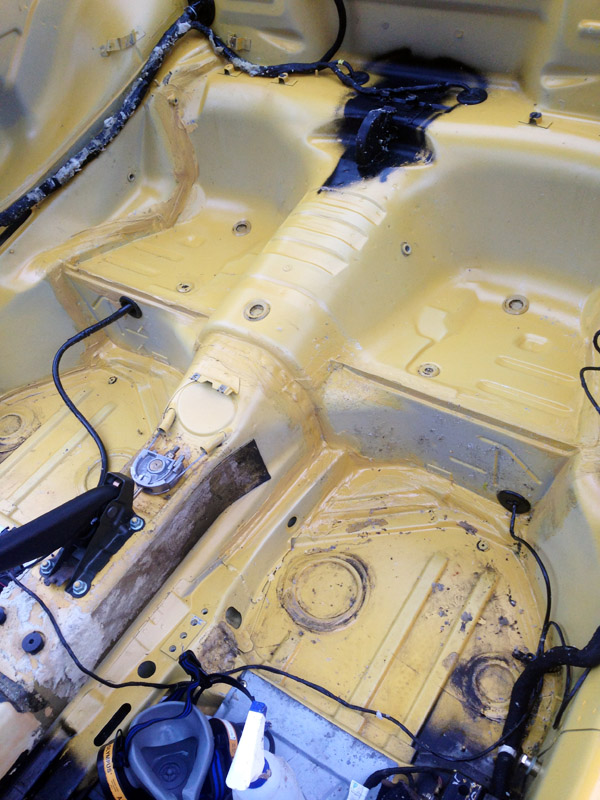
Tackled the hateful offside rear footwell, probably the worst section of the lot; a thick river of glue down in the corners adn crevices. Still it was a lovely sunny day here in blighty and I just took my time in a pair of shorts with the sunshine beating down .... glue ball, rag, xylene, rag, scraper, rag, fingernail, xylene, glue ball etc etc..
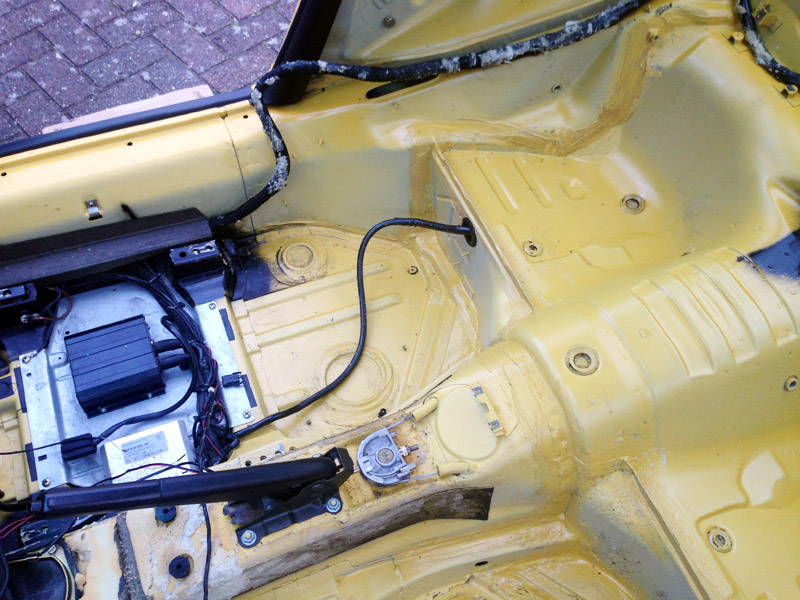
After that I pulled the small carpet pieces out from around the pedal box and took the remaining glue off there. That was uncomfrtable to say the least, lying flat on my tummy across the whole floorpan. Did the rear piece of transmission tunnel after that then did 80% of the nearside rear footwell too.
After that I gave her a real good wipe all over. Loosened up some of the stray dirt on the floors and inbetween all the modules and electrical boxes under the seats and then vacuumed everywhere.
A good afternoons work. Just have to finish the nearside rear footwell which will be a doddle, and then complete the forward sides of the transmission tunnel and then the only task left will be to go back over everything with a careful 'final finish' in preparation for handover.
Hurrah ! Almot done ...

Tackled the hateful offside rear footwell, probably the worst section of the lot; a thick river of glue down in the corners adn crevices. Still it was a lovely sunny day here in blighty and I just took my time in a pair of shorts with the sunshine beating down .... glue ball, rag, xylene, rag, scraper, rag, fingernail, xylene, glue ball etc etc..
After that I pulled the small carpet pieces out from around the pedal box and took the remaining glue off there. That was uncomfrtable to say the least, lying flat on my tummy across the whole floorpan. Did the rear piece of transmission tunnel after that then did 80% of the nearside rear footwell too.
After that I gave her a real good wipe all over. Loosened up some of the stray dirt on the floors and inbetween all the modules and electrical boxes under the seats and then vacuumed everywhere.
A good afternoons work. Just have to finish the nearside rear footwell which will be a doddle, and then complete the forward sides of the transmission tunnel and then the only task left will be to go back over everything with a careful 'final finish' in preparation for handover.
Hurrah ! Almot done ...
 05-17-2014, 07:12 PM
#42
POACB
Rennlist Member
Rennlist Member


