993 fuel pump DIY
 04-29-2014, 05:55 PM
#1
Racer
Thread Starter
Join Date: Apr 2013
Location: plainfield, nj
Posts: 271
Likes: 0
Received 0 Likes
on
0 Posts
I always dummy-run a job in my head before I start it because I want to be prepared and try to figure out solutions to any complications I may run into ahead of time. And no matter how prepared I always think I'll be, something always manages to surface forcing me to rethink my angle of attack...usually after the
third beer.
It was a beautiful Sunday, me and my honey were hauling *** on I-80. We were in fourth gear, hitting about 4000 or so revs going about 75 to 80mph...and I had two more cogs to go. What a sweet spot. Out of no where, I felt as if a giant hand grabbed me by my choke collar and slowed me down as I tried to run. She was dead at around 70mph, so I eased her over to the shoulder to see what the deal was.
Now I know it wasn't the alternator because I had just changed the regulator not too long ago, I figured the DME relay packed its bags. I popped the hood open, unlatched the fuse box panel, and checked the number 26 fuse first, a 25 amper that controlled the fuel pump. It was blown. Ah, it was probably an old fuse...but deep down I knew something caused it to blow. I replaced it, jumped back in the cockpit, fired her up...bingo. She ran for just under two seconds and then died again. Something's not right I said to my wife as I reached for the spare DME relay I always keep in the glove box. I knew it wasn't going to be the problem as I swapped out the old with the new and replaced the 25 amp fuse again. Fired her up a second time.
No dice. Time to call a flatbed...first time she ever left us stranded.
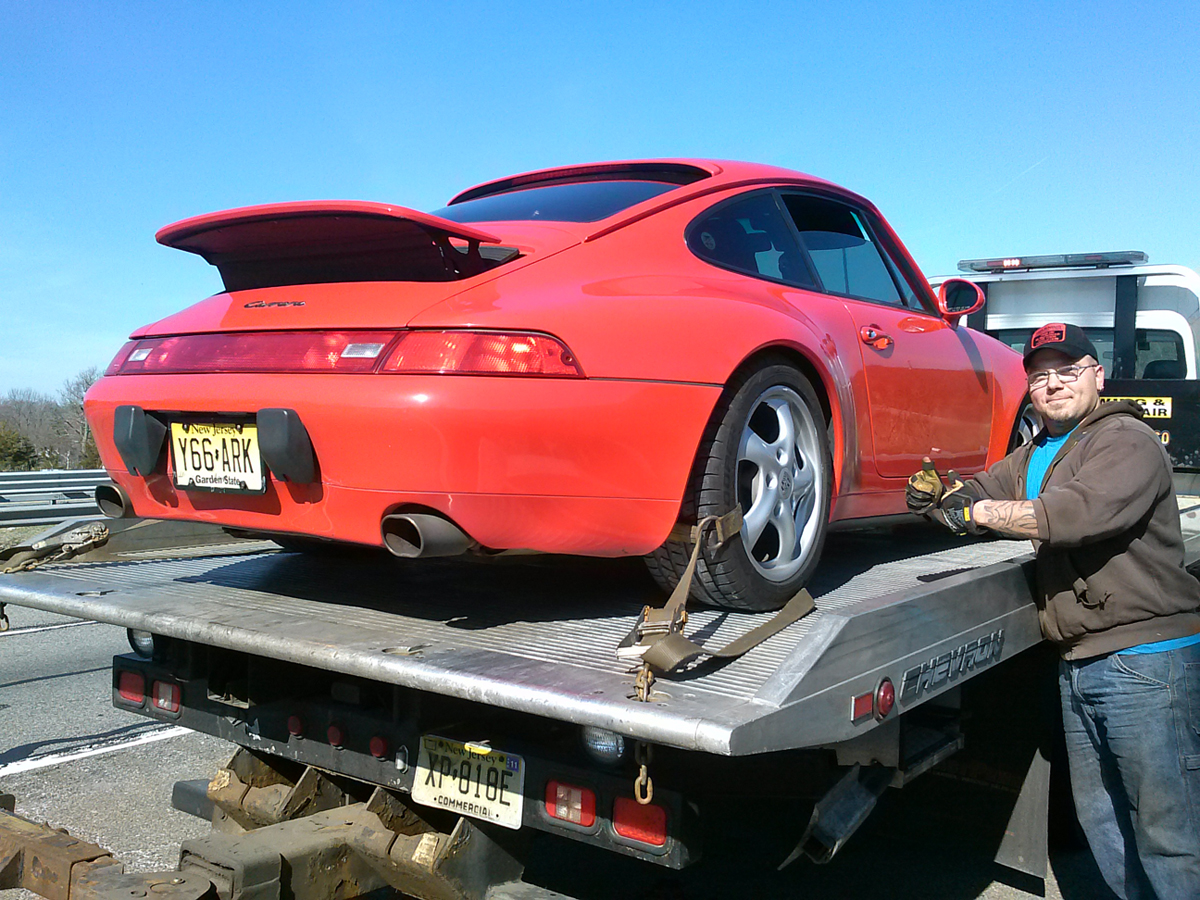
Once back at the garage, after a most awesome tow by Kyle Trew (a great story to be told in another article) it was time to make sure that the fuel pump pump was in fact the culprit. Before getting too deep, though, I put out my predicament here on Rennlist to see if anyone else had the same symptoms of blowing fuses. I didn't want to go through all the trouble to find out what was causing it because if someone else had experienced the same thing, I could get right to it first. Sure enough, Rennlster Sean Spicer chimed in mentioning that he too kept blowing fuses and once he changed out the fuel pump, all was good.
Just to be sure I didn't have a short circuit on my hands, I disconnected the brown wire (ground) from the fuel pump, pulled out the DME relay and jumpered the 3, 5, and 7 terminals. If I blew the fuse this time, I could rule out the fuel pump and start looking for a pinched wire somewhere. Well, the fuse never blew...looks like I'll be parting with $250 for a new fuel pump along with a case of beer. You could understand why I just didn't want to buy a pump without first making sure everything else checked out, especially since none of our Porsches ever had a fuel pump failure.
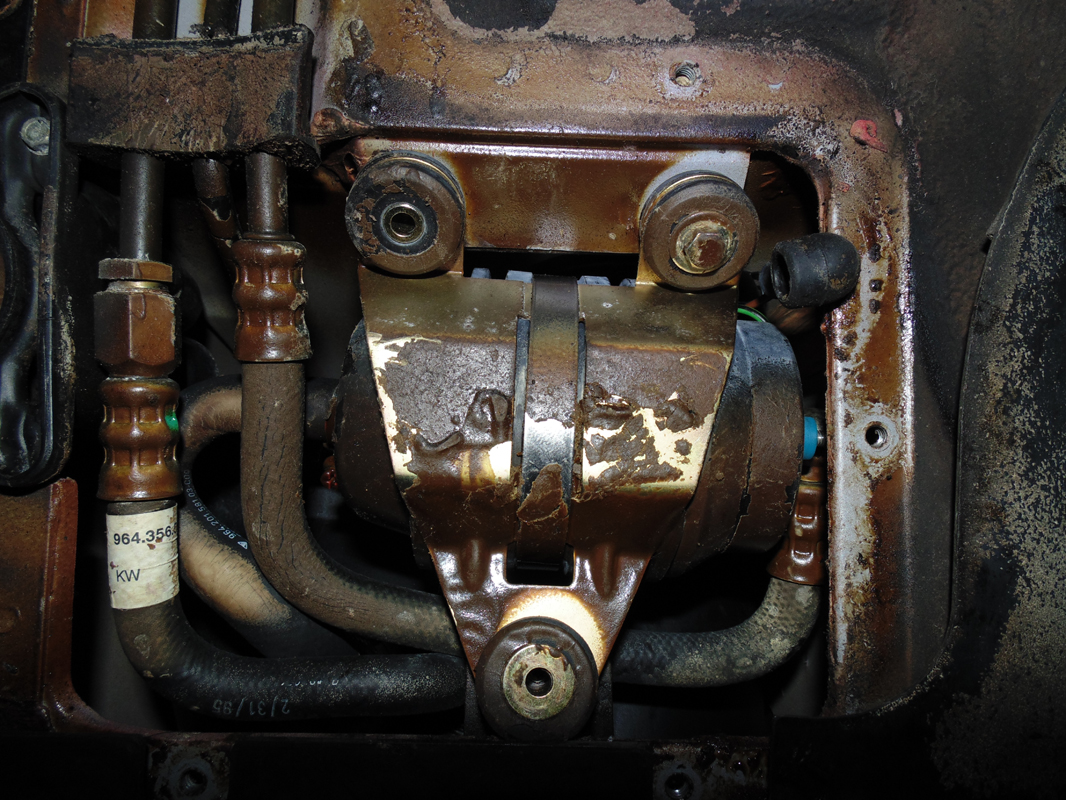
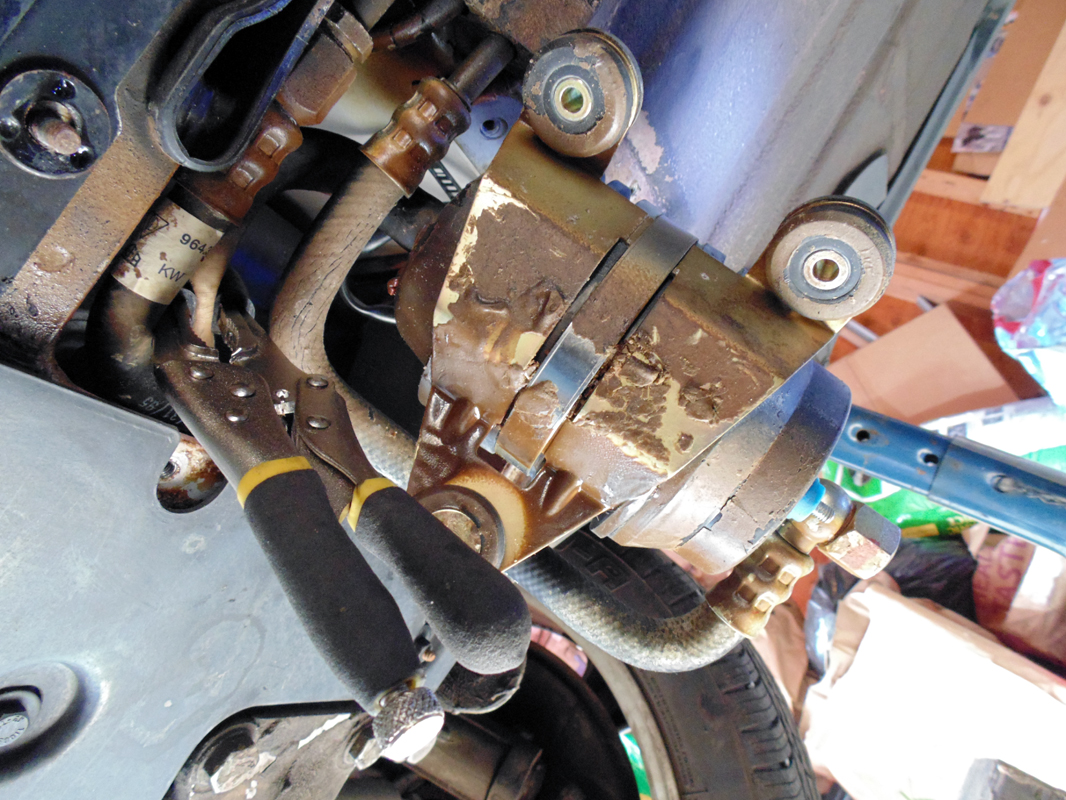
after removing the metal cover, this is what you'll find underneath...the fuel pump with the fuel feed and return lines. no one since the factory was in here because everything was covered in the brown protective undercoating, even the bolts. the ground wire is shown removed here to test for a short circuit.
Right, jack up the old girl and let's get started. I took the metal protective cover off and found everything coated in this protective brown goo which was great because it told me two things, one, I was the first to crack 'er open since she left the factory; and two, it was nice to see evidence of the hand-built era with undercoating obviously applied by a human.
And here's where the bull**** started.
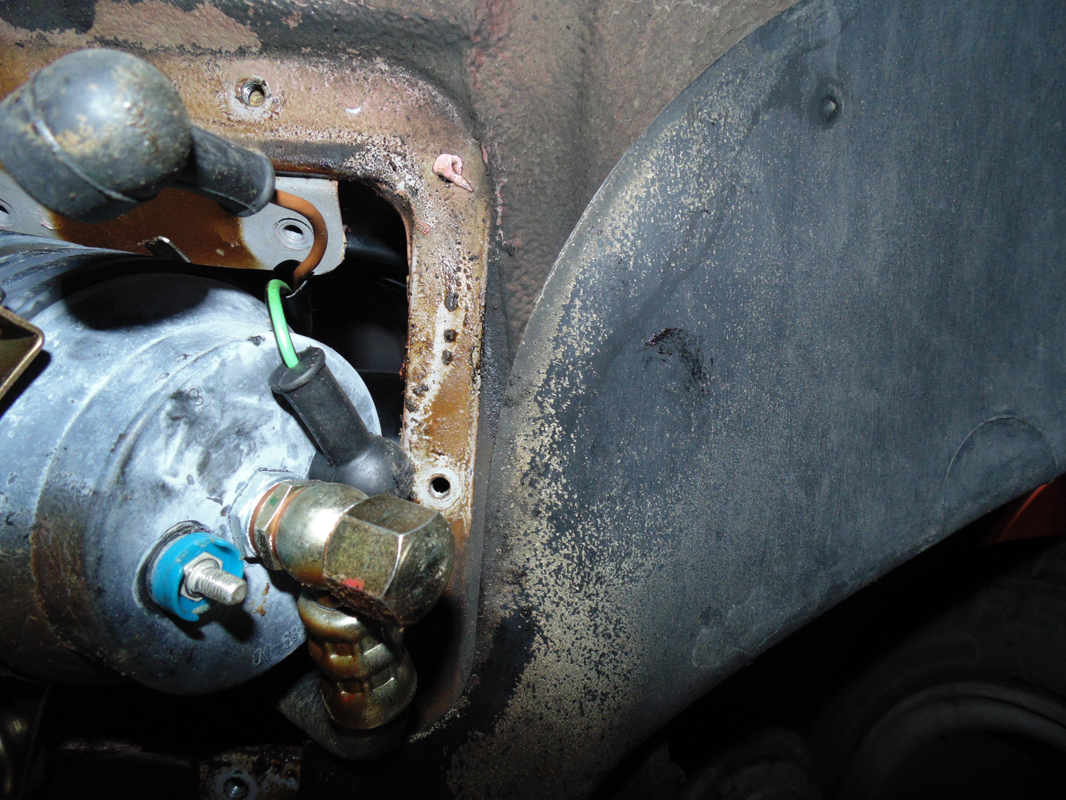
First, after removing the three bolts that held the fuel pump support bracket in place, I had to figure out how to gingerly wiggle the pump out with all of its connections without damaging anything. As you can see from the image, space is tighter than fly vajayjay. I needed to clear the fuel cap nut which extended a good inch past the opening on the right where the electrical connections were. This meant that I'd have to shift the whole assembly over to the left guiding the left ear of the fuel pump bracket under the feed line. It'll give, and you just have enough space to clear the cap nut to bring the right side of the fuel pump down. The image below shows you the cap nut in reference to the edge of the opening.

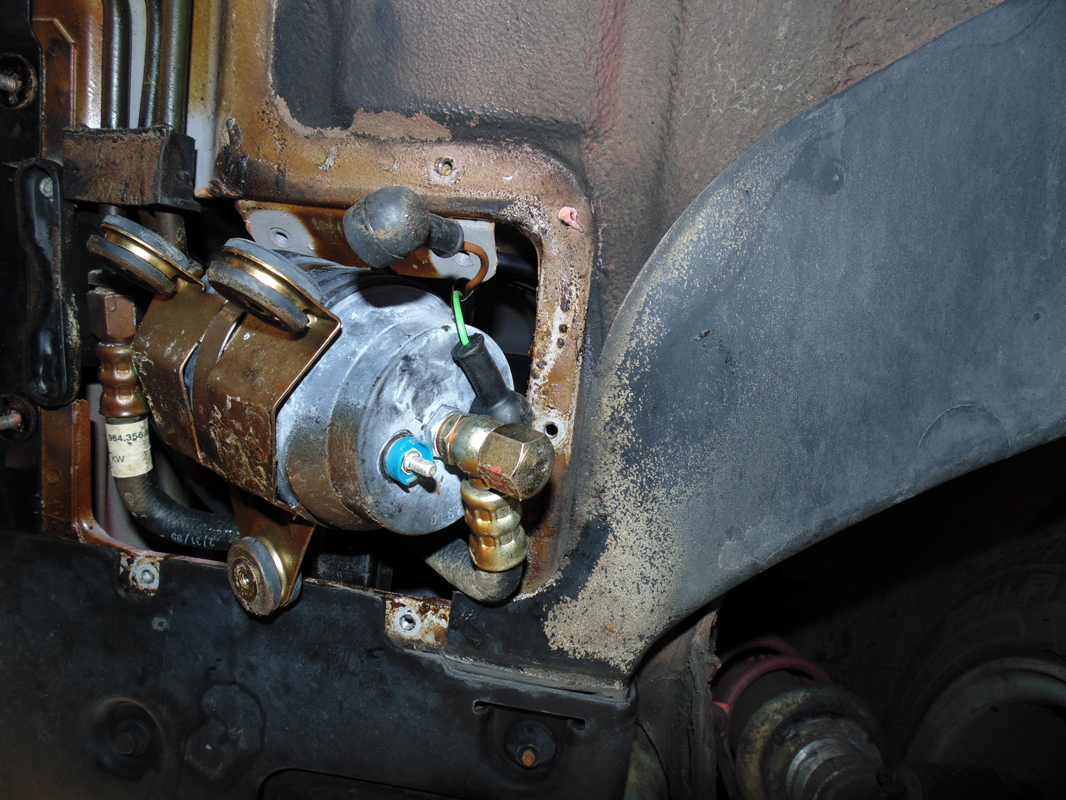
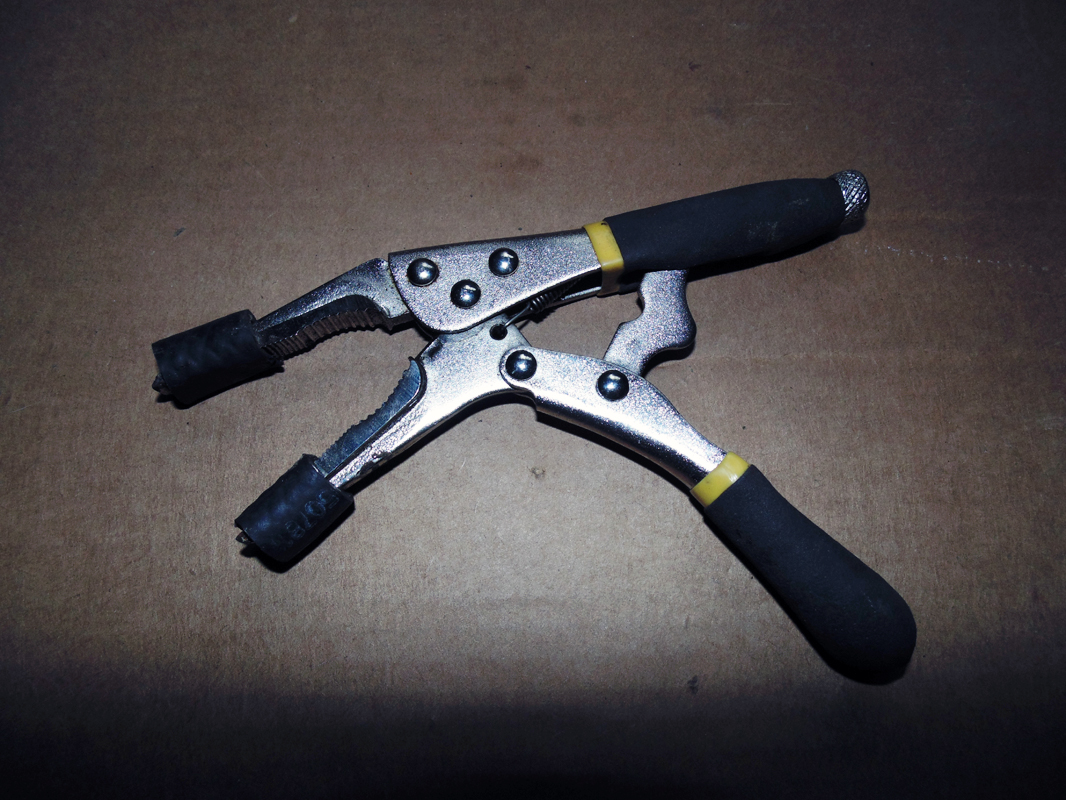
So there it is. The pump is half way out giving us a lot more room to work with. Before we do anything else, the fuel supply has to be cut off. What I like using for this occasion is a pair of needle nose vise grips with some spare fuel hose over the jaws to protect the fuel hose from damage.That hose is over to the right, you'll see where it attaches to the fuel tank...you'll also see you have just enough room to get your vice grips in there to clamp the hose.
Here's my logic, I figured I'd remove the hot wire from the pump and tuck that and the ground wire away from possible mutilation. Then I would remove the cap nut followed by the feed hose to the pump, if only it was that easy. The beeotch here wasn't the cap nut, not yet, it was getting a 17mm over the check-valve collar to counter-hold in order to loosen the 19mm cap nut. There was no room, literally, to fit that 17mm anywhere. I'm so glad I started this job early in the morning after my first coffee-chaser beer 'cause this was gonna take a while and test my small amount of patience.
Obviously faced with a problem, the 17mm was too fat to squeeze in between the terminals, and I wasn't grinding down a perfectly good tool to get it thin enough for the job. I crawled out from under the car and did the next logical thing...grab a beer and think about this one. I felt pretty misled since a book or two mentioned this to be an easy DIY. For who? Unless everyone else's 911 was set up differently and they chose to make this particular one especially difficult for me to work on.
I tried pliers with jaws long enough to clear the terminals. I tried wedging a screwdriver between the collar and the terminal...none of it worked. So, I took the 19mm and just applied some force just to see if by chance it would unscrew. It didn't but the check valve did. You, the reader, could simply say, "why the hell didn't disconnect the hose from the other end of the pump and then screw the pump off leaving you with the check valve and cap to deal with now that the pump was out of the way, and stop being a bitch."
Yea, I could've done that, but I chose to be pig-headed and continue on with what was now a personal vendetta with this set-up. Besides, there wasn't enough room for me to pull the pump far down enough to get that hose off anyway...the cap nut had to come off first lest I risked damaging something and then I'd really be screwed.
Here's what I ended up doing. I ripped the blue electrical connection collars off and twisted the check valve a bit to get a good bite with the 17mm and bam...out came the cap nut. What a pain in the ***. Now I could go and remove the hose on the other side of the pump, let some gas out, and put in the new pump.
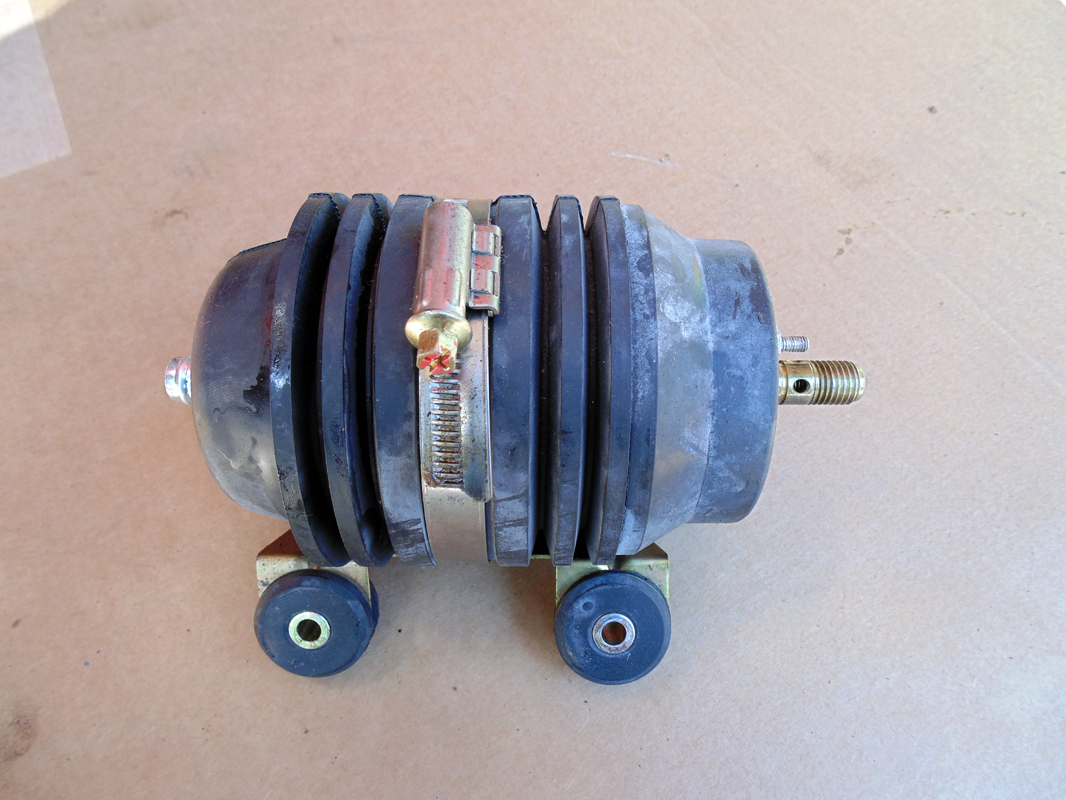
What I did next was so stupid that by sharing it with you, I'll know that you'll speak it quietly and spare me the ridicule. Now, I remember when I changed out the pump in the 944, (because it sat for ten years not because it failed) it had this beautiful rubber isolator meant to keep things quiet and protected. Lots of guys decided it too much to bother with and decide to pull some flim-flam move using a piece of old radiator hose on reassembly. Not me, keep the it factory I say, so with some soapy water and a few screwdrivers, I managed to pry the pump off the old one and pry it back on the new one.
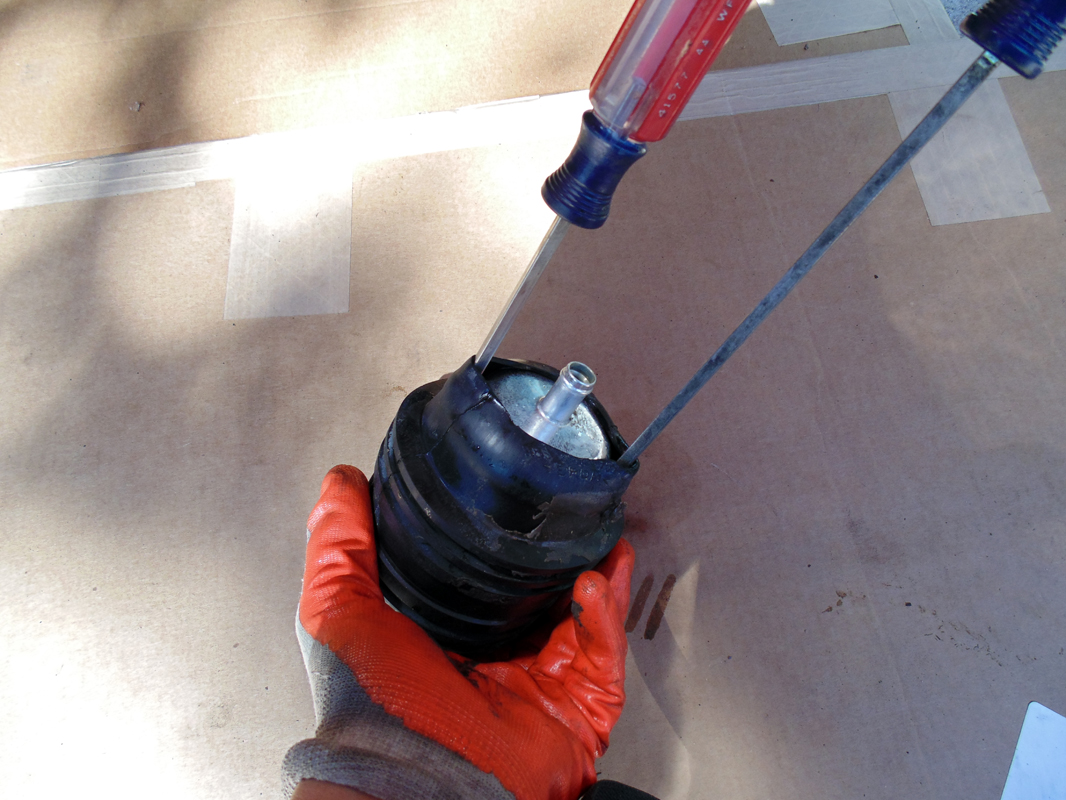
The 911 seemed to have the same set-up. Cool. So I grabbed some soapy water in a sprayer, squirted it inside the cocoon, and pried in the screwdrivers. Keep in mind the hole was as small as the barb on the pump. I figured this small hole in the isolator would give...and it did! So as I'm working this baby off with great success, the lid of it popped off...yes, the engineers in Zuffenhausen finally redeemed themselves by making this isolator easy to work with by giving it a lid!
I guess I should've checked first. Dumbass.
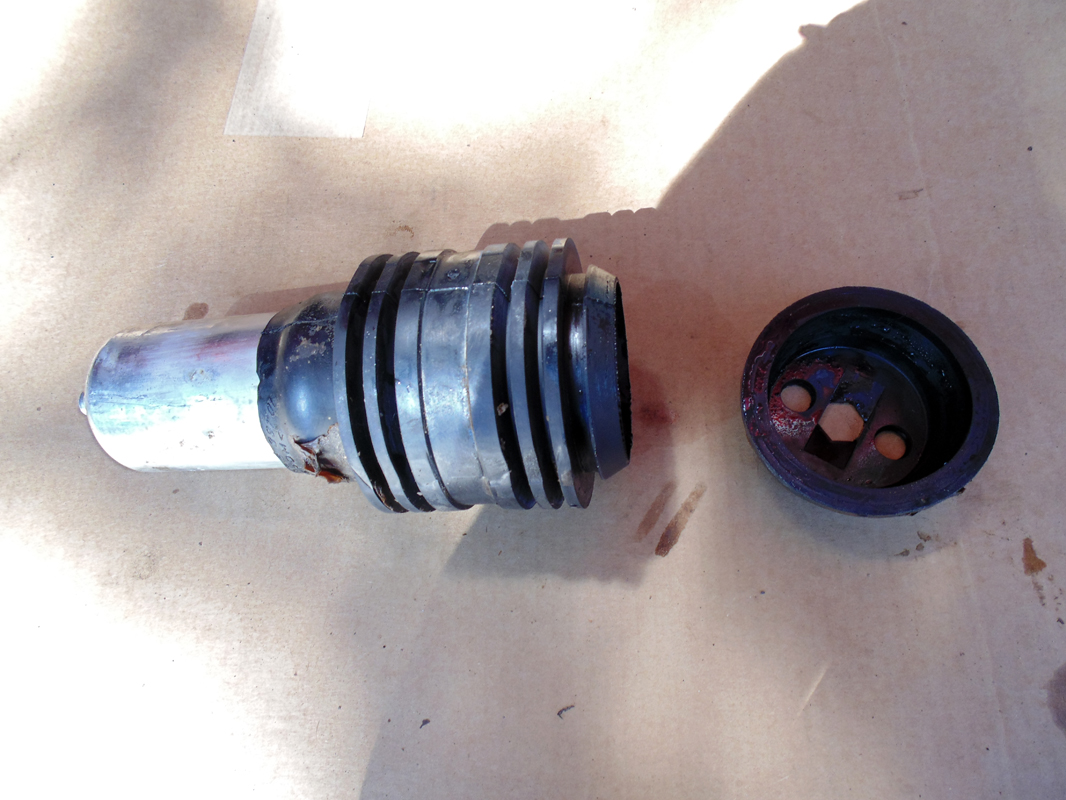
unbelievable...and it was almost all the way out too.
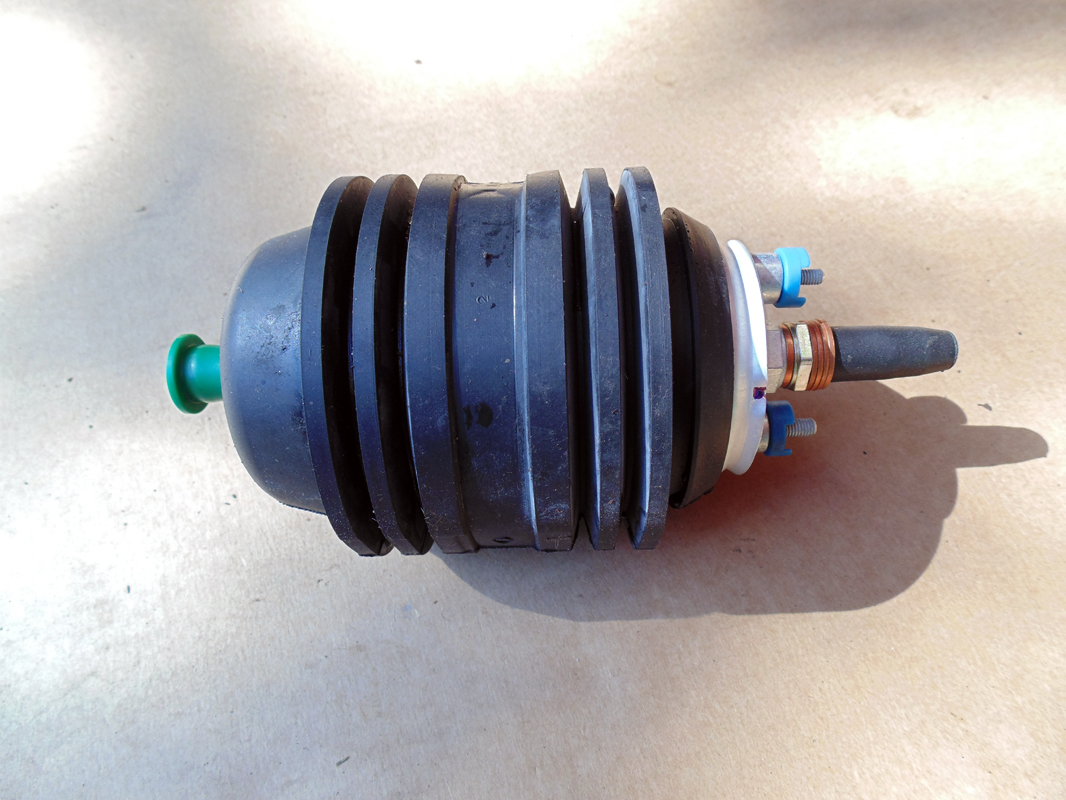
Awesome. I wasted no time in getting the new pump in there and putting the cap back on to get the whole shebang back in its cradle ready to go back in. Just make sure you remember the orientation of things like which terminal goes up (the hot wire) and which goes down (the ground) and how it sat in the pump cradle so that everything was as you found it
The rest was cake. Connect the fuel hose from the tank side first, try not to move the clamp around too much and keep it in its original groove on the hose, hook up the fuel line on the pressure side with two new copper washers measuring 12mm x 17mm, and the cap nut. All I did was tighten it good enough to feel it bite on the copper washers, then hook up your electrical connections, jimmy the whole thing in there again being careful, bolt it up and fire her up...no leaks. Man it felt good to hear her roar again.
A note on the copper washers. Porsche didn't have any in the US at the time of this writing, they'd be coming out of the Fatherland, but I didn't have the time to wait. Now 12 x 17 is an odd size, not a lot of suppliers carry it so I decided to use 12mm x 18mm...it works just fine, it's only .5mm larger all the around.
Don't be fooled, this is an easy DIY...
third beer.
It was a beautiful Sunday, me and my honey were hauling *** on I-80. We were in fourth gear, hitting about 4000 or so revs going about 75 to 80mph...and I had two more cogs to go. What a sweet spot. Out of no where, I felt as if a giant hand grabbed me by my choke collar and slowed me down as I tried to run. She was dead at around 70mph, so I eased her over to the shoulder to see what the deal was.
Now I know it wasn't the alternator because I had just changed the regulator not too long ago, I figured the DME relay packed its bags. I popped the hood open, unlatched the fuse box panel, and checked the number 26 fuse first, a 25 amper that controlled the fuel pump. It was blown. Ah, it was probably an old fuse...but deep down I knew something caused it to blow. I replaced it, jumped back in the cockpit, fired her up...bingo. She ran for just under two seconds and then died again. Something's not right I said to my wife as I reached for the spare DME relay I always keep in the glove box. I knew it wasn't going to be the problem as I swapped out the old with the new and replaced the 25 amp fuse again. Fired her up a second time.
No dice. Time to call a flatbed...first time she ever left us stranded.
Once back at the garage, after a most awesome tow by Kyle Trew (a great story to be told in another article) it was time to make sure that the fuel pump pump was in fact the culprit. Before getting too deep, though, I put out my predicament here on Rennlist to see if anyone else had the same symptoms of blowing fuses. I didn't want to go through all the trouble to find out what was causing it because if someone else had experienced the same thing, I could get right to it first. Sure enough, Rennlster Sean Spicer chimed in mentioning that he too kept blowing fuses and once he changed out the fuel pump, all was good.
Just to be sure I didn't have a short circuit on my hands, I disconnected the brown wire (ground) from the fuel pump, pulled out the DME relay and jumpered the 3, 5, and 7 terminals. If I blew the fuse this time, I could rule out the fuel pump and start looking for a pinched wire somewhere. Well, the fuse never blew...looks like I'll be parting with $250 for a new fuel pump along with a case of beer. You could understand why I just didn't want to buy a pump without first making sure everything else checked out, especially since none of our Porsches ever had a fuel pump failure.
after removing the metal cover, this is what you'll find underneath...the fuel pump with the fuel feed and return lines. no one since the factory was in here because everything was covered in the brown protective undercoating, even the bolts. the ground wire is shown removed here to test for a short circuit.
Right, jack up the old girl and let's get started. I took the metal protective cover off and found everything coated in this protective brown goo which was great because it told me two things, one, I was the first to crack 'er open since she left the factory; and two, it was nice to see evidence of the hand-built era with undercoating obviously applied by a human.
And here's where the bull**** started.
First, after removing the three bolts that held the fuel pump support bracket in place, I had to figure out how to gingerly wiggle the pump out with all of its connections without damaging anything. As you can see from the image, space is tighter than fly vajayjay. I needed to clear the fuel cap nut which extended a good inch past the opening on the right where the electrical connections were. This meant that I'd have to shift the whole assembly over to the left guiding the left ear of the fuel pump bracket under the feed line. It'll give, and you just have enough space to clear the cap nut to bring the right side of the fuel pump down. The image below shows you the cap nut in reference to the edge of the opening.
So there it is. The pump is half way out giving us a lot more room to work with. Before we do anything else, the fuel supply has to be cut off. What I like using for this occasion is a pair of needle nose vise grips with some spare fuel hose over the jaws to protect the fuel hose from damage.That hose is over to the right, you'll see where it attaches to the fuel tank...you'll also see you have just enough room to get your vice grips in there to clamp the hose.
Here's my logic, I figured I'd remove the hot wire from the pump and tuck that and the ground wire away from possible mutilation. Then I would remove the cap nut followed by the feed hose to the pump, if only it was that easy. The beeotch here wasn't the cap nut, not yet, it was getting a 17mm over the check-valve collar to counter-hold in order to loosen the 19mm cap nut. There was no room, literally, to fit that 17mm anywhere. I'm so glad I started this job early in the morning after my first coffee-chaser beer 'cause this was gonna take a while and test my small amount of patience.
Obviously faced with a problem, the 17mm was too fat to squeeze in between the terminals, and I wasn't grinding down a perfectly good tool to get it thin enough for the job. I crawled out from under the car and did the next logical thing...grab a beer and think about this one. I felt pretty misled since a book or two mentioned this to be an easy DIY. For who? Unless everyone else's 911 was set up differently and they chose to make this particular one especially difficult for me to work on.
I tried pliers with jaws long enough to clear the terminals. I tried wedging a screwdriver between the collar and the terminal...none of it worked. So, I took the 19mm and just applied some force just to see if by chance it would unscrew. It didn't but the check valve did. You, the reader, could simply say, "why the hell didn't disconnect the hose from the other end of the pump and then screw the pump off leaving you with the check valve and cap to deal with now that the pump was out of the way, and stop being a bitch."
Yea, I could've done that, but I chose to be pig-headed and continue on with what was now a personal vendetta with this set-up. Besides, there wasn't enough room for me to pull the pump far down enough to get that hose off anyway...the cap nut had to come off first lest I risked damaging something and then I'd really be screwed.
Here's what I ended up doing. I ripped the blue electrical connection collars off and twisted the check valve a bit to get a good bite with the 17mm and bam...out came the cap nut. What a pain in the ***. Now I could go and remove the hose on the other side of the pump, let some gas out, and put in the new pump.
What I did next was so stupid that by sharing it with you, I'll know that you'll speak it quietly and spare me the ridicule. Now, I remember when I changed out the pump in the 944, (because it sat for ten years not because it failed) it had this beautiful rubber isolator meant to keep things quiet and protected. Lots of guys decided it too much to bother with and decide to pull some flim-flam move using a piece of old radiator hose on reassembly. Not me, keep the it factory I say, so with some soapy water and a few screwdrivers, I managed to pry the pump off the old one and pry it back on the new one.
The 911 seemed to have the same set-up. Cool. So I grabbed some soapy water in a sprayer, squirted it inside the cocoon, and pried in the screwdrivers. Keep in mind the hole was as small as the barb on the pump. I figured this small hole in the isolator would give...and it did! So as I'm working this baby off with great success, the lid of it popped off...yes, the engineers in Zuffenhausen finally redeemed themselves by making this isolator easy to work with by giving it a lid!
I guess I should've checked first. Dumbass.
unbelievable...and it was almost all the way out too.
Awesome. I wasted no time in getting the new pump in there and putting the cap back on to get the whole shebang back in its cradle ready to go back in. Just make sure you remember the orientation of things like which terminal goes up (the hot wire) and which goes down (the ground) and how it sat in the pump cradle so that everything was as you found it
The rest was cake. Connect the fuel hose from the tank side first, try not to move the clamp around too much and keep it in its original groove on the hose, hook up the fuel line on the pressure side with two new copper washers measuring 12mm x 17mm, and the cap nut. All I did was tighten it good enough to feel it bite on the copper washers, then hook up your electrical connections, jimmy the whole thing in there again being careful, bolt it up and fire her up...no leaks. Man it felt good to hear her roar again.
A note on the copper washers. Porsche didn't have any in the US at the time of this writing, they'd be coming out of the Fatherland, but I didn't have the time to wait. Now 12 x 17 is an odd size, not a lot of suppliers carry it so I decided to use 12mm x 18mm...it works just fine, it's only .5mm larger all the around.
Don't be fooled, this is an easy DIY...

 04-29-2014, 07:15 PM
#3
Cool. In a bind, you can anneal copper washers by heating till they glow, then quenching in water. That cap nut was screaming for quality time w/ a 1/2" impact.
PS, those Kinesis Supercup R�der look a lot like the wheels on my Boxster ;-)
PS, those Kinesis Supercup R�der look a lot like the wheels on my Boxster ;-)
04-29-2014, 07:59 PM
#4
Racer
Thread Starter
Join Date: Apr 2013
Location: plainfield, nj
Posts: 271
Likes: 0
Received 0 Likes
on
0 Posts
Thanks fellas! The old annealing trick, forgot about that one.
Yep ToSi, she's got on her winter boots...until they fill the craters caused by this year's winter in NJ, they're staying on. I'm tired of rebuilding the Kinesis...I could be one of Thatcher Schultz's best client considering all the outers I bought from him in the past few years.
Yep ToSi, she's got on her winter boots...until they fill the craters caused by this year's winter in NJ, they're staying on. I'm tired of rebuilding the Kinesis...I could be one of Thatcher Schultz's best client considering all the outers I bought from him in the past few years.