Winter Project Writeup...
 08-18-2012, 02:36 PM
#1
Rennlist Member
Thread Starter
Bit late posting my winter roundup but I really am this slow. Once again, RL was invaluable as an educational tool, pretty much everything you need to know will be here or linked from here and I think the majority of the (drama free) contributors and RL in general are brilliant.
Mini Service:
Oil 15-50 change with both filters went smoothly, I have learned how to catch most of the oil from the tank, the remaining hot oil that scalds my skin just adds excitement to an otherwise straightforward task. Also changed the tranny fluid, the old oil has been very dark the past two times I�ve drained it so I might do a flush this next winter and see if it is possible to remove whatever sludge is hiding in there. Flushed and bled the brakes and clutch and adjusted the handbrake/ebrake, it was getting so I punched myself under the chin pulling it on. Some passengers laugh when I use the ebrake at every stop but I�m from the north of England and in those hills if you don�t, you roll and hit stuff behind you.
Interior Bits Swap:
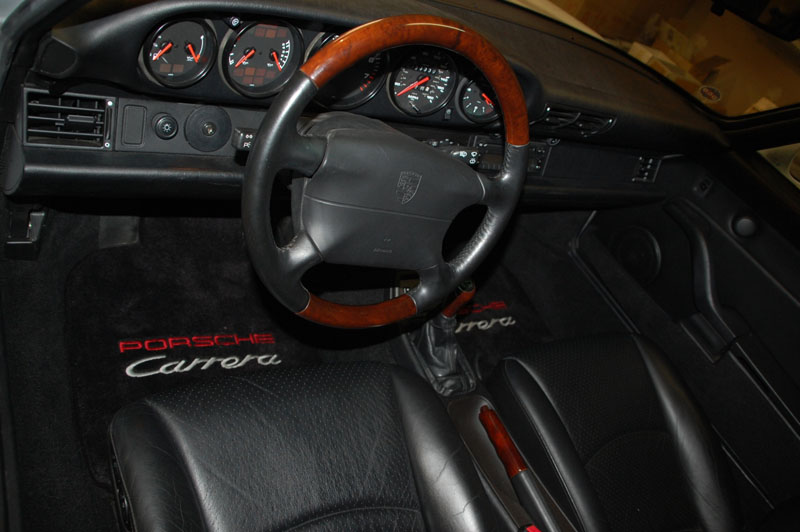
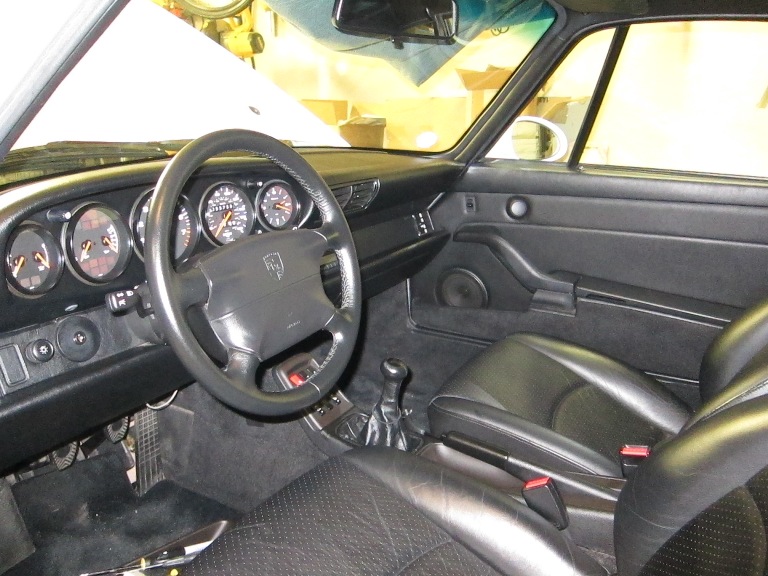
The first owner had purchased the wood wheel, **** and lever very soon after delivery and had wrapped up the originals which survived the next owner who passed them to me with the deal. I�d grown used to the wood look and sarcastic viewing comments but the mirror smooth finish did not go well with my sweaty hands and was a bit dangerous, so I unwrapped the originals and went back to black:
Bumper Plug:
From day 1 of ownership I wanted to get rid of the damn ugly front bulbous overriders. At the moment I am still keen on keeping all and any mods �bolt-on� so my hacking can be reversed easily if desired (yep I get that putting overriders back on is not likely...) which meant no permanent mods like fibre glassing the cutouts. I thought about buying a euro bumper but the wife read my thoughts and said they were too expensive. So over the next couple of years I hatched a plan. I wasn�t lying in the first sentence about my work rate.
The below took another year and a bit after the thinking part, I�ll just make it seem like one weekend and BAM done.
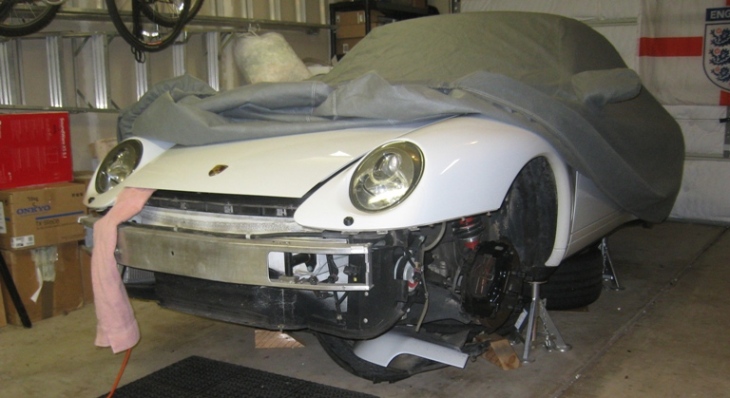
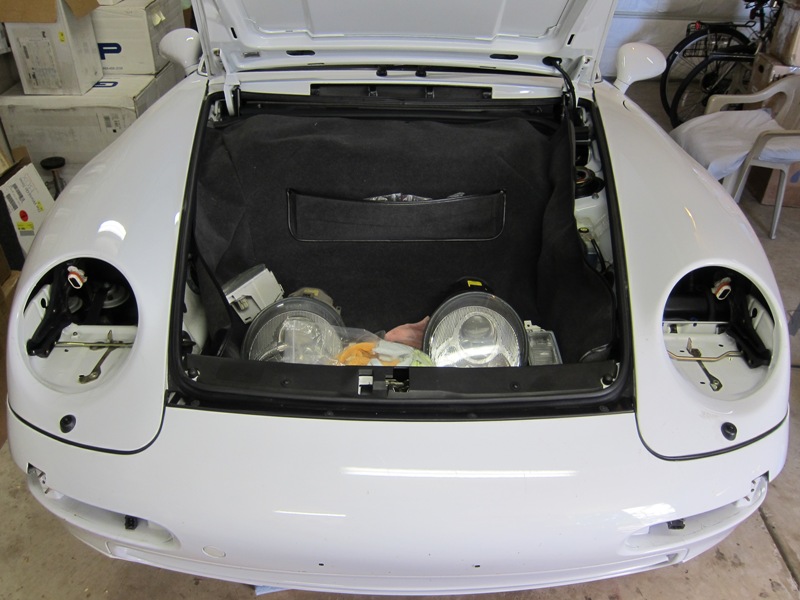
Took off the bumper and had a look. I love the look of any car with the internals on show:
I followed the readily available (thanks RL and P-Car) basic instructions for fibre glassing the cutout � I covered the slot so that filler material could follow the bumper contours. As a note, my factory cutouts were crap in terms of edge finish, it looks like they were hacked by hand:
I used plastic repair putty � the stuff you squeeze together to activate then as it heats up you realise you�re not quite ready and have to run around like a b^stard before it sets hard. I layered it in from the inside of the bumper, let it cure overnight and then extracted it. Mark 1 was rubbish and resembled a kindergarten sculpture:
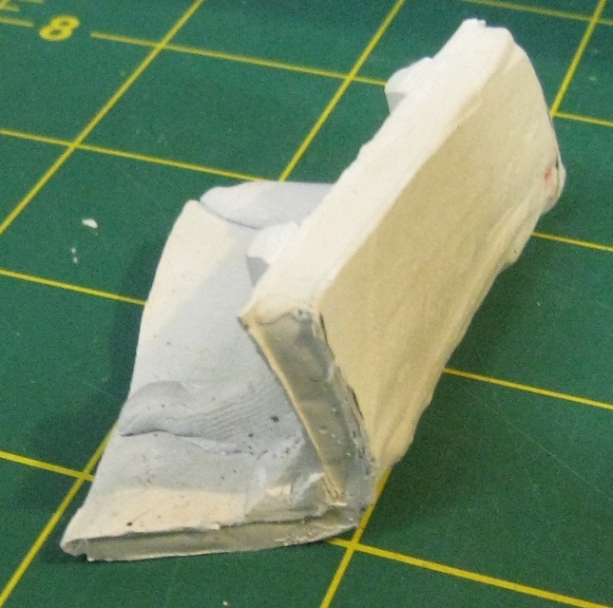
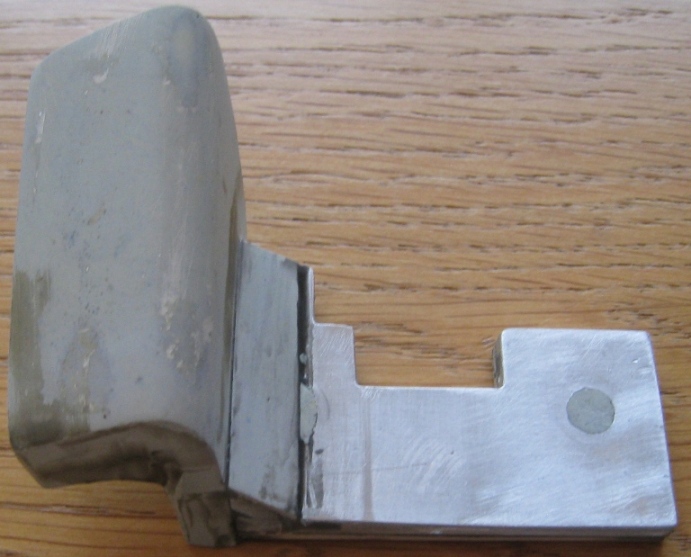
I then went through Mark 2, 3, 4, 5 ......... Each part was tweaked, sanded filled, sometimes painted then sanded and sometimes a new piece was made if the original was just too crap. Each time I used wood or metal, filler and putty to build up something that was robust enough to try on the car. At about Mark 8 this was good enough for a mold:
Make mold, make part, sand part, fill part, sand part, make mold, repeat:
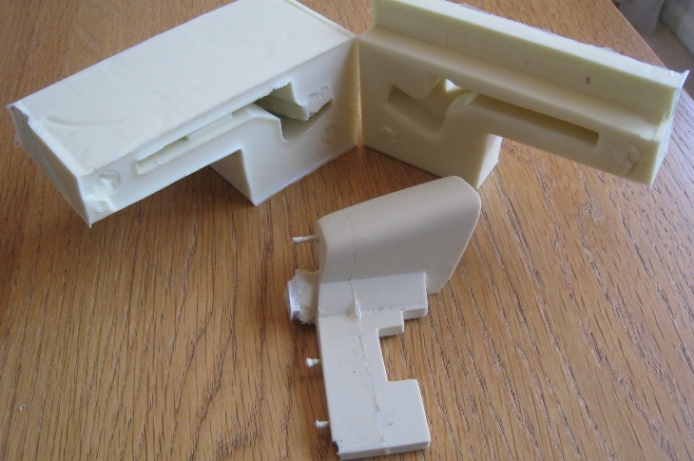
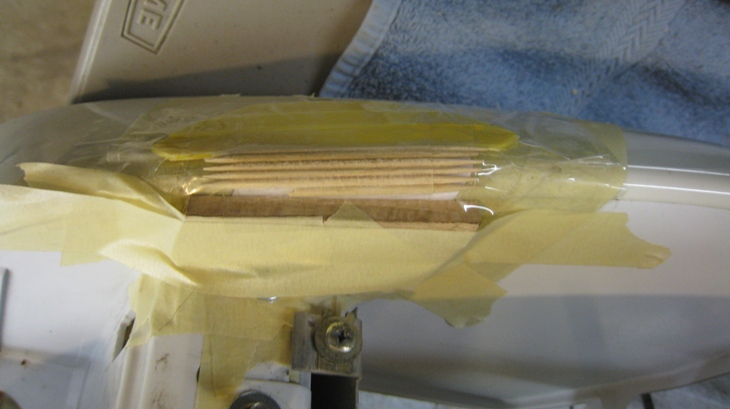
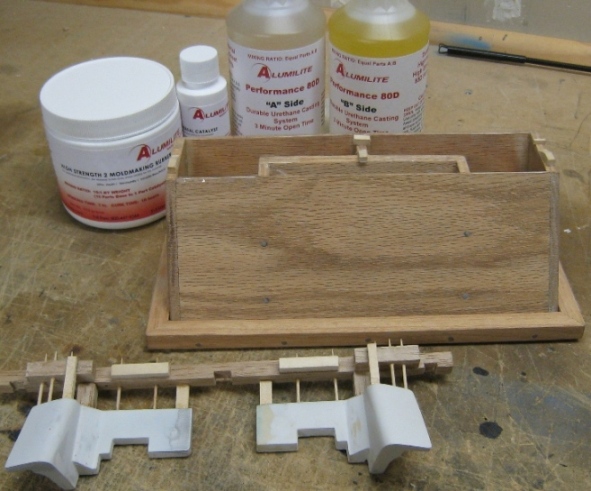
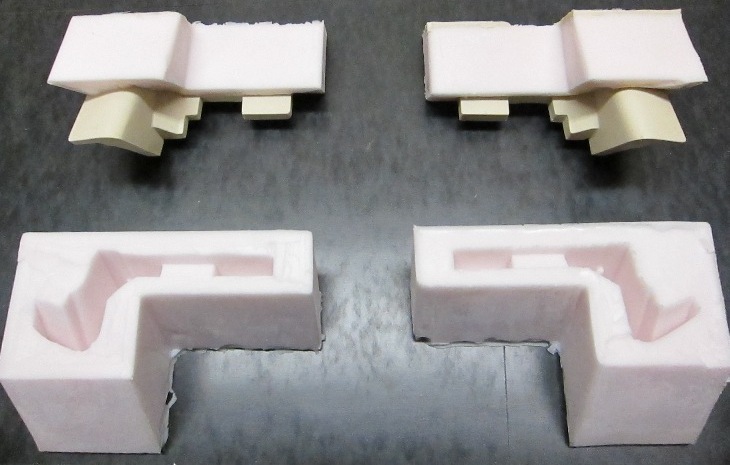
The mold is a type of silicone rubber and the parts were molded in two part plastic which is available at any hobby shop. The pre-cure window of time is short with these plastics and the first rushed few I made were more air pockets than plastic. Swiss cheese. So I added more breather holes, built a vacuum chamber (from UPVC sewer pipes ) to de-air both the mold material and the two part plastic, heated the mold in the oven, poured at this angle and that angle blah blah blah. I was never happy with the final result but sure as **** had a lot of fun. Below is getting ready to make the very last wood encased mold using a pair of opposite hand pieces, probably Mark 17�s by now. All the dowels connecting the bumper plugs to the main wood bar will become air breather holes when the mold sets.
If this project had covered one weekend, by now we�re at Sunday afternoon (14 months) and I�m really not 100% happy with the finish in terms of fit into the bumper. But I�ve probably spent 10x the predicted budget, Summer is approaching (again) and I need to wrap up. These are the final versions half extracted from the last mold:
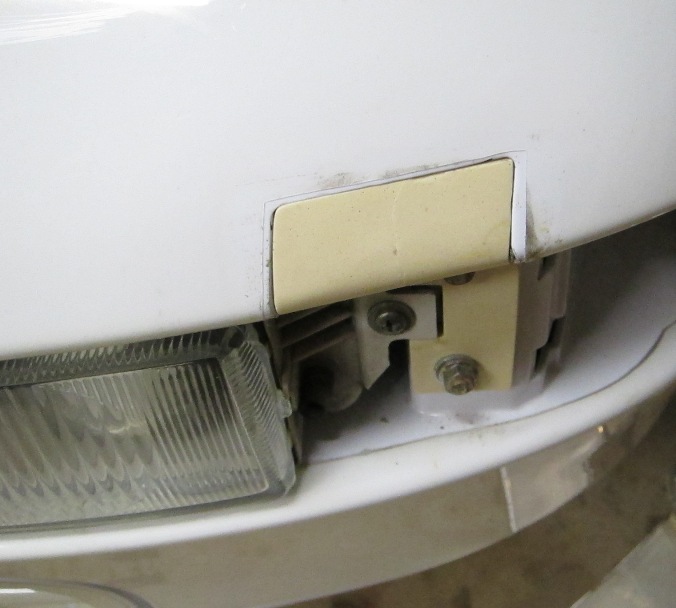
I gave them a trial fit, the dirt is ingrained in the clear plastic wrap covering the front of the car:
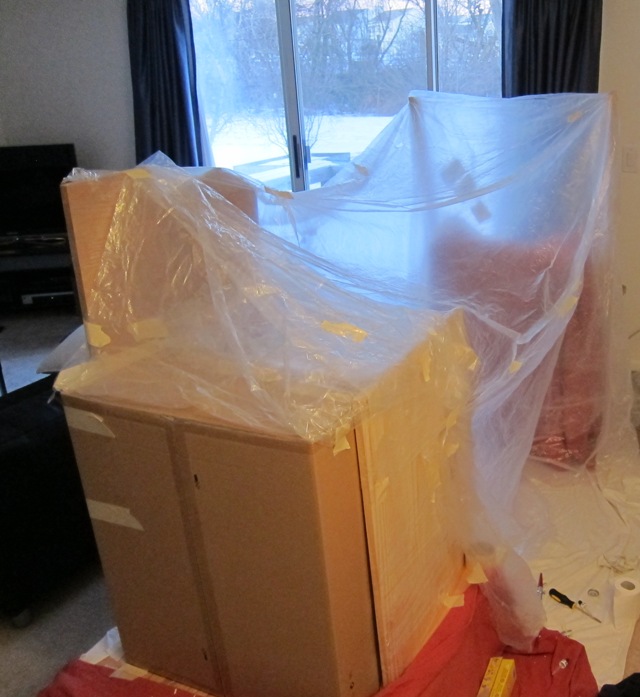
I bought an airbrush and my normally supportive wife told me I�d be seriously scr3wed if I tried using it in the house. But my painting was not going well and after more research on airbrushing I realised my efforts to date were failing because the garage was too cold, even with the heater on. She went away for a weekend and I immediately moved everything into the house and did it. I knew at the time I was being lazy but cleaning up all the paint dust afterwards re-focused me and a paint booth was born:
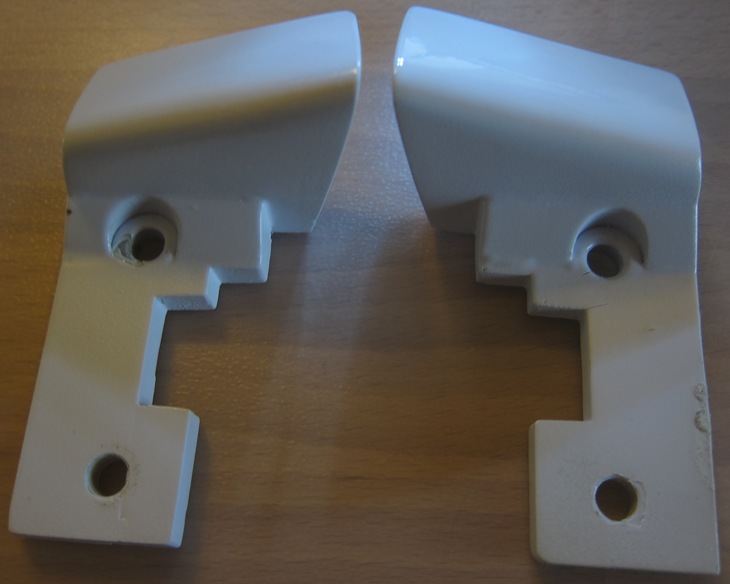
Learning about airbrushing was a ton of fun, even when I had no idea what was going on � at the time I didn�t laugh but it was pretty funny when what should have been lacquer shot out of the airgun like cotton candy/spiderwebs because my setup wasn�t right. And I googled �orange peel� often enough that my pop-up ads are now all for fruit. But in the end I got a decent finish and called it a day. Primer, glacier white base and lacquer top coat. I concentrated on the surfaces that would be visible when installed, sections that would be invisible when the plugs were mounted were not lacquered, or sanded and filled much either, hence the crappy finish:
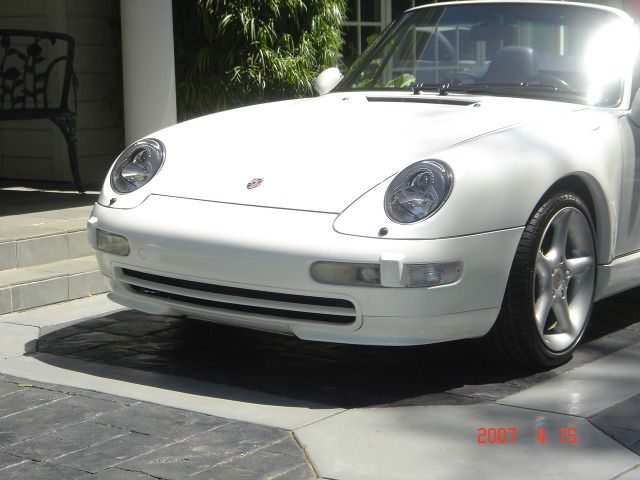
I�d actually bought the clear corners before I started the molding, my way of an incentive. Although the objective was not to modify any part of the car � the back of the clear corners were hitting the mounting bolts used for the overriders and now my plugs � so I ground off literally 1mm from each making the clears fit a little better. The bumper plugs bolt in from the front after the corners are removed.
What I ended up with are good 10-footers. If I look closer I get the urge to remake just one more set to get a better fit and finish...
cont...
Mini Service:
Oil 15-50 change with both filters went smoothly, I have learned how to catch most of the oil from the tank, the remaining hot oil that scalds my skin just adds excitement to an otherwise straightforward task. Also changed the tranny fluid, the old oil has been very dark the past two times I�ve drained it so I might do a flush this next winter and see if it is possible to remove whatever sludge is hiding in there. Flushed and bled the brakes and clutch and adjusted the handbrake/ebrake, it was getting so I punched myself under the chin pulling it on. Some passengers laugh when I use the ebrake at every stop but I�m from the north of England and in those hills if you don�t, you roll and hit stuff behind you.
Interior Bits Swap:
The first owner had purchased the wood wheel, **** and lever very soon after delivery and had wrapped up the originals which survived the next owner who passed them to me with the deal. I�d grown used to the wood look and sarcastic viewing comments but the mirror smooth finish did not go well with my sweaty hands and was a bit dangerous, so I unwrapped the originals and went back to black:
Bumper Plug:
From day 1 of ownership I wanted to get rid of the damn ugly front bulbous overriders. At the moment I am still keen on keeping all and any mods �bolt-on� so my hacking can be reversed easily if desired (yep I get that putting overriders back on is not likely...) which meant no permanent mods like fibre glassing the cutouts. I thought about buying a euro bumper but the wife read my thoughts and said they were too expensive. So over the next couple of years I hatched a plan. I wasn�t lying in the first sentence about my work rate.
The below took another year and a bit after the thinking part, I�ll just make it seem like one weekend and BAM done.
Took off the bumper and had a look. I love the look of any car with the internals on show:
I followed the readily available (thanks RL and P-Car) basic instructions for fibre glassing the cutout � I covered the slot so that filler material could follow the bumper contours. As a note, my factory cutouts were crap in terms of edge finish, it looks like they were hacked by hand:
I used plastic repair putty � the stuff you squeeze together to activate then as it heats up you realise you�re not quite ready and have to run around like a b^stard before it sets hard. I layered it in from the inside of the bumper, let it cure overnight and then extracted it. Mark 1 was rubbish and resembled a kindergarten sculpture:
I then went through Mark 2, 3, 4, 5 ......... Each part was tweaked, sanded filled, sometimes painted then sanded and sometimes a new piece was made if the original was just too crap. Each time I used wood or metal, filler and putty to build up something that was robust enough to try on the car. At about Mark 8 this was good enough for a mold:
Make mold, make part, sand part, fill part, sand part, make mold, repeat:
The mold is a type of silicone rubber and the parts were molded in two part plastic which is available at any hobby shop. The pre-cure window of time is short with these plastics and the first rushed few I made were more air pockets than plastic. Swiss cheese. So I added more breather holes, built a vacuum chamber (from UPVC sewer pipes
) to de-air both the mold material and the two part plastic, heated the mold in the oven, poured at this angle and that angle blah blah blah. I was never happy with the final result but sure as **** had a lot of fun. Below is getting ready to make the very last wood encased mold using a pair of opposite hand pieces, probably Mark 17�s by now. All the dowels connecting the bumper plugs to the main wood bar will become air breather holes when the mold sets.If this project had covered one weekend, by now we�re at Sunday afternoon (14 months) and I�m really not 100% happy with the finish in terms of fit into the bumper. But I�ve probably spent 10x the predicted budget, Summer is approaching (again) and I need to wrap up. These are the final versions half extracted from the last mold:
I gave them a trial fit, the dirt is ingrained in the clear plastic wrap covering the front of the car:
I bought an airbrush and my normally supportive wife told me I�d be seriously scr3wed if I tried using it in the house. But my painting was not going well and after more research on airbrushing I realised my efforts to date were failing because the garage was too cold, even with the heater on. She went away for a weekend and I immediately moved everything into the house and did it. I knew at the time I was being lazy but cleaning up all the paint dust afterwards re-focused me and a paint booth was born:
Learning about airbrushing was a ton of fun, even when I had no idea what was going on � at the time I didn�t laugh but it was pretty funny when what should have been lacquer shot out of the airgun like cotton candy/spiderwebs because my setup wasn�t right. And I googled �orange peel� often enough that my pop-up ads are now all for fruit. But in the end I got a decent finish and called it a day. Primer, glacier white base and lacquer top coat. I concentrated on the surfaces that would be visible when installed, sections that would be invisible when the plugs were mounted were not lacquered, or sanded and filled much either, hence the crappy finish:
I�d actually bought the clear corners before I started the molding, my way of an incentive. Although the objective was not to modify any part of the car � the back of the clear corners were hitting the mounting bolts used for the overriders and now my plugs � so I ground off literally 1mm from each making the clears fit a little better. The bumper plugs bolt in from the front after the corners are removed.
What I ended up with are good 10-footers. If I look closer I get the urge to remake just one more set to get a better fit and finish...
cont...
Last edited by LimeyBoy; 08-18-2012 at 02:46 PM. Reason: attachements did not show up

The following users liked this post:
911F1 (10-12-2023)
08-18-2012, 02:39 PM
#2
Rennlist Member
Thread Starter
Cont... Clear Wrap:
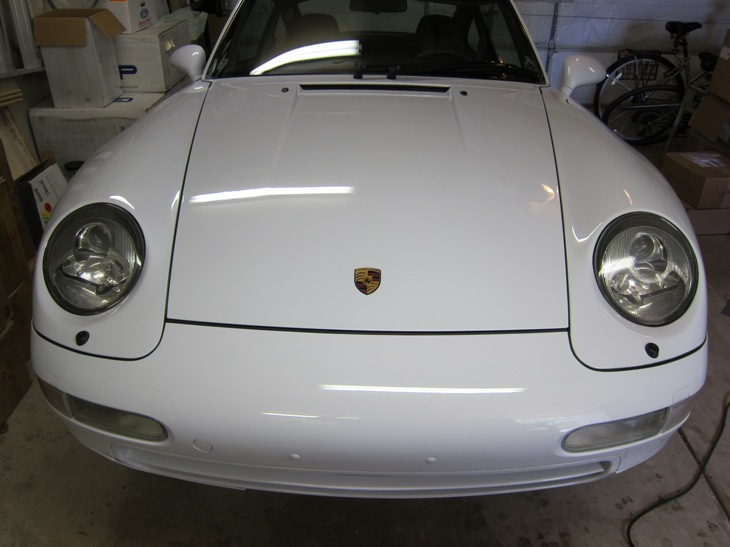
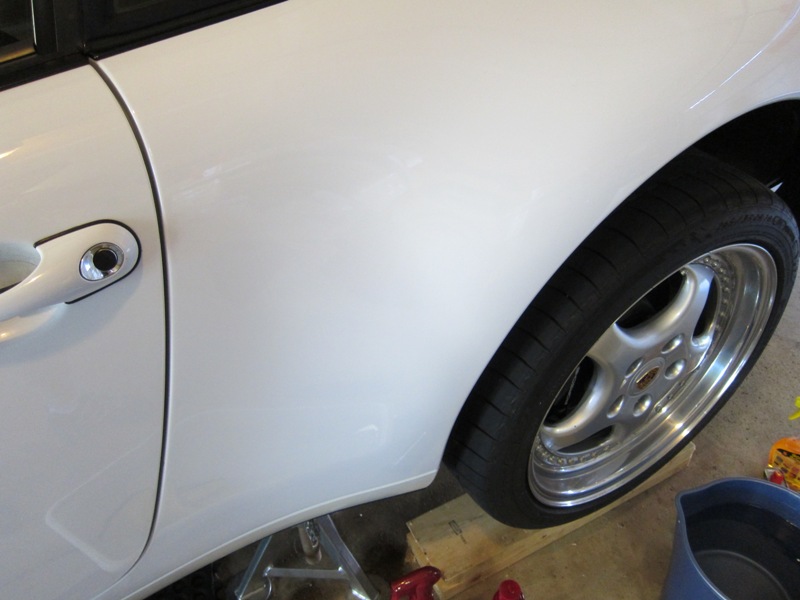
The car had the normal rear arch 14mil plastic and the previous owner had also wrapped a lot of the front plus the leading edge of the mirrors and trailing edge of the wheel arches in 8mil. A few years later and I had a tri coloured car with off-white/yellowing plastic becoming more and more obvious. I decided to remove all the top surface plastic (not inside arches) but after reading lots of posts on RL with horror stories, or warning of potential horrors, I thought about it for a year or two. Then one day I decided to man up, the car went out in the sun and a couple of hours later I ripped all the plastic off. Heat is the key as many have said. The plastic that was in direct sunlight peeled off with small sections of adhesive left on the paint, sections that had cooled a little left far more adhesive behind. Pulling off all the plastic took maybe an hour and I was very, very relieved that only one tiny bit of paint came off, maybe 1mm dia speck from one rear arch area that already has a few stone wounds.
Removing the adhesive took quite a bit longer and therefore followed my normal project timeline. At first I used a hairdryer with various goo-gone products and a credit card I had sanded to remove any sharp edges. However after the first 2�x2� square of adhesive had been removed I noticed micro scratches under fluorescent lamps. I debated if they were small enough to polish out but did not want to take the risk considering the large surface area I was about to tackle. I experimented lots with adhesive removers that would also be kind to the paint but in the end the technique below suited me best and left zero scratches, well that I can see:
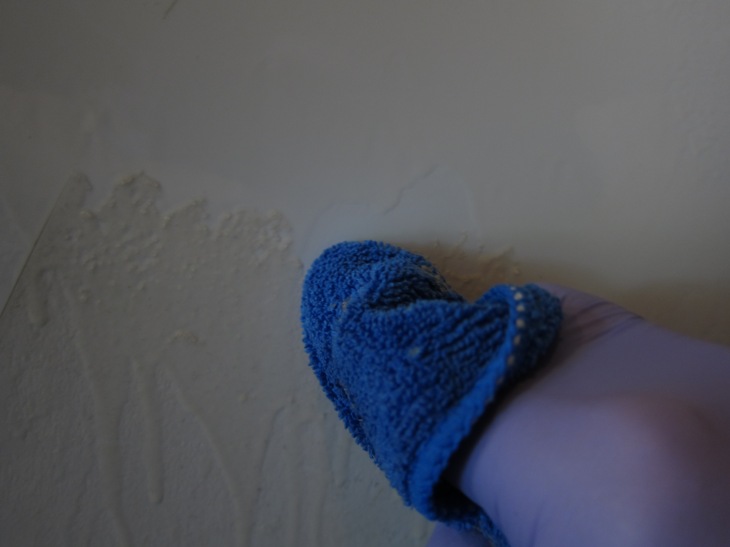
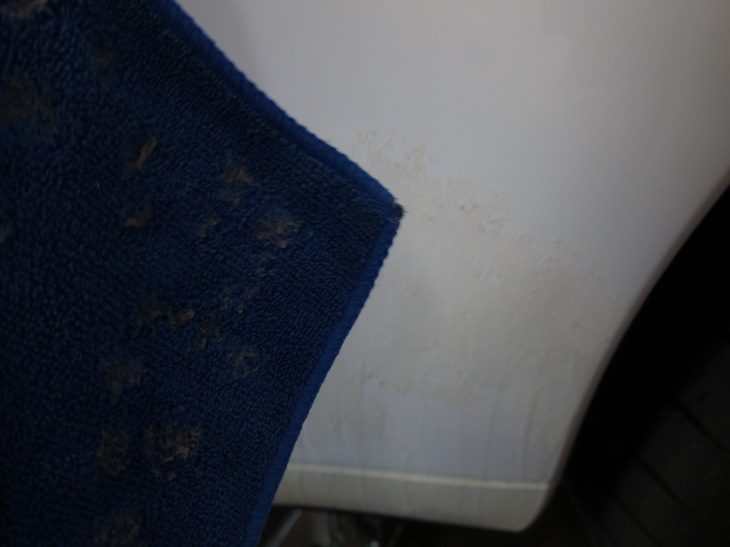
Heat with a hair dryer until adhesive warm to the touch, spray on goo gone or similar, re-heat with hair dryer until warm to the touch again (liquid does not evaporate). Then take a brand new section of microfiber towel wrapped around the finger and wipe down, one time. Move finger to new section of towel and wipe down once again. Each time a little bit if adhesive comes off. But switching to a new section of towel each time reduces the chance of pickup scratching the paint. Repeat hundreds of times until the finger goes numb and the towel looks full of snot:
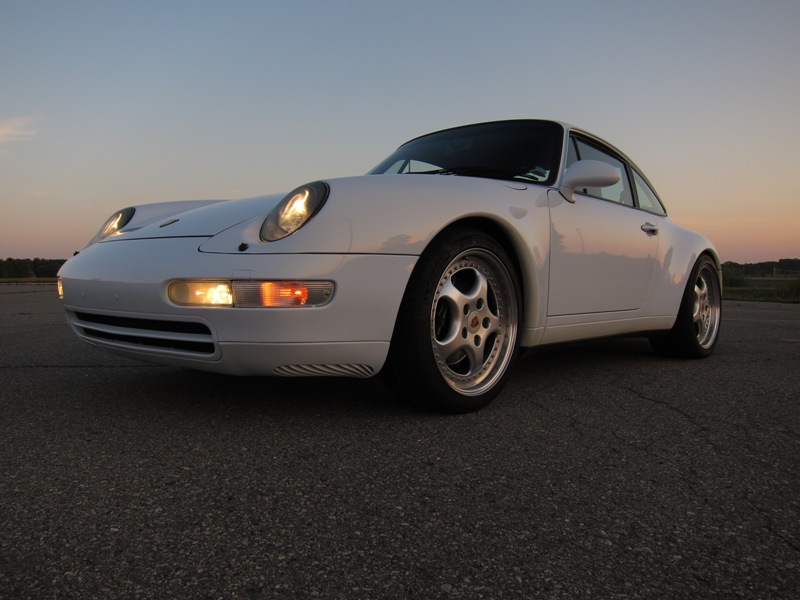
At this point with all the plastic removed I still had a tri-coloured car � the newly exposed paint was brighter with a very defined line visible. Another couple of days polishing and that was remedied. On the subject of protecting the paint with plastic or budgeting a front re-paint every x years (or the third choice of not caring I suppose) I am now undecided") . It is kind of expensive to re-cover the car as it was but I cannot doubt the plastic did a good job, the paint underneath was immaculate. I also liked the fact that after a drive, I could wipe off all the bug and tar crap very easily without fear of marking the paint. I still have a yellowish tint to the side sills (textured paint) � I�ve not investigated beyond a normal polish yet but anyone got any tips?
. It is kind of expensive to re-cover the car as it was but I cannot doubt the plastic did a good job, the paint underneath was immaculate. I also liked the fact that after a drive, I could wipe off all the bug and tar crap very easily without fear of marking the paint. I still have a yellowish tint to the side sills (textured paint) � I�ve not investigated beyond a normal polish yet but anyone got any tips?
Alignment:
Way back when, after changing the shocks/springs I had it aligned and hated the result. I took it back but left a second time still not happy, the car had gone from very benign to trying to throw itself off the road mid-corner if the balance so much as twitched. I�m no expert here but even I could tell something was not right � I debated asking RL for advice but struggled to try and describe the problem. Whereas before a slight lift would tighten the line mid corner, now the same lift would induce a large wallow that felt like some pre-load had been released but it would also do it at high speed in a straight line if I came off throttle. Anyway, whatever it was has now gone after this recent third alignment so thanks to Tim at Rennstatt/Arbor Motion in Ann Arbor.
That�s it. This car is great and I love working on it.
The car had the normal rear arch 14mil plastic and the previous owner had also wrapped a lot of the front plus the leading edge of the mirrors and trailing edge of the wheel arches in 8mil. A few years later and I had a tri coloured car with off-white/yellowing plastic becoming more and more obvious. I decided to remove all the top surface plastic (not inside arches) but after reading lots of posts on RL with horror stories, or warning of potential horrors, I thought about it for a year or two. Then one day I decided to man up, the car went out in the sun and a couple of hours later I ripped all the plastic off. Heat is the key as many have said. The plastic that was in direct sunlight peeled off with small sections of adhesive left on the paint, sections that had cooled a little left far more adhesive behind. Pulling off all the plastic took maybe an hour and I was very, very relieved that only one tiny bit of paint came off, maybe 1mm dia speck from one rear arch area that already has a few stone wounds.
Removing the adhesive took quite a bit longer and therefore followed my normal project timeline. At first I used a hairdryer with various goo-gone products and a credit card I had sanded to remove any sharp edges. However after the first 2�x2� square of adhesive had been removed I noticed micro scratches under fluorescent lamps. I debated if they were small enough to polish out but did not want to take the risk considering the large surface area I was about to tackle. I experimented lots with adhesive removers that would also be kind to the paint but in the end the technique below suited me best and left zero scratches, well that I can see:
Heat with a hair dryer until adhesive warm to the touch, spray on goo gone or similar, re-heat with hair dryer until warm to the touch again (liquid does not evaporate). Then take a brand new section of microfiber towel wrapped around the finger and wipe down, one time. Move finger to new section of towel and wipe down once again. Each time a little bit if adhesive comes off. But switching to a new section of towel each time reduces the chance of pickup scratching the paint. Repeat hundreds of times until the finger goes numb and the towel looks full of snot:
At this point with all the plastic removed I still had a tri-coloured car � the newly exposed paint was brighter with a very defined line visible. Another couple of days polishing and that was remedied. On the subject of protecting the paint with plastic or budgeting a front re-paint every x years (or the third choice of not caring I suppose) I am now undecided
. It is kind of expensive to re-cover the car as it was but I cannot doubt the plastic did a good job, the paint underneath was immaculate. I also liked the fact that after a drive, I could wipe off all the bug and tar crap very easily without fear of marking the paint. I still have a yellowish tint to the side sills (textured paint) � I�ve not investigated beyond a normal polish yet but anyone got any tips?Alignment:
Way back when, after changing the shocks/springs I had it aligned and hated the result. I took it back but left a second time still not happy, the car had gone from very benign to trying to throw itself off the road mid-corner if the balance so much as twitched. I�m no expert here but even I could tell something was not right � I debated asking RL for advice but struggled to try and describe the problem. Whereas before a slight lift would tighten the line mid corner, now the same lift would induce a large wallow that felt like some pre-load had been released but it would also do it at high speed in a straight line if I came off throttle. Anyway, whatever it was has now gone after this recent third alignment so thanks to Tim at Rennstatt/Arbor Motion in Ann Arbor.
That�s it. This car is great and I love working on it.
08-18-2012, 02:47 PM
#3
Burning Brakes

As a white 993 owner all I can say is that is freaking great. Vey clever, and very nicely done. Of course, you coulda just bought my white bumperettes instead.
 08-18-2012, 02:57 PM
#4
Rennlist Member
Thread Starter
I am on here almost every day and only saw your for sale ad now, as soon as I'd finished posting the above 