When you click on links to various merchants on this site and make a purchase, this can result in this site earning a commission. Affiliate programs and affiliations include, but are not limited to, the eBay Partner Network.
So...... who has found a solution to this problem and is willing to share?
I do not use the garden hose nozzle at full blast when I wash the car anymore.
I removed the left, right and center taillight assemblies last winter and can't recall if there were vent tube (pointing downwards) on the backs of any of the assemblies.
If the light sockets are a bayonet mount with O-ring, use some silicone grease on the O-rings. That might help.
"Cool - can you elaborate on the disassembly process? Last time I had it out, I could not see how."
I removed the unit from the car and disconnected the lights. The lens is glued to the housing with a type of black sealant. I started the removal process by softening the sealant by heating it with a hair dryer. I then inserted a narrow, fine flat head scewdriver between the lens and the housing and worked my way around to break the seal.
I believe there are two tabs on the top edge of the lens that snap into slots in the housing. You can see them by examining the edge of the housing. You have to work the sealant around them carefully with the screwdriver and lift the slot off the tab. It can be done without breaking anything. When you have loosened the integrity of the old sealant and unhooked the tabs, the lens will separate from the housing.
While I had the two pieces apart, I gave the inside a good cleaning. The rectangular area of the housing behind the Porsche lettering is painted metallic grey. The finish on mine was somewhat dull so I masked the area and spray painted it. I was relieved to find that the sockets for the back-up lights showed no signs of rust or corrosion.
When I was finished scraping off as much of the old sealant as possible (with particular attention to the area of the tabs), I put about a 3/8 inch (5 mm) bead of GE Silicone II (100% Silicone, clear) all the way around the lip of the housing and reinstalled the lens. The tabs snapped in place and held everything together in the correct position while the silicone hardened. No mess or leakage. I have not had any condensation since.
This is not a difficult DIY but it does require some care and patience.
I just removed my back center light and poured out about a cup of water. The light is only a few months old and is a Hella unit with a 993 number on it . No damage yet but I should get a solution figured out before to long. Obviously there is no vent hole on the bottam to hold so much water. Has anyone tried drilling a few holes? Any other solutions found other than taking it apart and resealing? I am tempted to carefully run a small bead of silicone all around it.
Doug
Here is what I learned in construction physics - the breathers connect the inside of tail light to the outside; that's what they are designed for. So the inside of the tail light is in equilibrium with the outside. A sudden increase in elative humidity outside (after a good rain or a car wash) will result in transferring some of the moisture inside the tail light (remember - it's dry inside). The moisture flow will follow the drop or raise in air pressure, and it is always easier for the moisture to get in than out. Same thing what happens inside your house. Hope this make sense...
Repeat this process a few times and you have moisture or water visible on the inside, especially after sun light starts to heat up the whole thing. Broken seems may contribute to this problem but I haven't yet seen this on my car.
I imagine using a pressure washer could magnify this problem.
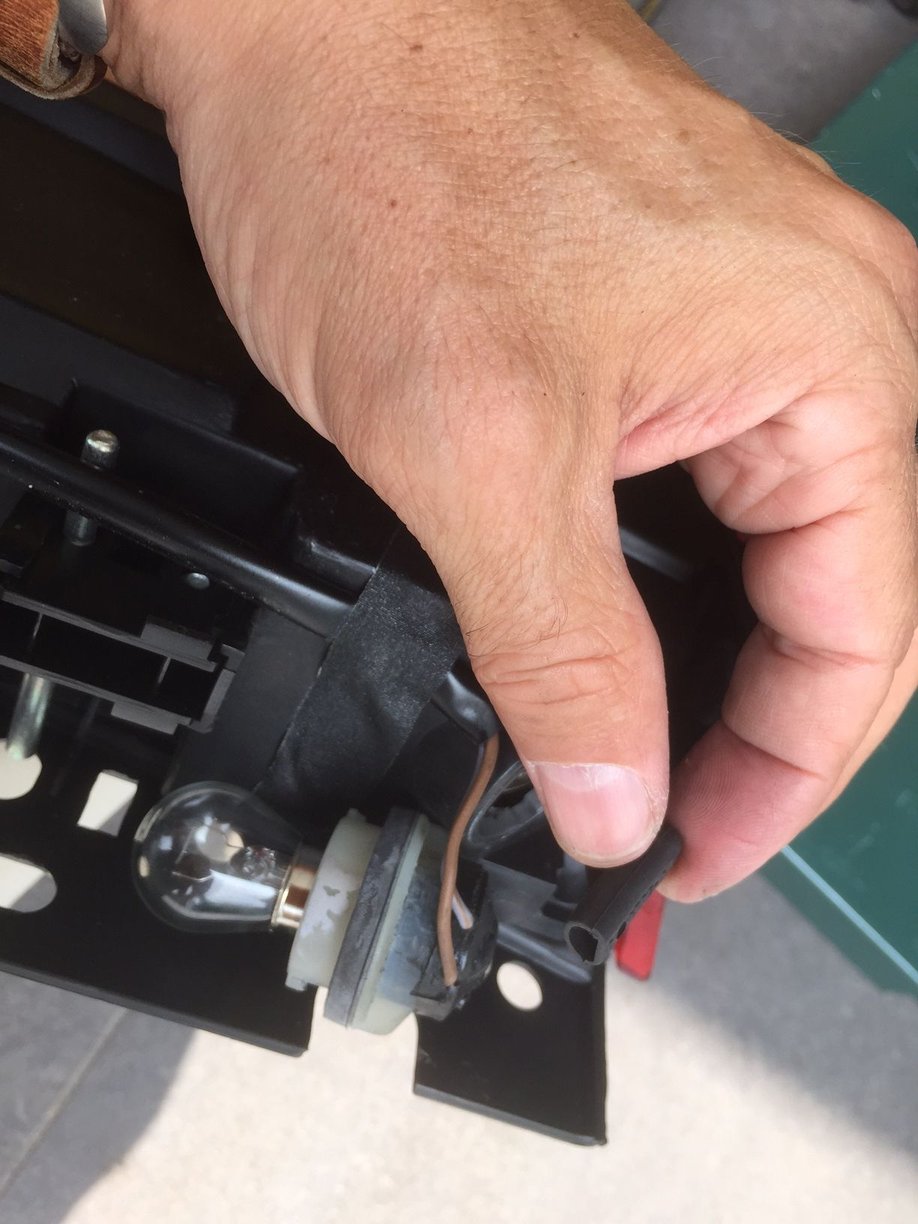
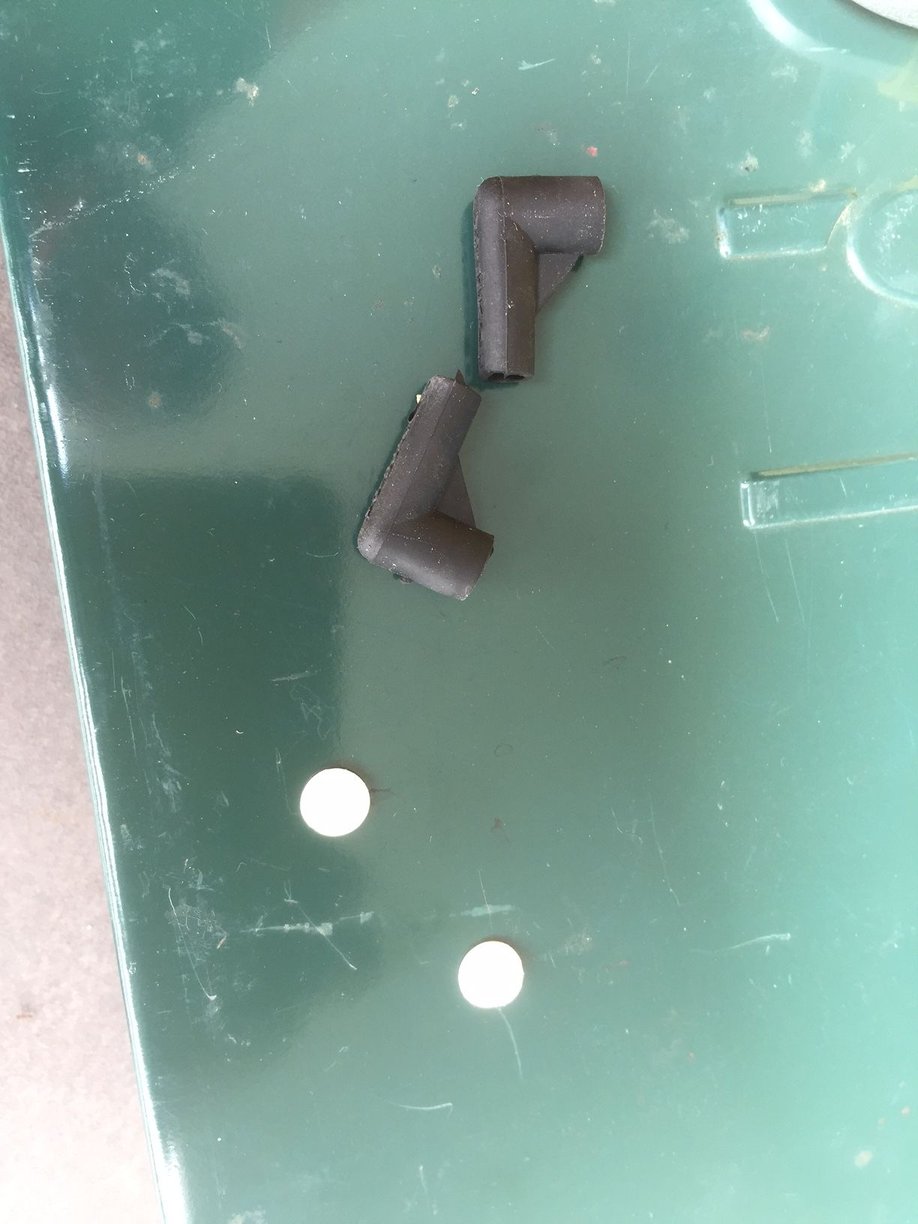
Hi guys. For those that buy a new reflector panel and face similar issues, remember to take the covers in the breather hoses out. I actually figured that out only a few weeks after installation when moisture stared to show in the reverse lights. I bought a new OEM reflector and did not check it during installation. Once removed again and pulling the little rubber hoses off, I found out that they are actually plugged up! See the pictures below. These little white plugs need to be removed before installation so that the breather fulfills its purpose. It is probably a protection during manufacturing or shipping and I am sure that most of you know this. I didn't.... :-) Maybe this is an easy fix for some....
This is an interesting post. ^ (and quite a contribution for a member with only 1 post I might add)
It is the only one I found about these white plugs. We have had a very wet spring, and even though I have not driven my car in the rain yet, it has been dry in the garage, for the first time the lenses start to fog up on me. Mostly around the reverse lights but also a little towards the red also.
So mine has these little white inserts also? Has anyone else removed these besides 993MY? I can't think of any reason they should be there whatsoever? They are also in the brake light vents
Those "plugs" are semi permeable material. Allows the assembly to slowly breathe but prevents (reduces) moisture intake and stops insects, etc. these are common on electronic devices, headlight assemblies, etc.
Just so I am clear (since I recently bought a new reflector), you take out the black breather hose, remove the white insert and then put the black breather hose back in place?
I believe the fixture needs to breath to relieve moisture. The tail lenses are warmed by the exhaust system so a good solution may be to drill a small hole at 6 o'clock on the lenses bulb bayonet socket and in that way any heated moisture that would otherwise condense back onto the lens will gass-out of the hole instead. Trying to completely seal somthing in such a wet / temperature changing/ constant vibration & movement environment may not be a successful approach in the long run. If you look at the design of the overall housing it seems the engineers intended the entire housing to breathe.
So mine has these little white inserts also? Has anyone else removed these besides 993MY? I can't think of any reason they should be there whatsoever? They are also in the brake light vents
It seems to me they are filters that allow expansion of the air in the lens from temperature changes to breath out while providing a barrier to drawing liquid moisture and dust back in. keep in mind that these lenses live in a very temperature dynamic wet and dirty environment exposed to engine heat, the sun, external environmental temperature and bulb heating. I would think these all cause continuous pressure changes in the enclosed housing.


 09-04-2010, 10:03 PM