When you click on links to various merchants on this site and make a purchase, this can result in this site earning a commission. Affiliate programs and affiliations include, but are not limited to, the eBay Partner Network.
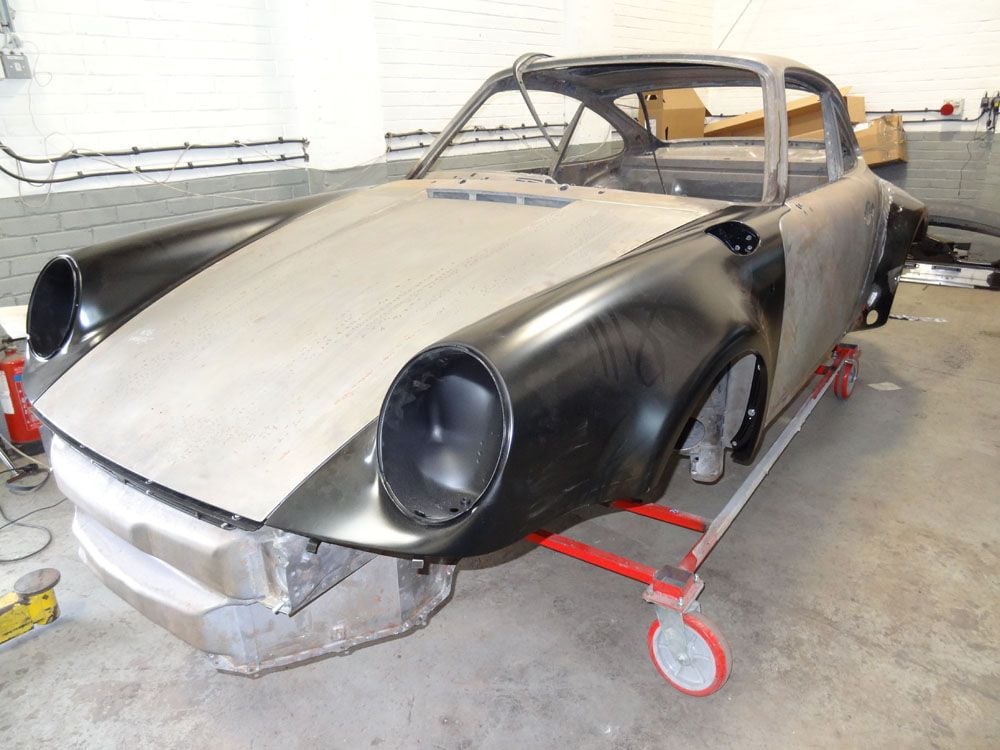
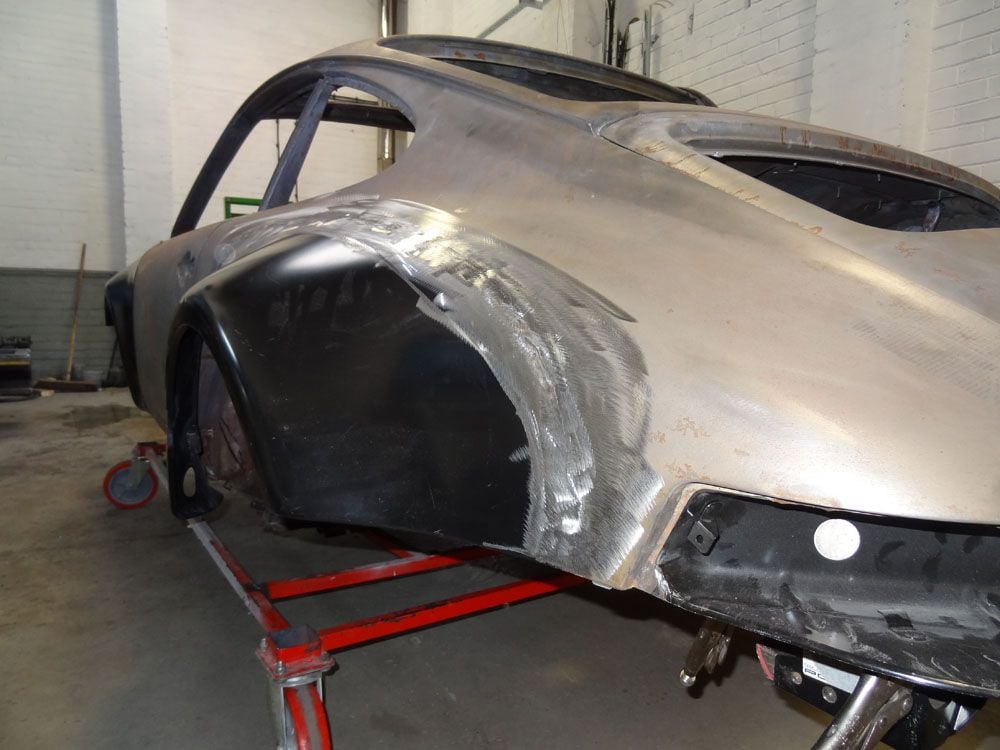
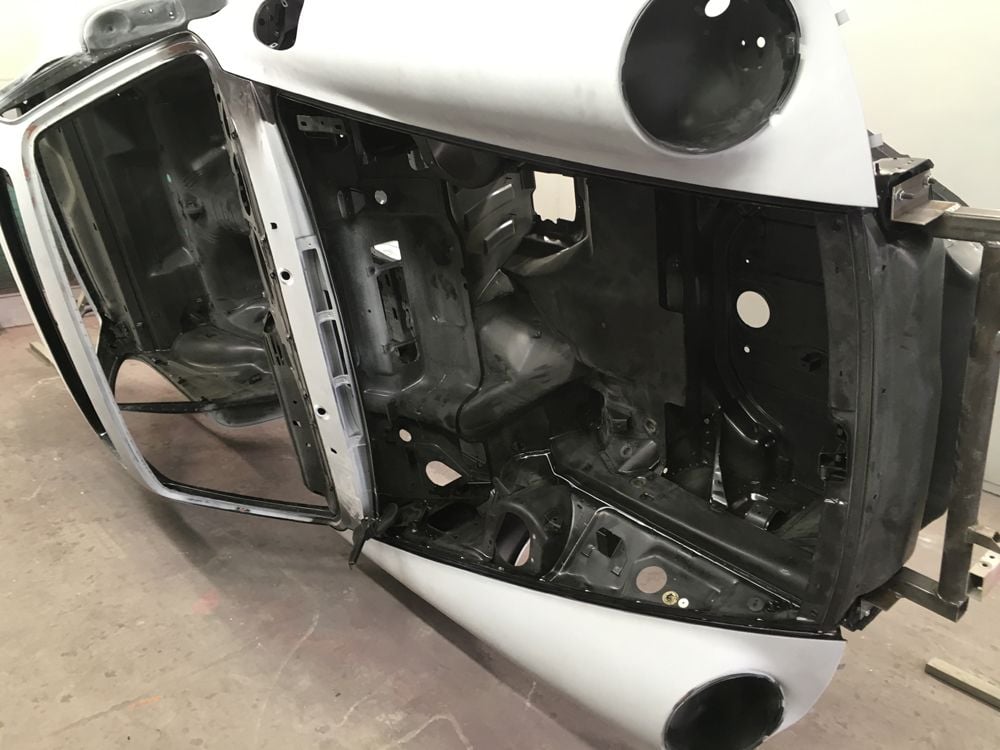
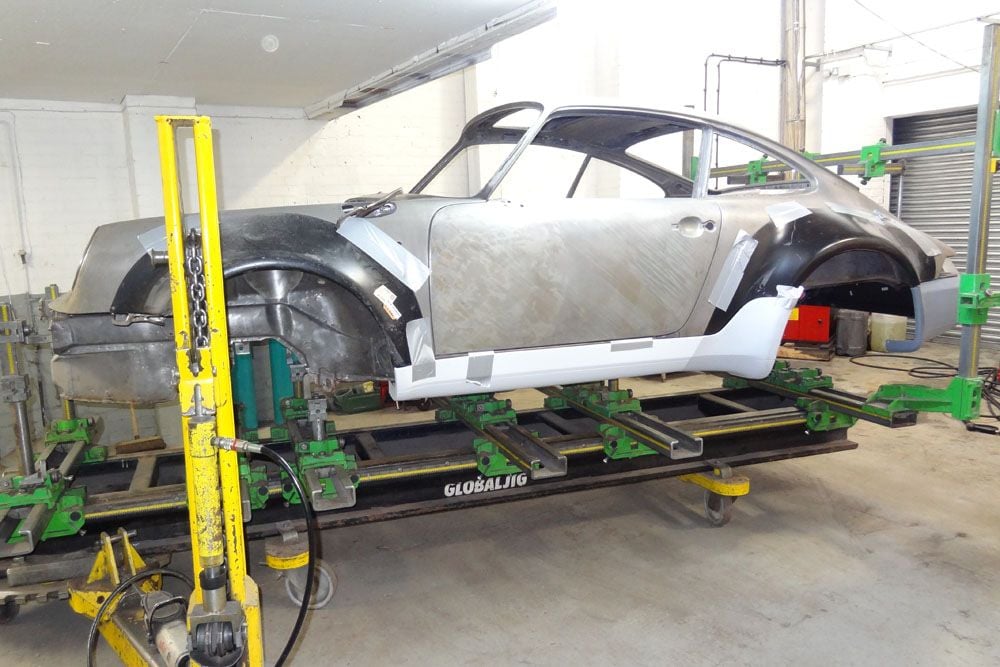
Managed to get a little time off today to go and see the bodyshell. There's been a few problems getting the panel alignments right so we decided to check things out on a chassis jig. This revealed a twist in the bodyshell, the front passenger side was out vertically by 8mm and there was also a missalignment side to side between the front and the rear by 4mm. Fortunately these were able to be pulled back into position hydraulically on the jig so now it's very close. The door alignments are now much better and the wing alignments have also come good. We're not really sure why it was twisted as there's no signs of any damage anywhere, could it be down to 25 years worth of wear and tear on the road..... ? Anyone have any ideas ?
I can understand a corner being off vertically due to torsional forces over time but side to side between front and rear doesn't seem right. It also seems that 8mm vertical is a lot. Either way, glad it came out. Can't wait to see final product. I'd love to do a widebody conversion some day.
I have to admit the first picture looked like a nice car but I have never seen so much rust on suspension and other components like that. Must have been sitting outside unprotected for quite some time.
You are going to love the end product the wide body with narrow trailing arms is how these cars should have been delivered.
agreed but if you look further down page 1 you will see that turbo rear arms are being used.
cool project and looks like you are doing it right from the bottom up prosonique. very nice
I guess I skipped over that. I would recommend using the narrow body arms with a 1.25" spacer and less offset wheel like I did. I own one of each configuration and I love my turbo but if it wasn't worth so much i would do a narrow arm conversion. The improvement is considerable. The turbo track offers high speed turning stability but the arms are heavy and slow at reacting and cause some less agile maneuverability. The combination of the two is by far the better compromise.
This is mine with the spacers and fikes and factory RSR speedline stock offsets. the fikses give a stock turbo look compared to the deep dish look. It is interesting to see how much difference a set of wheels can make.
Thanks everyone for the messages... I'm opting for the Turbo trailing arms as I just prefer to see the wheel with less dish. I don't intend to race the car so I'll probably never notice any benefits for or against the wide or narrow trailing arm. If I change my mind later I have the old ones so I could easily swap them over
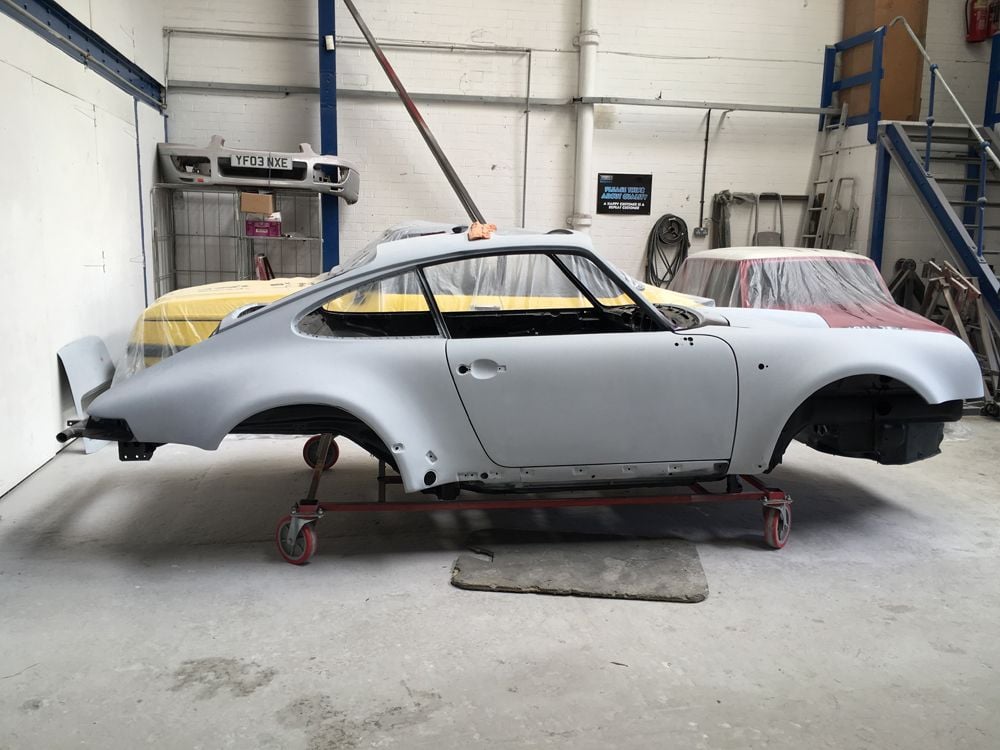
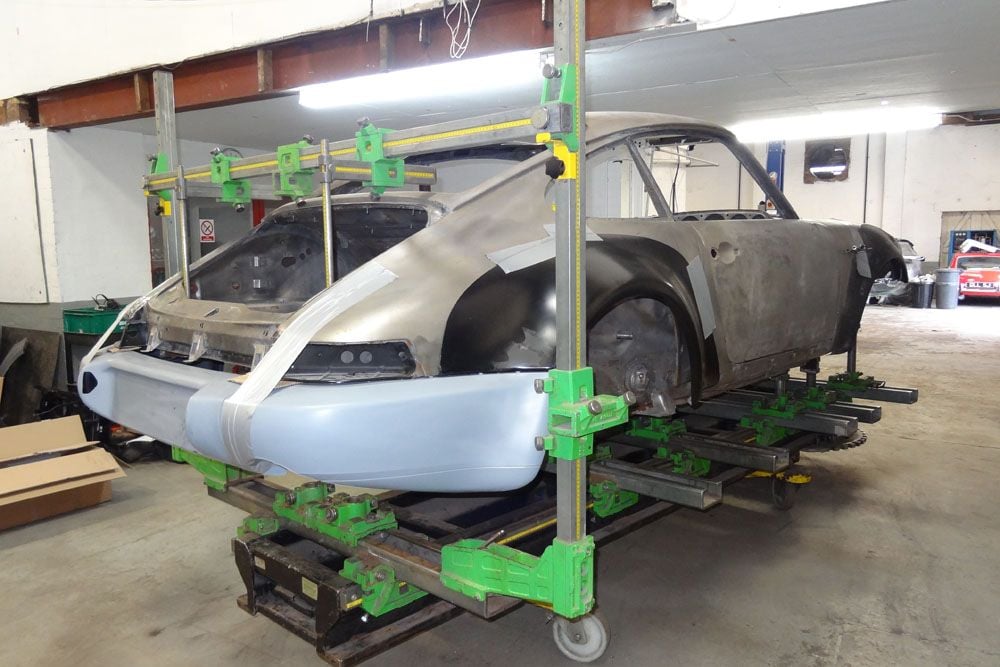
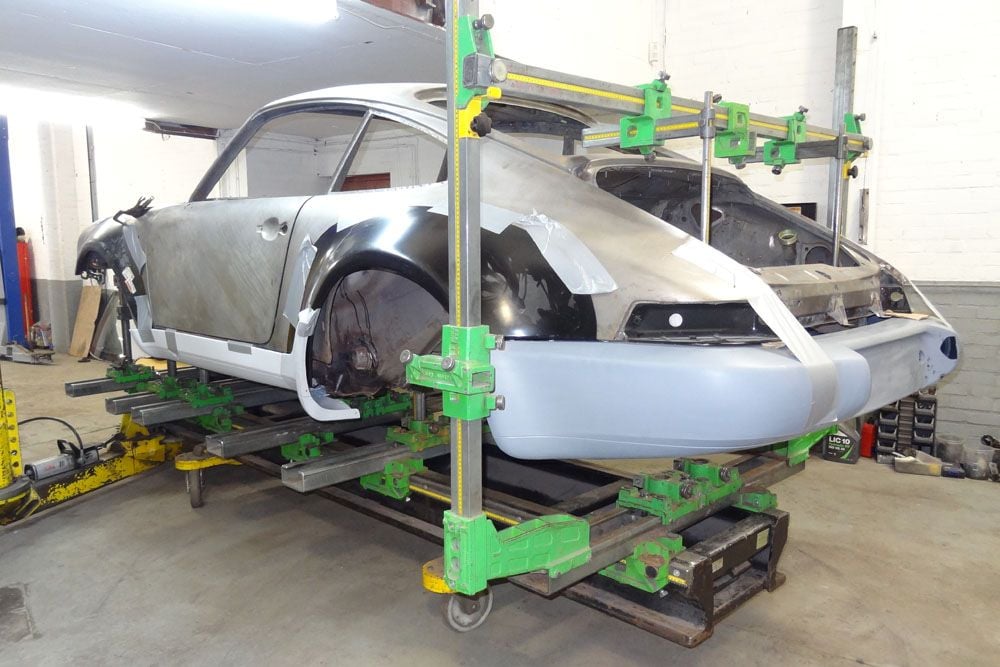
Update :- The fabrication work on the body shell is now complete so it's off for E-coating on Monday. The doors, bonet and boot etc will be removed and sent seperately. They normally take about 2 weeks to process so with a bit of luck I'll get it back ready for the next stage by early June.
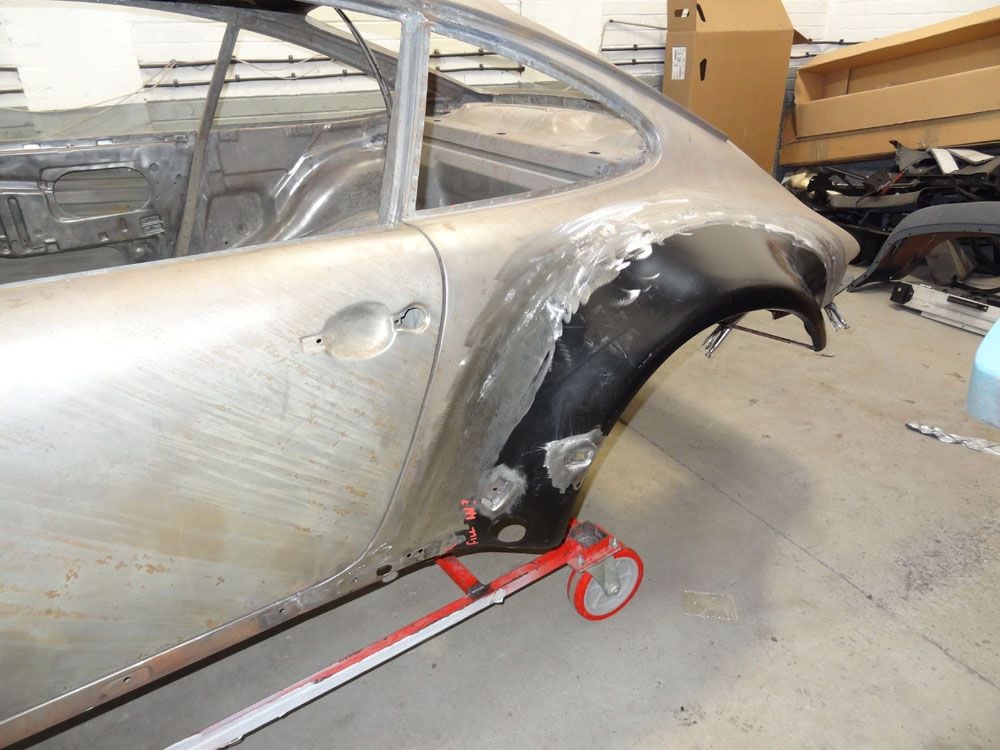
We had some alignment problems with the front arches, the fit was awful and the form didn't match the cill covers at all, I could get a finger in some of the gaps. With the amount of work needed to correct them I didn't feel it was worth it so my pockets were once again left a little lighter with the arrival of a pair of shiny new wings.
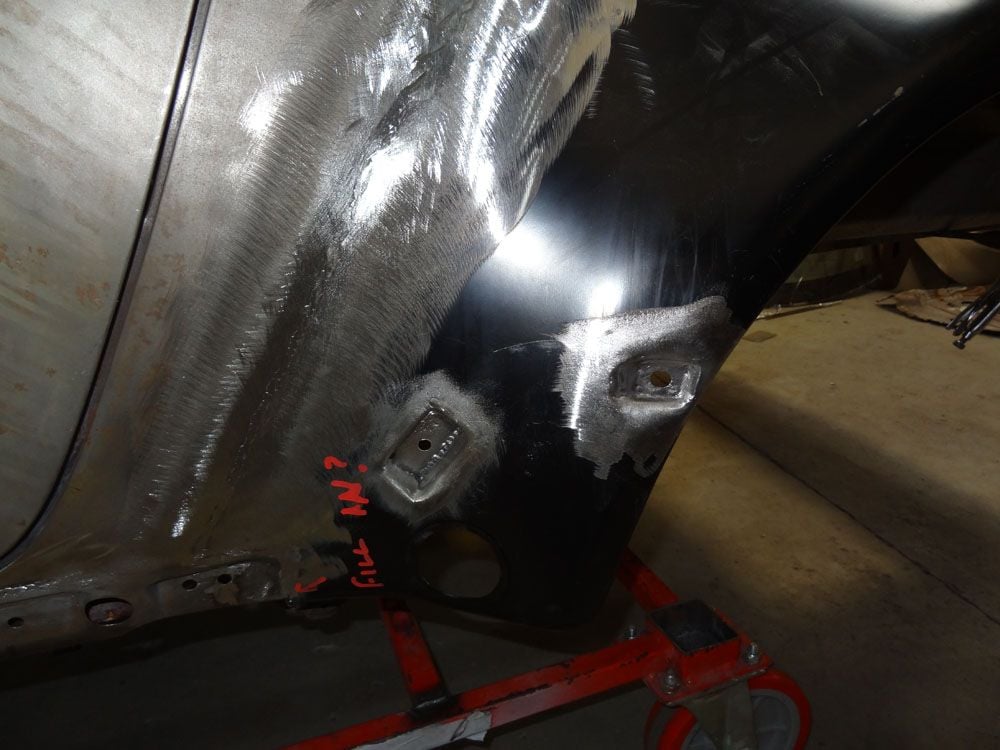
Alignments with the rear arches was good but they did need a little fabrication work to enable the rear section of the cill cover to fit.
Two recesses had to be let into the arch to allow the plastic retaining clips of the cill locate.
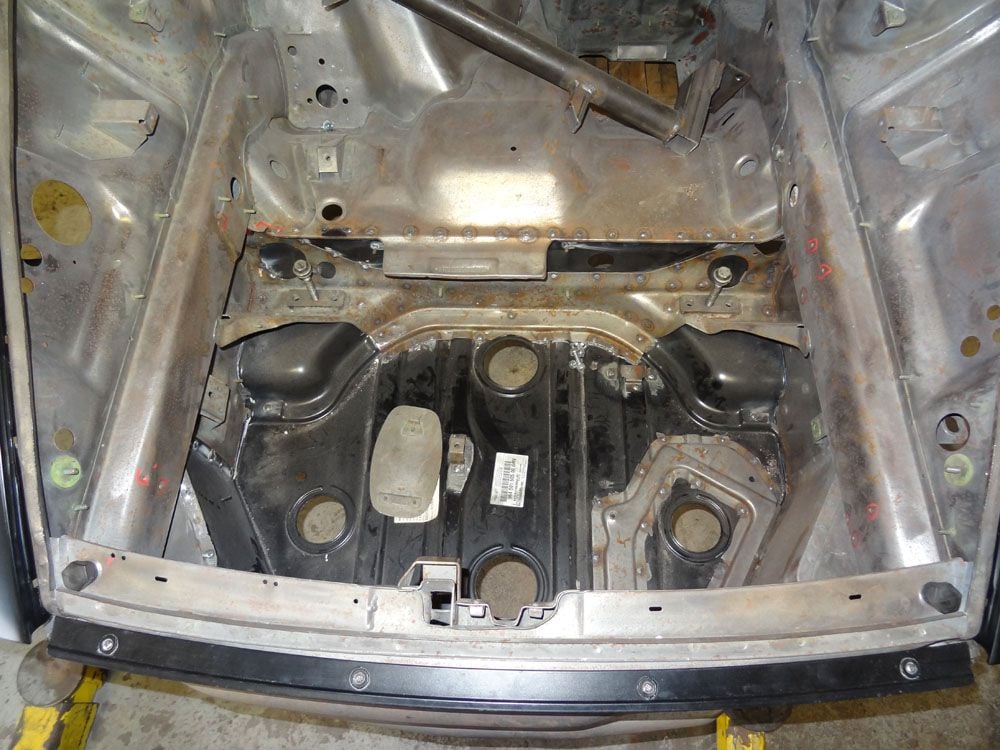
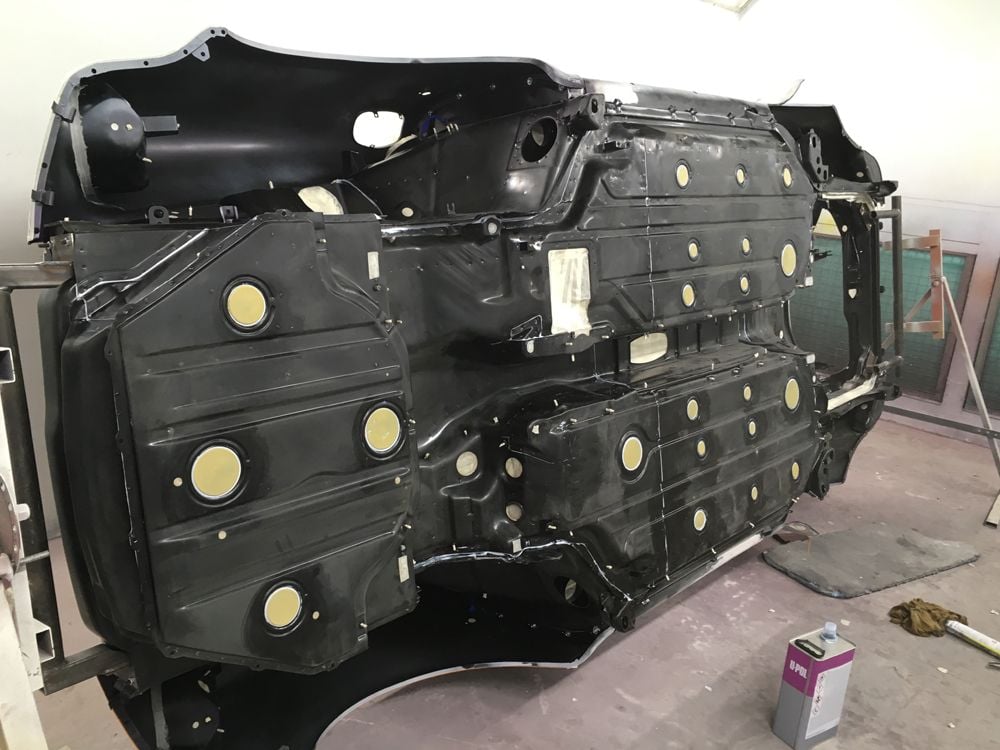
New boot floor and rear light boxes welded into position.
I think you will find the wb rear trailing arms to be very slow at reacting compared to the nb versions. The weight difference is quite noticeable and tight cornering is not as good with the larger arms. You can do a happy medium with nb arms spacers and a not so deep dish wheel and still save the weight and gain the responsiveness of the narrow body arms. You will also need different axles and sway bar options are limited for wb rear.
Looks like you made the indent for the extra clip of the long side sill as well. Everything should fit like factory.
Are you going to swap to a G50 transaxle to use the Turbo axles? The G64 and G50 flanges use different sized hardware to attach the axles to the output flanges.
Are you going to swap to a G50 transaxle to use the Turbo axles? The G64 and G50 flanges use different sized hardware to attach the axles to the output flanges.
I need to check the details but I think the Turbo Look drive shafts will fit ok.
The car arrived back from ecoating this week and I'm really pleased with the results ..... here's a few pics and details of the process taken from their information.
Although the body shell had already been chemically stripped the ecoating process requires it to be cleaned and decontaminated again prior to ecoat.
The Cleaning and Protection Processes.
Stage 1. Decontamination
Heavy organic coatings including underseal, filler, mastic sealants, anti-vibration materials and adhesives are broken down using advanced dehydration process.
Stage 2. Organic Material Removal
The remaining organic compounds such as paint, grease, oil and carbon are now removed in an alkaline hydrocarbon solution for prior to a water rinse.
Stage 3. Rust Removal
Corrosion is now removed via immersion in a dilute solution of inhibited hydrochloric acid. Inhibitors prevent the acid from attacking �good metal�, only breaking down the corrosion. Tilting the shell backand- forth within the solution improves penetration and helps displace air locks.
Stage 4. Passivation Rinse
An advanced agitated alkaline neutralisation and passivation immersion process follows. To ensure maximum penetration, a neutralising preservative is applied by hand, into the seams and recesses leaving the shell bright and stable.
The Electrophoretic or E-Coating System.
Stage 1. Pre-Treatment
The cleaning process utilises varying strength alkaline silicate solutions at 50�C to remove oil and grease followed by water rinses. Following a conditioner rinse, the shell is immersed in a bath of zinc, manganese and nickel (tri-cation) phosphate solution. Water rinses remove the excess phosphate solution and finally the shell is rinsed with demineralised water.
Stage 2. Electrophoretic Deposition
Next, the shell is fully immersed in a 33�C, 55,000 litre PPG paint tank . A highly uniform paint film of between 22μm and 28 μm with excellent bond strength is achieved as an electrical current of around 400 volts and 600 amps is passed through the shell. An Ultra Filtrate molecular resin solution rinse is then applied prior to curing..
Stage 3. Curing
The shell passes through a high temperature oven at 180�C for 45 minutes. This will cross-link the polymer resin allowing the coating to become smooth and continuous. Crucially, the controlled heat drives out residual moisture from within the seams and box sections.
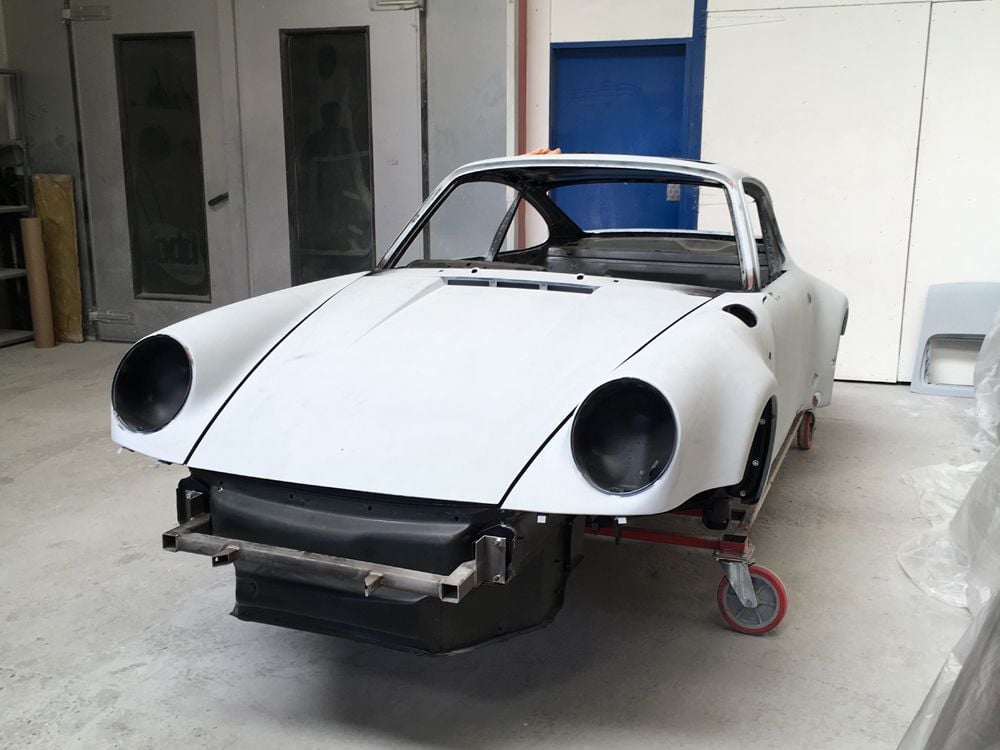
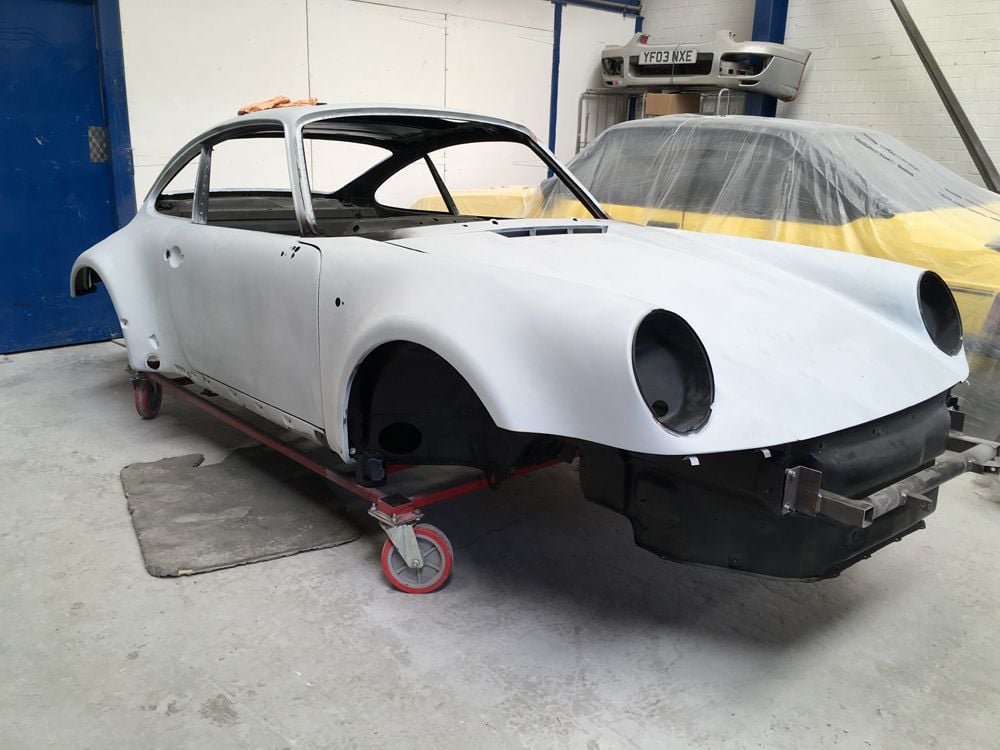
Here's a little update of progress so far. The doors, bonet and boot lid have all been fitted and the bodywork's had a couple of coats of build primer. The outer bodywork and panels have been flatted off and panel gaps set so it's all looking pretty good. The floor has had the blanking plates bonded back in and all the joints seam sealered. Over the weekend it's going to be primered underneath and three coats of stone guard applied, this will eventually be painted to match the car's colour.
Stunning. It's so far removed from the other 964 sub tribe of shot frunk struts, sagging engine mounts and dodgy original shocks. This should be good for another 50 years given how well these cars are treated now.

 03-23-2016, 07:08 PM


 subscribed