When you click on links to various merchants on this site and make a purchase, this can result in this site earning a commission. Affiliate programs and affiliations include, but are not limited to, the eBay Partner Network.
Well I will be looking at my CCU sometime soon. Thanks for the great documentation again Ricardo! This type of info in our community keep our 946's going. Love it.
Quick bump of this amazing old thread. Couple notes from my work today. The Audi A8 part is even easier to use the the Jaguar. Orientation is same as 964 unit. I just took the new one apart to put a little red lube on the axle and installed the 964 bracket which hooks up perfectly. Splice in the 964 harness and you�re good to go.
second, you don�t need to take apart the whole CCU to clean the thermistor. Just take out the plastic duct that attaches to the fan and you can see the thermistor inside. I just used some compressed air and all the dust blew out easily. Put little ducting back and all is good. Now it whirs beautifully and all for about $25!
Finally I have stable heat controls in my car and I can fine tune the temp I want!
Now what idiot defined the CCU button coating material that it wears off in every 964. Even the low 30k mile 964 I saw pictures of recently have this problem!
I have two CCUs, both of them 80.000k+ miles and looks like new!
If you use sun block lotion and don't wash your hands before you touch the buttons, that will ruin the finsh!
Revived this thread. A great tip to replace the squeaking CCU fan. I bought a Landy Discovery fan for 20 pounds from a UK wrecker. I followed RicadoD instructions and so far no more squeaking. Plus my fan now runs on after shutdown. I will see how long this one lasts, otherwise it will be Tore’s fan.
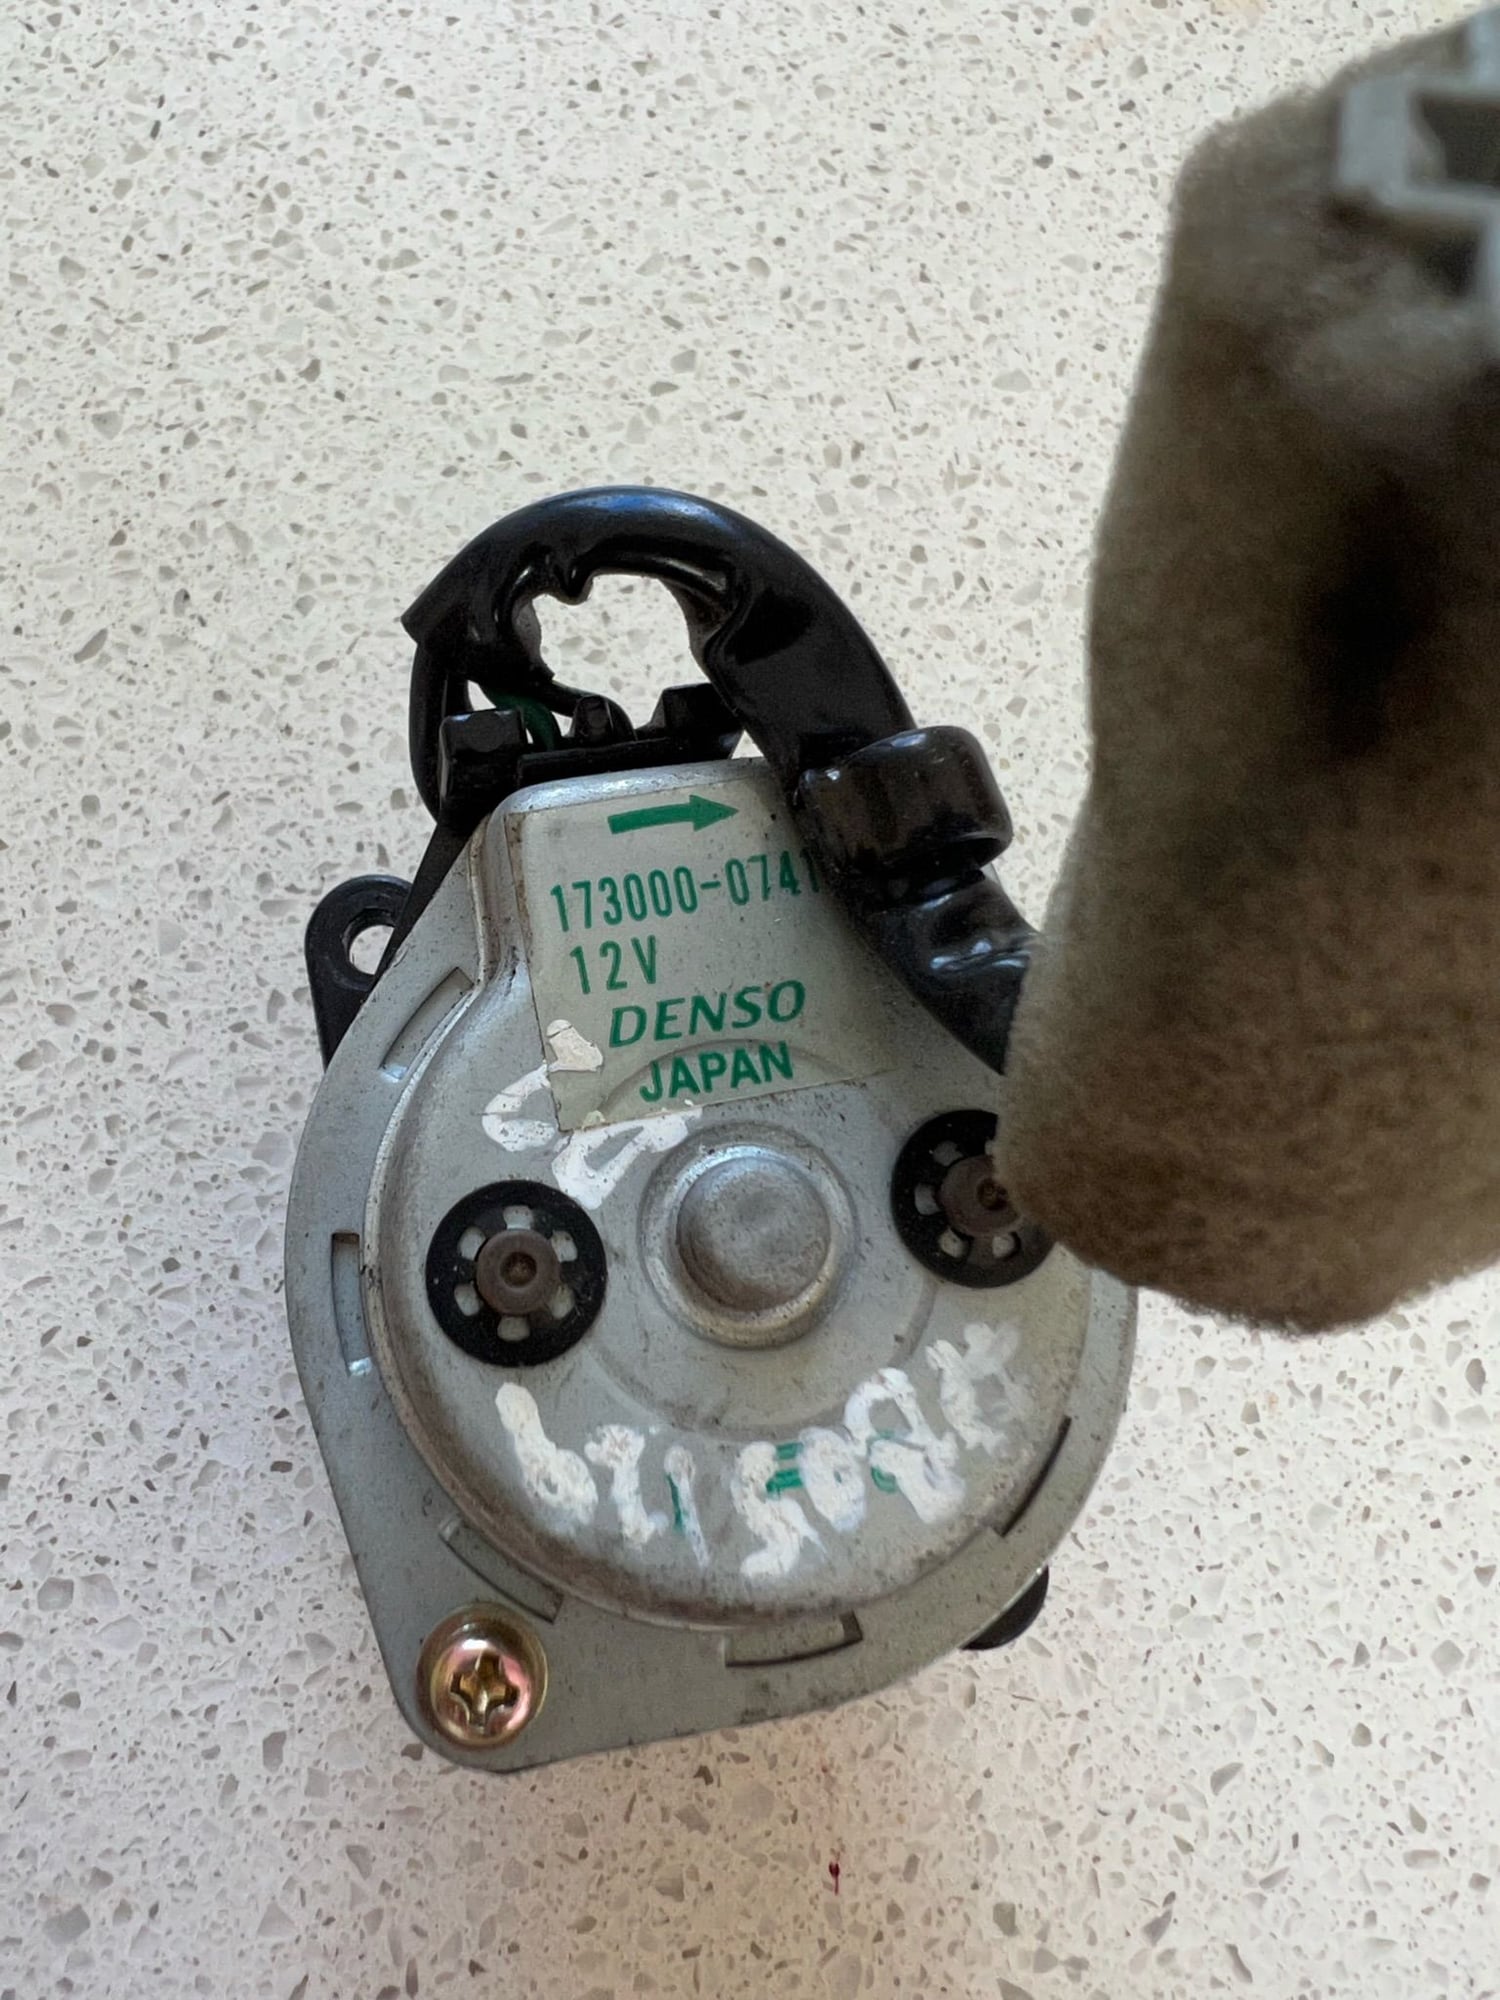
Reviving this older thread because it was super helpful in fixing the CCU fan on my '96 993. This other thread gave several options of Denso part numbers. I bought a used 173000-0731 for a Jag XK8 off of ebay and it was a straight-across swap - all I had to do was solder the Porsche connector plug onto the new fan's leads. Fantastic!
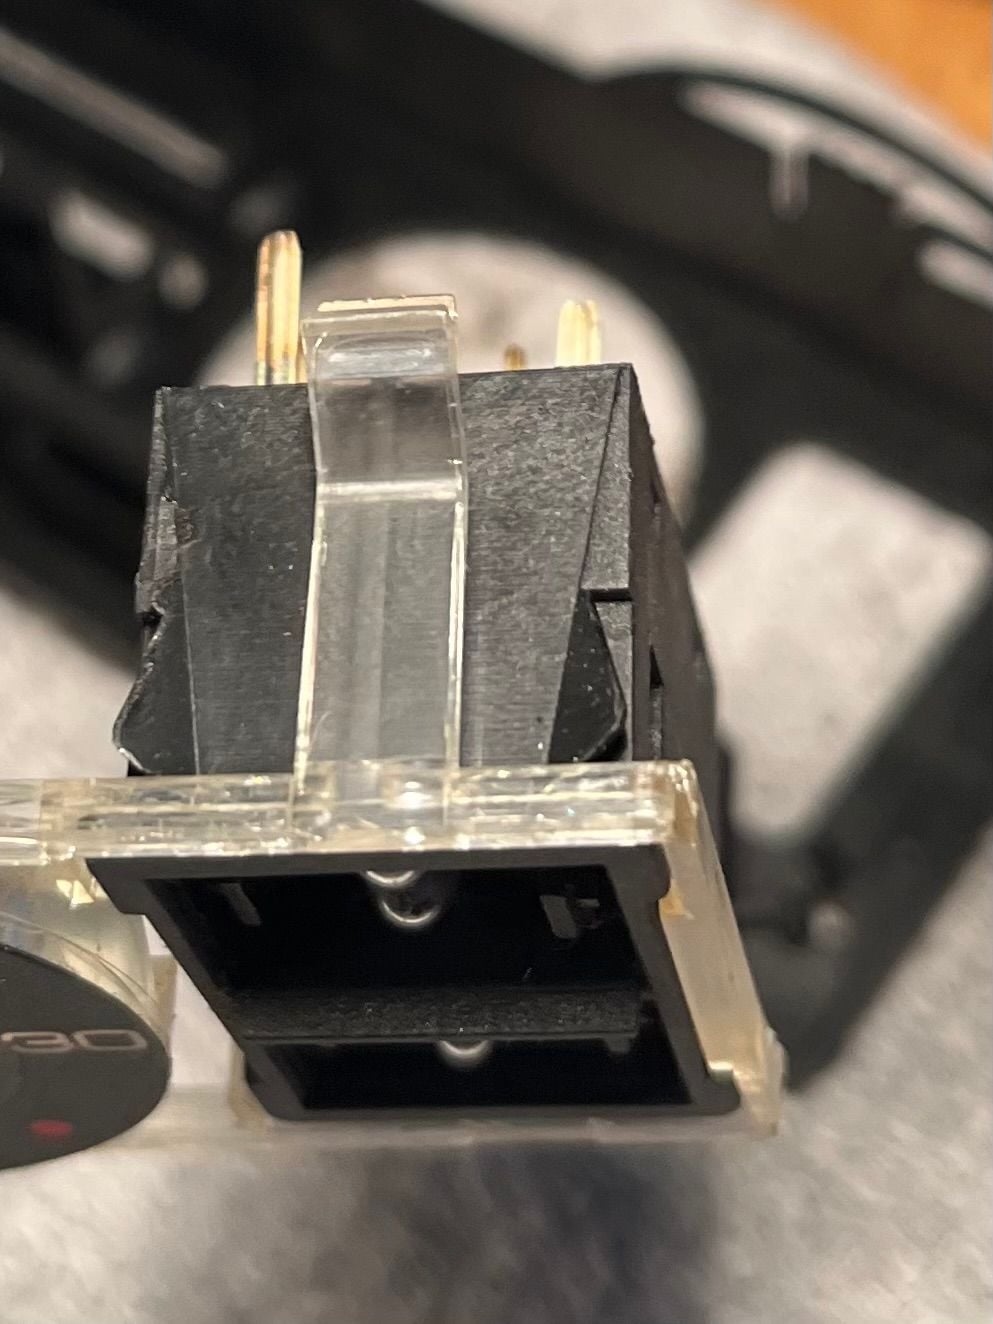
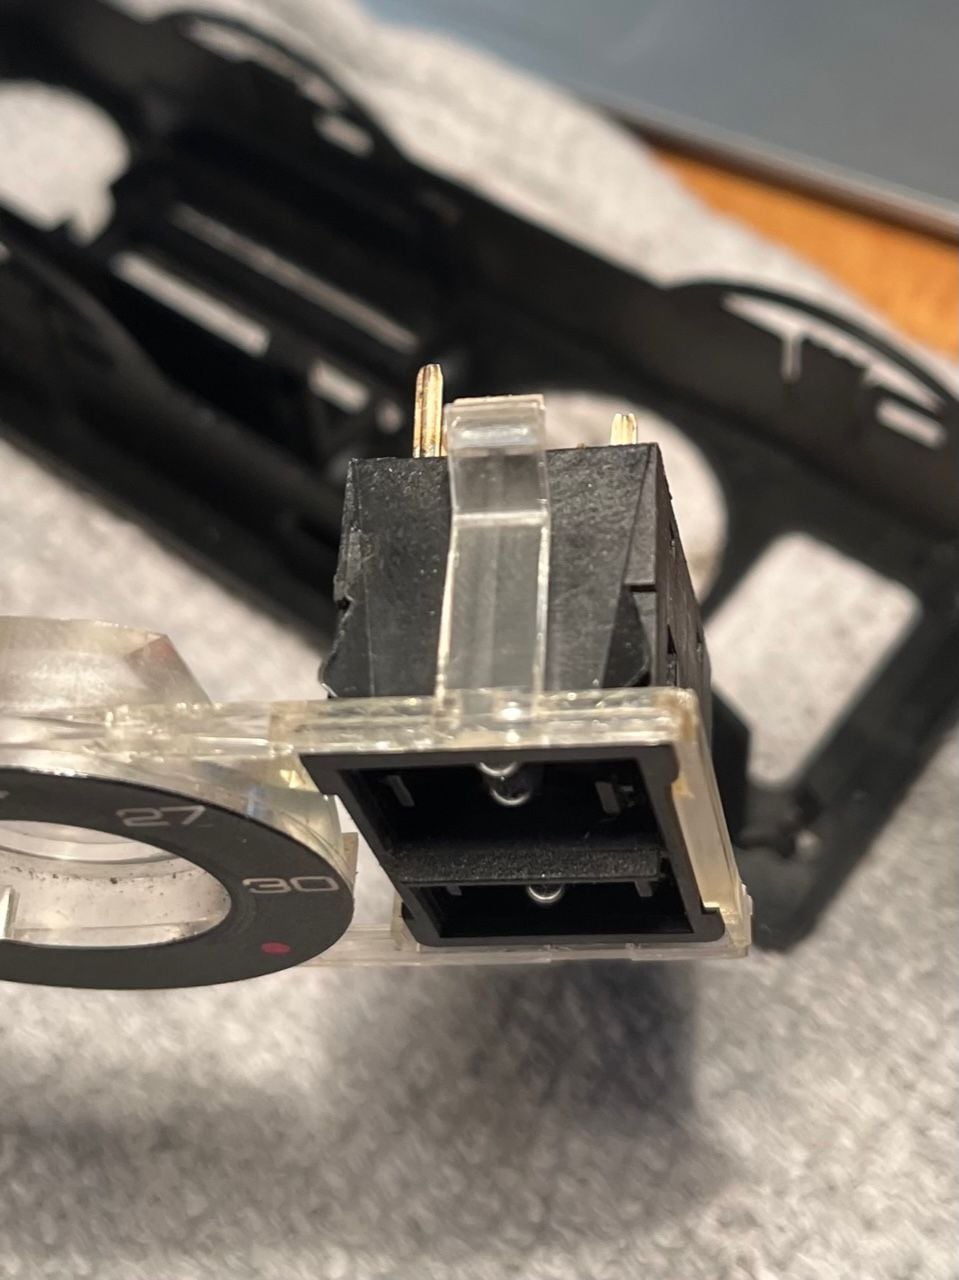
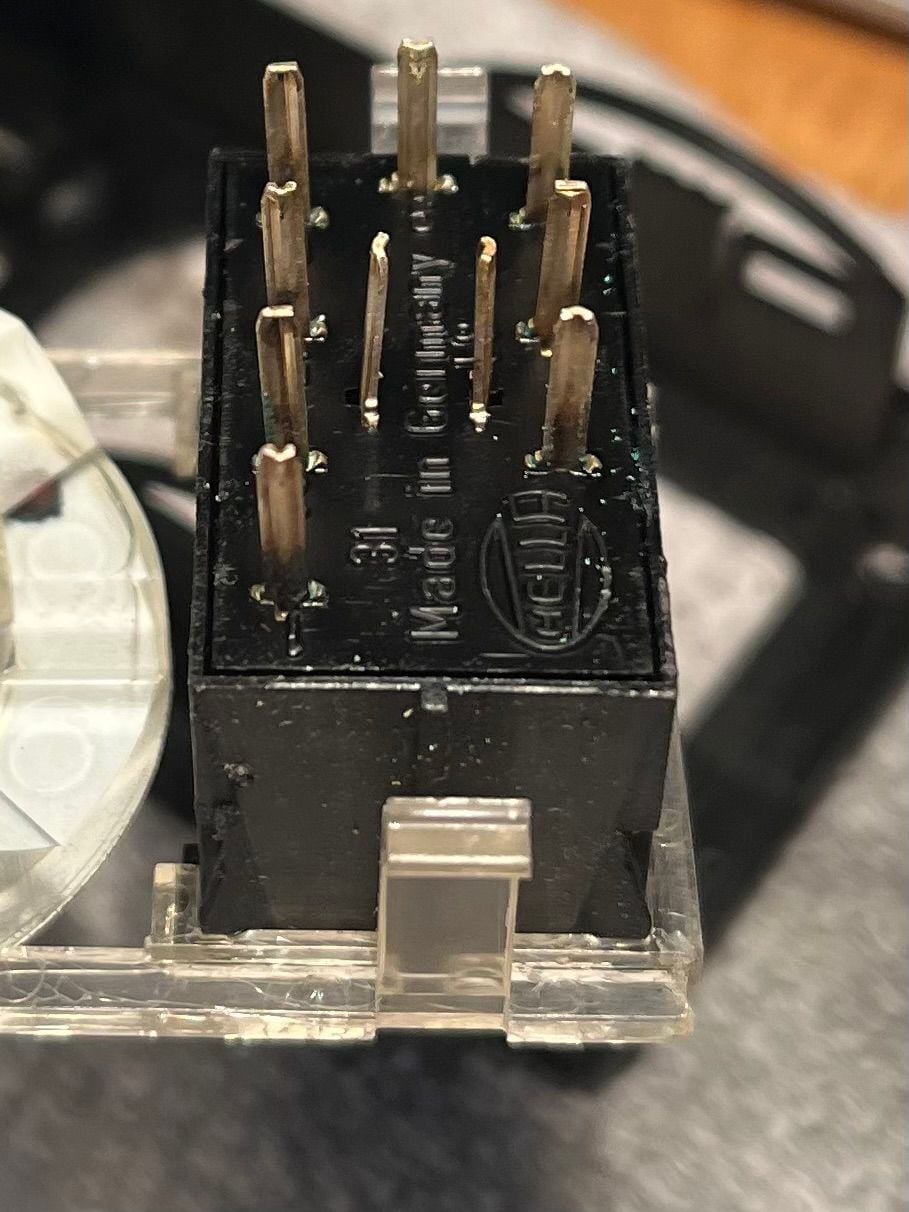
Could you guys give me some guidance please. I am trying to get this button out so I can put the new one in but there are these little 'fins' that hold it in there. Do you know if I fold them down so it fits through the clear housing?
But then I think, the new one has the same 'fins' so will I fold those down as well or will it just slide in?
Thank you very very much
The tabs must be depressed to extract the switch housing. Be careful, it looks like your plexiglass front panel frame is old and brittle, they easily crack or disintegrate if stressed.
Cheers,
Tore


 10-30-2014, 02:11 PM