
I'm in the motor now
 04-24-2014, 01:23 PM
#1
Three Wheelin'
Thread Starter
Literally.
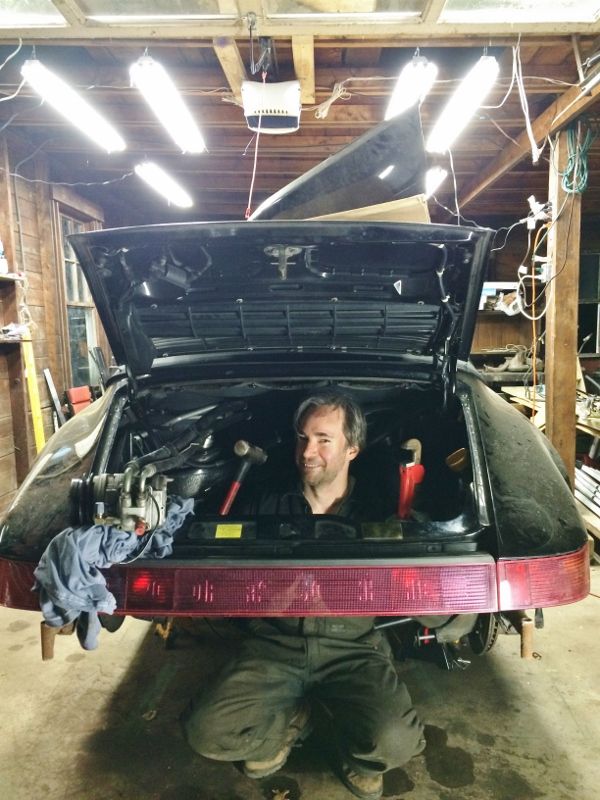
This original plan was to replace the timing chain cover gaskets. That escalated quickly... This is my first time into a flat-six engine. Absurdly more complicated than it seems that it should be. I'll keep this thread updated as I go along. Thanks to RocketRob for letting me borrow those amazing crank and cam special tools. And thanks to both he and Goughary for some behind the scenes advice. The patient is an 82k mile 1991 C4.
Here we go, in order of when I found something interesting-
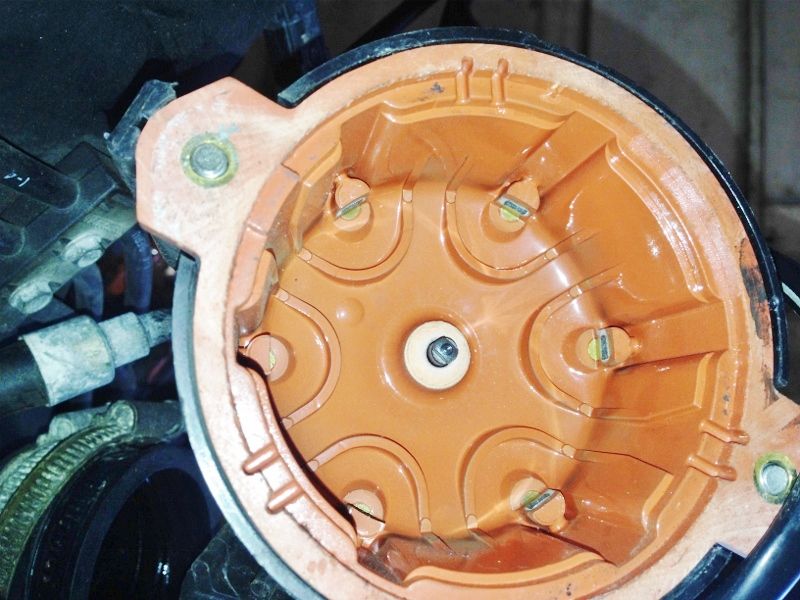
I was surprised to find so much wear on the caps and rotors. I replaced these only 18,000 miles ago-
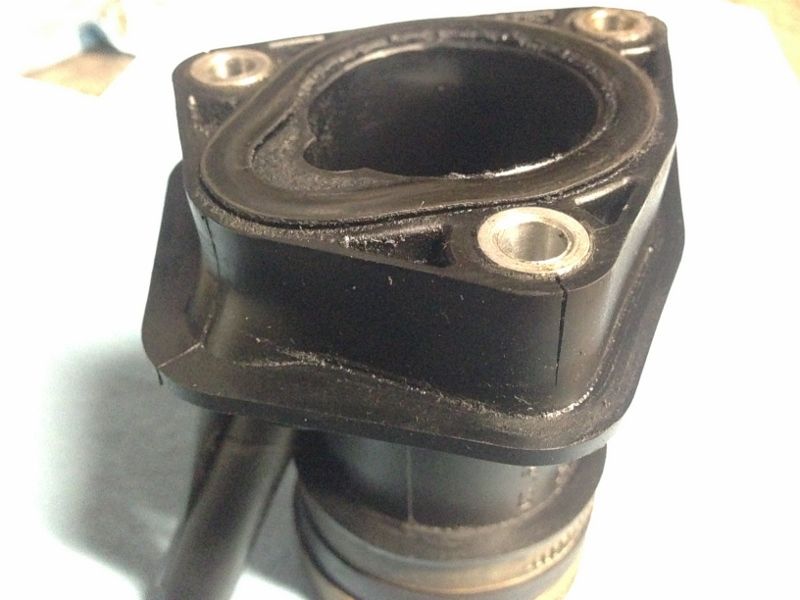
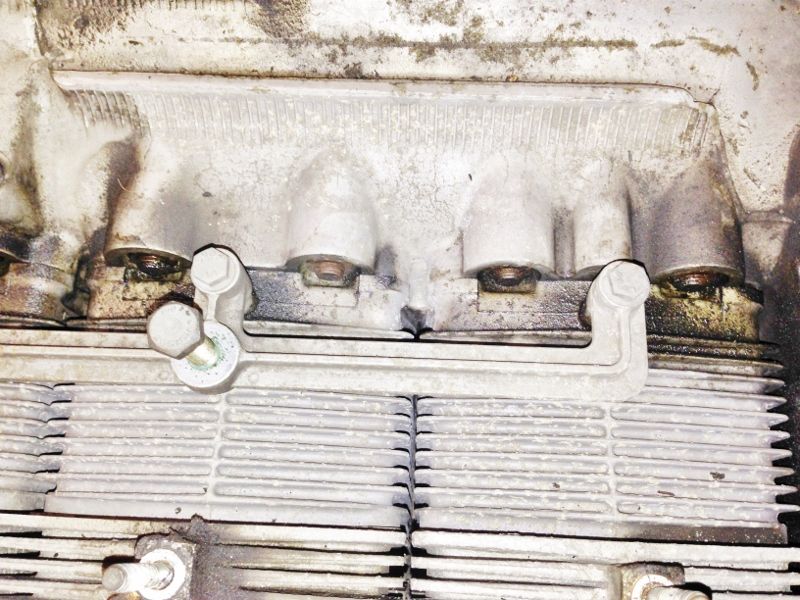
Here is an interesting one. Is this common? All of my intake "manifolds"/ injector holders / whatever you call them, have cracks in the plastic on the outside of each mounting bolt hole. Doesn't seem like it would affect the gasket seal.
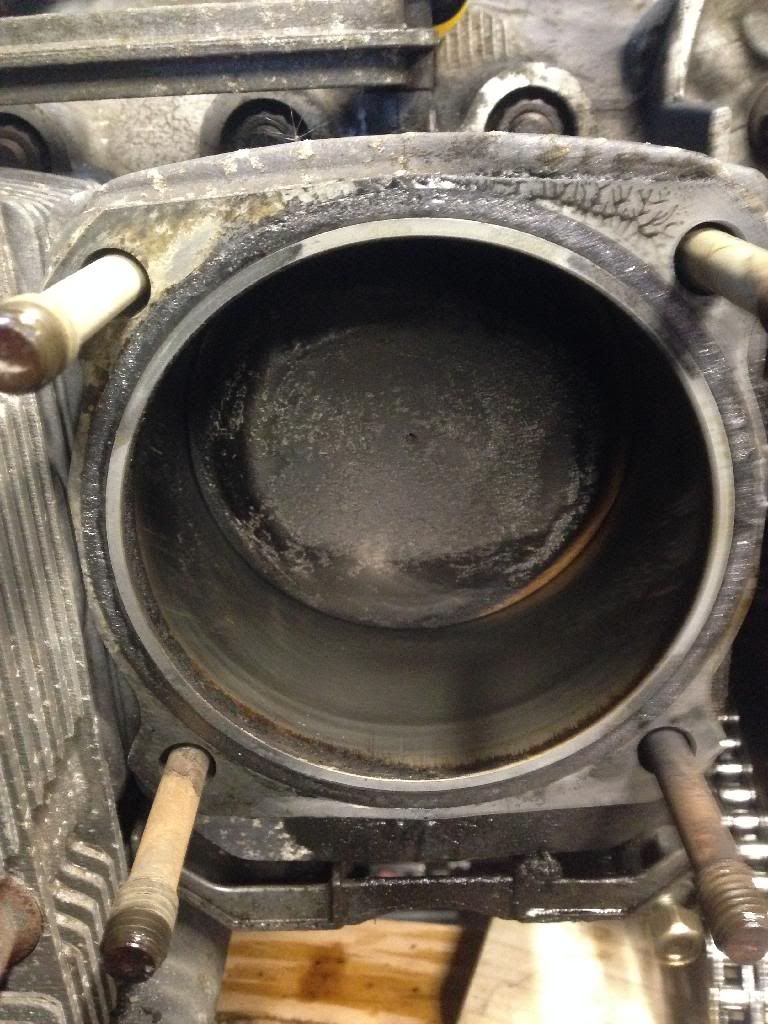
Do these wet spots look indicative of through-bolt o-ring leaks? I was hoping that this would just be a quicky head rebuild.
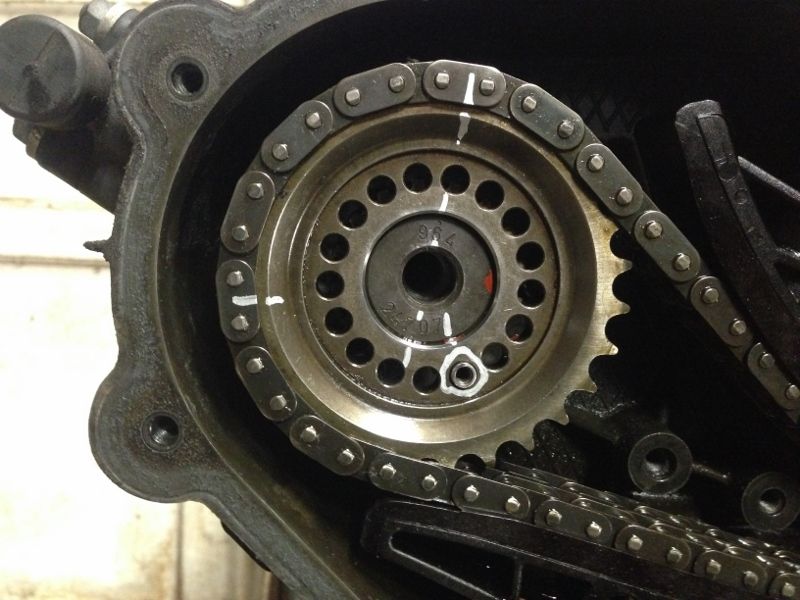
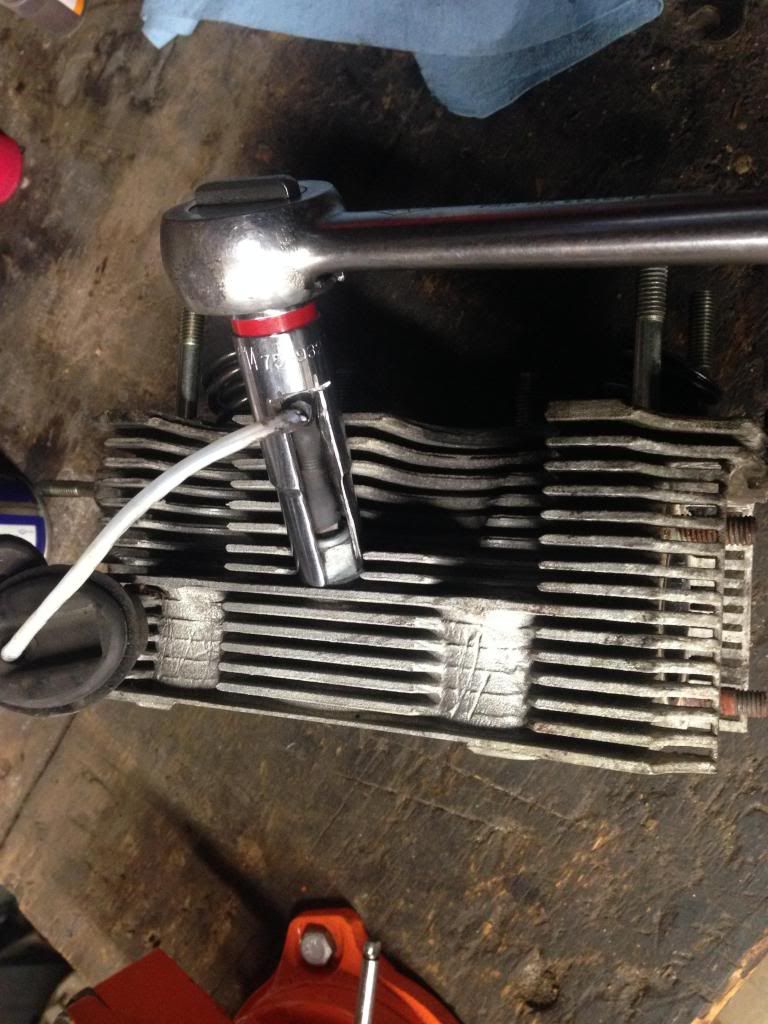
Cam timing. Who came up with this nutty arrangement? Here is one side all painted up for battle.
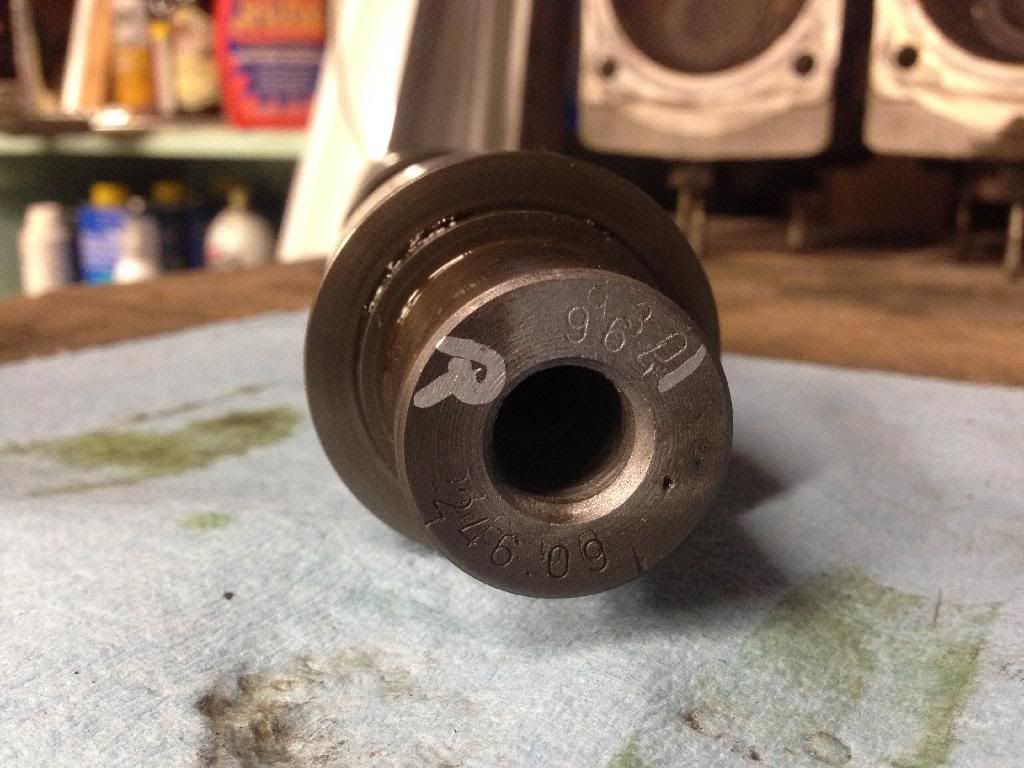
I mounted my dial indicator to check the intake valve lift at TDC to see what the factory setting looked like. Factory manual says 1.26 +-0.1mm.
I got 1.24mm lift for cylinder #4 intake for the right side cam with exactly 0.1mm lash. Excellent.
And then there is the left cam. I set cylinder #1 intake to 0.1mm lash at TDC when the valve is closed. After 180 degrees of crank rotation, the lash has changed to 0mm. Hmm. The lobe doesn't come around until about 300+ degrees of crank rotation. Lash stayed at 0mm until the lobe came around and I measured 1.47mm lift. Not sure what is going on there. I'll have the cams checked when I pull them out.
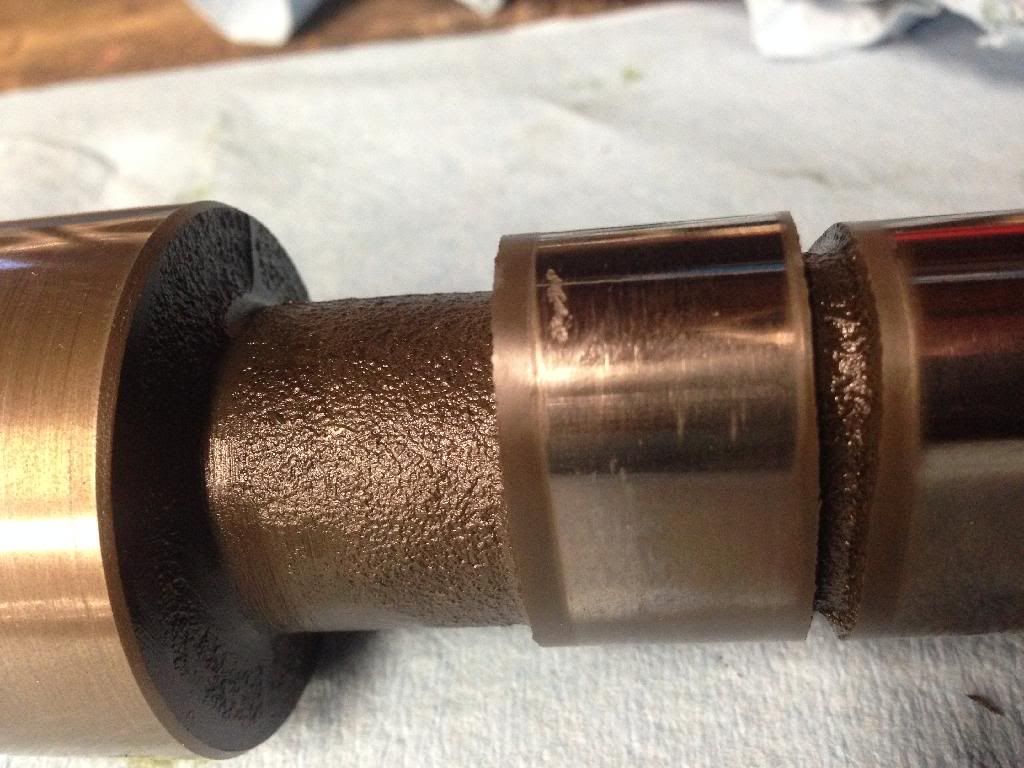
I also found that the top left chain guide has some wear. Bottom left seems fine. I suppose that makes sense as the top guide is the one with the tensioner. Haven't gotten the right side apart yet.

This original plan was to replace the timing chain cover gaskets. That escalated quickly... This is my first time into a flat-six engine. Absurdly more complicated than it seems that it should be. I'll keep this thread updated as I go along. Thanks to RocketRob for letting me borrow those amazing crank and cam special tools. And thanks to both he and Goughary for some behind the scenes advice. The patient is an 82k mile 1991 C4.
Here we go, in order of when I found something interesting-
I was surprised to find so much wear on the caps and rotors. I replaced these only 18,000 miles ago-


Here is an interesting one. Is this common? All of my intake "manifolds"/ injector holders / whatever you call them, have cracks in the plastic on the outside of each mounting bolt hole. Doesn't seem like it would affect the gasket seal.

Do these wet spots look indicative of through-bolt o-ring leaks? I was hoping that this would just be a quicky head rebuild.

Cam timing. Who came up with this nutty arrangement? Here is one side all painted up for battle.

I mounted my dial indicator to check the intake valve lift at TDC to see what the factory setting looked like. Factory manual says 1.26 +-0.1mm.
I got 1.24mm lift for cylinder #4 intake for the right side cam with exactly 0.1mm lash. Excellent.
And then there is the left cam. I set cylinder #1 intake to 0.1mm lash at TDC when the valve is closed. After 180 degrees of crank rotation, the lash has changed to 0mm. Hmm. The lobe doesn't come around until about 300+ degrees of crank rotation. Lash stayed at 0mm until the lobe came around and I measured 1.47mm lift. Not sure what is going on there. I'll have the cams checked when I pull them out.
I also found that the top left chain guide has some wear. Bottom left seems fine. I suppose that makes sense as the top guide is the one with the tensioner. Haven't gotten the right side apart yet.
 04-24-2014, 01:49 PM
#2
Nordschleife Master
 04-24-2014, 03:11 PM
#3
IHI KING!
Rennlist Member
Rennlist Member
Join Date: Aug 2001
Location: Nashua, New Hampshire, USA
Posts: 13,384
Received 221 Likes
on
175 Posts
+1 - I replaced my intake injector holders too during my rebuild.
As for the cam timing checking, did you pre-tension the chains when you checked the measurement? Are you replacing your chains as part of this exercise? Either way, you will need to redo the cam timing once you have the heads back on.
As for the case through bolts, yes it looks like you were getting a small amount of weeping. I'm not sure that its bad enough to split the case. You may want to replace all of the easy to reach external seals while you have it out like the oil pressure sender o-ring and crush washer, the rear main seal, etc.
04-24-2014, 03:41 PM
#4
Nordschleife Master

Same here, except I went w/ 993 intake manifold rather than 964 parts. Slightly larger internal diameter but shouldn't affect performance on a standard motor, and about $20-something each rather than close to $100 for the 964 pieces.
04-24-2014, 05:47 PM
#5
Rennlist Member
Cool! I'll be keeping an eye on your thread. Interesting how many of the 993 parts are cheaper than the 964 parts. Another good example is the brake master cylinder - big difference.
04-24-2014, 05:50 PM
#6
Three Wheelin'
Thread Starter
Great info!
I priced the 964 injector boots at $50 a pop through Sonnen. Definitely an additional annoyance. Is there anything to be had for getting the 993 versions and port-matching the heads on the intake side? I haven't heard anybody mention this?
Rob- you caught me, I didn't tension the chains when I tried out the measurement. Maybe that is where the difference is coming from. It was good to see how the measurement works knowing that I'll have to do it from scratch when it all goes back together. Paint alignment marks are just there as reference / starting points.
The timing chains appear fine and I was planning to reuse them. Is there a case for replacement?
I hadn't researched through-bolt o-ring replacement. If the case has to be split, then forget it! It's barely moist around two of the bolts. I enhanced the photo above and it looks much worse than it is. I can easily live with that.
Question- I see the valve lift number of 1.0mm often quoted in the forums. Is that more desireable than the factory 1.26mm spec? Admittedly, I haven't searched this topic yet.
Here is the current parts/work list. Subject to change as parts get checked. Let me know if you see anything missing.
- Head rebuild, valve guides, stem seals, valves if needed.
- Check/recondition rockers.
- Check cams, grind if needed.
- Oil pressure sender and breather gaskets - done. Replaced earlier this year.
- Rear main and trans input seal.
- Front crankshaft seal. I noticed that it's been leaking when I removed the pulley.
- Timing chain gasket kit from Wrightwood Racing- with the better viton rubber bits.
- Timing chain box square gaskets and big cam o-ring gaskets.
- Timing chain guide rails.
- Valve cover gaskets.
- Intake manifold/injector housing gaskets, at least.
- Oil return tubes and o-rings.
- CHT, the wire is looking delicate near the sensor.
- Flywheel position sensor, the harness-end plug has completely disintegrated.
- Power steering belt and seal kit.
- Breather hose, current rubber is rock solid on the engine side.
- Clutch fork needle bearings and seals and pressure plate bolts. And check that the rod is straight.
- Possibly replace the clutch friction disk. It's only about 1/2 worn, but my the pedal effort seems a bit high.
- Clutch throw-out bearing.
- All of the exhaust and heat exchanger gaskets.
- Lots of new nuts, bolts, clamps, and oil line sealing rings.
- Patch up and powdercoat the engine tin.
- Powdercoat the engine/alternator fan.
- Powdercoat valve covers.
Unrelated:
- Rebuild C4 diff locks. transverse was very leaky.
- Replace diff lock bellows seals.
- Diff lock flexible hose lines.
- 4x brake line flexible hoses.
- Front diff input and output seals.
- tie rods, ball joints, front swaybar droplinks
- fuel feed and return lines from tank to engine, and smaller lines
- rebuilt all power steering hydraulic lines
- new/used left side heat exchanger to replace the rusty/holey one
- heat exchanger flex pipes
- lots of clips and hardware a $1 bits
There can't be much more left!

Trending Topics
 04-25-2014, 06:05 AM
#9
Three Wheelin'
Looooong list - following a good wash it'll be a new car 
Whilst the alternator is off check out the bearing condition. I'd pop out the regulator/brush box and replace if the brushes are low.
Whilst the alternator is off check out the bearing condition. I'd pop out the regulator/brush box and replace if the brushes are low.
04-25-2014, 08:22 AM
#11
IHI KING!
Rennlist Member
Rennlist Member
Join Date: Aug 2001
Location: Nashua, New Hampshire, USA
Posts: 13,384
Received 221 Likes
on
175 Posts
The timing chains appear fine and I was planning to reuse them. Is there a case for replacement?
I hadn't researched through-bolt o-ring replacement. If the case has to be split, then forget it! It's barely moist around two of the bolts. I enhanced the photo above and it looks much worse than it is. I can easily live with that.
Question- I see the valve lift number of 1.0mm often quoted in the forums. Is that more desireable than the factory 1.26mm spec? Admittedly, I haven't searched this topic yet.
If you want, you could remove the "weepy" through case bolt heads and put some Permatex Black on the sealing surfaces. It would be a kluge but might suffice.
The factory specs for the timing are 1.26mm. If you change the cams, then use the specs that come with your new cams.
As for your "to do list". It looks good.
Best of luck.

 04-25-2014, 04:40 PM
#13
This is a funny thing about this car and rebuilding
Same here, except I went w/ 993 intake manifold rather than 964 parts. Slightly larger internal diameter but shouldn't affect performance on a standard motor, and about $20-something each rather than close to $100 for the 964 pieces.
You can get into the motor or other parts and not use 964 parts and save a ton of green backs. Always been funny how much 964 parts are but the others are less.
04-28-2014, 01:49 AM
#14
Three Wheelin'
Thread Starter
Hi folks!
ffc- oil pipes have been gone through already.
Robt- alternator is new. But good suggestion to check it.
Boxsey- clutch slave cylinder and the flexible hose attached to it is what I meant. Both are new now.
Back to the fun. I made some progress today-
What a minute, these cylinders have headgaskets? All this time, I thought that my '91 was before the update. Should have checked the engine serial number earlier.
Interesting, you can see rub/scuff marks, in front of each head bolt hole, inside the headgasket ring. Typical?

All was going nice and smoothly. I was chugging along happy to see those headgasket rings. Left side cam lobes looked perfect. Make my way to the right side of the engine. Inspect the cam. D@#$! Tiniest spec of pitting on the #6 intake lobe. Time to look into cam grinding.
And, of course, a little entertainment. That looks a lot like "930" lightly stamped under the "964" on this cam. Was this engine built on a Friday afternoon? Did someone grab the wrong stamp at Zuffenhausen?
ffc- oil pipes have been gone through already.
Robt- alternator is new. But good suggestion to check it.
Boxsey- clutch slave cylinder and the flexible hose attached to it is what I meant. Both are new now.
Back to the fun. I made some progress today-
What a minute, these cylinders have headgaskets? All this time, I thought that my '91 was before the update. Should have checked the engine serial number earlier.

Interesting, you can see rub/scuff marks, in front of each head bolt hole, inside the headgasket ring. Typical?

All was going nice and smoothly. I was chugging along happy to see those headgasket rings. Left side cam lobes looked perfect. Make my way to the right side of the engine. Inspect the cam. D@#$! Tiniest spec of pitting on the #6 intake lobe. Time to look into cam grinding.

And, of course, a little entertainment. That looks a lot like "930" lightly stamped under the "964" on this cam. Was this engine built on a Friday afternoon? Did someone grab the wrong stamp at Zuffenhausen?
 04-29-2014, 11:51 AM
#15
Three Wheelin'
Thread Starter
Now that I've discovered how lucky that I am to have the later headgasket head/cylinders, anyone have a tip on how to remove the headgaskets?? There is no lip to get under. And I don't want to dig around into the aluminum.
Also, bling ideas for engine tin, fan, valve cover power coating? Should I keep stock colors, or add some splash? I'm undecided. I like the idea of lighter colored tin so that it's easier to see when drop a washer down into them... An m&m fan and valve cover color is intriguing in my mind, but I also like the understated stock look.
Oh yeah, and I made a tool to remove the CHT. Was this factory placement really necessary?! 14mm deep 1/2" drive socket and 2x cut-off wheels. 1/2" drive was needed, the CHT was in there quite tight.
