
I'm in the motor now
 06-27-2014, 11:47 AM
#31
RL Technical Advisor
Those guides were not properly installed, hence the cracking. I've seen plenty of these, unfortunately.
The crack in the top pic, very slight, is something to watch, however the lower head should be replaced as the severe crack will progress to the seat. The cost of correctly welding may be as much as a good used head (which will need to be matched to the others) and it may not hold up.
The crack in the top pic, very slight, is something to watch, however the lower head should be replaced as the severe crack will progress to the seat. The cost of correctly welding may be as much as a good used head (which will need to be matched to the others) and it may not hold up.
 07-02-2014, 12:56 PM
#32
Three Wheelin'
Thread Starter
While I'm getting the heads sorted out... I replaced the aluminum crush washer behind the oil pressure valve plug on the bottom rear left side of the case. Called the safety valve in the workshop manual. The torque spec is 44 ftlb. At about 35 ftlb the washer collapses and crushes into a thin disk that completely deforms. I ended up using 30 ftlb to keep the washer from completely crushing. Maybe a copper crush washer would have held the factory torque spec?
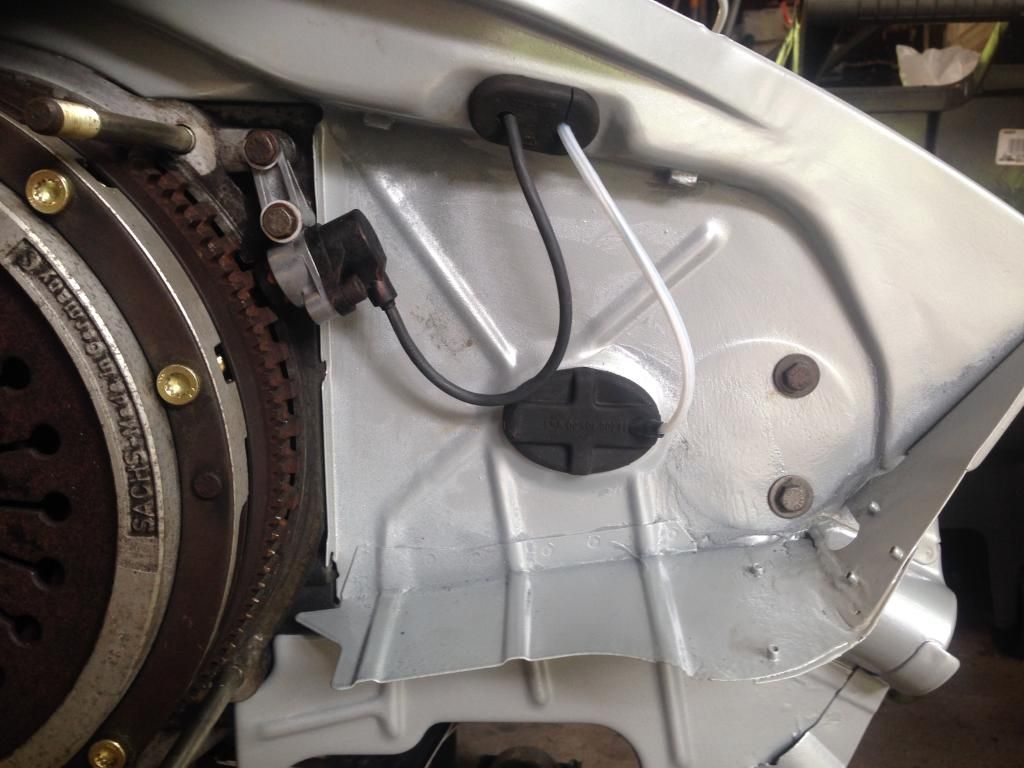
Removed the flywheel sensor from the alloy mounting bracket and the bracket cracked open quite easily. It looks like it was glued in at the factory and the aluminum bracket had bloomed with corrosion and distorted the sensor. Not sure if this is typical, but luckily new brackets are cheap, ~$25, and readily available through the dealer. Just so that I remember, distance between sensor and flywheel teeth is 1.0mm +-0.2mm.
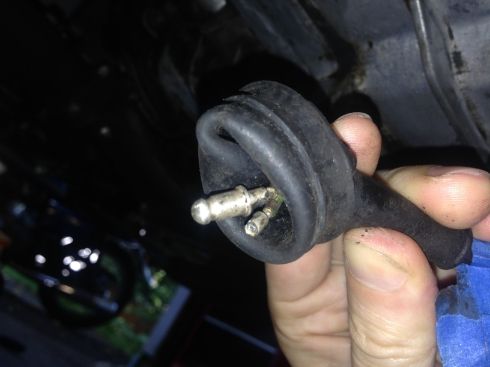
Stay tuned for some sensor plug carnage. The original sensor with the amp / junior power timer plugs is no longer available. It's been superseded by a 996 part number with weatherpak style plugs, same as the 993. Instead of butchering my wiring harness for the updated plugs, I'm working on an adapter between the two. Also to note, the 996 sensor is a couple inches shorter than the original 964 flywheel sensor.
Removed the flywheel sensor from the alloy mounting bracket and the bracket cracked open quite easily. It looks like it was glued in at the factory and the aluminum bracket had bloomed with corrosion and distorted the sensor. Not sure if this is typical, but luckily new brackets are cheap, ~$25, and readily available through the dealer. Just so that I remember, distance between sensor and flywheel teeth is 1.0mm +-0.2mm.
Stay tuned for some sensor plug carnage. The original sensor with the amp / junior power timer plugs is no longer available. It's been superseded by a 996 part number with weatherpak style plugs, same as the 993. Instead of butchering my wiring harness for the updated plugs, I'm working on an adapter between the two. Also to note, the 996 sensor is a couple inches shorter than the original 964 flywheel sensor.
07-02-2014, 01:52 PM
#33
IHI KING!
Rennlist Member
Rennlist Member
Join Date: Aug 2001
Location: Nashua, New Hampshire, USA
Posts: 13,384
Received 222 Likes
on
176 Posts
Nick - My flywheel sensor was stuck in the mounting bracket too. We broke the bracket trying to separate it. I must have been lucky, I didn't have to change my wiring harness nor connectors. I must have gotten one of the remaining stock of "old" ones.
07-02-2014, 01:59 PM
#34
Technical Guru
Rennlist Member
Rennlist Member
Originally Posted by nick
Ceramic liner cracks don't appear to be an issue. I even came across a Porsche TSB that it can be ignored. The valve guide boss crack is most certainly from the shop who replaced the guides...
Stay tuned for some sensor plug carnage. The original sensor with the amp / junior power timer plugs is no longer available. It's been superseded by a 996 part number with weatherpak style plugs, same as the 993. Instead of butchering my wiring harness for the updated plugs, I'm working on an adapter between the two. Also to note, the 996 sensor is a couple inches shorter than the original 964 flywheel sensor.
07-02-2014, 02:59 PM
#35
Three Wheelin'
Thread Starter
Hi Jason,
I do remember seeing that TSB. That is exactly what I don't want to do. Not only do I want to avoid cutting into the original wiring harness, but the new sensor has a shorter lead too. A PO had a knock sensor replaced at the dealer at some point and they used the updated/993 sensor and cut the harness. The knock sensor lead is much shorter than original and it's a stretch for it to reach the harness. I'm fixing the dealer update on that one with a new amp connector for the harness (no luck finding it in the original green, sadly). An intermediate plug to bridge the two different connectors is relatively easy. Both male and female connectors have decent availability- as long as you like black.
Good tip on blowing out the cat.
Rob- Lucky indeed. I didn't come across anyone selling the old connector version of the flywheel sensor. I did find old/original versions of the CHT and knock sensors, but stock appears to be dwindling for all of them.
I do remember seeing that TSB. That is exactly what I don't want to do.
Not only do I want to avoid cutting into the original wiring harness, but the new sensor has a shorter lead too. A PO had a knock sensor replaced at the dealer at some point and they used the updated/993 sensor and cut the harness. The knock sensor lead is much shorter than original and it's a stretch for it to reach the harness. I'm fixing the dealer update on that one with a new amp connector for the harness (no luck finding it in the original green, sadly). An intermediate plug to bridge the two different connectors is relatively easy. Both male and female connectors have decent availability- as long as you like black. Good tip on blowing out the cat.
Rob- Lucky indeed. I didn't come across anyone selling the old connector version of the flywheel sensor. I did find old/original versions of the CHT and knock sensors, but stock appears to be dwindling for all of them.
07-10-2014, 02:40 PM
#36
Three Wheelin'
Thread Starter
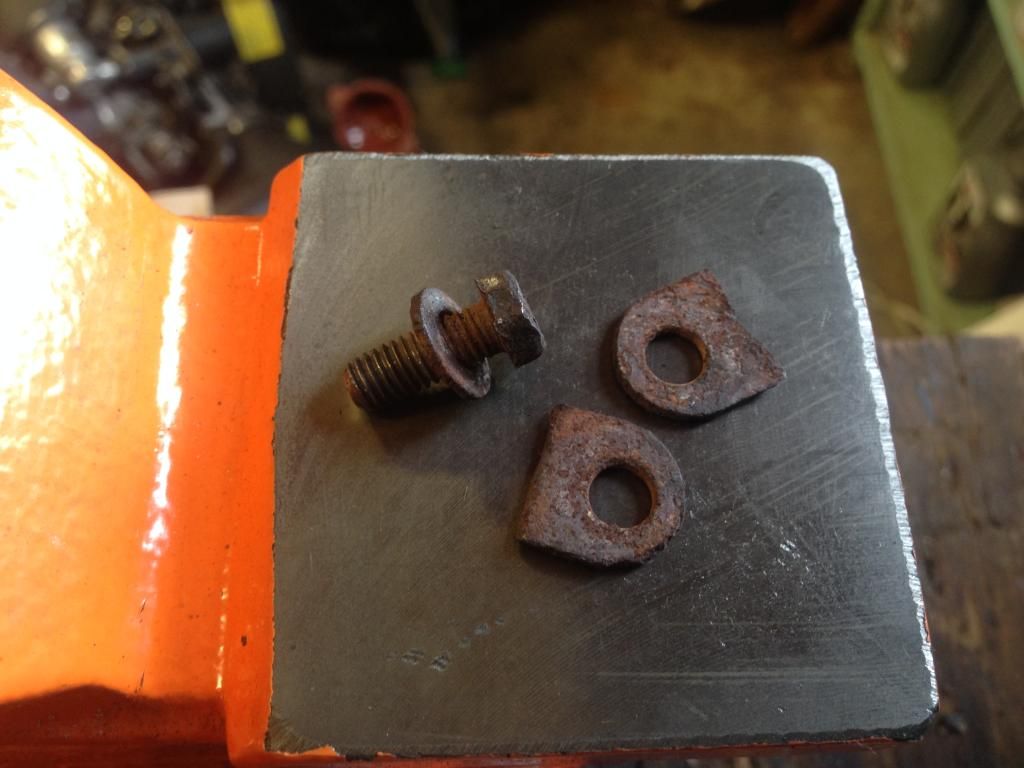
Rebuild marches on. Anybody know what is supposed to go along with these m6 bolts on the back of the engine tin? Photos of the rusty pieces that came off, and the spot where I've currently threaded two bolts into.
And ooh, check out my silver/grey powder coated tin. I like it much more than the black (hole).
And ooh, check out my silver/grey powder coated tin. I like it much more than the black (hole).

 07-10-2014, 04:34 PM
#37
IHI KING!
Rennlist Member
Rennlist Member
Join Date: Aug 2001
Location: Nashua, New Hampshire, USA
Posts: 13,384
Received 222 Likes
on
176 Posts
Nick - Looking good! I have a cable clamp on my engine holding the flywheel position sensor's cable. That would explain part of it. Not sure what the second would be for.
07-10-2014, 04:54 PM
#38

Actually those two tabs are both on the clamp that is bolted to one of the right side bolts in the picture above and it holds both the CHT sender and the crank-position sensor. No worries. Look good.
07-25-2014, 01:15 PM
#40
Three Wheelin'
Thread Starter
Thanks for the info on the mystery clamp! I think that I've got it right now.
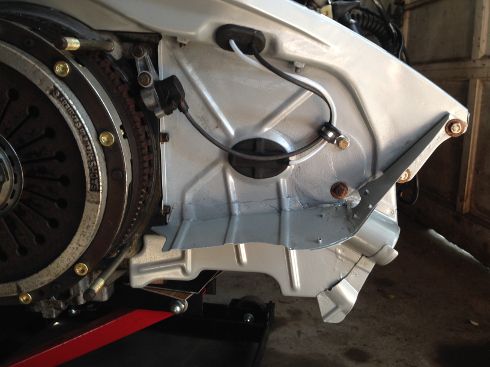
Mystery makes sense in light of a dealership CHT replacement receipt from the previous owner. This explains the snapped cam tower/tin top bolt head in the photo, the remains of the missing clamp on the intact bottom bolt, and the two completely stripped allen head bolts that hold the tin to the case below the reference sensor. I cannot express how much I enjoy fixing dealership repair work. Let's see if this works:
Anyway, moving forward now. And with *all* new brake lines, fuel lines (including those two ridiculous 6ft long lines), and rebuilt power steering lines.
Here's a question that I haven't seen come up before. Keep in mind that this is a C4 (front diff and torque tube), and the steering rack and front suspension is off the car at the moment.
Option 1) Bolt the engine, trans, torque tube, and front diff all together then lift them all straight up under the car?
Option 2) Bolt engine and trans together, then bolt them into the car. Then mate the torque tube and front diff together?
Options 3) Reverse of #2, bolt front diff and torque tube in first, then slide in motor and trans?
I feel like #1 would be easiest. Everything is out of the way. Front suspension and steering rack are easy to bolt on after the rest is in. Big advantage to #1 is that I can align everything up and get to the hard to reach torque tube bolts while it's all on the floor.
08-29-2014, 02:50 PM
#41
Race Car
Hey -Nick ... How's the progress? Back in the car now?
Interesting re-read thanks ... New stuff seems to appear each time!
(That clamp for the sensor for example)
Interesting re-read thanks ... New stuff seems to appear each time!
(That clamp for the sensor for example)
09-16-2014, 02:12 PM
#42
Three Wheelin'
Thread Starter
Motor is running great! Finally backed the very dusty car out of the garage on 9/10.

Would have been sooner but I had all of my power steering lines "rebuilt" at a hydraulic shop, who used 1) SAE hose instead of metric on the return lines, 2) the wrong sized SAE feed line hose. Now you know, 1/16" diameter difference results in hi-pressure power steering fluid spraying all over a nice clean engine bay. To the shop's credit, they very apologetically refunded me and gave me a generous store credit. Mistakes do happen. Now that I know, all of the low-pressure power steering lines and one hi-pressure line can be DIY very easily. More on that in another thread.
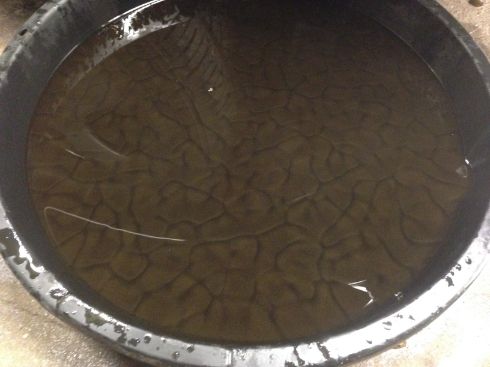
Last night was the ~500 oil change. I had already changed the oil after the 20 minute 2k rpm cam break-in. The break-in oil looked very clean. This time, it appears that all of the moly finally washed out. A little freaked out at first, but the photo is supposed to be what hot oil mixed with LM 48 assembly lube looks like. It was reassuring that the magnetic plugs only had a very small and light paste of ferrous material. I bottled up a sample and am sending it to Blackstone.
Still plenty to do.
1. The tach decided to stop working when I fired up the motor. OBD1 port gives me an rpm signal into the laptop. And the connector on the back of the gauge is firm. That will go off to North Hollywood Speedometer next week.
2. What sounds like a loud valve tick. It starts up about 2minutes after running the engine from cold. And I can only hear it when accelerating from a stop or from low rpm. I'm a little nervous about this one because I was meticulous when setting the valve lash, but I'll find out this week when I take off the valve covers to re-check.
3. While I'm checking/adjusting valves, I want to check the head nut torque. Anyone know what value to use? I reused the original steel studs and used the 90 degree torque angle method. I have no idea how that translates into ft-lbs.
4. A pin in the reverse light connector broke off. Not quite sure where to find a replacement pin to solder on?
5. I have a wideband o2 that I'm going to do some tail-pipe sniffing with. When I took the car for a dyno pull a few years ago, the AFR was very rich. Wish that I had done some pre-rebuild testing with the wb-o2 to compare. I'm taking the motor up for another dyno pull after it's nicely broken in.
6. Some interior/center console squeaks to chase down.
7. Oh yeah, all the other non-engine-related projects on my list...

Would have been sooner but I had all of my power steering lines "rebuilt" at a hydraulic shop, who used 1) SAE hose instead of metric on the return lines, 2) the wrong sized SAE feed line hose. Now you know, 1/16" diameter difference results in hi-pressure power steering fluid spraying all over a nice clean engine bay. To the shop's credit, they very apologetically refunded me and gave me a generous store credit. Mistakes do happen. Now that I know, all of the low-pressure power steering lines and one hi-pressure line can be DIY very easily. More on that in another thread.
Last night was the ~500 oil change. I had already changed the oil after the 20 minute 2k rpm cam break-in. The break-in oil looked very clean. This time, it appears that all of the moly finally washed out. A little freaked out at first, but the photo is supposed to be what hot oil mixed with LM 48 assembly lube looks like. It was reassuring that the magnetic plugs only had a very small and light paste of ferrous material. I bottled up a sample and am sending it to Blackstone.

Still plenty to do.
1. The tach decided to stop working when I fired up the motor. OBD1 port gives me an rpm signal into the laptop. And the connector on the back of the gauge is firm. That will go off to North Hollywood Speedometer next week.
2. What sounds like a loud valve tick. It starts up about 2minutes after running the engine from cold. And I can only hear it when accelerating from a stop or from low rpm. I'm a little nervous about this one because I was meticulous when setting the valve lash, but I'll find out this week when I take off the valve covers to re-check.
3. While I'm checking/adjusting valves, I want to check the head nut torque. Anyone know what value to use? I reused the original steel studs and used the 90 degree torque angle method. I have no idea how that translates into ft-lbs.
4. A pin in the reverse light connector broke off. Not quite sure where to find a replacement pin to solder on?

5. I have a wideband o2 that I'm going to do some tail-pipe sniffing with. When I took the car for a dyno pull a few years ago, the AFR was very rich. Wish that I had done some pre-rebuild testing with the wb-o2 to compare. I'm taking the motor up for another dyno pull after it's nicely broken in.
6. Some interior/center console squeaks to chase down.
7. Oh yeah, all the other non-engine-related projects on my list...
09-16-2014, 02:25 PM
#43
Technical Guru
Rennlist Member
Rennlist Member