
Cabrio Top Mechanism Problems
 10-09-2005, 09:51 AM
#1
Professor of Pending Projects
Rennlist Member
Rennlist Member
Thread Starter
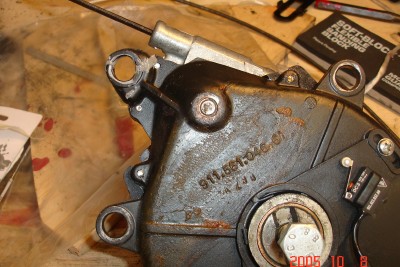
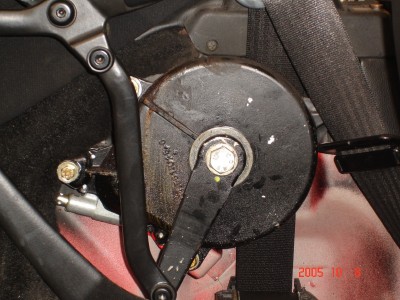
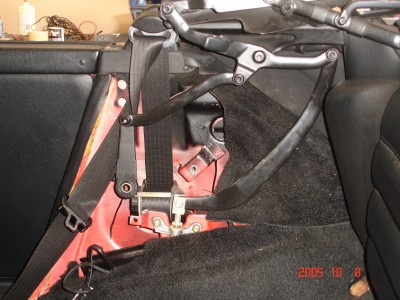
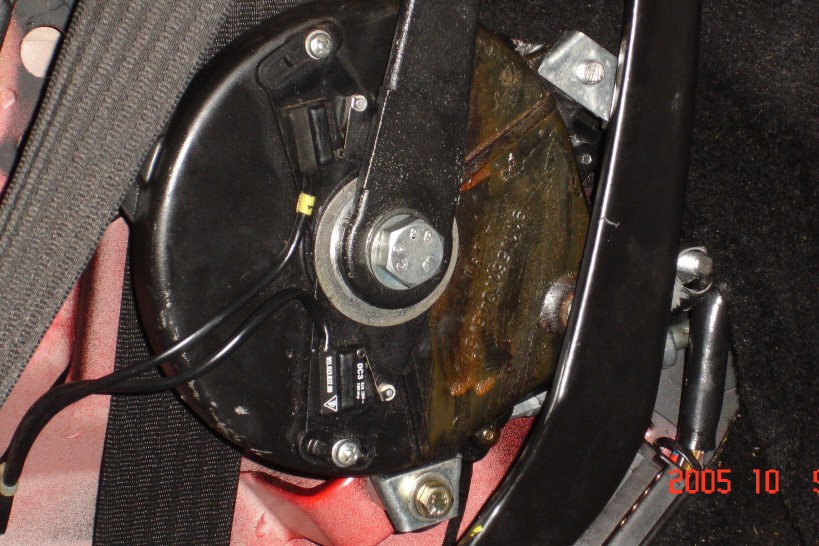
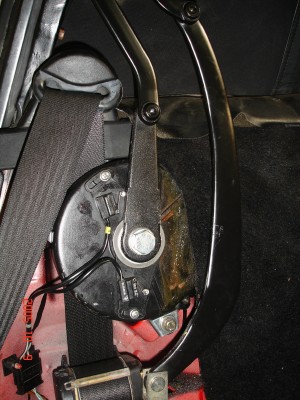
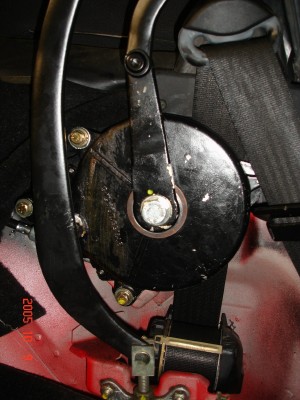
First of all, if you have a cabriolet make sure you take time to take off the cover that hides the top's transmission on the sides and inspect (and most likely tighten all the bolts. As you will see from my post, you might even need to remove the transmission to get to the small phillips bolts in the back...)
Here we go:
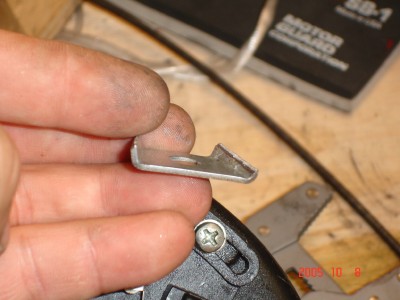
A few months back there was a strange noise while opening the top and then an awful �SNAP�. I thought it was over for my top�s mechanism. Fortunately it turned out to be a broken eyelet on the top�s transmission. All was due to loose bolts. I have been operating the top manually since then, but yesterday I decided to fix it.
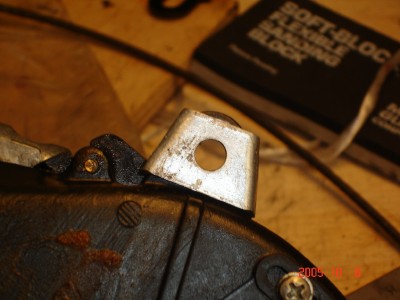
In addition to the broken eyelet the nuts that are welded to the car for two of the bolts were gone. Seem the bolts and torque from the top�s transmission broke them loose. My father-in-law came up with the idea of sliding a nut in the back and using a full threaded rod with a double nut to hold it in place. We then cut the spacers to compensate for the thickness of the nut. Worked out pretty good.
I still have to align the top, as one side seems to be out of synch with the other one. So any hints on how to do that are welcome.
Here are a few photos:
Here you can see the broken eyelet that we held back in place with some JB Weld:
The father in-law also made some metal covers to reinforce the eyelets:

Here we go:
A few months back there was a strange noise while opening the top and then an awful �SNAP�. I thought it was over for my top�s mechanism. Fortunately it turned out to be a broken eyelet on the top�s transmission. All was due to loose bolts. I have been operating the top manually since then, but yesterday I decided to fix it.
In addition to the broken eyelet the nuts that are welded to the car for two of the bolts were gone. Seem the bolts and torque from the top�s transmission broke them loose. My father-in-law came up with the idea of sliding a nut in the back and using a full threaded rod with a double nut to hold it in place. We then cut the spacers to compensate for the thickness of the nut. Worked out pretty good.
I still have to align the top, as one side seems to be out of synch with the other one. So any hints on how to do that are welcome.
Here are a few photos:
Here you can see the broken eyelet that we held back in place with some JB Weld:
The father in-law also made some metal covers to reinforce the eyelets:
 10-09-2005, 09:58 AM
#2
Professor of Pending Projects
Rennlist Member
Rennlist Member
Thread Starter
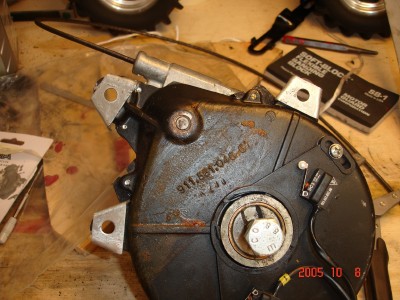
I also checked the other side to find all bolts loose inside and out...
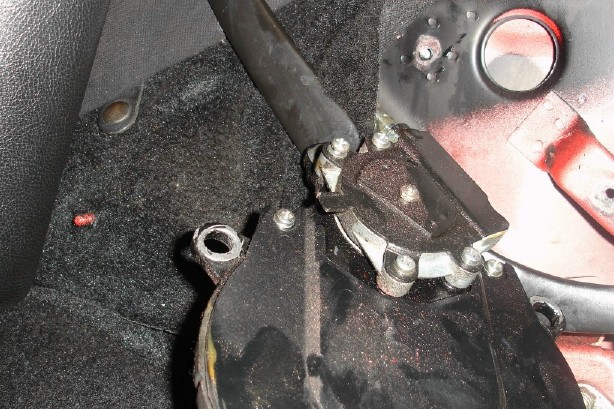
In addition to the three main bolts that hold the transmission in place these little phillips screws where loose... only way to get to them is to remove the unit and turn it around to get access to them:
In addition to the three main bolts that hold the transmission in place these little phillips screws where loose... only way to get to them is to remove the unit and turn it around to get access to them:
10-09-2005, 10:06 AM
#3
Professor of Pending Projects
Rennlist Member
Rennlist Member
Thread Starter
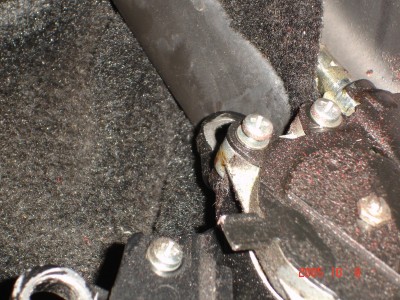
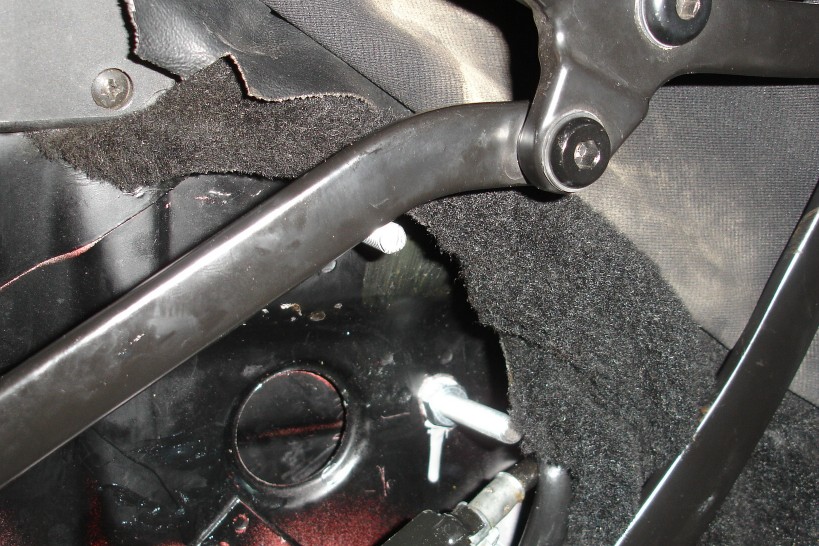
Here are a few photos on the bolts we had to put in place due to the broken weld of the stock nuts...
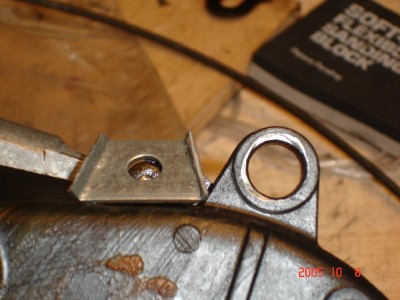
The hole you see in the middle allowed us to hold a nut in a piece of wire and slide it into place while we inserted the threaded rod (nothing more than a full threaded bolt that we cut the head off) with the additional nut.
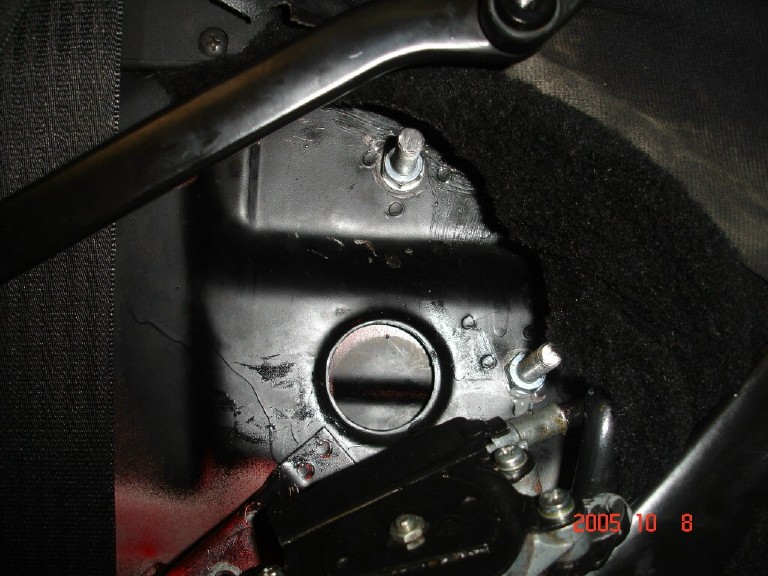
The stuff dripping, next to the bolt, was my first attempt to fixing a nut with some JB Weld...
This is what we did to slide the nut in place:
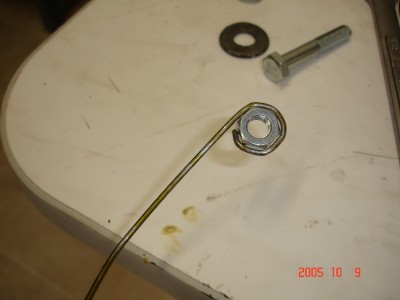
The hole you see in the middle allowed us to hold a nut in a piece of wire and slide it into place while we inserted the threaded rod (nothing more than a full threaded bolt that we cut the head off) with the additional nut.
The stuff dripping, next to the bolt, was my first attempt to fixing a nut with some JB Weld...
This is what we did to slide the nut in place:
Last edited by Wachuko; 10-09-2005 at 08:26 PM.
10-09-2005, 10:14 AM
#4
Professor of Pending Projects
Rennlist Member
Rennlist Member
Thread Starter
Here is the other side in place (only missing the two nuts...)
I will take a few more photos as I finish this... need to head out to buy two more fine threaded metric nuts since I ran out of them... and I need to search the archives for the procedure on how to align/sync up both sides...
This thread from garrett376 seems to help with the alignment question:
cabrio top repairs... the shortened cable fix!
More later...
Last edited by Wachuko; 10-09-2005 at 10:37 AM.
10-09-2005, 01:21 PM
#5
RL Community Team
Rennlist Member
Rennlist Member

I'm with you - I think that all cabrio top failures are due to bolts loosening up - whether they're those little phillips screws on the back, or the main bolts to the chassis... use threadlocker, baby! 
10-09-2005, 08:33 PM
#6
Professor of Pending Projects
Rennlist Member
Rennlist Member
Thread Starter
Originally Posted by garrett376
... use threadlocker, baby!

Here is the finished product:
Passenger side:
Driver side:
And the car finally with the top down by its own power

Took the family out for a ride and to eat ice cream. Weather is getting nicer (cooling down) to be able to do more and more pleasant top down driving.
 10-09-2005, 08:40 PM
#7
Professor of Pending Projects
Rennlist Member
Rennlist Member
Thread Starter
Could not help posting this one... my son got in the car before I started working on it and he took the sunglasses and started messing with the steering wheel and the pedals... perfect kodak moment...

Trending Topics
10-09-2005, 08:43 PM
#8
Burgled
Rennlist Member
Rennlist Member
Good job Jaime! I had mine down all weekend but left the airconditioner going!
Took a ride up to the Sanford River walk this evening. Pretty drive down the lake shore. Darn huge gators were everywhere along the lake shallows
Still gonna be another month until it gets a bit cooler and less then 100% humidity!
When you pull the rear side panels off is it easier to check the bolts with the top down or does it need to be up? I want to check mine this week. You guys are scaring me")
Took a ride up to the Sanford River walk this evening. Pretty drive down the lake shore. Darn huge gators were everywhere along the lake shallows
Still gonna be another month until it gets a bit cooler and less then 100% humidity!
When you pull the rear side panels off is it easier to check the bolts with the top down or does it need to be up? I want to check mine this week. You guys are scaring me
10-09-2005, 08:52 PM
#9
Professor of Pending Projects
Rennlist Member
Rennlist Member
Thread Starter
Pull the cover, easy to do. Once the cover is out you can inspect with the top down or up... but top up is the easiest of the two... only need a 10mm wrench for the small ones and a 19mm if you want to check the center bolt.
10-10-2005, 12:43 PM
#10
Racer

Join Date: Aug 2001
Location: Jersey, UK
Posts: 373
Likes: 0
Received 0 Likes
on
0 Posts
Hi Wachuko
Nice fix, exactly the same happened on mine. They seems to shake themselves loose. The phillips head screws were loose on mine and was just about to the the worm drive free.
Like the idea with the nut and the wire, you know what they say "Up there for thinking, down there for dancing"
Thks
Rob
91 964 Cab
66 912 Coupe
Jersey, UK
09-03-2011, 09:57 PM
#11
resurrecting Jaime.
I busted one of the nuts off. So I kinda get what you did with the nut and wire to get it into place. Did you put JB Weld on both sides? Did you then take the threaded rod out after the weld cured? I'm so confused.
I busted one of the nuts off. So I kinda get what you did with the nut and wire to get it into place. Did you put JB Weld on both sides? Did you then take the threaded rod out after the weld cured? I'm so confused.
09-05-2011, 05:13 PM
#12
Professor of Pending Projects
Rennlist Member
Rennlist Member
Thread Starter
That is what you see in the photo:
At the time, I found it to be the easiest/fastest fix...
09-05-2011, 06:35 PM
#13
well, maybe a bit more efficient, but if you JB weld or locktight a nut on the threaded rod on one side, then put a nut on the transmission side, you could leave some of that threaded rod visible and just put a nut on top of that. Basically reversing the entire method of securing it.
09-05-2011, 07:58 PM
#14
Professor of Pending Projects
Rennlist Member
Rennlist Member
Thread Starter
well, maybe a bit more efficient, but if you JB weld or locktight a nut on the threaded rod on one side, then put a nut on the transmission side, you could leave some of that threaded rod visible and just put a nut on top of that. Basically reversing the entire method of securing it.
