When you click on links to various merchants on this site and make a purchase, this can result in this site earning a commission. Affiliate programs and affiliations include, but are not limited to, the eBay Partner Network.
Been making steady progress on rebuilding my engine harness. After careful inspection, I am now absolutely convinced that most wire harnesses are a complete ship wreck. I found so many potential problems lurking everywhere, frayed wires, exposed wires, crumbled connectors, and corrosion. Before I started this project I thought the harness was in "ok" shape. This could not have been farther from the truth. Hoping to have my harness ready in the next few days. I will post pictures of the completed harness.
Its not the first harness i have seen looking like that.
I did a complete wire rebuild on a NA last year "lights and dash wires" and the car was different afterwords .. Its allot of work but its worth it.. I may have to copy your work when i get a spare harness for my 951 and maybe next time i pull the engine again install the new (rebuilt) harness.
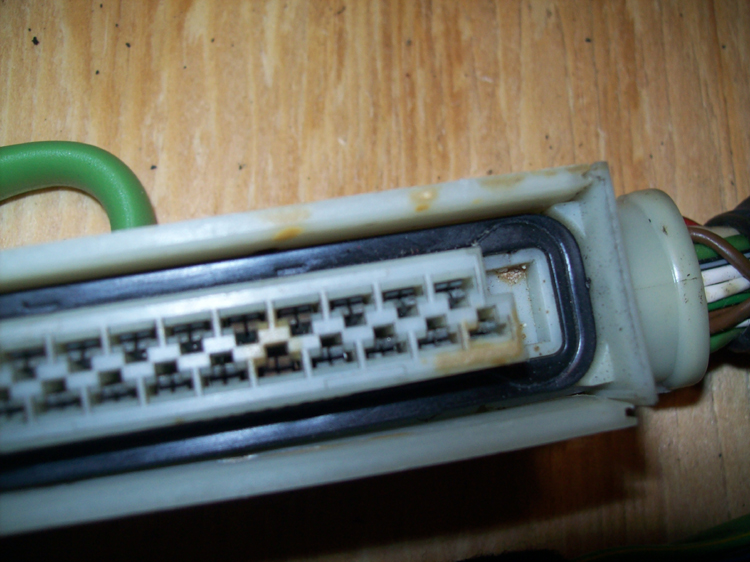
Looking for a way to clean the contacts of the DME and KLR connectors. Looking at them under magnification definitely shows some corrosion. I think I am going to use the stuff below with a small brass wire brush. What do you think? Any suggestions? TIA
I'm going through my harness right now as well (though, the much easier route, using LR harnesses) and yours is definitely looking a little worse for wear than mine. I was actually surprised at the condition of my harness, the wires are all good, it's just the connectors and outer covering that have seen better days. The S&R sensor connectors had disintegrated so the PO decided to hot-glue the leads into the wiring loom side... Most of my time spent doing electrical work was spent undoing all the little presents the PO or his mechanic left me.
As for cleaning the contacts I use CRC QD Electrical Contact Cleaner (AutoZone, Wal-Mart, etc. carries it) or isopropyl. A toothbrush also helps if there is any heavier corrosion.
versus starting another thread I will post any tips I find during my process here. (long winter project).
One question, any tips for removing this glue stuff? Does any type of solvent work. WD40 did nothing. Glue is real pain to get off...I ran it under hot water and that helped separate large bundles of wires but want to separate and clean each wire for a good inspection.
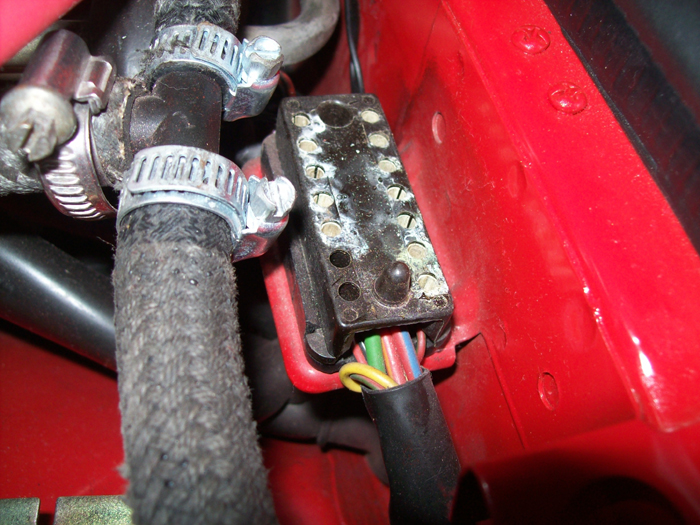
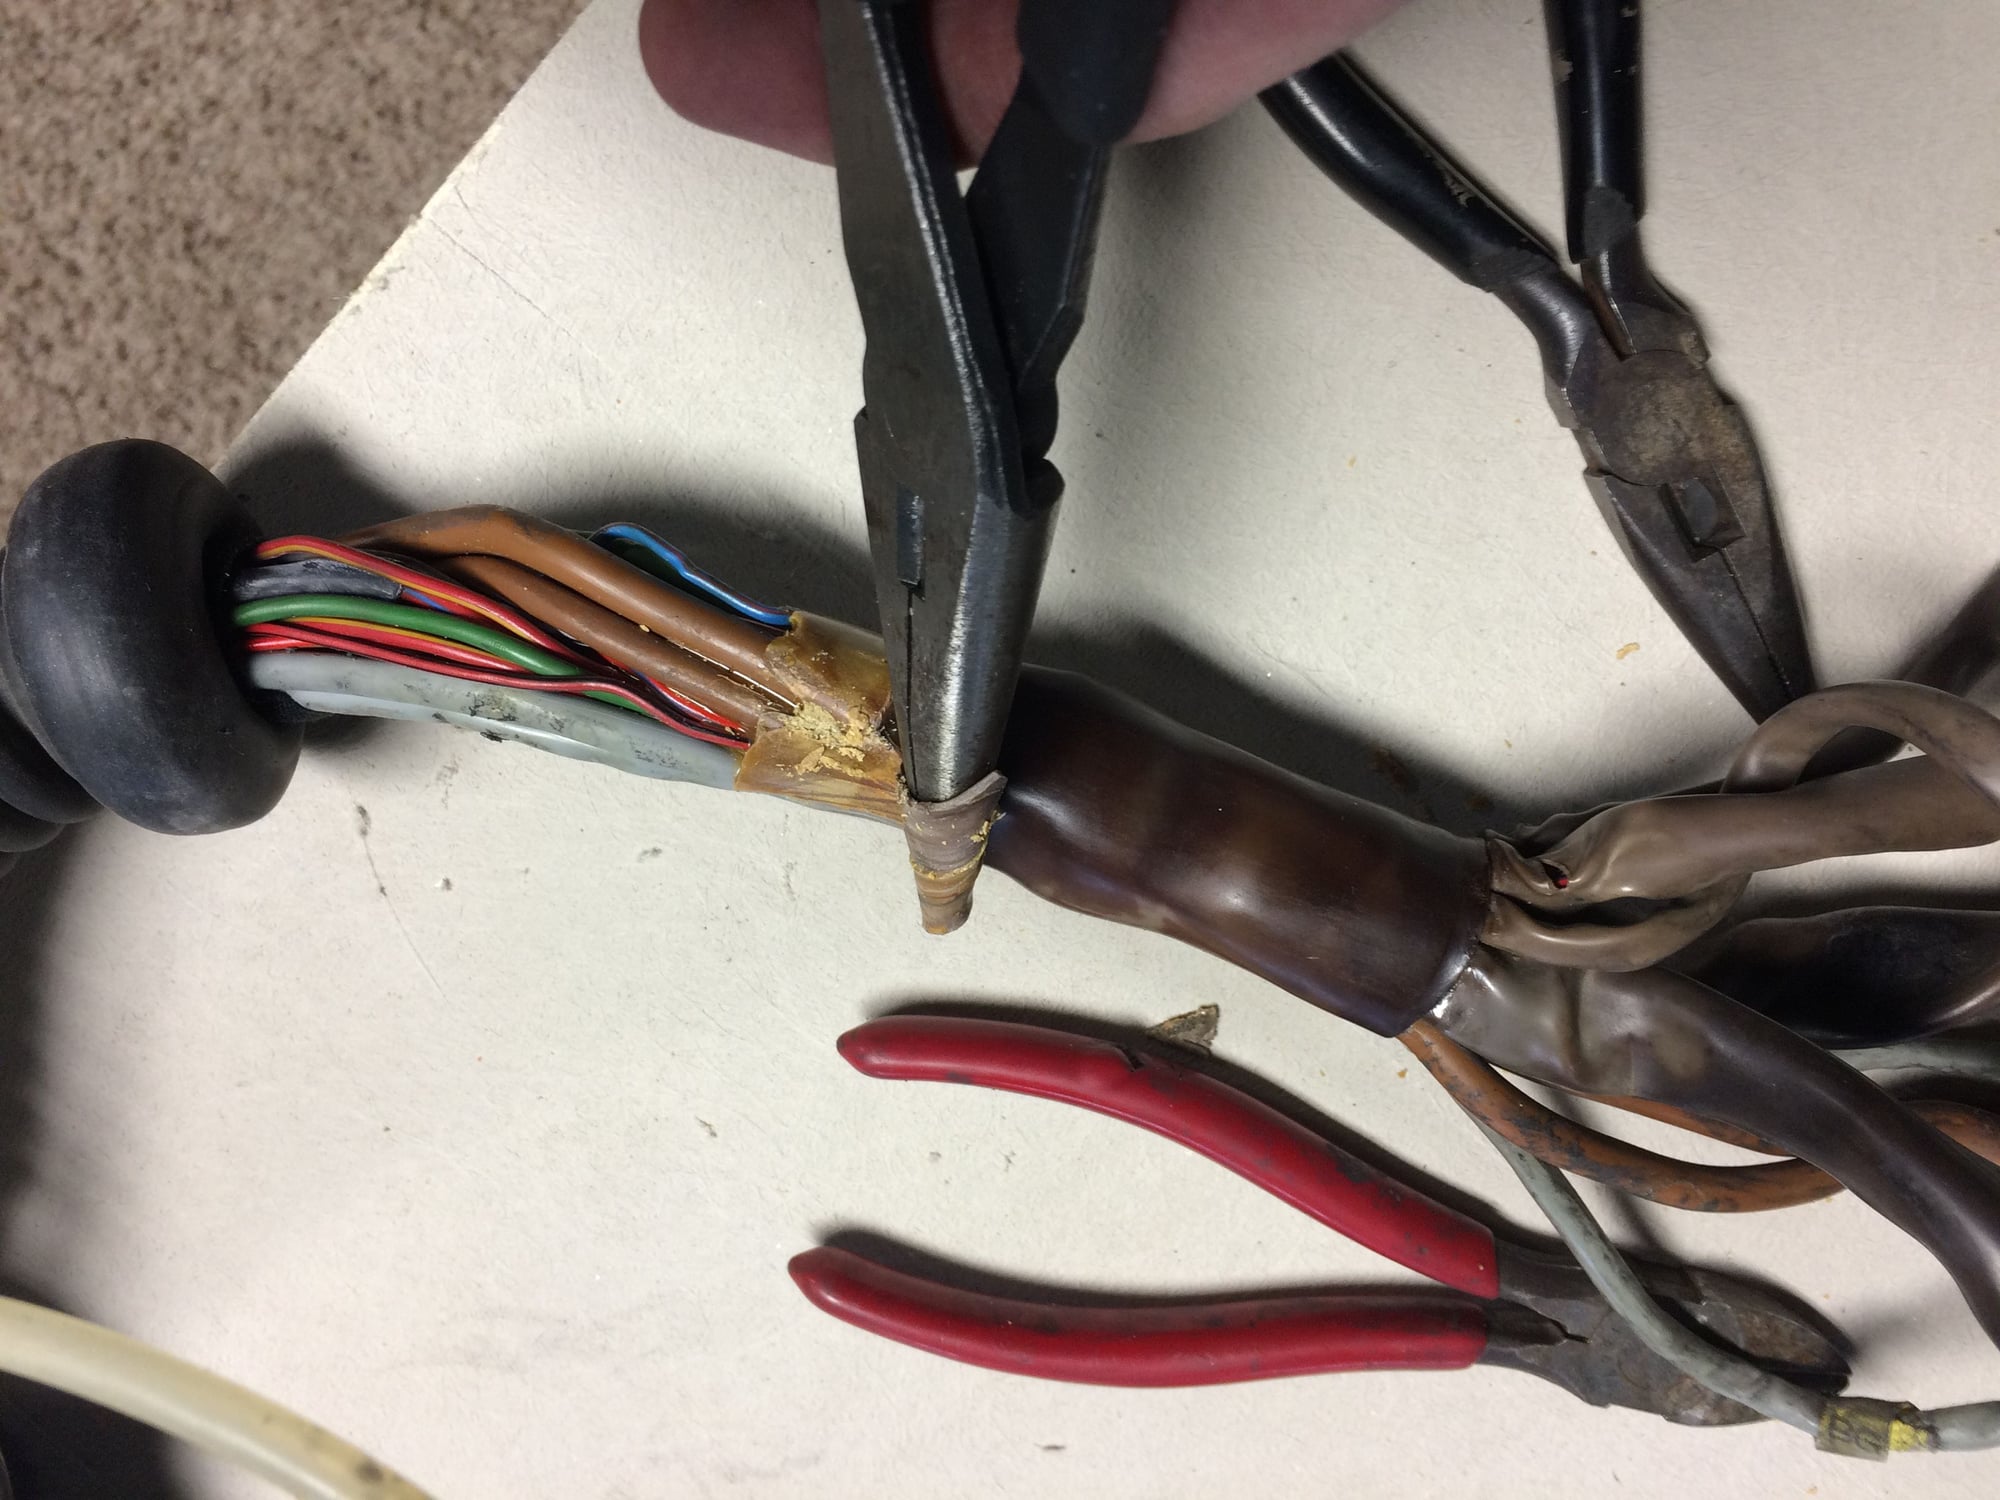
Most of the harness appears to be in good shape (thanks Lart), except for last two inches at each connector where heat takes its toll.
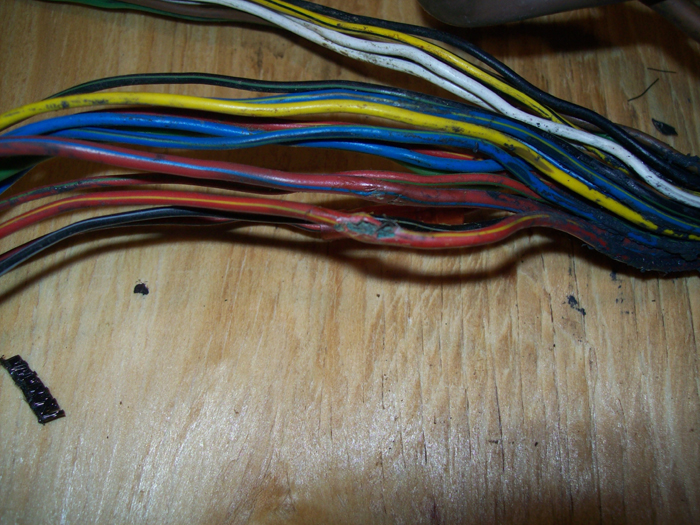
The other bad spot is this bundle. Reference and speed sensor wires have bare spots so the will be replaced.
Good luck ekoz! And yes, curious to hear from Shawn too.
I never did get around to building one myself before I sold my car. The buyer wanted the old crusty harness I sourced too (otherwise I was thinking about rebuilding it and selling it...)
I kept all the connectors and pins tho in case I ever stumble across another harness (or buy another 80s German car...)
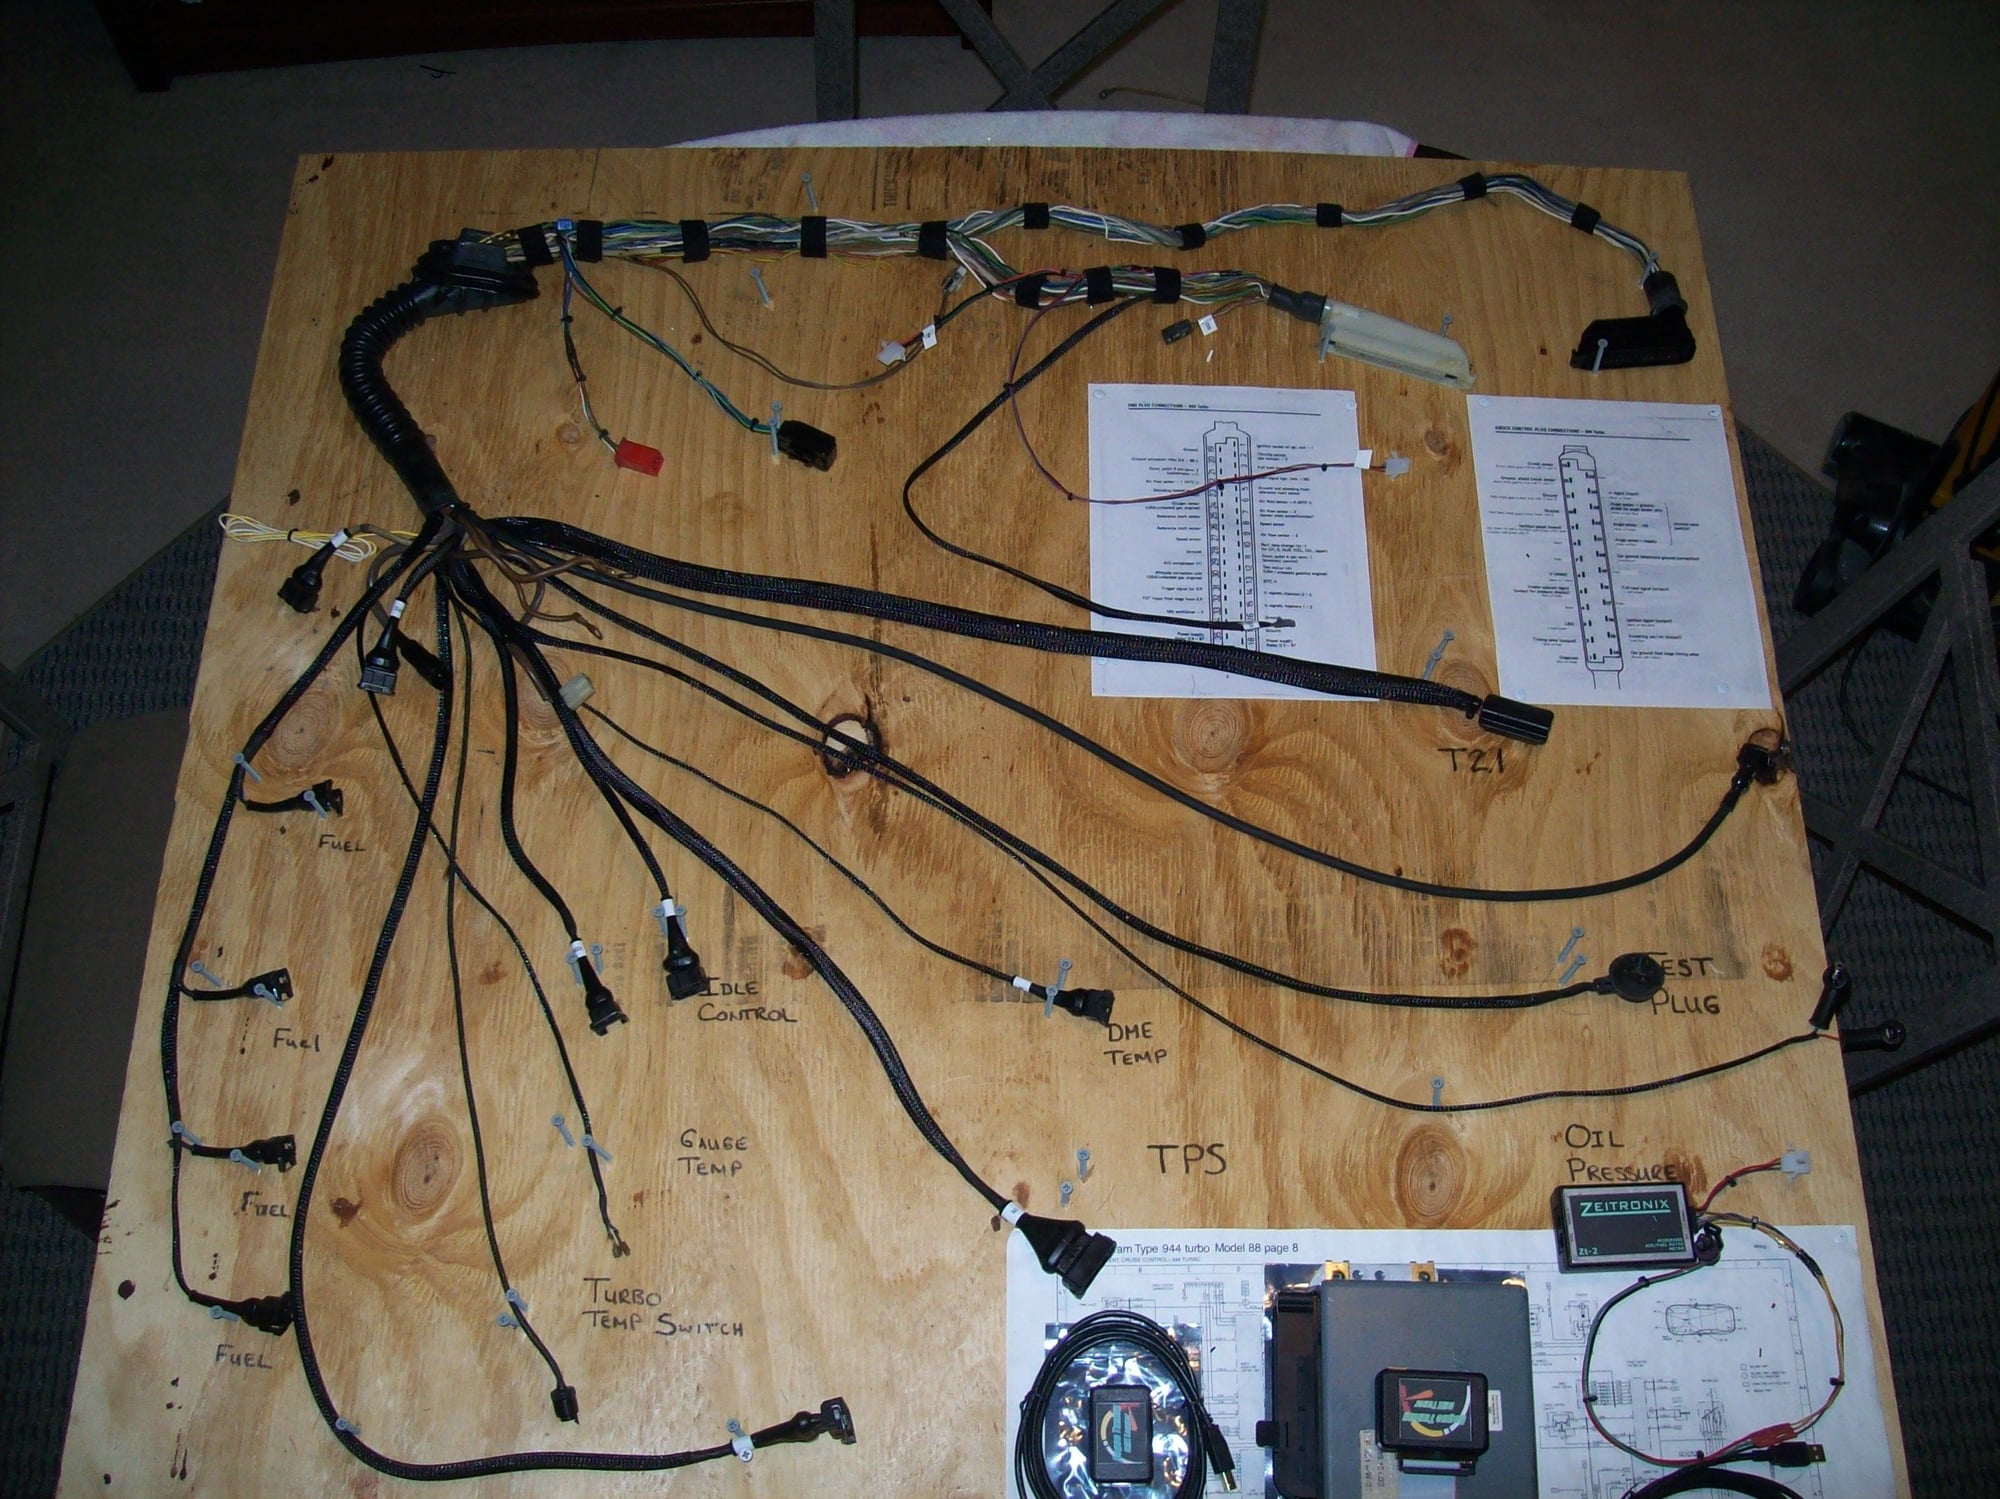
Funny I never updated this thread . Harness turned out great and it was one of the best mods I did especially with respect to reliability. Here are some pics.
The harness connector that attaches to that is available new from Porsche again.
Originally Posted by refresh951
Been making steady progress on rebuilding my engine harness. After careful inspection, I am now absolutely convinced that most wire harnesses are a complete ship wreck. I found so many potential problems lurking everywhere, frayed wires, exposed wires, crumbled connectors, and corrosion. Before I started this project I thought the harness was in "ok" shape. This could not have been farther from the truth. Hoping to have my harness ready in the next few days. I will post pictures of the completed harness.

 02-26-2013, 12:12 AM


 . Harness turned out great and it was one of the best mods I did especially with respect to reliability. Here are some pics.