When you click on links to various merchants on this site and make a purchase, this can result in this site earning a commission. Affiliate programs and affiliations include, but are not limited to, the eBay Partner Network.
Have you checked the fuel pump and relay? Pull the relay and bridge 30 & 87. You should hear the pump running. This should be a priority check. Swap out the relay if pump is good.
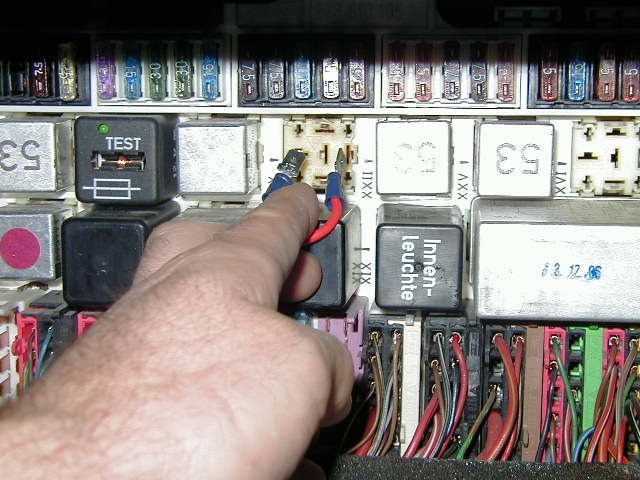
A noid light is useful to check for injector pulse on these cars. Injectors batch fire. If one of the injector plugs shorts then all are compromised. Check also the condition of coil ends. Sometimes they corrode where the coil wires plug up.
I jumpered the fuel pump relay and replaced the fuel pump fuse. I did not hear the fuel pump running. Still no start. After cranking for 10-20 seconds, I removed a spark plug to check for fuel and it was dry, maybe just a small whiff of fuel. Is there another way to test the fuel pump to make sure it is or is not working? Not sure how accessible the pump is to replace without a lift. I'm doing this in my driveway under a carport. Before running this way, anything else to check?
Actions taken so far:
- Replaced spark plugs.
- Cleaned battery ground strap - both ends
- Cleaned lower engine to body ground strap - this connection was poor.
- Cleaned the two grounds at the top rear of engine. (I think these were harness grounds)
- Checked relays 4,16,20,24
- Replaced fuel pump fuse and jumpered fuel pump relay - no sound of fuel pump.
If you jumpered the relay to the fuel pump correctly (and it looks as if you have the right idea) and it did not run, then I would suspect you are in the market for a new fuel pump unless your battery is dead. (and I think you have ruled that out)
Jumper the fuel pump and check for power at the fuel pump at the electrical connections. If you have power there and your fuel pump is not working then you will know for sure that you need a new fuel pump.
Last edited by soontobered84; 10-20-2016 at 04:05 PM.
Reason: add
Ok, so you're getting somewhere. It seems strange that you smelled fuel on previous starting attempts but you don't hear the pump when jumpered.
I agree with soontobered84, check for battery voltage at the pump when jumpering. If no voltage there, you can still check the pump function in place. If you don't know how to access the pump, read on.
Accessing the fuel pump is pretty easy. There's a great writeup in Dwayne's Garage (search for it). You don't need a lift, I actually serviced mine with the front wheels up on ramps, so there was even less room than if the car were on level ground. The fuel pump and filter are located under the fuel tank at the right-rear of the car. There's a protective metal covering held in place with 2 nuts at the very back. Remove the 2 nuts and then wiggle the cover out, it's tucked in at the front edge (see Dwayne's writeup).
Once the cover is off, you will see 2 wires attached on the right side, with (brittle) rubber boots covering them. Check for voltage here when jumpering, as noted. If no voltage, disconnect the wires and move them aside. You can then check if it works by directly connecting a 12v battery using alligator clips at the battery and round connecting lugs on the pump end. Take time and make these jumper wires. WARNING: You will need an in-line fuse rated the same as the pump fuse, connected to one of the wires. This is EXTREMELY important since, if the pump is seized, the fuse will blow and save you. If no fuse, I shudder to think what could happen.
But first, make sure there's fuel in the tank
Running a good pump dry will kill it.
Connect the wires securely to the Pump terminals FIRST, then with the battery several feet away, connect the + wire from the pump to the + battery terminal, then carefully connect the (-) pump wire to (-) batt terminal and listen.
Whatever the result of this check, promptly disconnect the (-) wire from the battery. If it runs, your problem lies elsewhere....possibly the CPS. If it doesn't run or the fuse blows, get a new pump...and a new filter! You should at least change the filter if the pump works.
Do you have Fuel in the Fuel Rail?
There is a test port on the end of the right hand side rail in the very front of the rail, remove the cap DON'T lose the small ball behind the cap, Fuel should come pouring out if the pump as been working at all.
Edit: this is also where one would connect a Fuel Pressure Gauge, should be at least 36 PSI at idle
The power to the fuel pump relay socket starts at a dedicated wire feeder that connects to the battery positive post. There are several smaller red wires that connect there. If you've been in the battery well disturbing connections, or even if you haven't, take a little time to:
-- Check the fuel pump fuse. Really.
-- lift the ground strap where it connects at the rear apron behind the tool panel. Isolate that end so it doesn't touch anything grounded as you work.
-- Carefully disassemble and clean all the connections there at the battery positive terminal. That means the clamp around the battery post connection, and the smaller wires too. The smaller wires get buffed with a small brass brush. The post connections get a regular battery terminal brush. Only after the connections and bolts/nuts are secure, I add a coating of Vaseline to them.
-- Clean the ground strap connections to the negative battery post. Same battery terminal brush, followed by a little Vaseline.
-- Clean the rear apron connecting point for the ground strap, and the contact surface of the end of the ground strap. Reassemble that connection.
-- Clean gound point MP VI in the spare tire well, forward end above the battery well. Once clean and connected well, a little Vaseline there. This ground point services the fuel pump motor, the backup-lights switch, and also the neutral safety switch and the gear indicator switch on auto-gearbox cars.
-- Try the fuel pump relay jumper again. If the pump makes no noise, we'll go after checking for power at the pump.
Update - Just a few drops of fuel in the fuel rail, so I think we either have no power to the pump of the pump is defective. I went to test for voltage at the fuel pump but could not reach the positive terminal, let alone remove the very brittle terminal cover, without removing the fuel pump assembly, which in turn would require me to drain the fuel tank, which I am not equipped to do where the car sits now.
Prior to past start attempts I had cleaned up the connections as per Dr. Bob except for MPVI, which for my 1985 is not in the spare tire compartment but rather likely behind the interior trim panel by the right rear taillight. I tried to remove the panel this morning but was unsuccessful - perhaps one of you knows where all the bolts are to remove this. Is there a simple way to test for voltage at terminal 30 of the fuel pump relay on the relay board?
Yes. Remove relay. Stick one lead of digital volt meter into slot corresponding to 30. This should be bat voltage all the time. Put other lead against a ground, say, the bolt hole that holds the lower wood cover for the ce panel. Should show 12.4 volts or so.
These pumps can clog with debris. Sometimes removing pump and reversing leads can clear it. Problem is that a clogged pump is indicative of degraded strainer at tank disharge and dirty tank. You might clear it and reinstall, but it clog again.
If you are just changing out the external fuel pump, you can do this without draining the tank using a suitable bolt to plug the outlet hose. You need to work fast as fuel will spill. I have done this a couple of times. Be careful, disconnect battery etc etc...
If you plan to change the strainer or in-tank pump, then obviously the tank must be drained.
BTW, you should change the fuel injection relay, ignition relay, LH relay and fuel pump relay. All number 53. I know you have checked them, but you won't get power to the fuel pump without 100% functioning relays.
You should check voltage using multi meter at the pump to save you changing the pump for nothing. Voltage good, then pump dead. Problem nailed.
I checked for power at terminal 30 of the fuel pump relay. I get 12.39 volts - so that looks good. If I jump this relay, does it matter about the other relays working? Seems that the jump would override the other relays. The wiring diagram seems to support a direct connection between the relay and the pump. (I say seems because it's been a long time since interpreting)
That said, I just purchased the new relays and will swap them out.
I tried another crank again to verify spark with relay jumped. Spark is confirmed - checked fuel rail and again had a little fuel trickle out but no pressure.
Still hesitant to take apart the fuel pump in my driveway even if I don't have to drain the tank - Just a safety concern - I've got about 12 gallons in the tank. I'd like to eliminate as much of the other possibilities before turning it over to my local mechanic to swap the pump. I would have him test voltage after pulling the pump. I still would like to clean up MP6 so will focus on getting at that now.
Thanks again guys for sticking with me. I wish a had more than just an hour or so per day to get this done, but hey, retirement is busy!
So, looking more closely at the wiring diagrams for 1985 cars, the ground point is MPIV for the fuel pump, on the driver's side footwell firewall. This is different from MPVI in the rear of the car as later ('86+) cars have.
The fuel pump power exits the CE panel at connector U15. It's worth sticking a meter probe in the back of that pin to verify that there's power there before it goes back to the pump.
After that, the pump cover comes off, and the bolts that hold the pump and filter to the support isolators come out so you can rotate the pump to where you can test the power at the pump connections.
You can use a hose-pincher to squeeze the hose between the tank outlet and the pump. Absent that, a couple thin sticks (like popsicle sticks) will work in the jaws of a vise-grip style locking plier. The hose there is single-reinforced rubber with no plastic lining, so it's OK to squeeze it gently to block flow. Squeeze it "just enough" and no more, so you can reduce the chance of fracturing the well-aged rubber hose.
------
For those playing along at home vicariously or even sympathetically, part of the "DIY 928 Test and Rescue Travel Toolset" is the relay jumper wire. The most elegant implementation has wire long enough to reach the fuel pump area from the CE panel, has a toggle switch mounted in series, maybe with a normally-open momentary pushbutton wired in parallel with the switch. This allows you to sit back next to the fuel pump to feel or listen for activity as you apply and remove power, for instance. Or turn the pump on manually for fuel system leak testing both in the rear and in the engine bay as you get ready to close up a plumbing or refresh project. The button is a handy helper when you are diagnosing starter problems, and perhaps allowing you to bypass a failed switch or relay to get home in a pinch. Add a couple alligator clips with mating spade connectors and you expand the versatility even more.
I checked voltage at U15 and got 10.75. Not sure if I just wasn't getting good connection from the back, whether this drop is normal, or whether we have a problem here. I tried to test U15 with the connector removed but found that power coming in from the battery passes through this connector as well (U12), so removing the connector cut power to terminal 30 at the fuel pump relay. Put things back and got the same 10.75. Moving on to clean up MP4 while I await your response(s)
1) Attach battery tender/charger to batt. Have fire extinguisher handy.
2) Jumper relay XX pin 30 to 87 with 14Ga wire and spade ends. Listen for pump to run.
3) Measure voltage at U15 to ground, record voltage.
4) Remove fuse 42, clean and inspect. Bend the tangs of the fuse slightly in a "v" to improve contact with socket. If fuel pump was running, it should stop.
5) insert fuse 42, check for pump running.
6) If pump doesn't run, measure voltage at U15, compare to step 3. > 12.5 volts, go to step 7; if < 12.5 volts at U15, investigate wiring on CE panel U15, Q14, and fuse 42 socket.
7) Measure voltage at + wire at fuel pump, under the cover. Compare to step 6. If > 12.5 volts R&R fuel pump(s). If < 11.5 volts, investigate wiring from U15 back to fuel pump. Also, check fuel pump for case temp with your bare hand. It should not be warm to the touch.
..
Vaguely following this...
To r&r the fuel pump and filter as an assembly, ..if I remember correctly, what I did was , I crimped the hose that exits the tank with a vicegrip plies, I cushioned the jaws with some old hose,
...

 10-18-2016, 04:16 AM