When you click on links to various merchants on this site and make a purchase, this can result in this site earning a commission. Affiliate programs and affiliations include, but are not limited to, the eBay Partner Network.
Nate - I am not a 3D expert but these were made by a professional organisation that specializes in 3D manufacture.
I had the same issue with the bumper plugs - surface finish was not smooth and no matter what material they tried it just cracked when pushing the plug into the bumper. We went with the cast and mold method and the part was totally successful. Tooling costs are higher but well worth the $.
Ok. Just for fun, I am going to reverse engineer one of the bumper plugs on my car, print it and send it to you. I think it'll be an eye opener for you.
Nate - be extra careful taking it out as they are very brittle.
__________________
Does it have the "Do It Yourself" manual transmission, or the superior "Fully Equipped by Porsche" Automatic Transmission? George Layton March 2014
928 Owners are ".....a secret sect of quietly assured Porsche pragmatists who in near anonymity appreciate the prodigious, easy going prowess of the 928."
Nate - be extra careful taking it out as they are very brittle.
I just removed one and actually it is still plyable. I'll have it printed out tomorrow and send it to you over the weekend. Your invoice address a good address to send it to?
I just removed one and actually it is still plyable. I'll have it printed out tomorrow and send it to you over the weekend. Your invoice address a good address to send it to?
Hi, I would be interested in one of these (sensor bezel cover) if you are 3d printing them.
You can PM me with a price if you like including cheapest possible postage to Ireland. Thanks, John
Last edited by murray928; 07-30-2016 at 06:40 AM.
Reason: Want clear that I was enquiring about sensor bezel rather than bumper plugs.
Care to elaborate as all the sensors were the same from 80+. Part number 928 624 041 00.
What am I missing?
All the different variations Porsche came up with. They messed around until February of 1981 to finalize the standard part that your PN references. The one I am talking about is on the bottom left.
So Blake, what part on the early style is broken? The mounting ring? If you have a broken one, I can take a stab at recreating a 3D printed version that may work.
Nate - I am not a 3D expert but these were made by a professional organisation that specializes in 3D manufacture.
I had the same issue with the bumper plugs - surface finish was not smooth and no matter what material they tried it just cracked when pushing the plug into the bumper. We went with the cast and mold method and the part was totally successful. Tooling costs are higher but well worth the $.
Ok Roger, I spent just a few hours last weekend reverse engineering one of the rear bumper plugs on my '84. After a few iterations I got a design that pops in with good resistance and did not crack when I pushed it back out. I ended up printing one on my home FDM printer and 4 on my work PolyJet printer. The picture below is of all of them including the OEM part which is second from the left. My work printer has such good resolution capability that I can add stuff like a logo you may recognize.
Our PolyJet printer right now is only loaded with an opaque white material so I decided to spray paint 2 of the 4 pieces with just some rattle can Krylon to give you the idea what they would look like if printed in black.
I will be sending you all these printed pieces this week so you can check them out, try to fit one, throw them away, whatever you want to do. The whole point of this exercise was to show you the quality that is available out there. And with just a little front end time the possibilities are endless, i.e. think of any NLA parts or parts of parts that may lend themselves to this method.
The far left is an FDM print from my home printer. Next is OEM. Last 4 are PolyJet material from an Objet printer.
OEM on the left. PolyJet spray painted gloss black on the right.
Back sides of the same parts above.
Customization like this is very easy to do with 3D parts and cost zero added dollars unlike having to have a custom mold made.
Same part as above just unpainted.
Since the PolyJet material is like a resin it is less flexible than the OEM polyurethane part. Therefore I had to modify the shape of the clips to be more rounded so that it was able to be pushed back out once inserted. This didn't seem to comprise how tight and secure the fit was.
You can see here how the OEM clips are more sharp edged.
Finally, this is the FDM clip. As you can see the resolution is not nearly that of PolyJet and you can see the layer build up clearly. However the face of this part is actually pretty good and I am curious to hear how it compares to the parts you had printed.
If you do the bezel for the sensor, I am in for a couple.
Thanks for doing this, the 3D technology & material available is getting better every day.
Sounds good. And yes, the technology is improving rapidly and faster than most people tend to casually follow. 3D metal sintering printers are just now getting to a consumer level. That will be a big game changer once they get it affordable.
I got quotes and samples for three of the big 3D experts and no matter what they did they could not get it right. It cost me a chunk of change in drawings and samples.
I got quotes and samples for three of the big 3D experts and no matter what they did they could not get it right. It cost me a chunk of change in drawings and samples.
I put these in the mail to you today. I'll be interested to hear your feedback.
Sorry to hear about your experience. If the ones I sent are better than the ones you spent lots of money on I suggest you tell those "experts" that some dude in Seattle spent only 8 hours on the weekend designing these in his boxer shorts and they work! Now imagine what I could get done if I had pants on!
Seriously though, if you ever decide to go the 3D route again, let me know. I can help.
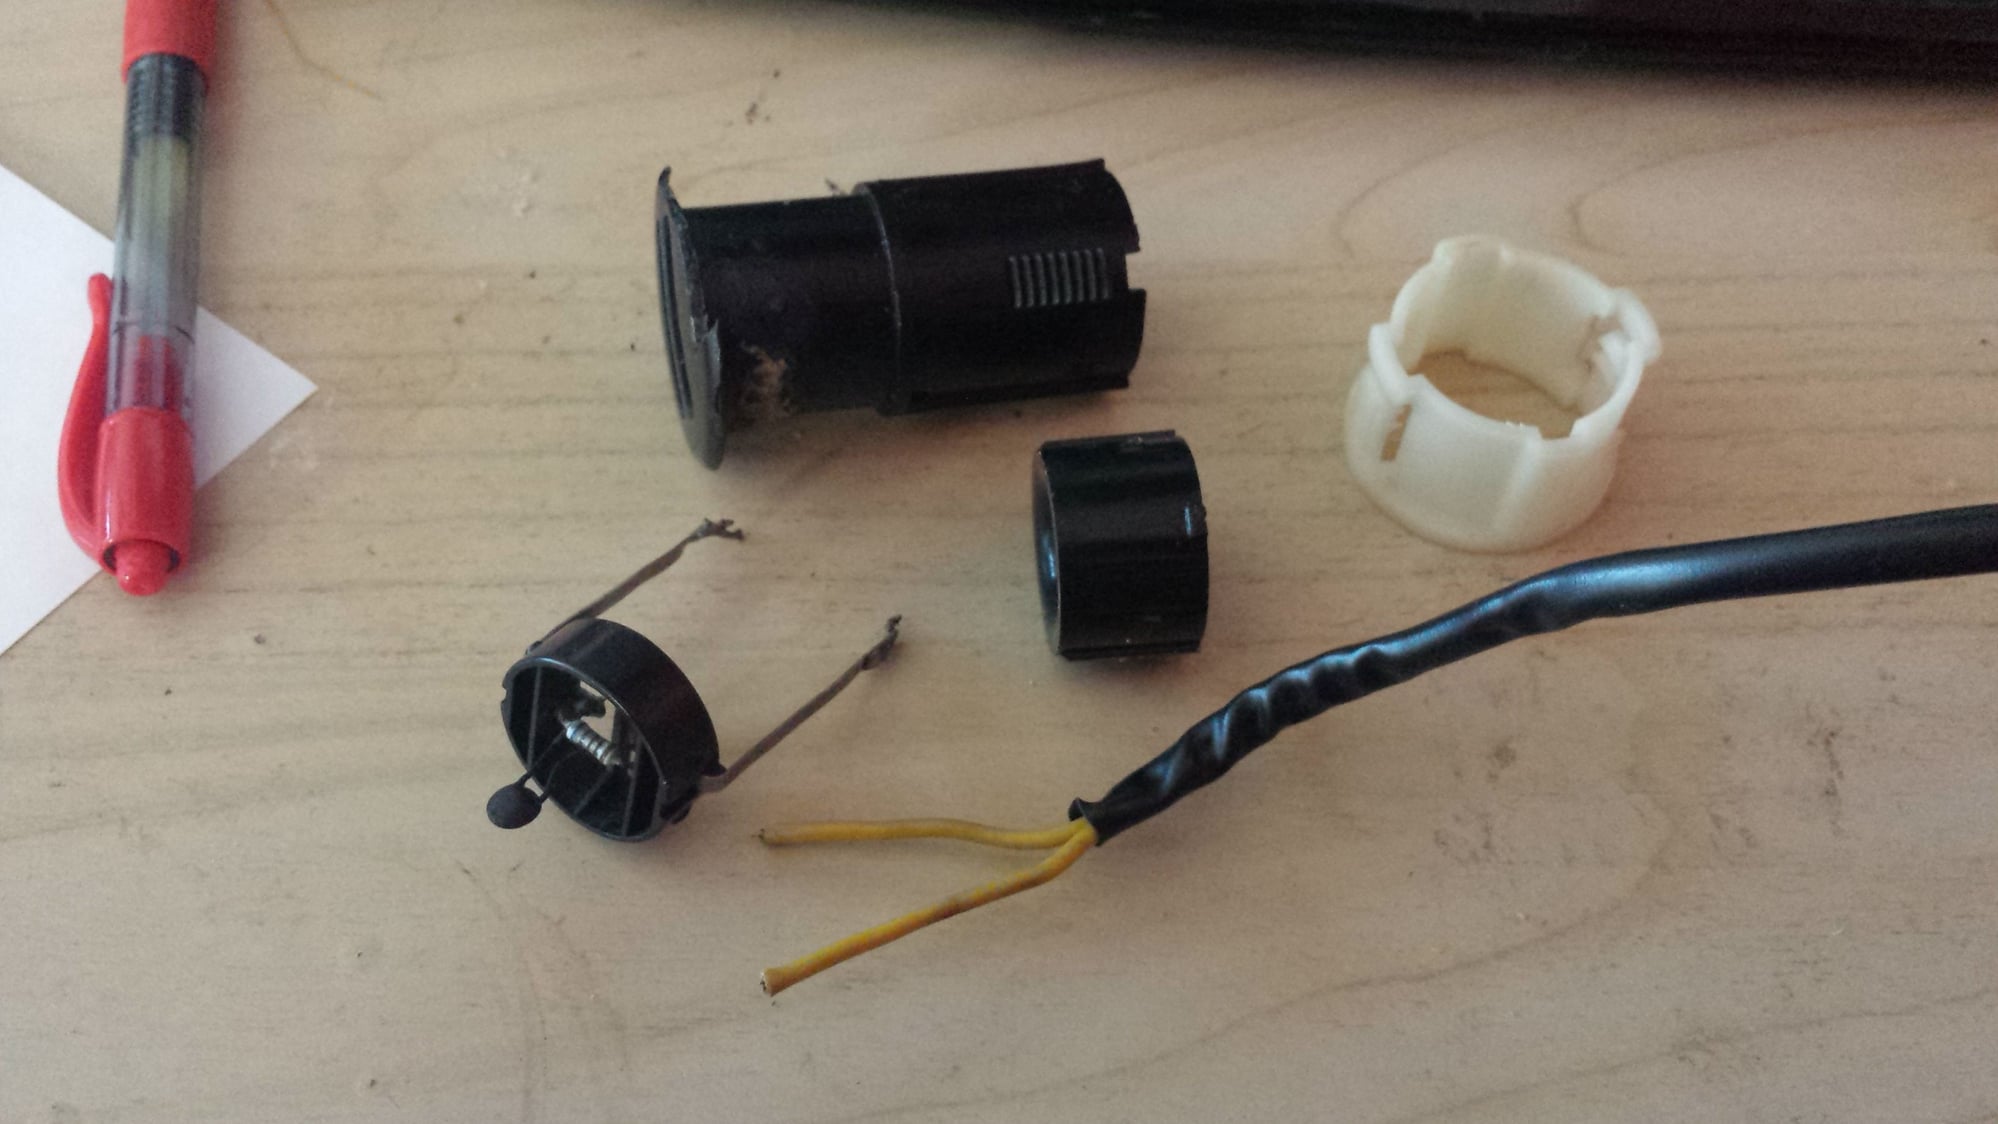
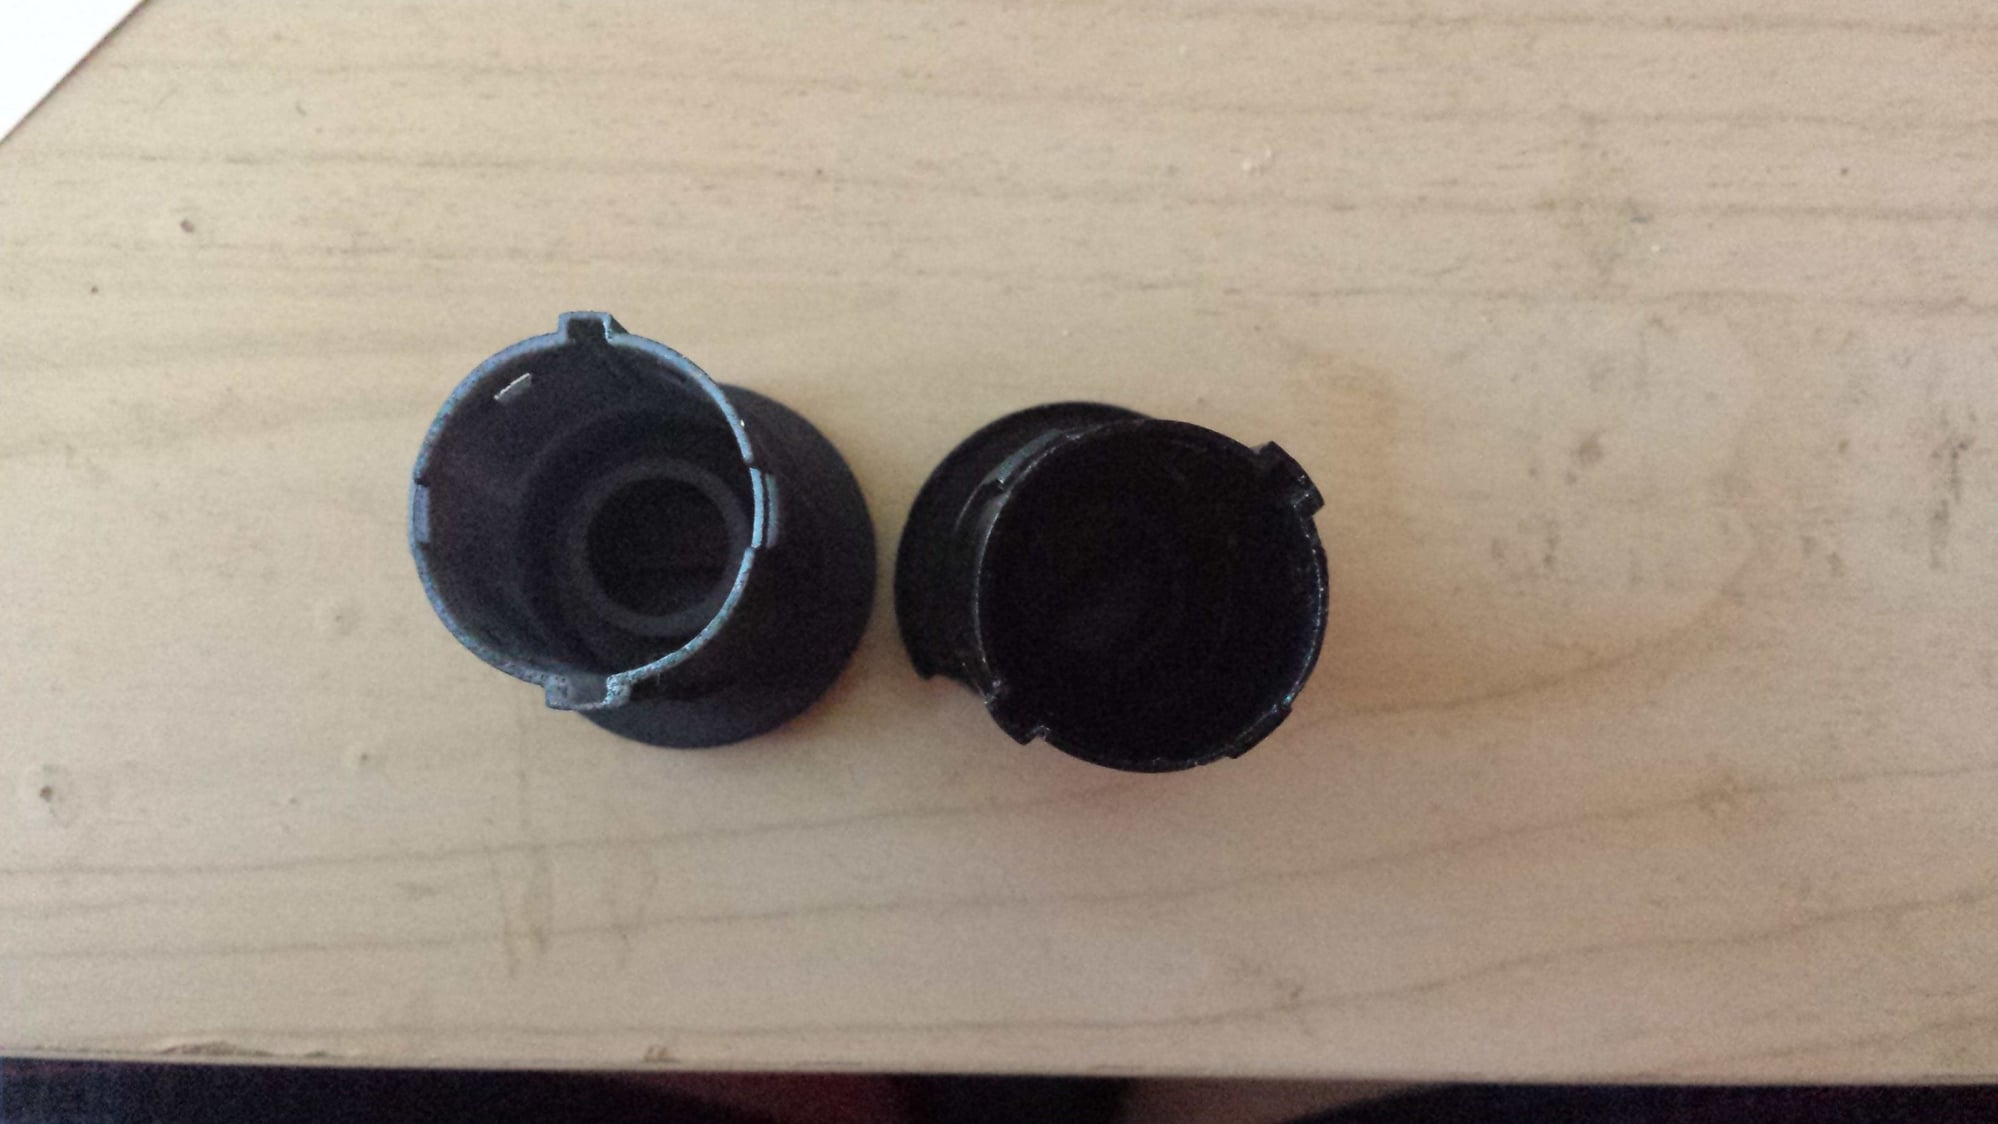
So John was nice enough to send me one of his broken temperature sensor bezels. Here is what it looks like broken in the typical fashion.
I took it apart so that I could reverse engineer the shell. There are two pieces that fit inside; a thermocouple assembly and what looks to be a small bell mouth flow straightener.
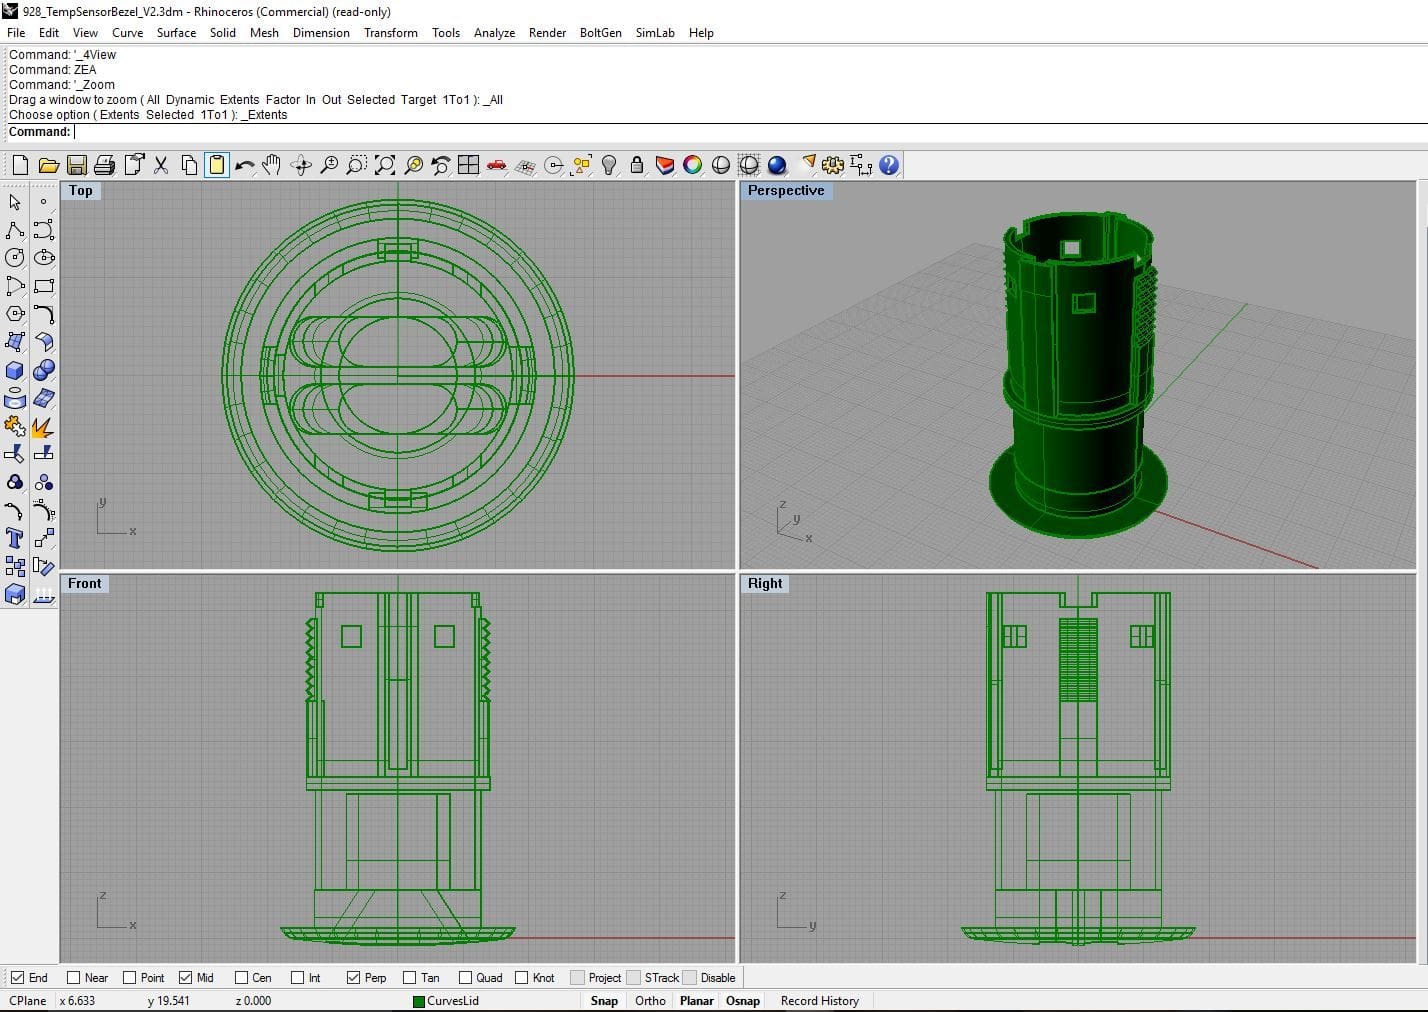
With those piece out of the way I measured the shell and created a CAD model from which the 3D print could be made.
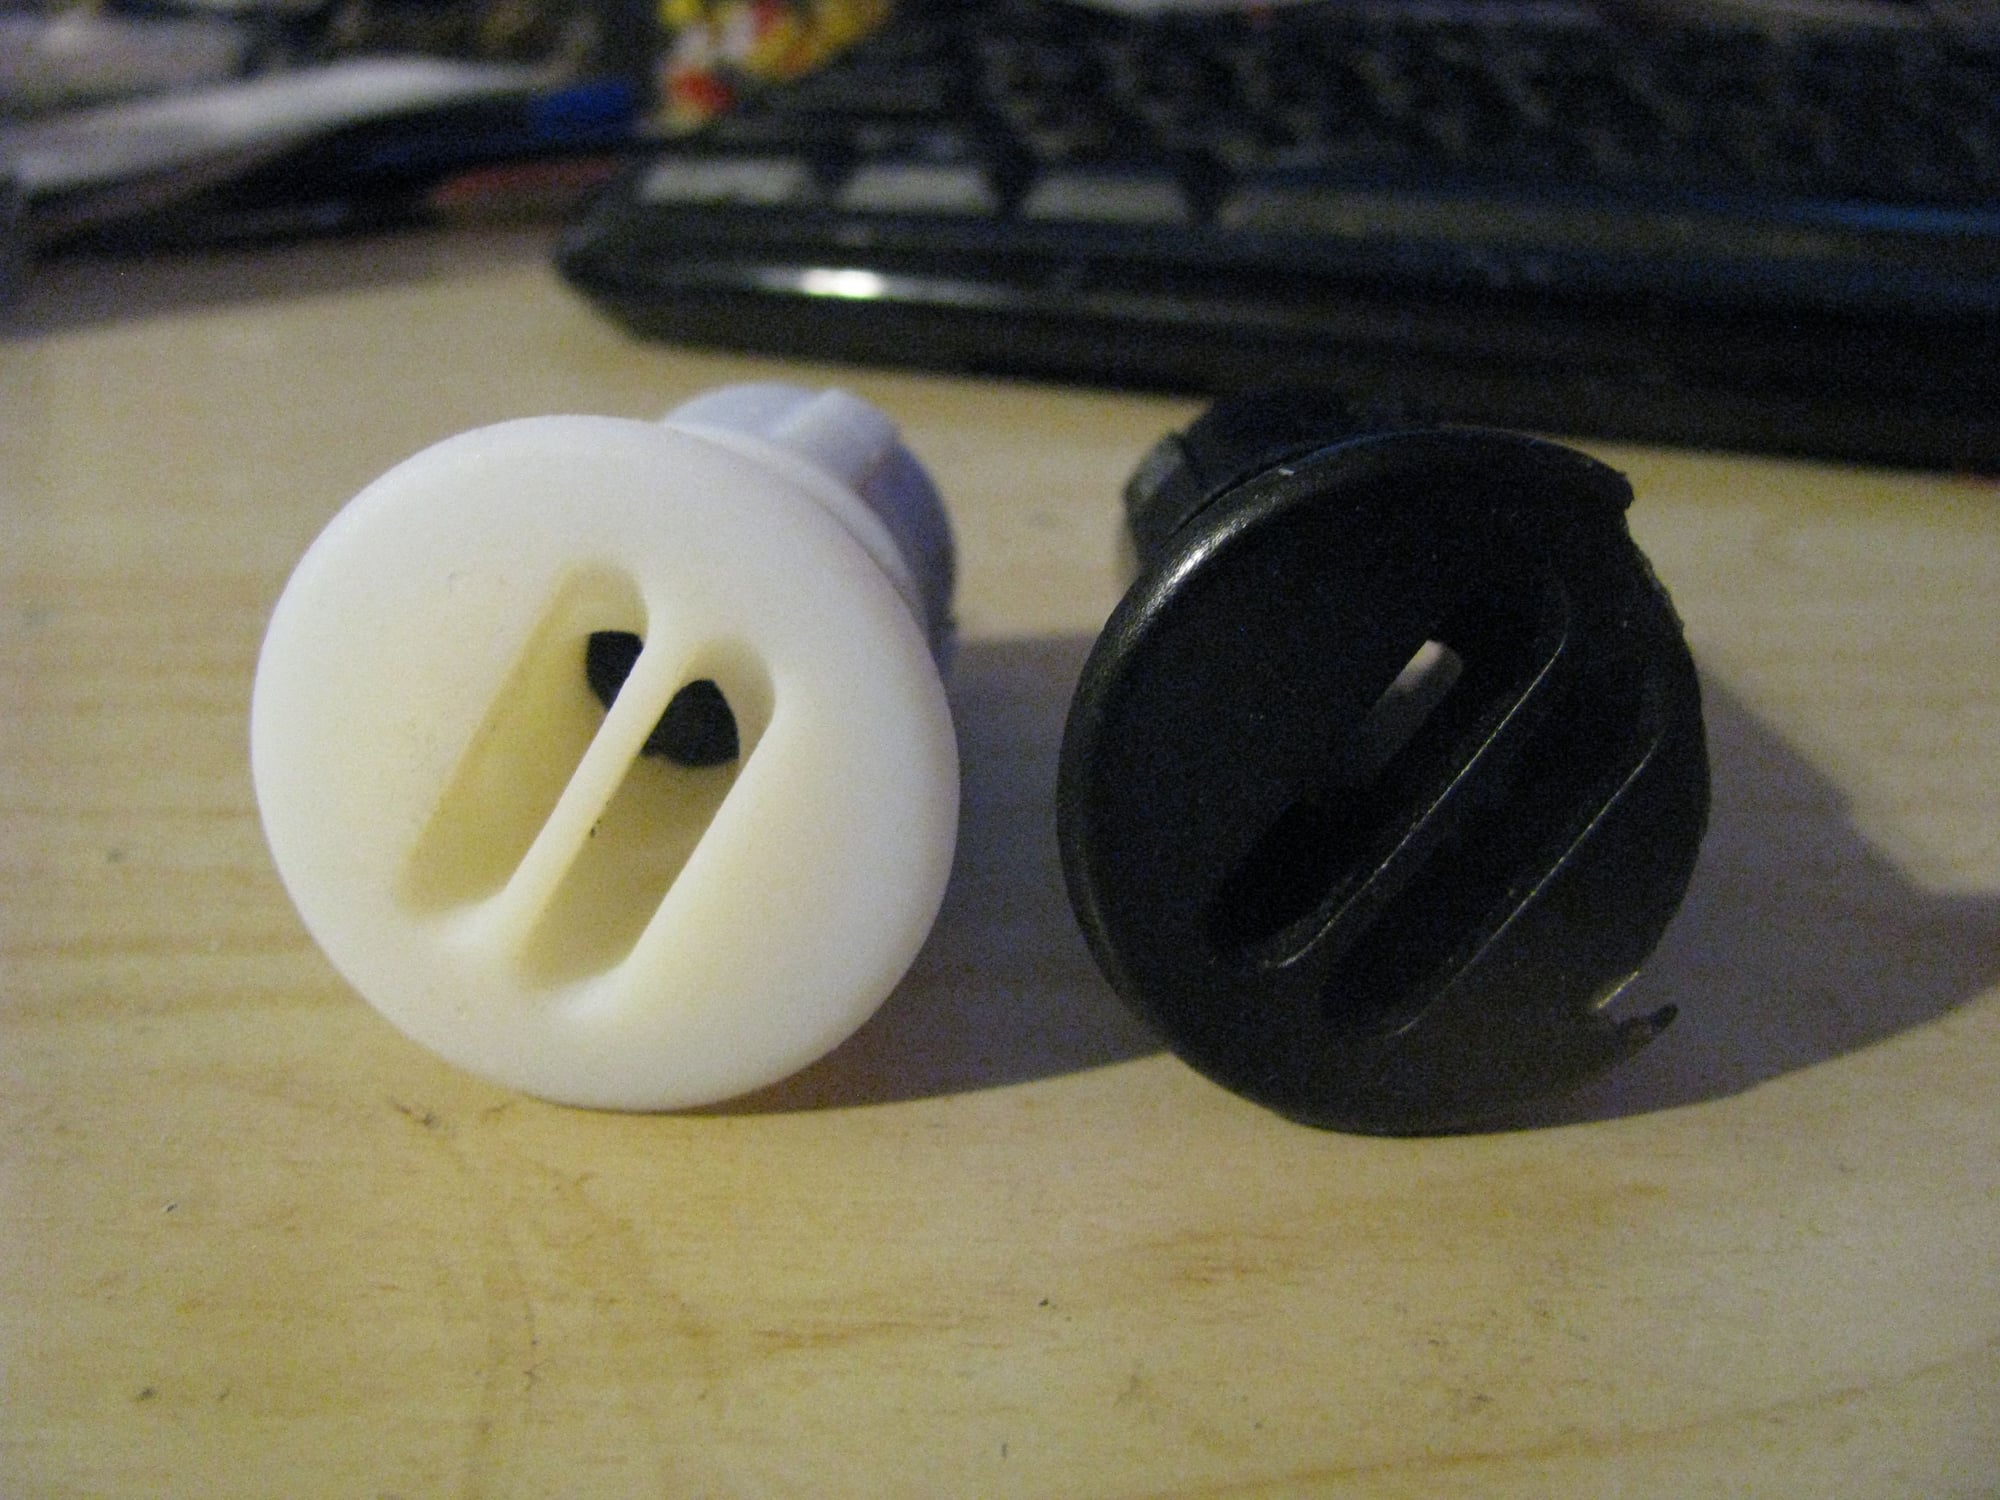
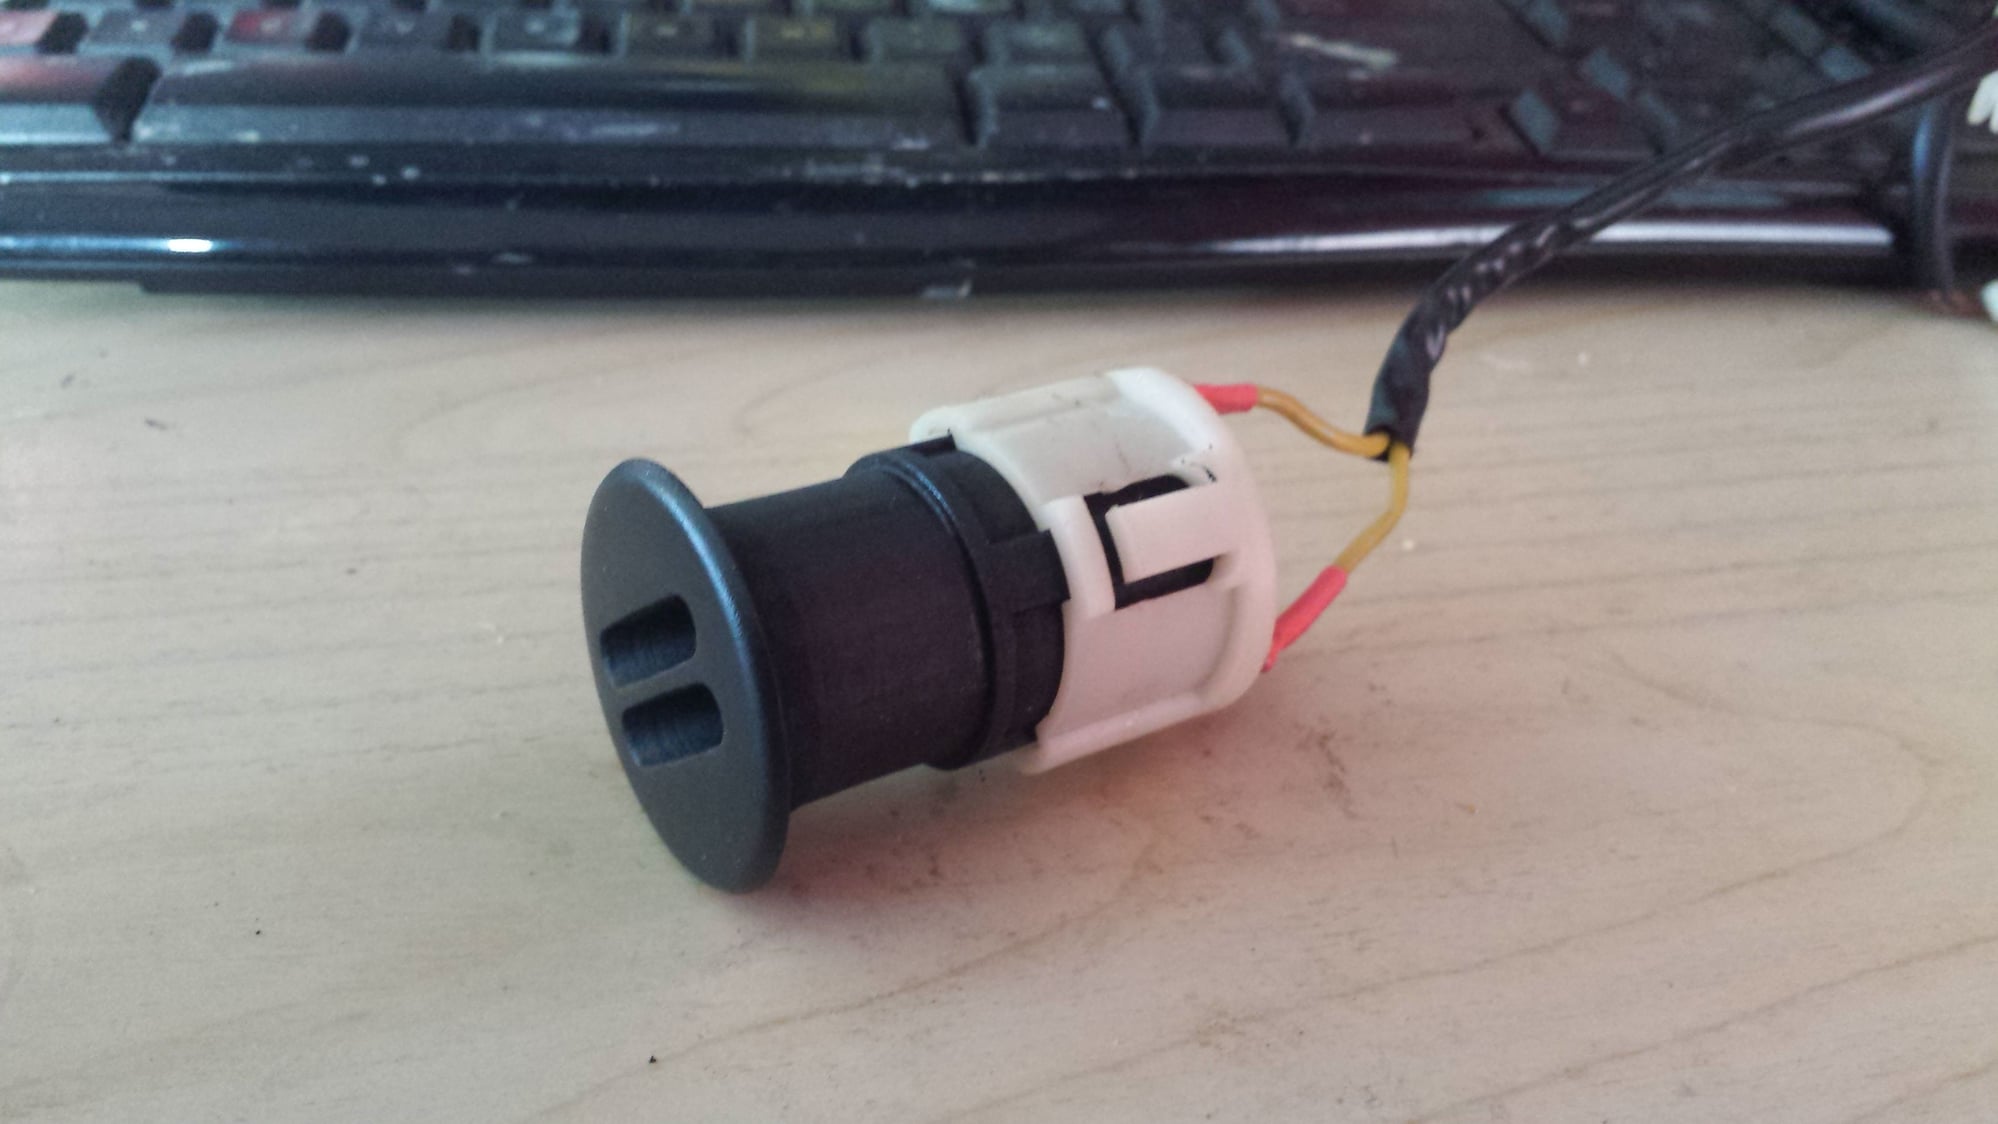
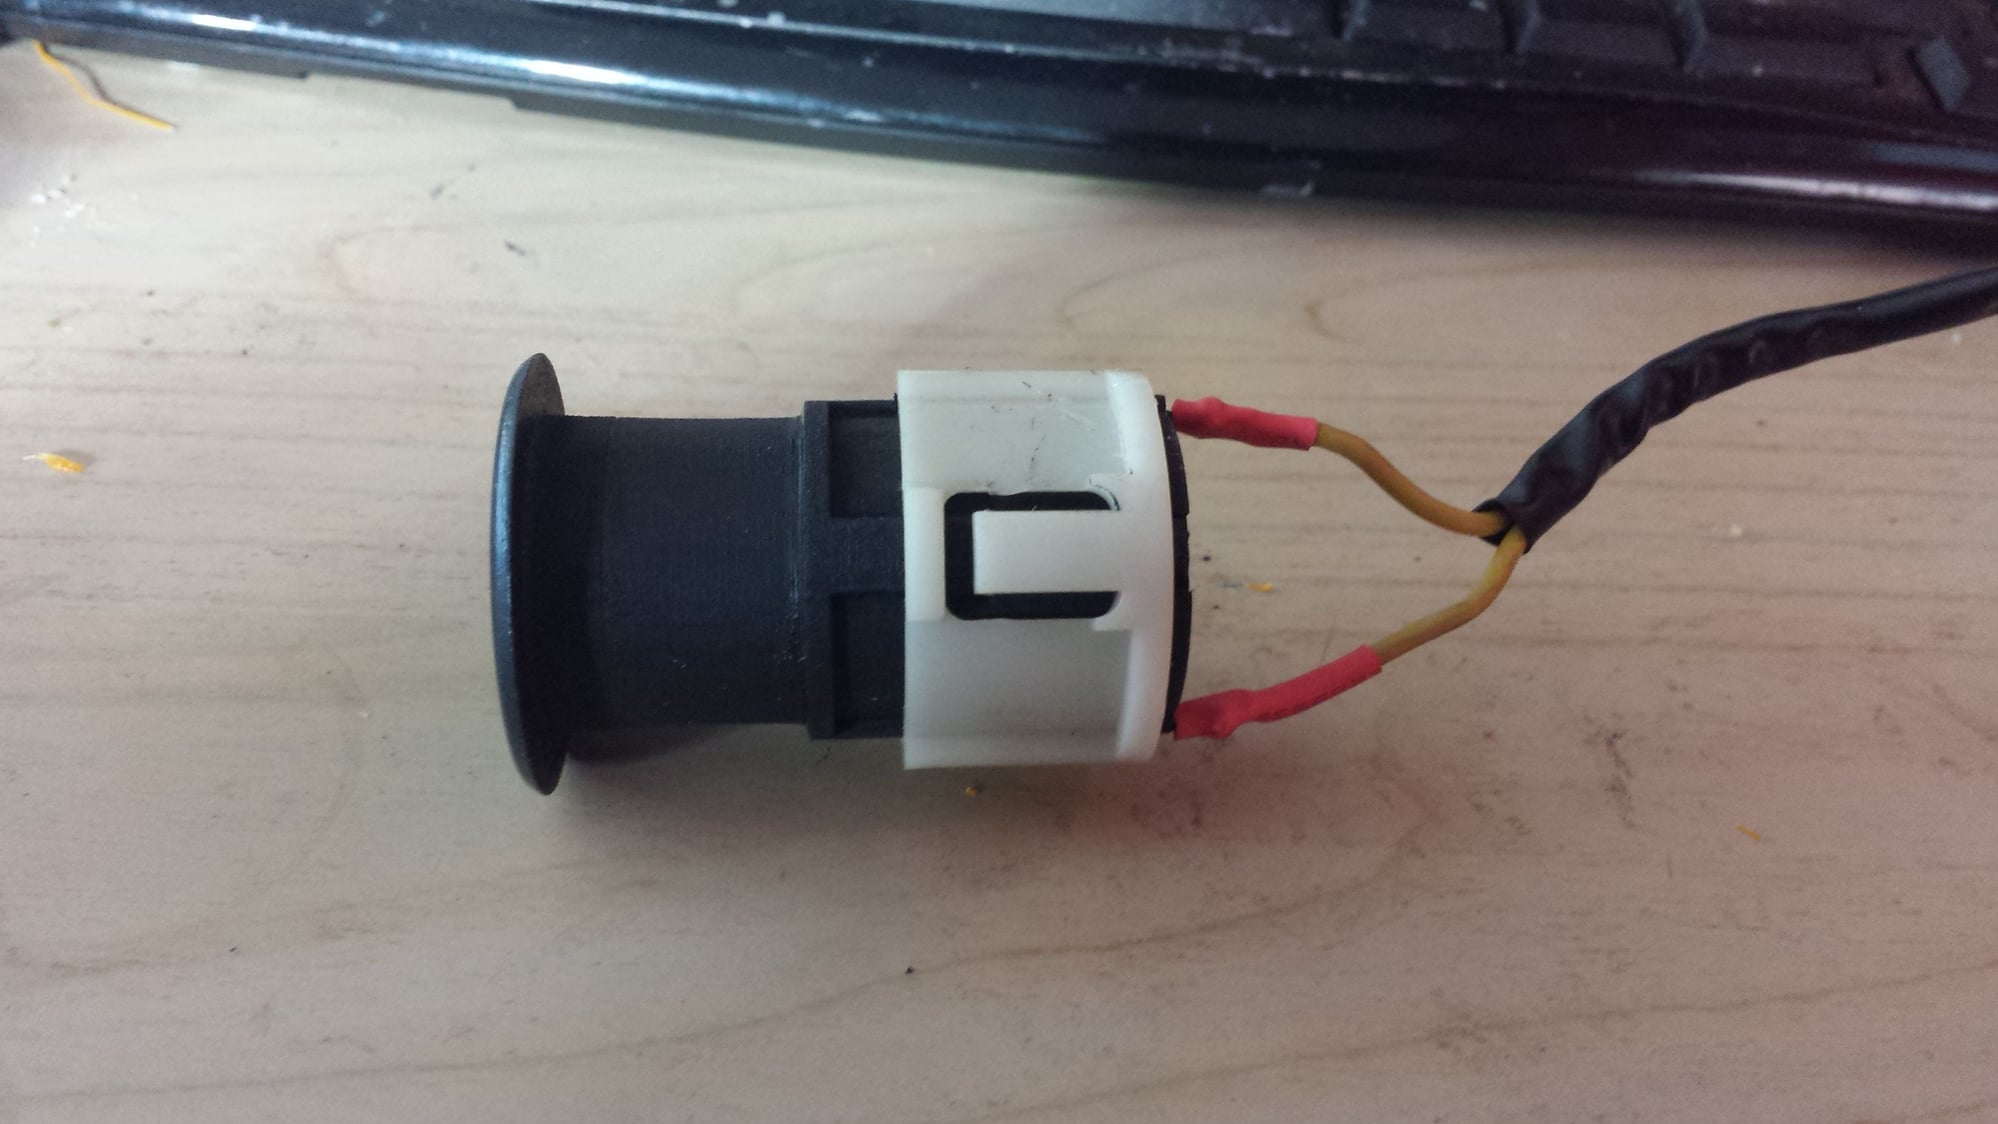
I then printed out John's part using an industrial 3D printer I have access to at work (an Objet 30 Pro for those that are interested in that kind of stuff). We currently have the printer loaded with a white-ish colored build material, thus I had to paint the part black. I think it turned out very good. However ideally these parts would be printed in a black material to start.
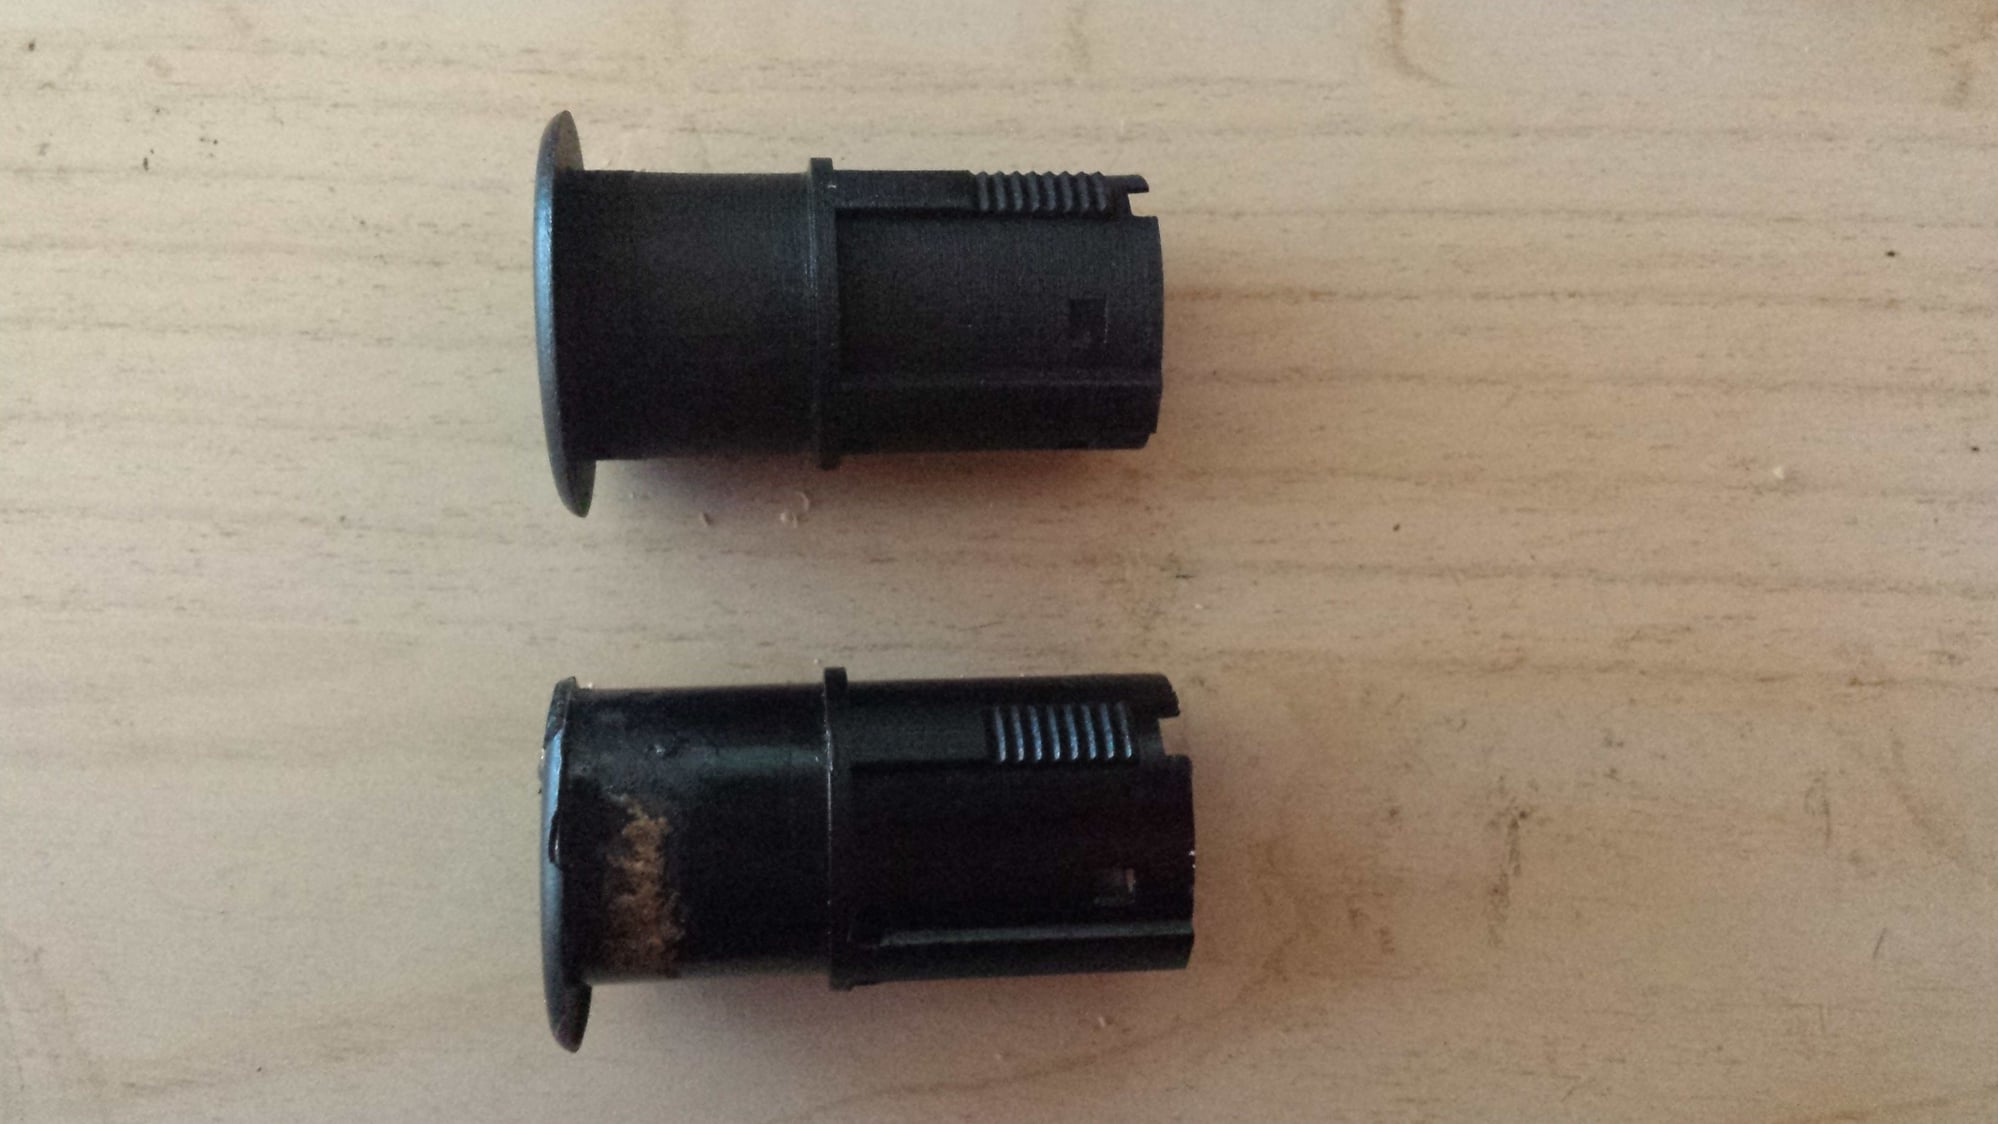
And here is what it looks like reassembled
I'd be happy to share the .STL file if anyone with access to a 3D printer would like to print one out. Alternatively if anybody is interested in having me build these I'll go figure out what It'll cost.
Last edited by GT6ixer; 01-06-2017 at 06:09 PM.
Reason: typo
I would like a quote on one installed please. Awesome work, and I hate my aftermarket cover on the 86.5.
You can share the quote here or text me.
Happy New Years
Thomas

 07-28-2016, 10:01 PM


 George Layton March 2014