When you click on links to various merchants on this site and make a purchase, this can result in this site earning a commission. Affiliate programs and affiliations include, but are not limited to, the eBay Partner Network.
That thread started to go off the rails on my end towards brake work. I am rehashing some of that here, and continuing on to being a full clean and inspect of the rear brakes, parking brakes, front brakes, and front wheel bearings.
All this spiraled out of control on a simple suggestion from Stan (mr merlin.)
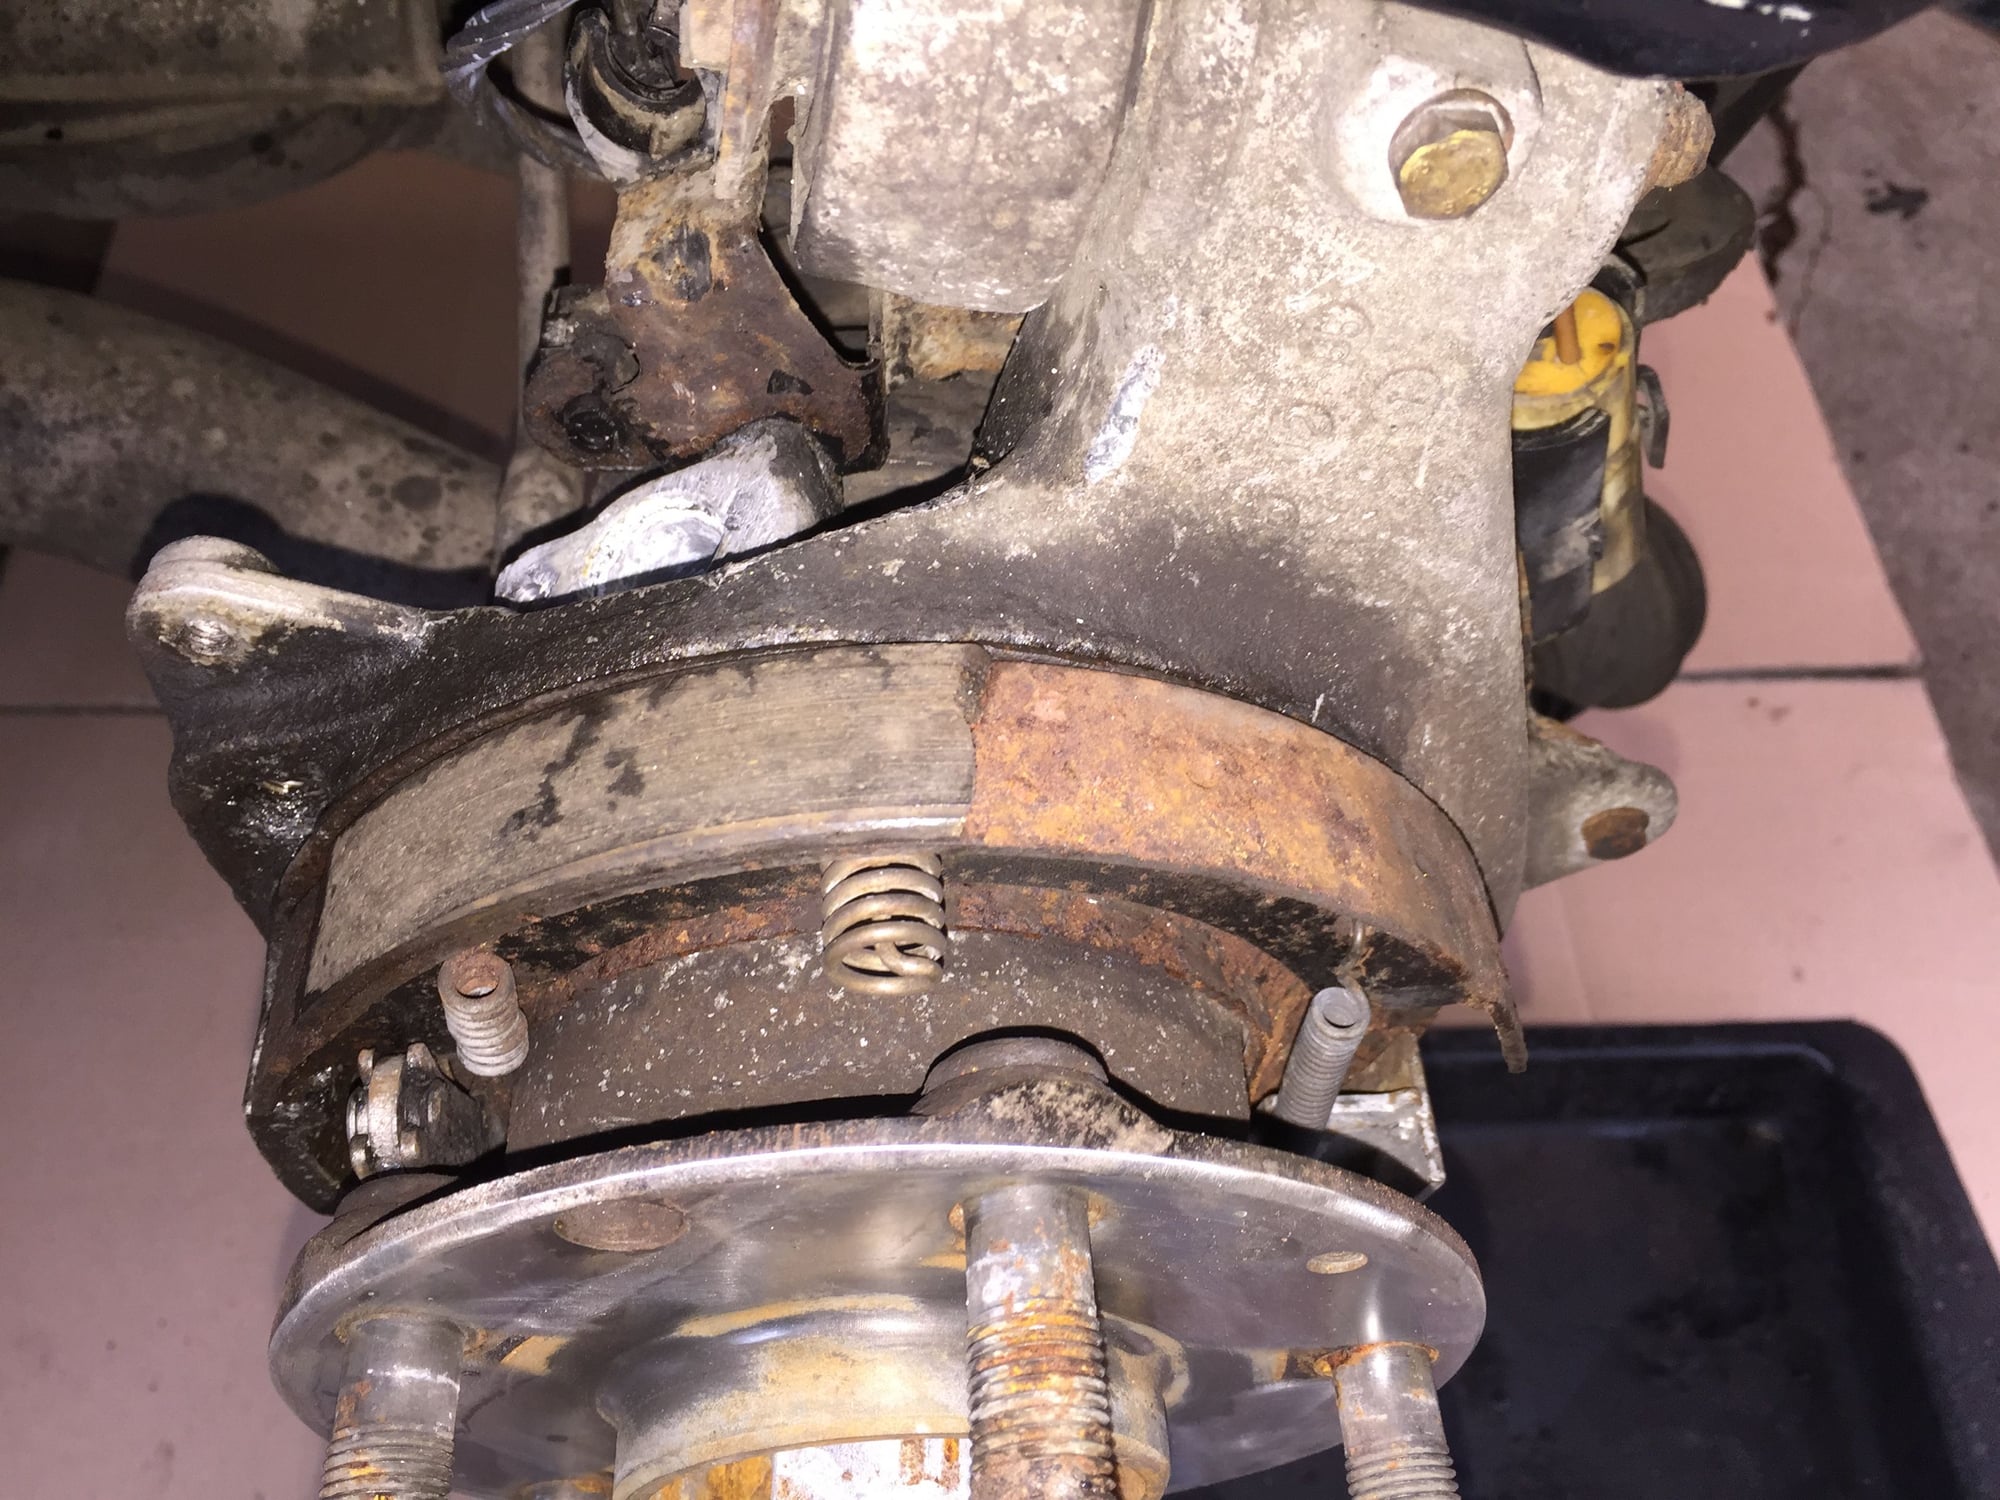
Since I had the rear wheels off, he recommended I adjust the parking brakes. That deevolved into removing the rear rotors, to cleaning and inspecting the parking brakes.
Now, I am cleaning and inspecting the front and rear brakes without removing the calipers from the hydraulic lines, as well as repacking the front wheel bearings.
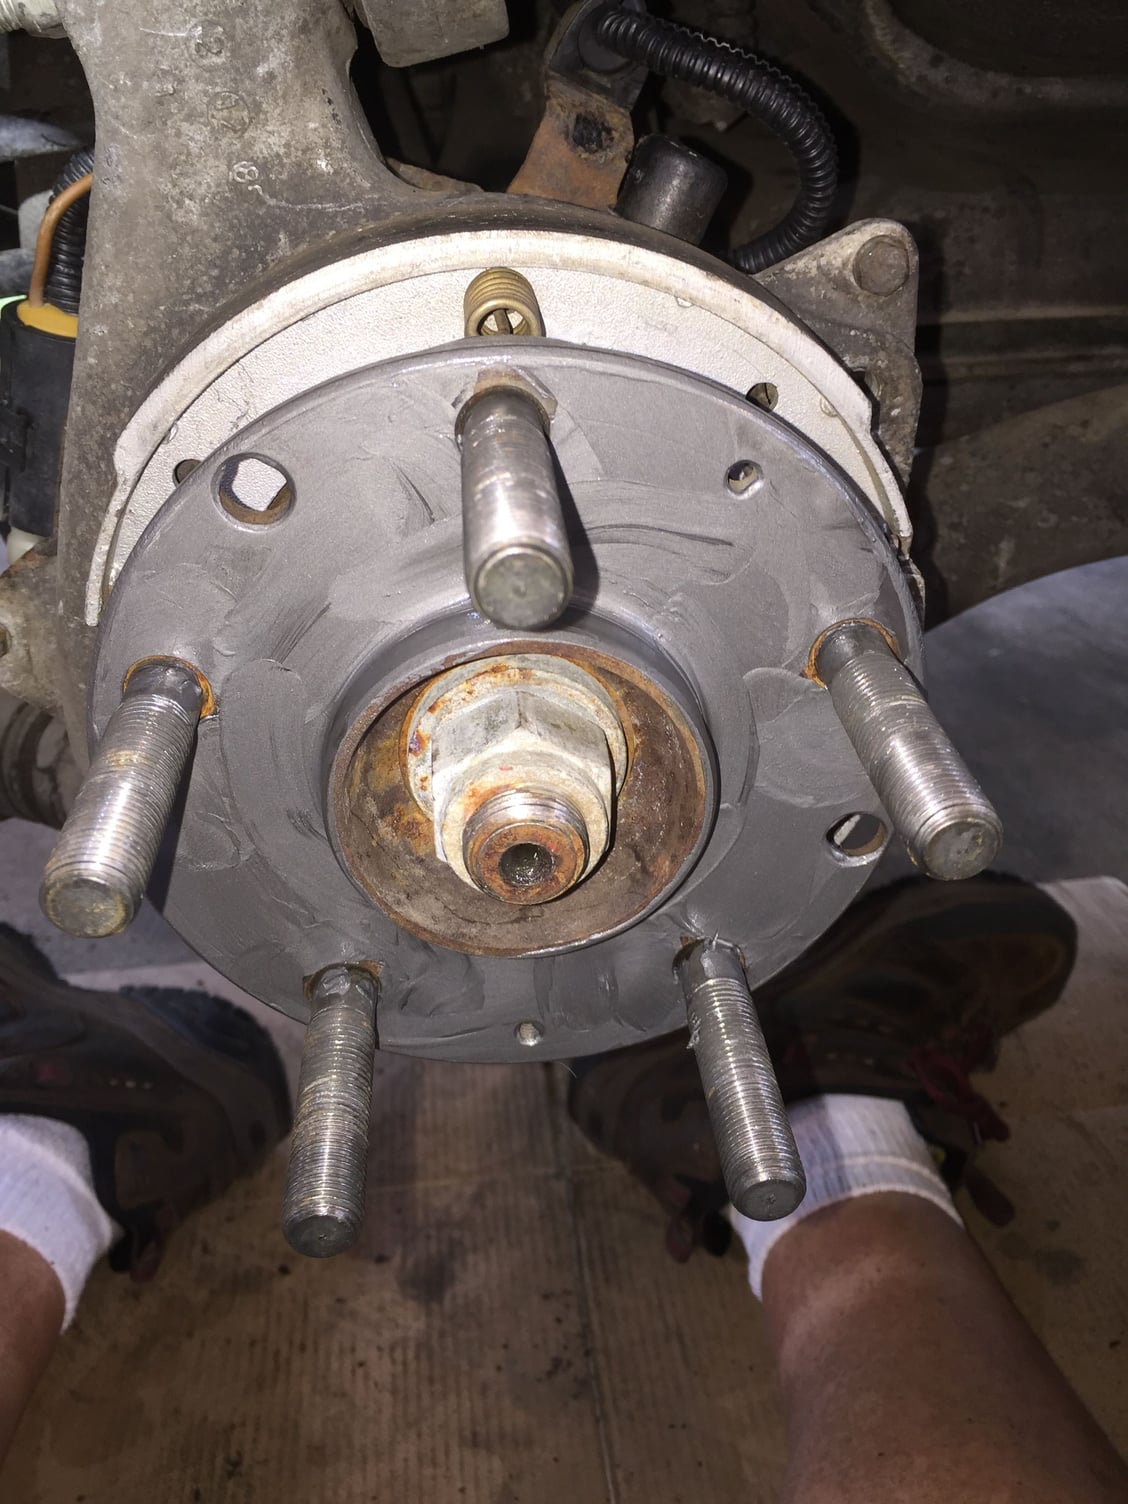
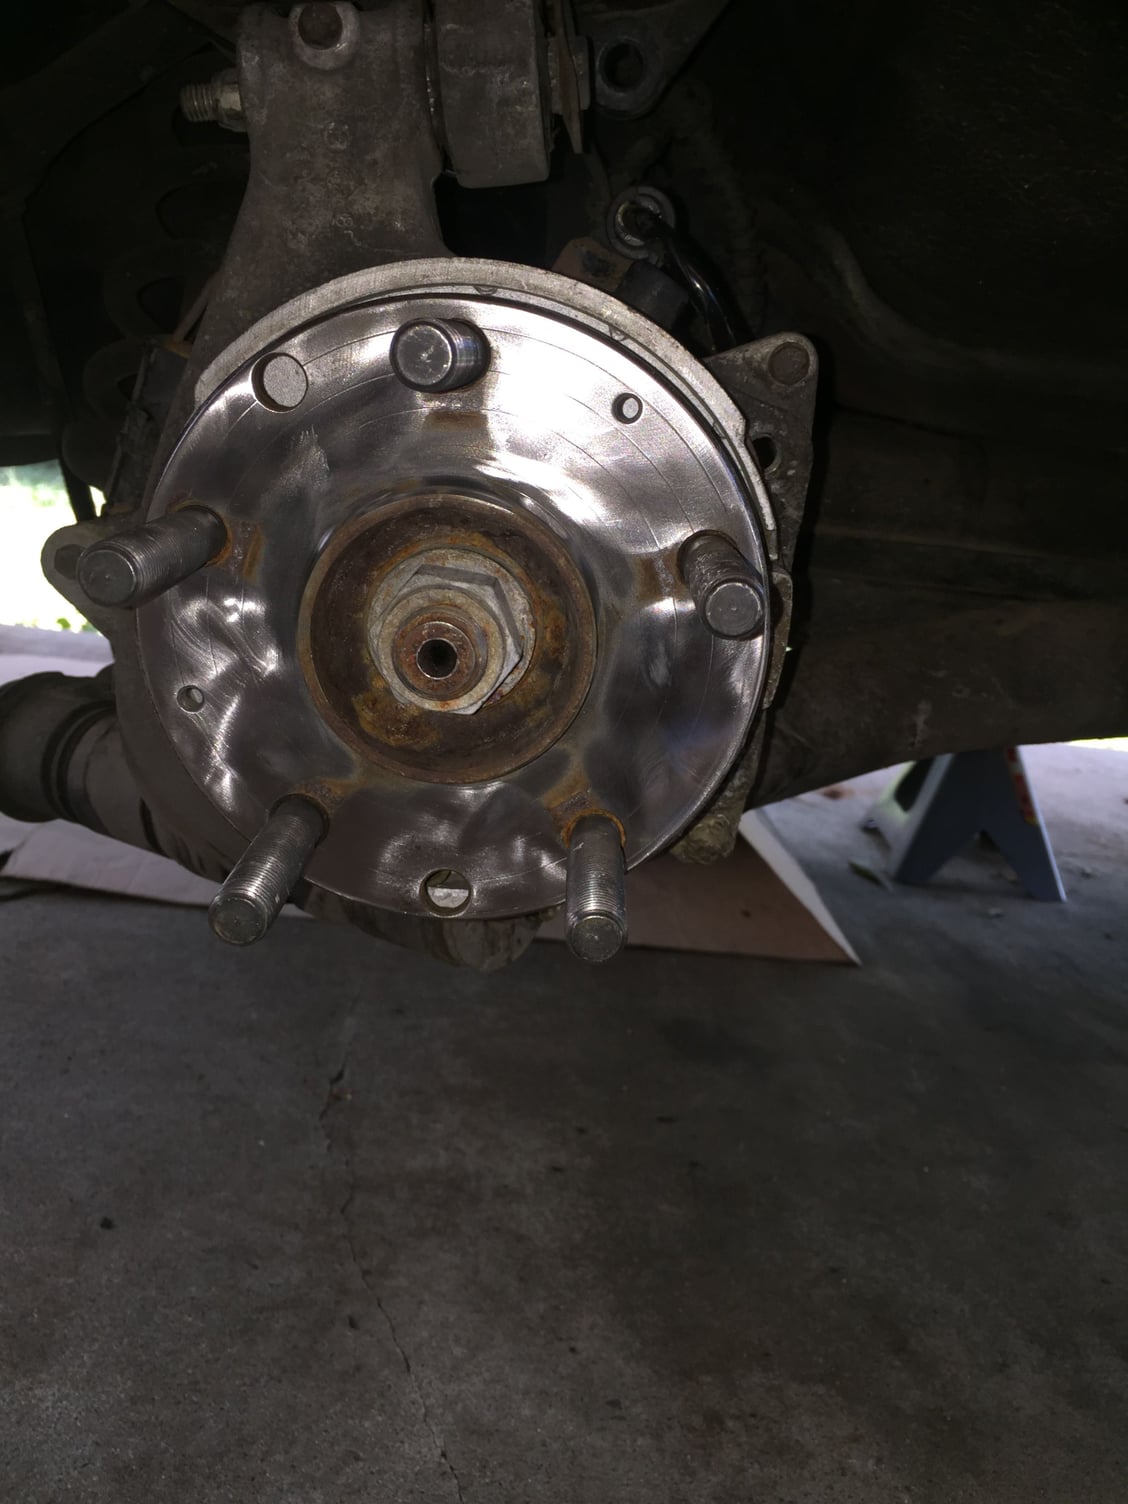
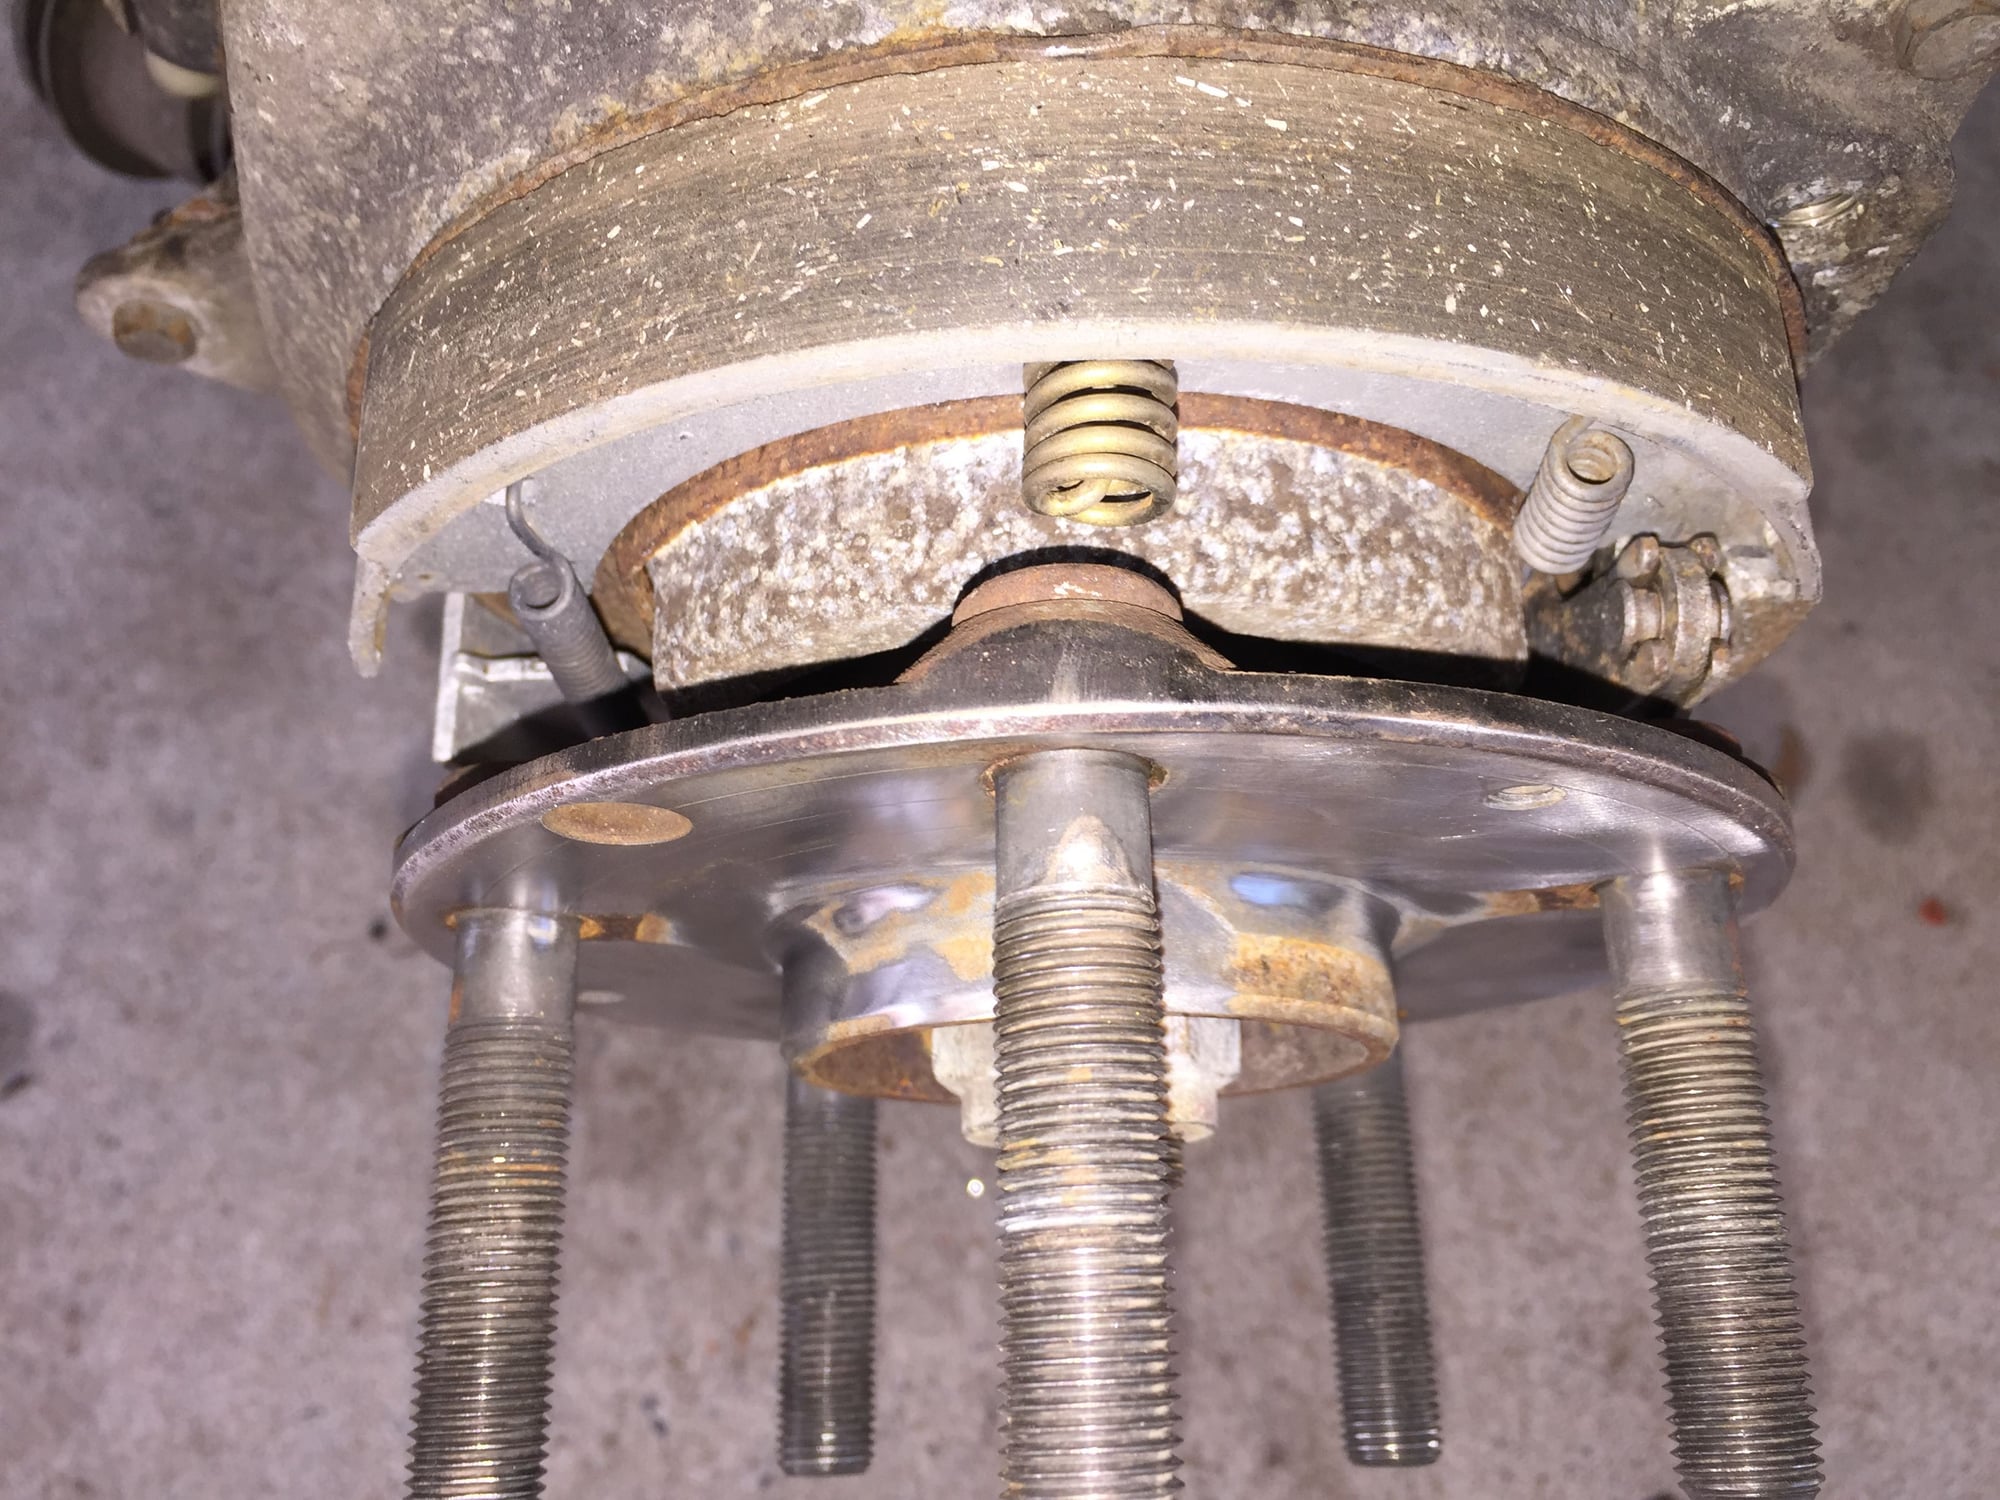
Today I started off by cleaning the corrosion off both axle flanges with a red roloc pad. That took care of most of it, but left patches between the lug studs and the hub pilots. I tried to take care of that with a wire wheel. Semi-successful.
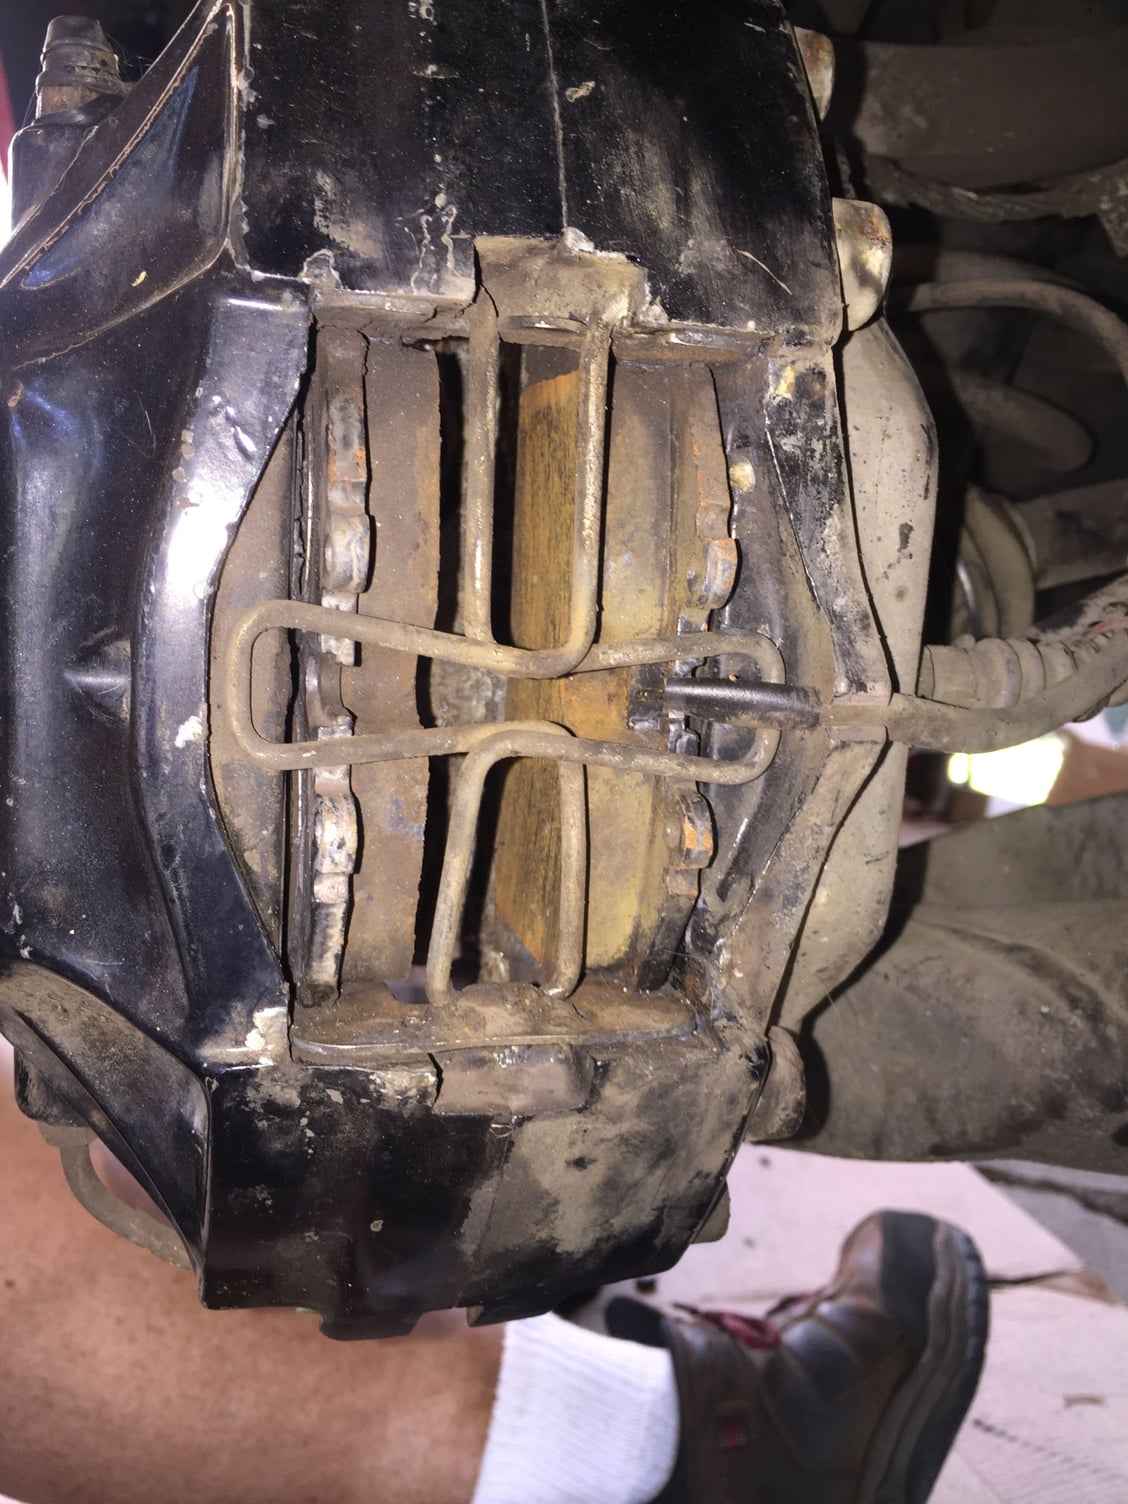
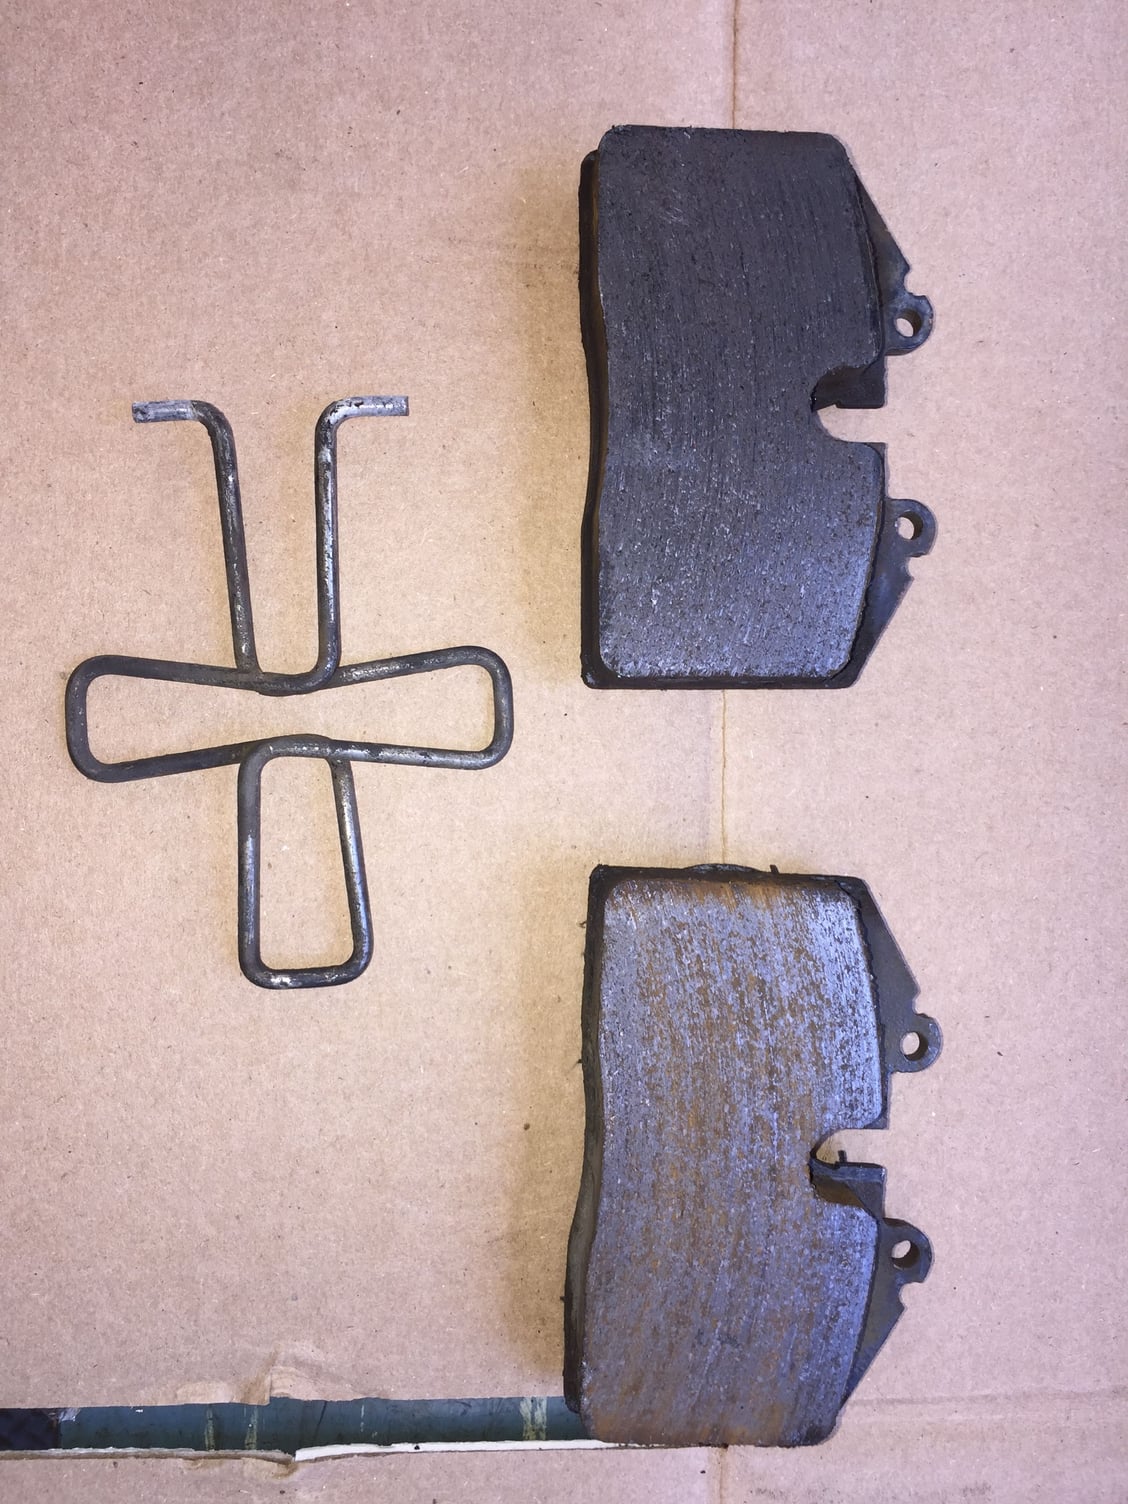
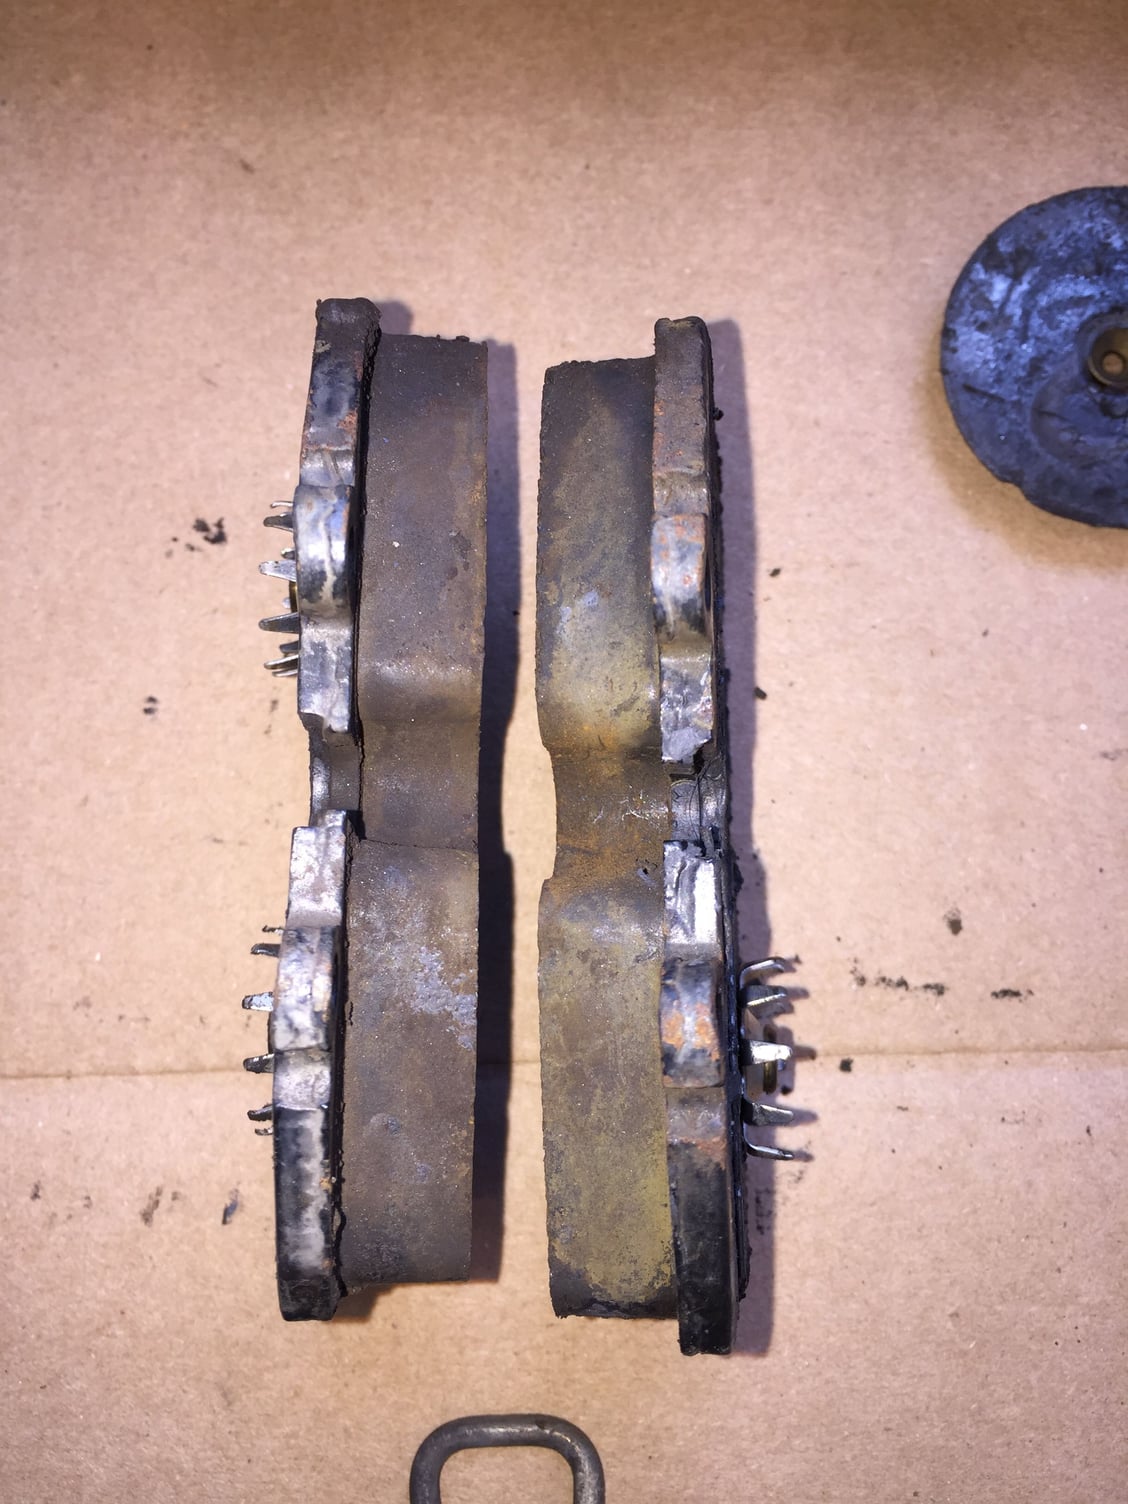
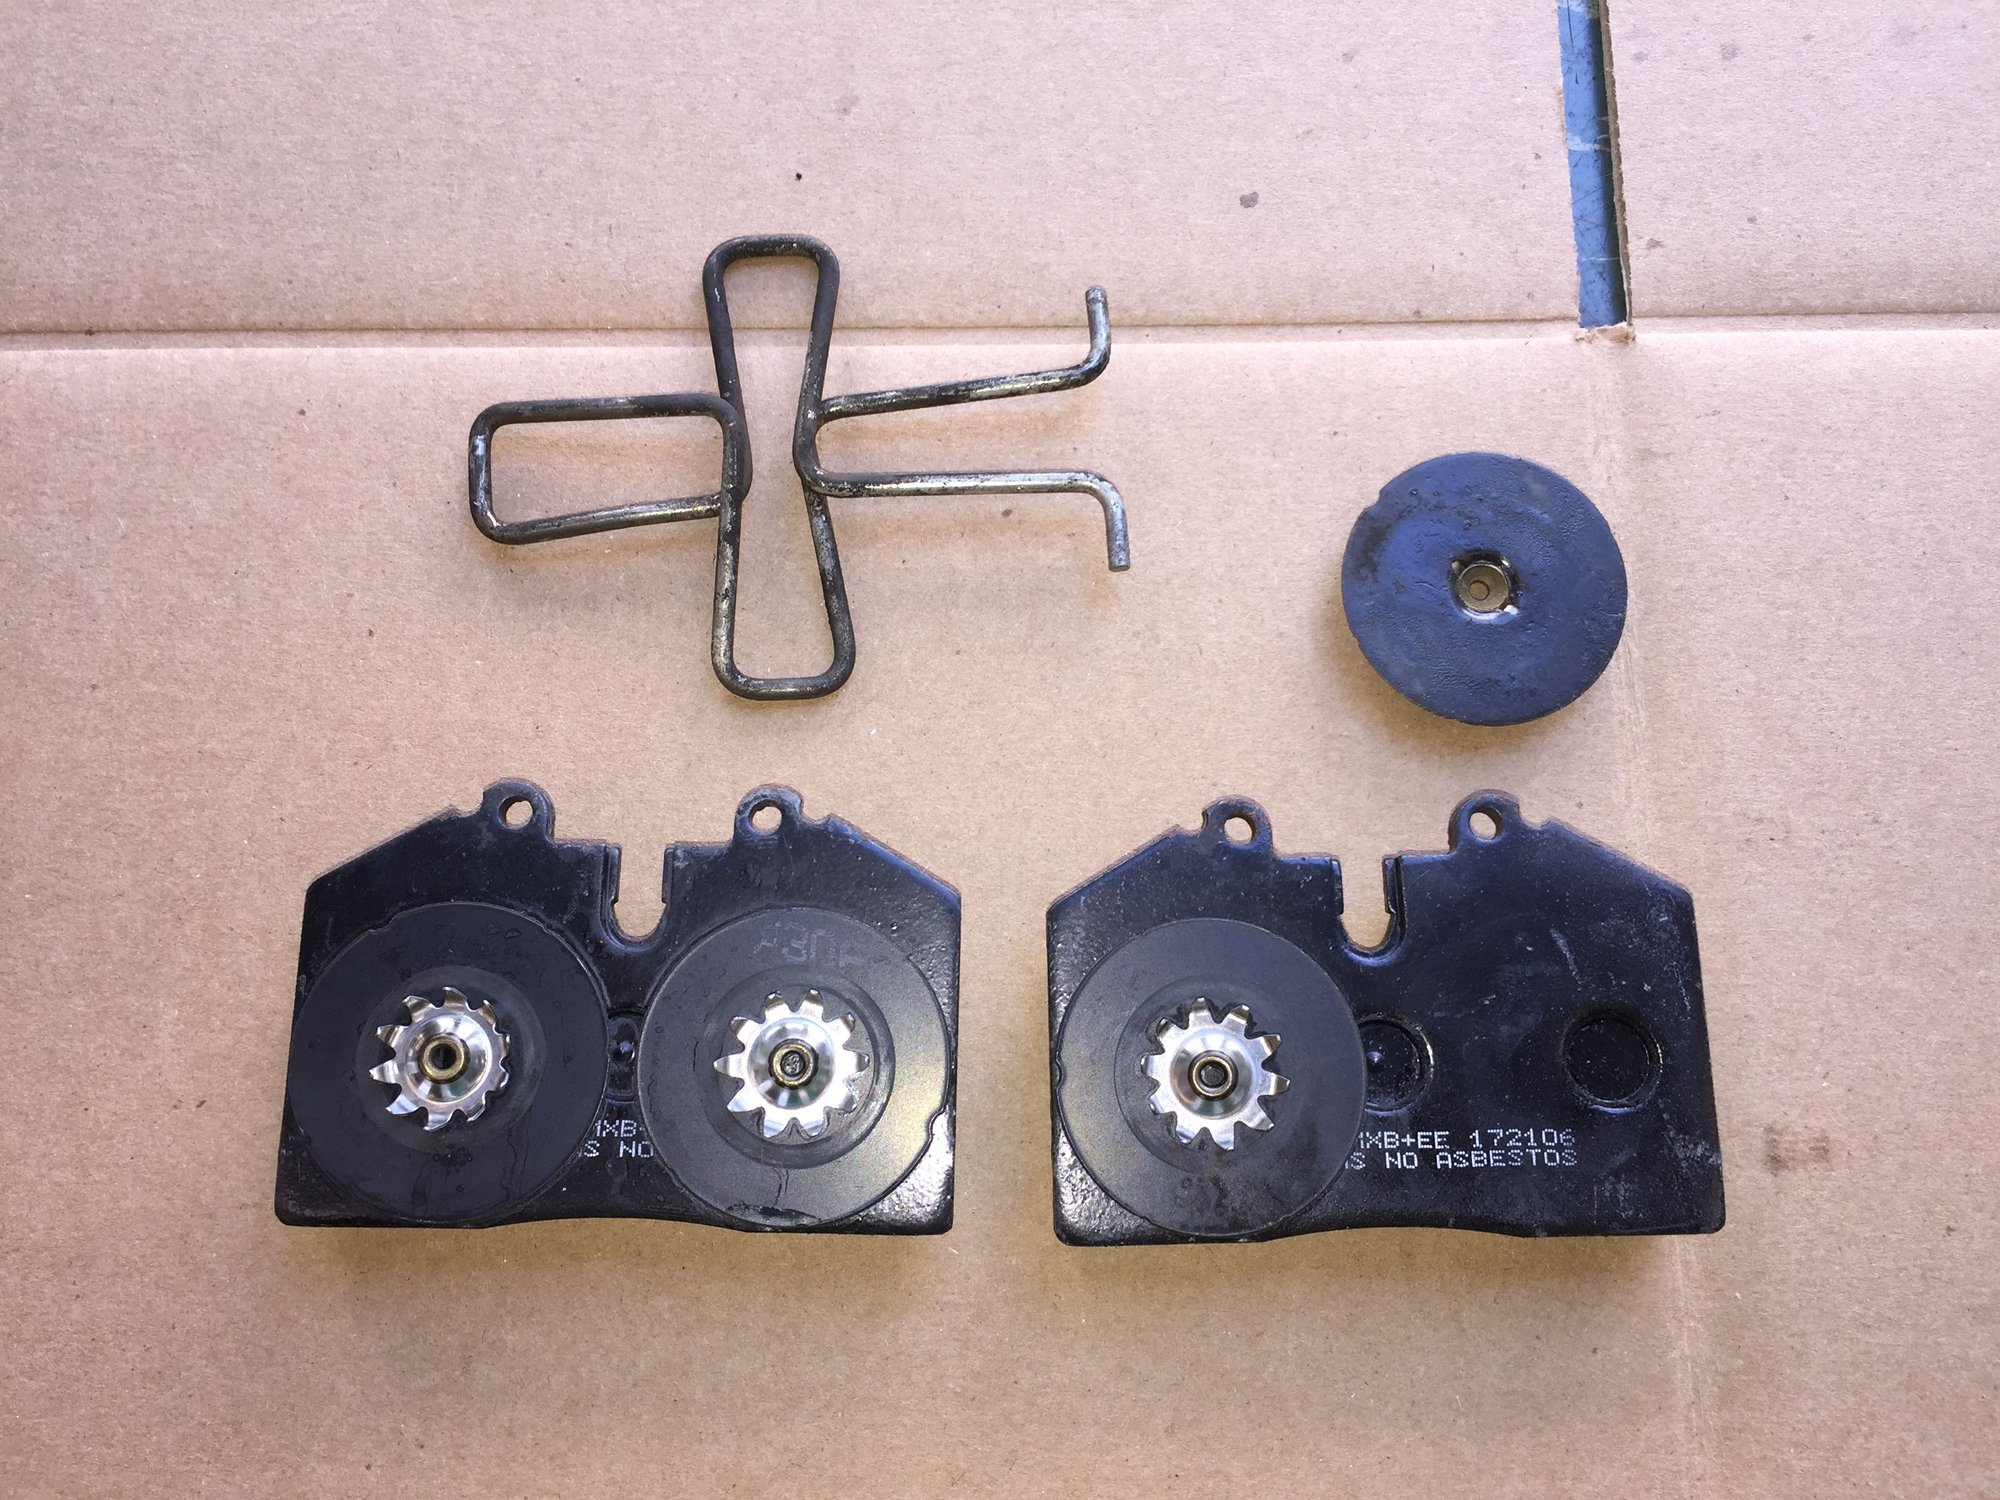
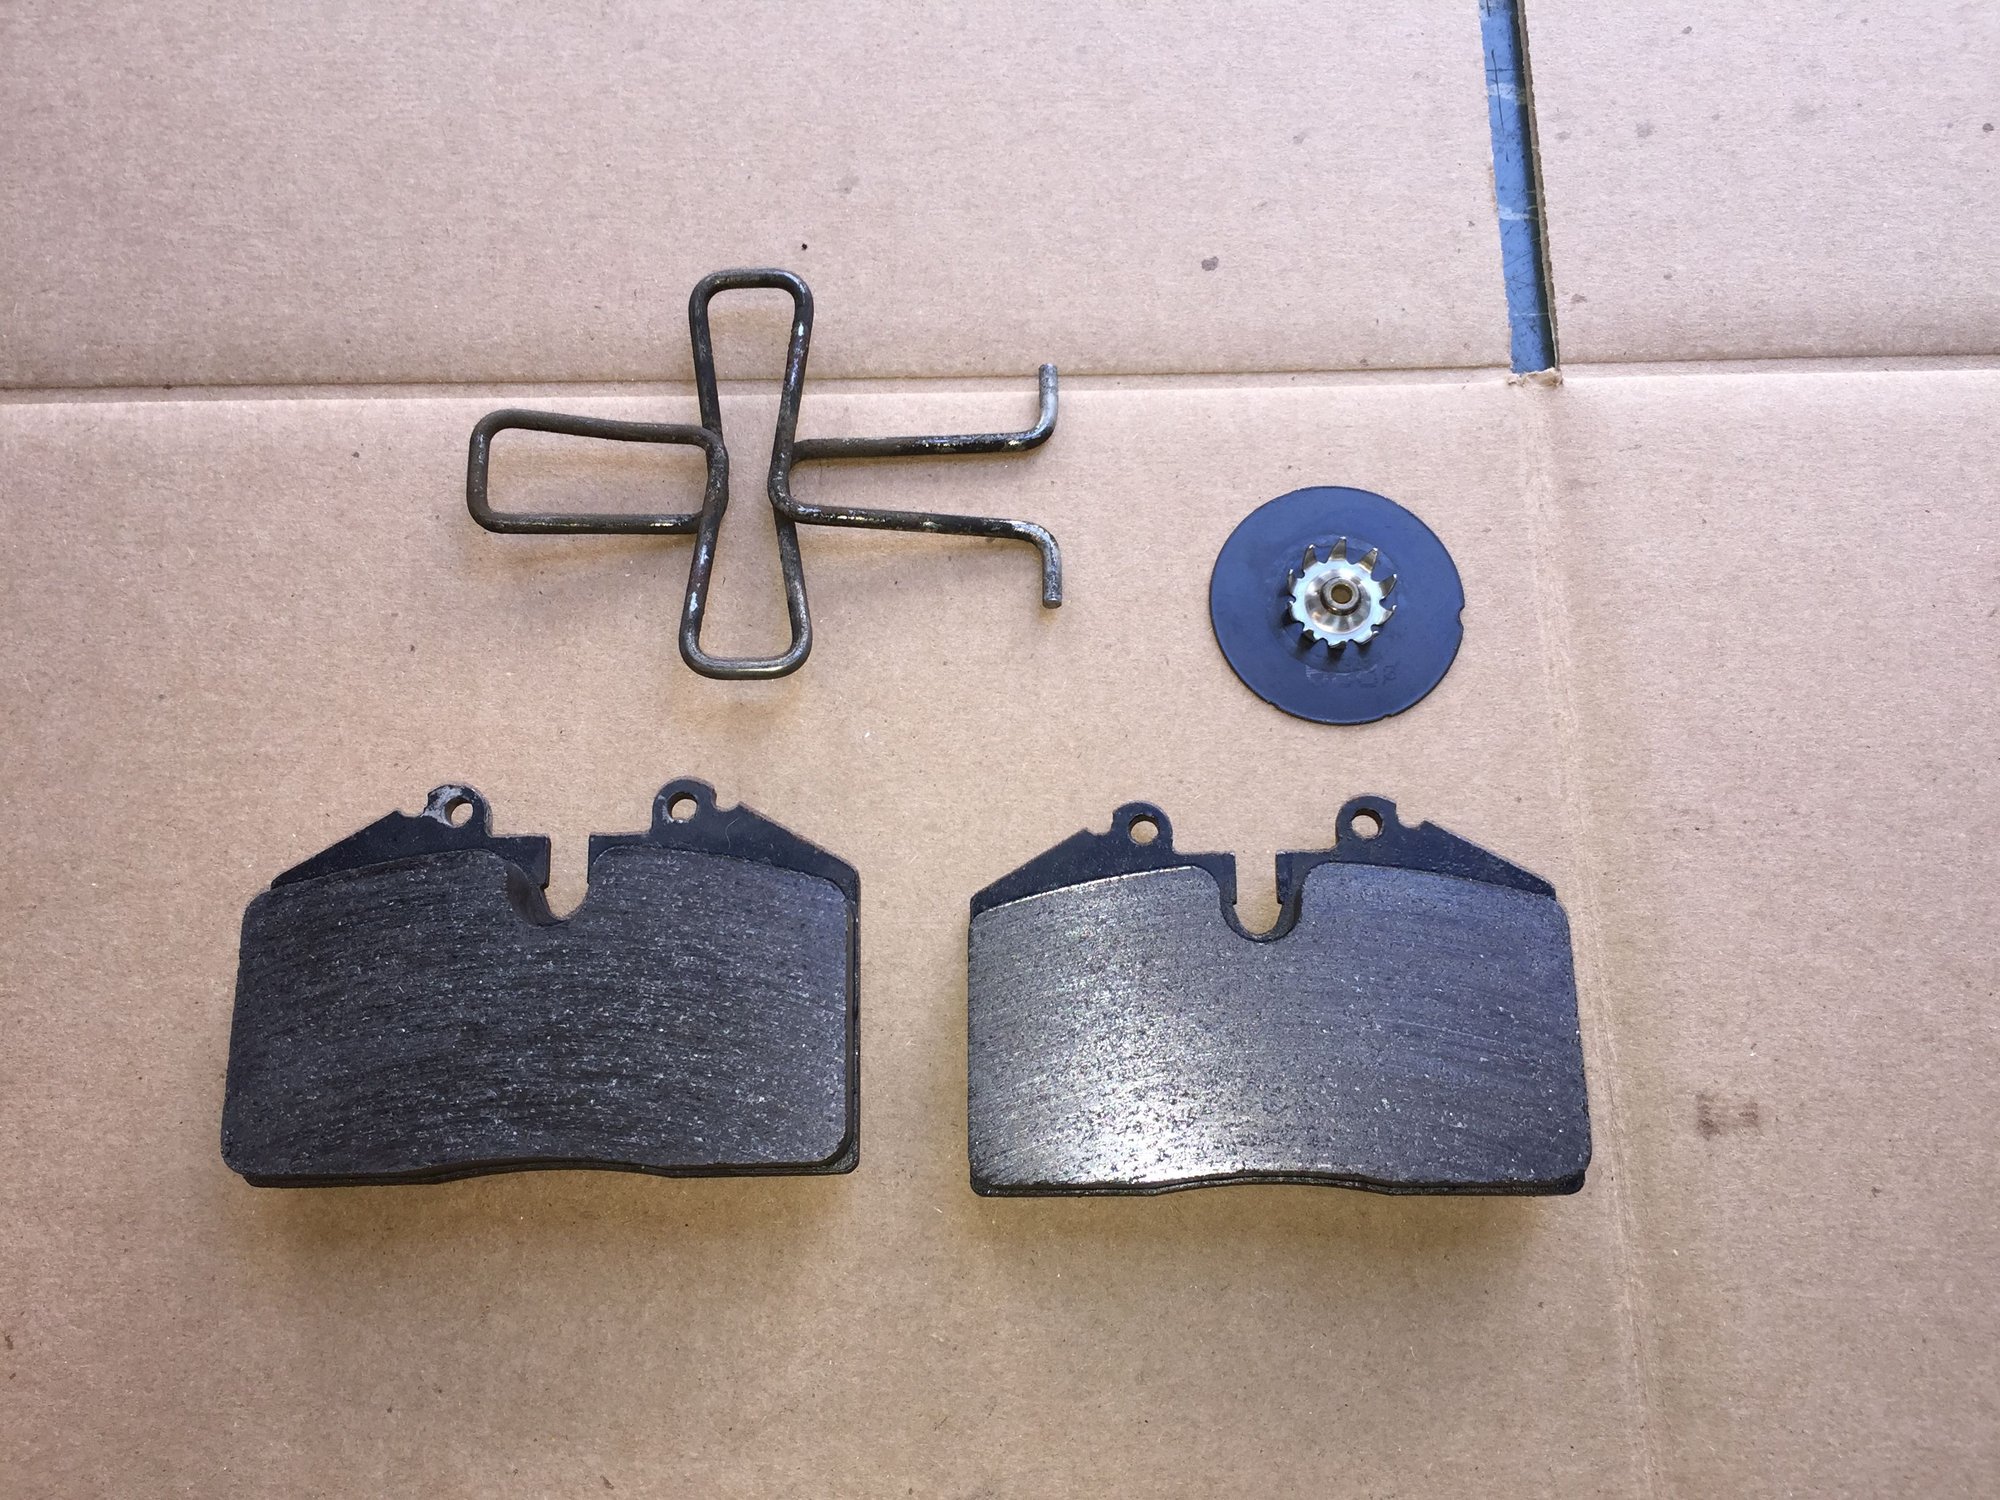
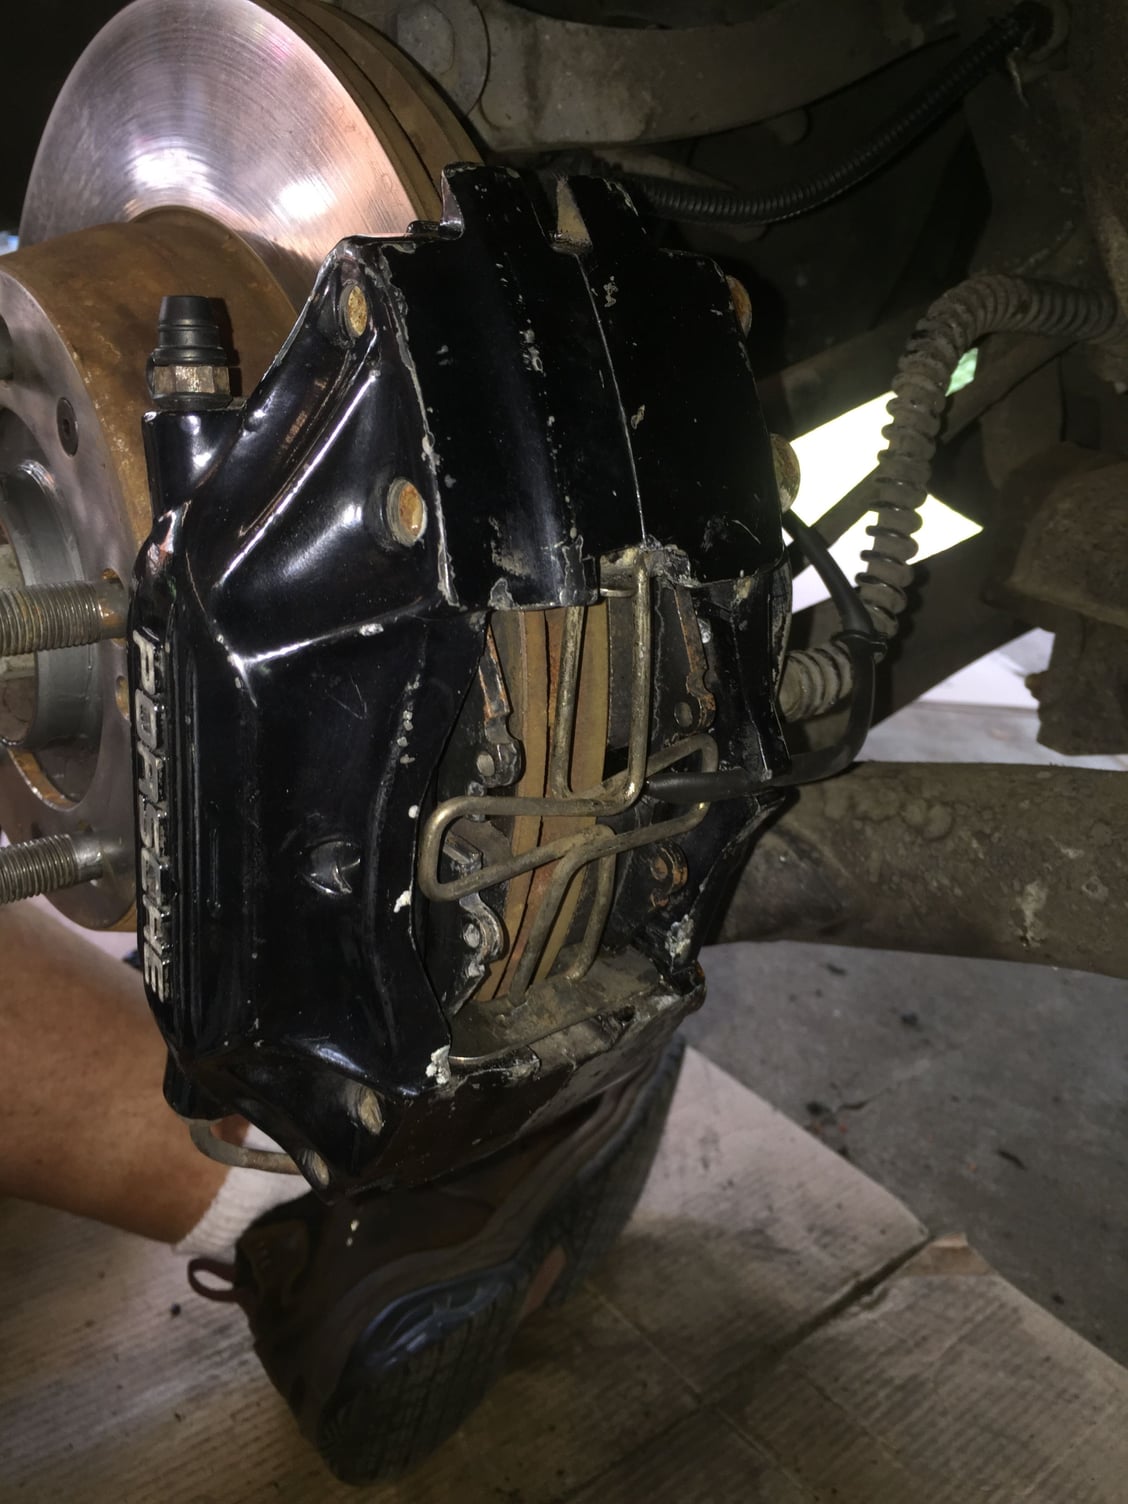
I then reinstalled the passenger's side rear caliper on its mounting bolts. Armed with the WSM, I started to disassemble it. Out came the pad wear sensor and pad retaining spring. It was almost seized in the pivot holes. The pads came out next, relatively easily. Once the dampers cleared the pistons, I thought the pads would slide right out. They didn't, I had to tilt them slightly. And one of the dampers came off the inner pad.
Again with my trusty toothbrush and mineral spirits, I thoroughly cleaned the pads, escaped damper, and retaining spring. The pads had a nasty goo of mixed brake dust, too much pad lubricant, and road grime. After scrubbing, all got rinsed with brake cleaner. Everything cleaned up well.
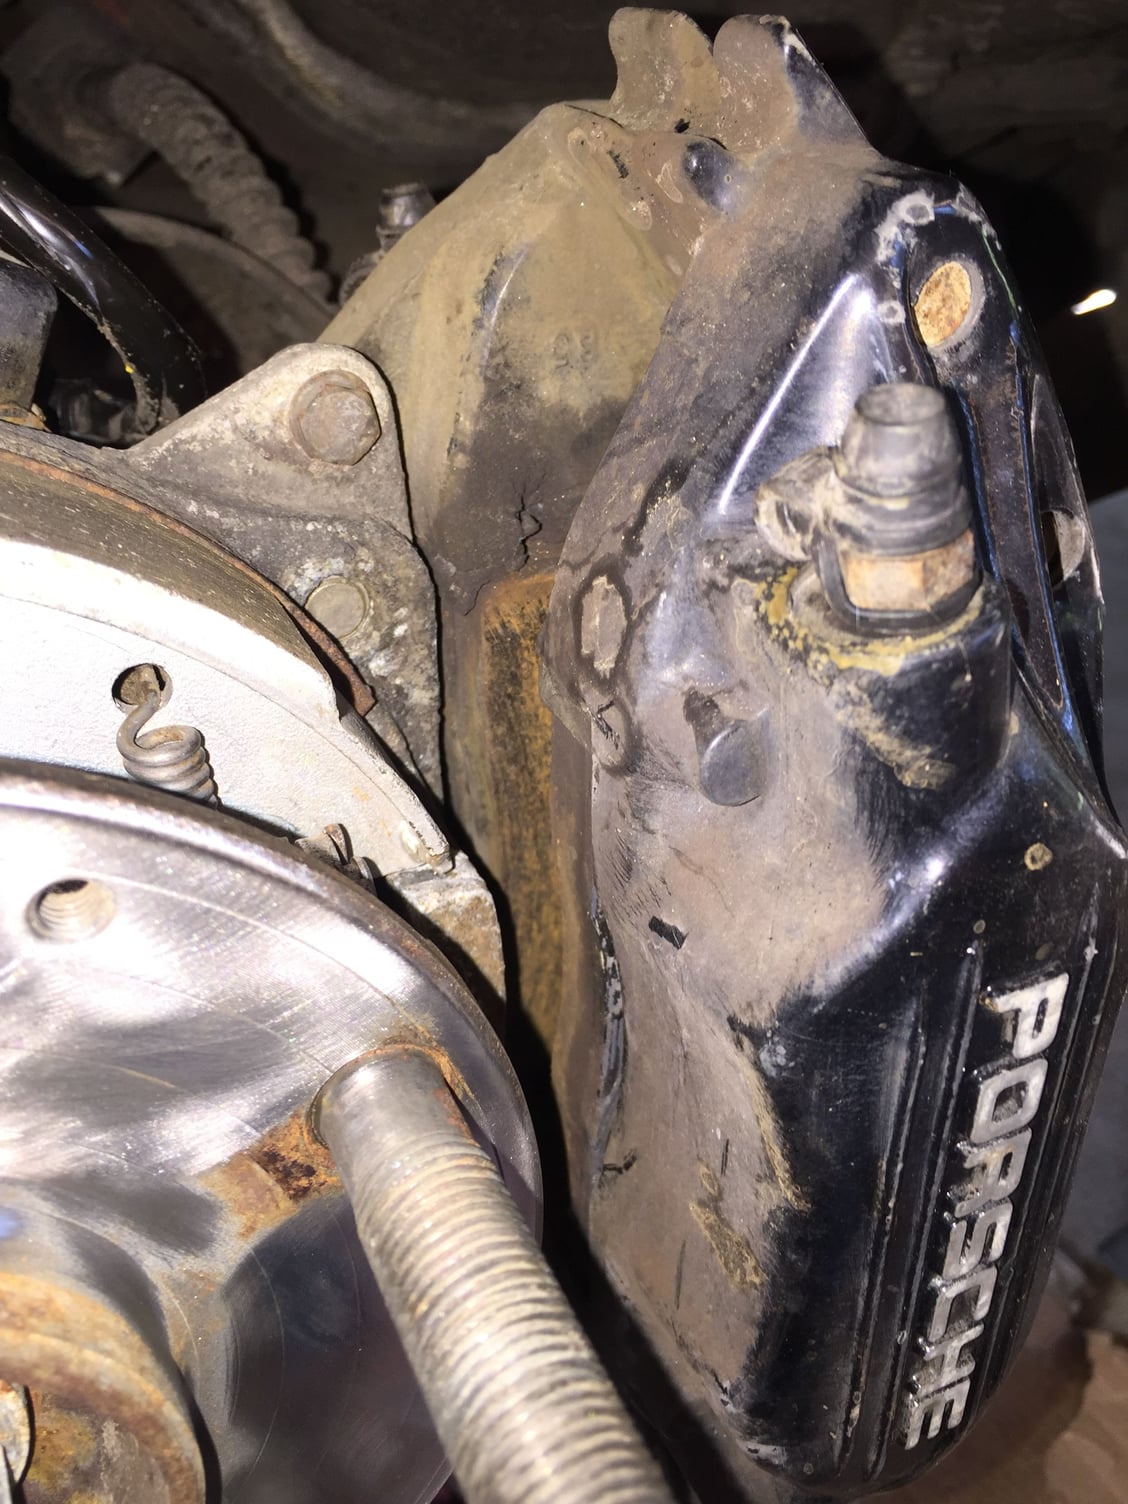
The caliper was next. I left the caliper bolted in place so it would be stable while I was cleaning it. Full disclosure: I spent more effort cleaning the outside of the caliper that was visible through the wheel slots. If I were completely removing the calipers, I would have scrubbed them much better. As it was, I scrubbed the hell outta the pistons, pad plates, and inside area of the caliper. Much better. I did not see any evidence of brake fluid leakage from the pistons. I even buffed the outside edge of the caliper with a cloth. It is still sorta shiny.
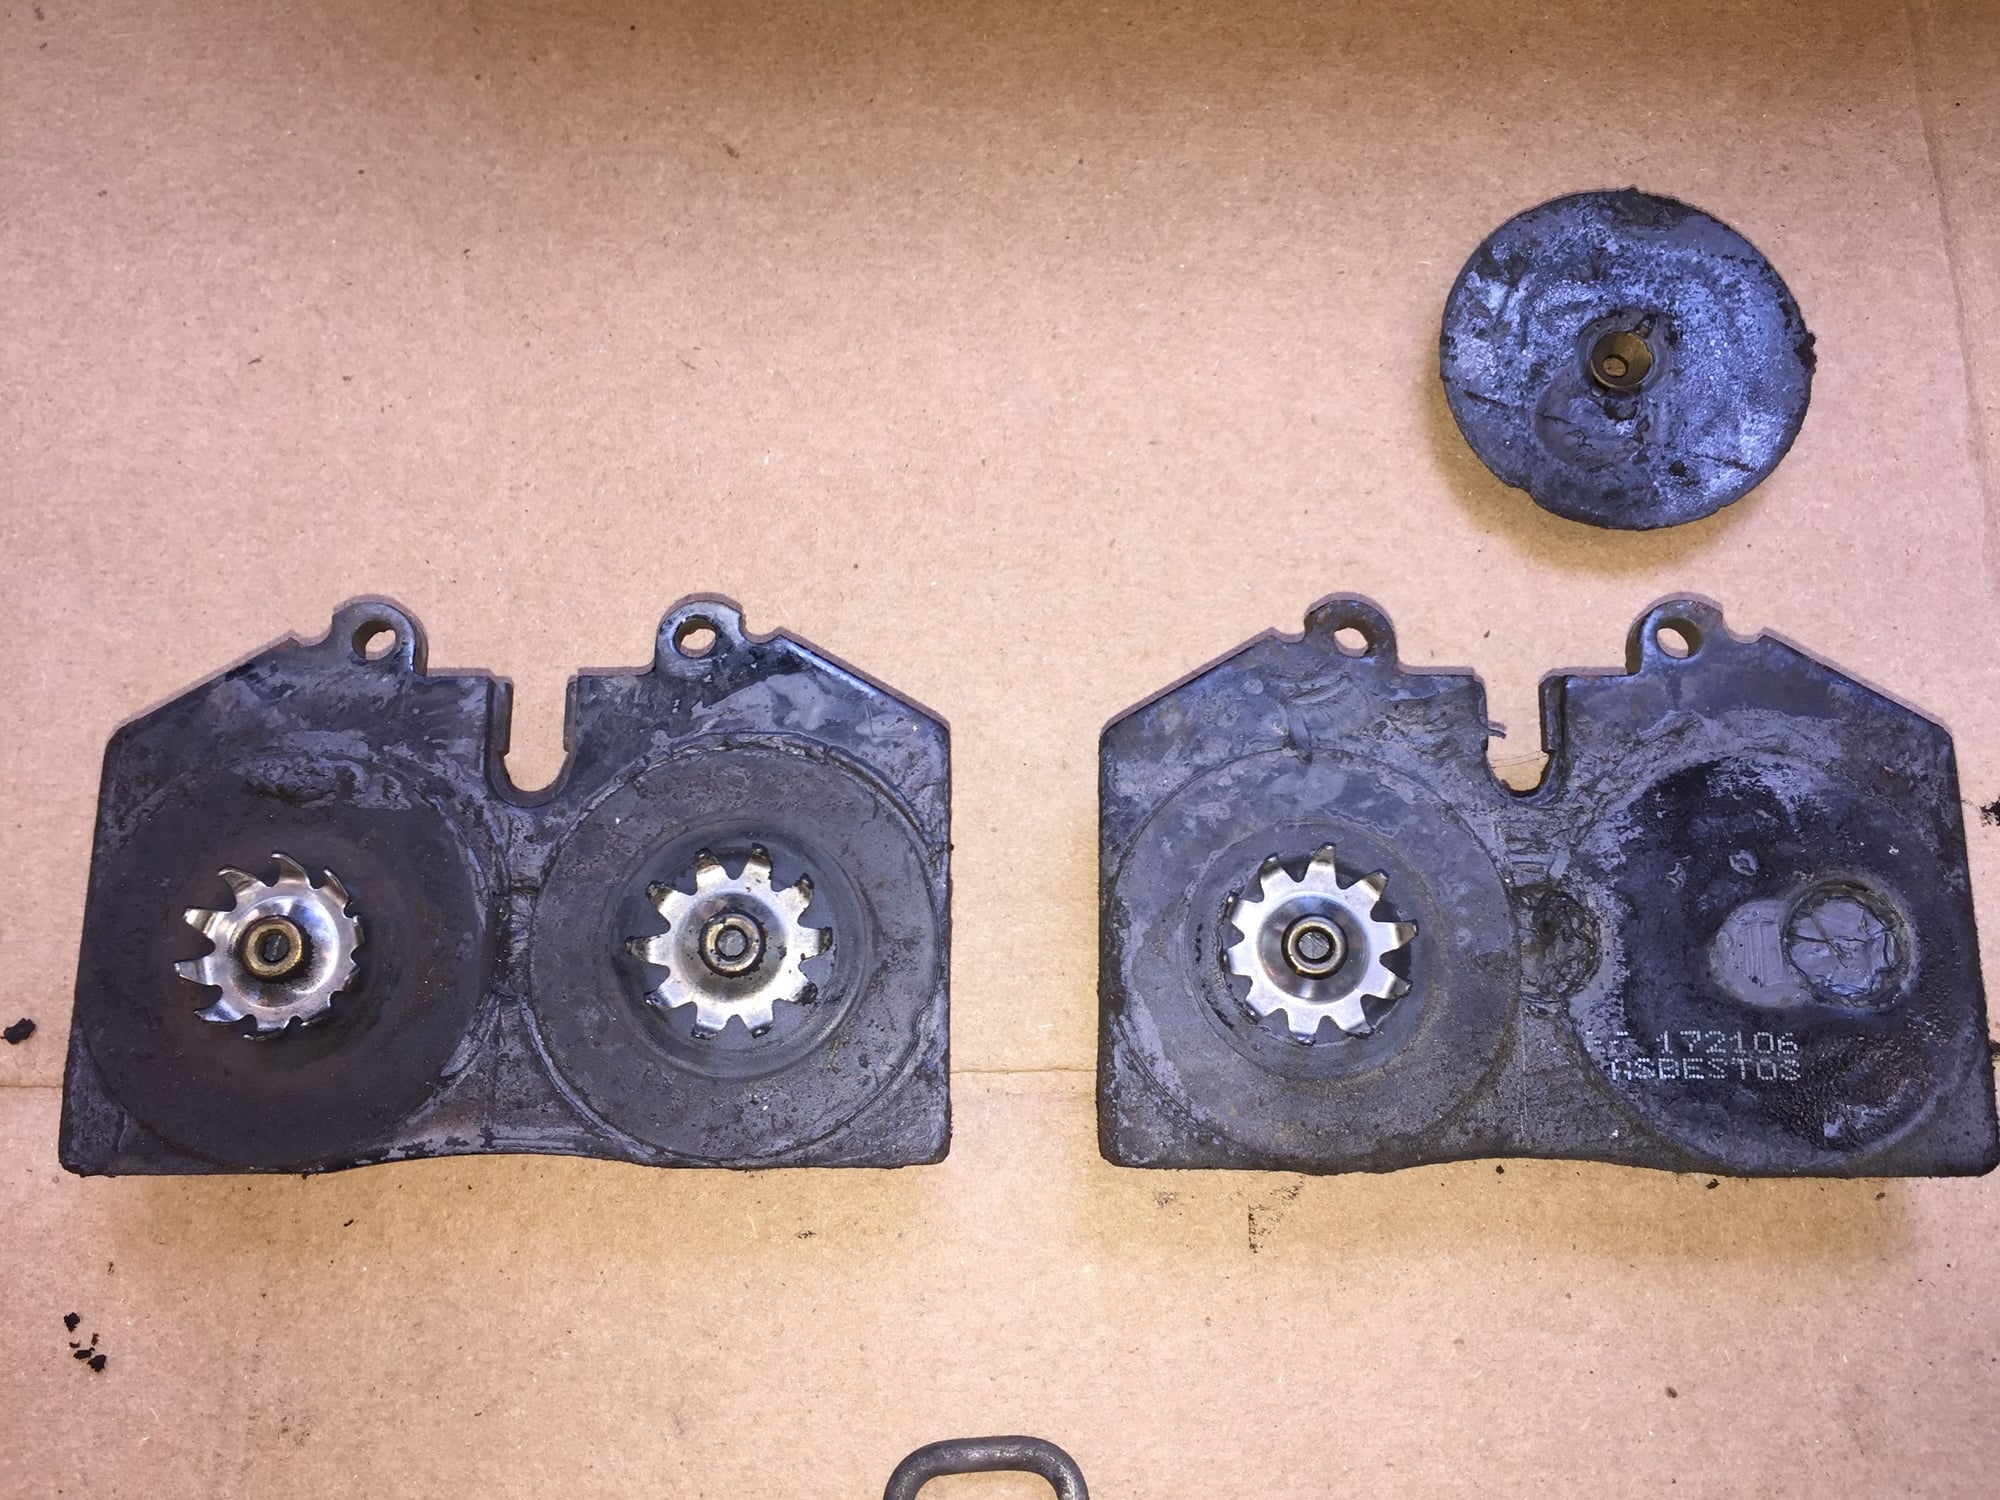
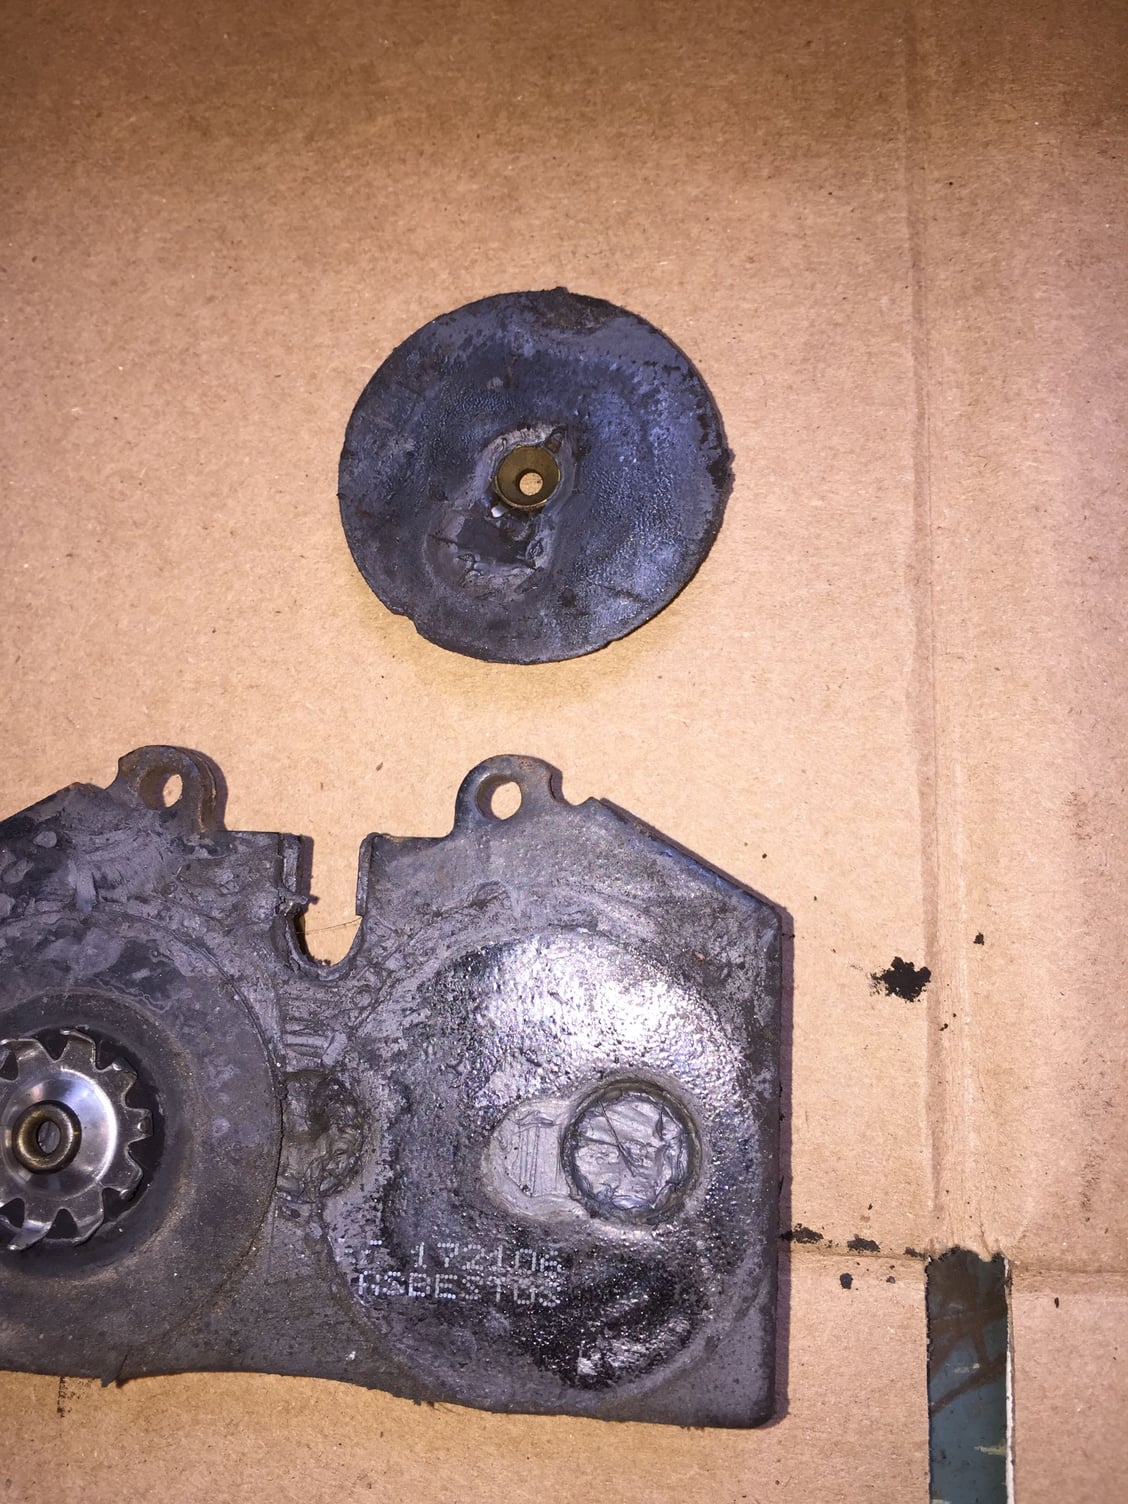
I did get some baseline readings while it was all apart. The passenger's side rear rotor was 23.80mm thick. WSM spec's out the wear limit at 22mm. Inner brake pad friction material was 12.21mm thick, while the outer pad was 12.15mm. Wear limit is 2mm. Upper parking brake shoe lining thickness was 4.26mm, while lower was 3.75mm. Wear limit is 2mm. These are quite good for 18+ year old components.
I noticed the escaped damper was still slightly sticky. Not sticky enough, so I gave it a light coat of disc brake quiet to act as an adhesive.
As of this moment, I don't have any Optimoly HT, so I put a very thin layer of high temp brake caliper pin lube on the edges of the pad backing plates. Pads are back in the caliper, on their correct sides. Spring retainer is back in, though I have a nasty feeling I might have it upside down. Pad wear sensor is back in. I am now waiting for the rain to pass so I can finish the passenger's side rear and start on the driver's side rear.
So you went to all that effort to clean the caliper only to put it back on with those rusty fasteners. I suggest wire wheeling the fasteners then dipping them in a black oxide solution. I used this kit from Caswell on all my GT6 fasteners that I reused. Works great and is simple and affordable.
Very true.
However, reality check. I would like to drive the Red Witch soon.
I am drawing the line at clean and functional. If I were to go off the cliff of restoration, I would never drive her again.
I do understand where you are coming from. However, there is so much to be done that The freshly black oxide coated bolt heads would surely clash with the overall patina. I can't realistically refinish it all.
Very true.
However, reality check. I would like to drive the Red Witch soon.
I am drawing the line at clean and functional. If I were to go off the cliff of restoration, I would never drive her again.
Point well taken, Seth.
I drove off that cliff a year ago !
But having ...errrr....fun.... in the garage all the same ! !
Great work, buddy, and THANKS for taking the time and care to document your effort.
Have a great weekend,
Very true.
However, reality check. I would like to drive the Red Witch soon.
I am drawing the line at clean and functional. If I were to go off the cliff of restoration, I would never drive her again.
I do understand where you are coming from. However, there is so much to be done that The freshly black oxide coated bolt heads would surely clash with the overall patina. I can't realistically refinish it all.
Thanks for the link!
Seth K. Pyle
Hmmm...that may explain why I am on year 6 of my 6 month Triumph restoration. Reality be damned!
Daniel5691: Thanks! I am trying to avoid getting in too deep at once. I am trying to do things in bite sized chunks.
You are quite welcome! I document because it helps me later, and also it lets others point out my mistakes.
That, and if my posts help another newbie figure something out, then excellent!
GT6ixer: Don't misunderstand me. I want the Red Witch to be nice. But, I want to drive her worse. My 1966 Chevrolet C-10 Fleetside short bed WAS a running driving truck. I took it off the road to do some repairs/upgrades. And fell right off the cliff of WYAIT. Now, it is a bare frame, with parts scattered to the winds in various stages of restoration.
^^ I second keeping the car in driver condition because even if you do a concourse level restoration, it will be back to driver status in a few years if you actually use it.
928s run better the more they are driven and problems can actually fix themselves if you use the car. Just make it reliable and have fun with it.
Thanks, Blake! That is my point and motivation. I want to DRIVE this 928! The past two months of driving her have me hopelessly addicted. I am chomping at the bit to get back behind the wheel.
So, all work will be well done to a mechanical and cleanliness standard, but cosmetics may not be addressed.
And, I find it kinda disheartening to blow a fortune to restore something, then have it deteriorate through constant use. Its a mobius strip of 'restore it to make it nice/drive it to make it worn.'
Can't win.
HA! Finally got one done. Passenger's side rear is complete.
I took Sean's advice and went back for the ABS sensor. Search was my friend. I found a post by Stan (mr merlin) that was very helpful.
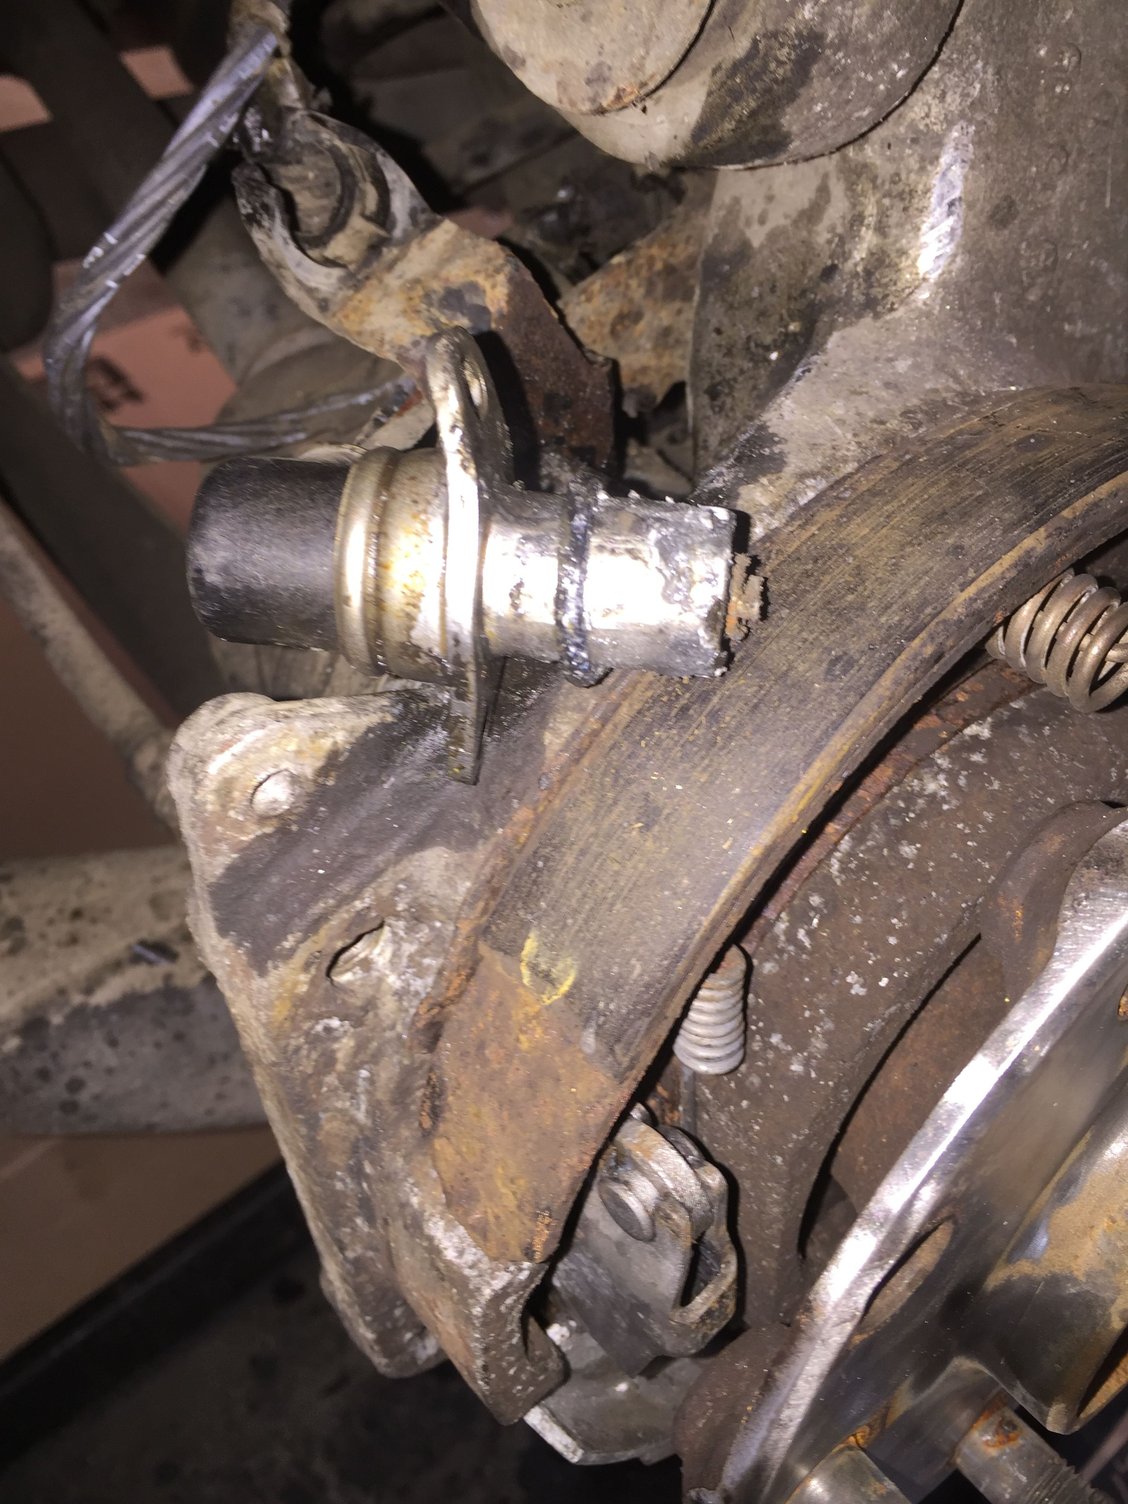
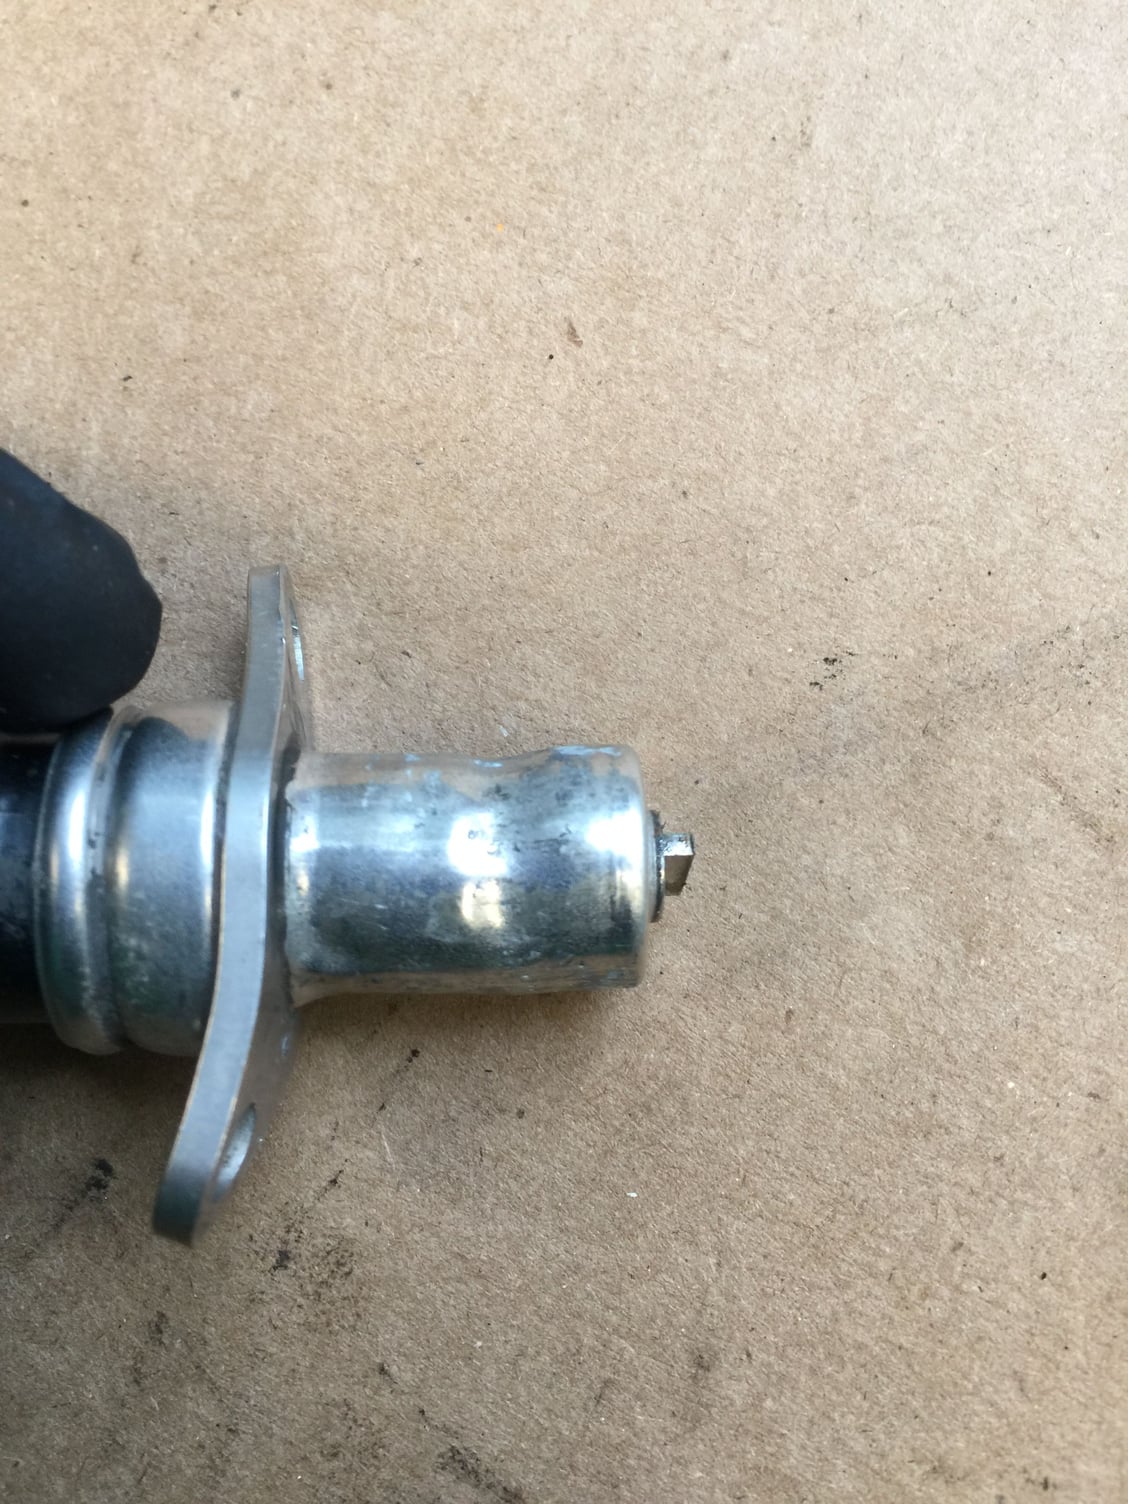
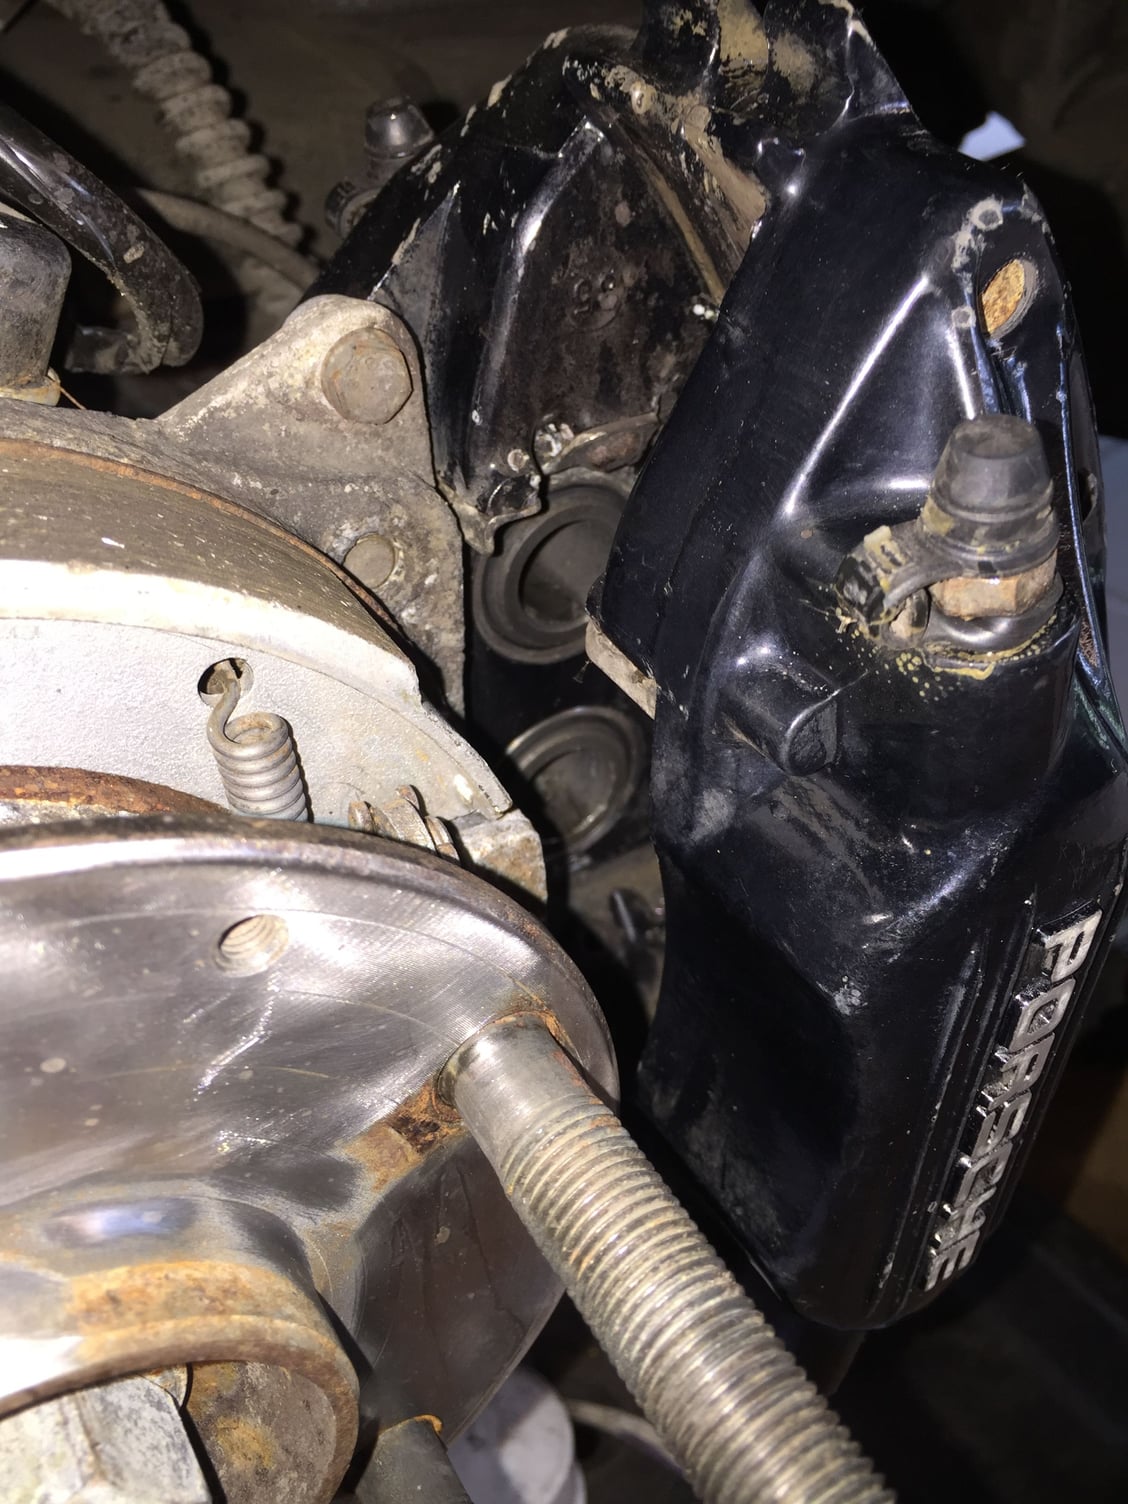
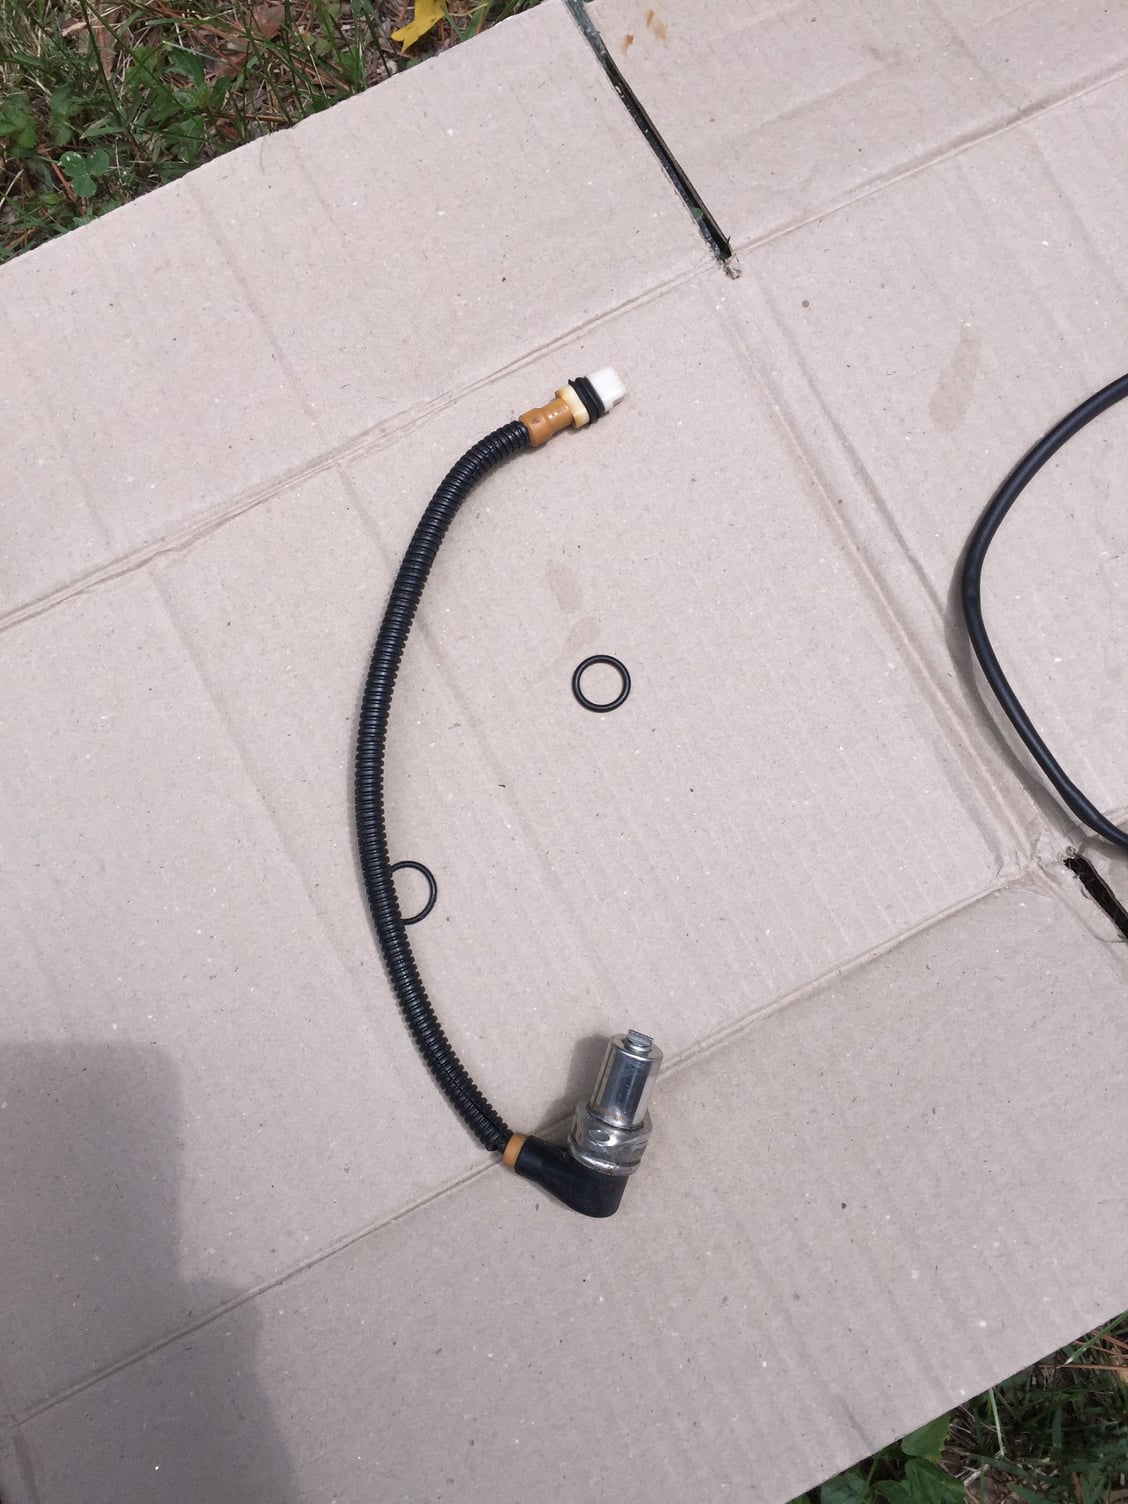
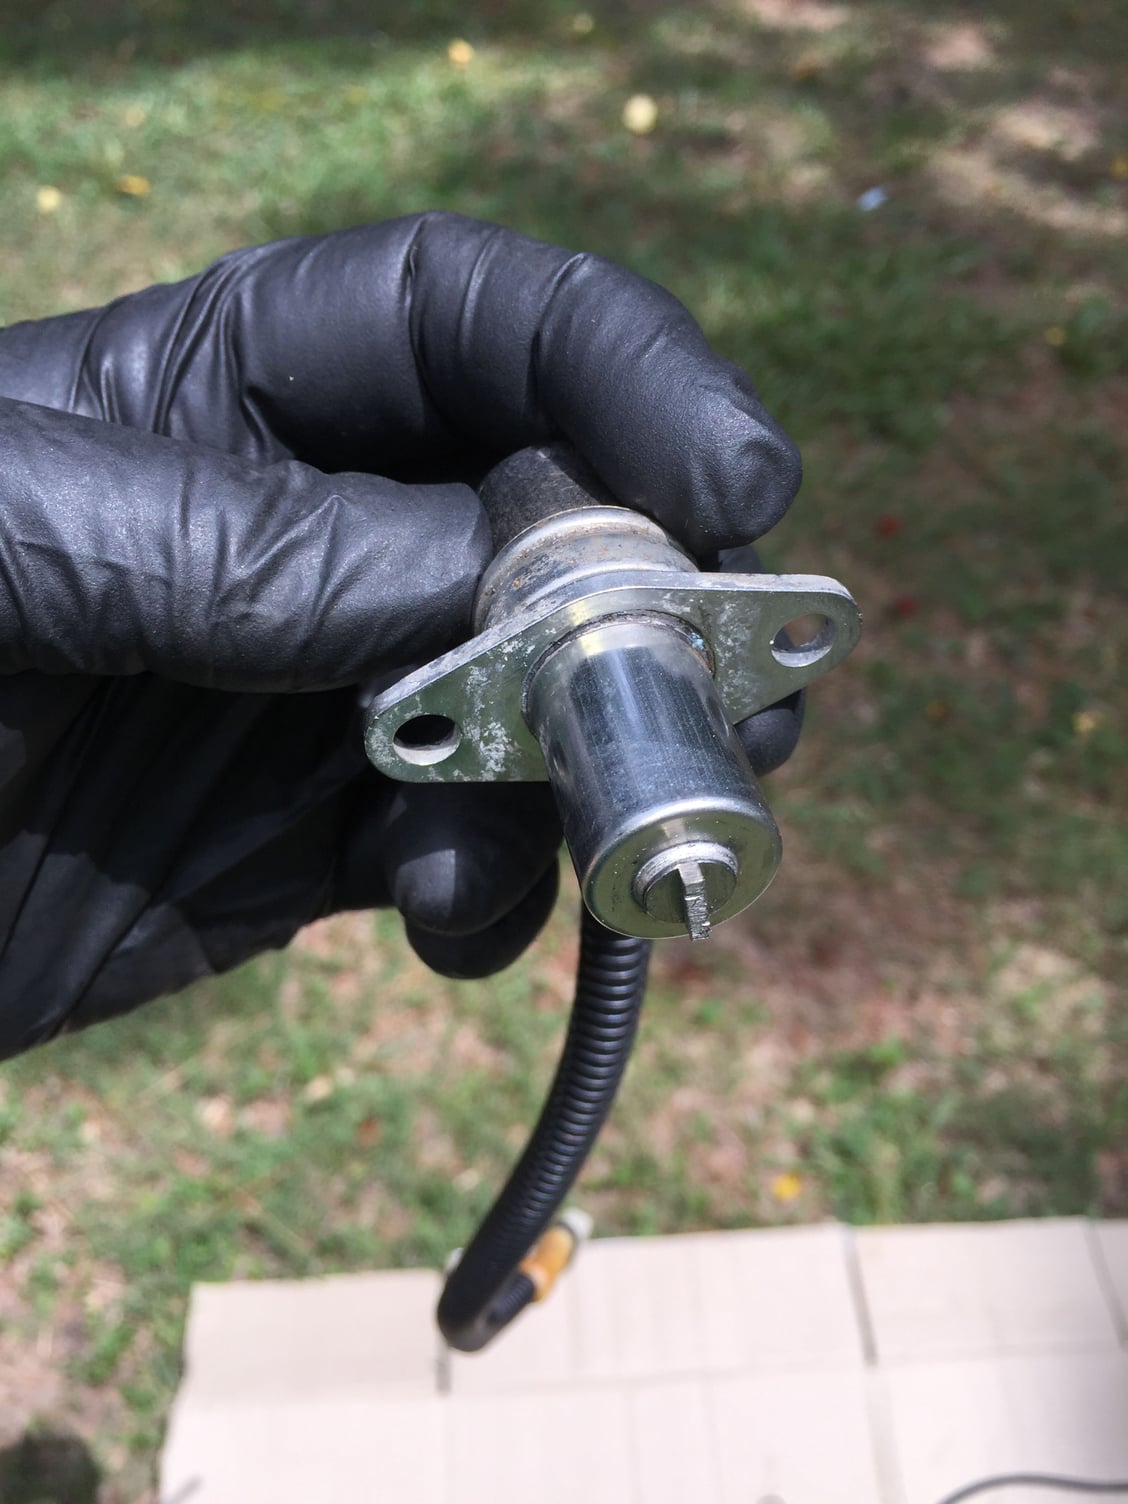
Started off by hitting it with Aerokroil, then removed the socket head cap screw. Using a small hammer and a long punch, I gently tapped each side of the mounting wings, trying to rotate the sensor. It quickly broke free. I kept working it back and forth to loosen the body of the sensor. I have read several posts where guys have had real carnage getting the sensor out.
Next step was to alternately pry on one of the mounting wings and wiggle the top of the sensor. This acted to rock the sensor side to side, ever so slightly. It worked. After a moment or so, the sensor started to pull out of the wheel carrier.
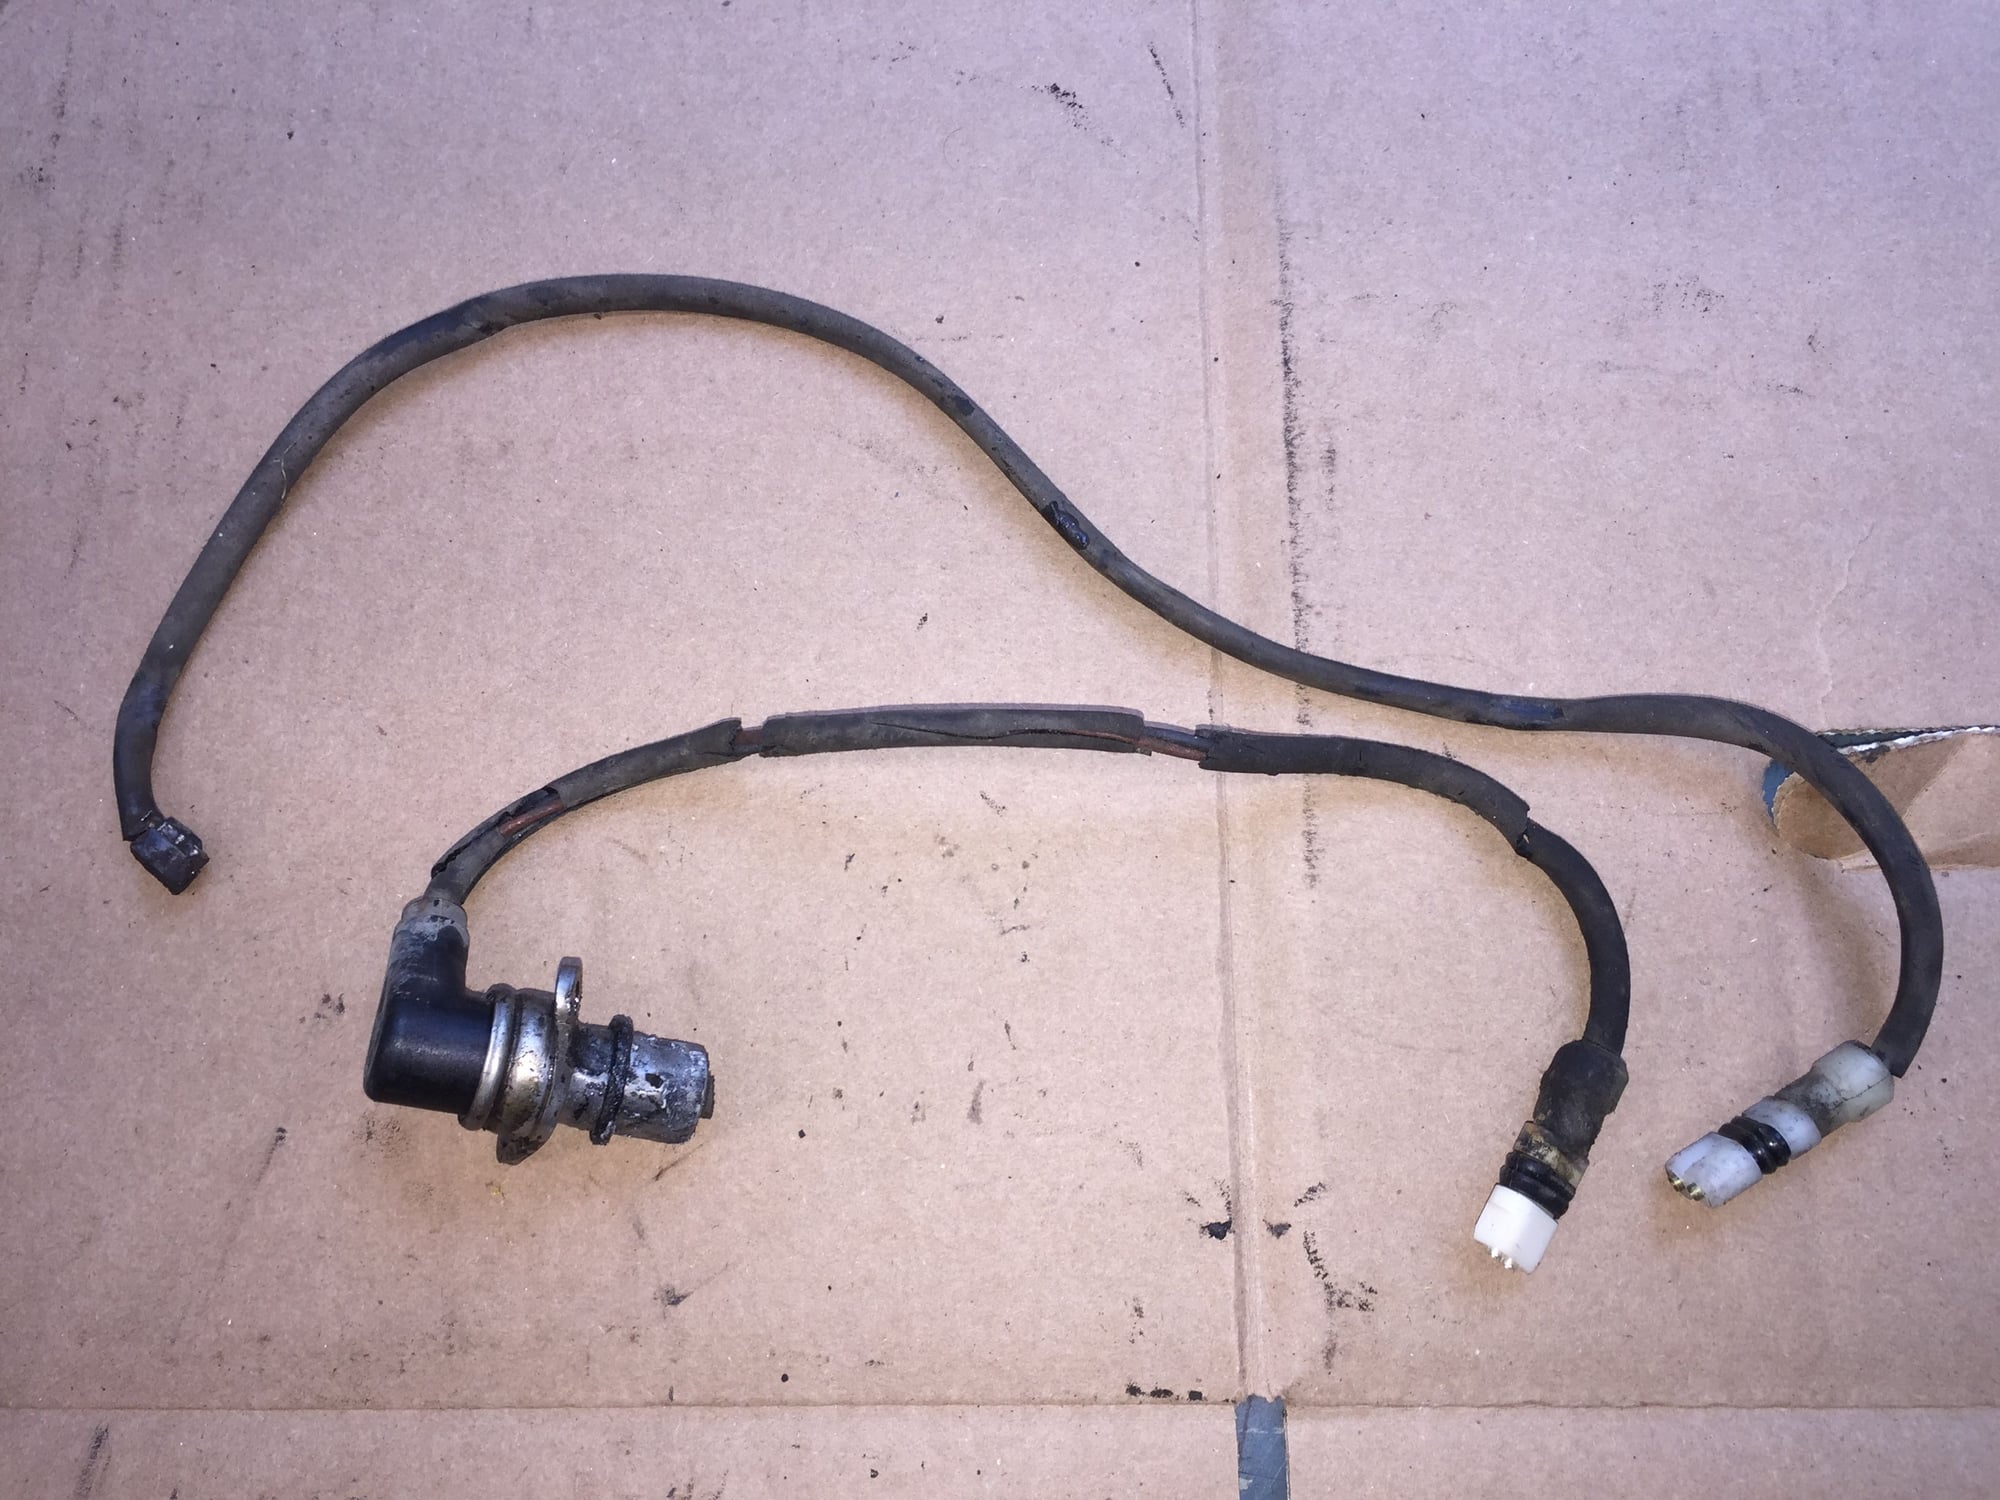
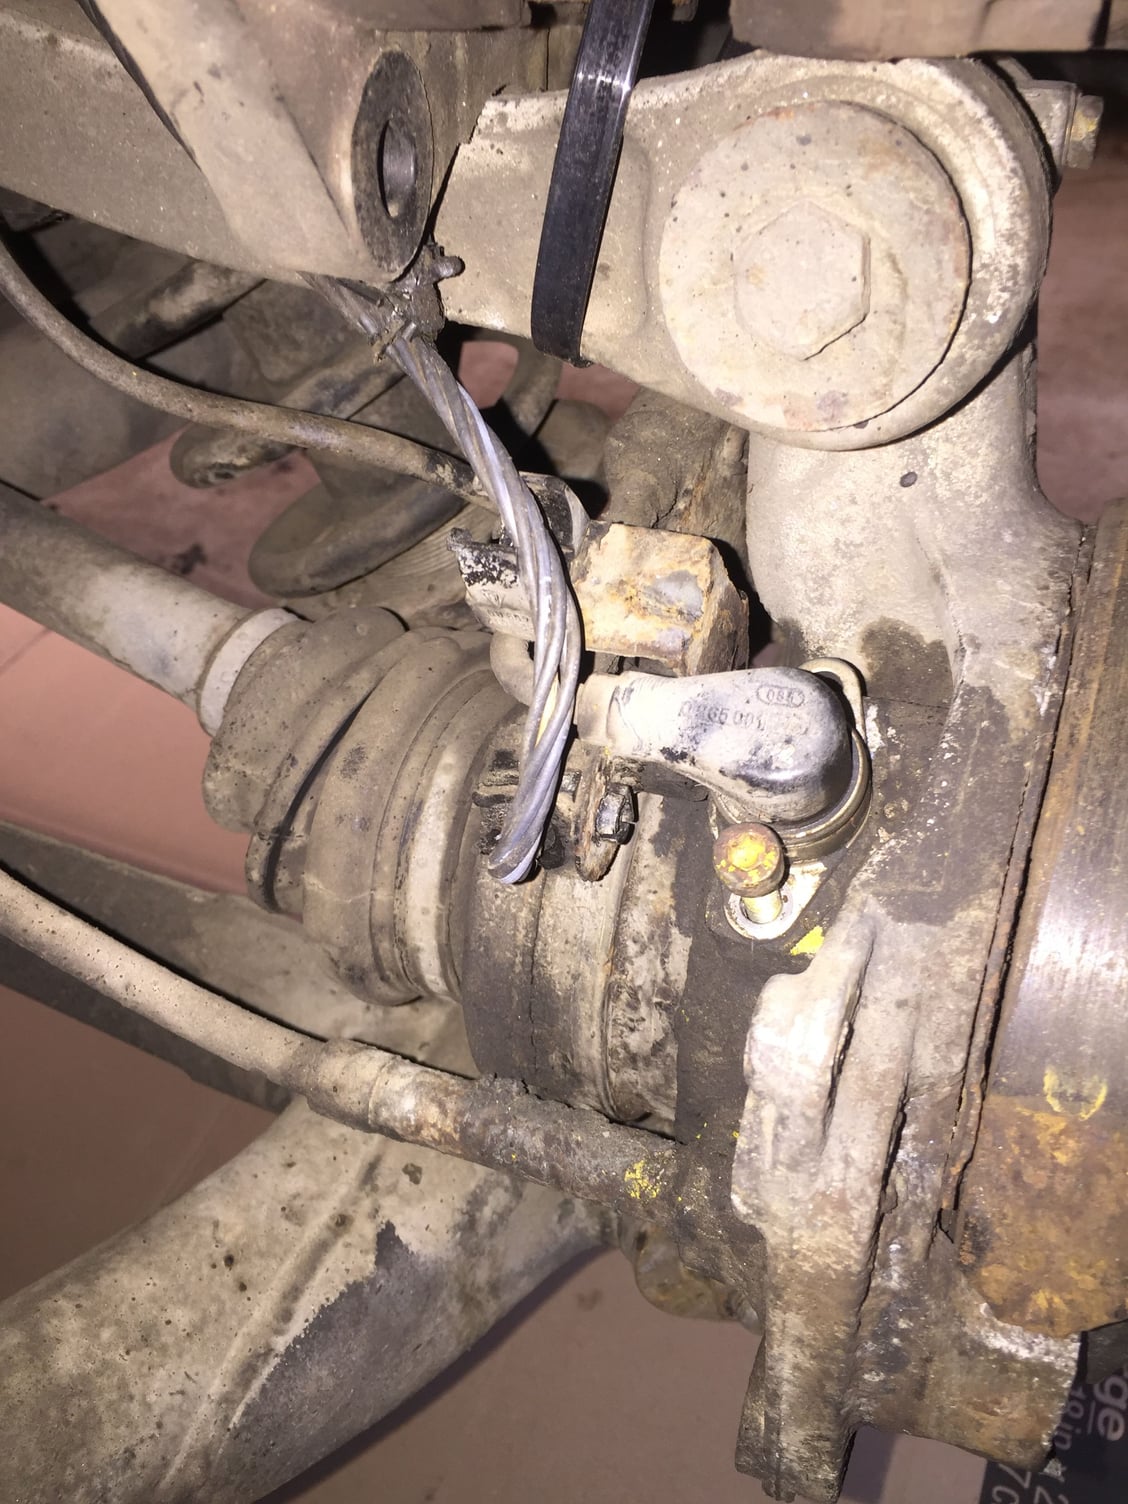
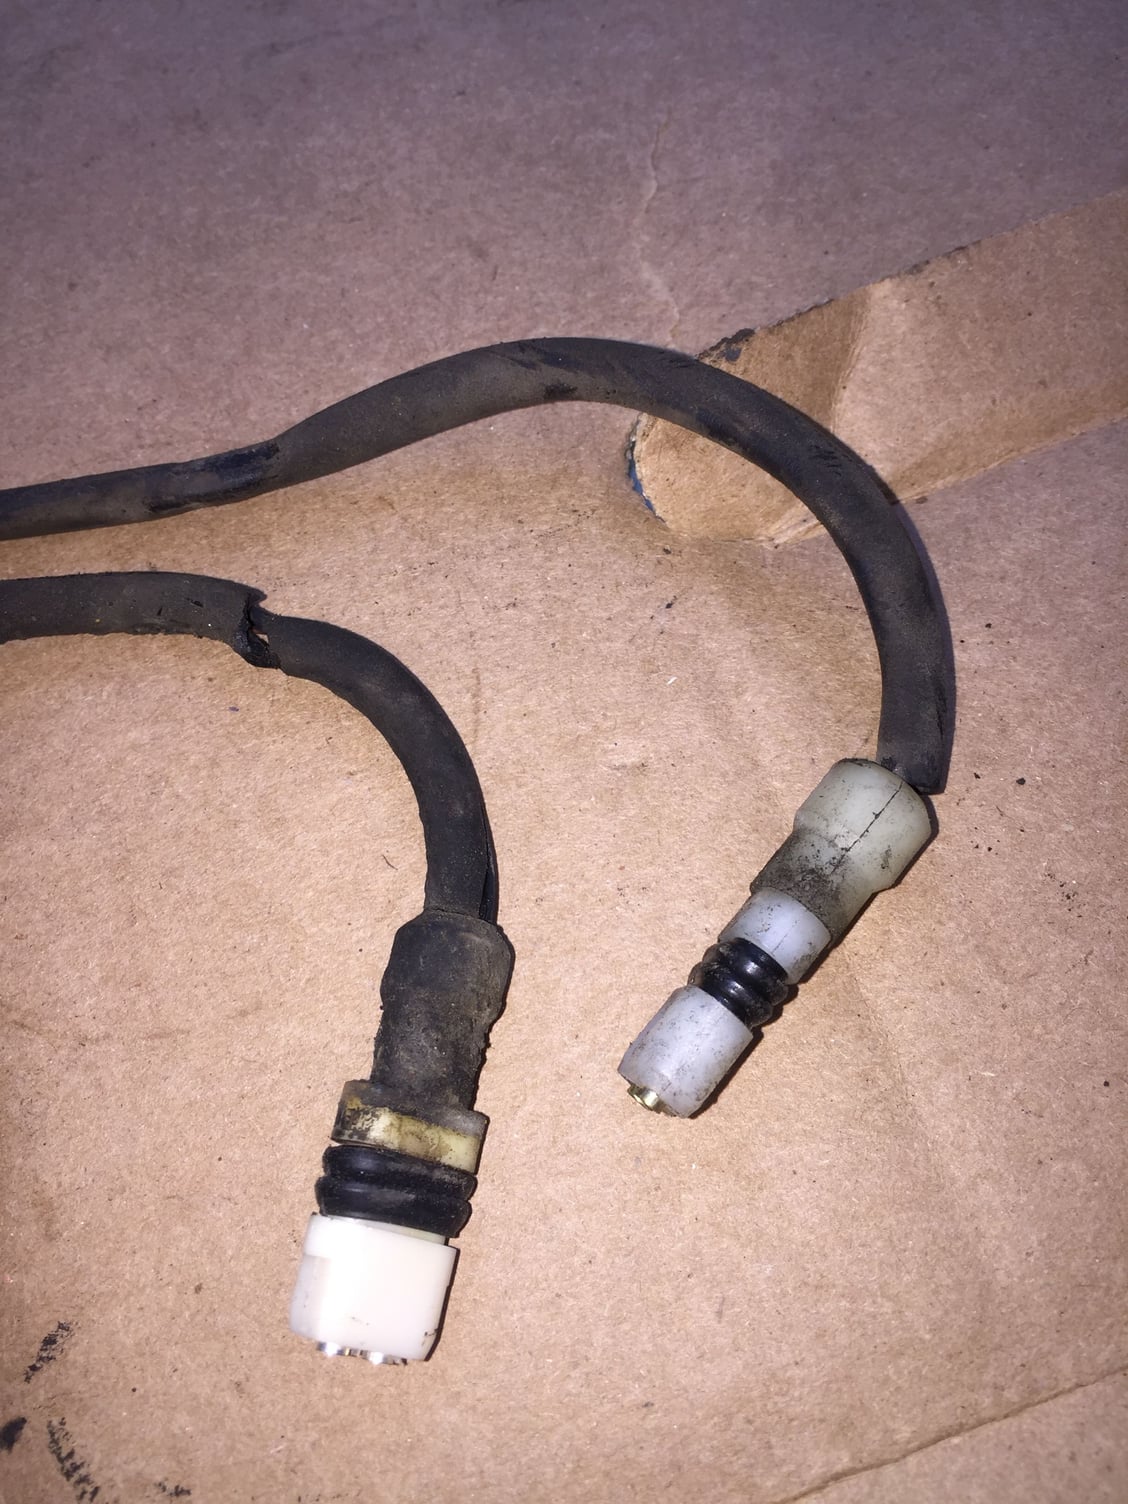
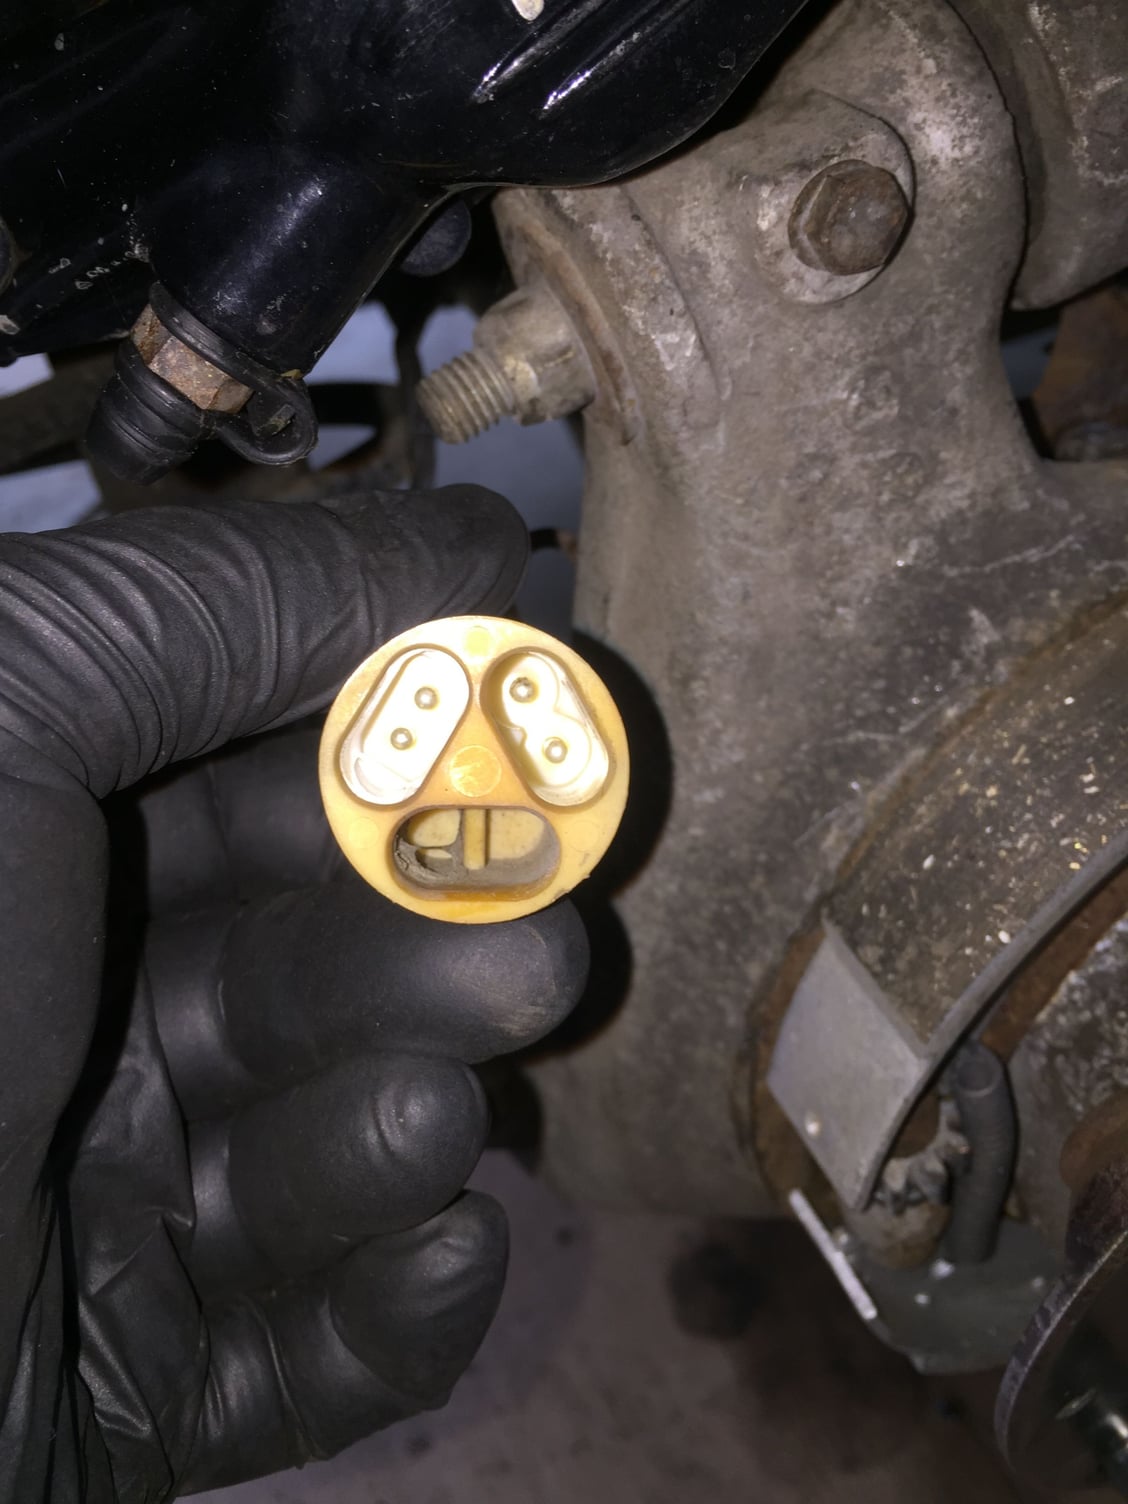
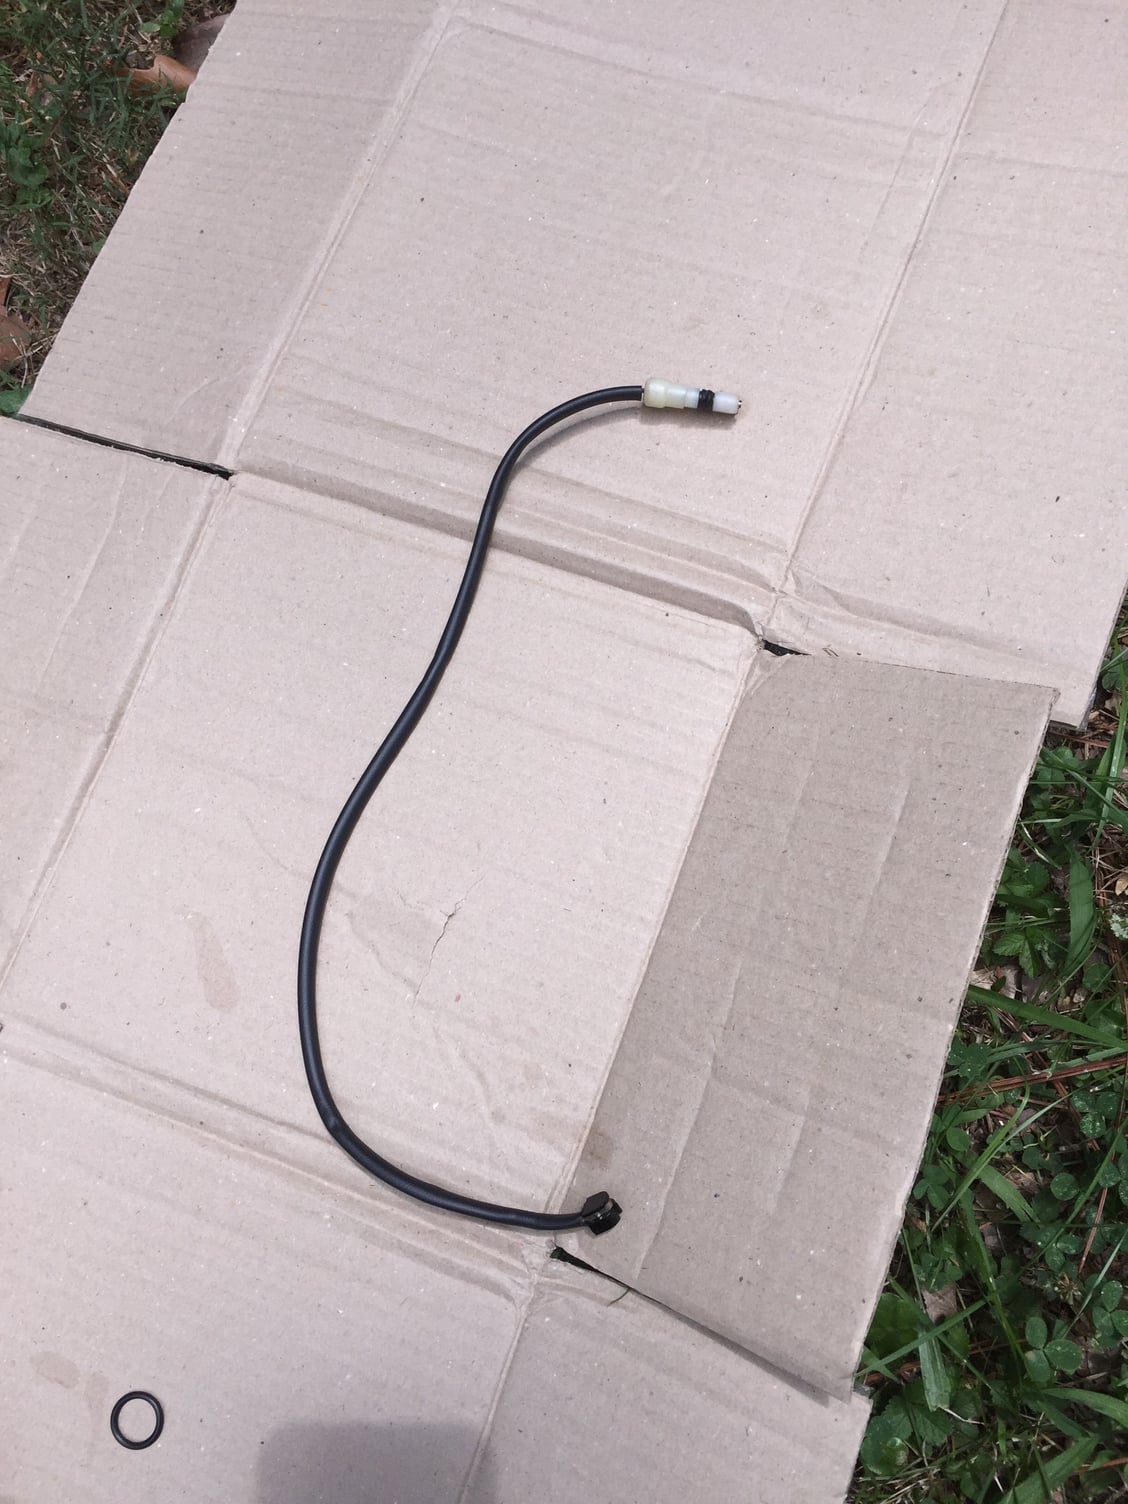
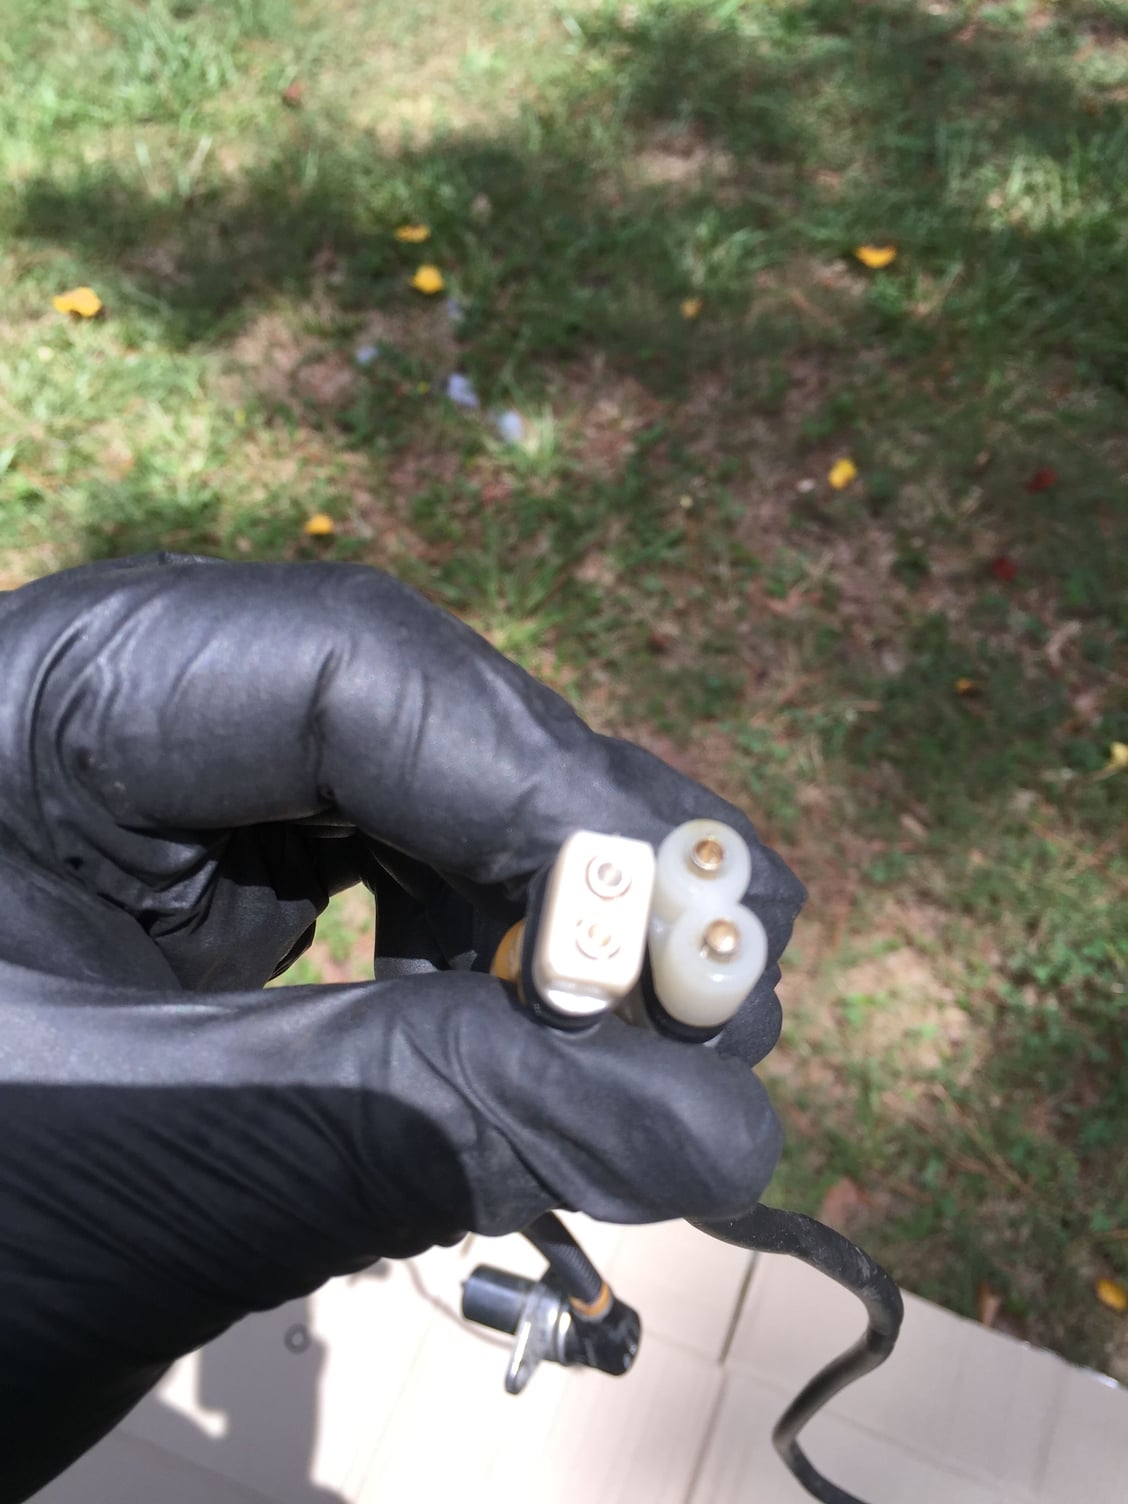
At this point, now knowing that the sensor was going to come out, I disconnected the wiring from the barrel connector. I removed botht the ABS and brake pad wear sensor wires from the barrel connector and the various clips. Then, I finished removing the ABS sensor.
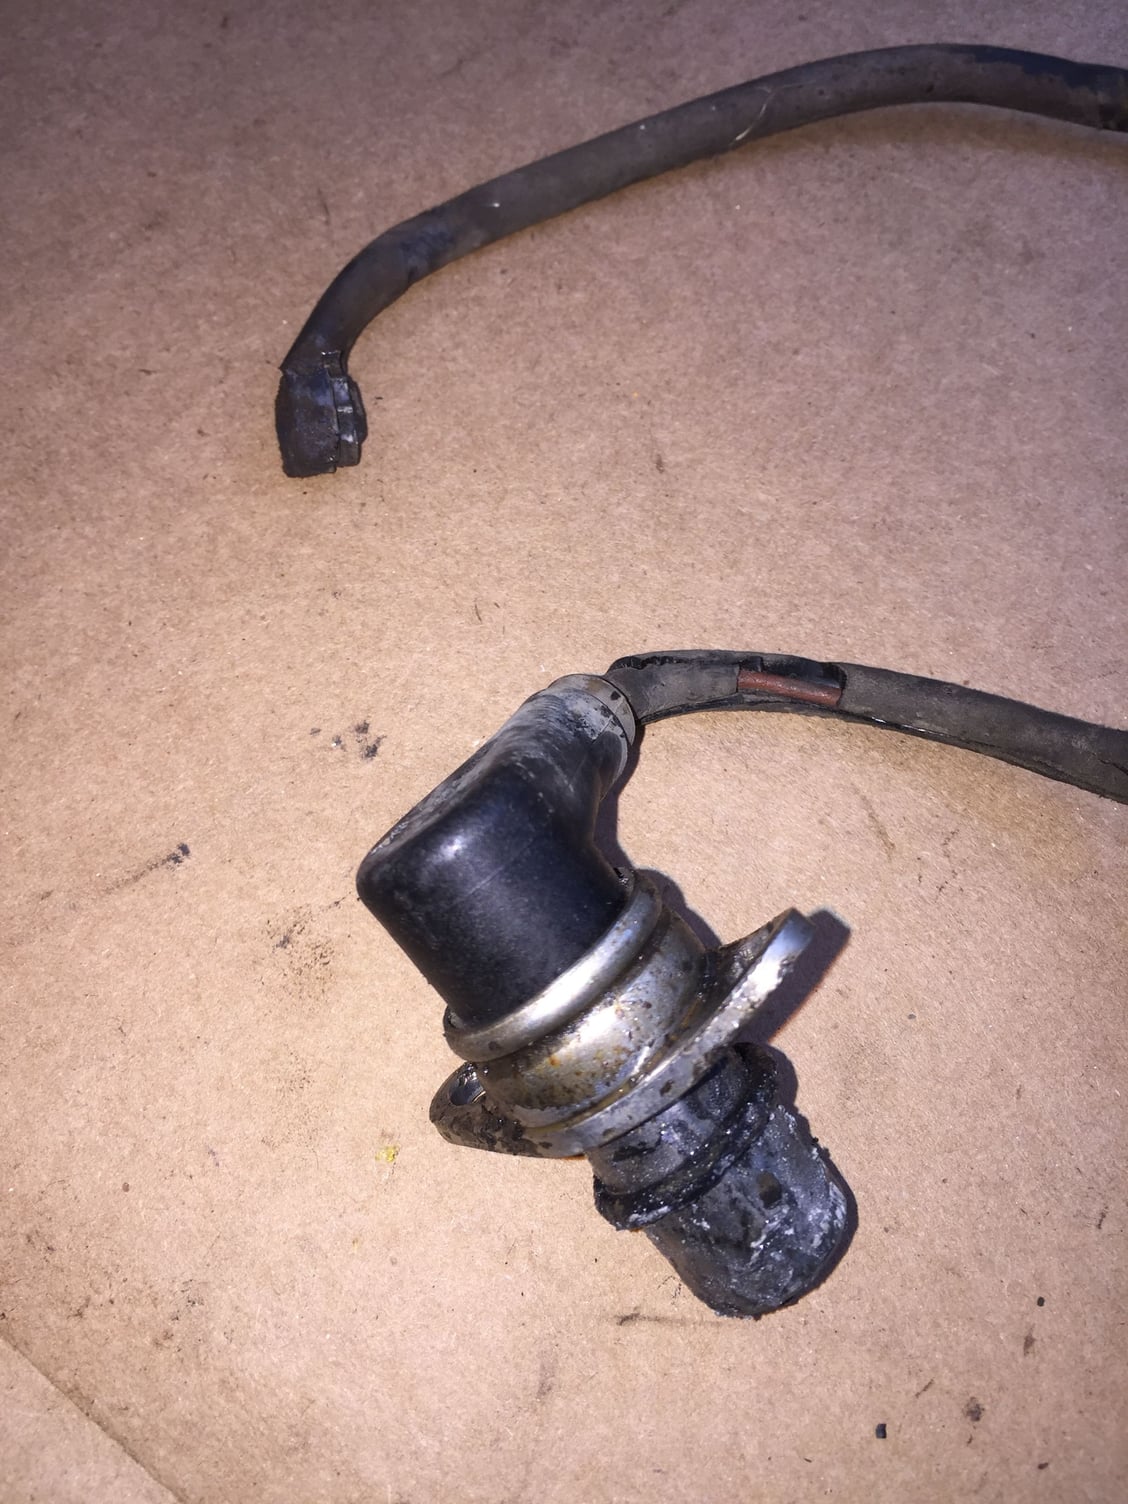
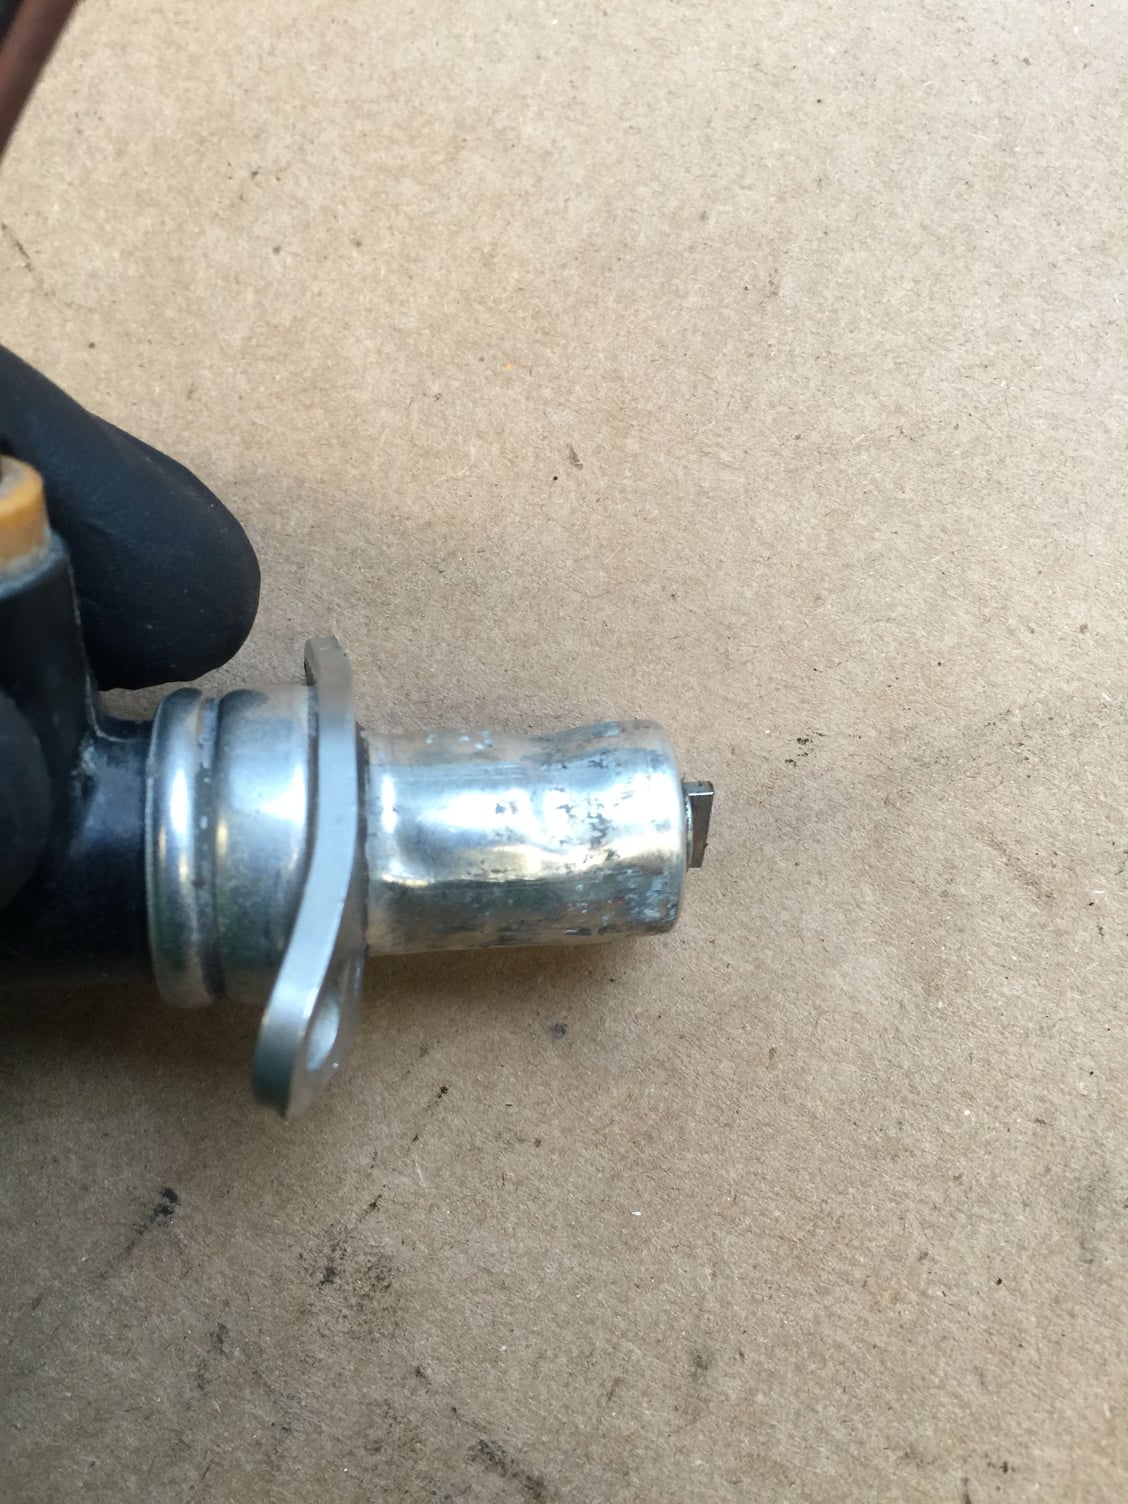
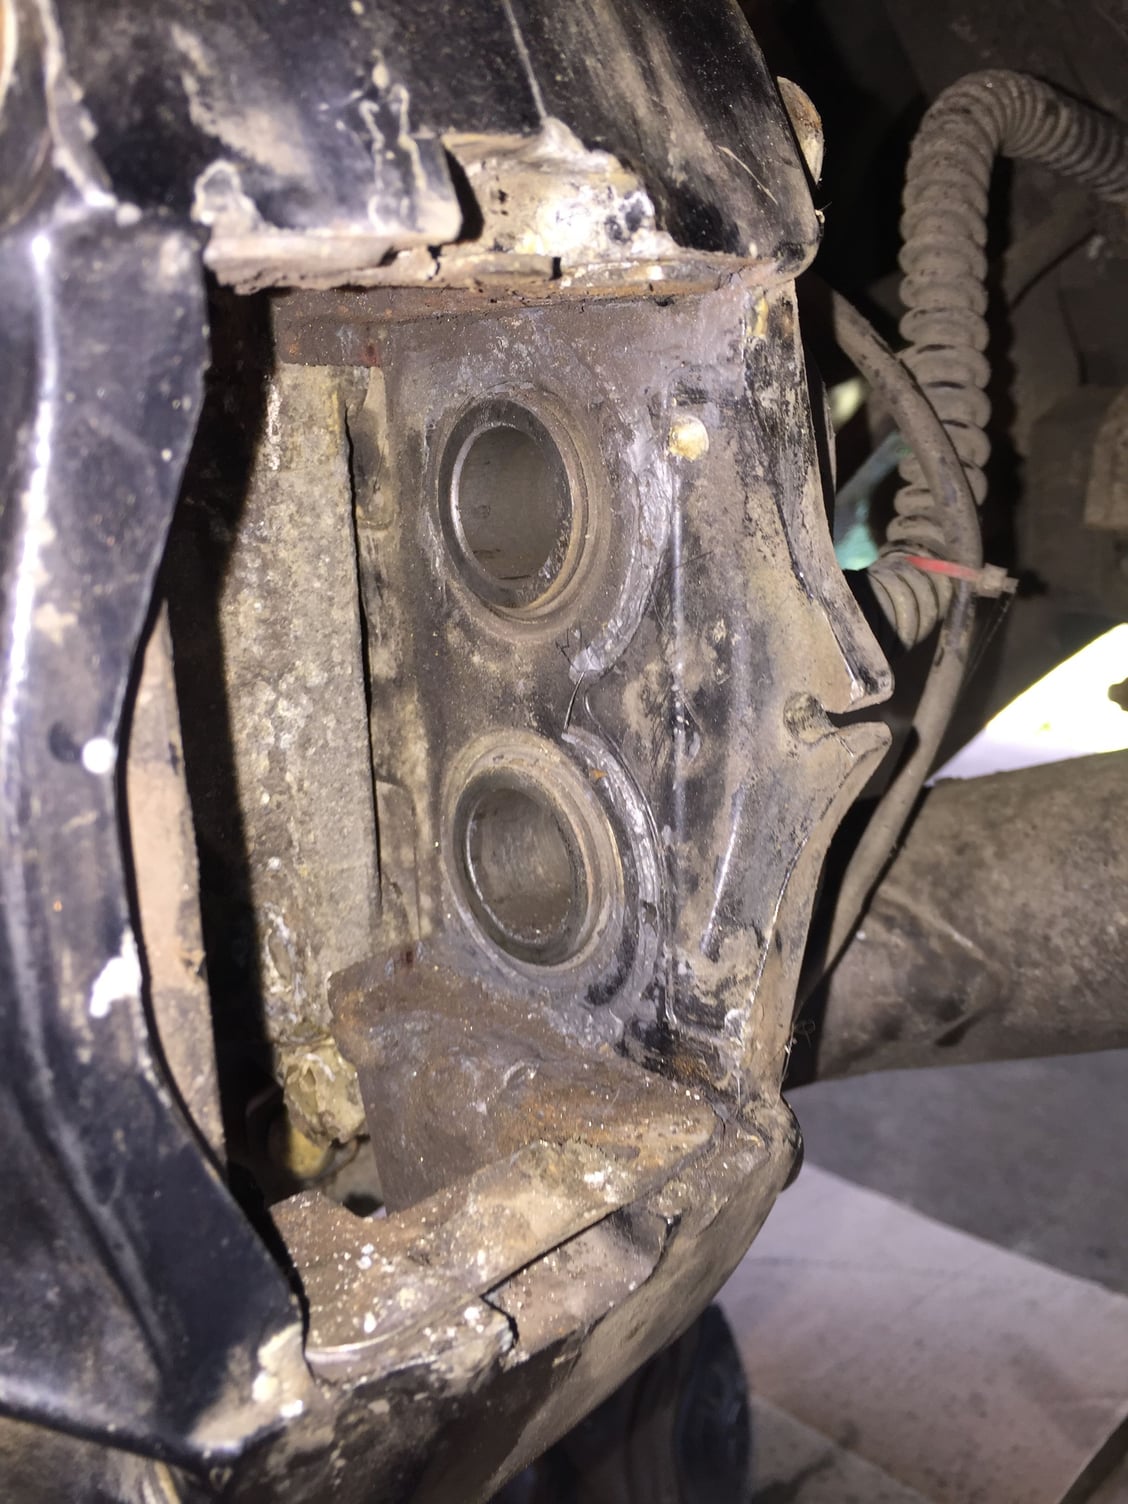
Surprisingly, there was no corrosion on the sensor body. The O-ring stayed in the wheel carrier. The sensor bore showed some corrosion of the aluminum at the top. I cleaned the sensor with mineral spirits and a toothbrush, followed with a rinsing of contact cleaner. Ended with a shot of DeOxit 5 to the terminals. Same thing for the brake pad wear sensor.
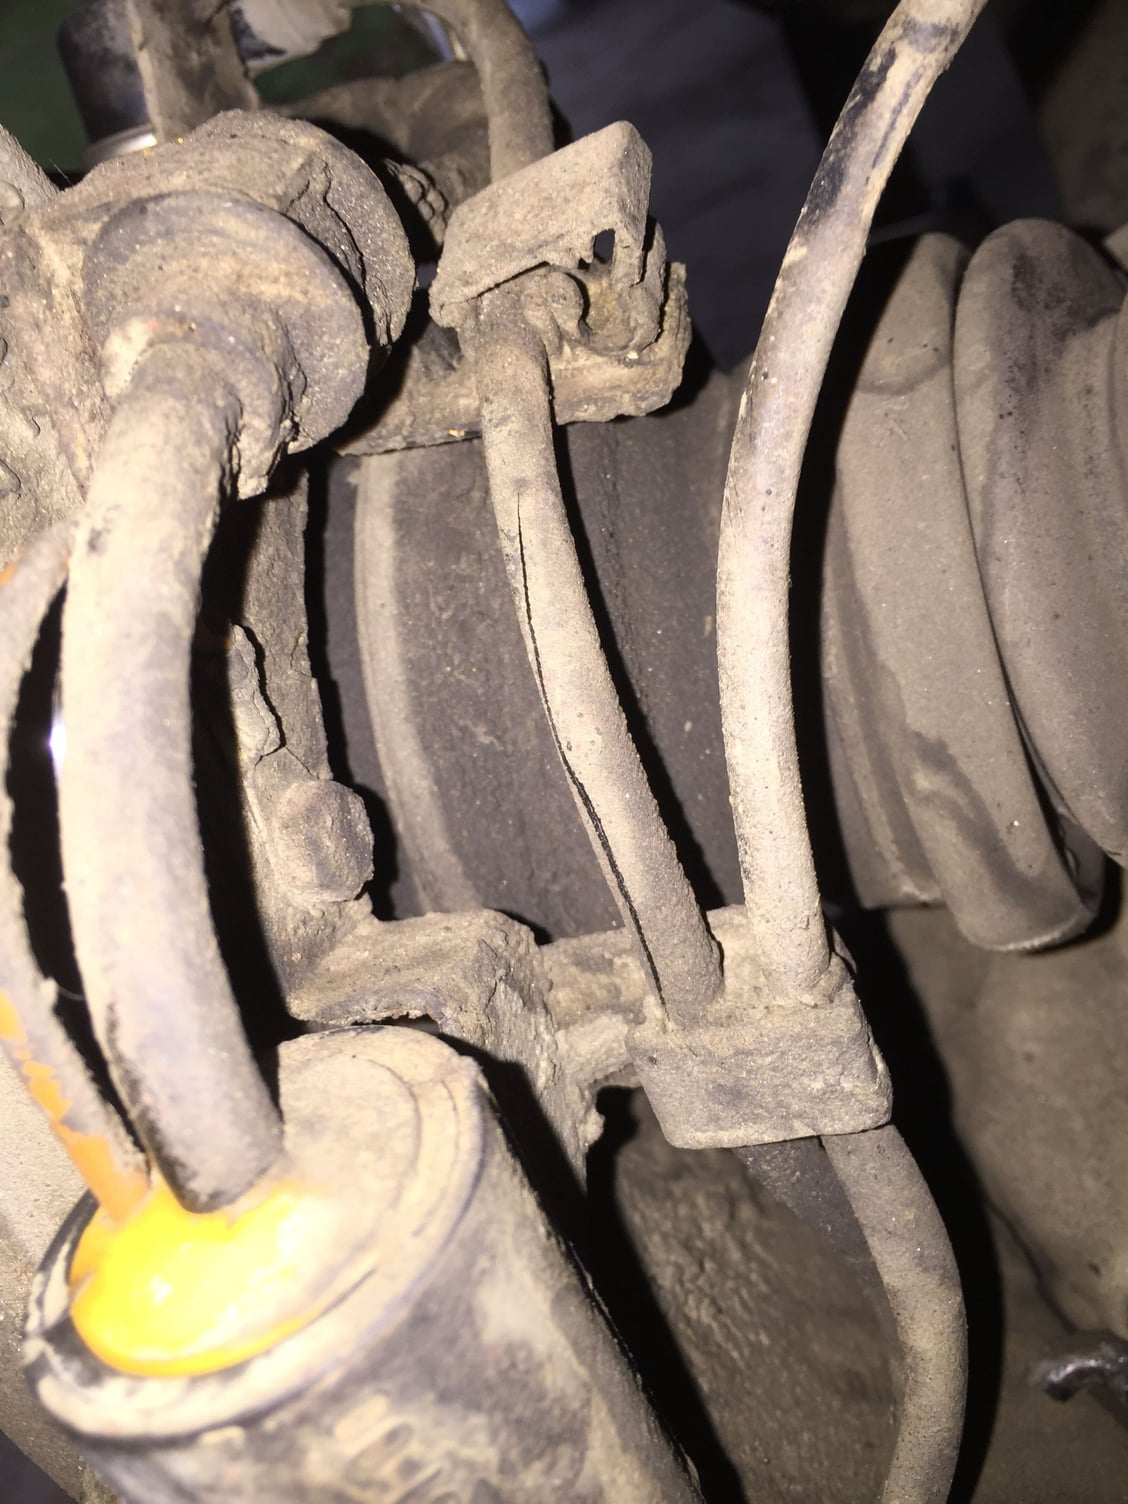
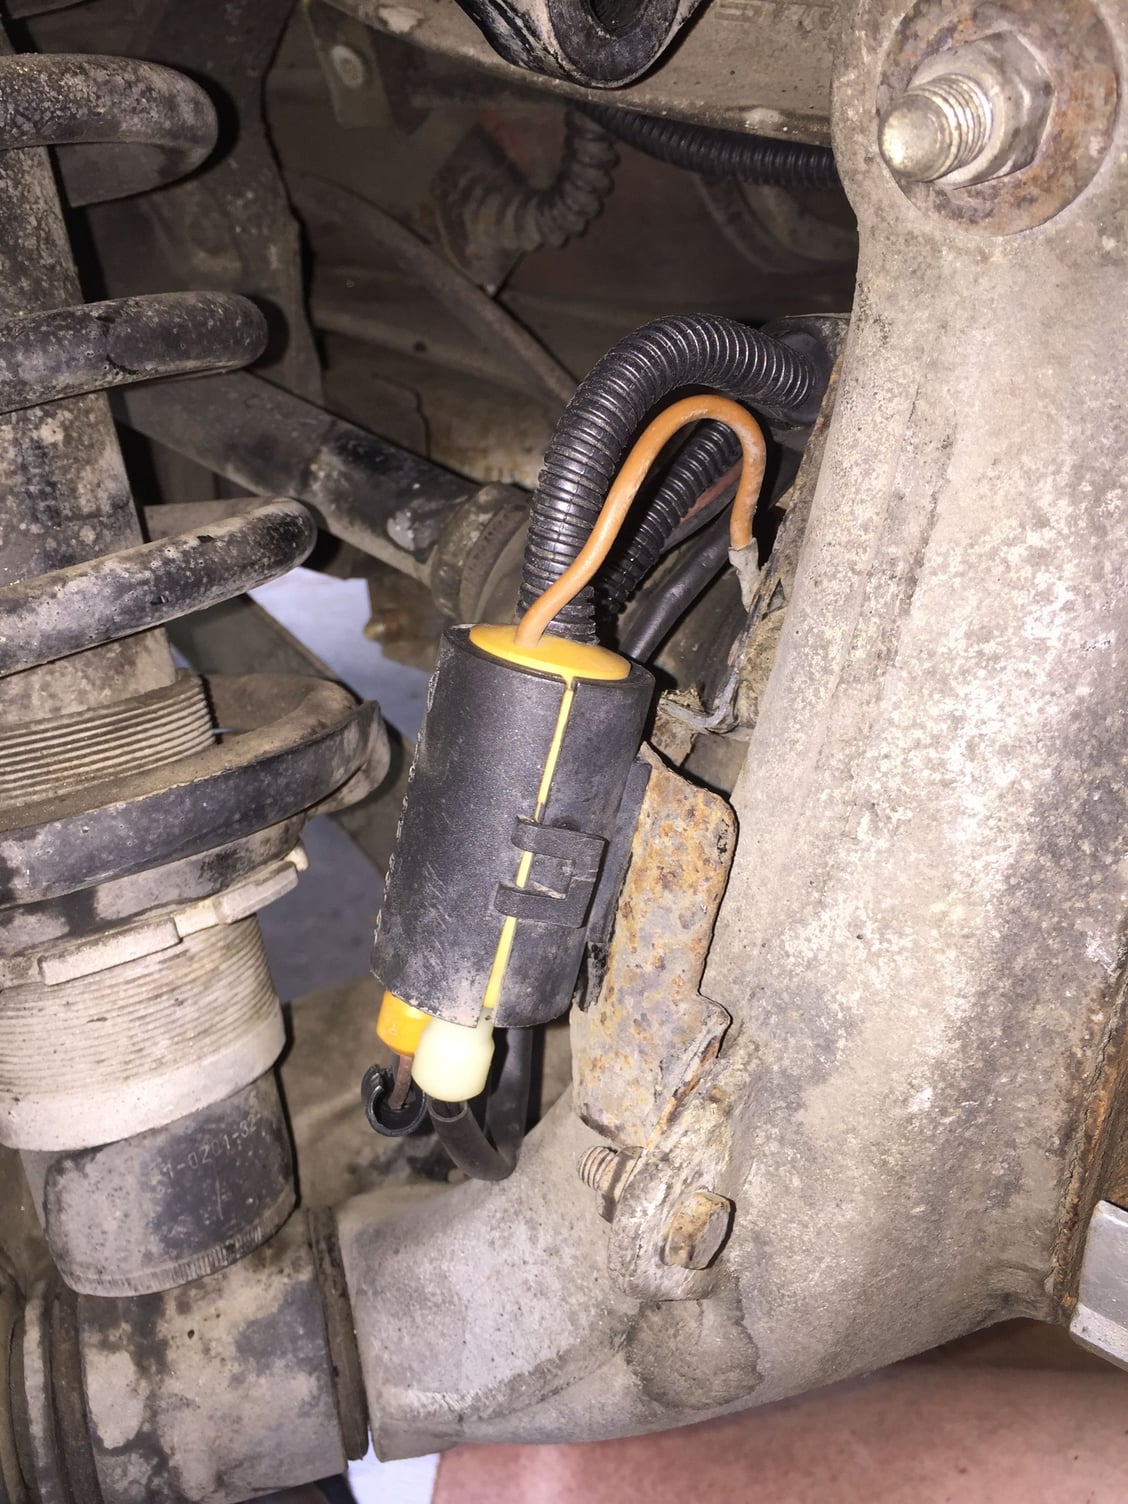
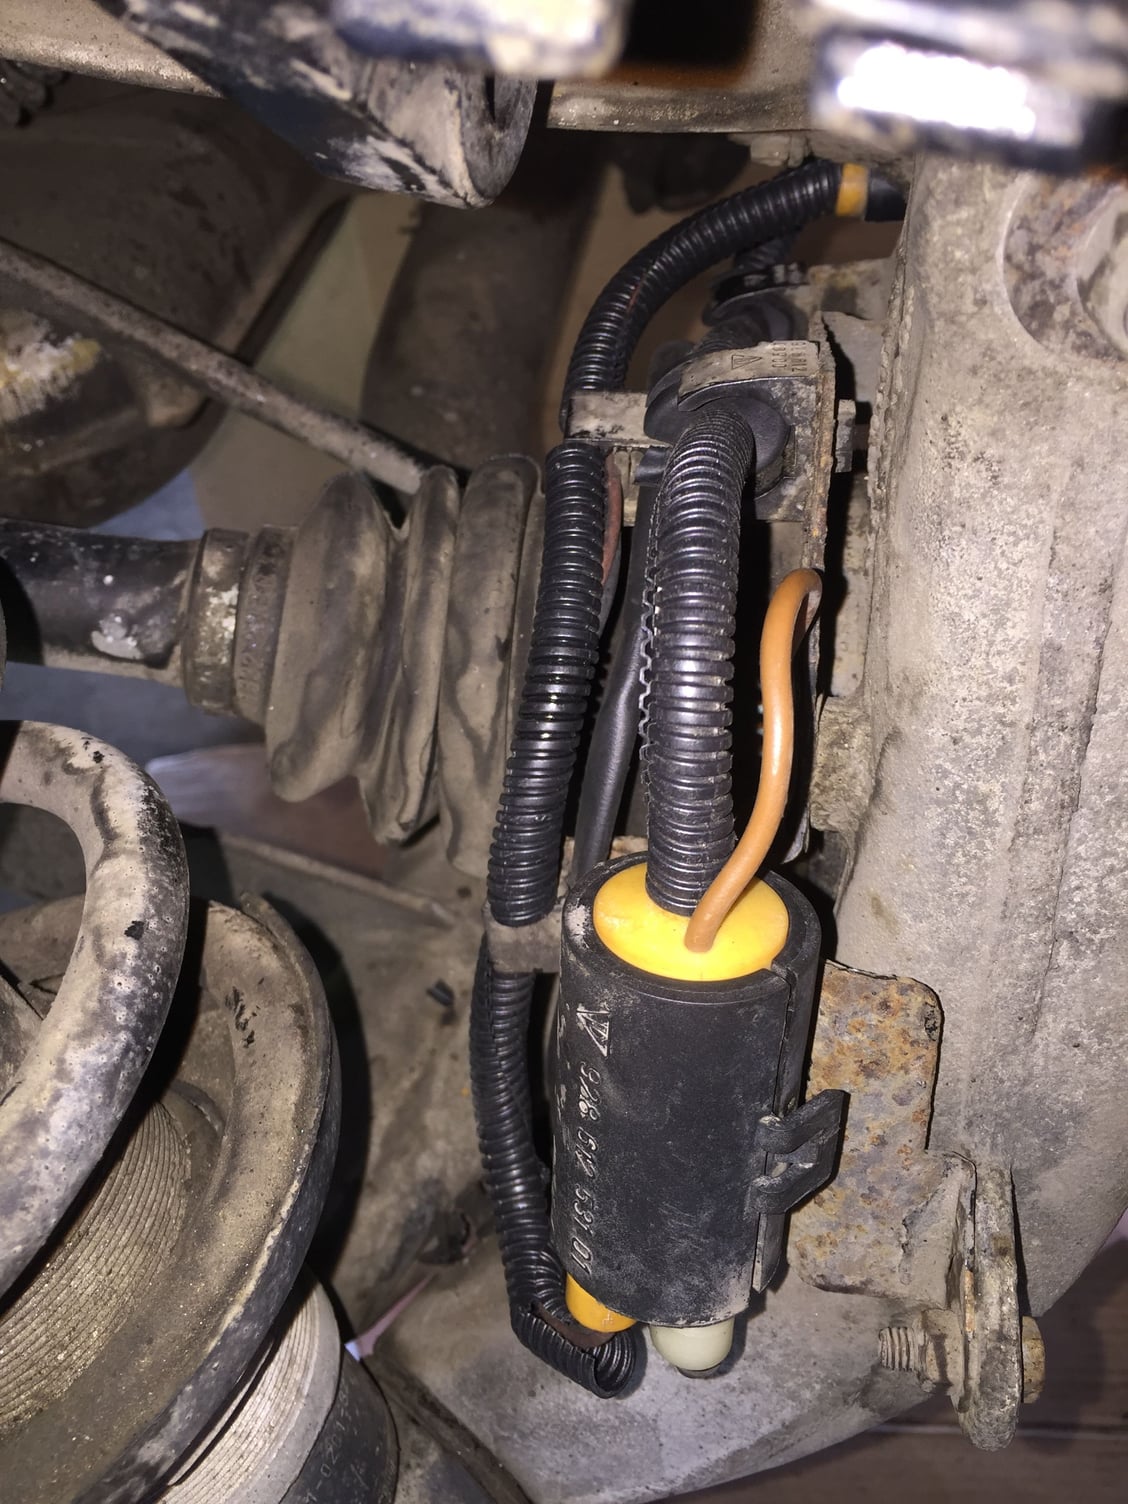
Lovely...
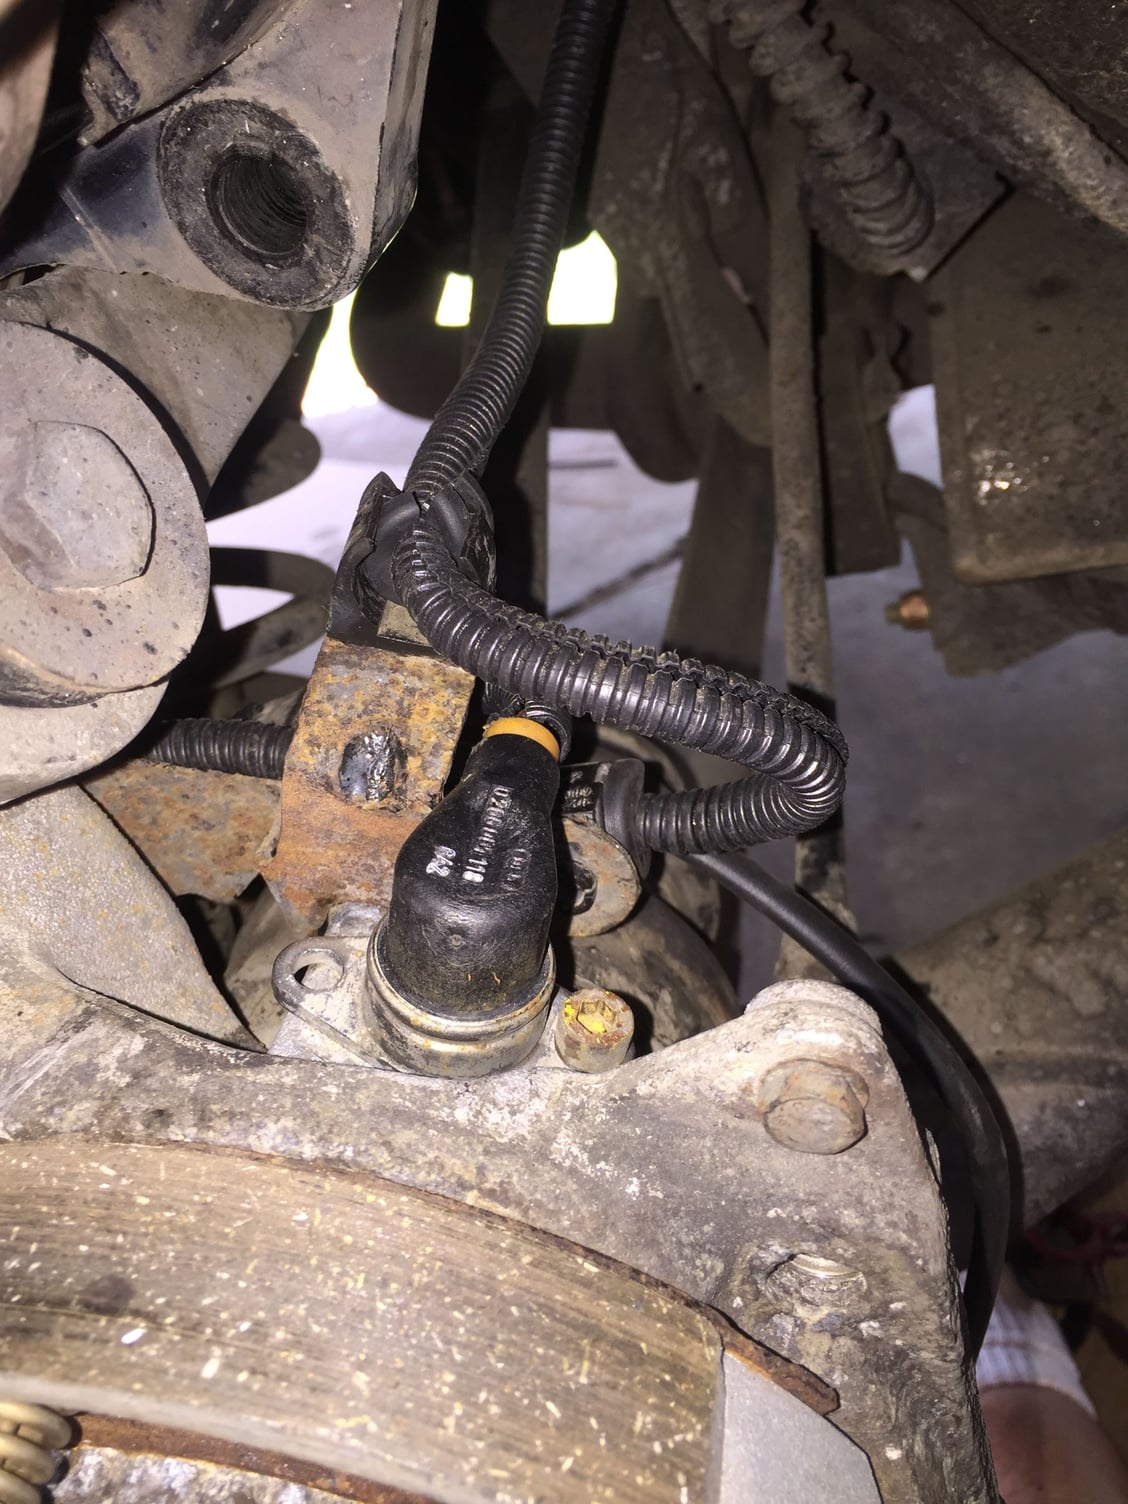
Note the split loom on the ABS sensor wiring.
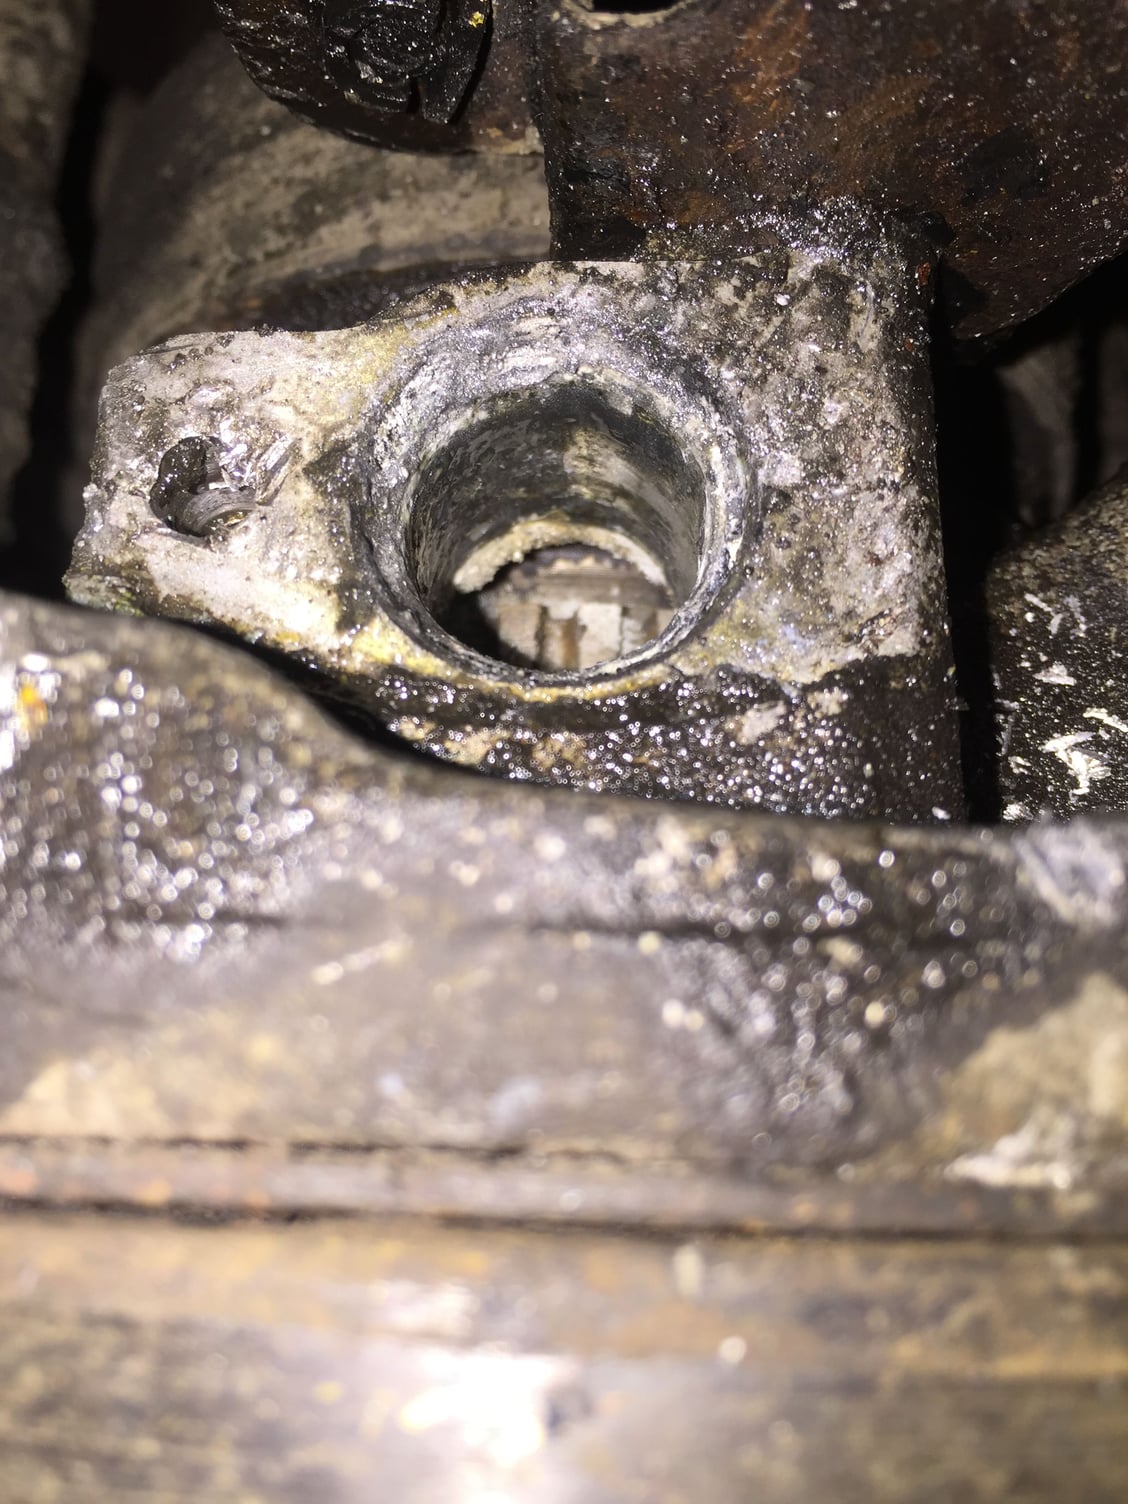
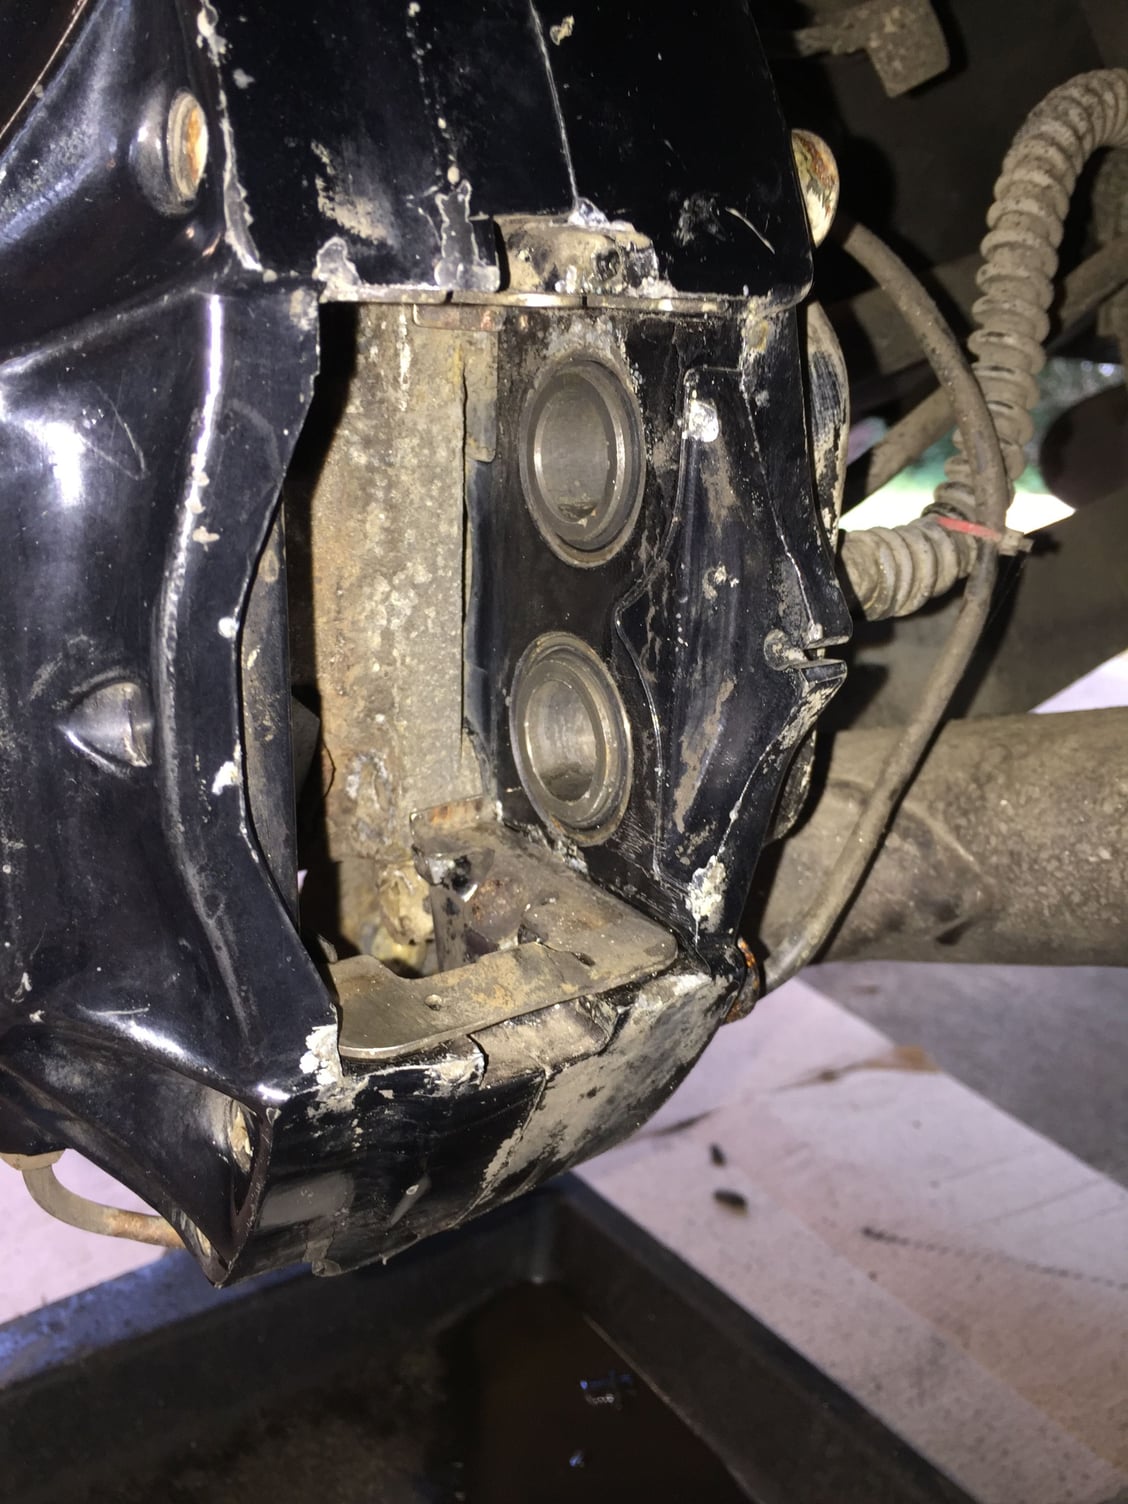
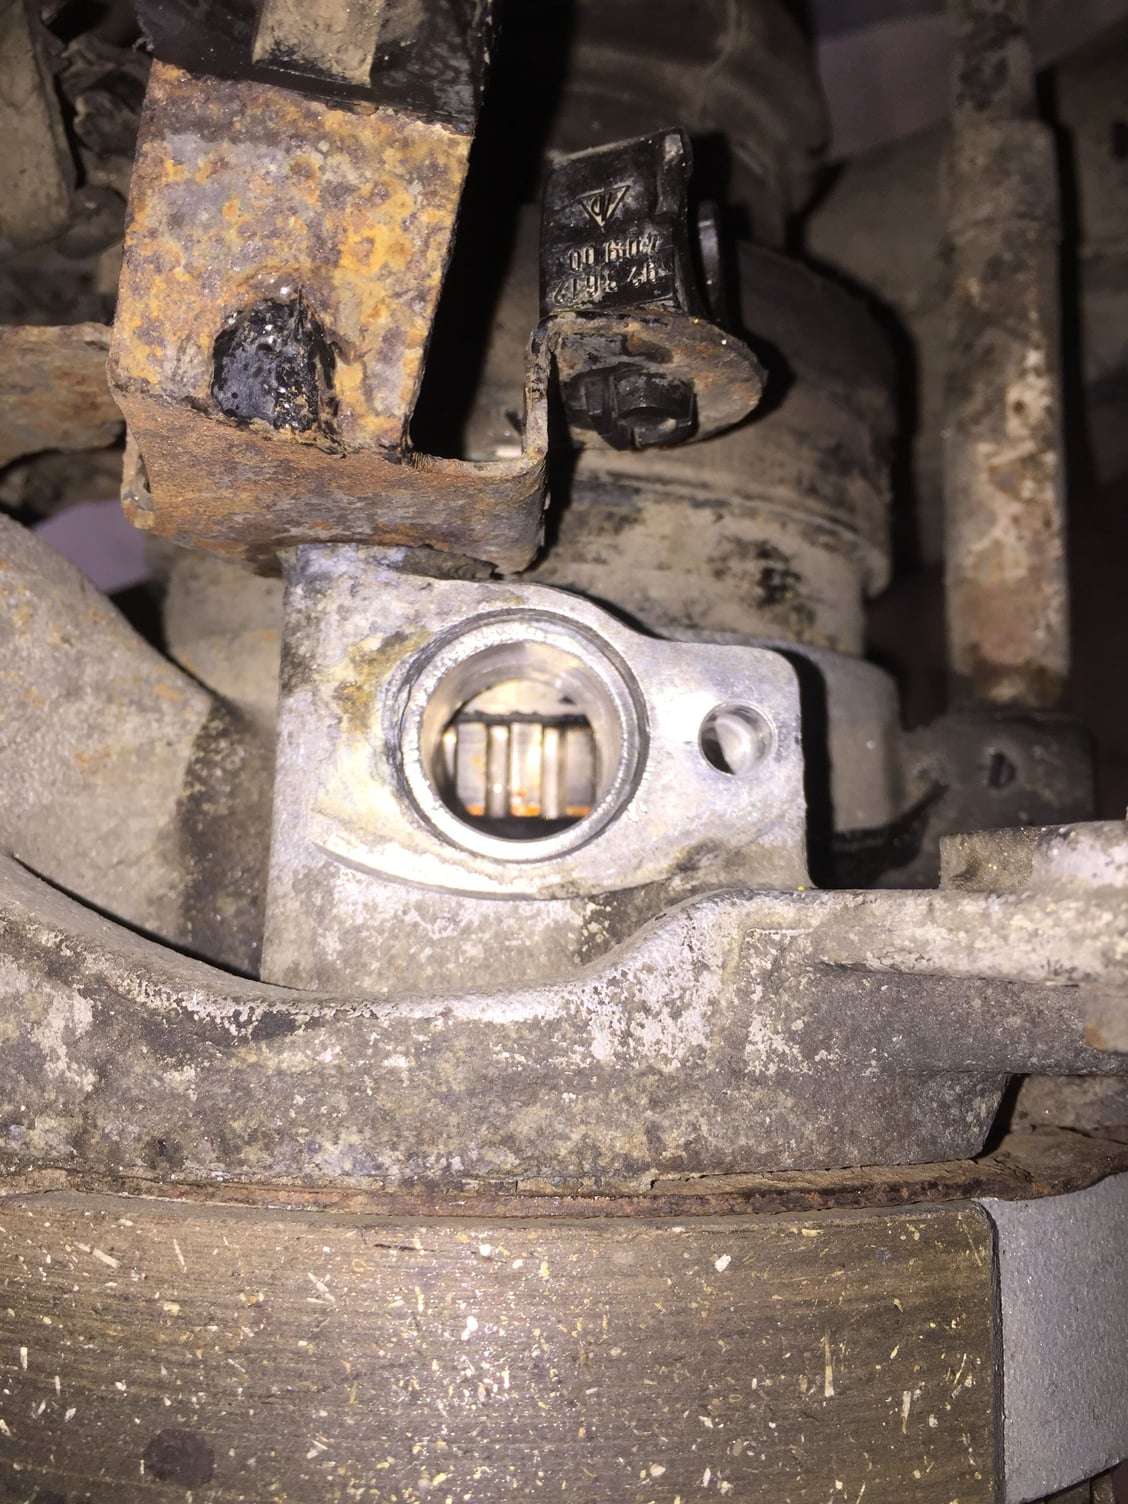
I scrubbed the mounting surface and bore for the ABS sensor with mineral spirits and a toothbrush. For the corrosion, I used a battery terminal cleaner for the bore. I followed up with a small cup brush on my rotary tool. Finished with a rinse of brake cleaner. I also cleaned the tone ring with brake cleaner, spraying down the bore as I rotated the hub through a full turn.
Note the clean tone ring teeth down the bore.
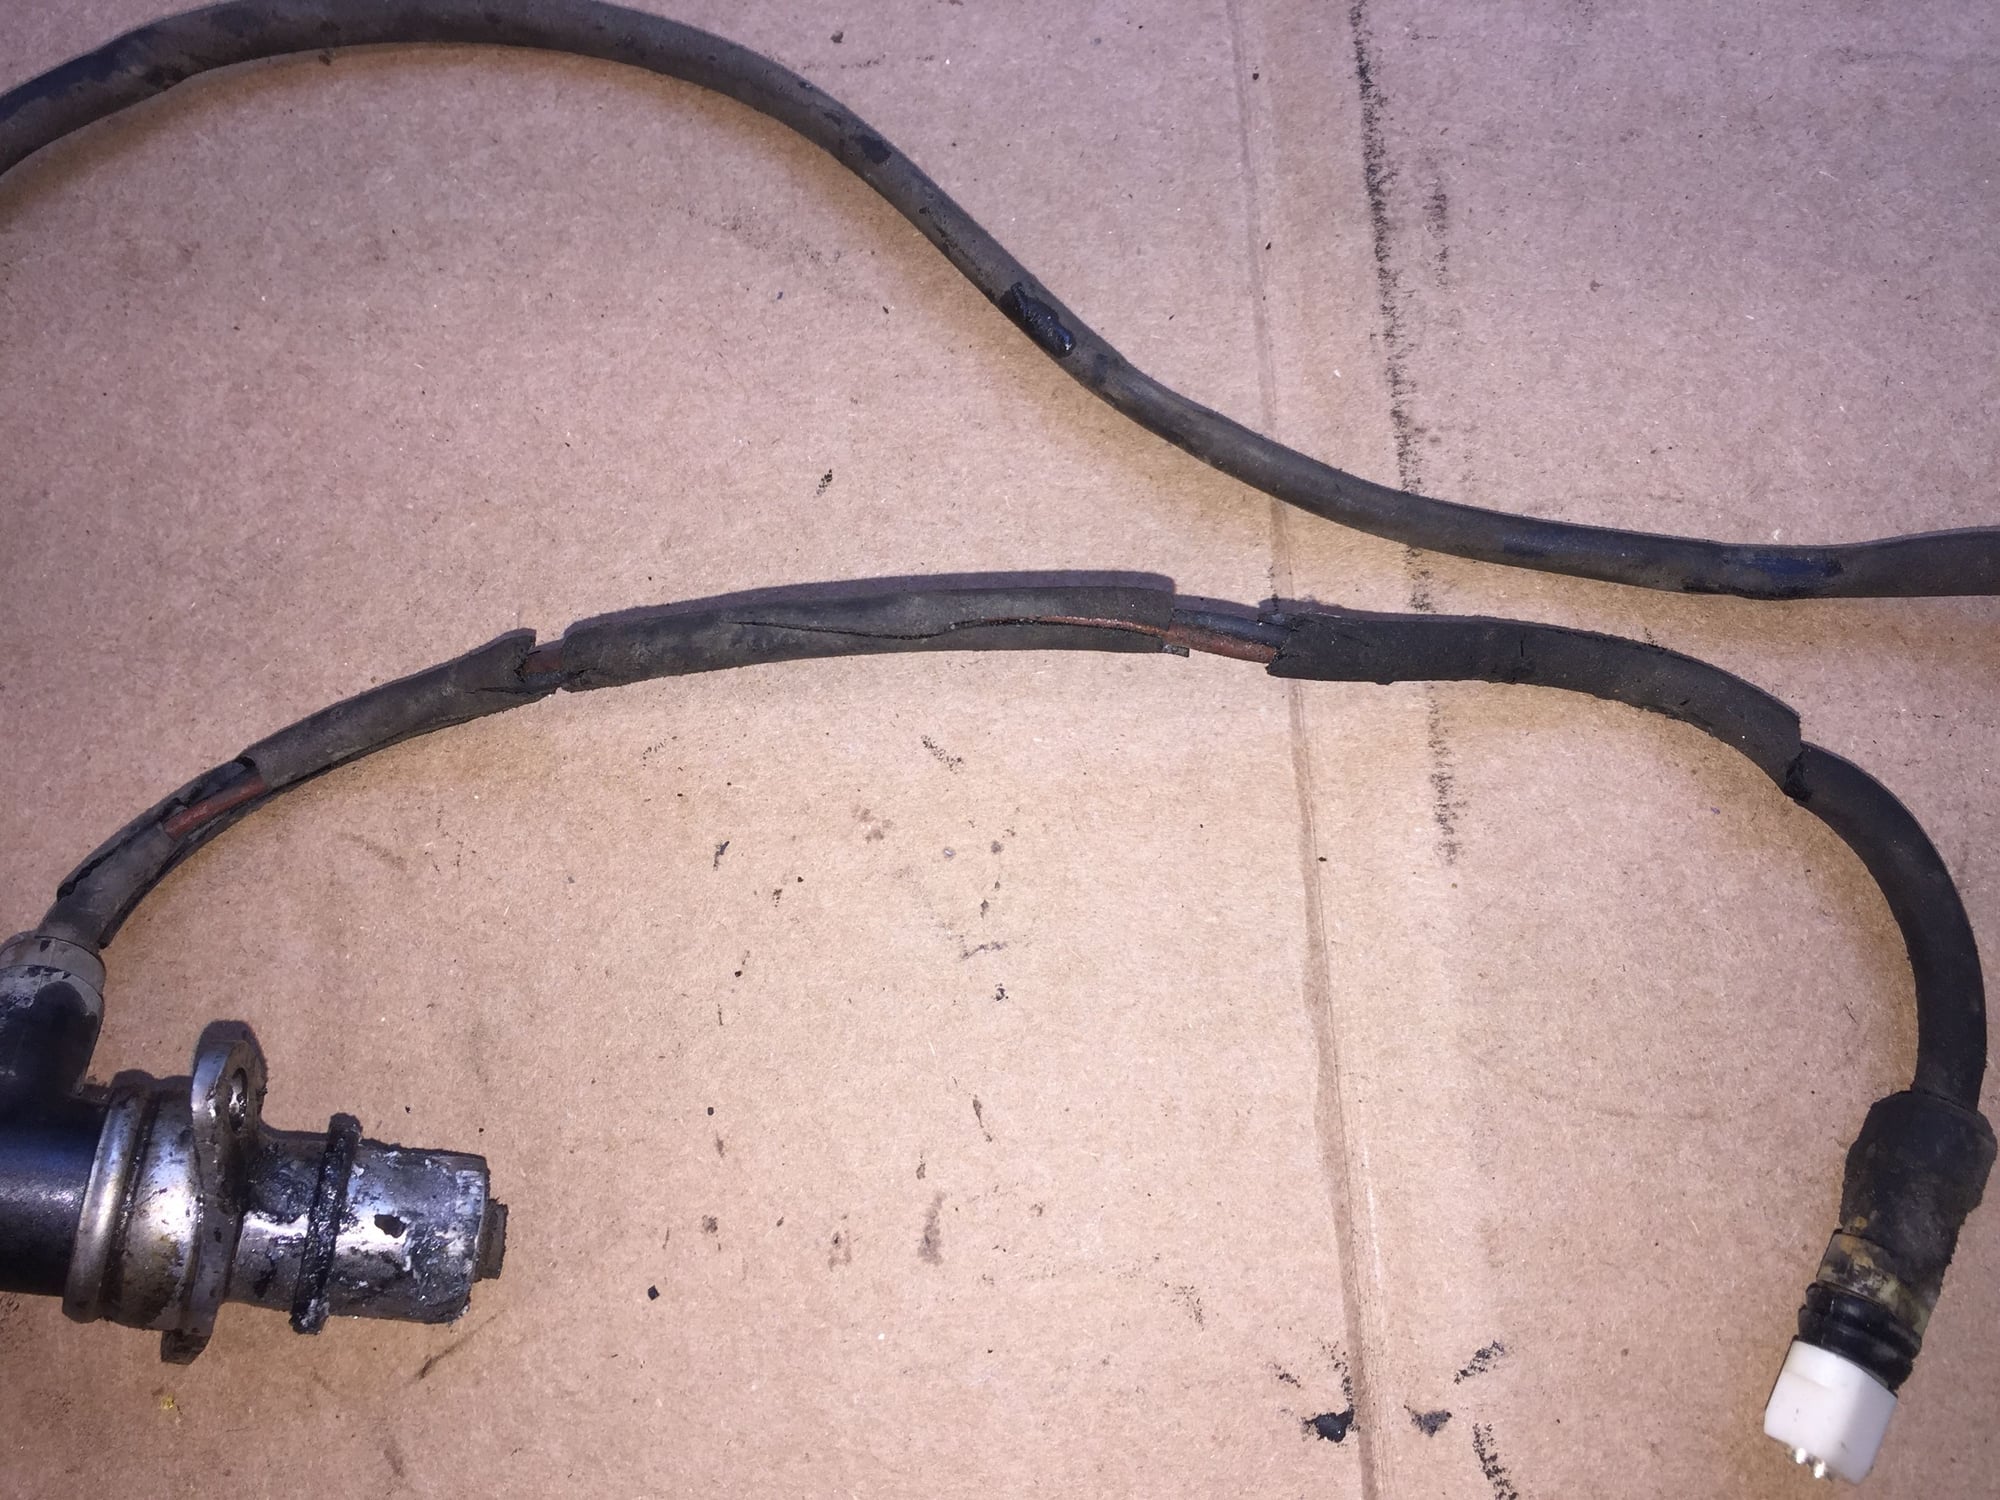
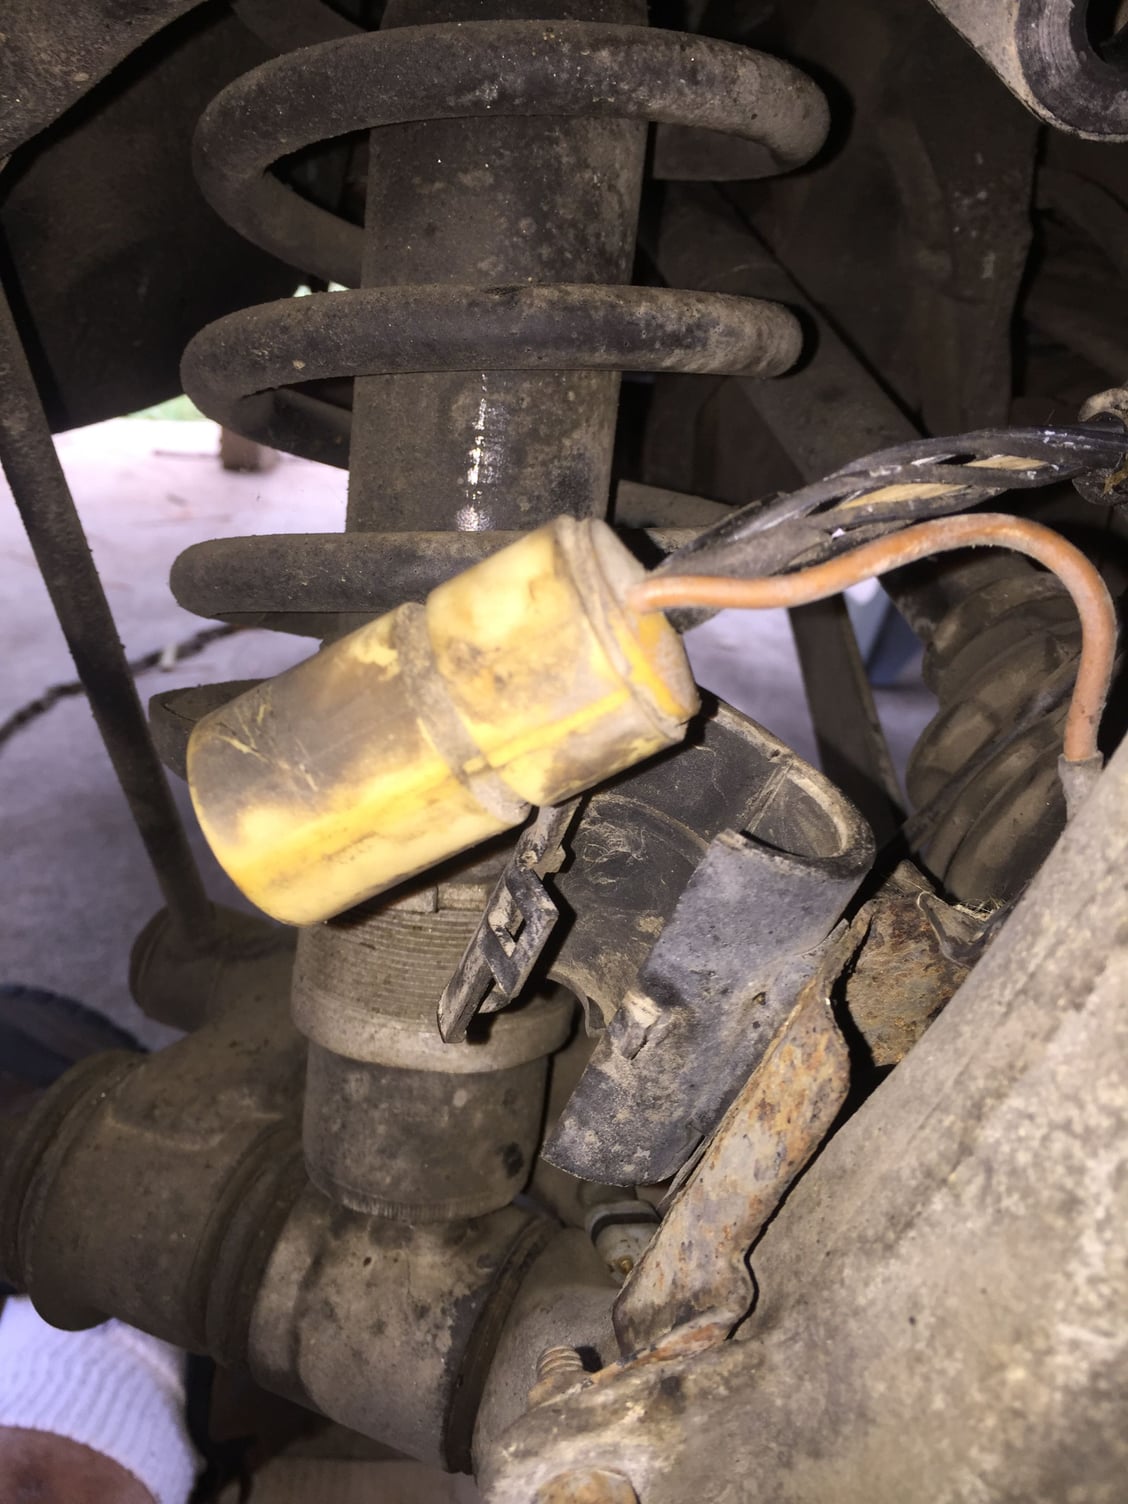
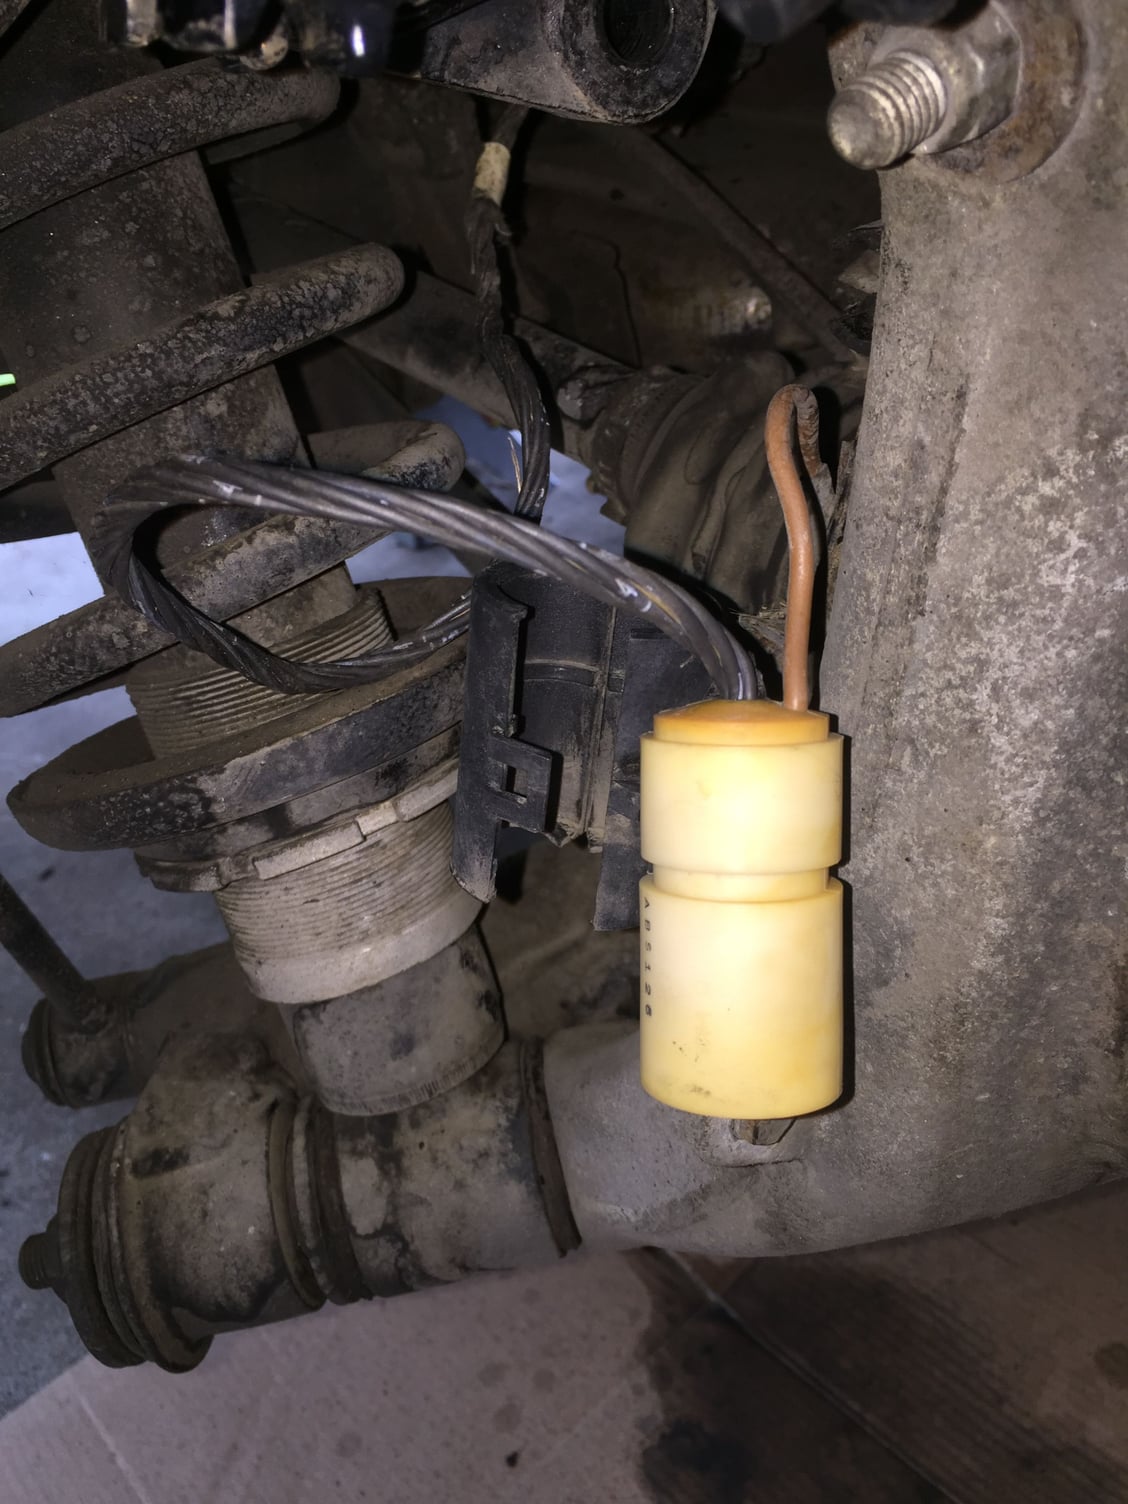
Like just about every other post 1985 928, the ABS wiring harness is a mess on the Red Witch. The inner wires are OK, but the outer jackets are crumbling. For the ABS sensor, I pulled off all the crumbling jacket, then cleaned the wires with mineral spirits on a rag. I covered them with some small diameter split loom. It is temporary, as I will order some self fusing silicone tape soon. I did the same for the barrel connector.
Not having any Molykote Longterm 2 onhand, I coated the body of the ABS sensor with some moly bearing grease I have. I know, I know, blasphemy. The O-ring was pretty rough with embedded crusty aluminum corrosion. I found a suitable replacement O-ring from my stock. I will order the correct replacement soon. Sensor slid back in like butter.
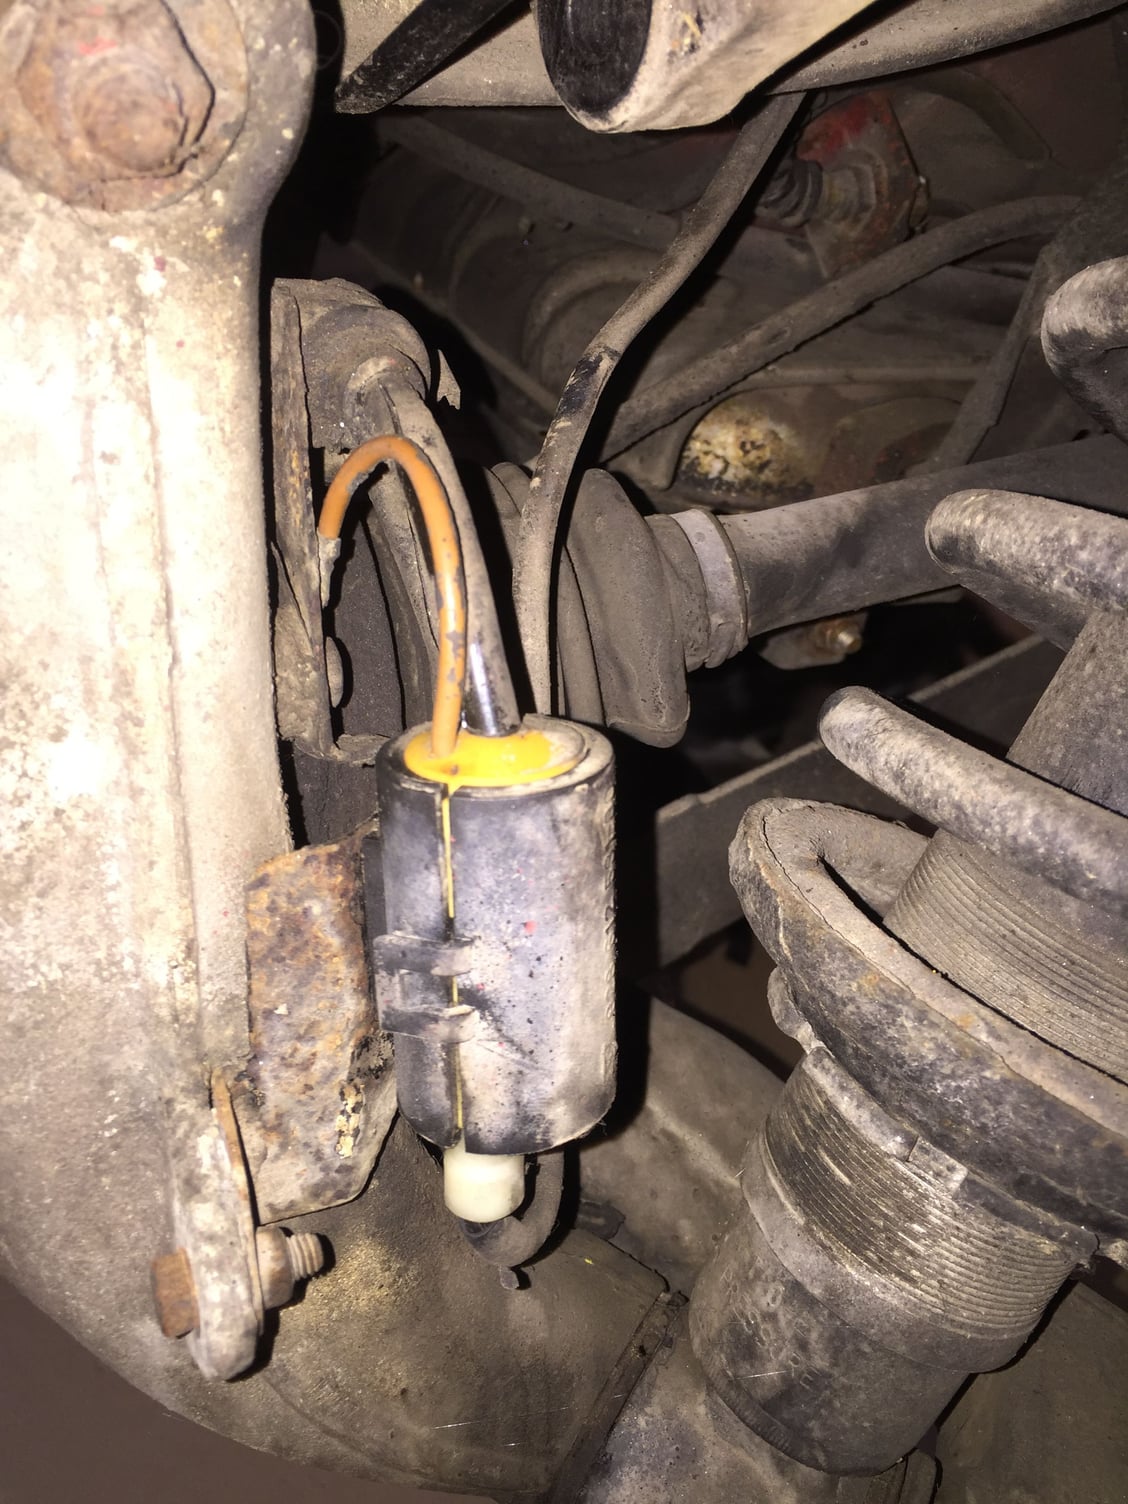
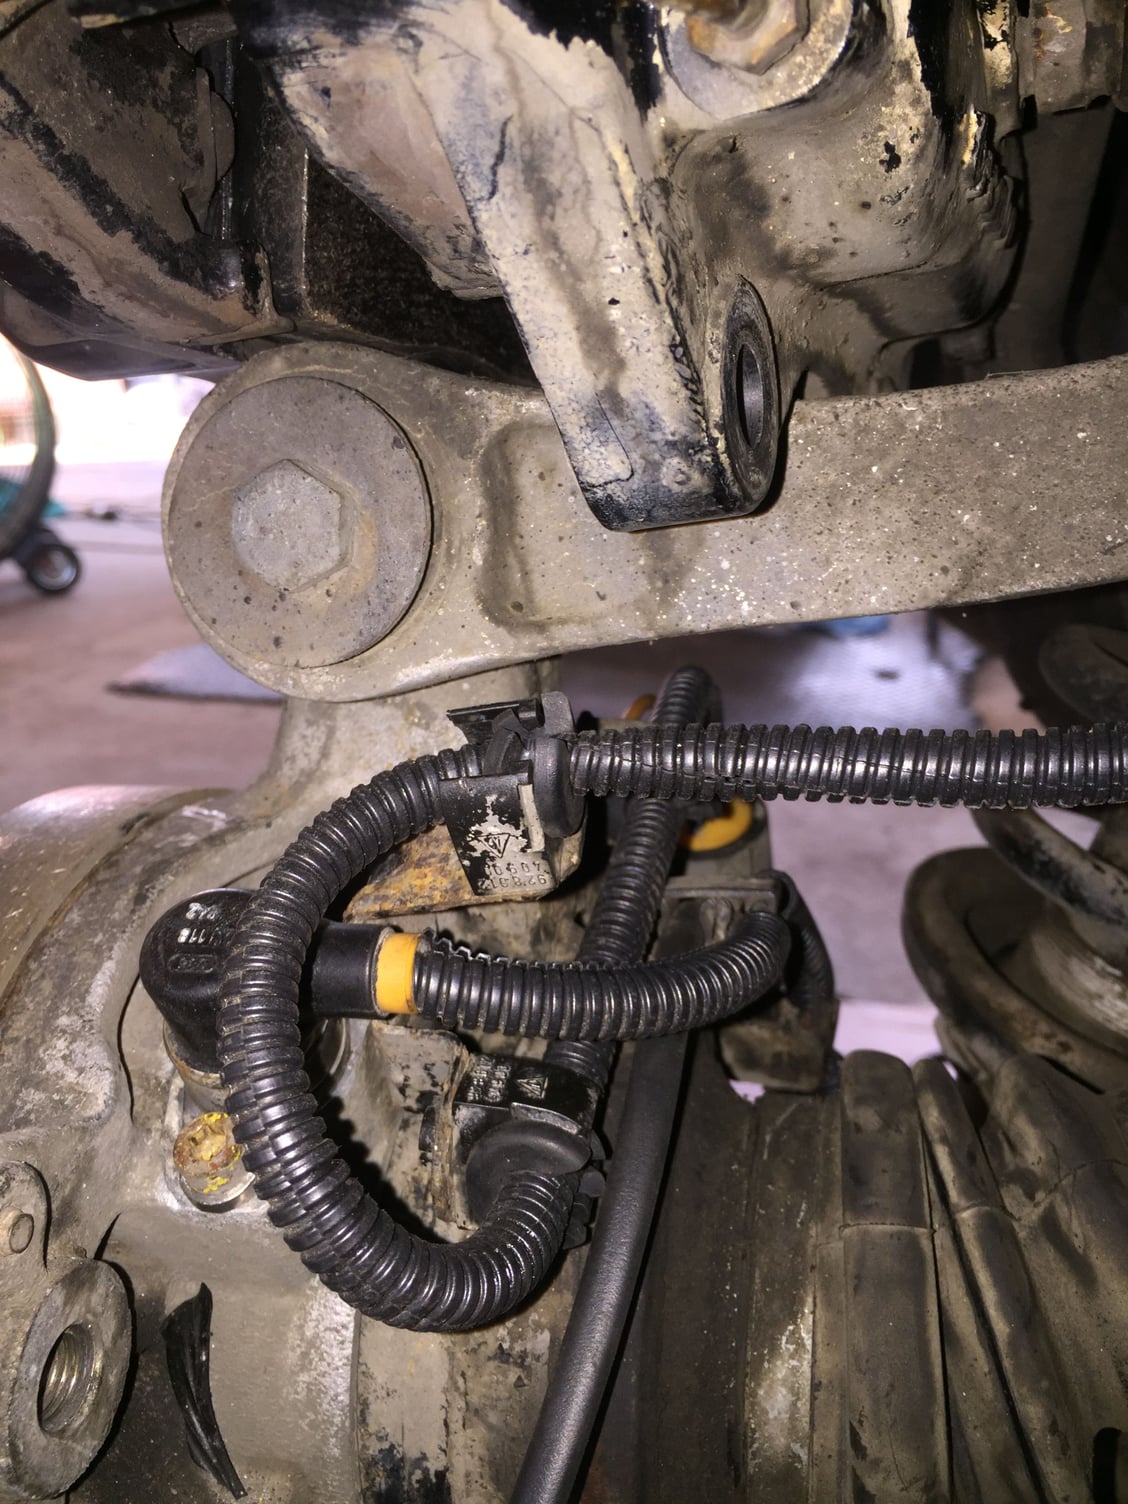
Even though I took photos, routing ABS sensor, brake pad wear sensor, and barrel connector wiring was a be-yatch. It took me a few tries to get it all routed smoothly. Since the isolators that fit into the brackets for routing the barrel connector wiring fell off with the jacket, I had to make do. I cut 90 degrees out of a suitably sized grommet, put it around the split loom on the wiring, and worked it into the brackets. Fugly, but secure.
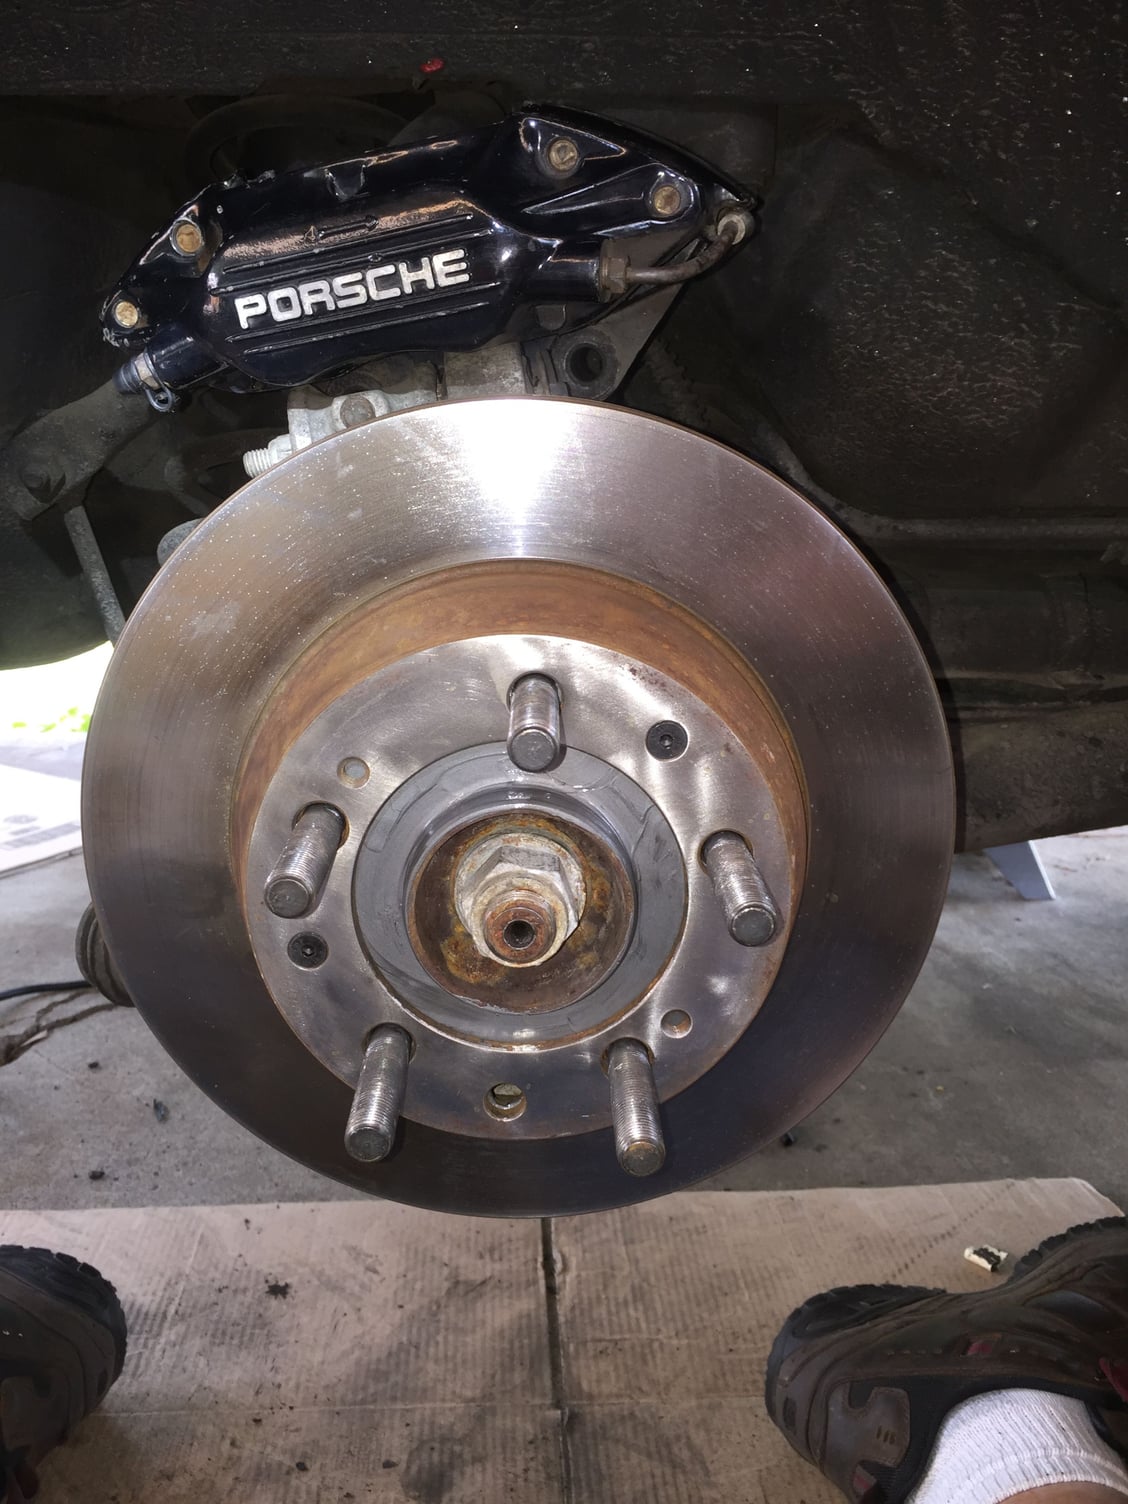
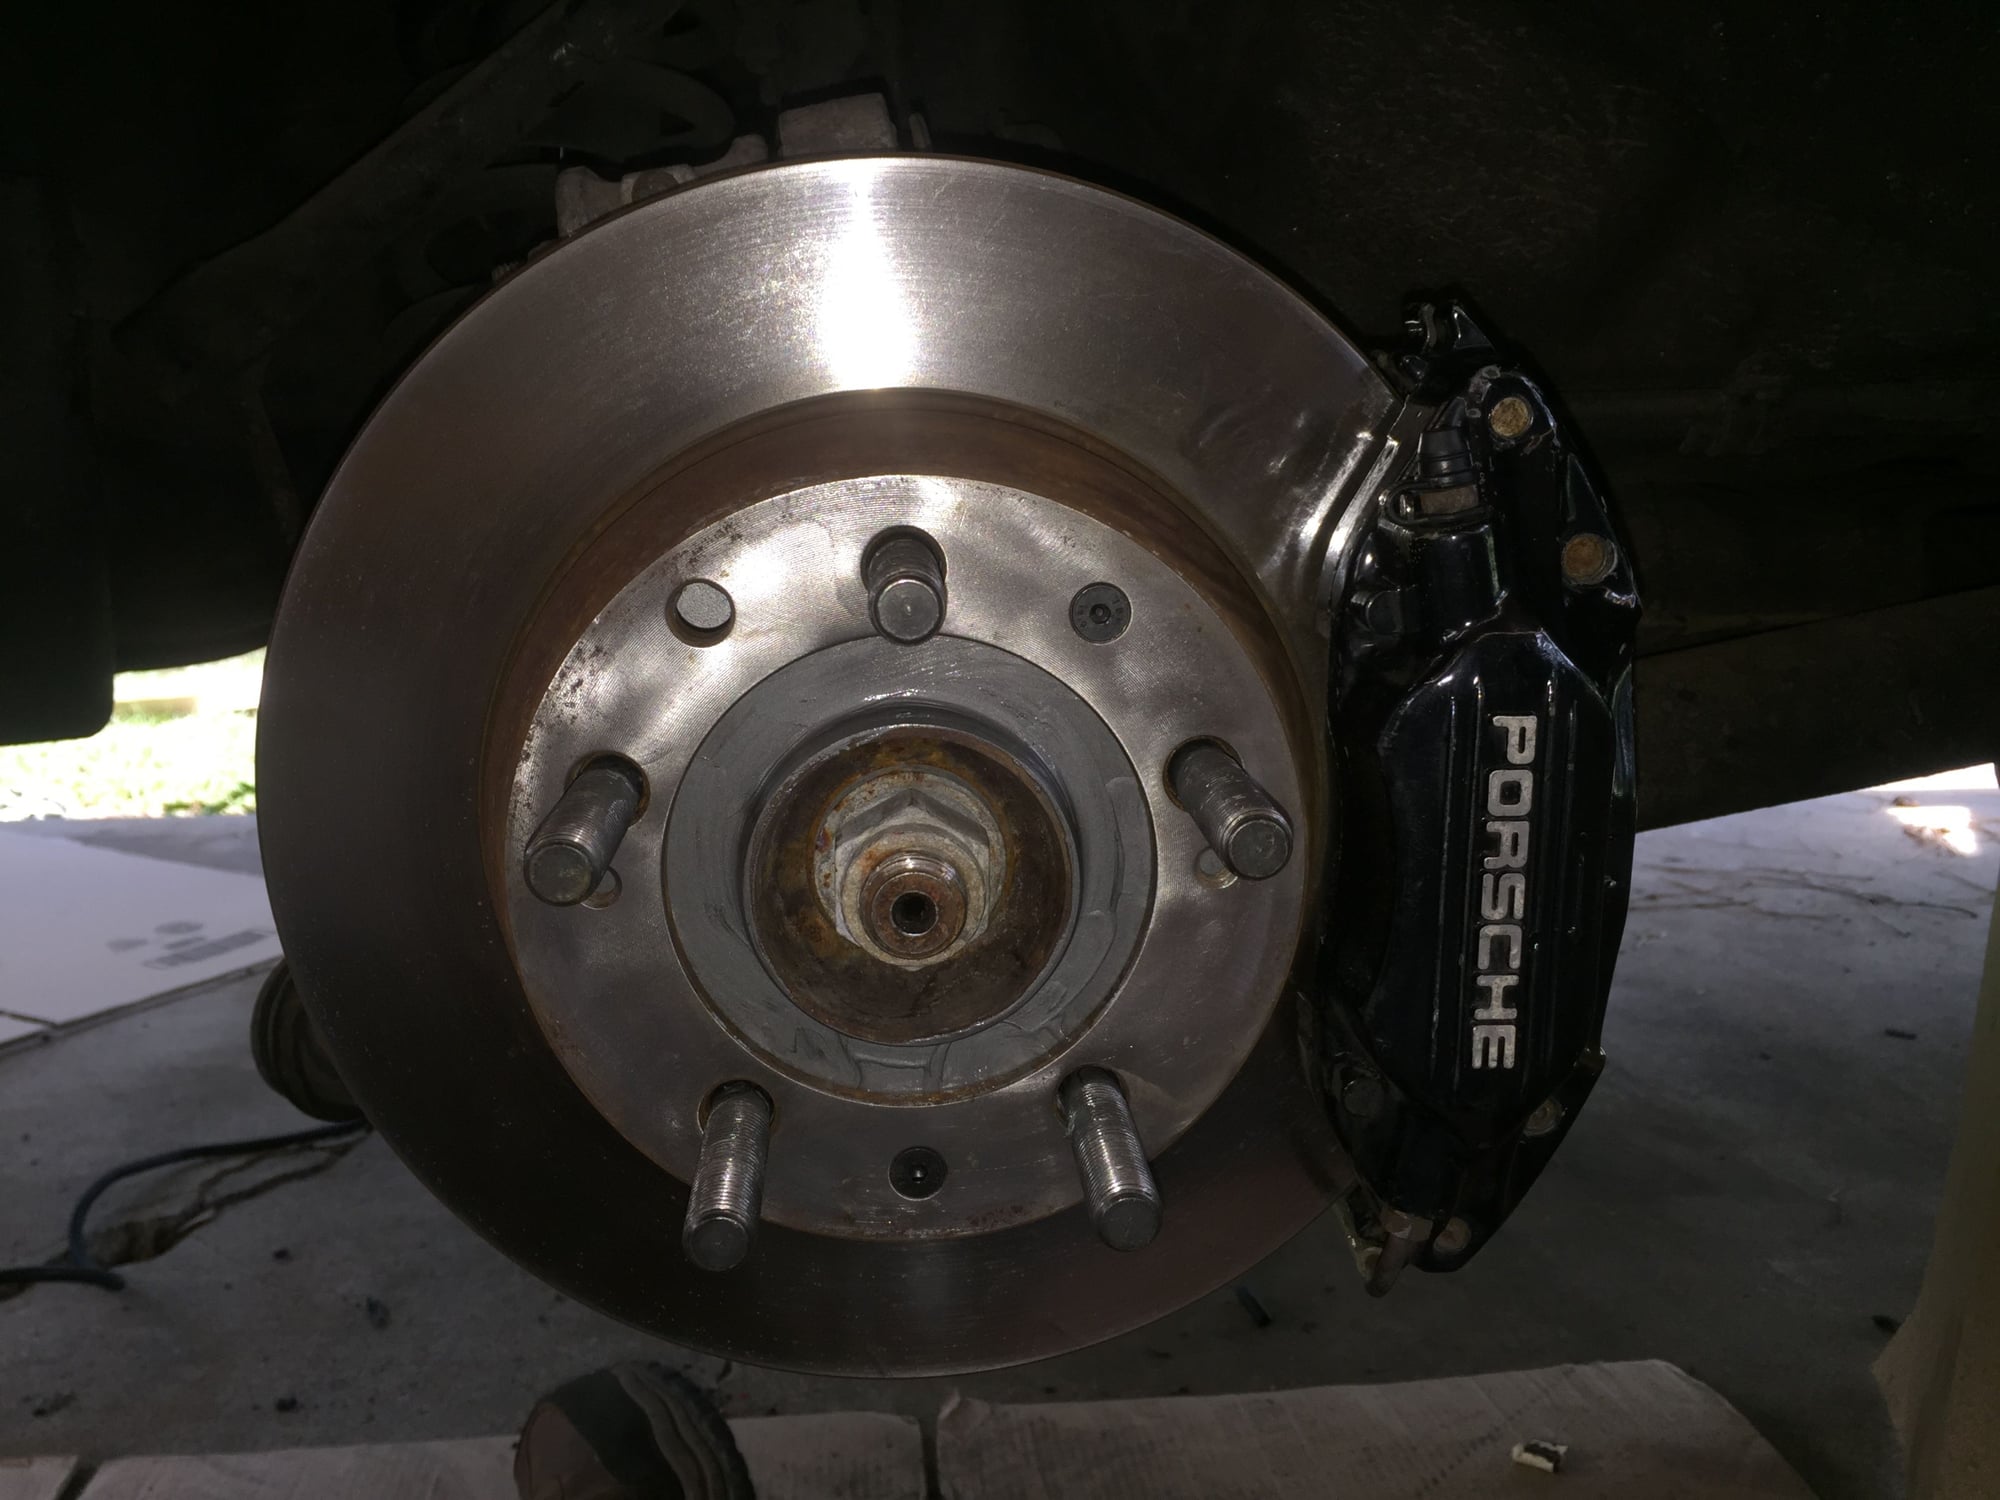
With the ABS wiring out of the way, I was able to turn back to the rotor. I adjusted the parking brake shoes so that the rotor would just slide on smoothly. I coated the hub flange with a thin layer of nickle anti-seize and fitted the rotor. Only had to put it on twice to line up the various holes correctly. I put a wisp of anti-seize on the back of the counter sunk screws and tightened them down. Mounted the caliper and torqued the bolts to 62 ft/lbs.
I started with the ABS sensor. I already got the mounting bolt out and shot it with Aerokroil last night. Today, it was stiff. Using the same methods as the other one, I was able to get it to start rotating back and forth. I kept this up for several minutes, spraying more Aerokroil periodically. Soon, I felt I could start trying to rock it up and out.
The only place to pry is the rear mounting wing. I very gently started prying and releasing, trying to rock the sensor body. It ever so slightly started to rock. However, the mounting wing started to bend. I can deal with that later. Several more minutes of prying and rotating, with some more Aerokroil. Eventually, I was able to start a tiny screwdriver under the mounting wing on the other side. Then, I could get a larger, useful screw driver in there. Now, I had two points to pry. I worked them alternately. Soon enough, the sensor started to move. I pried it up a little, sprayed more Aerokroil, then tapped it back into place. Pried it up a little, tapped it back down.
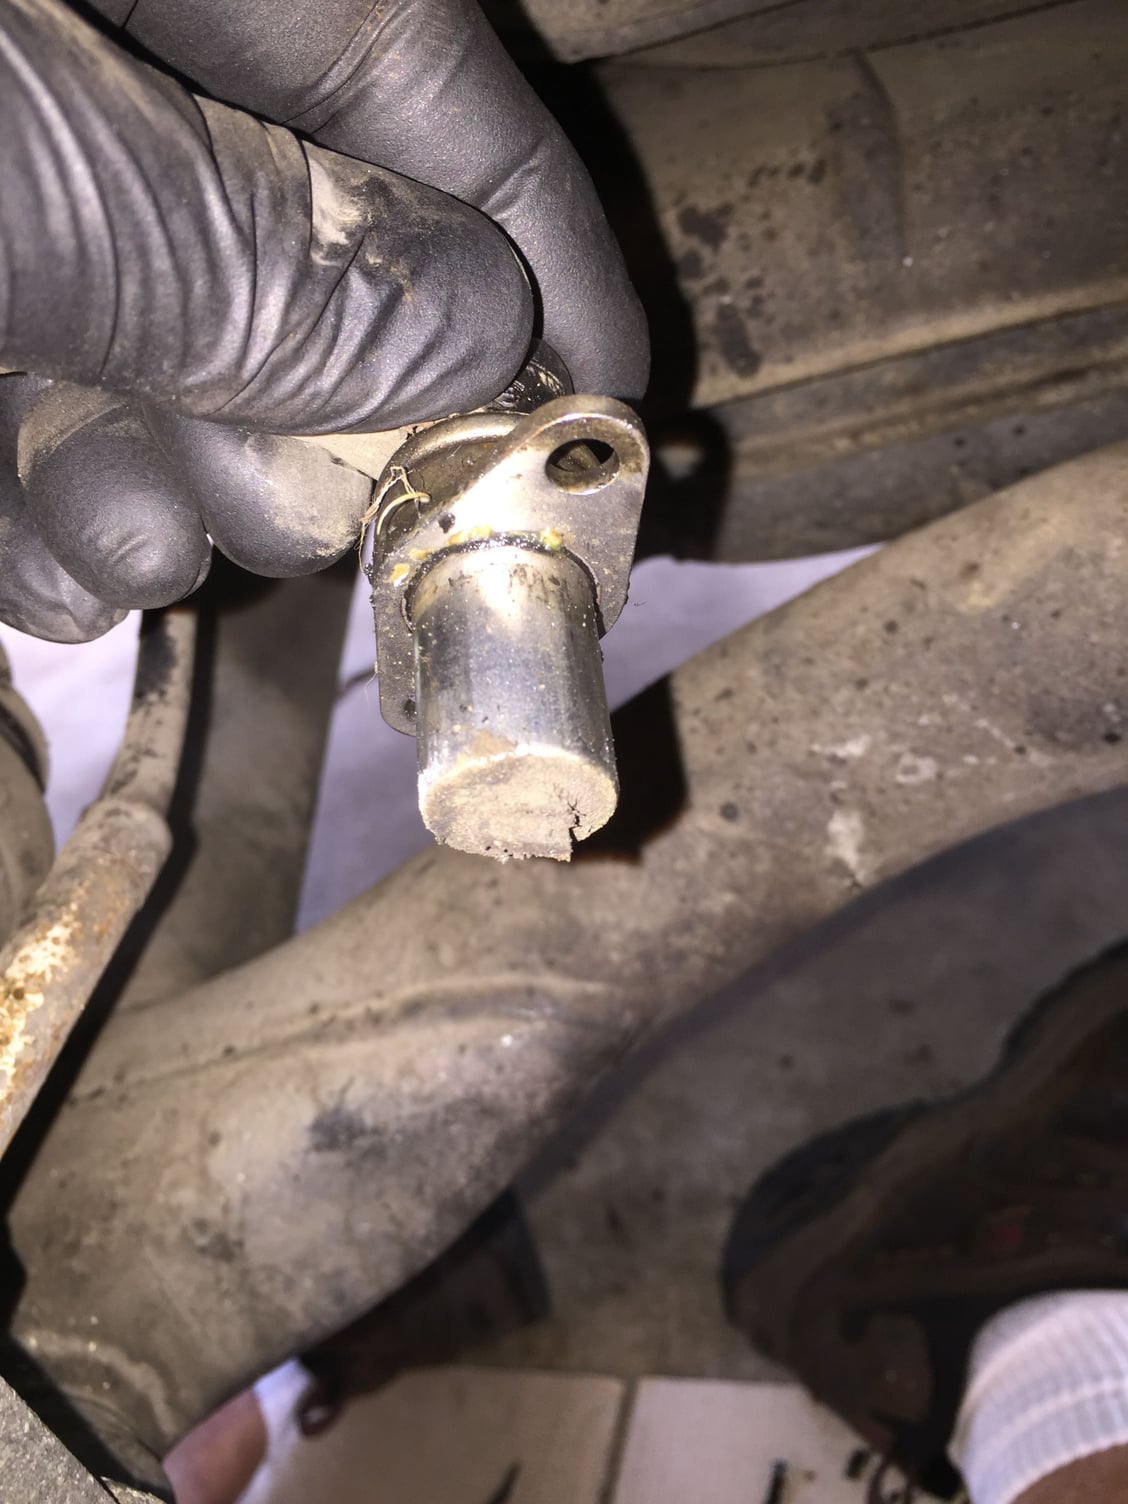
Next time I started prying, the sensor started to rise up out of the bore. Yay! Unfortunately, I tried prying from the front. I was losing leverage on the side. Well, in doing so, I cocked the body of the sensor in the bore.
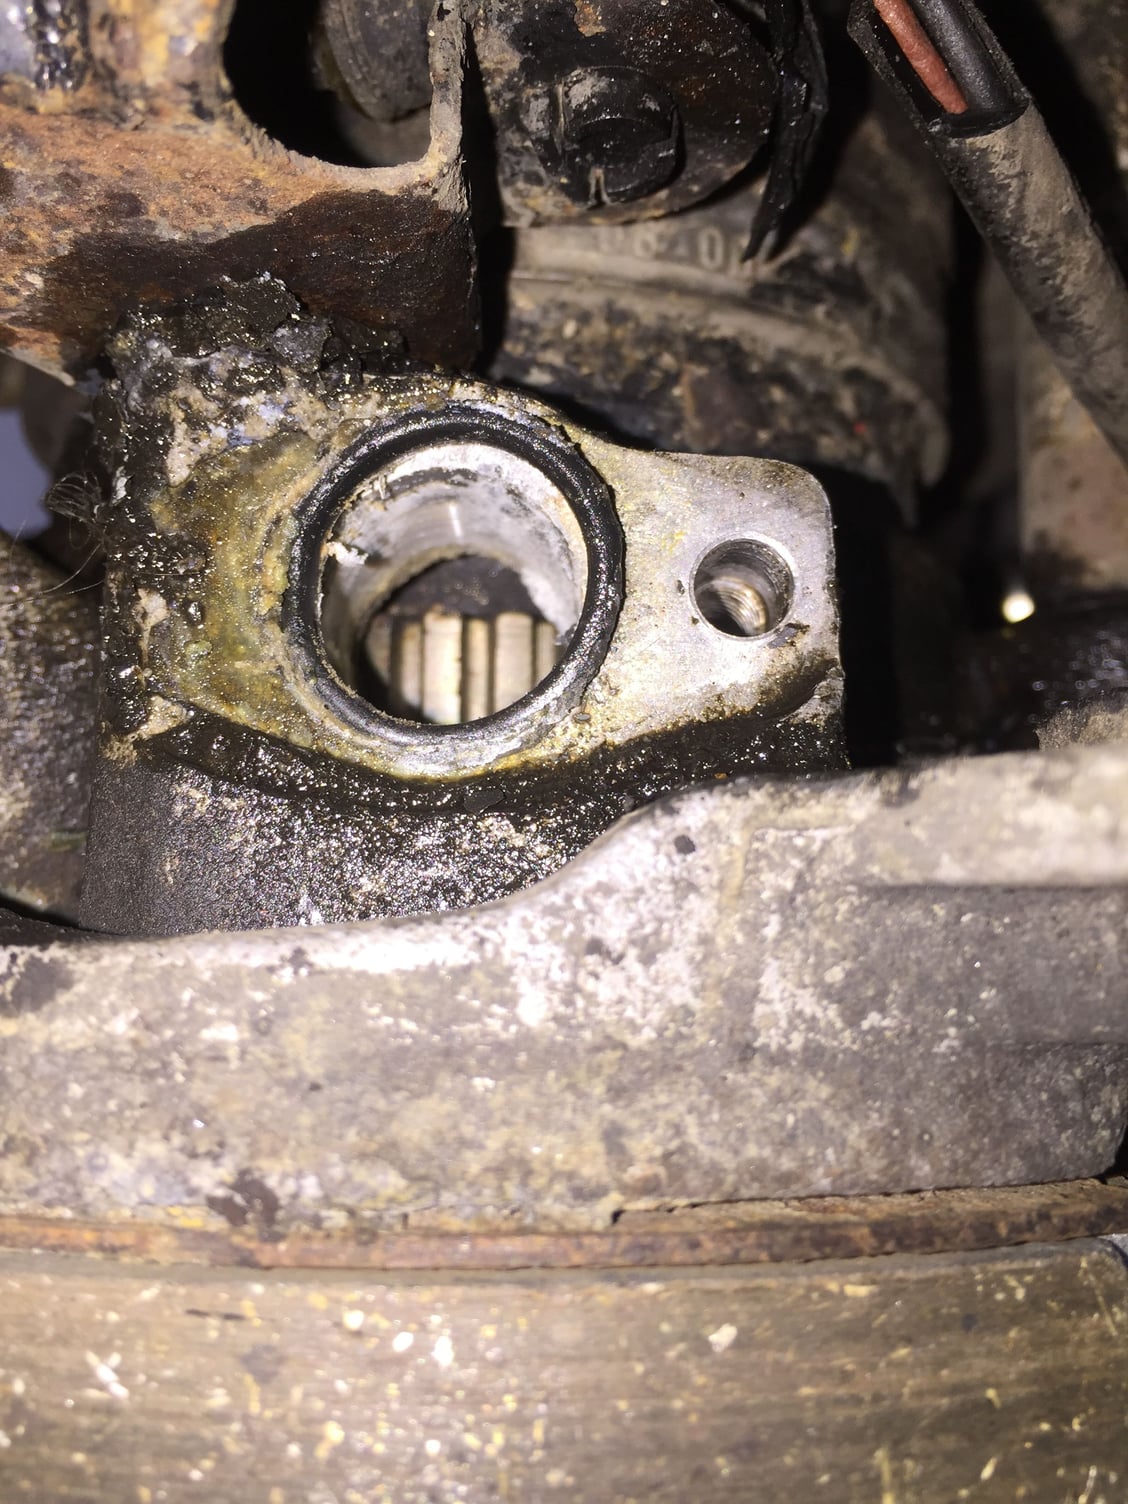
When I got the sensor out, the body had aluminum corrosion on it, and the bore looked pretty rough. This time, the O-ring stayed with the sensor.
This one put up a bit of a fight.
Like the passenger's side, the ABS wiring jackets were crumbling.
When I started to clean the ABS sensor with the mandatory by Seth Law toothbrush and mineral spirits, I felt the body was distorted. Sure enough, there was a nice crease/dent. That would be from when I cocked the sensor in the bore when prying out from the front. Sh*t.
I remember from reading other posts on ABS sensors that there were possible measurable characteristics:
-resistance of around 1 Kohm between terminals.
-approximately 700 Mv output between terminals when the tone ring was rotating
-could see a signal on an O-scope when rotating the tone ring
So...out came my measuring tools.
My trusty Fluke 87V showed 36 Mohm's and rising between the terminals of the ABS sensor. Not good. I set the Fluke to read Mv DC. I moved the end of the sensor to and from my vise. No real reading.
For comparison, I unplugged the passenger's side ABS sensor from the barrel connector. It read 993 ohms between the terminals, rock solid. Turning the hub generated a Mv DC reading of between -12 and 56.
My GoldStar O-scope is packed away in my storage building right now, but I do have a Craftsman Professional 82289 MiniScope. Unfortunately, being a DMM based mini O-scope, its trigger response time is slow as hell. This time, I was reading Mv AC. I was able to get a stable, repeatable pattern by turning the hub. I did not have enough hands to get a video of the miniscope screen while doing this.
I quickly cleaned the driver's side ABS sensor bore and put the sensor back in place. Rotating the hub, the miniscope showed a pattern, but it was not the same as the passenger's side.
Either way, I no longer trust that damaged ABS sensor. So...time for another.
New: $200.
Used from 928 Intl: $100.
So, I am contacting Mark this coming week. Tomorrow, I will try to remove the front ABS sensors. That way, if I kill them too, I can order what I need in one hit. Hopefully they will go well. Reading between the lines on the threads I have read, the fronts are usually not to bad to get out. The rear ABS sensors are the problem children.
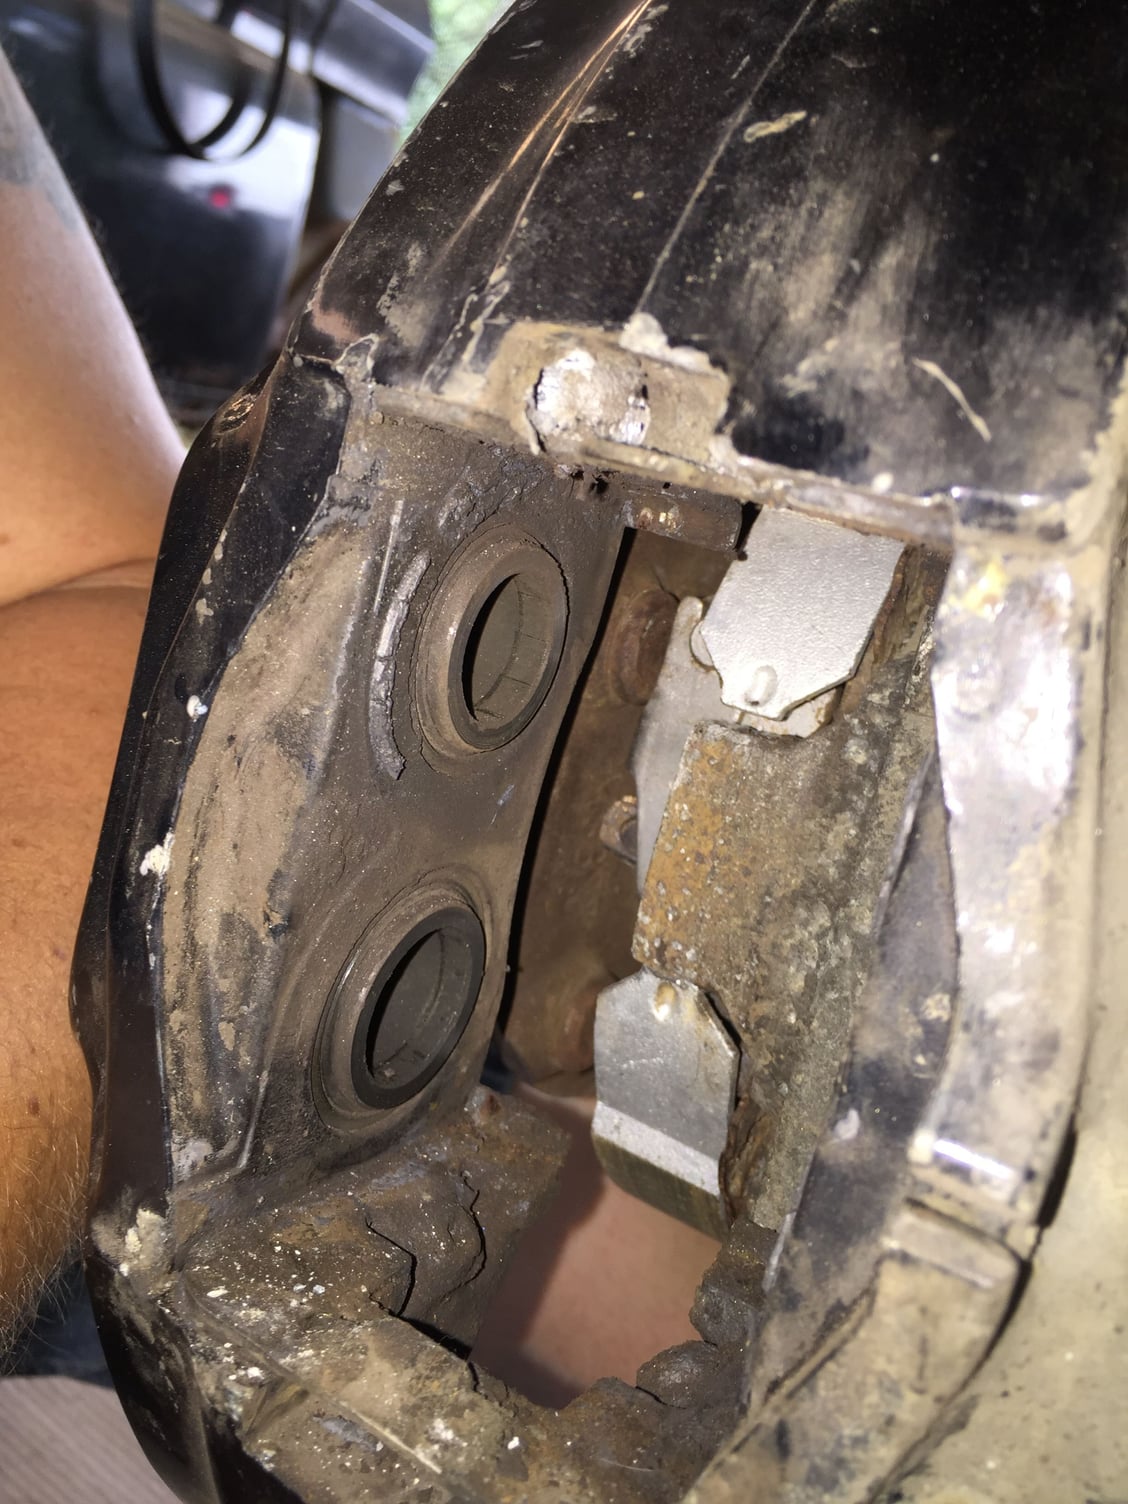
Now good and pissed off at myself, I glared at the driver's side wheel carrier. I noticed that the driver's side parking brake shoes looked old in comparison to the passenger's side. Then, I noticed that the aft end of the lining on the top shoe looked like it might be separating. I gave it a little tug. And half of the lining broke off. The shoe was rusty underneath.
Yep. I'm done for tonight. This pretty much wrecks my plans for driving the Red Witch for awhile.
I am going to take this as an opportunity, albeit an expensive one, to refresh some things. Here is my shopping list as of right now:
Now, before I get flamed, I don't see this as a chance to refresh the brakes, for a few reasons:
1) all four rotors look very good. So far, the passenger's side rear has measured very good. Same for the matching pads. Visual shows the other three corners to be similar. No need to spend money on pads and rotors right now.
2) I have found no evidence of brake fluid leakage at any of the calipers.
3) I have read several posts on refurbishing the Brembo calipers. Not for the faint of heart or faint of wallet.
4) My credit card is still on fire from all the past spending. I am trying to keep that under control. See the end of 1). Depending upon what this totals, I may reuse the existing parking brake adjuster assemblies and all caliper mounting bolts and washers. We shall see.

 07-15-2016, 07:19 PM

 It is still sorta shiny.
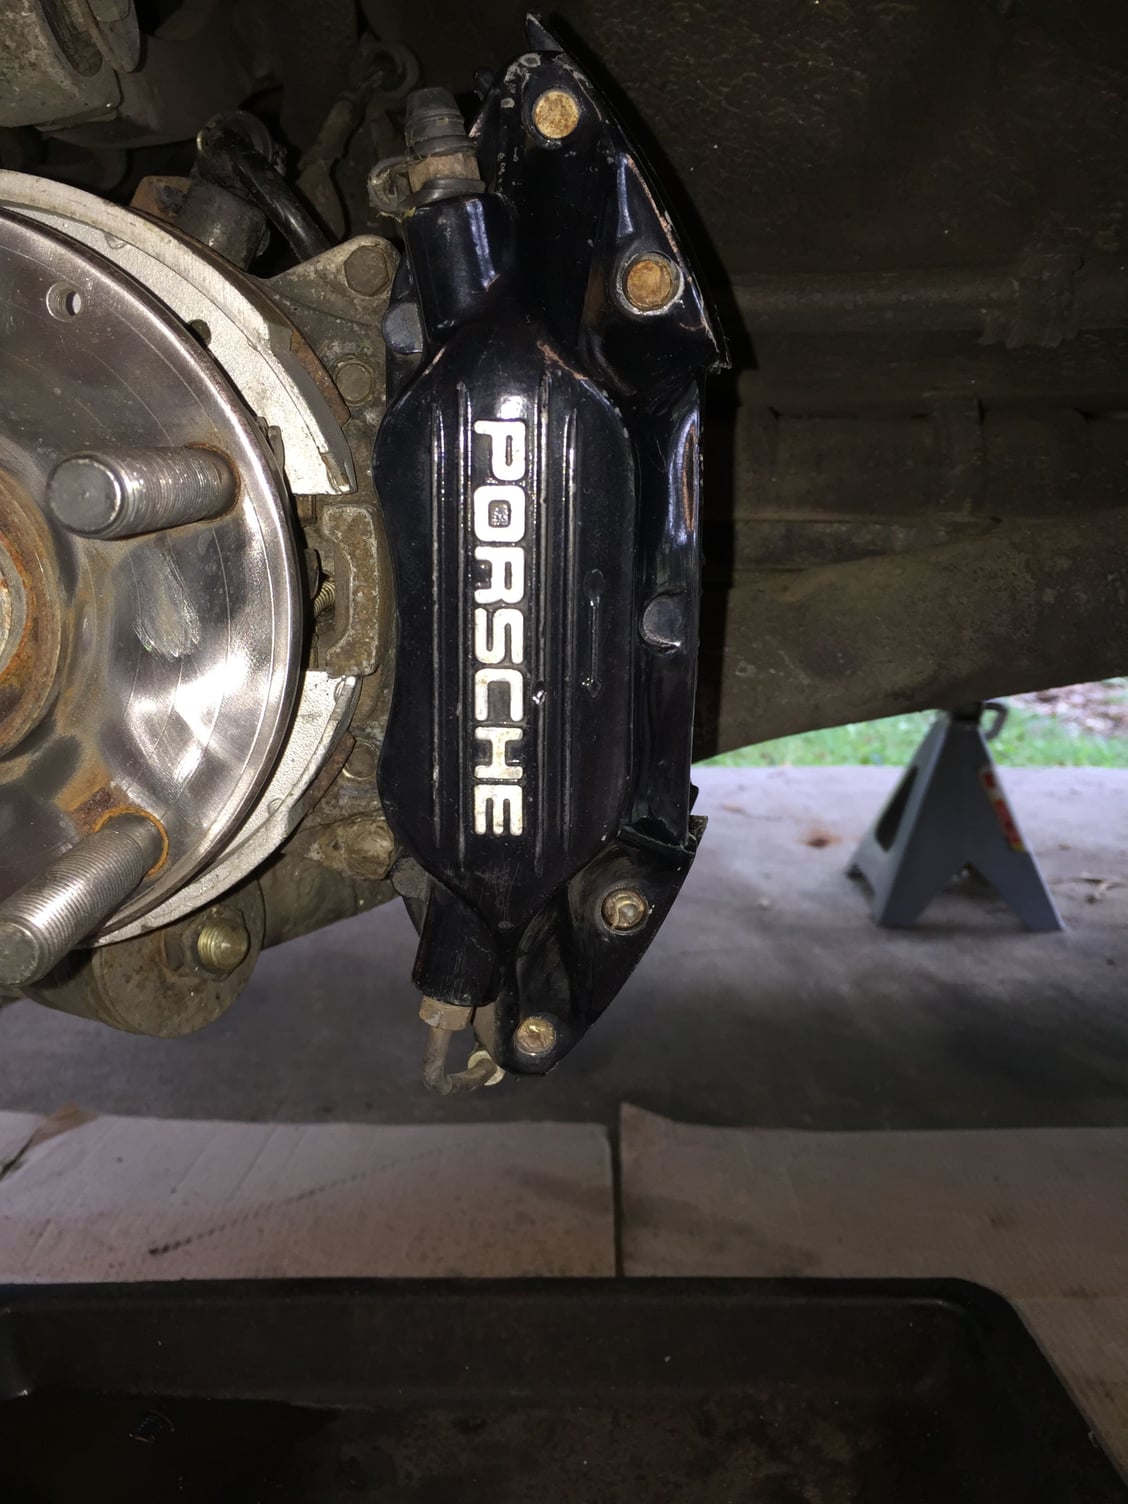


") I put a wisp of anti-seize on the back of the counter sunk screws and tightened them down. Mounted the caliper and torqued the bolts to 62 ft/lbs.
I put a wisp of anti-seize on the back of the counter sunk screws and tightened them down. Mounted the caliper and torqued the bolts to 62 ft/lbs.