When you click on links to various merchants on this site and make a purchase, this can result in this site earning a commission. Affiliate programs and affiliations include, but are not limited to, the eBay Partner Network.
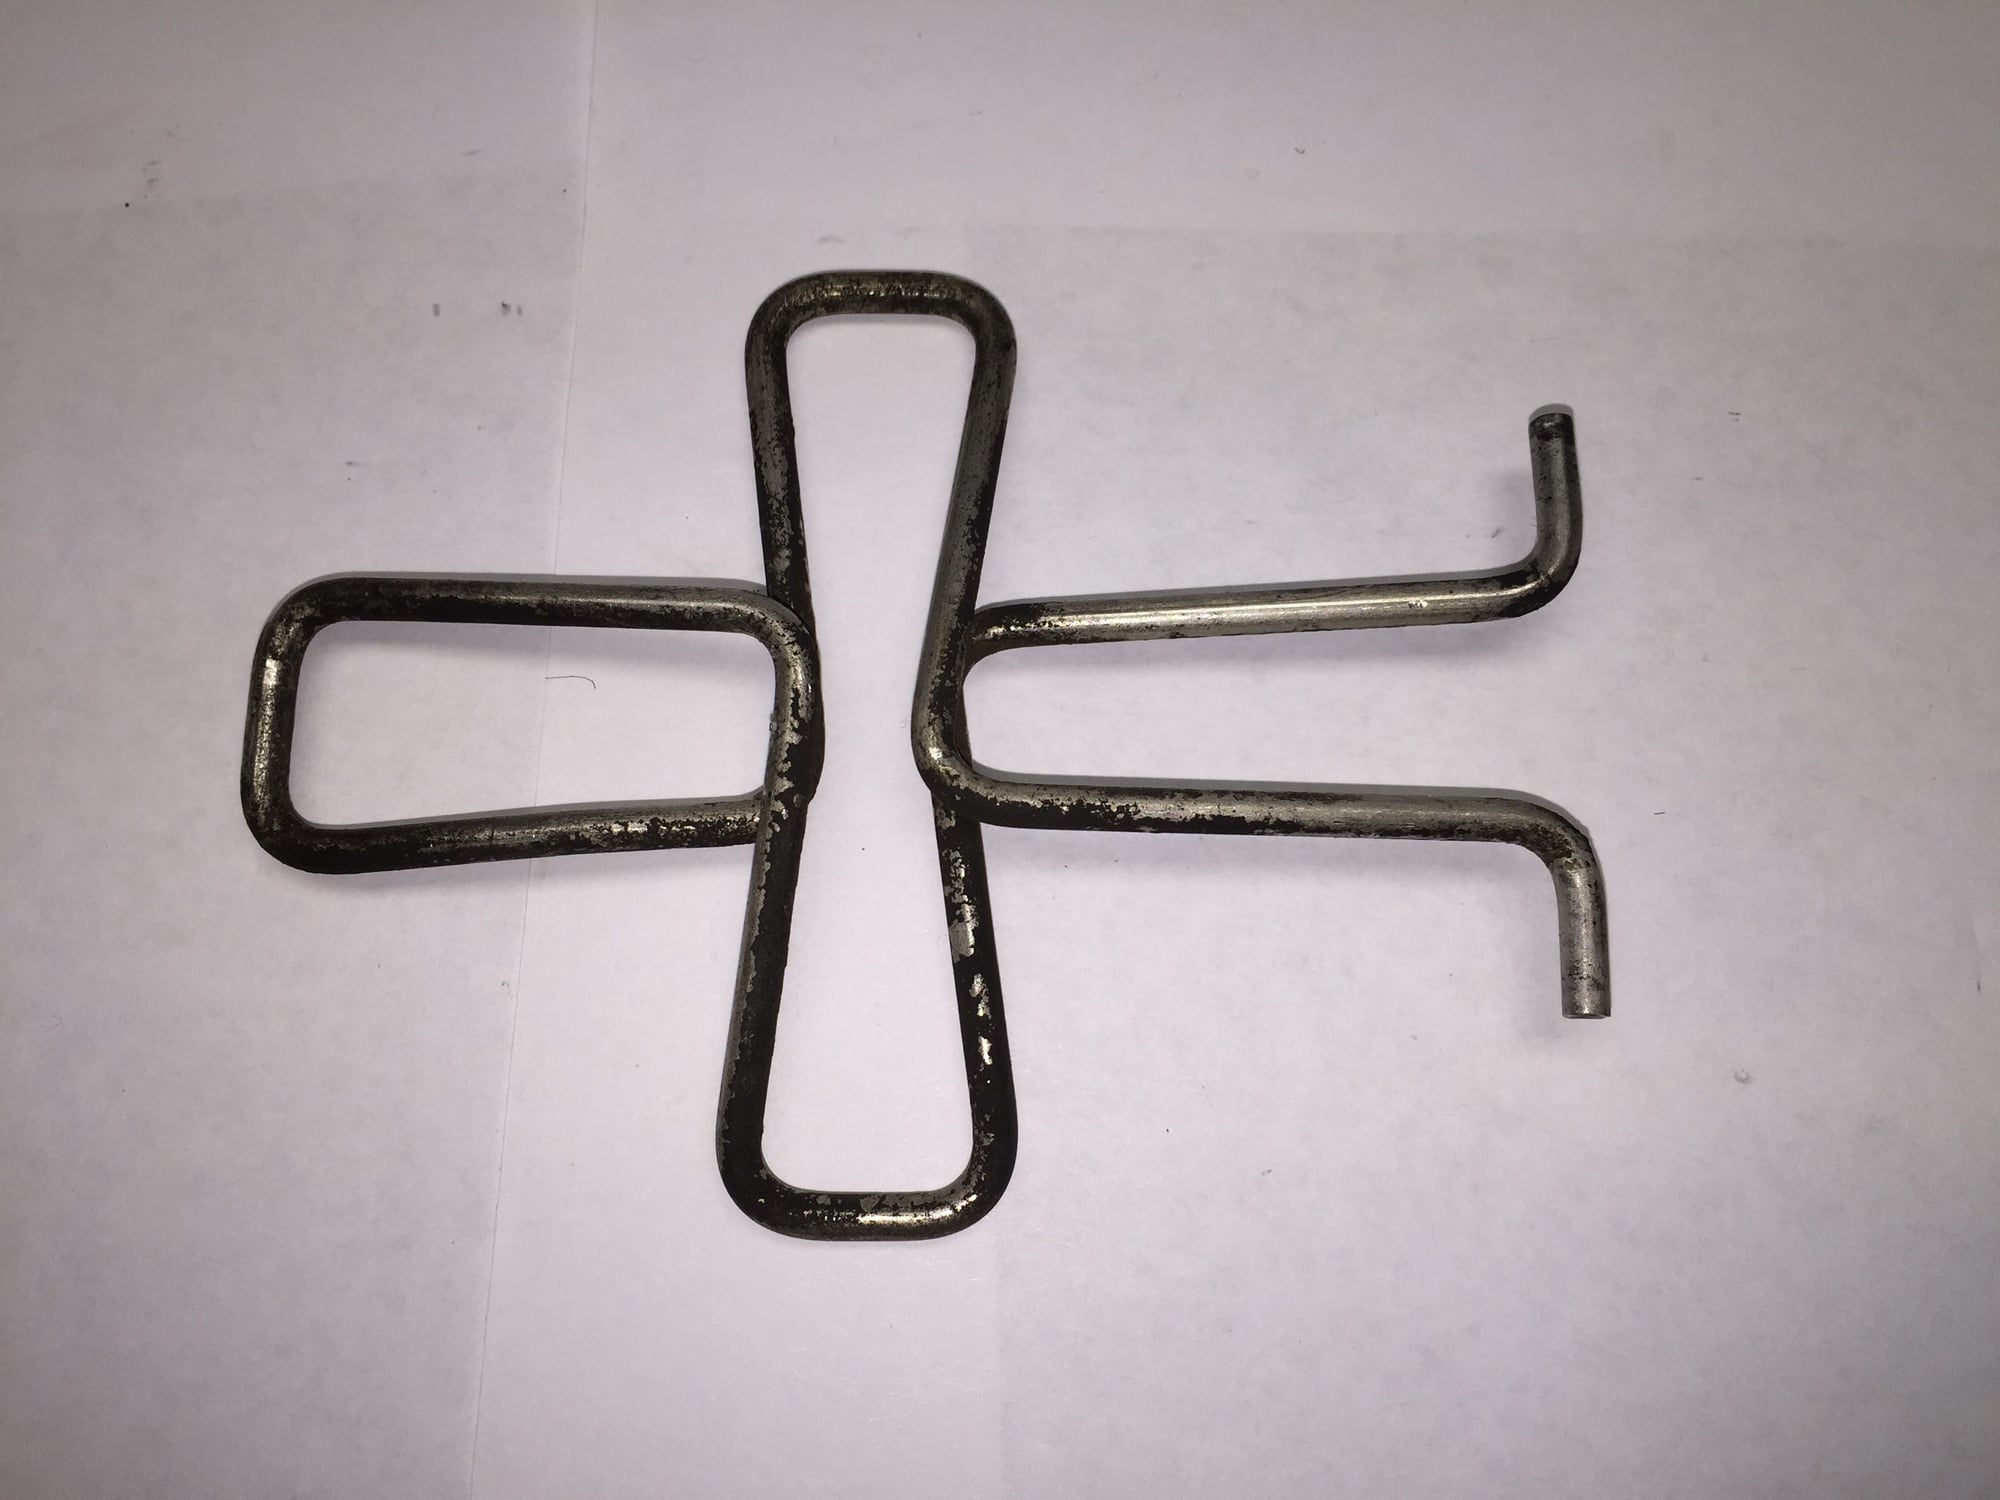
You don't need all those parts for the emergency brakes, the springs rarely go bad along with the adjusting mechanism. If it is all broken and rusted to high h*ll, replace them.
From the pictures you gave us, I think you should be okay
Same goes with the pad dampers. They are stupid expensive and if you pry them off carefully you can reuse them with some good high temp adhesive.
They are metal so unless you destroy one (like I have) you shouldn't need those as well.
Aha! Good to know. I was going to change the springs based upon age.
As for the dampers, I thought they had to be replaced if they fell off the pads. Three fell off on the passenger's rear caliper alone. VERY good to know. What high temp adhesive did you use?
I am very appreciative of this info, as this will free up the budget for brake lines. At best, they are 18 years old. At worst, they are 30.
Permatex High-Temperature Red Silicone should do the job, it's good to 650F which will be more than what most brake pads will handle anyway. Unless you are racing using carbon ceramics
Just make sure it is a thin layer to ensure proper pedal feel and abs effectiveness.
I replaced all of my rear pads and 5 of my fronts as they were missing when I bought a set of 993 calipers to put on my 81.
They are the same as 91+ 928 calipers (S4 front) but the rears have 20% bigger pistons.
They really hurt my bank account, but they were worth it
I haven't run brake pad dampers in at least 10 years. No squeaks. Just a little antiseize on the backs of the pads and the edge points where they contact the guides.
A couple of weeks ago, I found a torn rack boot. New ones have been ordered. Now, since I will be having the front hubs off, seems like a very good time to remove the outer tie rod ends to replace the rack boots.
PPI found a damaged ball joint boot. If I am going to remove the outer tie rod ends from the spindles, its only a hop skip and a jump to undoing the ball joint.
If I am doing one ball joint boot, might as well do them all.
If I am doing ball joint boots, I should think about tie rod end boots.
Sigh...
I removed the driver's side rear caliper from the flex hose. Caliper and such will go to work for a thorough scrubbing. I have already plugged the flex line port.
I have wire brushed all four flex line to hard line connections. They are not bad rusty, but they are rusty. Grrrr...I have already shot them with AeroKroil, and plan on doing so twice a day for the next week or so before I try to crack them loose.
Both front ABS sensors read 1.042 Mohm between the terminals. I was unable to get a Mv reading due to the front rotors being very stiff to turn. After I remove the front calipers, I will spin the rotors and measure the ABS sensor's outputs.
My plan for the calipers is to remove them, remove the brake pads and dampers, then scrub the h*ll outta them with mineral spirits and a toothbrush. I will pay close attention to the stainless steel spring plates. I have no intention of trying to remove them, as I don't see a need. I will make sure they are smooth and clean.
Right now, I have a tight fitting rubber plug in the fluid inlet on the caliper I removed. I am going to try to make a plug out of a short M10 bolt, tight fitting washer, and an O-ring. We shall see.
The failure mode, such as it is, on the SS plates is that aluminum corrodes and swells behind them. That pinches the pads so they don't move freely, and it's downhill. The plates also harbor deposits of brake dust underneath, which add to the corrosion issues. So it's a Good Idea to remove and clean behind them when you have a chance. If you wait too long, you'll be splitting the calipers and using a torch to get the little soft SS screws out.
The caliper hold-down bolts need a generous treatment with anti-seize, to keep the aluminum caliper from corroding and swelling up into the bolt and making the bolts even tougher to get out.
For steel pieces like the hubs that like to corrode, consider using one of the instant cold galvanize spray products to keep the corrosion devils at bay for a while. Or paint them, except on the mating faces.
Have fun! I'm living vicariously through your write-ups and pictures. Thanks, and keep up the good work.
Hi dr bob! OK, that makes sense. I will remove the spring plates. I understand it takes heat. Question: which would be better, putting the caliper in a toaster oven and heating the whole thing, or localized heat with a high capacity heat gun?
I am shying away from a hot-wrench (oxy-acetylene torch) due to the piston seals.
Good point on the caliper mounting bolts, thanks!
I thought the front wheel hubs were aluminum?
I appreciate all the advice. I am working a fine balance between doing the job right and falling off the cliff of going too far. I am trying to keep the work to manageable bite sized chunks. I don't want the Red Witch off the road for very long at a time.
Thanks for the encouragement, it is appreciated.
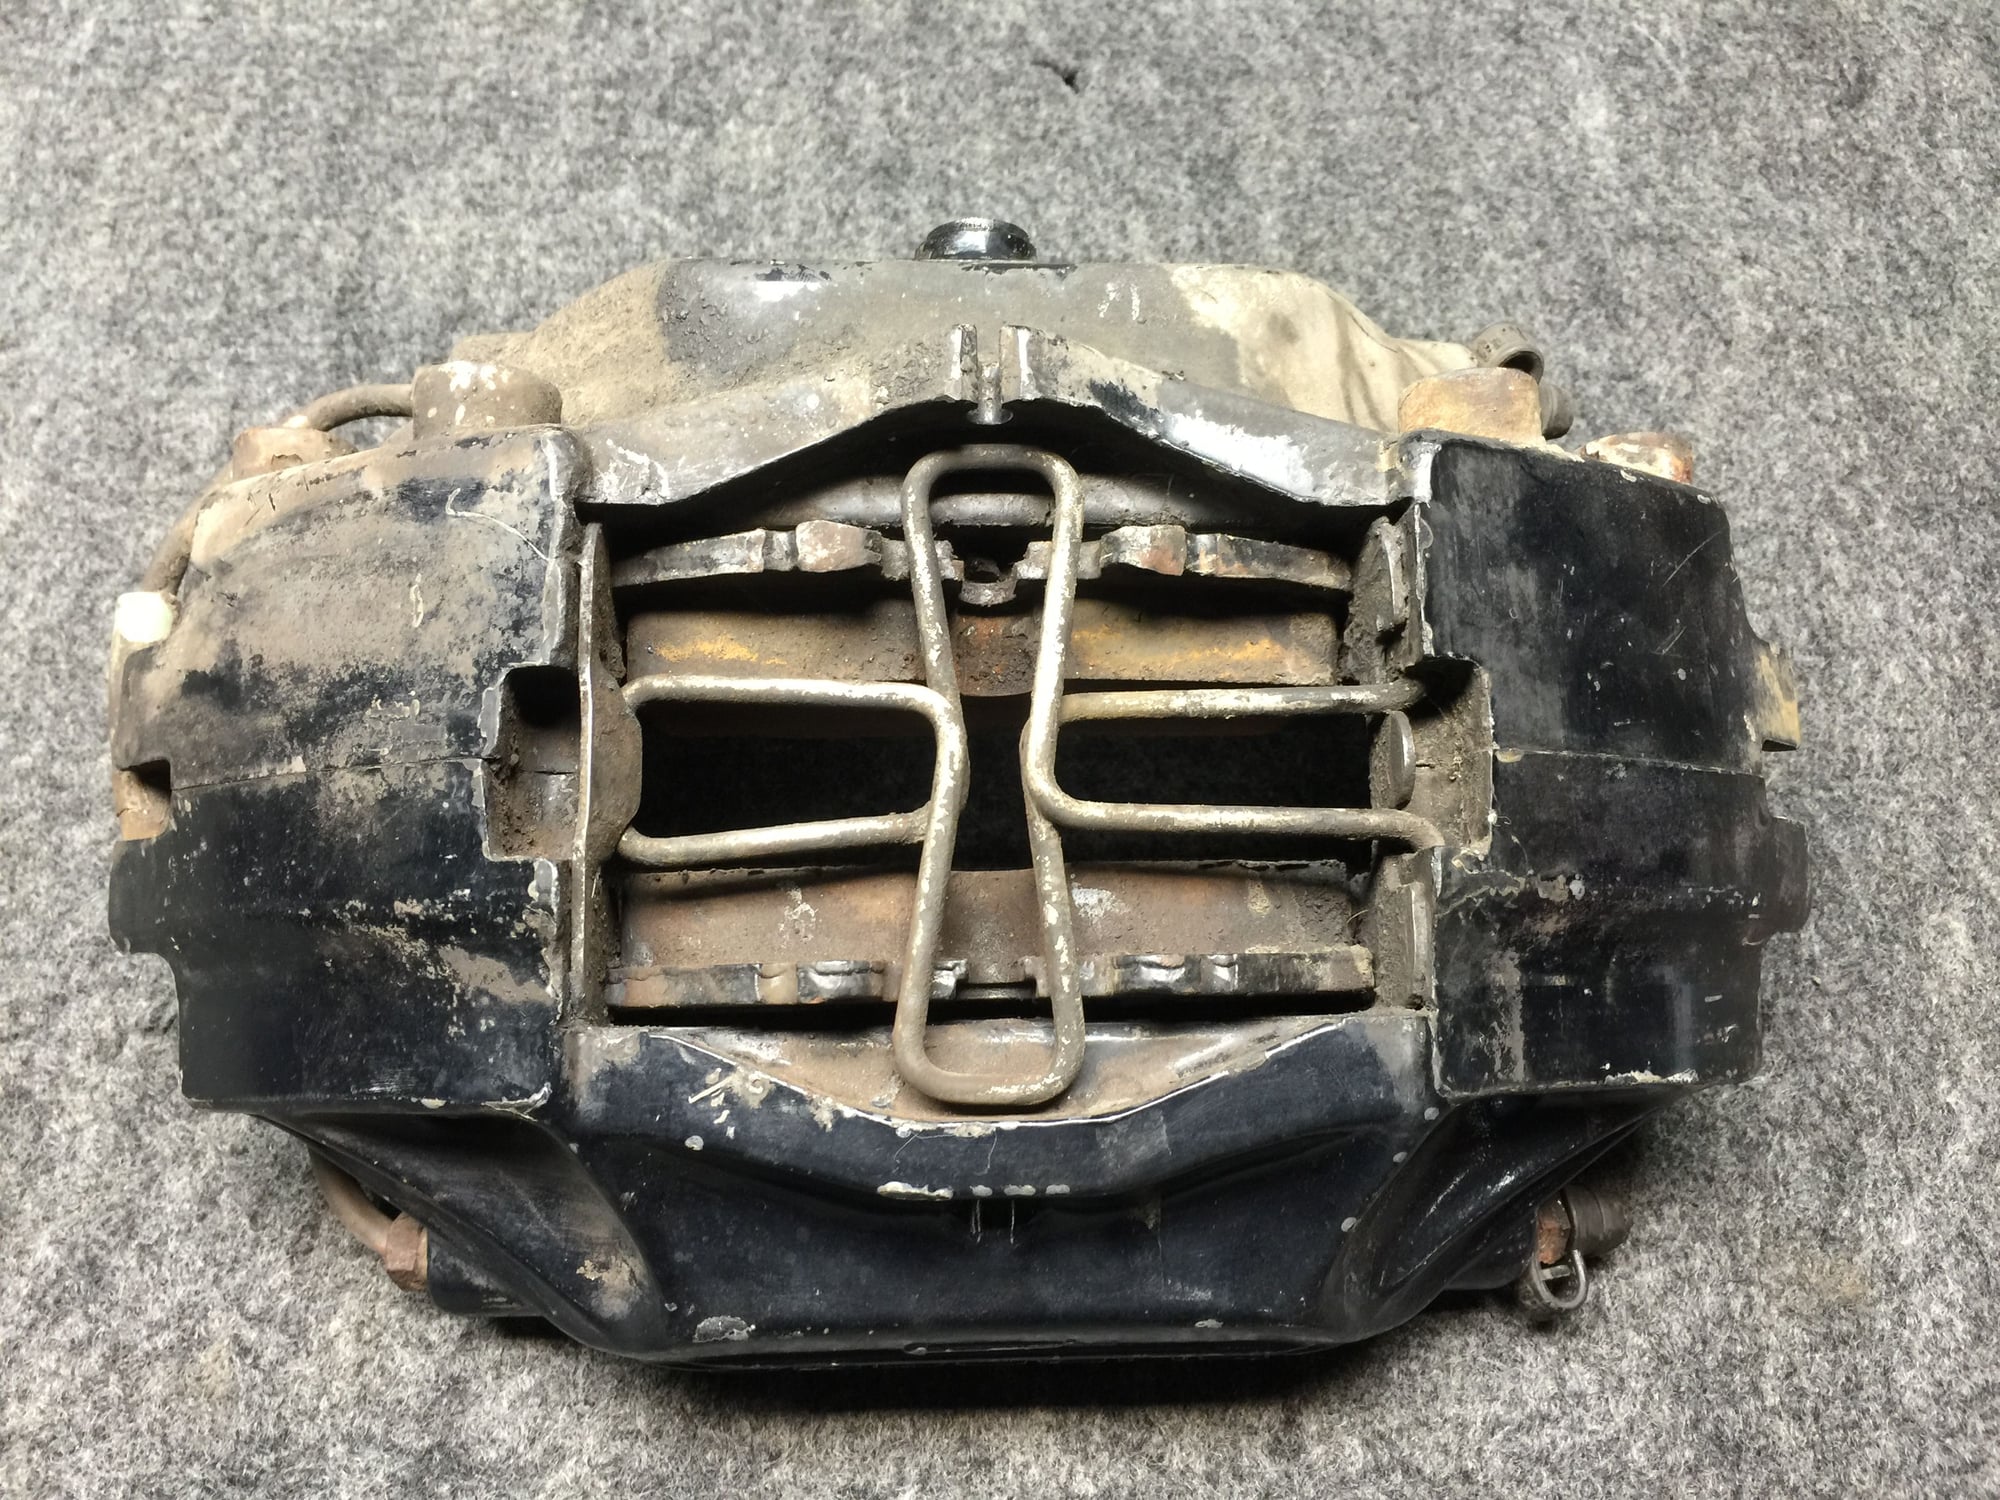
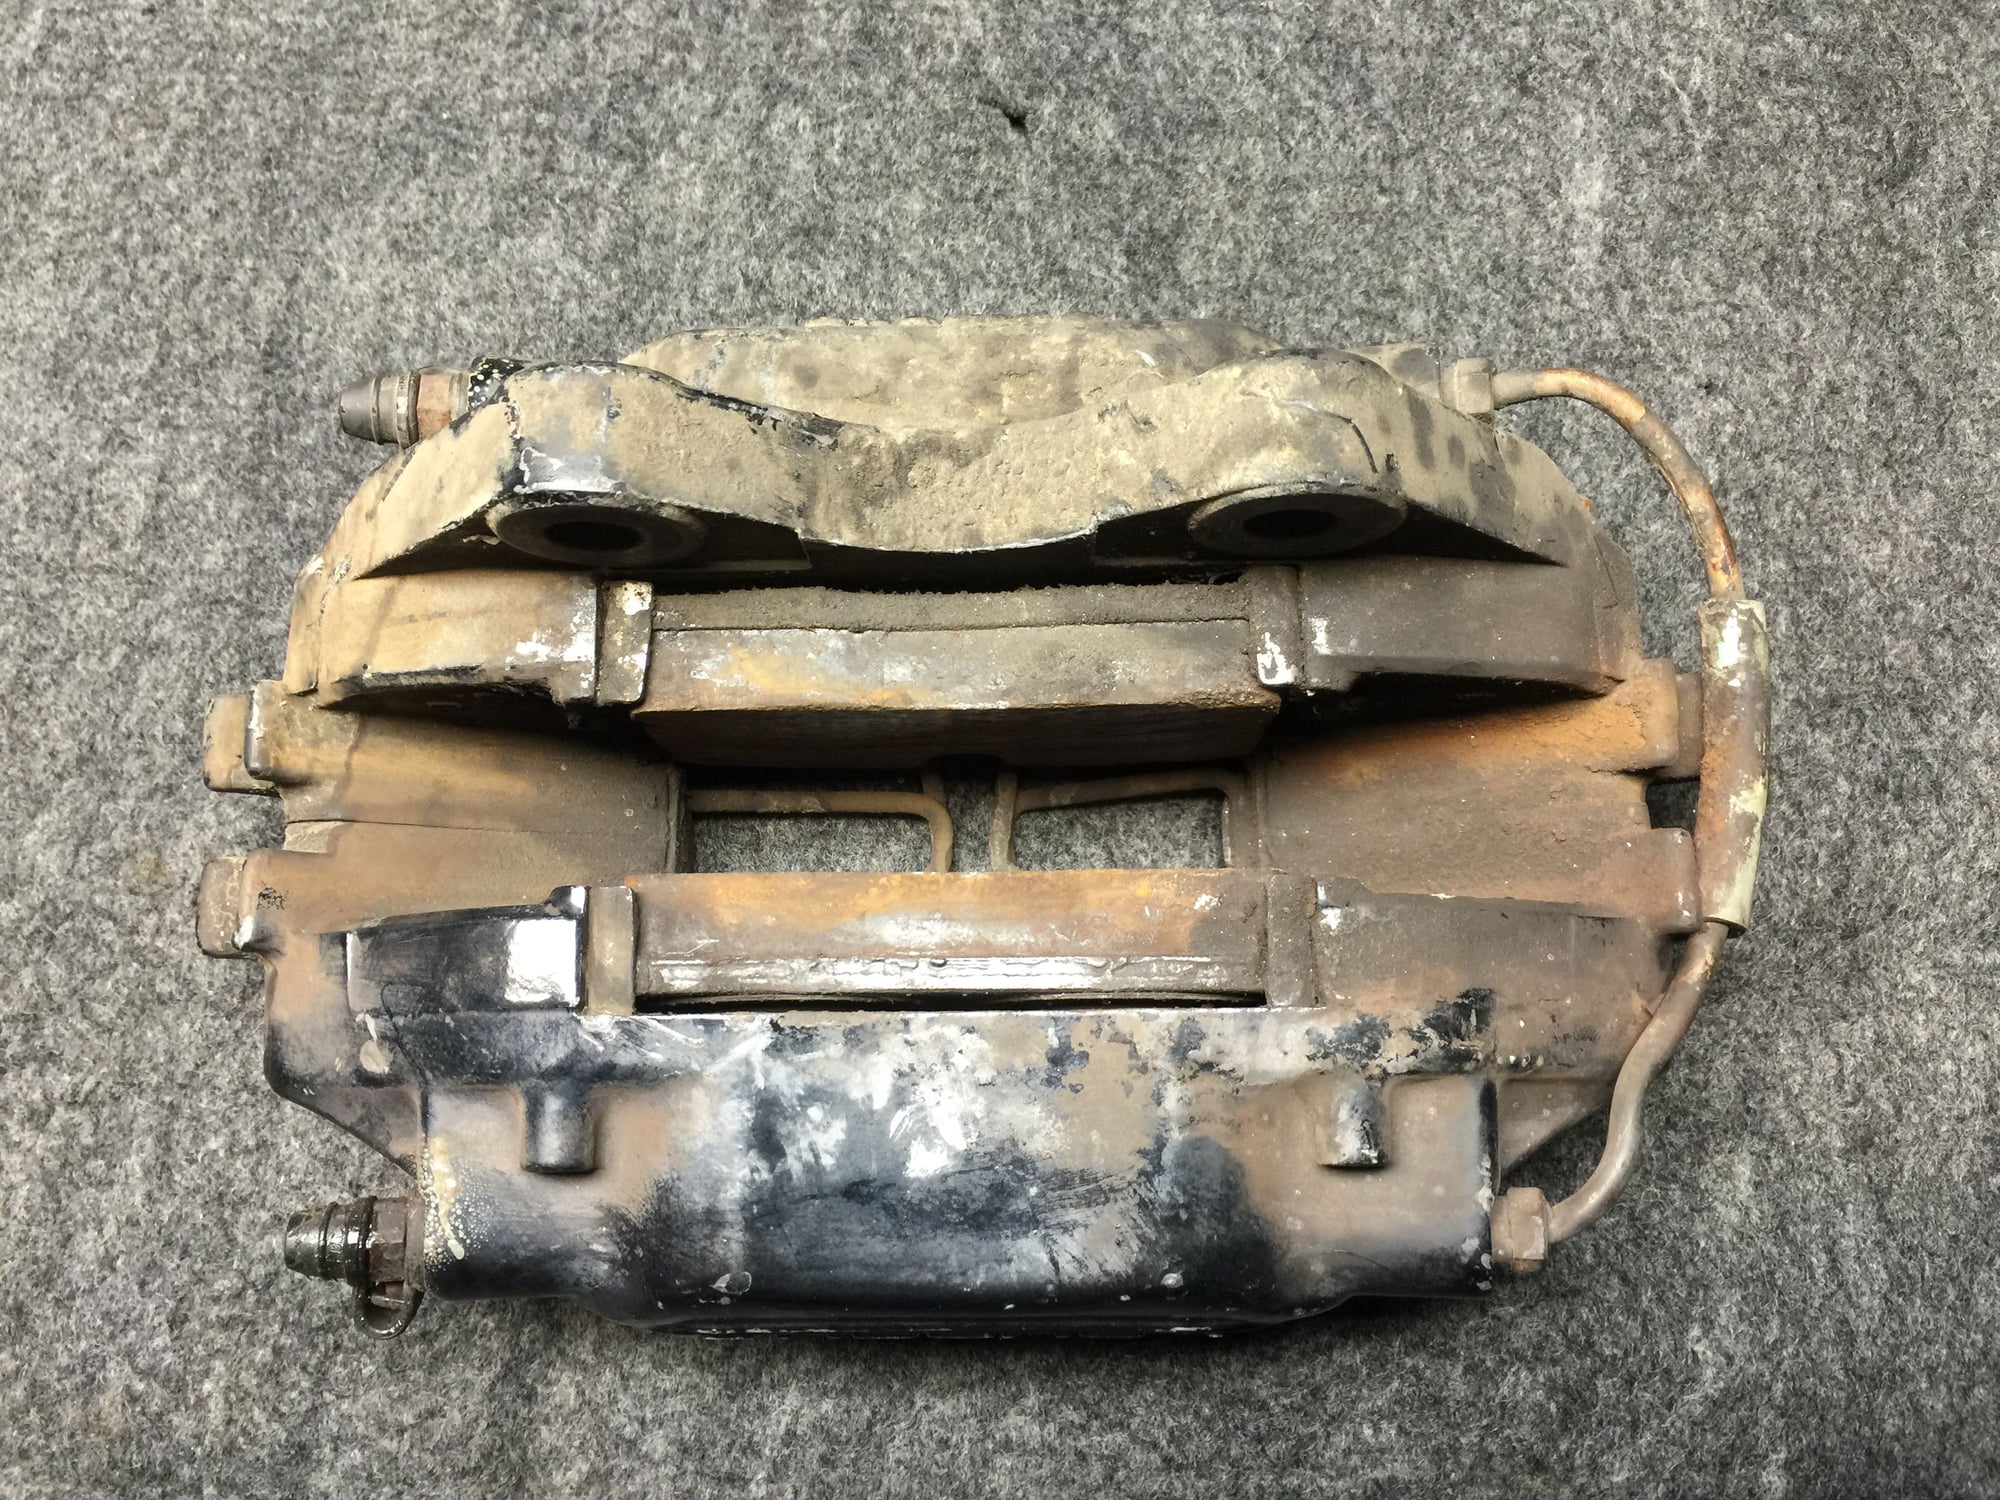
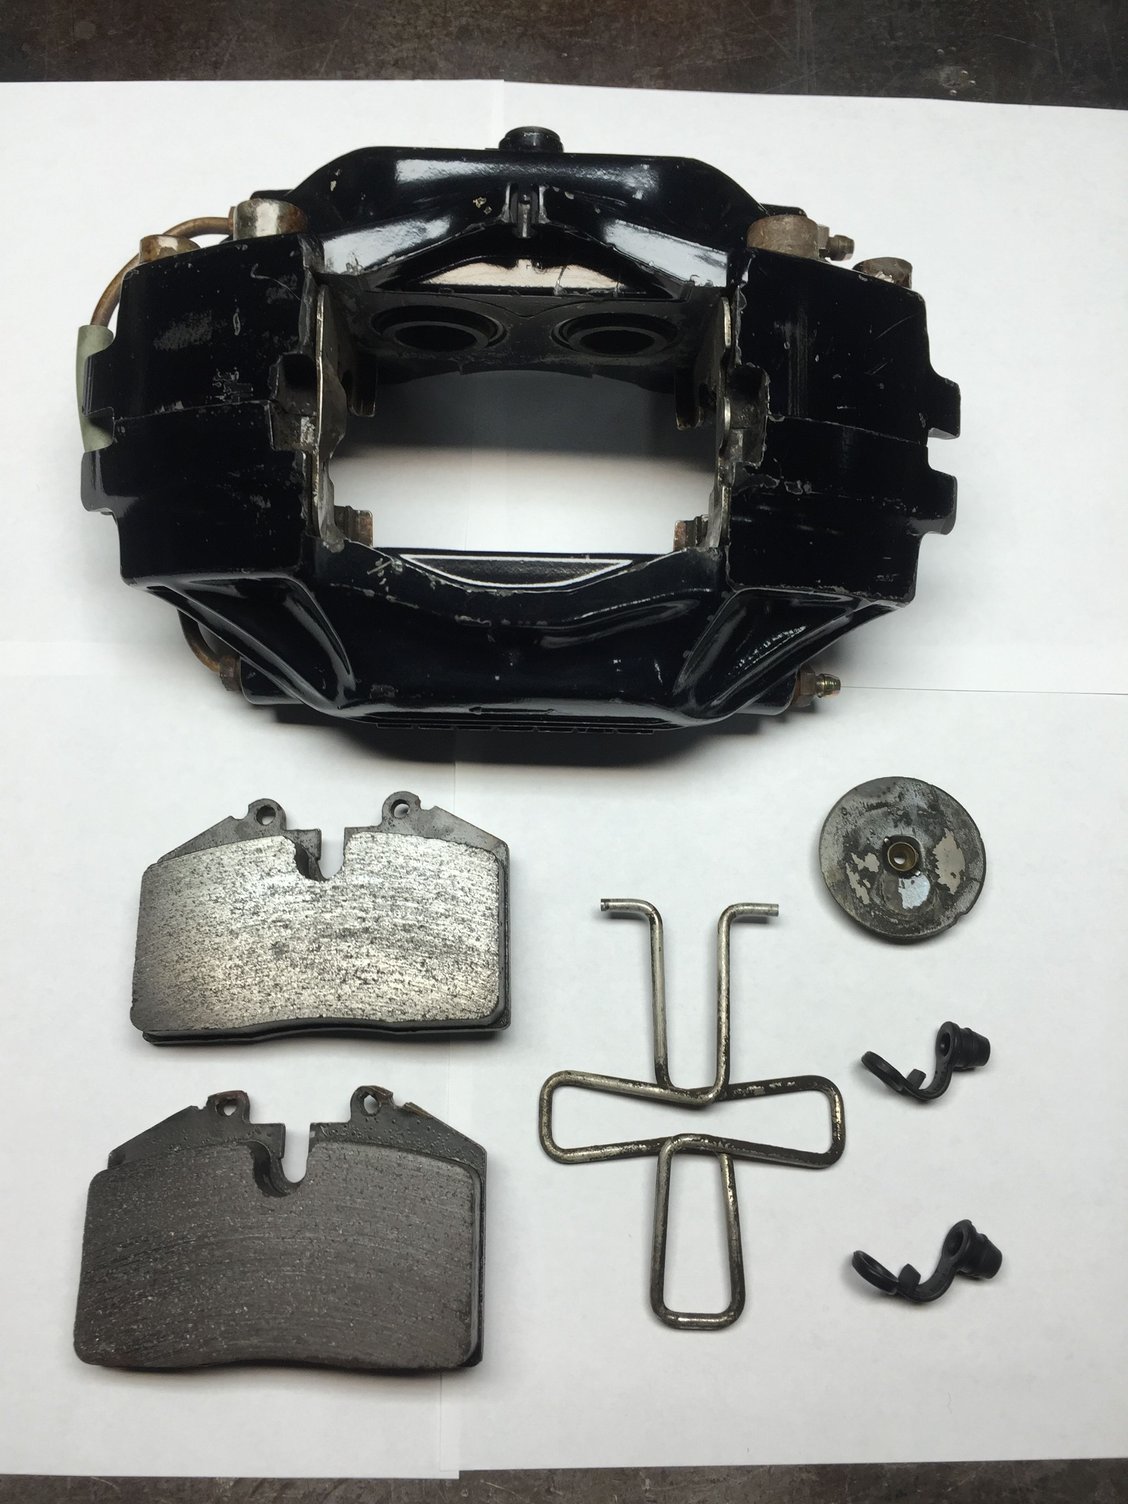
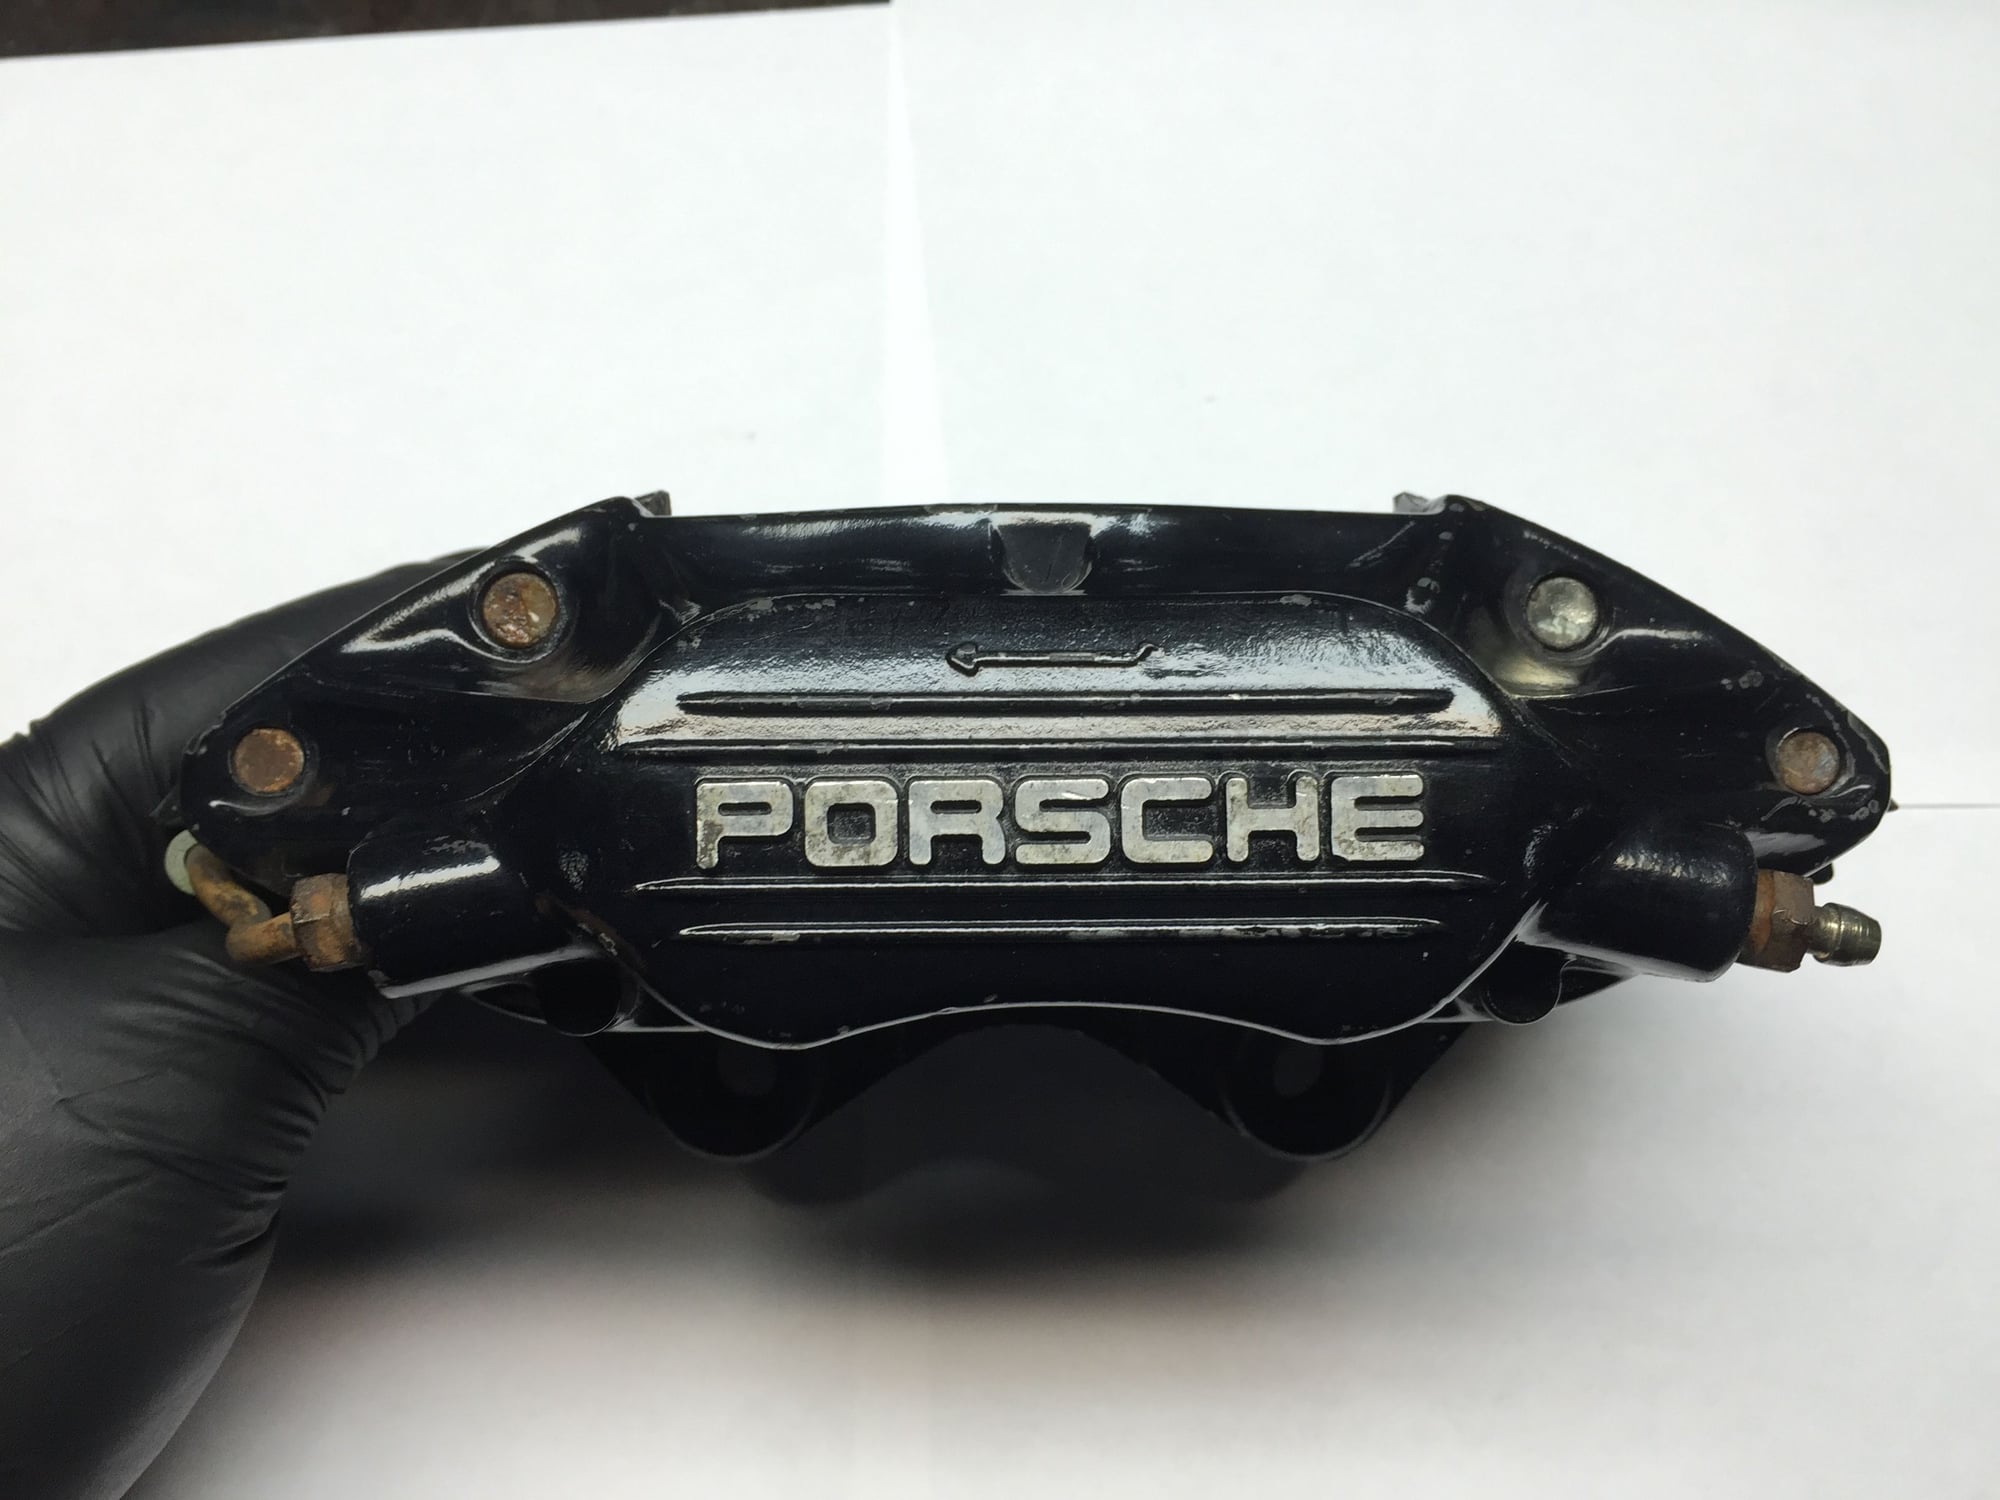
I spent some time last night scrubbing on the driver's side rear caliper.
What I started with:
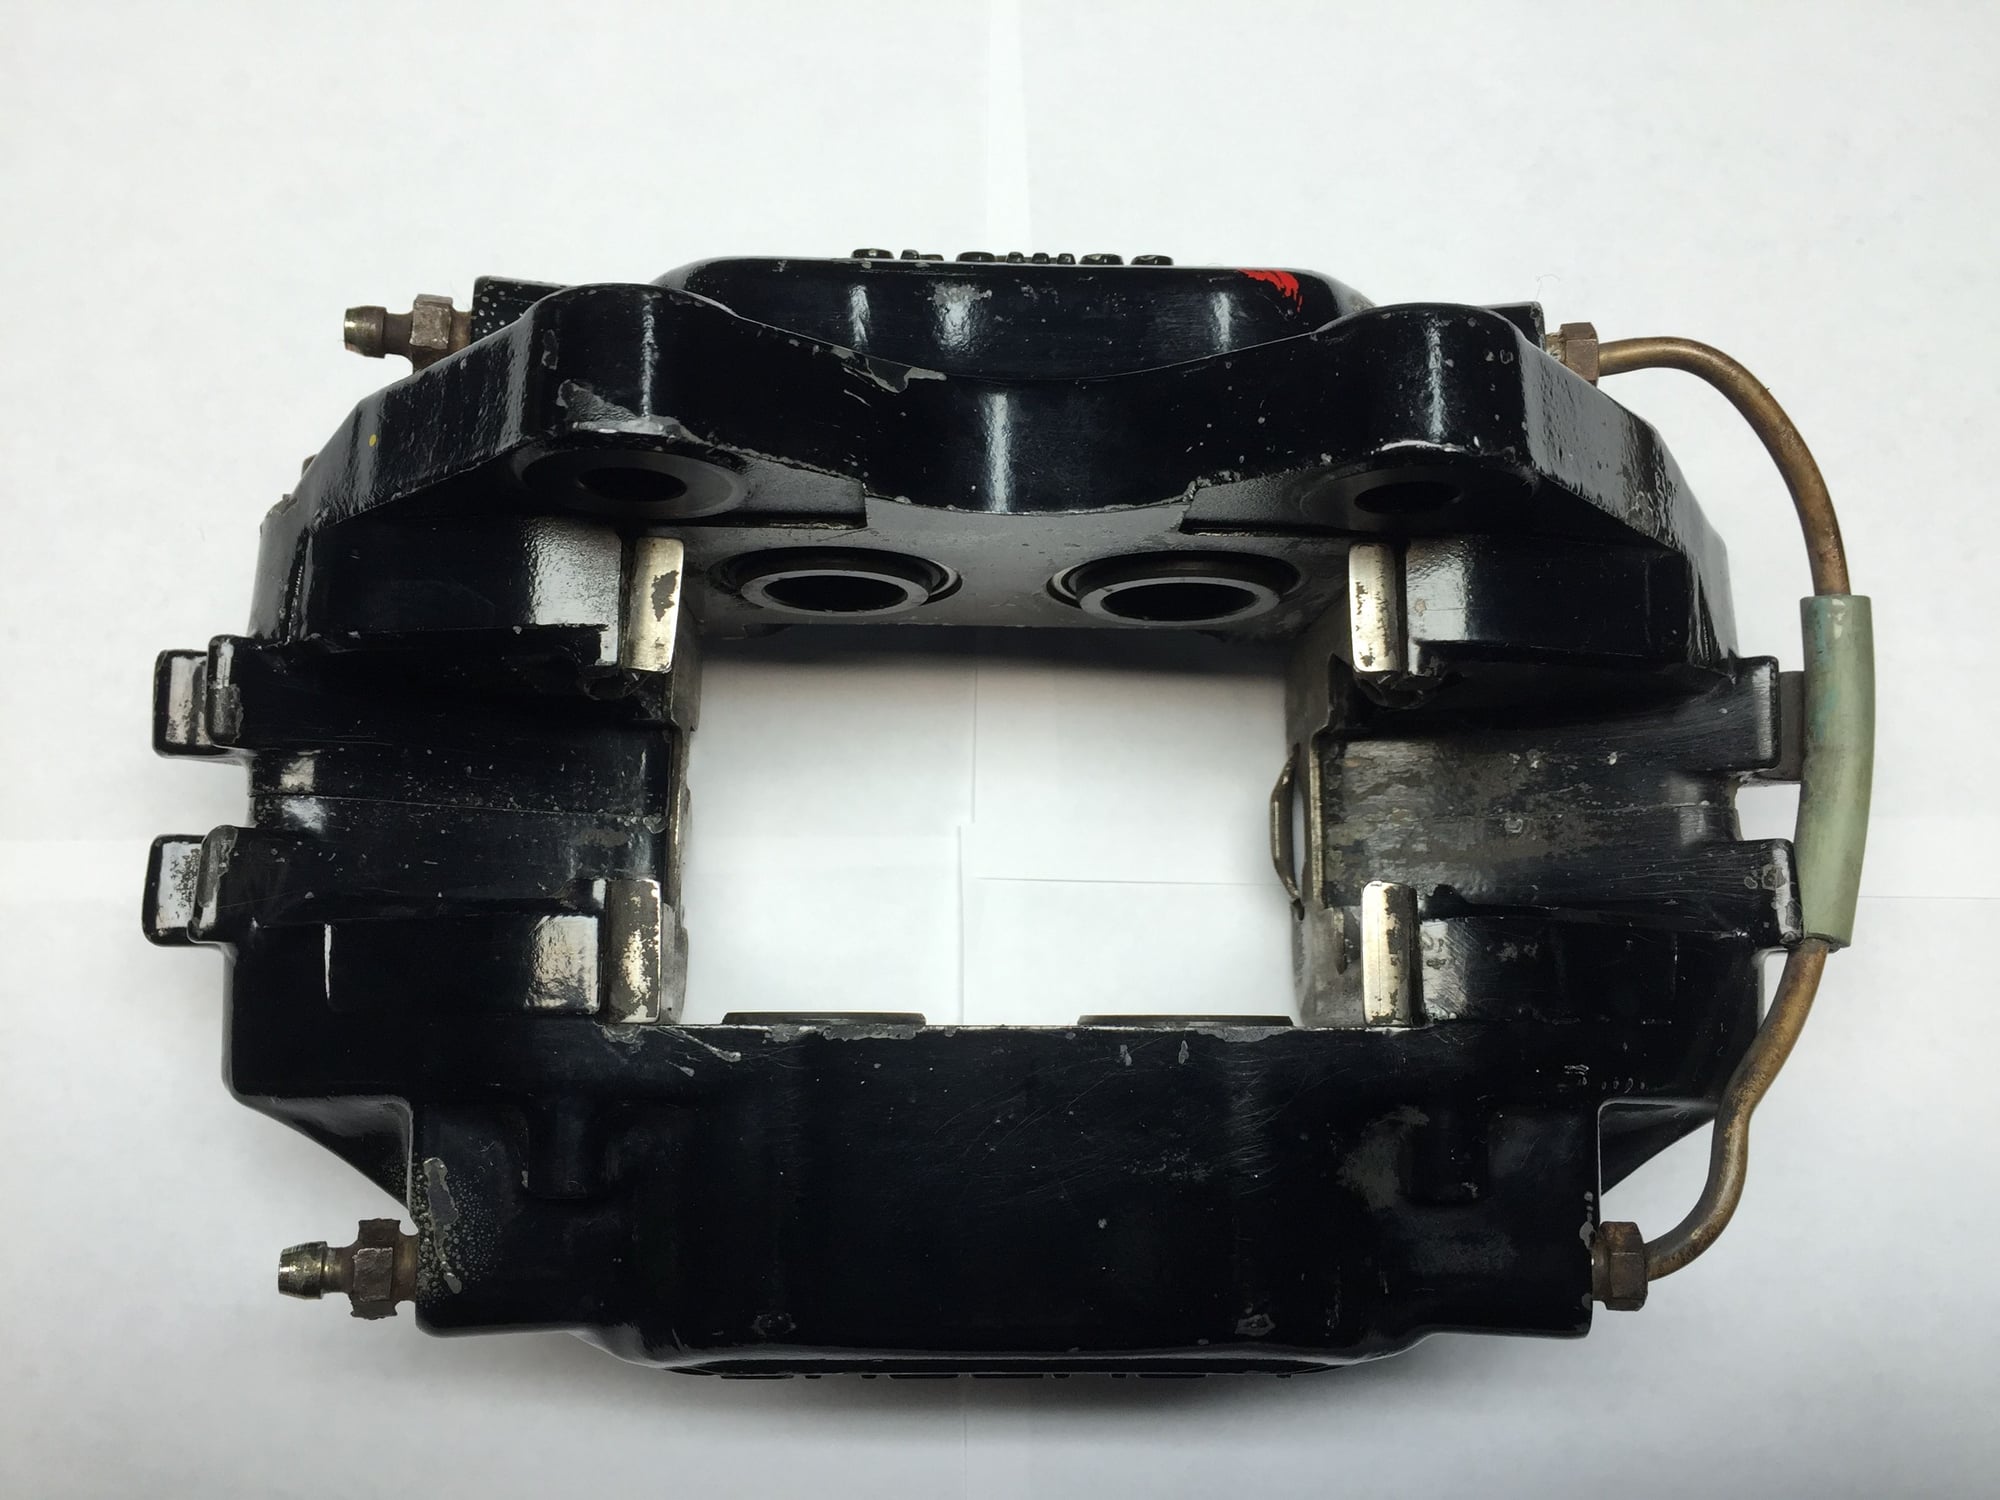
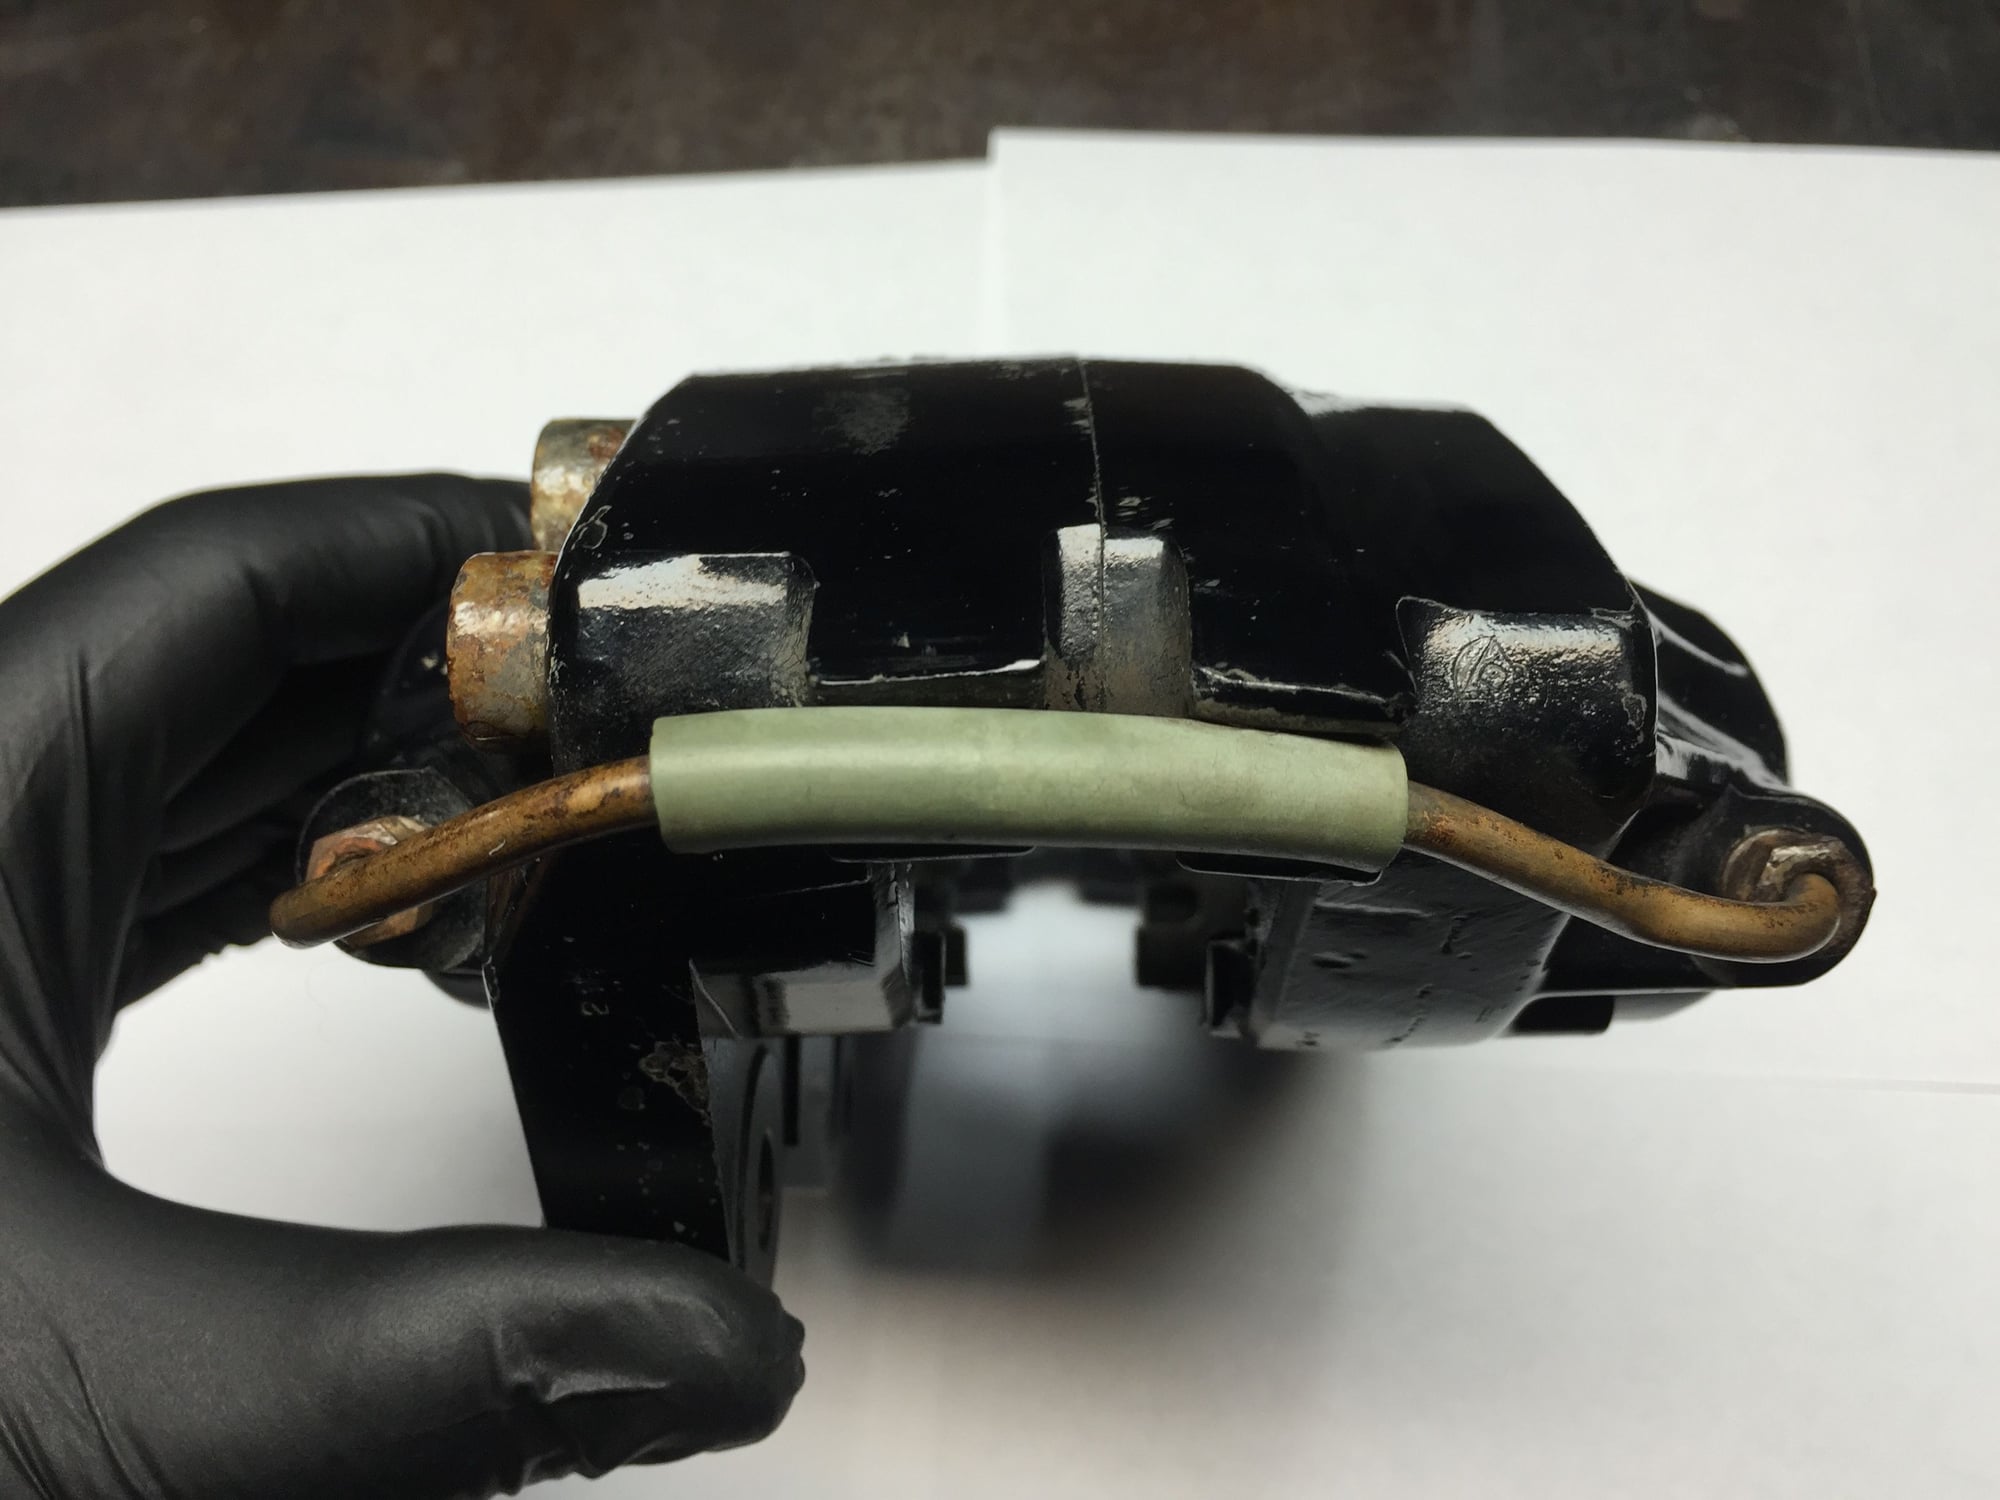
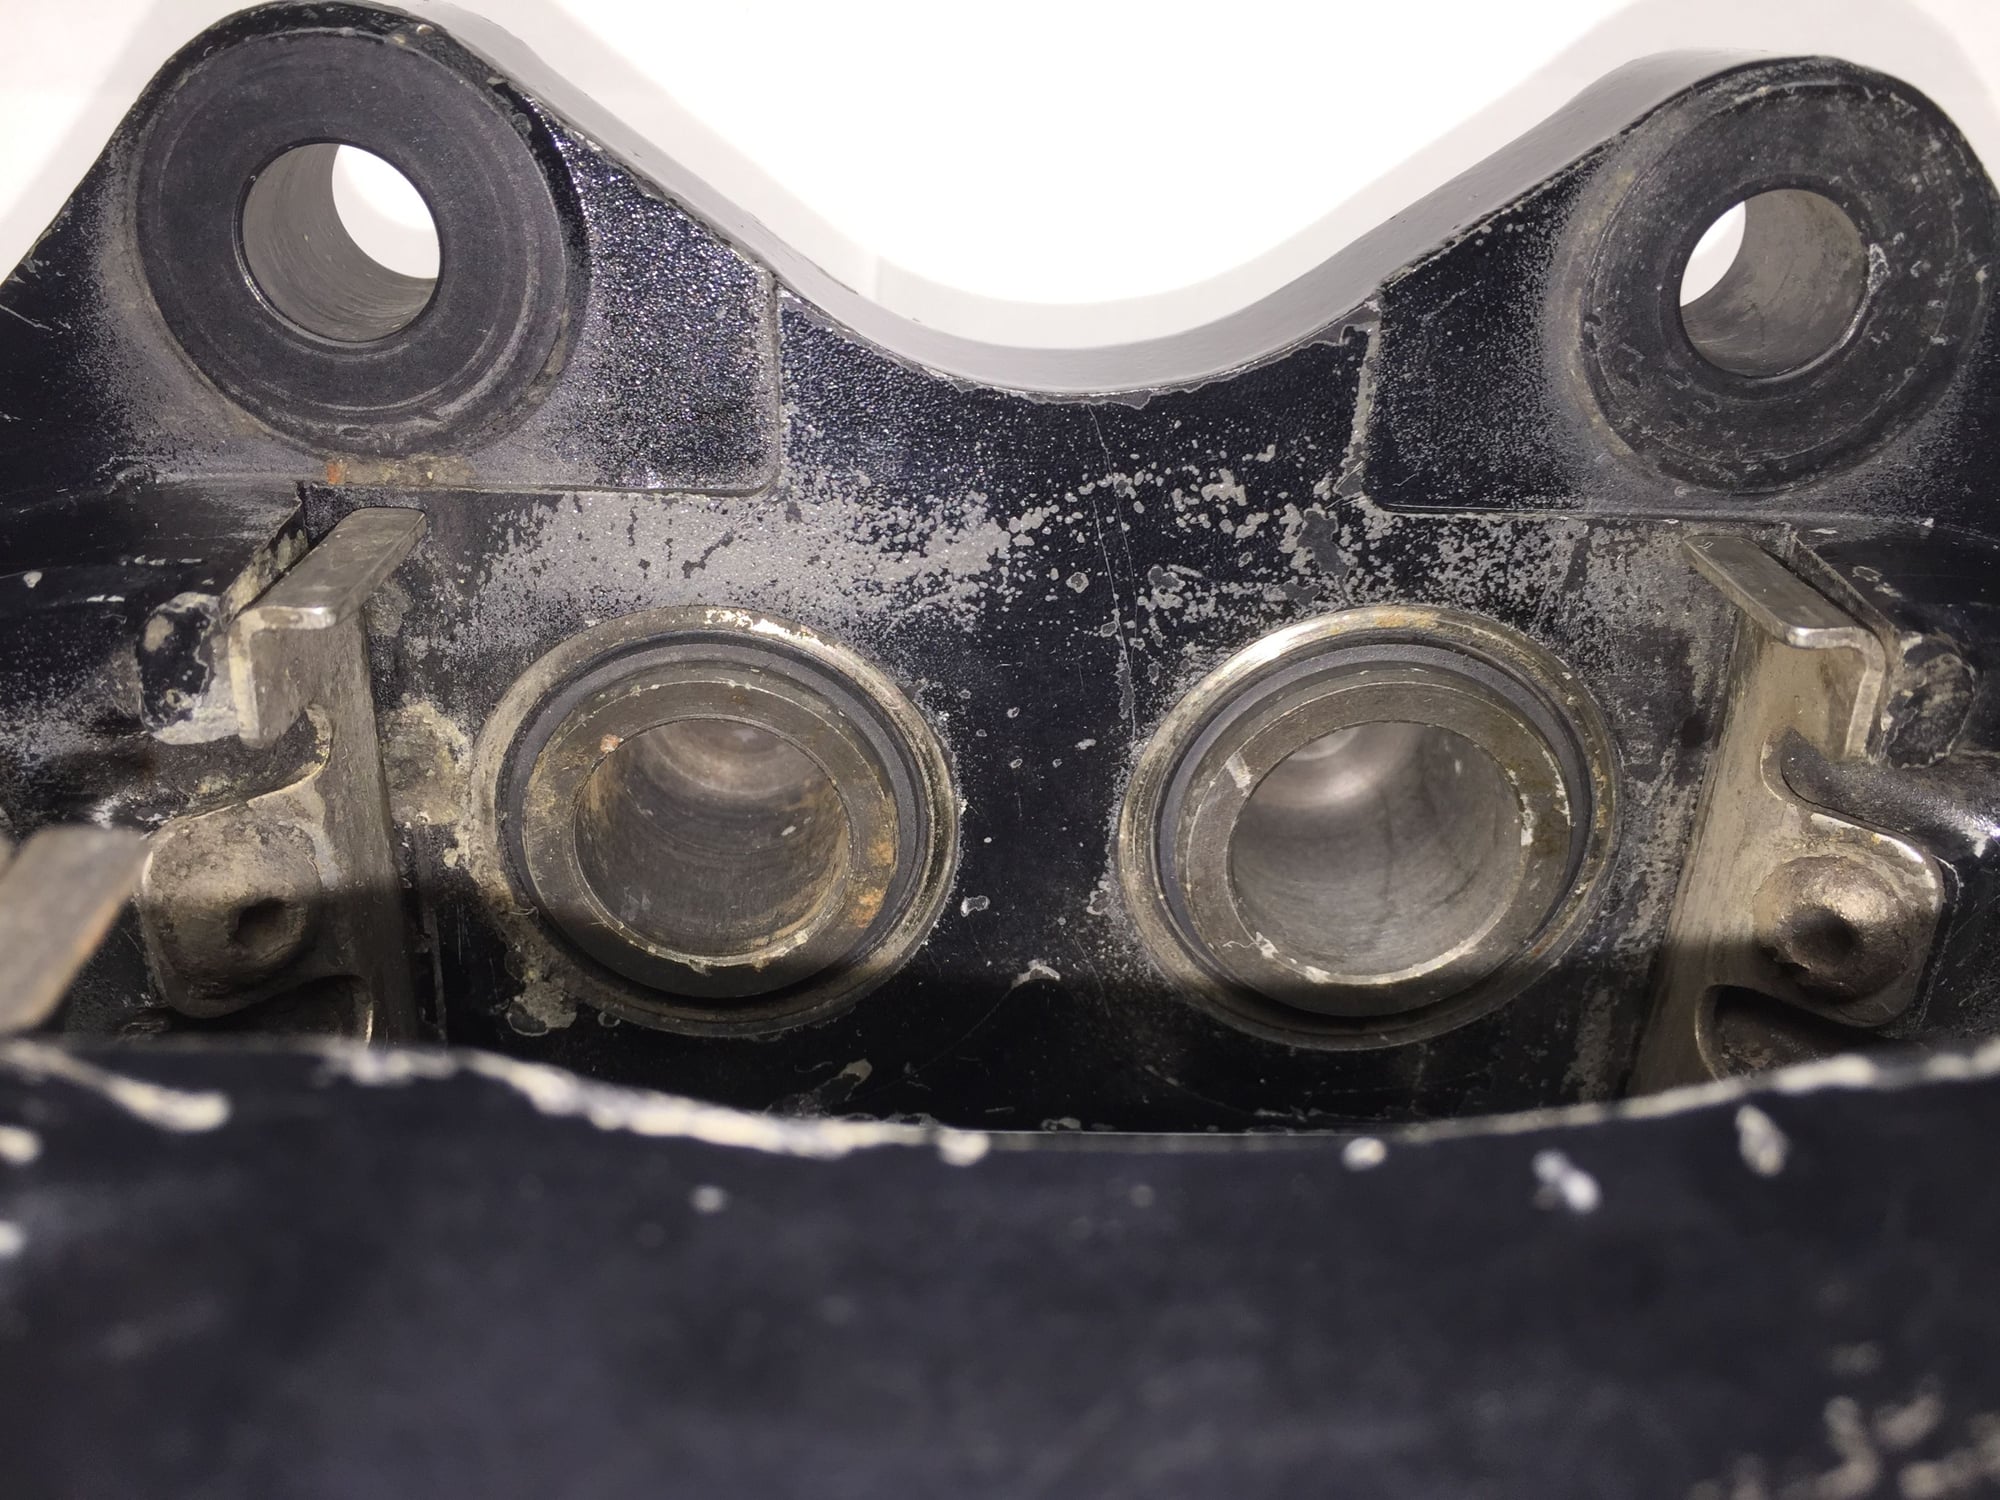
Hmmm...something's not right with the crossover line.
Yep...crossover line definitely is not right.
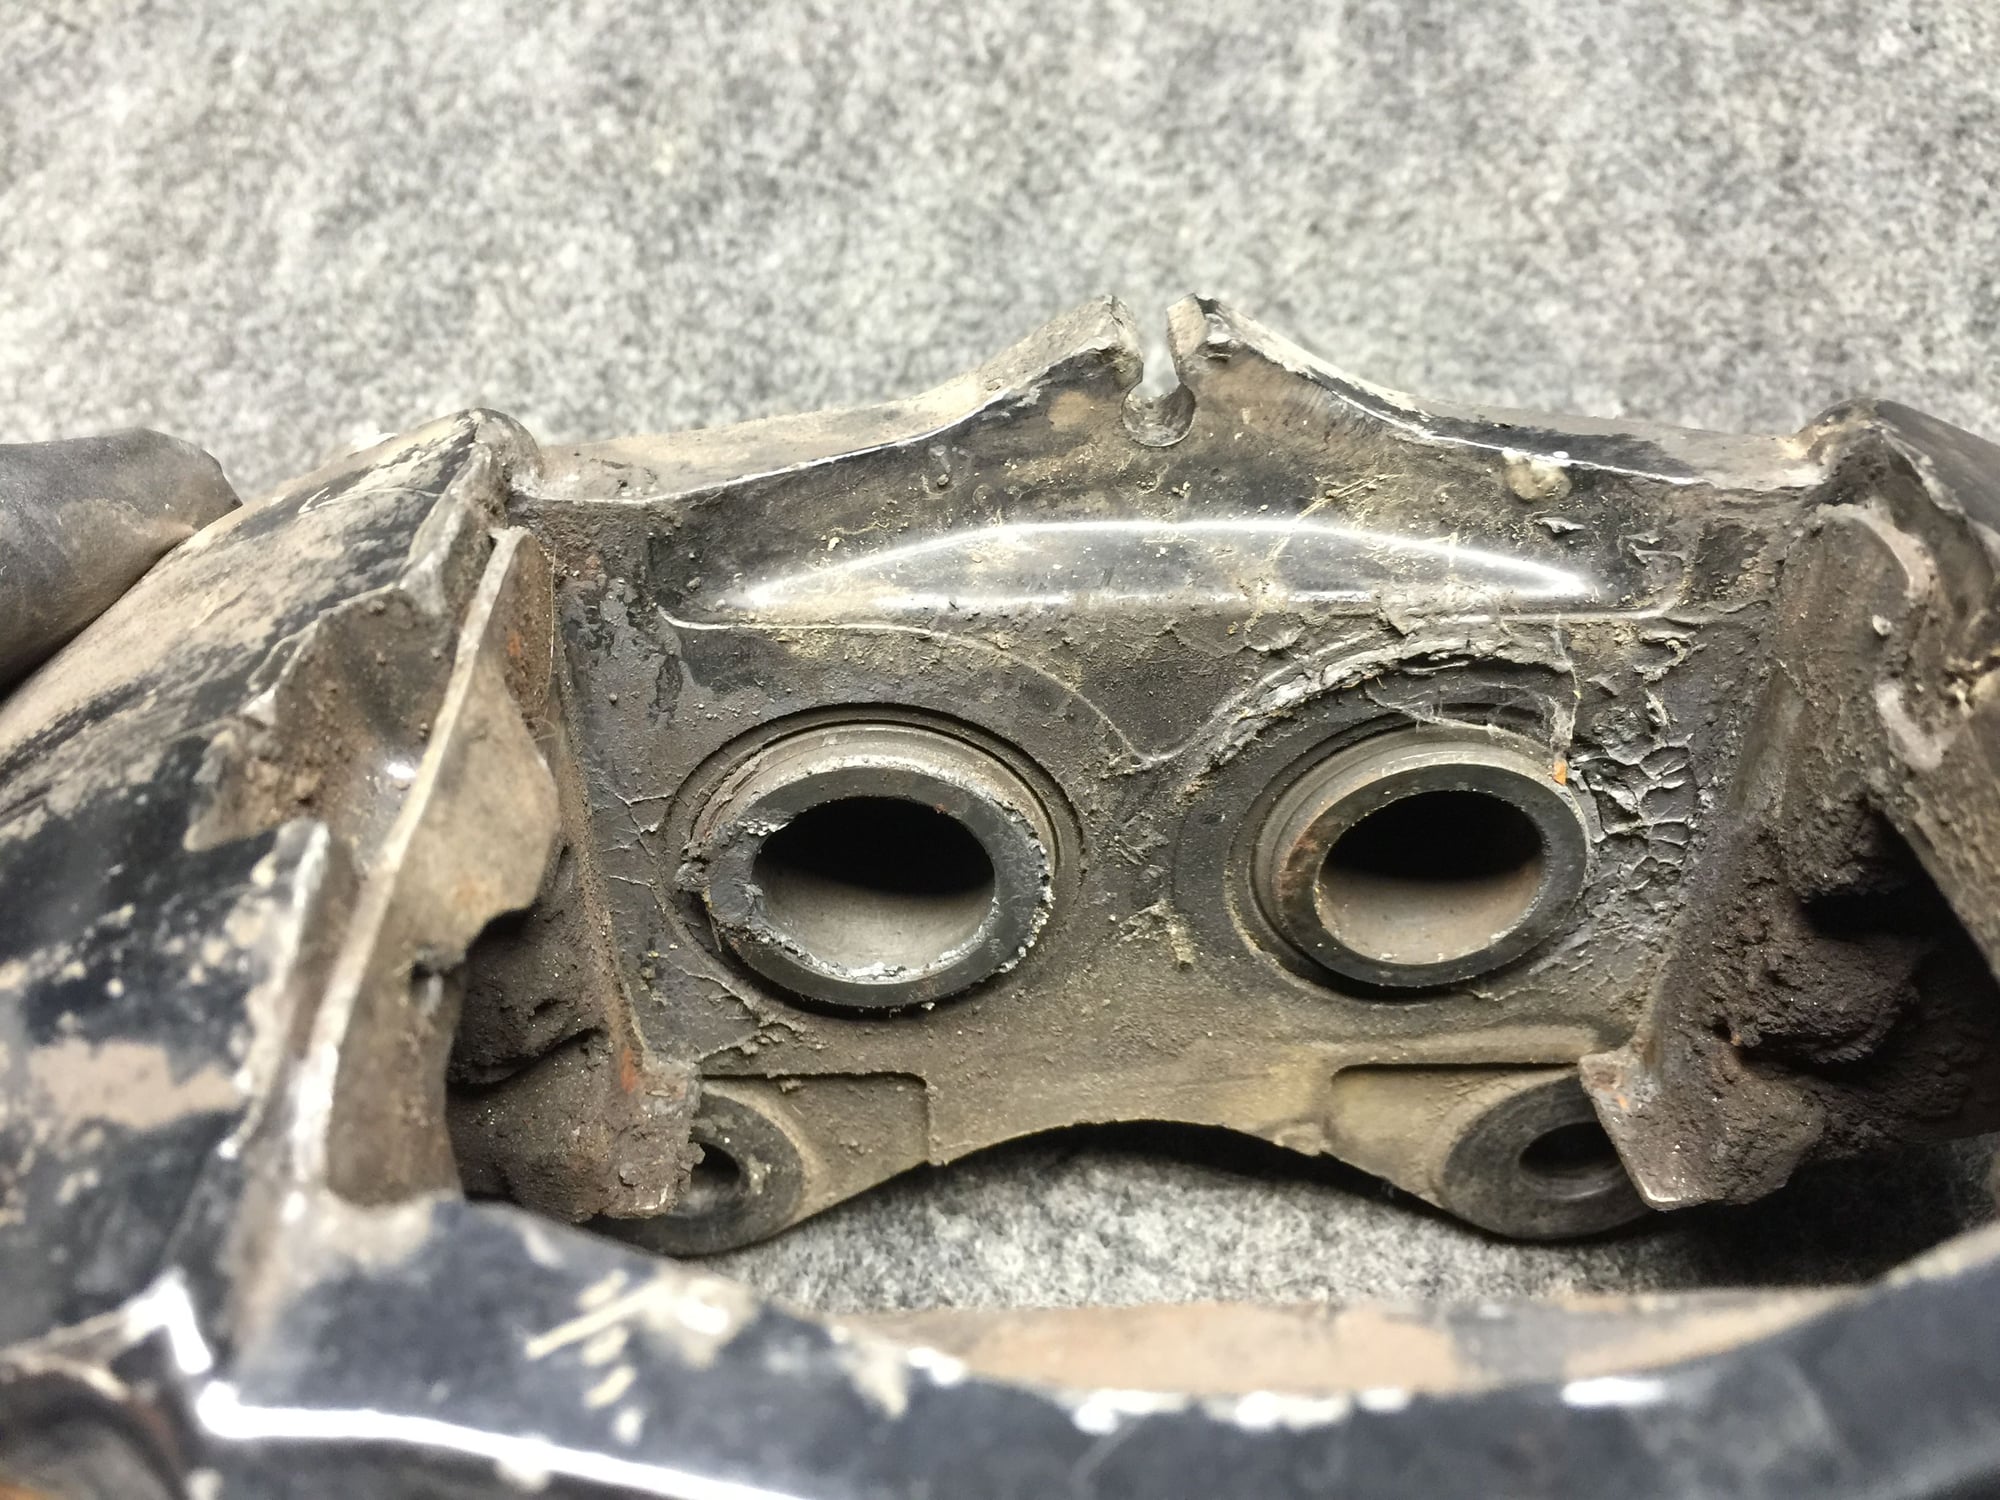
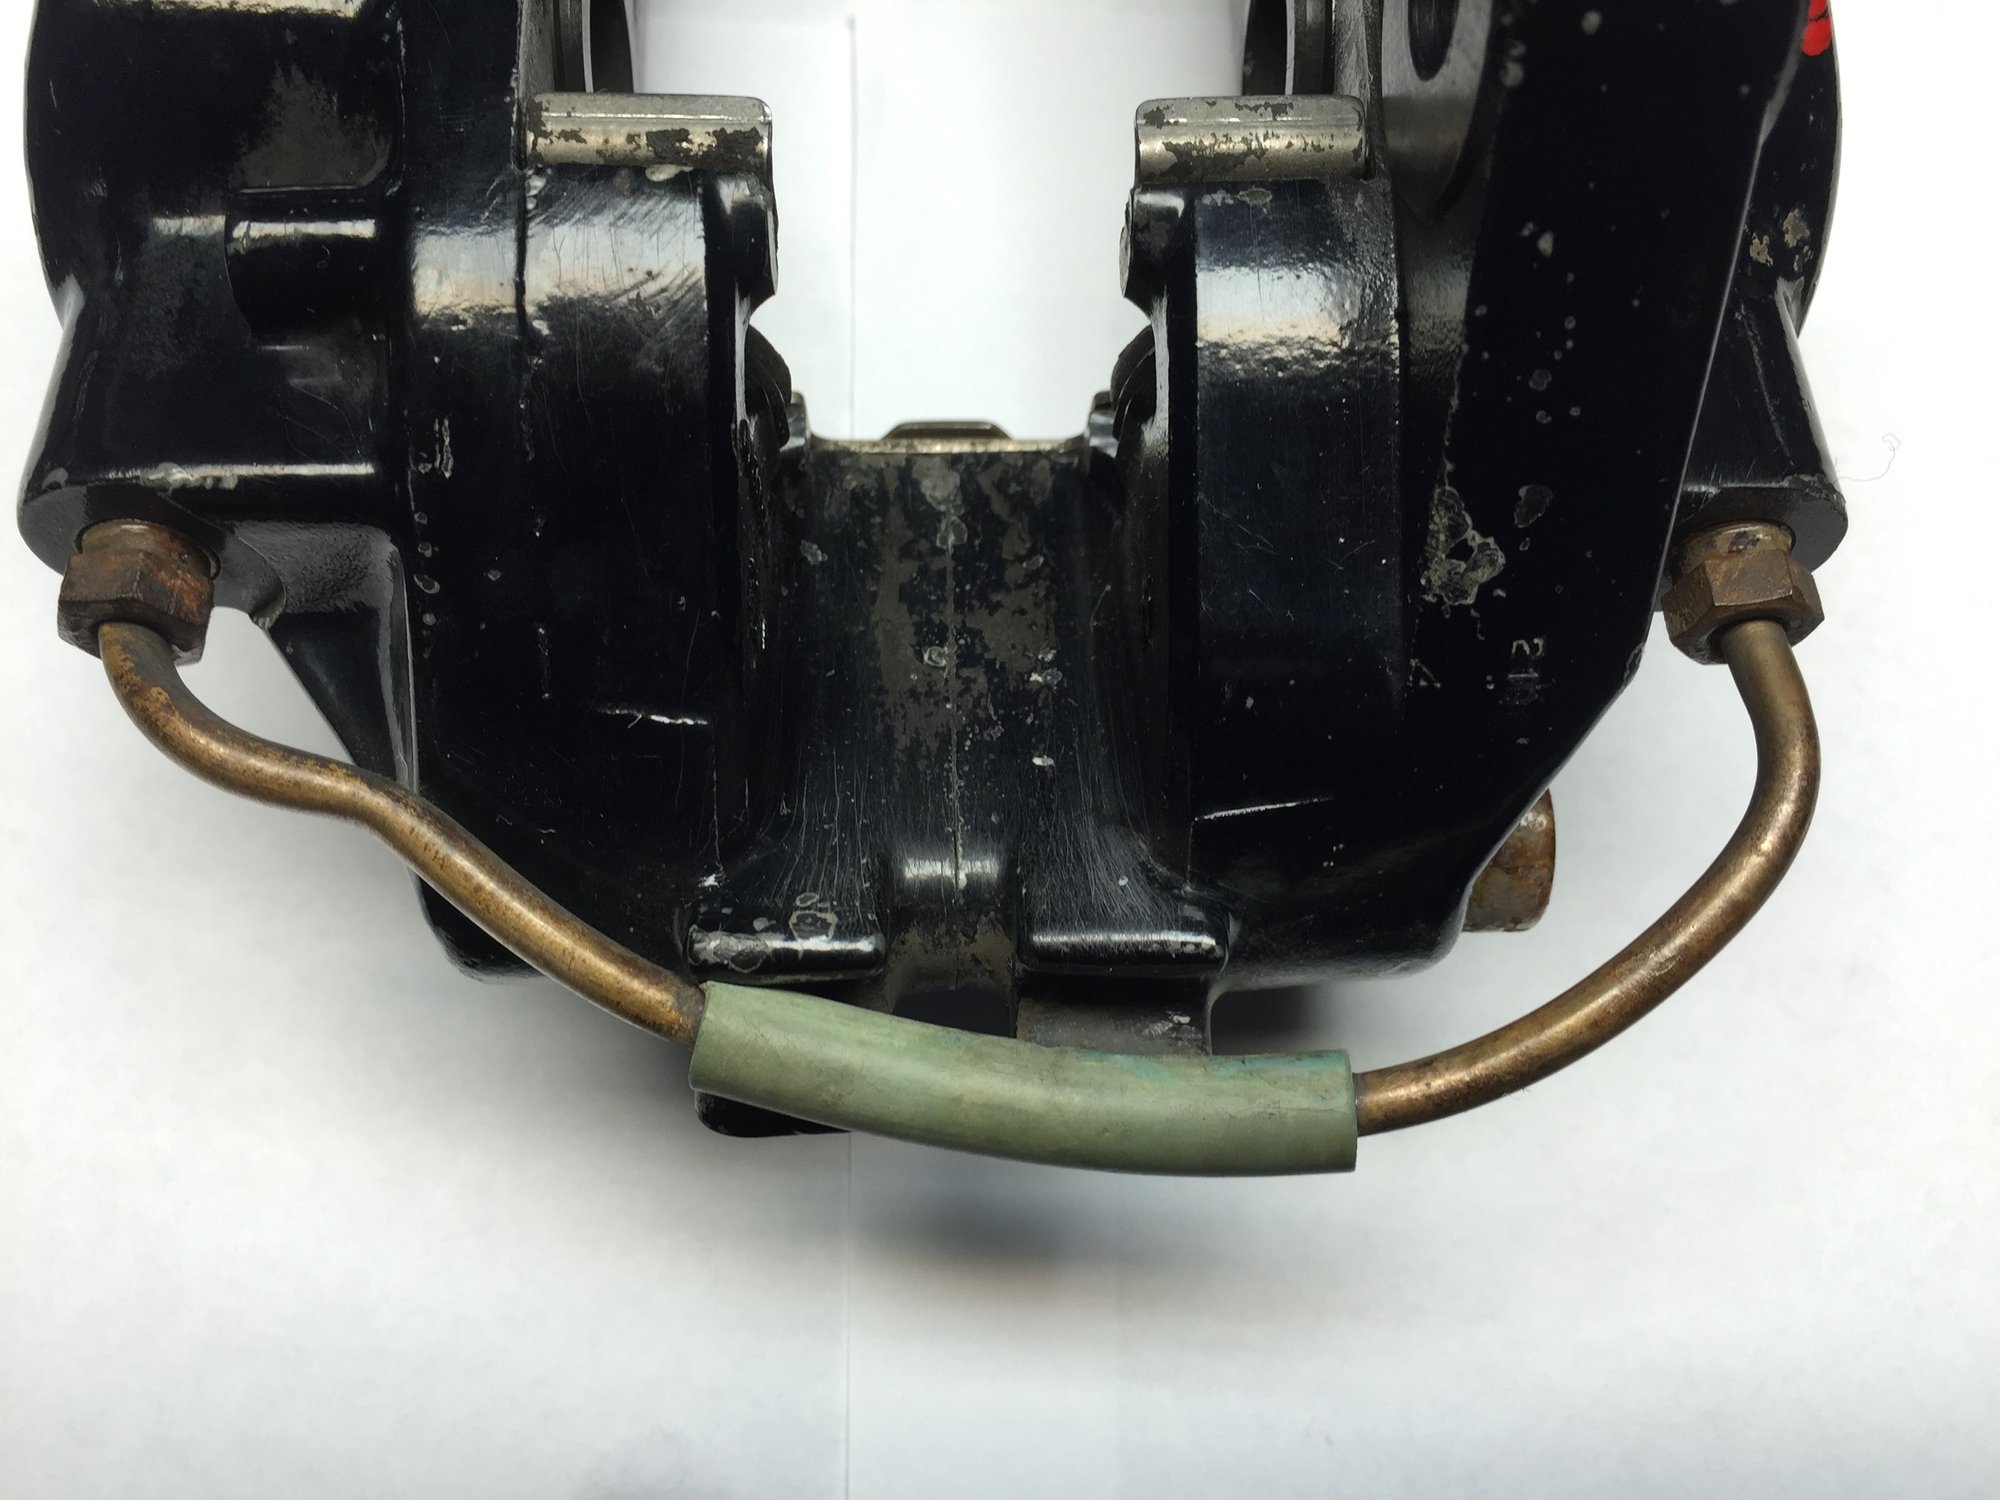
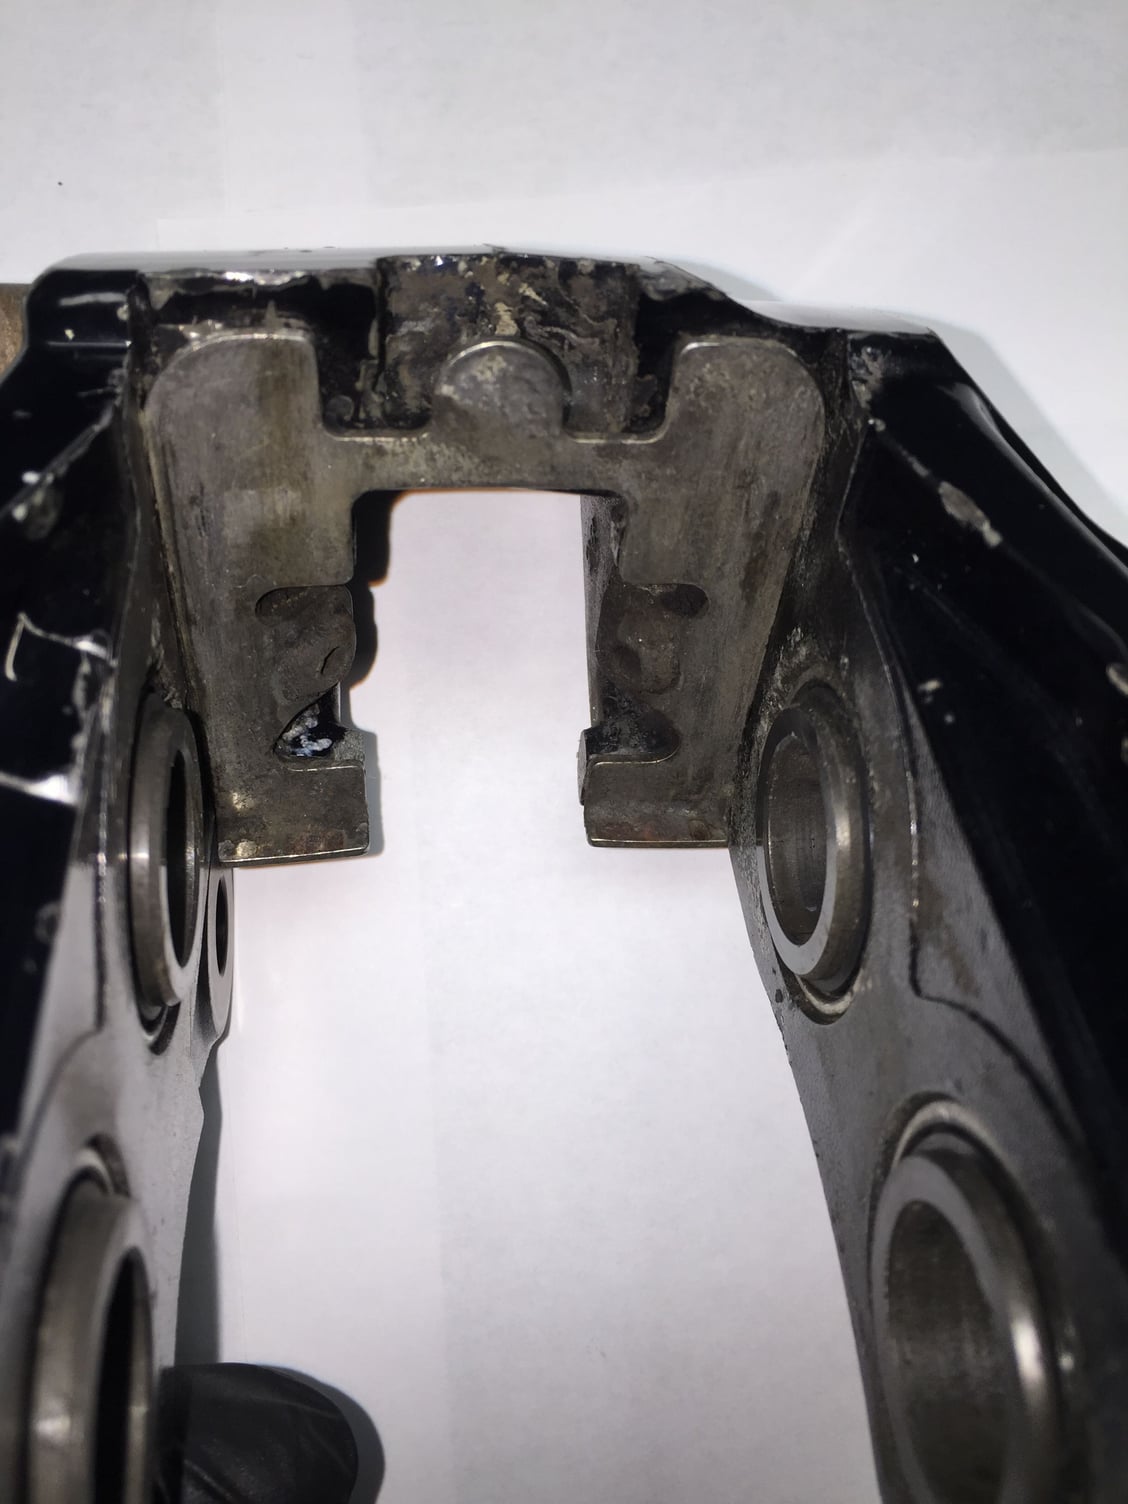
Missing a damper for a long time. Note the witness ring from the piston.
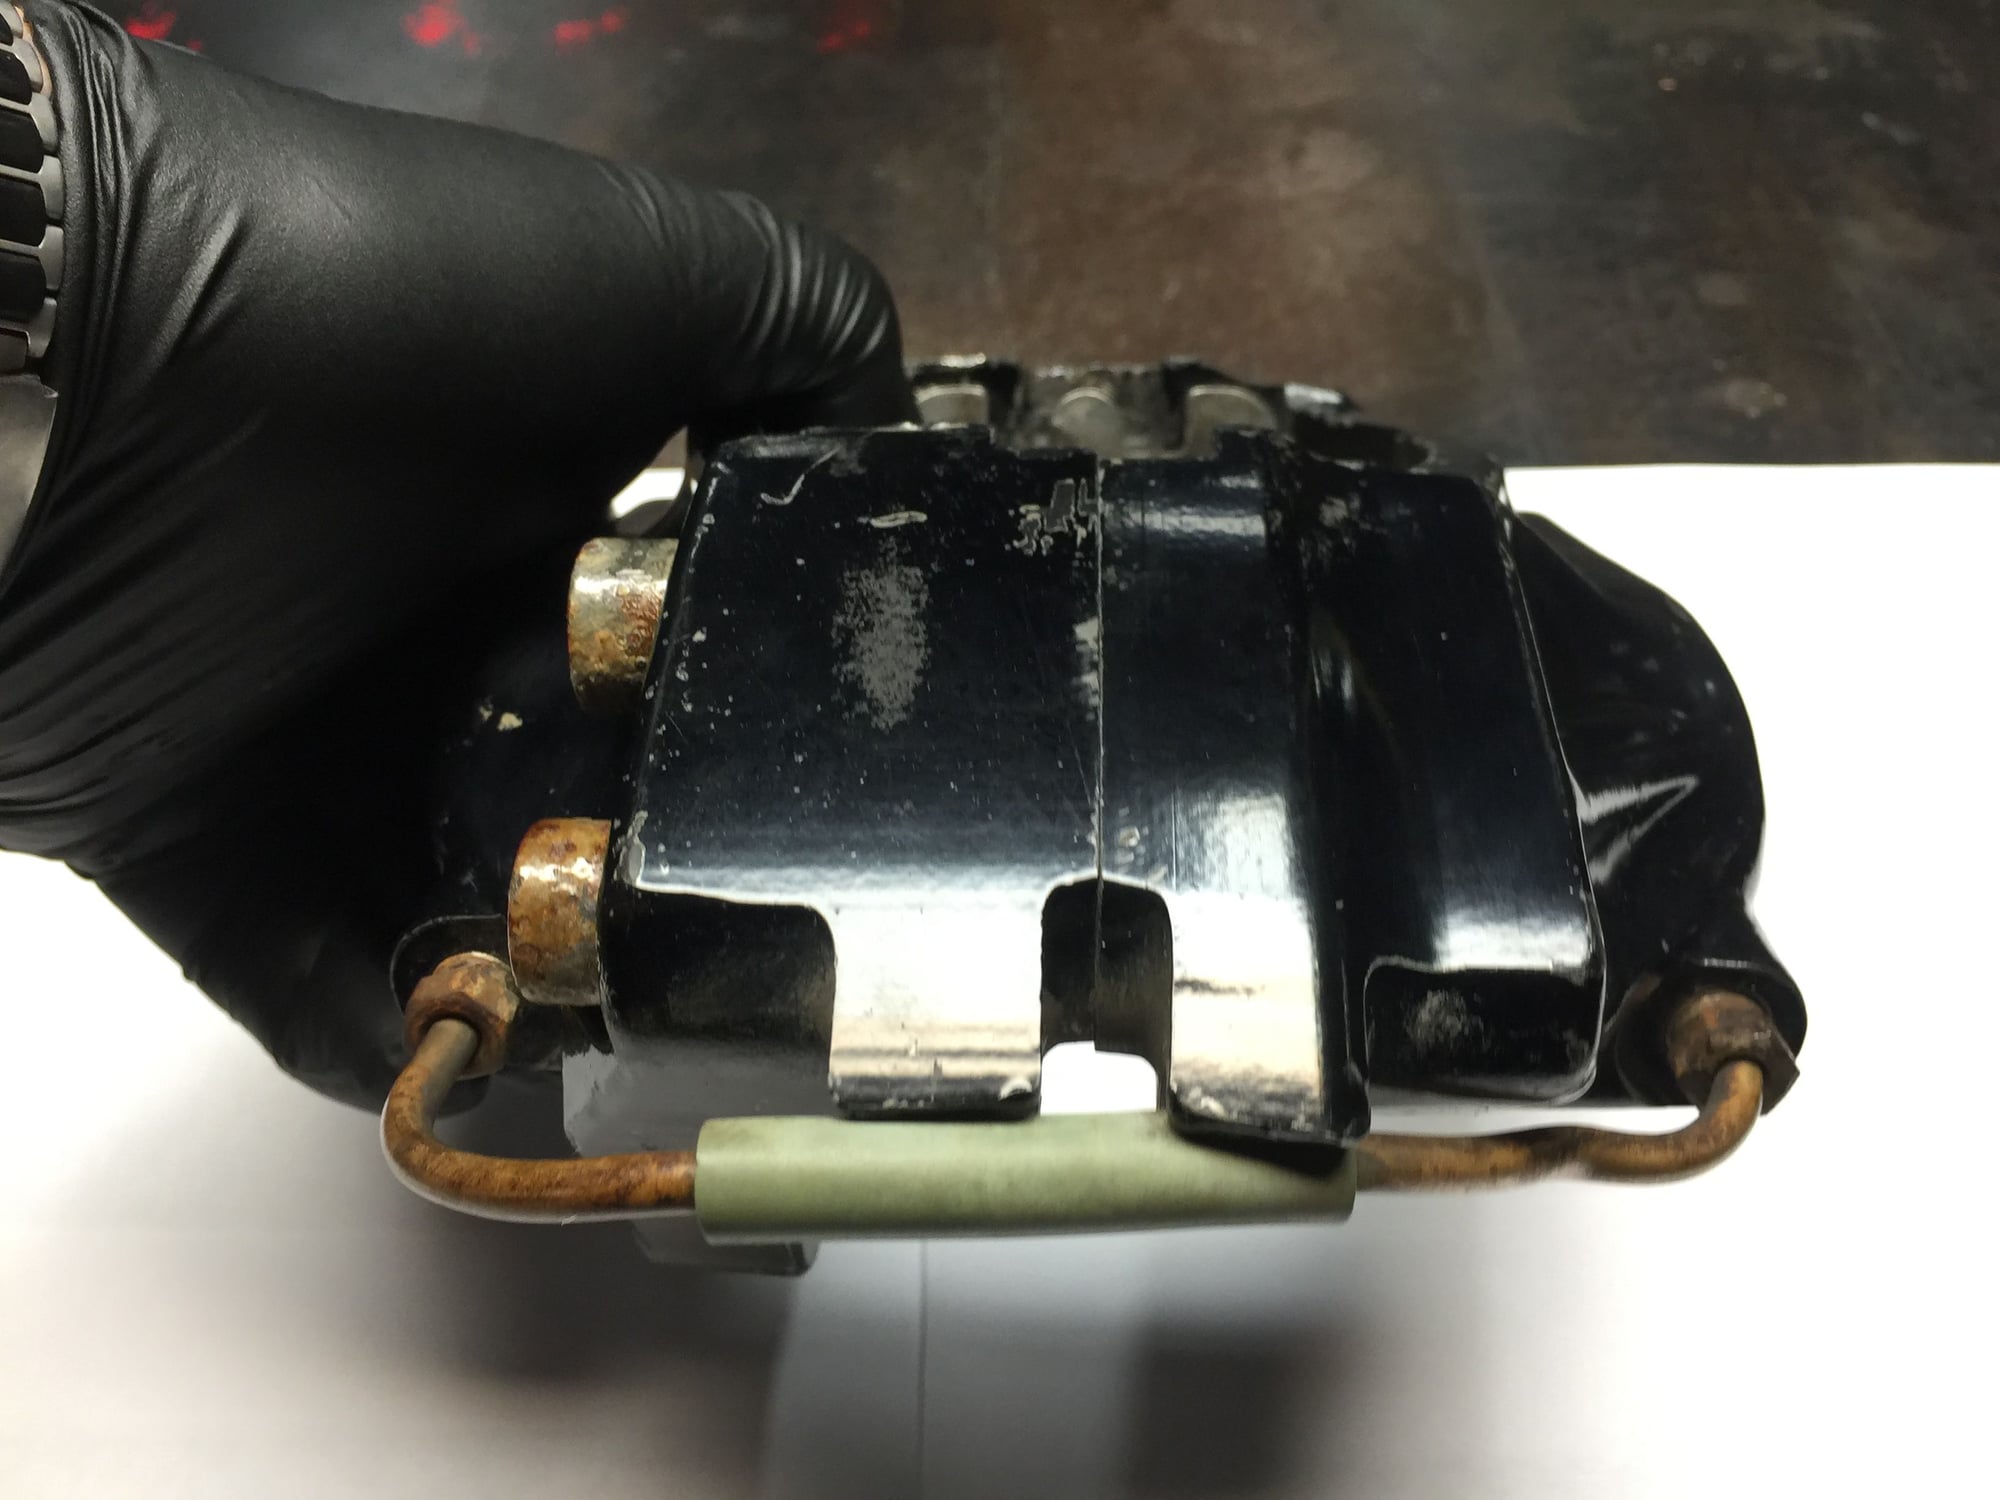
Excessive anti-seize or such, in my opinion.
I spent quite awhile scrubbing all the parts with a toothbrush, small brass bristle brush, and mineral spirits. Rinsing was done with contact cleaner.
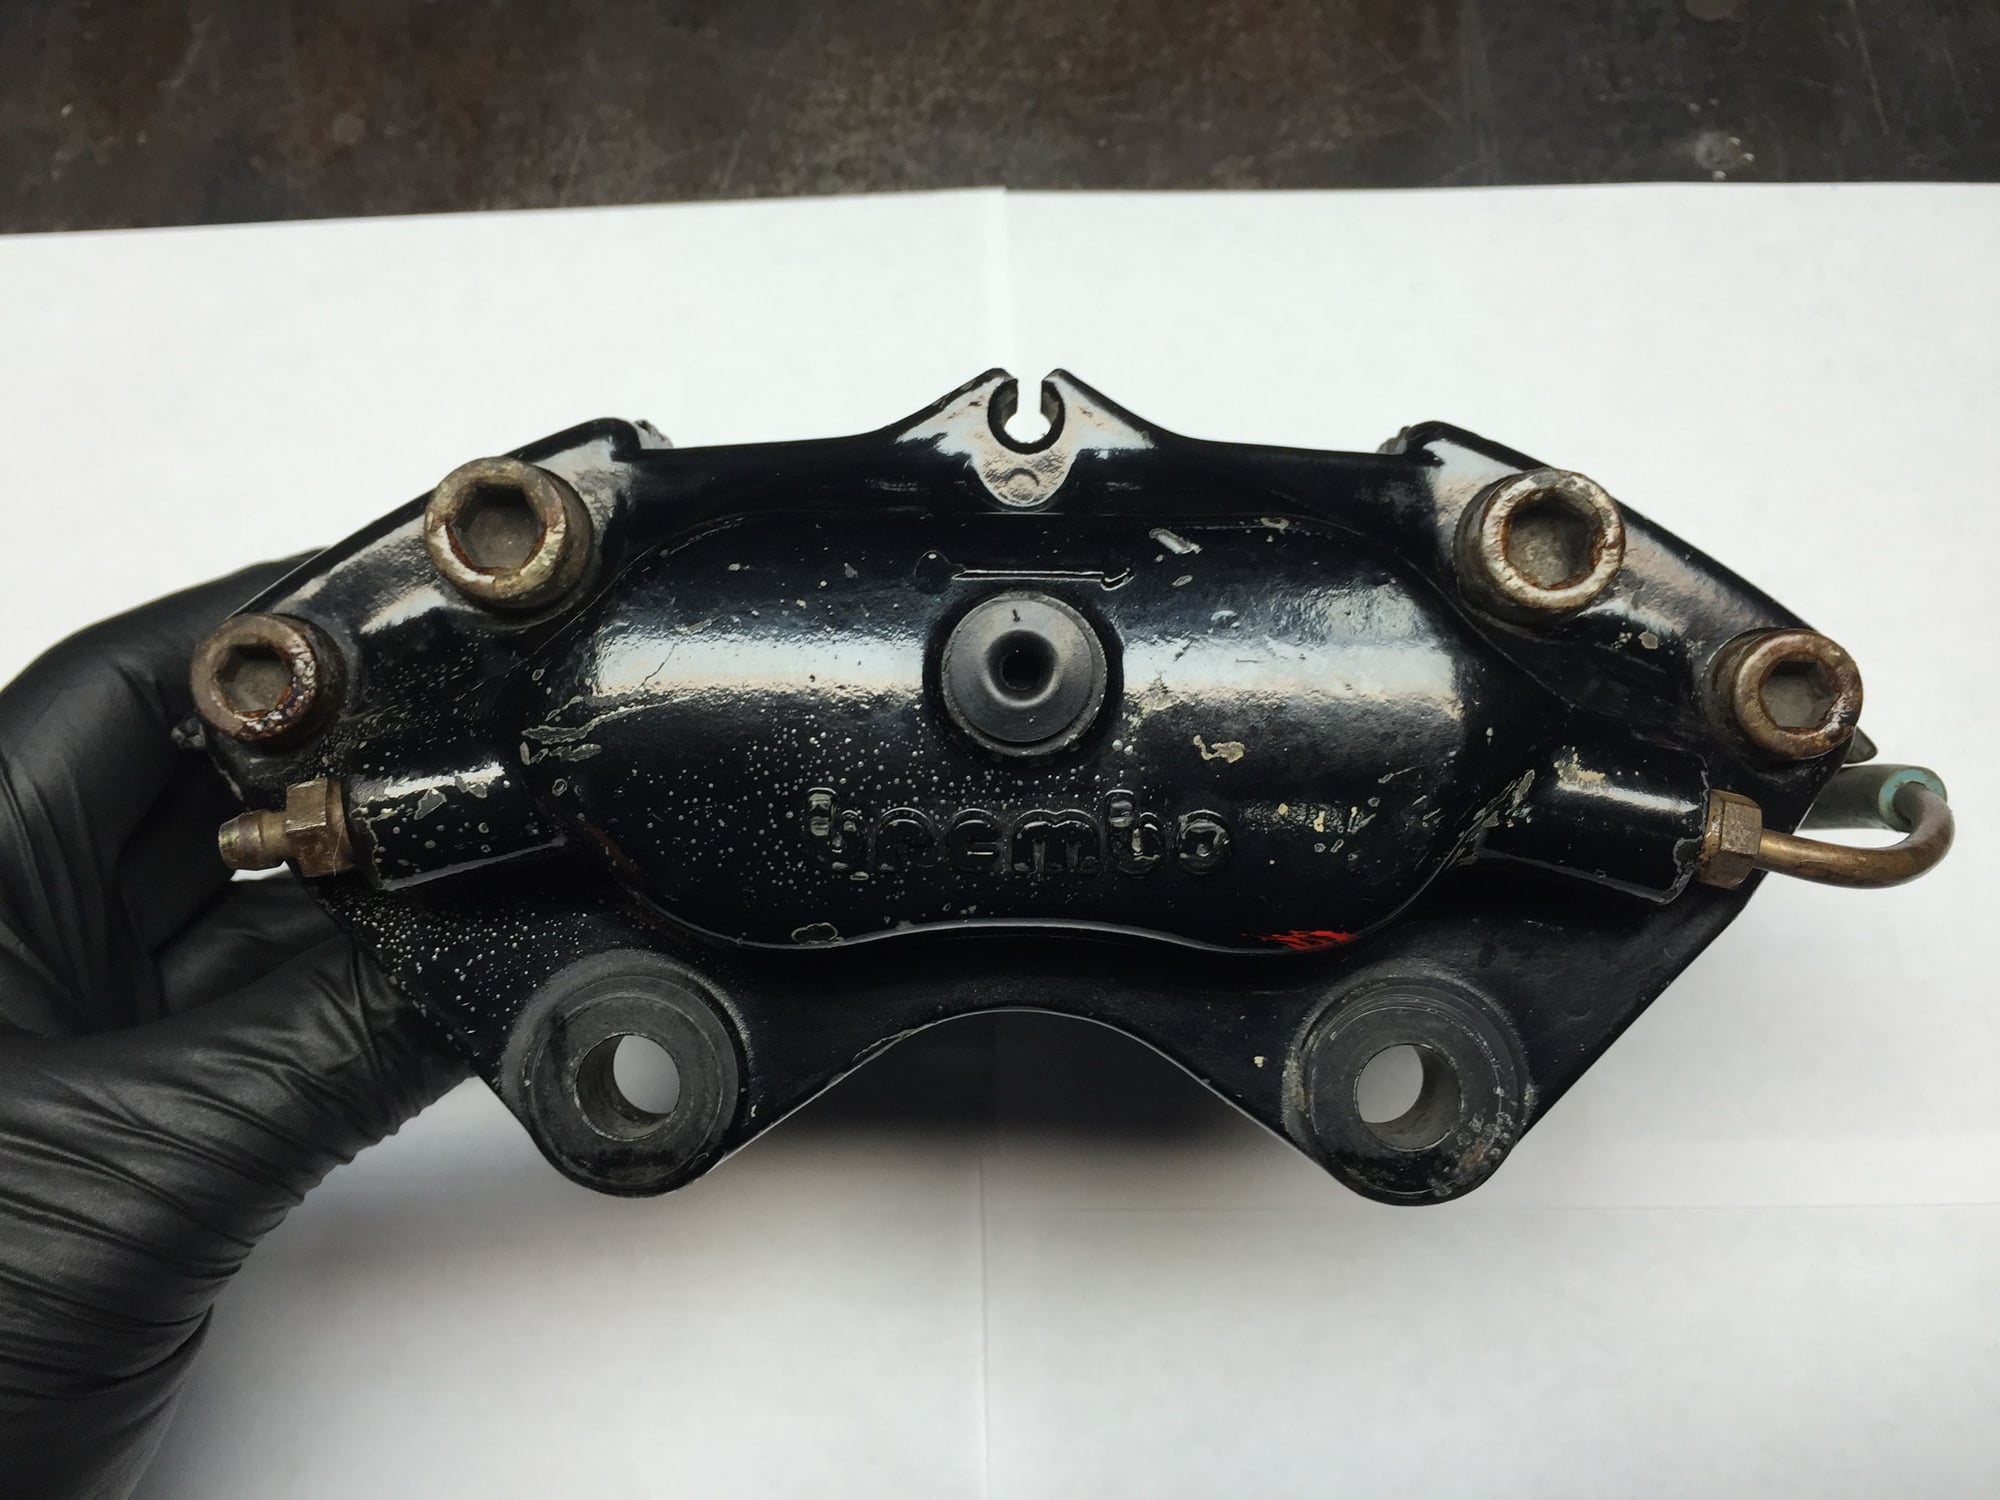
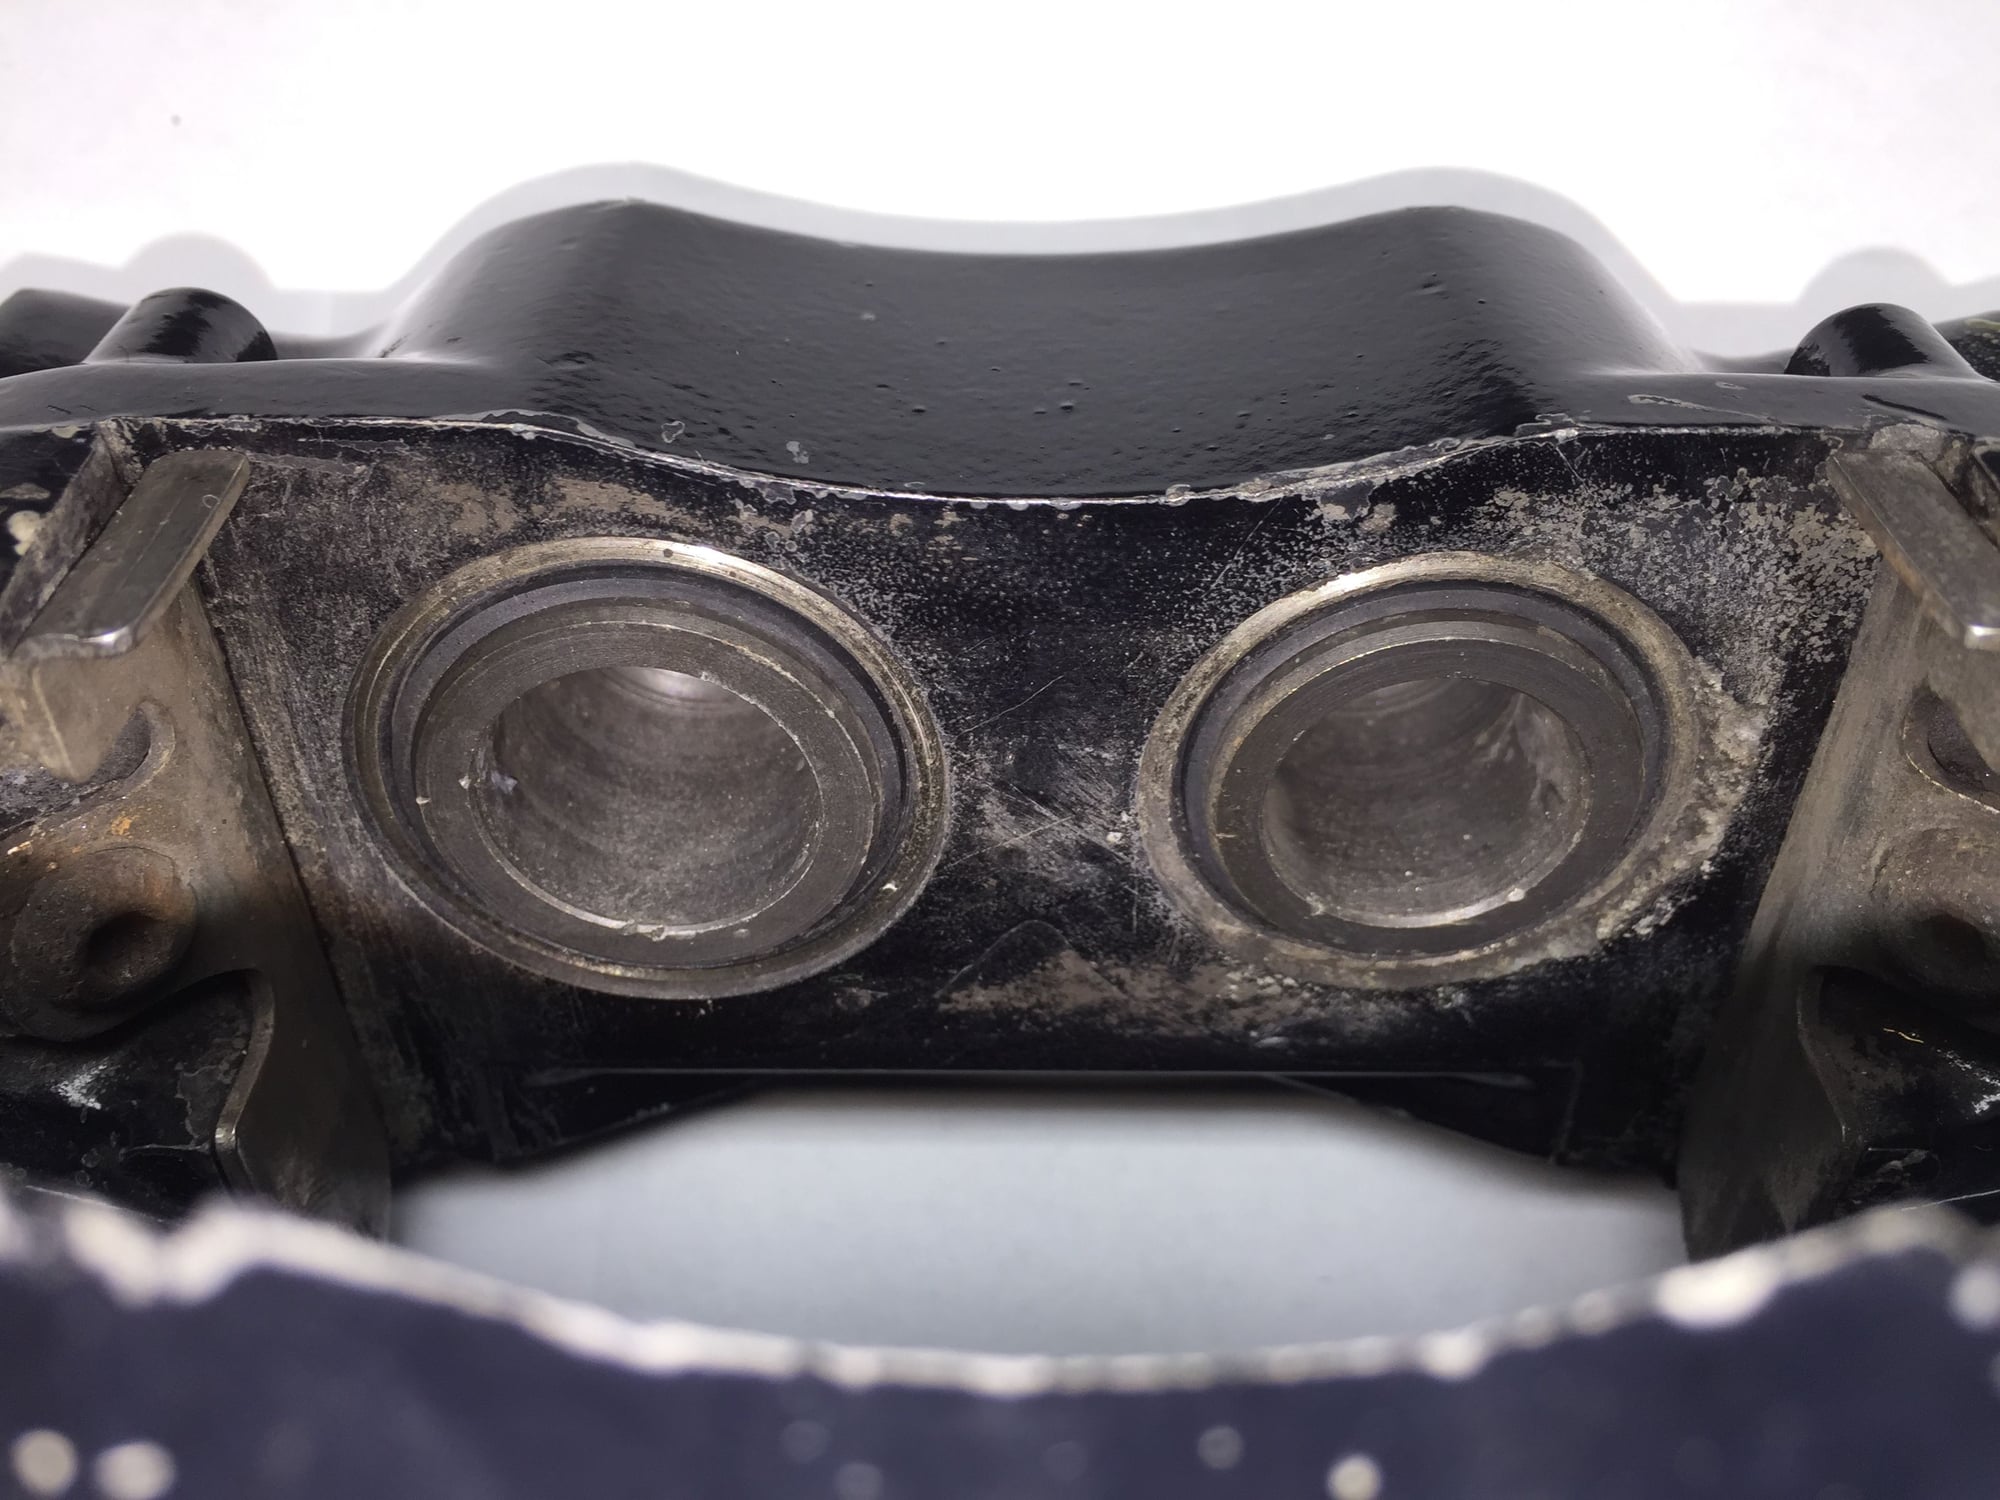
The caliper and parts cleaned up well, but it is VERY obvious they are not new. I understand that as far as 1986.5 calipers go, this one is beat. However, it is what I have and I am going to work with it.
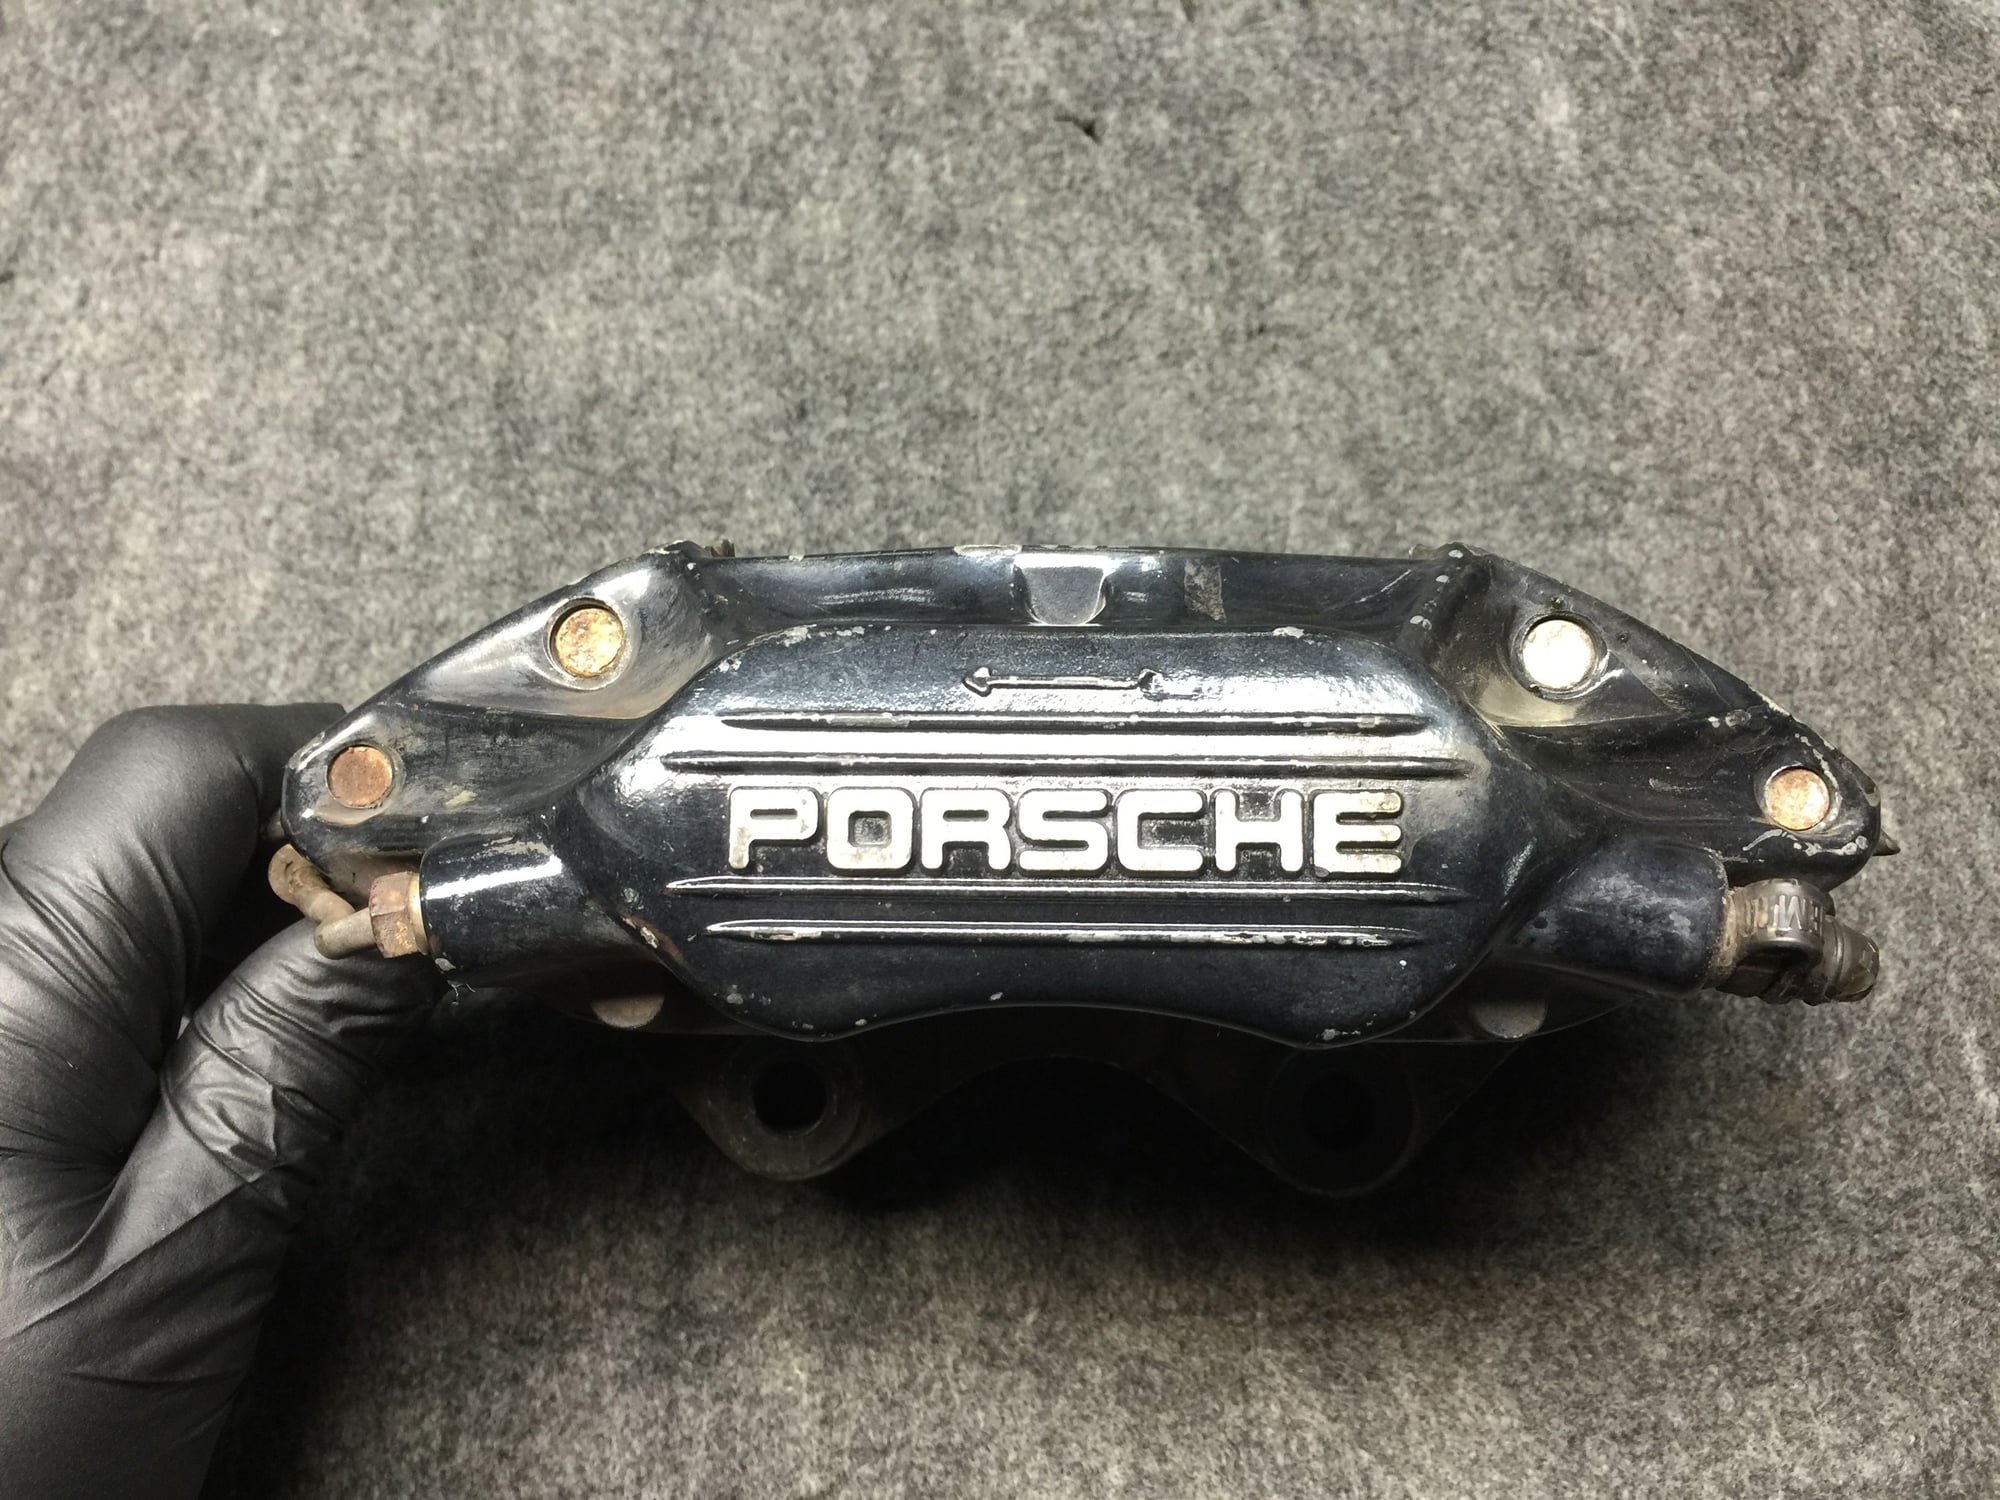
After cleaning:
Better.
I am going to say the crossover line got bumped somewhere along the line.
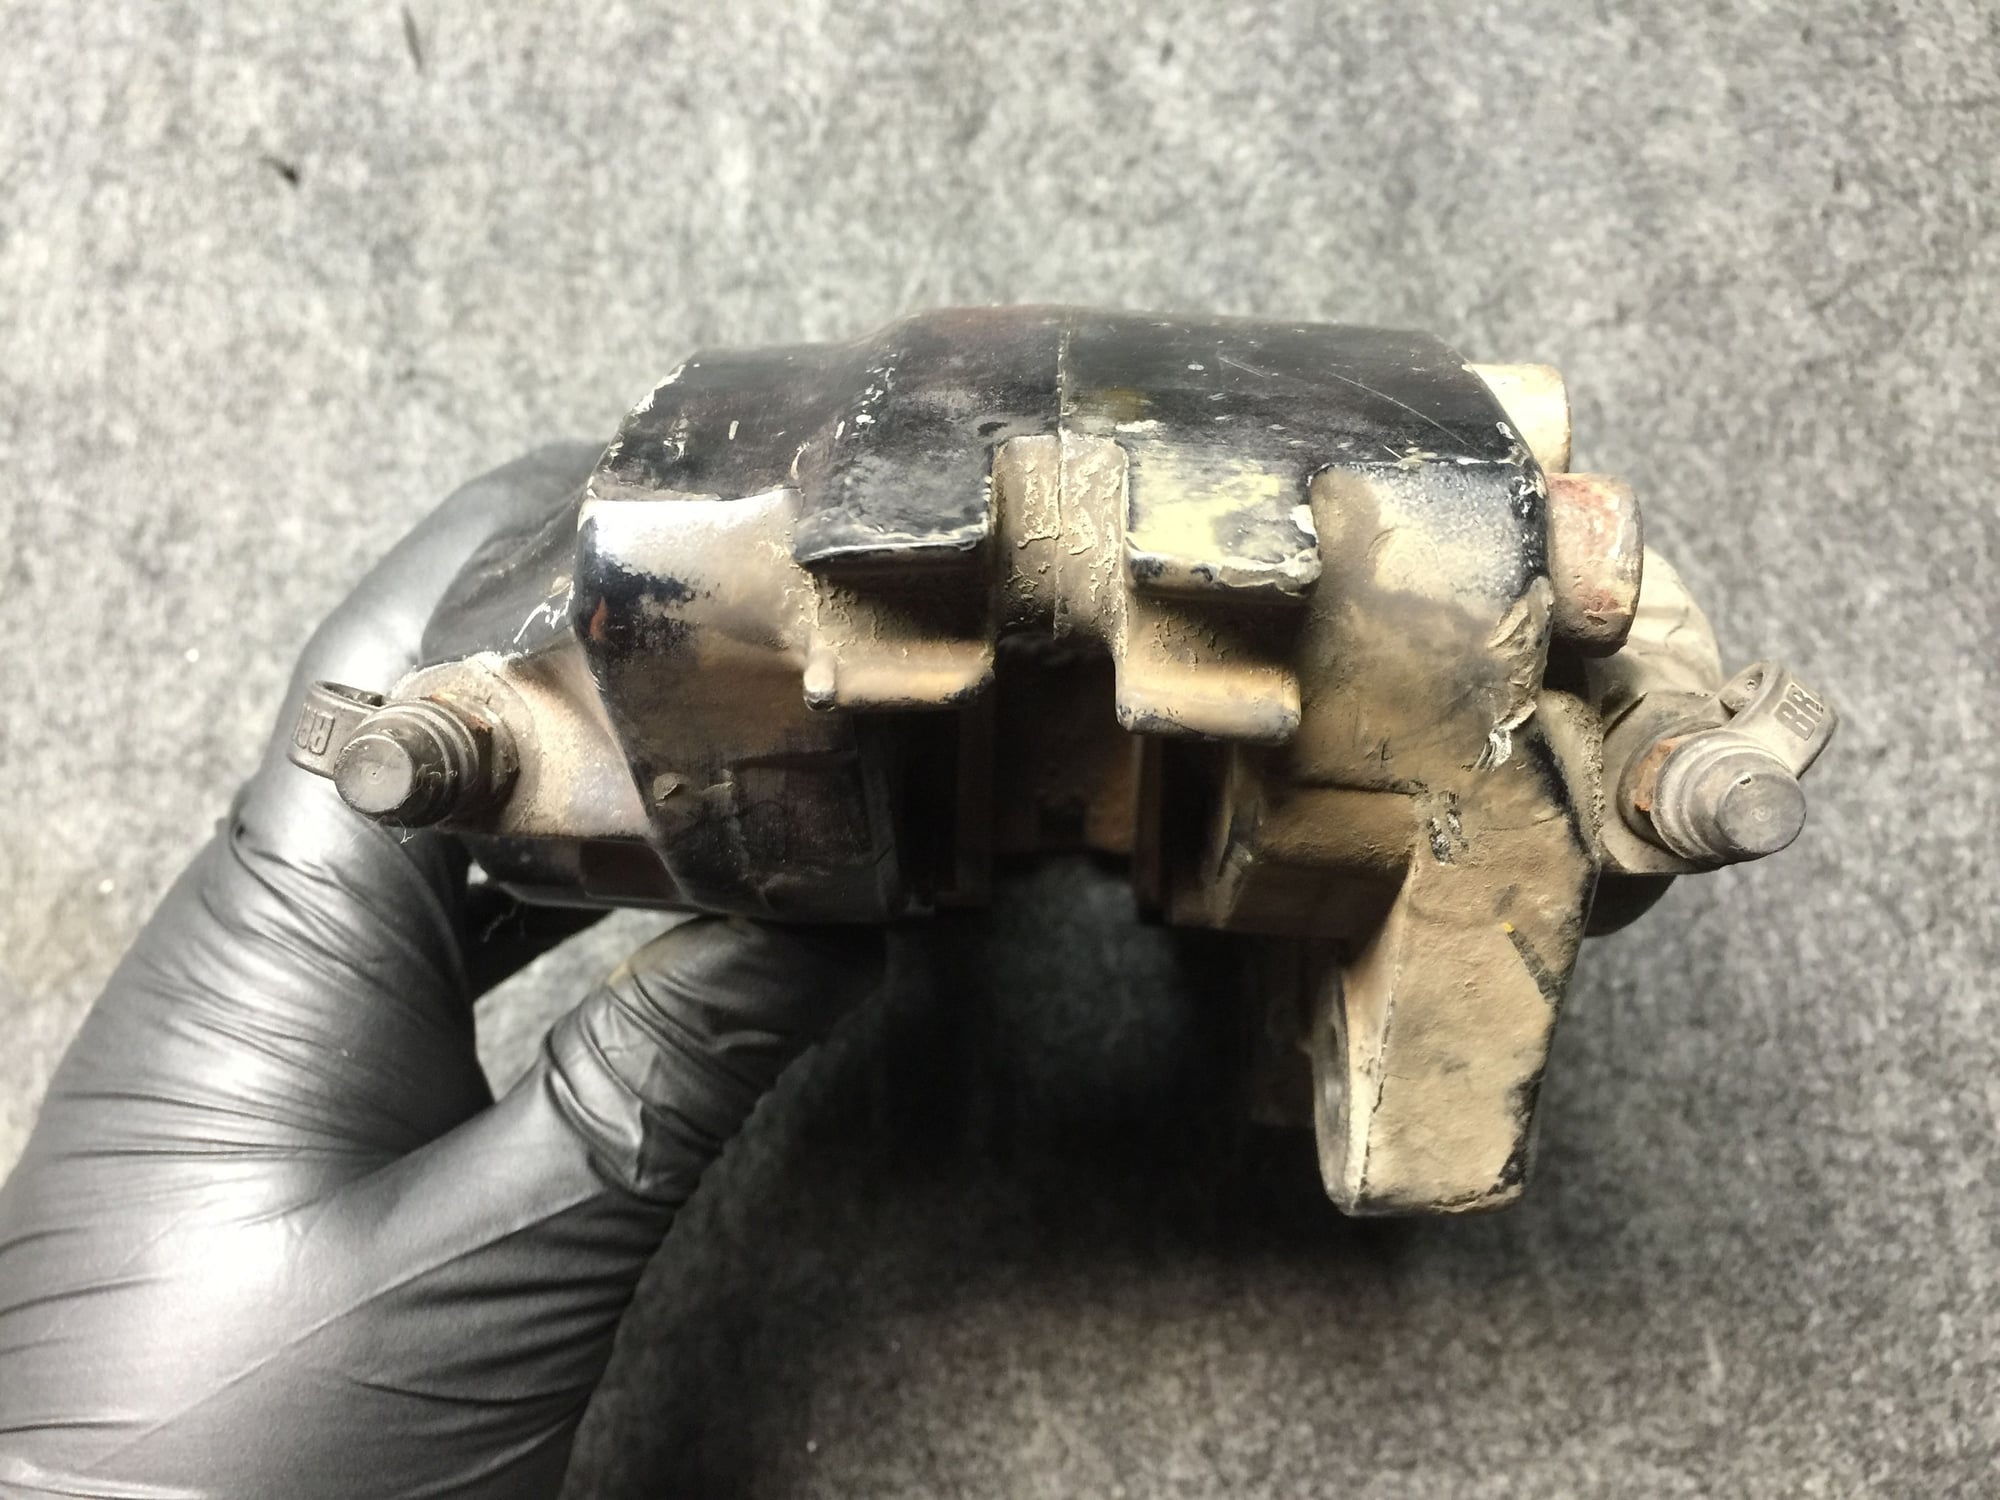
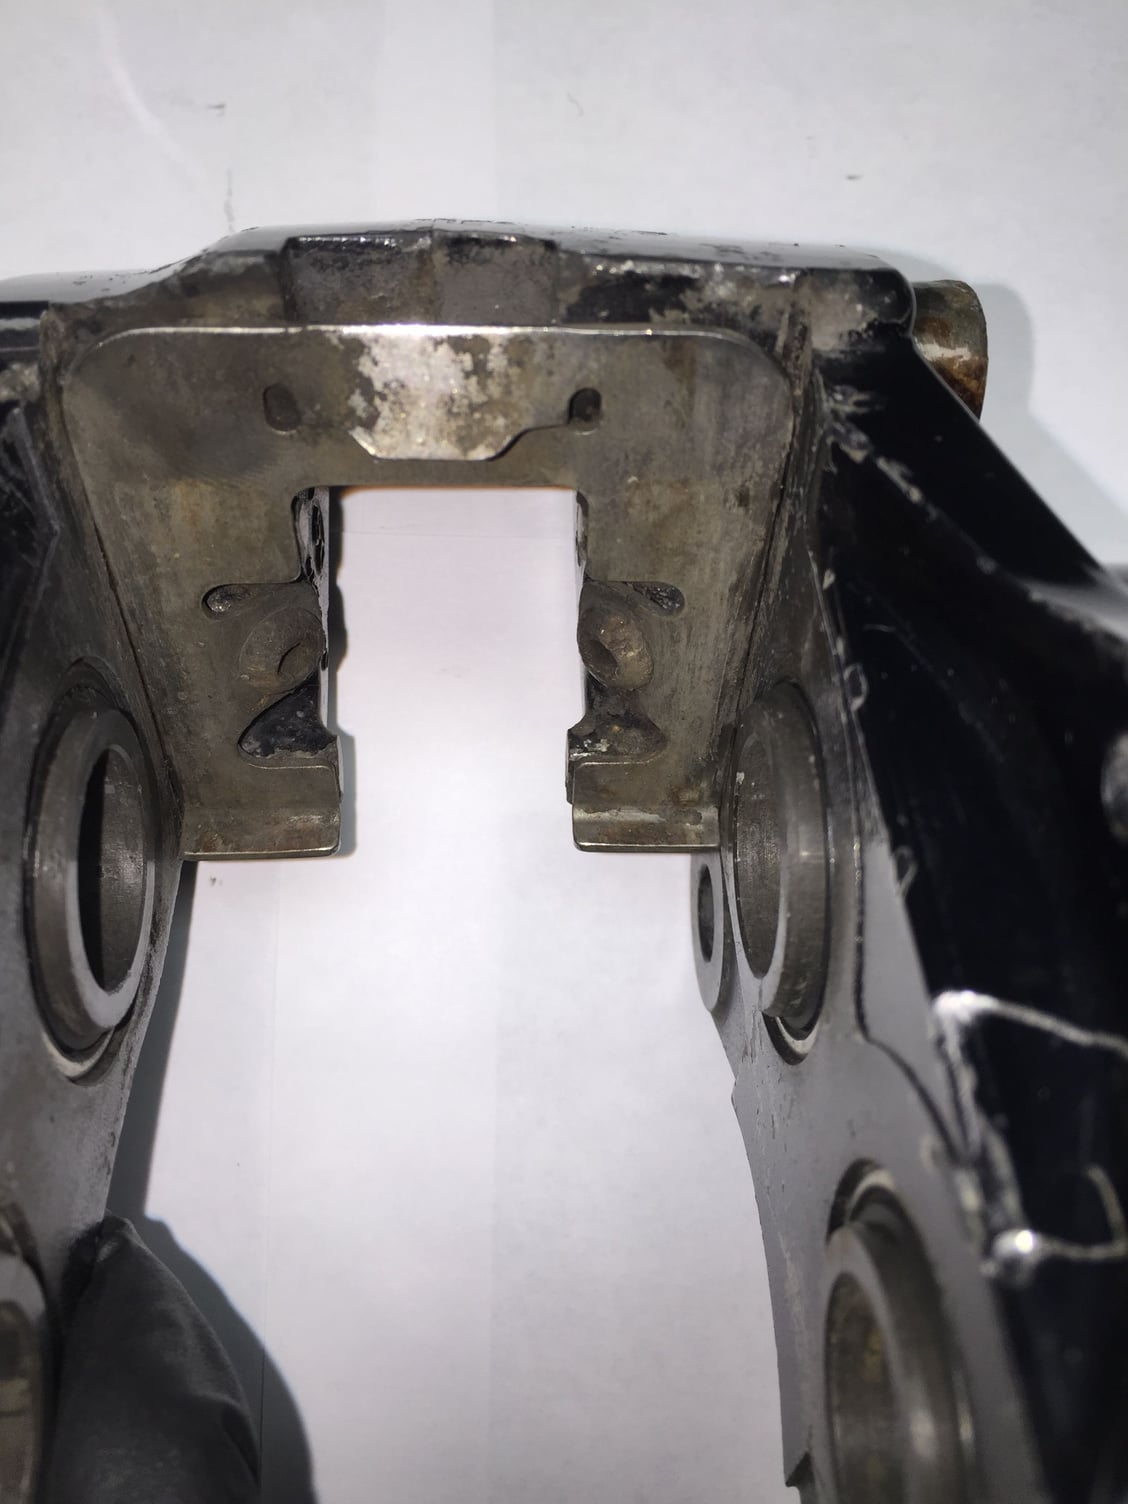
I am a little concerned about the corrosion at the left edge of the metal seal on the left piston.
I am a little concerned about the corrosion at the right edge of the metal seal on the right piston.
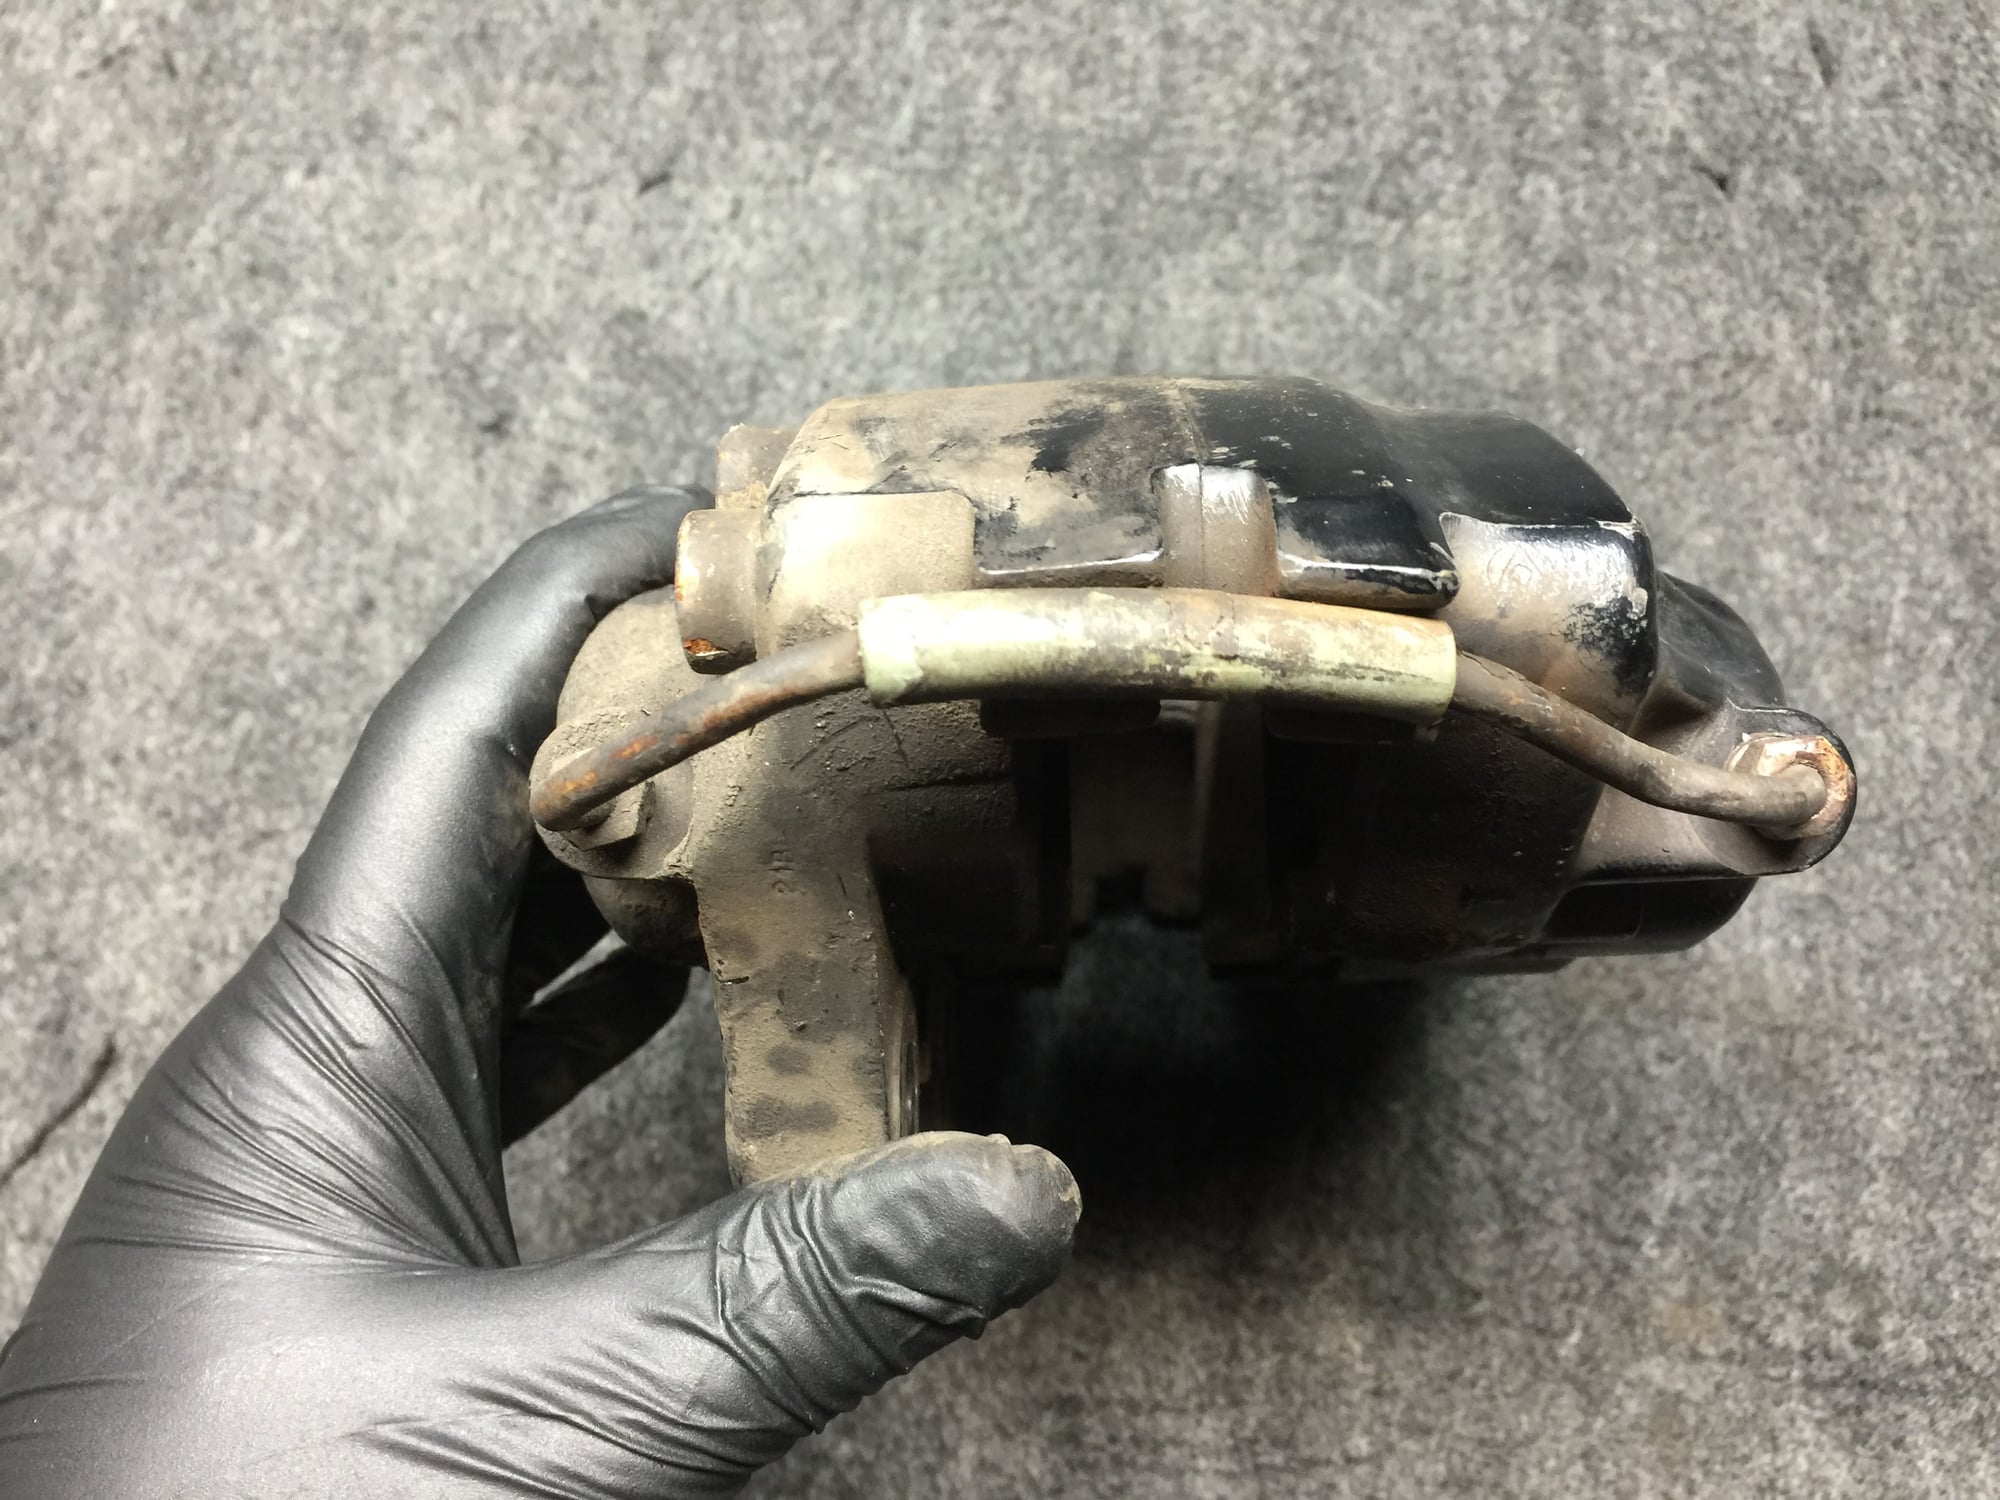
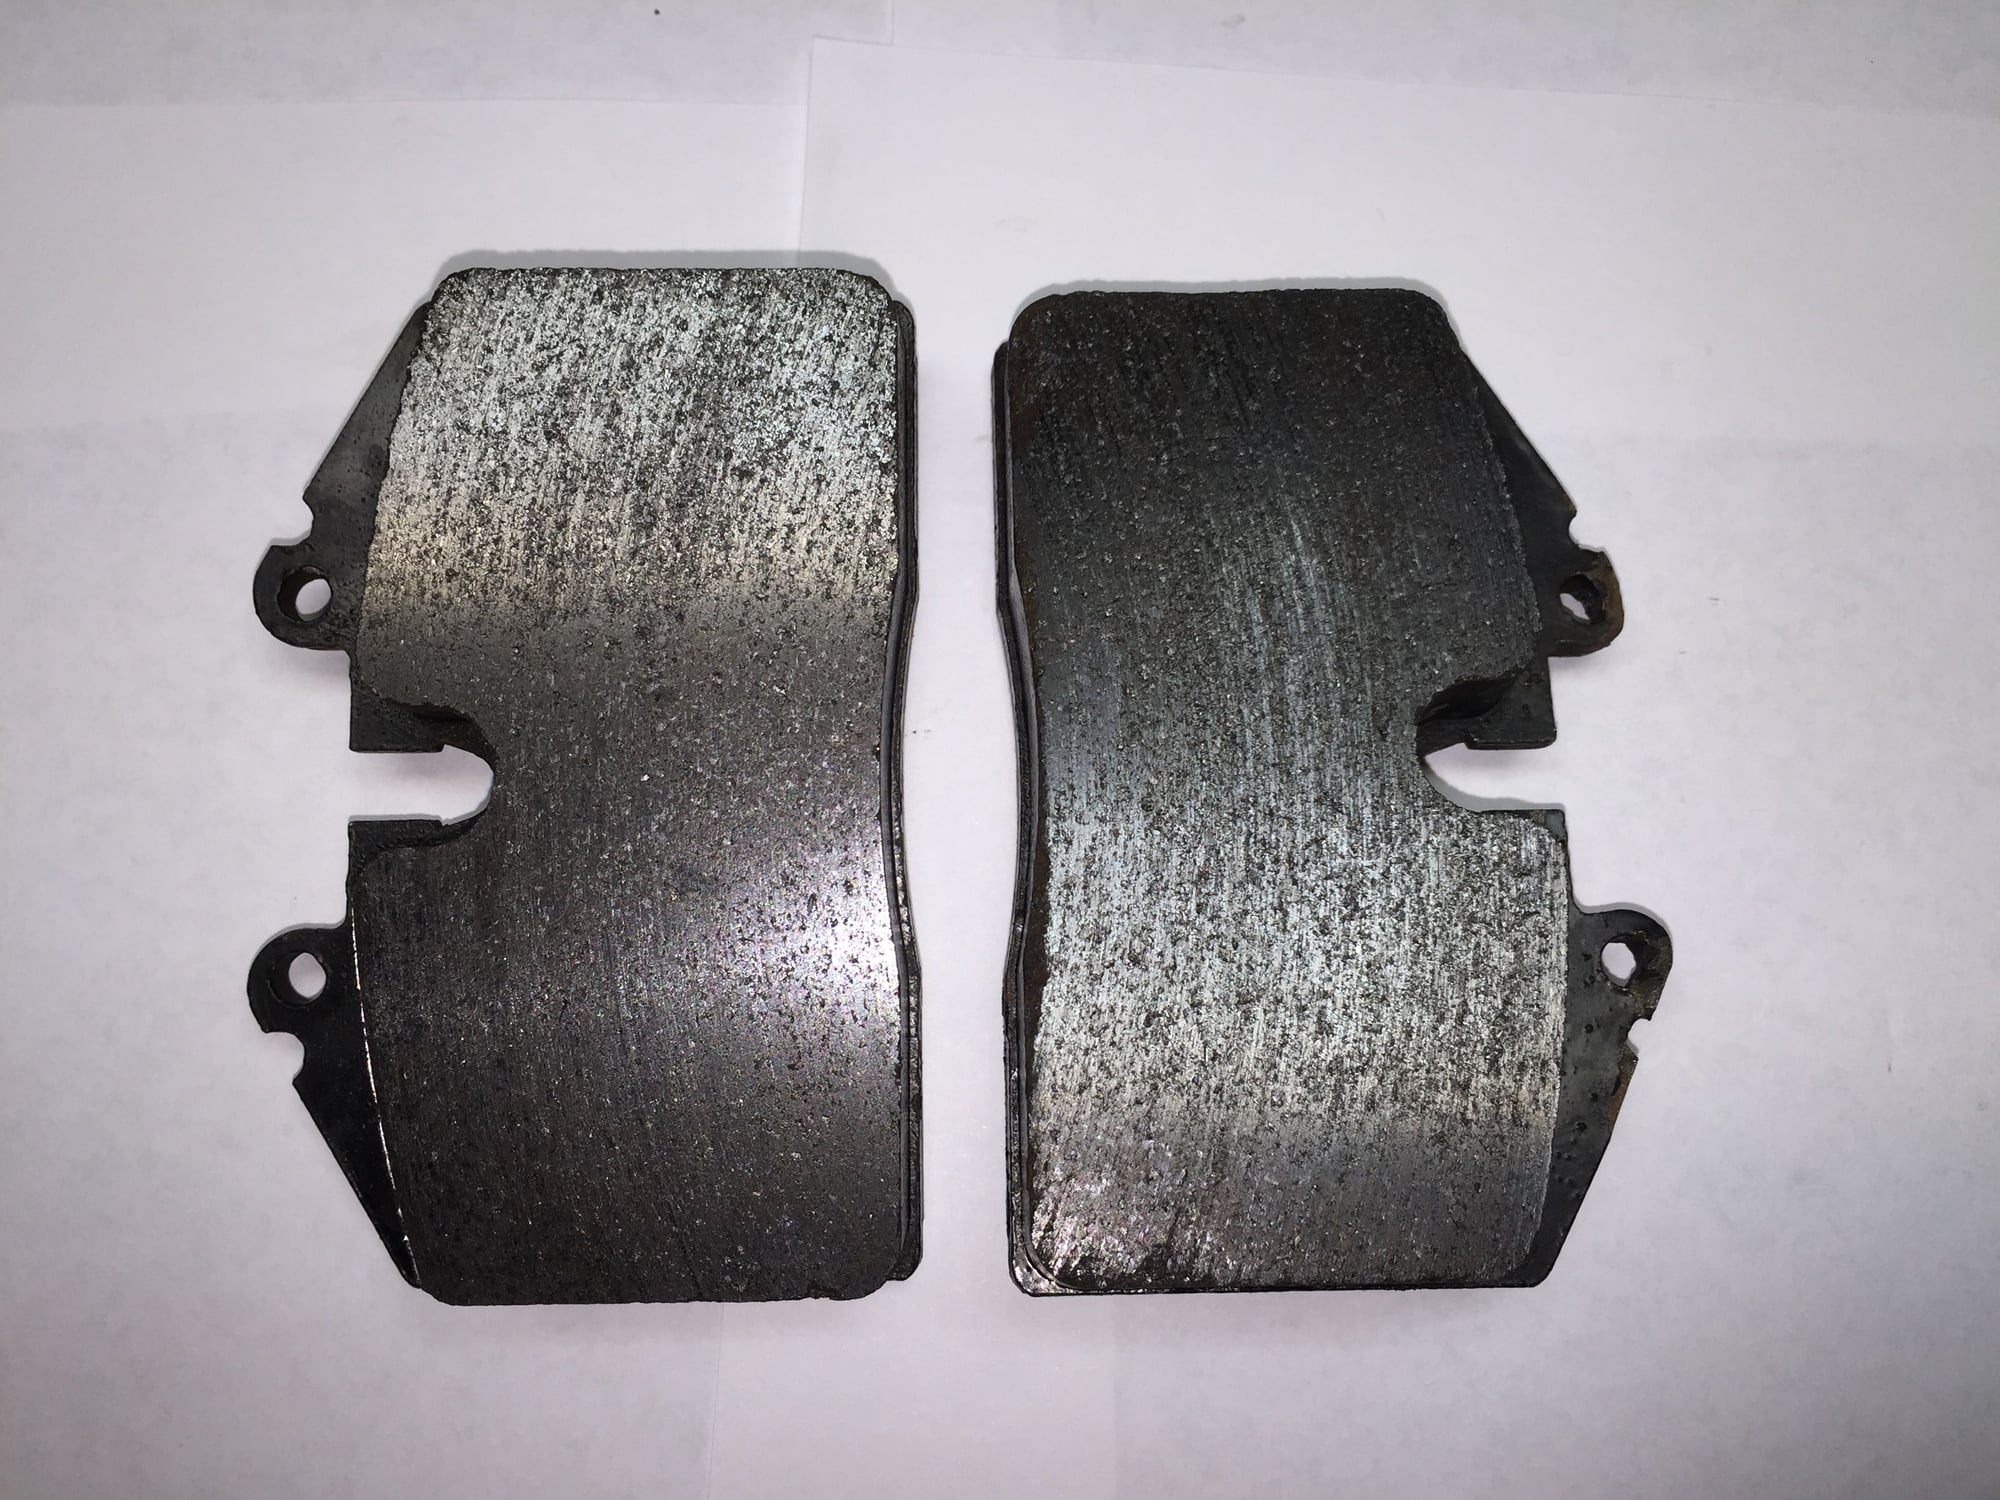
Very curious as to why the top of the right pad backing plate is smashed.
A damper fell off while cleaning. Note the top of the right pad, the smashed eyelets. That is the inboard pad.
Hex's are a little rough on the bleeder screws, but the threads are clean.
I believe this is still a serviceable caliper. Understand that I am not done cleaning yet. Tonight, I plan on hitting the spring plate screws with a no-sh*t heat gun at work to loosen the thread sealer. Once the plates are removed, cleaning will recommence.
I am concerned about the damaged crossover line. However, I am going to leave it alone. I don't believe I can straighten it. I have made brake lines before, and am competent with a flaring tool set. However, I am not confident I could duplicate that line. Based upon pad wear, I believe brake fluid is passing freely through the crossover line. And, I don't believe it is leaking. So, it stays right where it is.
There is some corrosion in the caliper body halves, right next to a couple of the metal piston seals. I say that because, if I understand the WSM correctly, pre-1987 calipers use a metal cased wiper seal at the outer edge of the piston. I saw no evidence of leakage. I will look closer after more cleaning. May be another case of leave it alone.
I am really curious as to why the eyelets are smashed on the top of the inboard pad backing plate. Hammer installation? The pad material shows no cracking or deformation. Hmm...
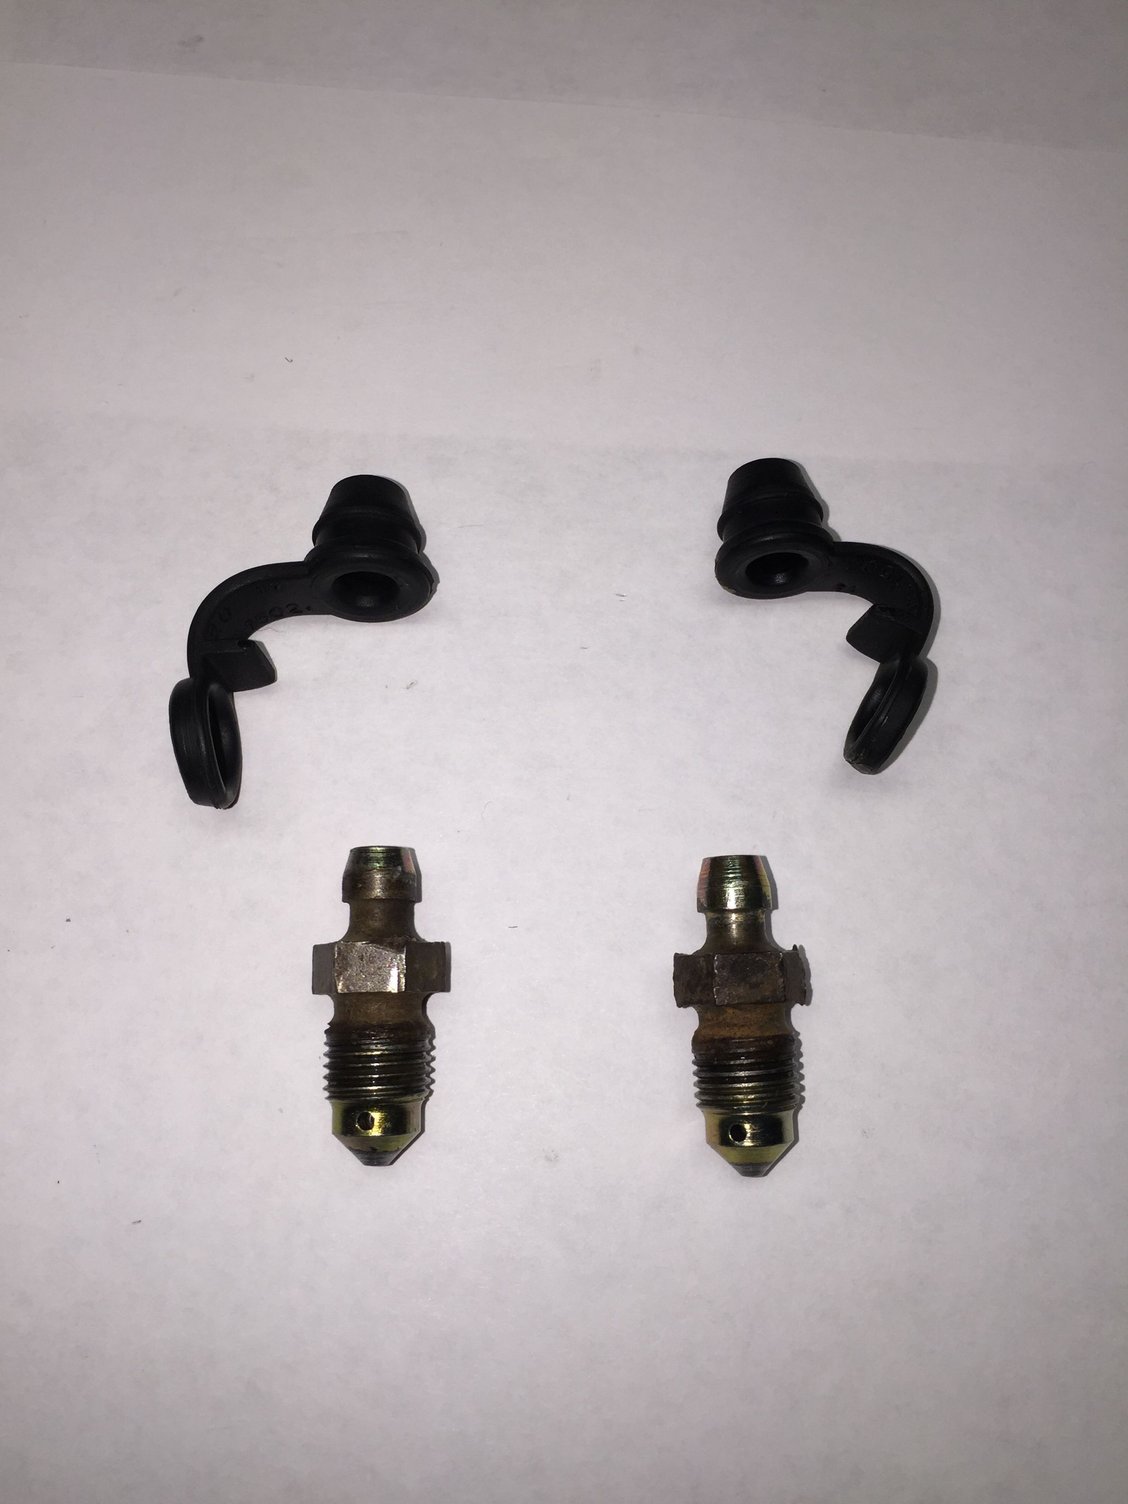
I am going to replace the missing damper. Not sure yet about the bleeder screws and dust covers. Probably...
So, since this is my first high performance caliper, and my first aluminum caliper, I would like you guys to study the above photos. Am I missing anything that would prevent me from continuing to use this brake caliper?
So you went to all that effort to clean the caliper only to put it back on with those rusty fasteners. I suggest wire wheeling the fasteners then dipping them in a black oxide solution. I used this kit from Caswell on all my GT6 fasteners that I reused. Works great and is simple and affordable.
I bought caliper service kits from 928 Intl a while ago when we did a brake fluid flush-and-replace clinic at the Glendale Ca house. This kit has new bleed screws and dust caps. Call Tom and see if they are still available. The kits were reasonable enough that I bought a set just-in-case one of the clinic cars had issues.
Get with Tom or Mark and see if those kits are still available. The new bleeders give you comfort that you'll be able to get them out next time you need to bleed those brakes.
Originally Posted by skpyle
I spent some time last night scrubbing on the driver's side rear caliper.
What I started with:
Hmmm...something's not right with the crossover line.
Yep...crossover line definitely is not right.
Missing a damper for a long time. Note the witness ring from the piston.
Excessive anti-seize or such, in my opinion.
I spent quite awhile scrubbing all the parts with a toothbrush, small brass bristle brush, and mineral spirits. Rinsing was done with contact cleaner.
The caliper and parts cleaned up well, but it is VERY obvious they are not new. I understand that as far as 1986.5 calipers go, this one is beat. However, it is what I have and I am going to work with it.
After cleaning:
Better.
I am going to say the crossover line got bumped somewhere along the line.
I am a little concerned about the corrosion at the left edge of the metal seal on the left piston.
I am a little concerned about the corrosion at the right edge of the metal seal on the right piston.
Very curious as to why the top of the right pad backing plate is smashed.
A damper fell off while cleaning. Note the top of the right pad, the smashed eyelets. That is the inboard pad.
Hex's are a little rough on the bleeder screws, but the threads are clean.
I believe this is still a serviceable caliper. Understand that I am not done cleaning yet. Tonight, I plan on hitting the spring plate screws with a no-sh*t heat gun at work to loosen the thread sealer. Once the plates are removed, cleaning will recommence.
I am concerned about the damaged crossover line. However, I am going to leave it alone. I don't believe I can straighten it. I have made brake lines before, and am competent with a flaring tool set. However, I am not confident I could duplicate that line. Based upon pad wear, I believe brake fluid is passing freely through the crossover line. And, I don't believe it is leaking. So, it stays right where it is.
There is some corrosion in the caliper body halves, right next to a couple of the metal piston seals. I say that because, if I understand the WSM correctly, pre-1987 calipers use a metal cased wiper seal at the outer edge of the piston. I saw no evidence of leakage. I will look closer after more cleaning. May be another case of leave it alone.
I am really curious as to why the eyelets are smashed on the top of the inboard pad backing plate. Hammer installation? The pad material shows no cracking or deformation. Hmm...
I am going to replace the missing damper. Not sure yet about the bleeder screws and dust covers. Probably...
So, since this is my first high performance caliper, and my first aluminum caliper, I would like you guys to study the above photos. Am I missing anything that would prevent me from continuing to use this brake caliper?
that sure is a lot of pix. when faced with parts as crusty as you have there I deluge them all with PB blaster, go have a couple beers, then take the rest of the day off. maybe the next day I'll take a whack at it.
then again, maybe a couple more beers.
drove the old 79 tonight. still starts and stops. good old car.
Thanks for the tip, dr bob. I will check with 928 Intl. when I order the used ABS sensor and possibly a used fuel tank cradle.
upstate bob: Yeah...I tend to get happy with the camera. Makes for good forum posts, but more importantly, it helps me get the damned thing back together.
This is what it took to remove the spring plate screws on the driver's side rear caliper.
Of course the El-Mondo heat gun was nowhere to be found at work. I drug out my trusty Ryobi. It only goes to 1100 degrees F, but I figured it was worth a try. Brush and pick were to clean off and out the screw heads. Hammer, chisel, pliers, and ratchet/4mm hex bit are what it took to unscrew them. Contact cleaner was for a cockamamie idea to quench-shock the screws as I heated them. Flashlight was to see what I was doing.
Not shown was the IR gun I used to monitor temps of the screw heads and pistons.
The screw heads were pretty rough looking. They were corroded, and I wasn't too confident about the hex recesses. I wire brushed the loose corrosion off the heads and picked the recesses clean, followed by a rinse with contact cleaner.
I tried the heat gun on 500 degrees first. I was aiming for a screw head temp of 300 degrees. I thought I read that somewhere. Well, 500 only got me around 150 at the screw head with the gun removed. I worked up through 800 degrees and finally just set it to 1100 and let her rip.
After approximately 5 minutes of heating from both sides, I saw around 200 degrees at the screw head. The 4mm hex bit felt loose in the screw head, so I started with the chisel. No motion. Back to the heat gun. After another 5 minutes, I saw around 250 at the screw head and around 200 at the nearest piston. I whacked the screw head on a tangent with the chisel. After a few hits, it started to turn. Yay! I whacked it again, then used the ratchet to completely unscrew the screw. And knew enough not to pick it up with my gloved fingers.
The other three screws took around 10-15 minutes of heating and varying levels of violence. One popped free with only the ratchet. One required just about destroying the screw head with the chisel to break free. In the end, all four came out without damaging the threads in the caliper. I broke my M6 x 1.0 thread chaser at work some time ago, so I will have to bring in the one I have at home. I want to chase the threads in the caliper to remove all the thread lock. I tried making an M6 x 1.0 bottoming tap out of a starting tap, but that didn't work out so well. Best decision I made was NOT to try in on the caliper.
However, none of the screws are reusable. I am going to source new screws. They are button head M6 x 1.0. As far as I can tell, and from research, there is nothing special about them. Brembo does not list them, Porsche only lists them as part of the individual spring plate kit.
Question: do I go stainless steel or zinc plated carbon steel?
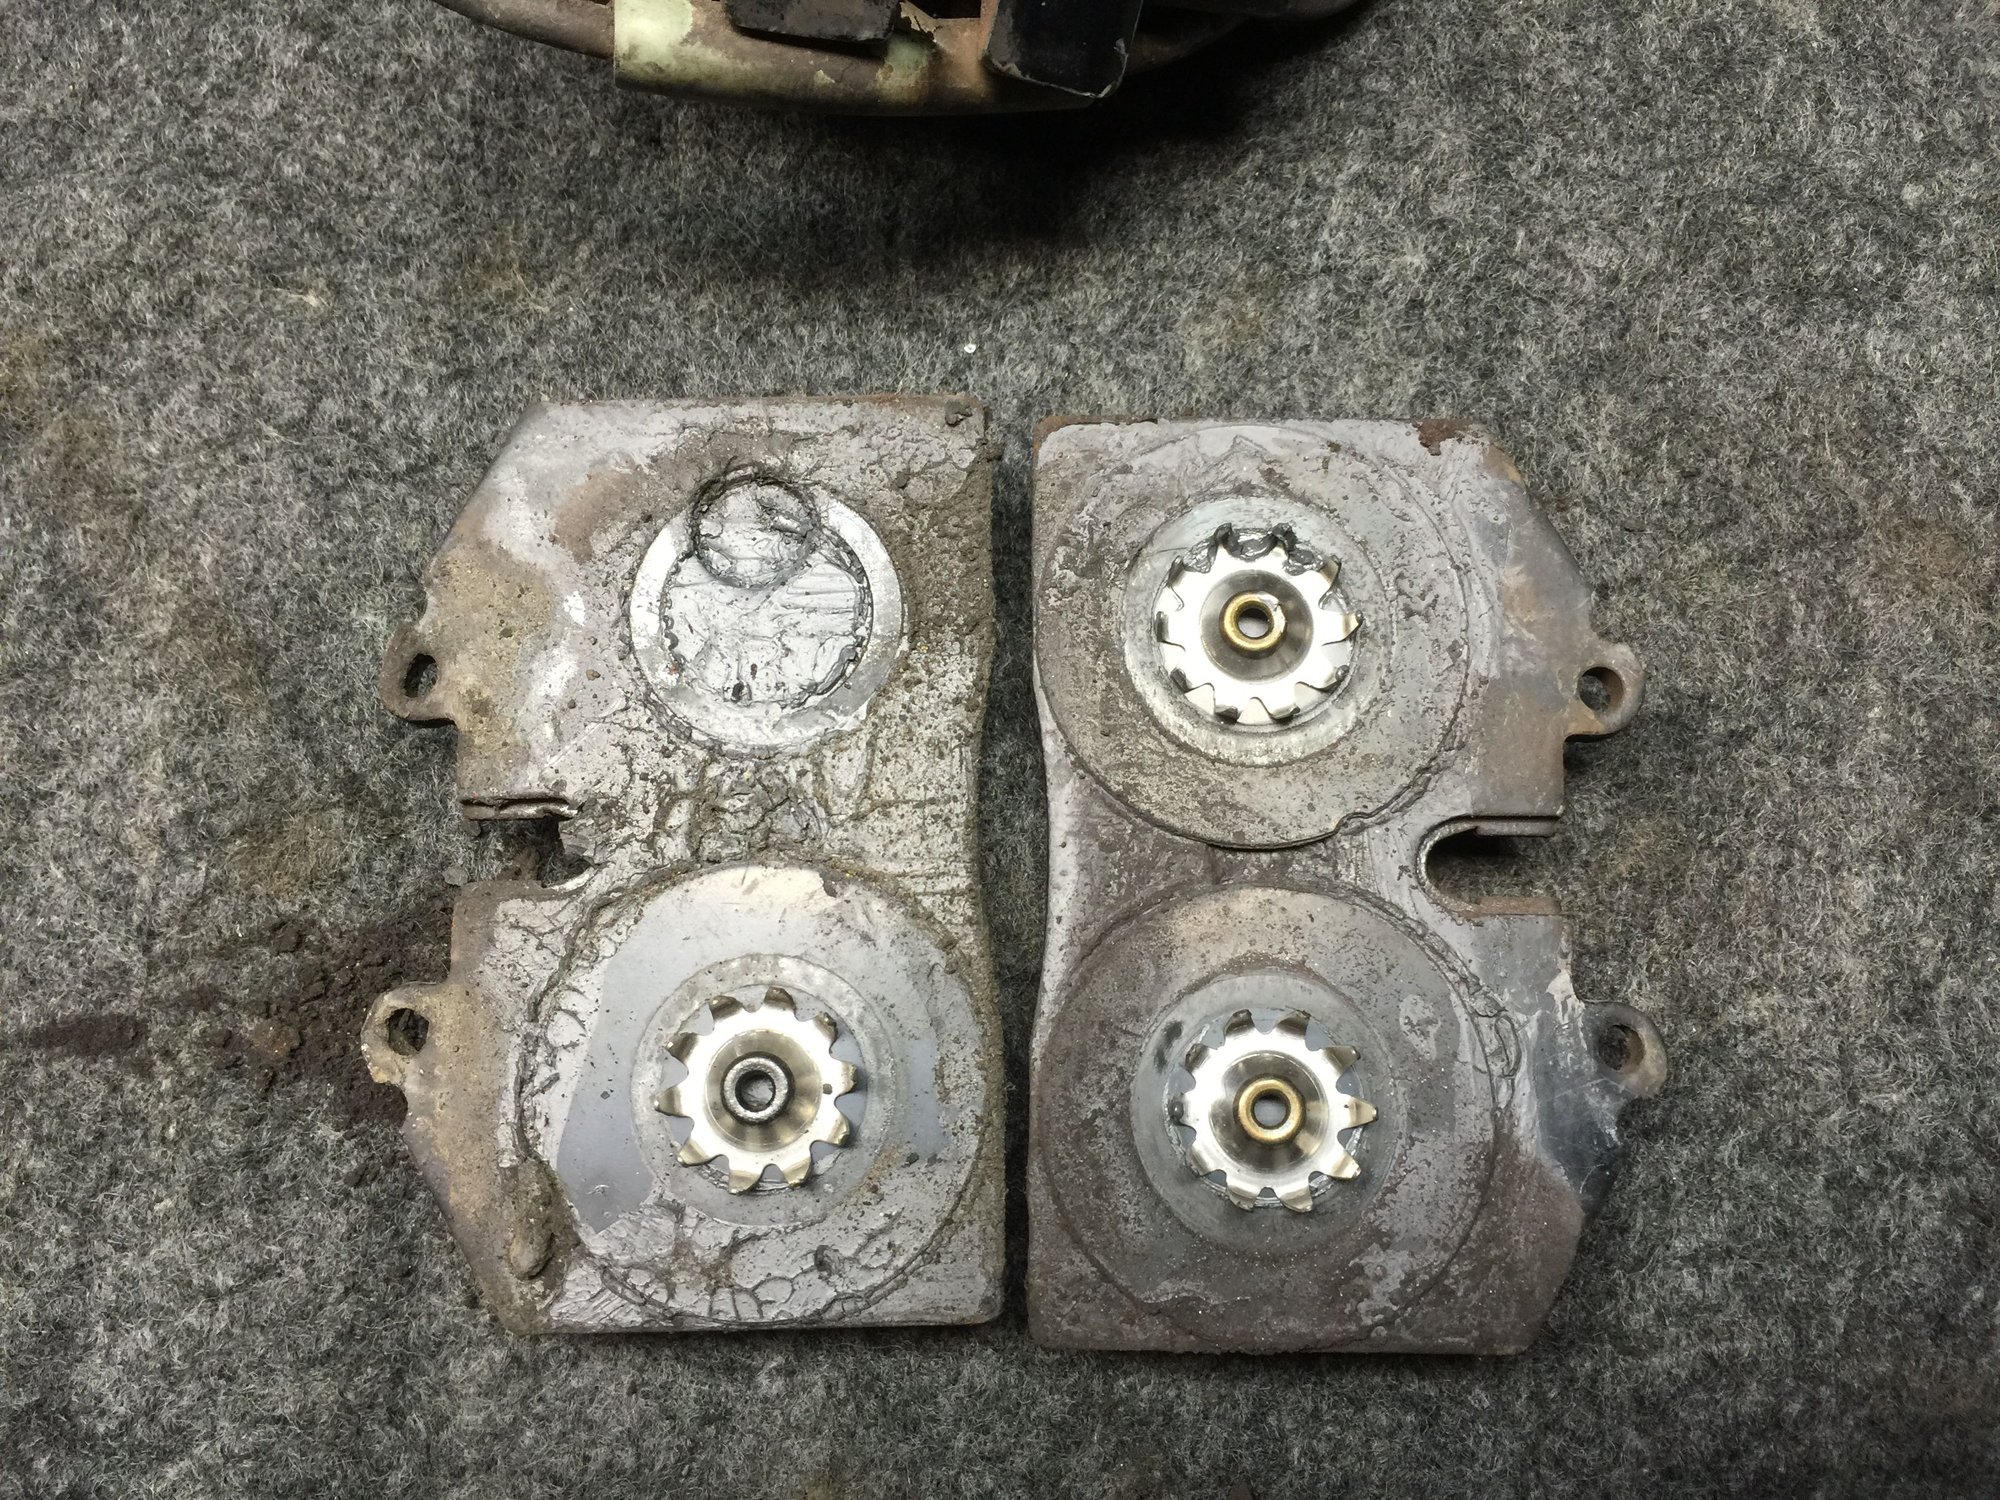
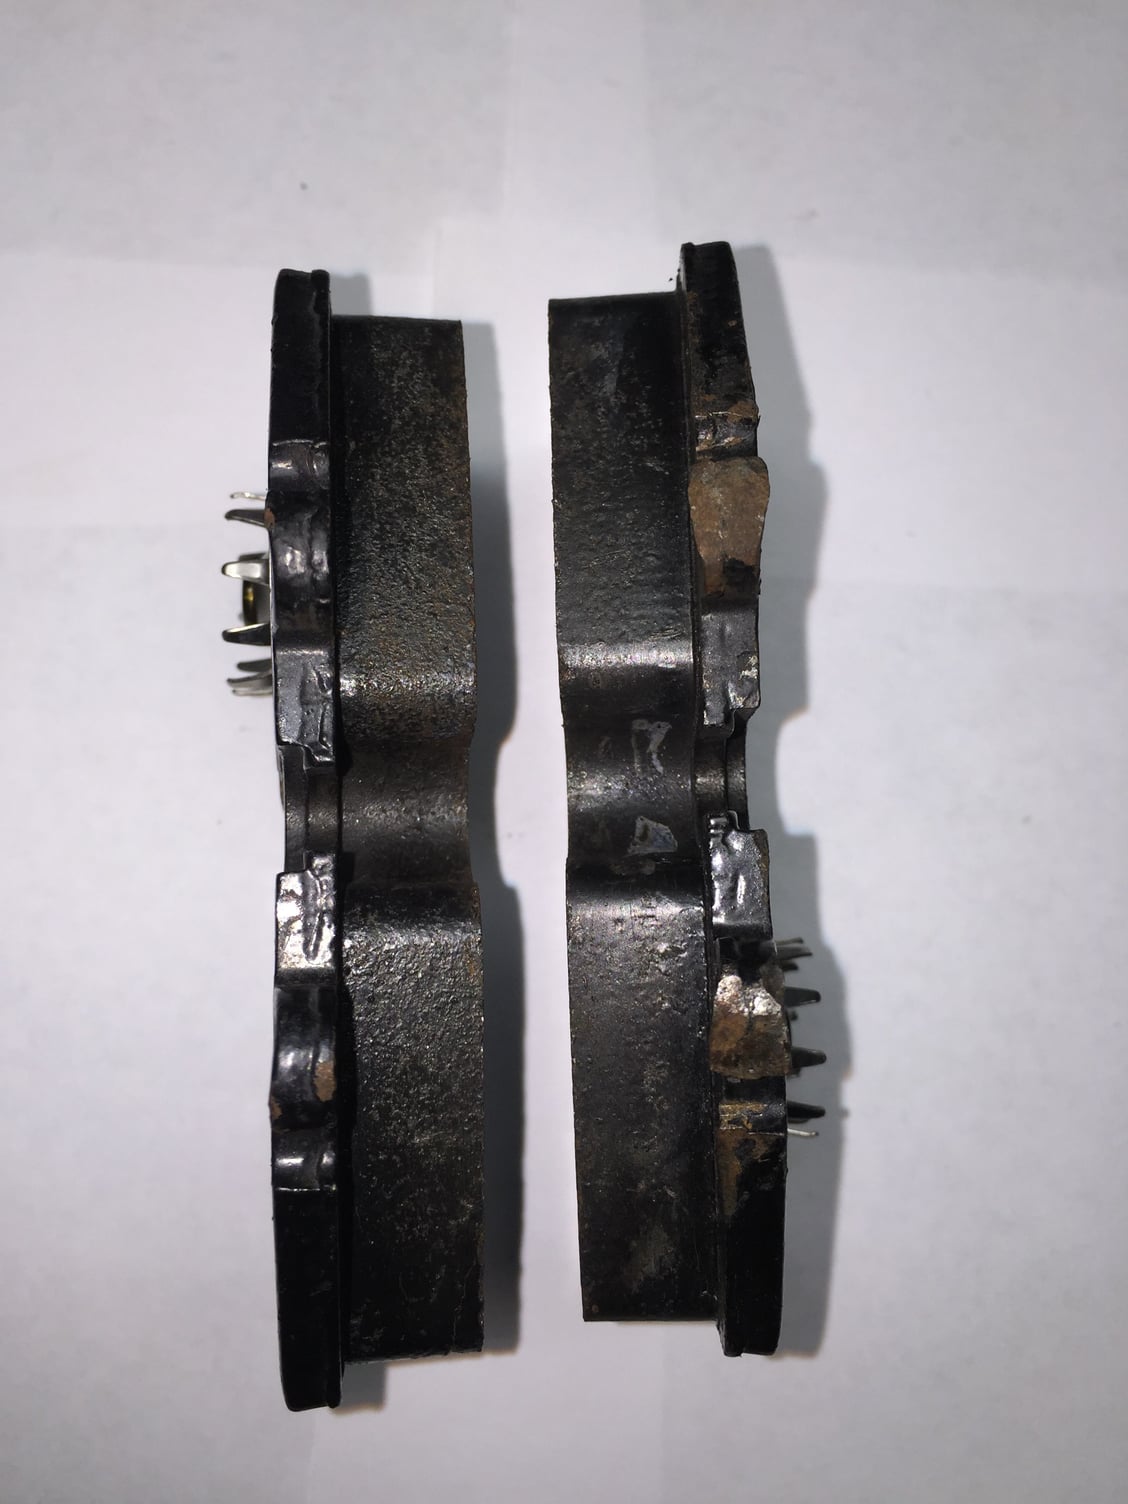
Top side where pads ride.
Bottom side against caliper.
All four spring plates are reusable. I will clean them and possibly buff them for smoothness. Not sure about that yet.
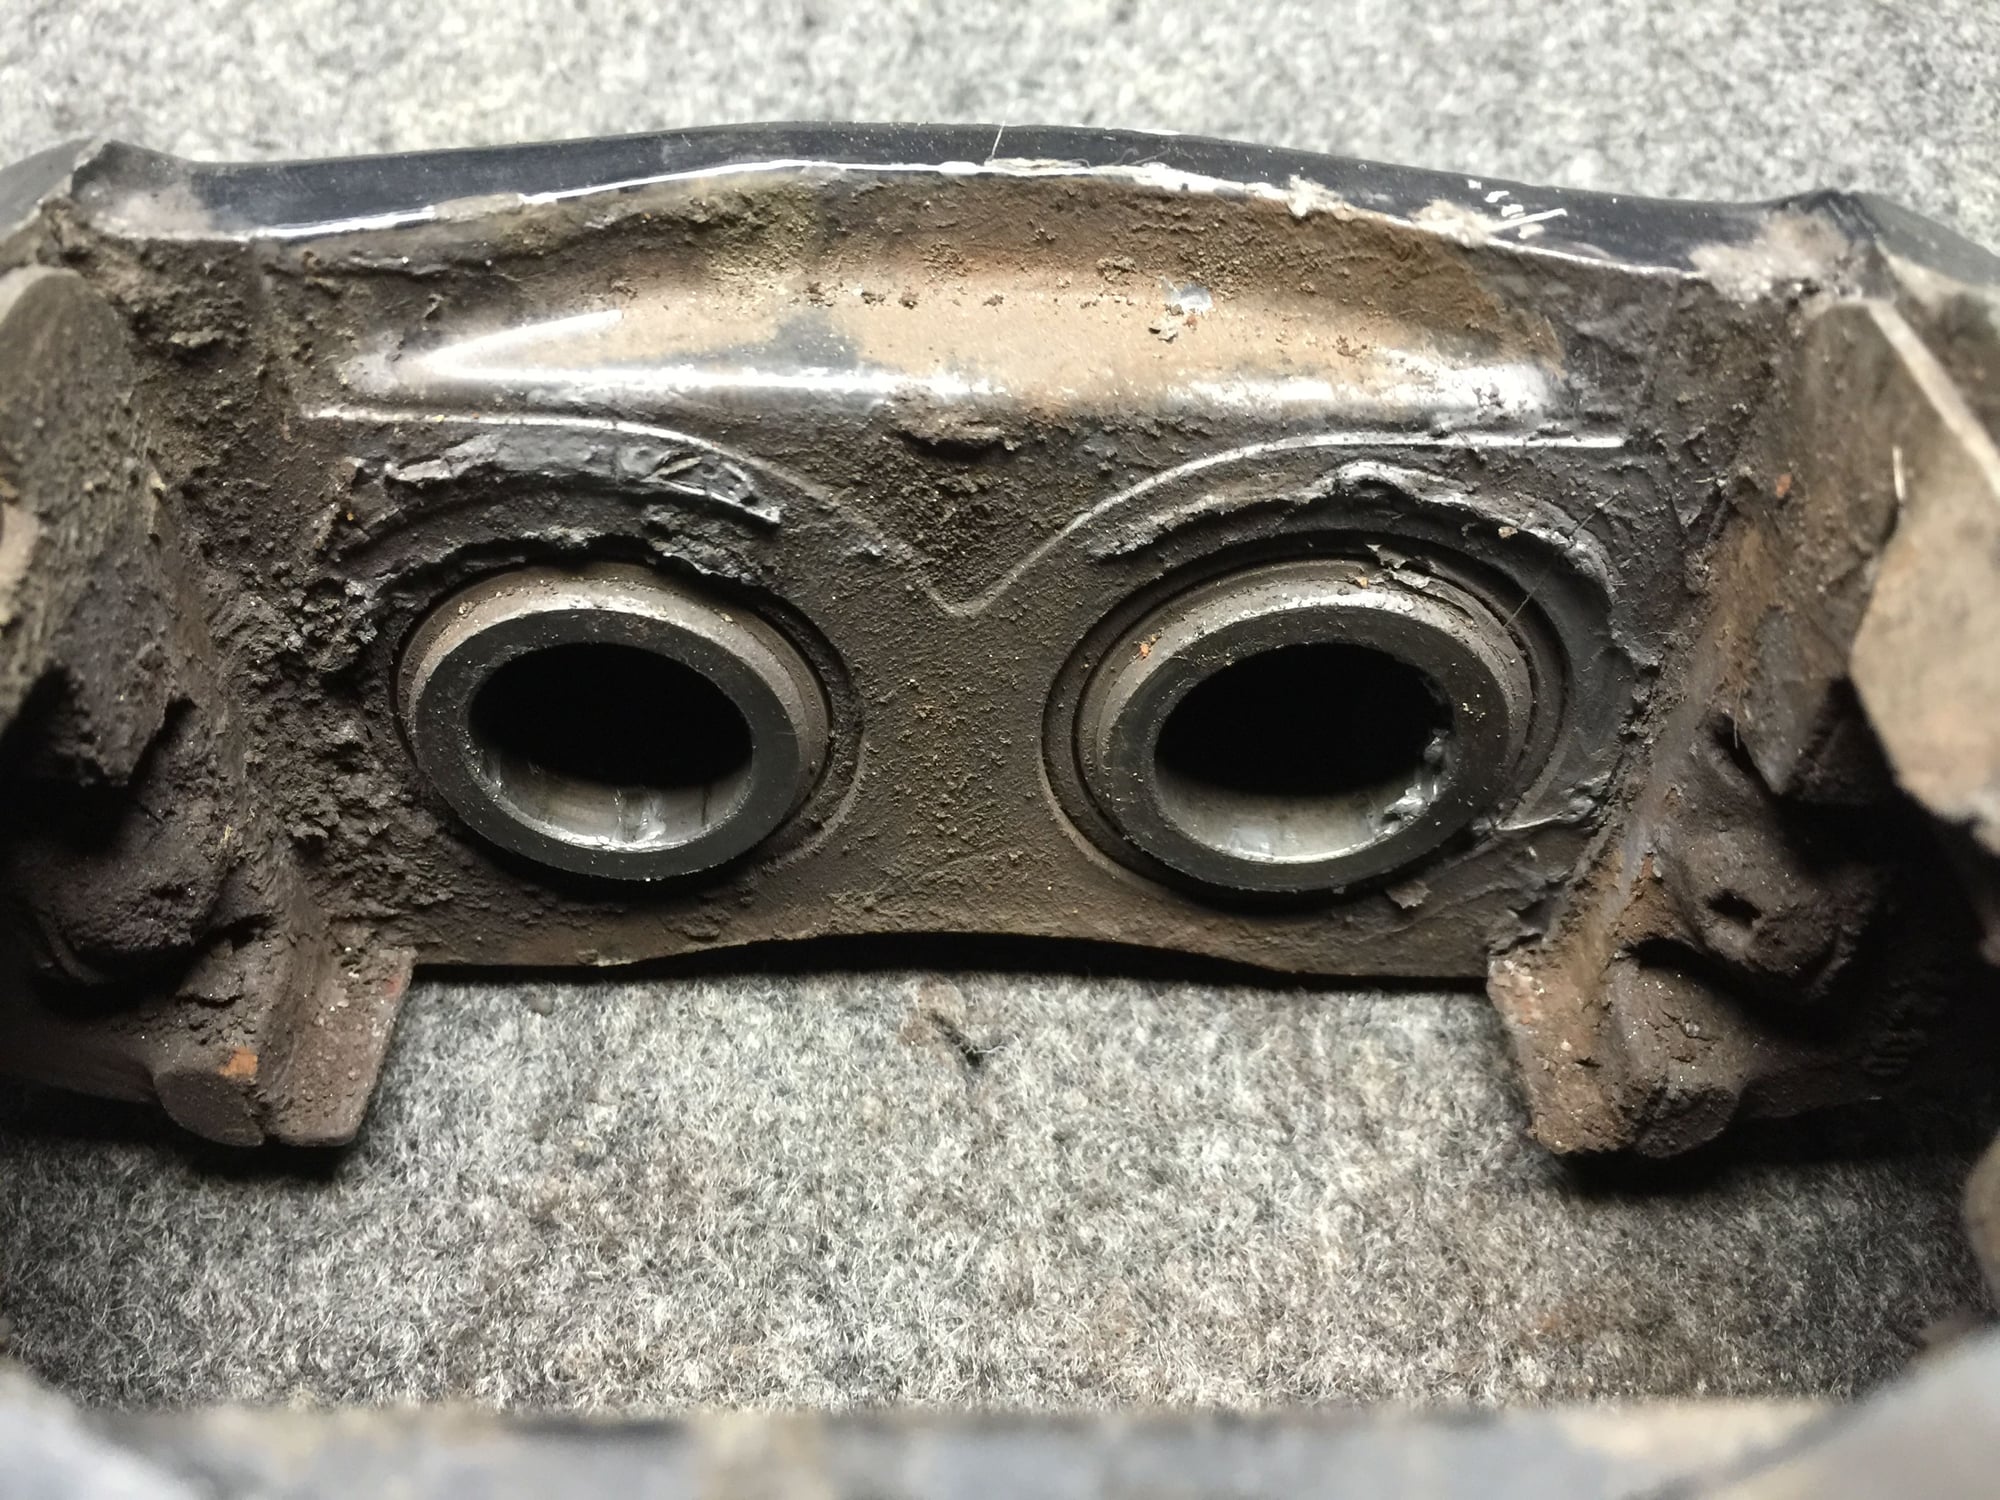
Corrosion after removing the spring plates.
The caliper does have some corrosion under the spring plates. I gave them a quick hit with a wire brush to knock the big chunks off. I am going to have to go back with a small brush on a rotary tool to really get rid of it.
After a quick hit with a wire brush.
On that note, once I have cleaned the corrosion, what do I coat it with? I am not refinishing the calipers at this time. Just put a good layer of anti-sieze? I read an internet post from a guy in the UK with similar issues on his 944 S. He put a layer of high temp silicone sealant under the spring plates to seal out the corroded areas. Any merit to this?
Here are some photos from the weekend:
These are the junctions of the brake hardlines to the flex hoses. They are not end of the world rusty, but they are rusty. I am spraying them daily with Aerokroil. In a week or so, I may try to break them loose. I have seen reference to using the tubing clamp from a flaring tool kit. I don't see enough free room after the nut for this to work. My flaring kit has a relatively wide clamp. Hmmm...
Last night, I took some good advice from a few members here, and ordered a set of good, used MAC metric flare crow's feet.
I have a question for The Forgotten On, regarding pad dampers: Am I understanding that you are recommending Permatex High-Temperature Red Silicone for adhering the dampers to the pads? Is this the same as the gasket maker, or is this different? I want to make sure I get the correct stuff.
That's it for today, off to bed now.
Thanks for following along! More to come...
The pad braking surfaces look glazed. Put some 100 grit sandpaper on a flat surface and run the pads back and forth across it until the shiny glaze is gone.

 07-17-2016, 02:46 AM


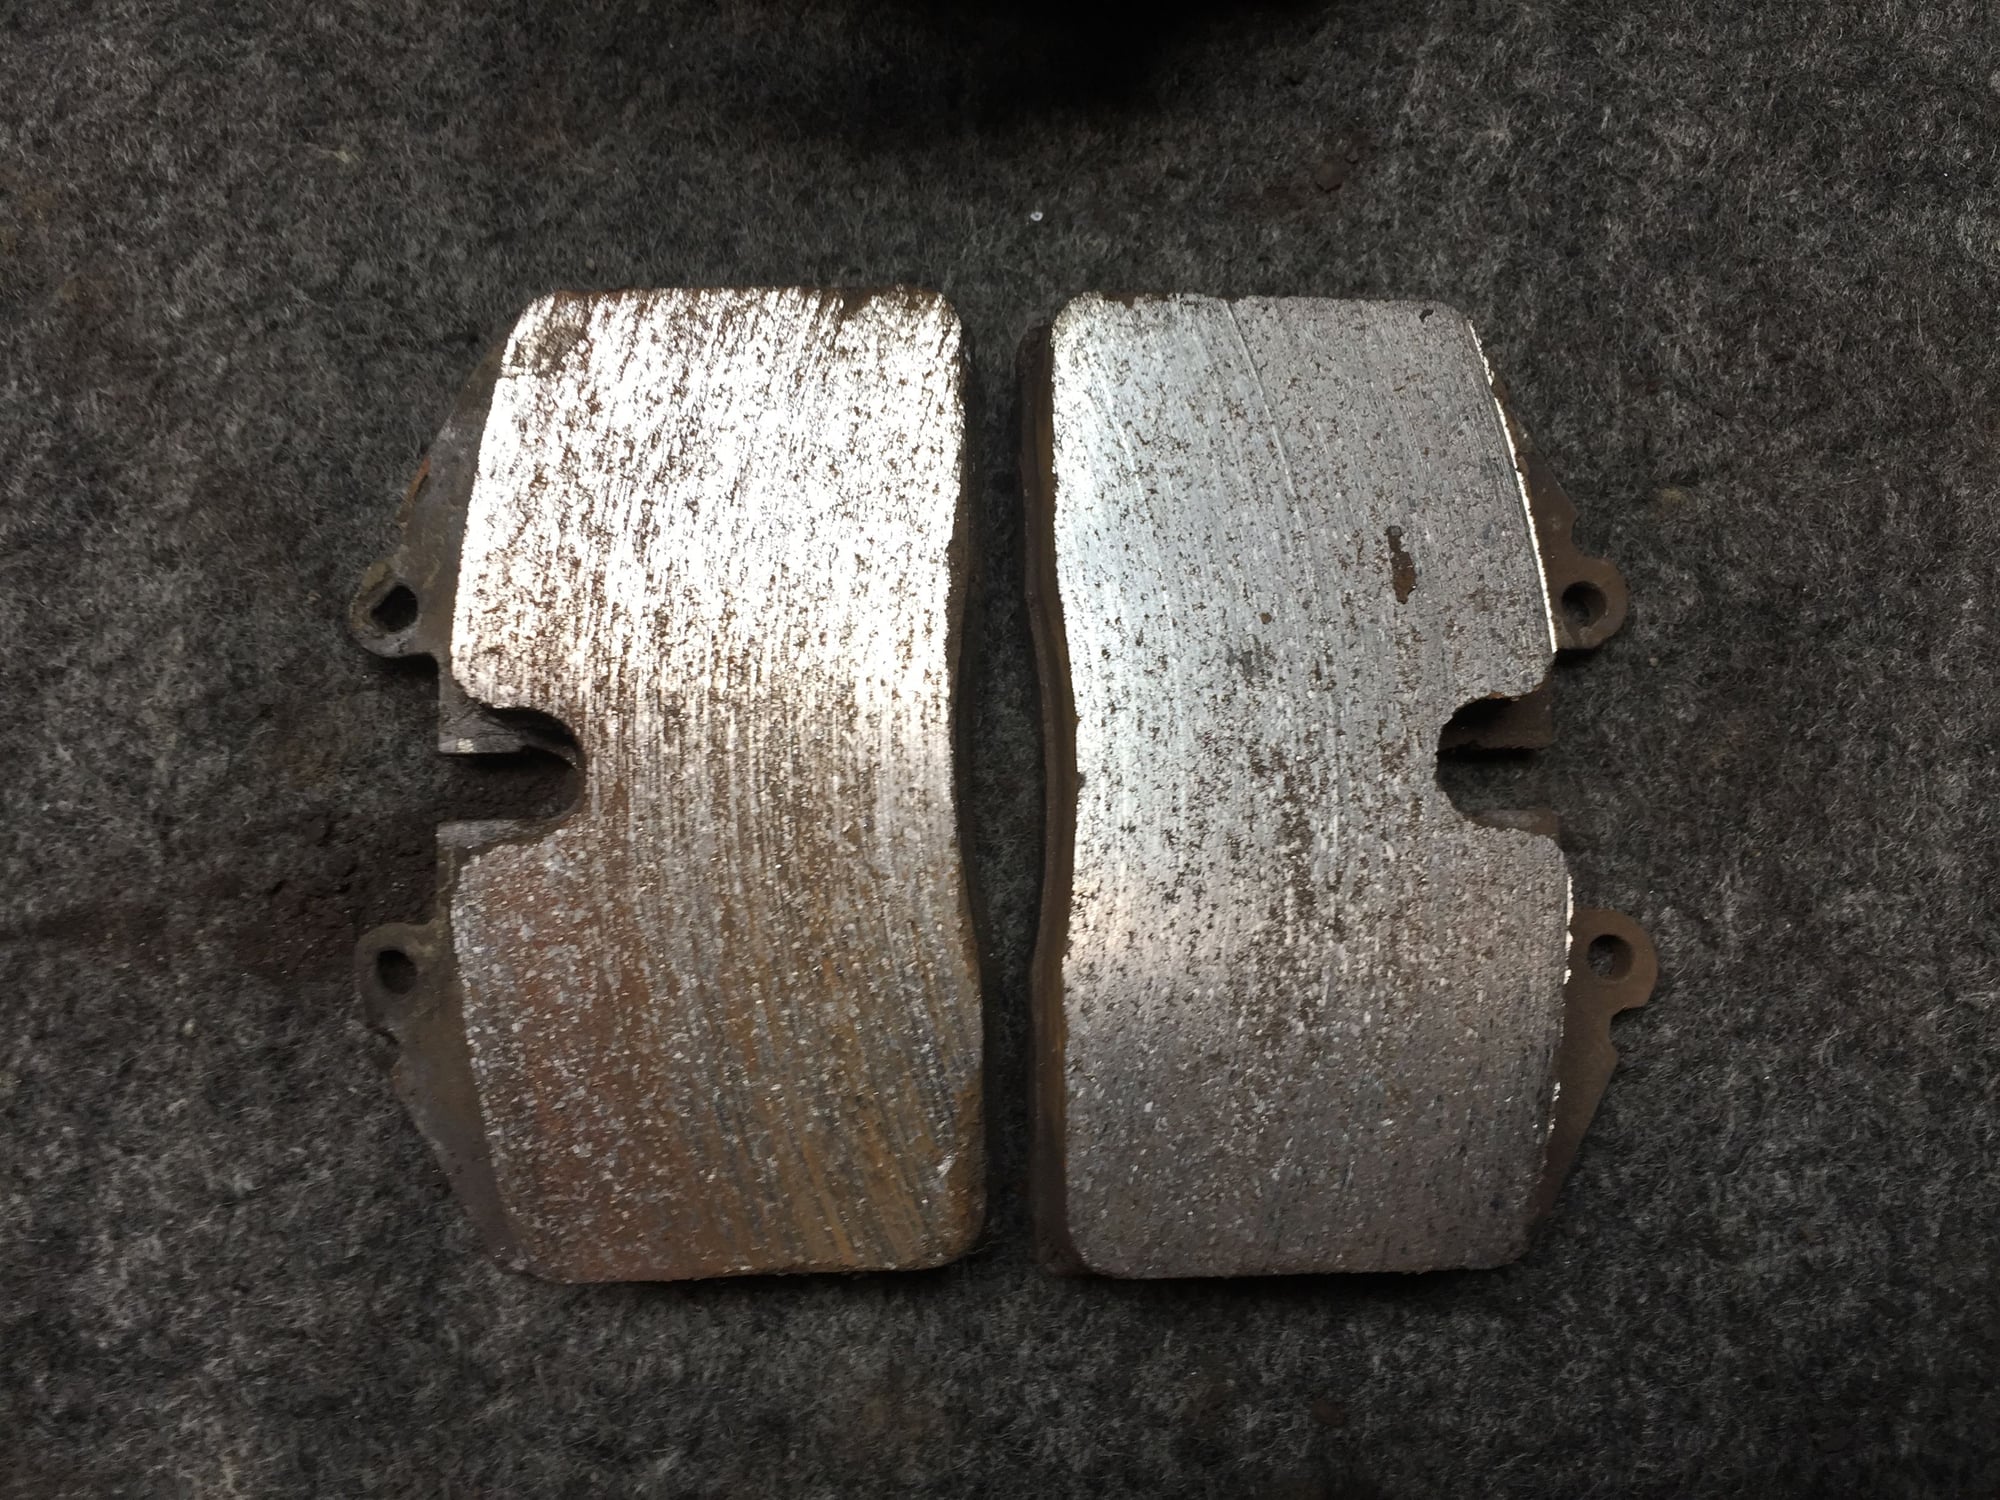


 The pad material shows no cracking or deformation. Hmm...


