
1983 928S

 06-23-2016, 09:43 PM
#47
Burning Brakes
Thread Starter
Thank you for the offer. I went in determined to work non-stop until it was adjusted to my taste. It took me two hours and wow did my legs hurt when I got up but I got it perfect. I do not have nearly so much exposed thread as the above picture, the lock nuts are only about 3mm from touching, but the shifter is just right in the car, a few degrees back from vertical.
In my opinion this would be impossible to install without at least dropping the front of TT as I did. Although I cannot drive for a real test, I can say that the shifting action feels way more direct even though the stock ball cup and bushing had very minimal play.
06-24-2016, 03:22 PM
#48
Developer
Well said. Yes, you can adjust the drag on our ball cup so you can get it very "right" and remove the play that even a brand new nylon cup has.
And Yes - it's a bear. We do recommend either that you replace the ball cup when you do your motor mounts (as you can lower the motor with the mounts out and then can access the ball cup from the top, under the air filter then as well as the bottom) or when you drop the TT for some other reason. Can be installed and adjusted in the car, its just harder.
And Yes - it's a bear. We do recommend either that you replace the ball cup when you do your motor mounts (as you can lower the motor with the mounts out and then can access the ball cup from the top, under the air filter then as well as the bottom) or when you drop the TT for some other reason. Can be installed and adjusted in the car, its just harder.
06-25-2016, 11:48 PM
#49
Burning Brakes
Thread Starter
I made good progress last night and today. I checked resistance from the temp II sensor and got 1925 ohms at about 80F so that looks good. The thermo time switch however should have no resistance at this temperature from each terminal to its housing but it read 63 and 109 ohms. Between both terminals was 63 ohms and it should be between 25 - 40. A new switch is in my future but I can live without it for now. Still doesn't solve the up/down rpms at idle though.
I was able to button up the front of the engine. The timing belt goes on really tight and when I finally got it on and thought "I'm glad I won't have to do that again for a while", of course the cam sprocket was off a couple teeth. That took a bit of learning by doing and fiddling around till I got it right.

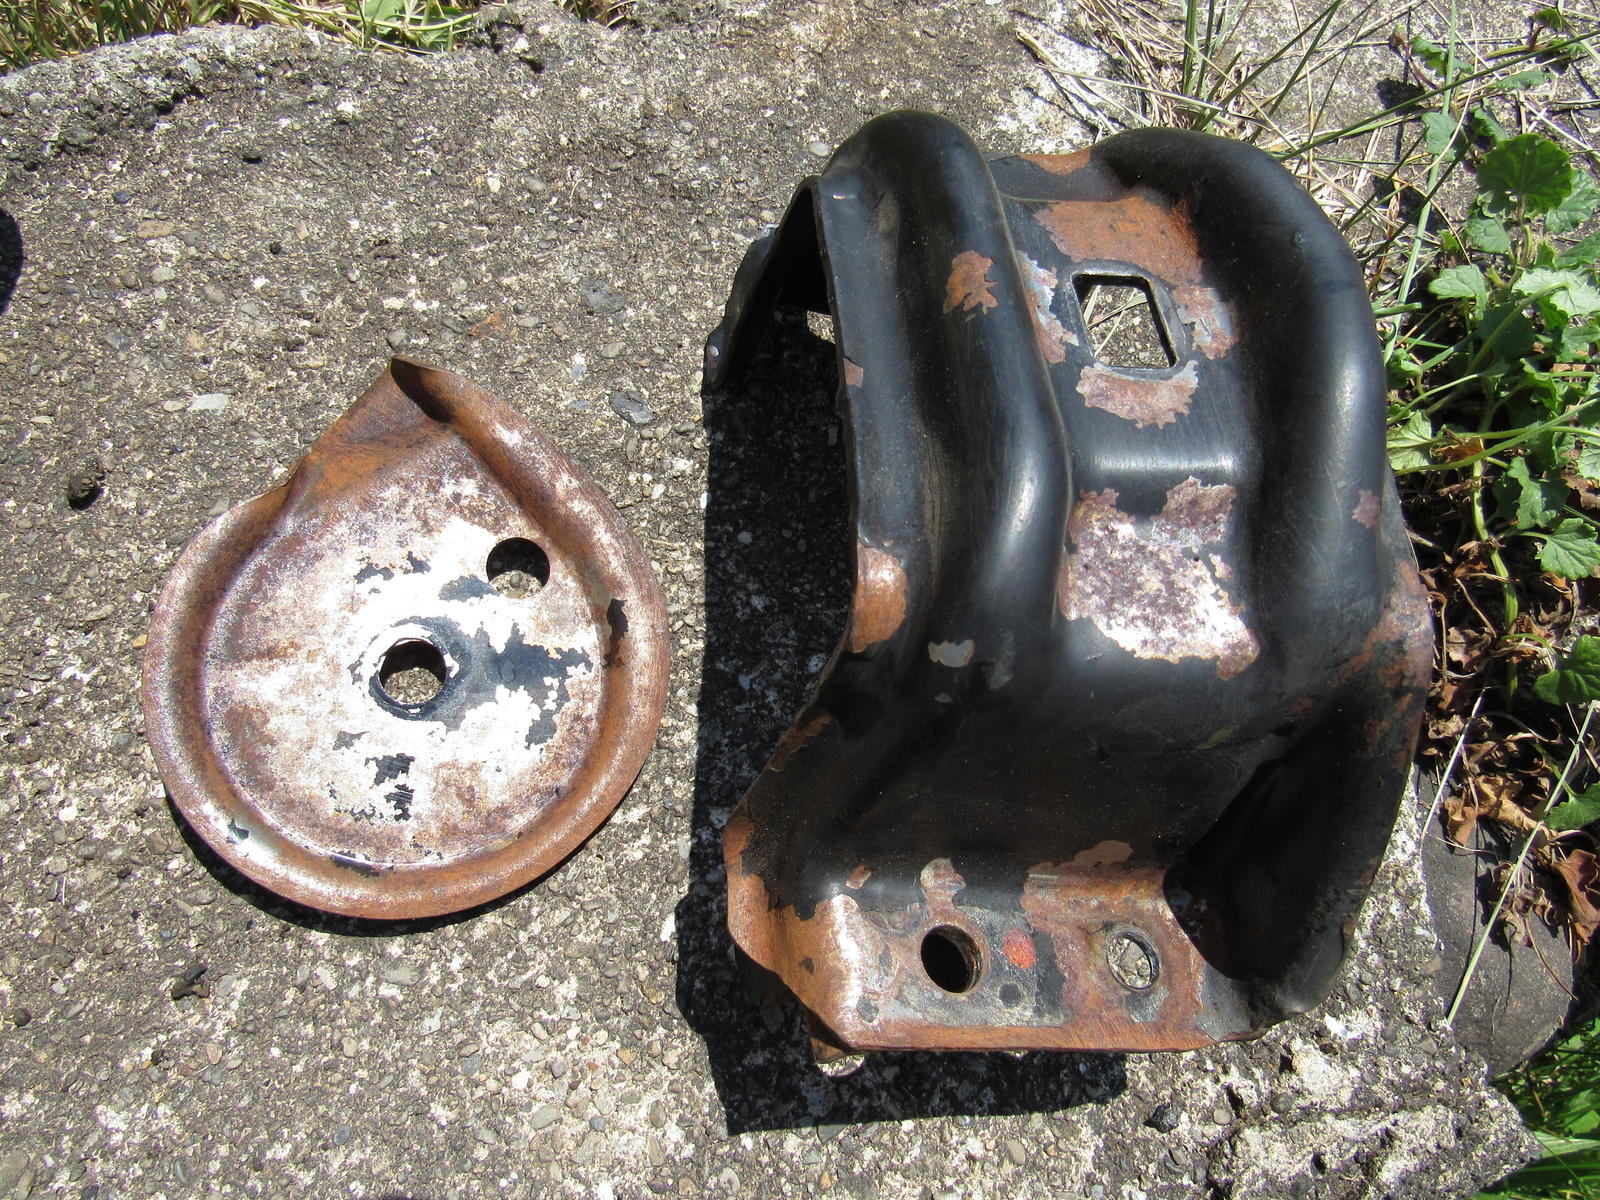
I power washed the center cross member and engine mount parts and some of the paint came off so I hit it with a wire brush, rust converter, and brushed on rustoleum wherever it was needed. I am letting it all dry overnight for installation tomorrow.
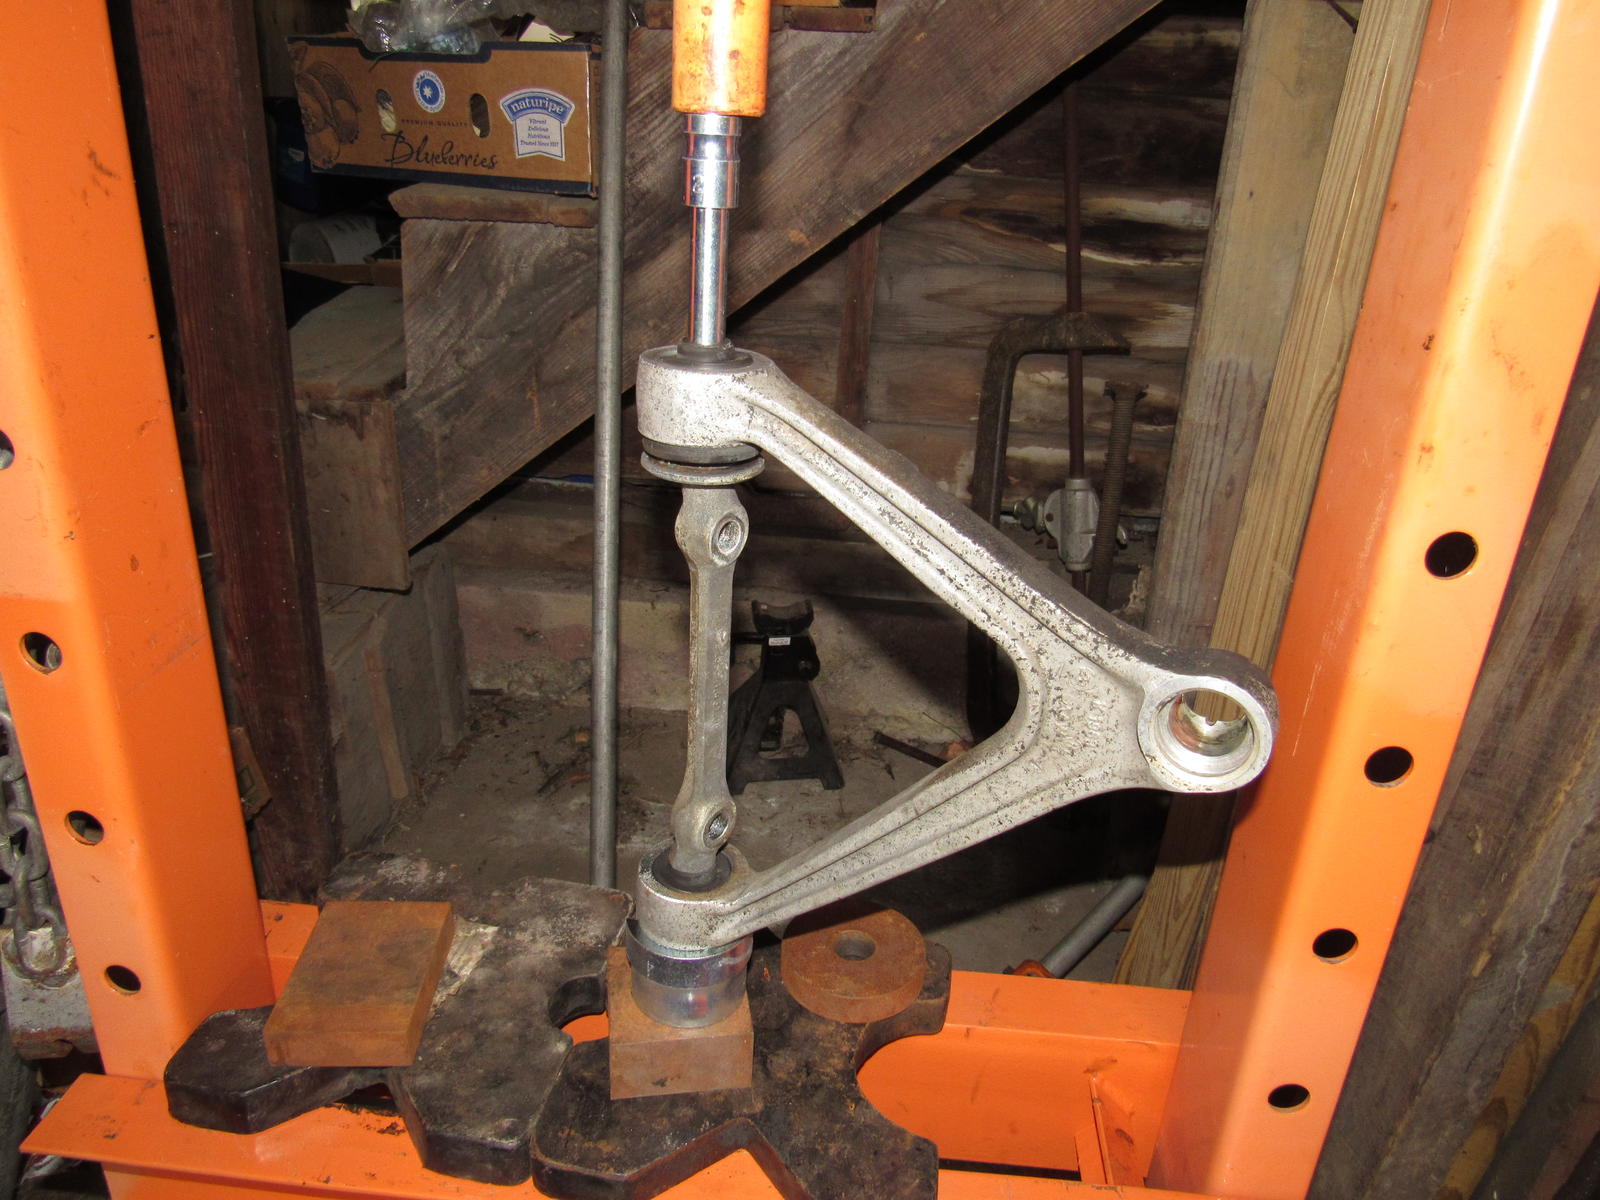
Then what turned out to be a pretty time consuming job - the upper A arm bushings and ball joint. My neighbor helped me out with his shop press. This went pretty well.
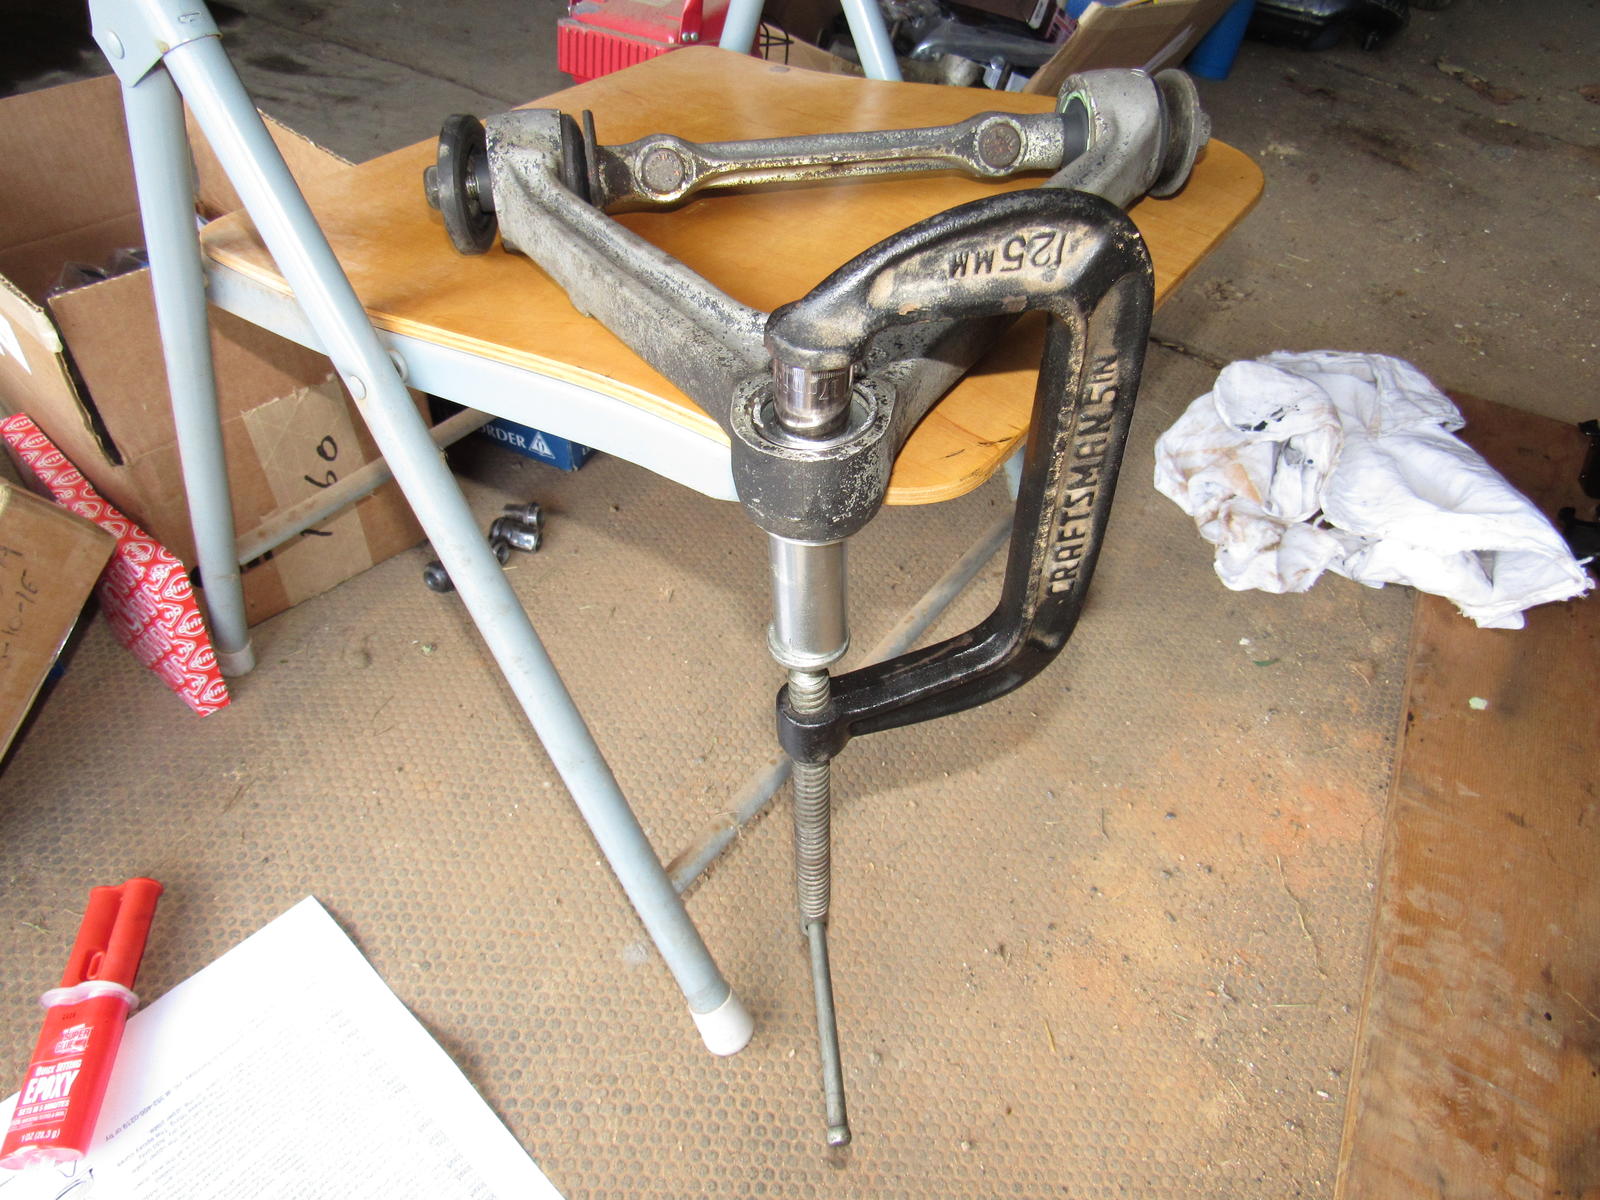
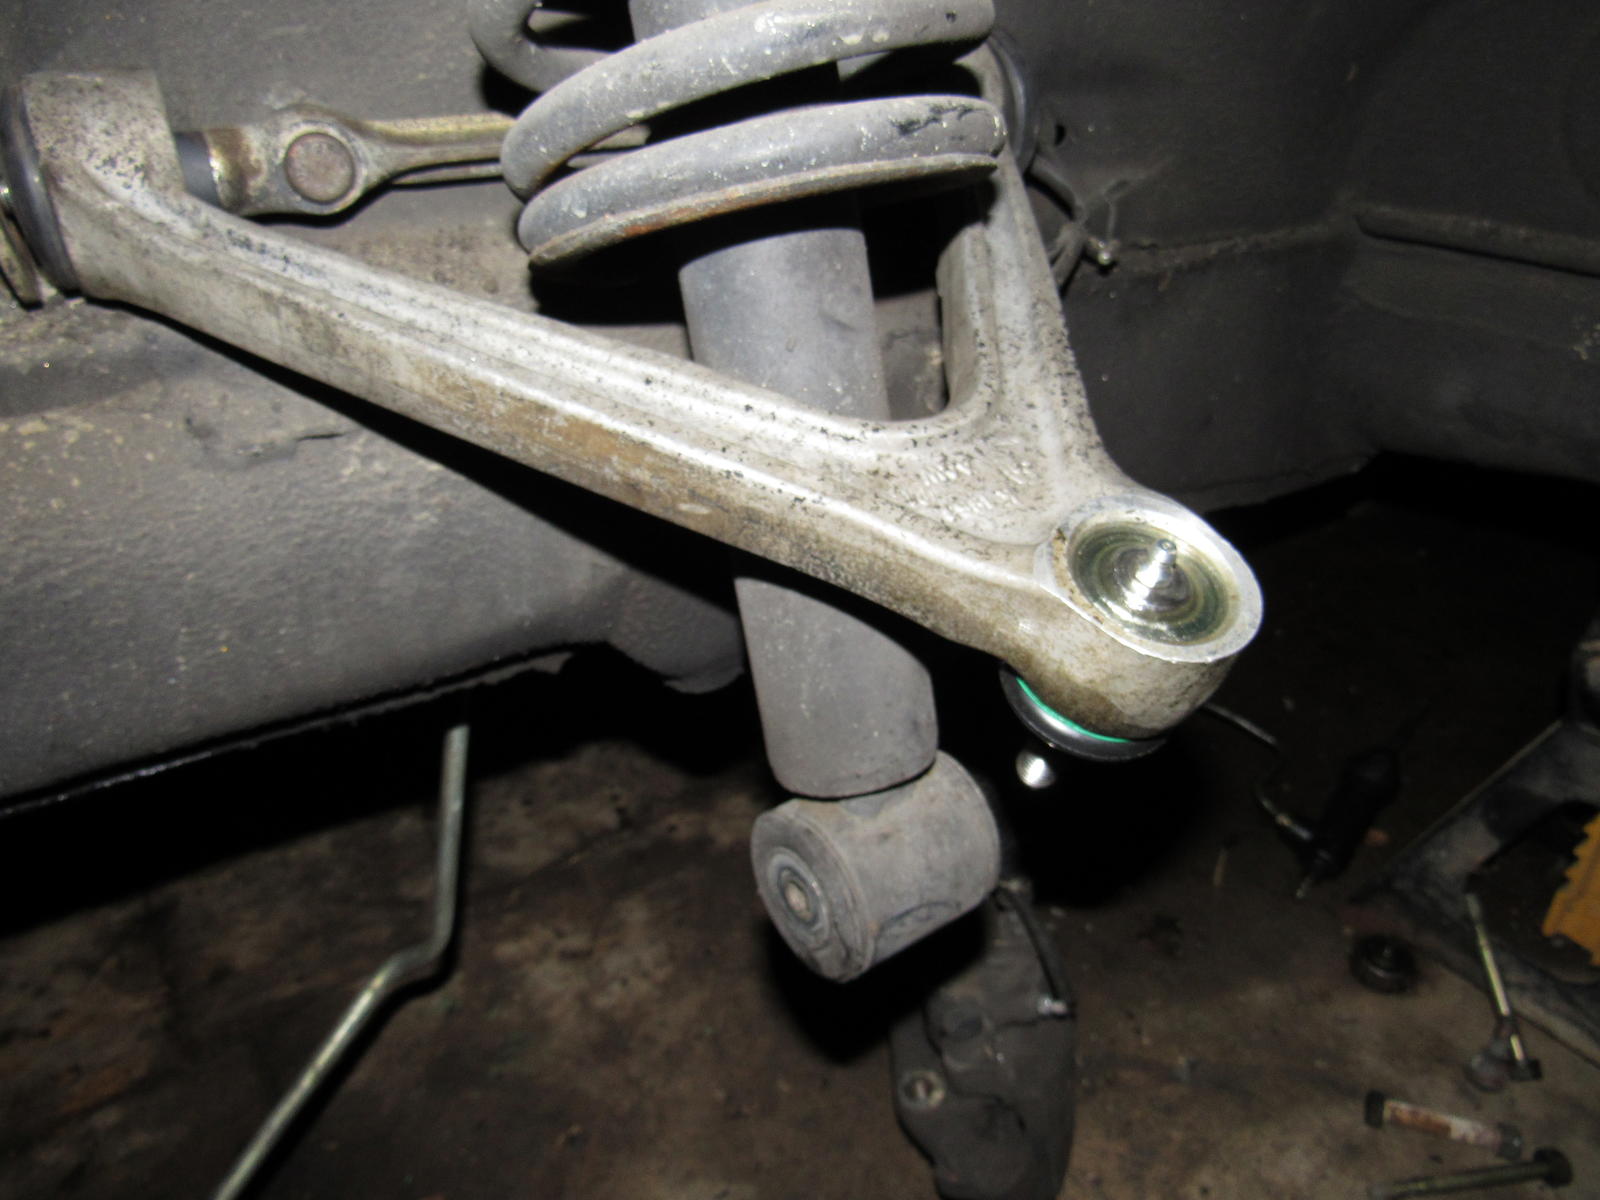
And the ball joints. This is easy until you get to the circlips. I had to tighten my C-clamp as tight as possible and force the clip into the groove with a screwdriver leveraged against the clamp. Once all done, one ball joint is very tight, not really able to be moved by hand and the other is kind of loose, but there is no play at all.
It sure feels good to be tightening bolts for a change
I was able to button up the front of the engine. The timing belt goes on really tight and when I finally got it on and thought "I'm glad I won't have to do that again for a while", of course the cam sprocket was off a couple teeth. That took a bit of learning by doing and fiddling around till I got it right.
I power washed the center cross member and engine mount parts and some of the paint came off so I hit it with a wire brush, rust converter, and brushed on rustoleum wherever it was needed. I am letting it all dry overnight for installation tomorrow.
Then what turned out to be a pretty time consuming job - the upper A arm bushings and ball joint. My neighbor helped me out with his shop press. This went pretty well.
And the ball joints. This is easy until you get to the circlips. I had to tighten my C-clamp as tight as possible and force the clip into the groove with a screwdriver leveraged against the clamp. Once all done, one ball joint is very tight, not really able to be moved by hand and the other is kind of loose, but there is no play at all.
It sure feels good to be tightening bolts for a change
Last edited by Majestic Moose; 07-08-2017 at 12:24 AM.
06-26-2016, 11:05 PM
#50
Burning Brakes
Thread Starter
Today I installed the center cross member and wrestled with the steering rack. My rebuilt rack came with new bushings but I had solid ones so I figured now is not the time to compromise. I used a flat screw turner and hammer to pry up the metal edges and a C-clamp to press them out.
Everything else went pretty well till it came time to insert the steering shaft into the steering column. This was really hard getting the old rack out and the new would not go in more than about 4mm. I had to resort to setting the knuckle on a 2x4 to support it while I hammered a screw turner into the expansion slot. Don't be gentle, it takes a lot of force to spread it open. Then I was able to hold the knuckle with one hand and hammer the steering rack with a rubber mallet. After a dozen good whacks it was all the way home.
Now the odd thing, the steering rack was centered and shaft/knuckle alignment was perfect but I ended up with my steering wheel a perfect 180 degrees upside down. It was perfect before..? I pulled the steering wheel and set it correctly.
Oh I tried greasing the upper ball joints and it cracked the epoxy and started coming out the top. I don't think I mixed it well enough.
One question, do the front most upper A arm studs not use a washer? This seems strange but I didn't have any.
Last edited by Majestic Moose; 07-08-2017 at 12:25 AM.
06-27-2016, 06:08 PM
#52
Burning Brakes
Thread Starter
 06-28-2016, 06:53 PM
#54
Burning Brakes
Thread Starter
So I am in a real bind. after installing the headers I discovered there would not be enough clearance to install the lower bell housing cover. Not a big deal, I loosened them up and fitted the cover. Now I have been battling getting the engine back in all afternoon. soontobered84 you are correct about the engine mounts but I had already installed the steering rack. Anyway, millimeter by millimeter I've gotten to the point where I could bolt up the TT to the bell housing but I didn't think about the coupler, I have no access because of the bell housing cover and I can't remove it because of the headers in the way 
I guess I have to somehow loosen up the headers, at least they have new exhaust studs.
I guess I have to somehow loosen up the headers, at least they have new exhaust studs.
06-28-2016, 10:48 PM
#55
Burning Brakes
Thread Starter
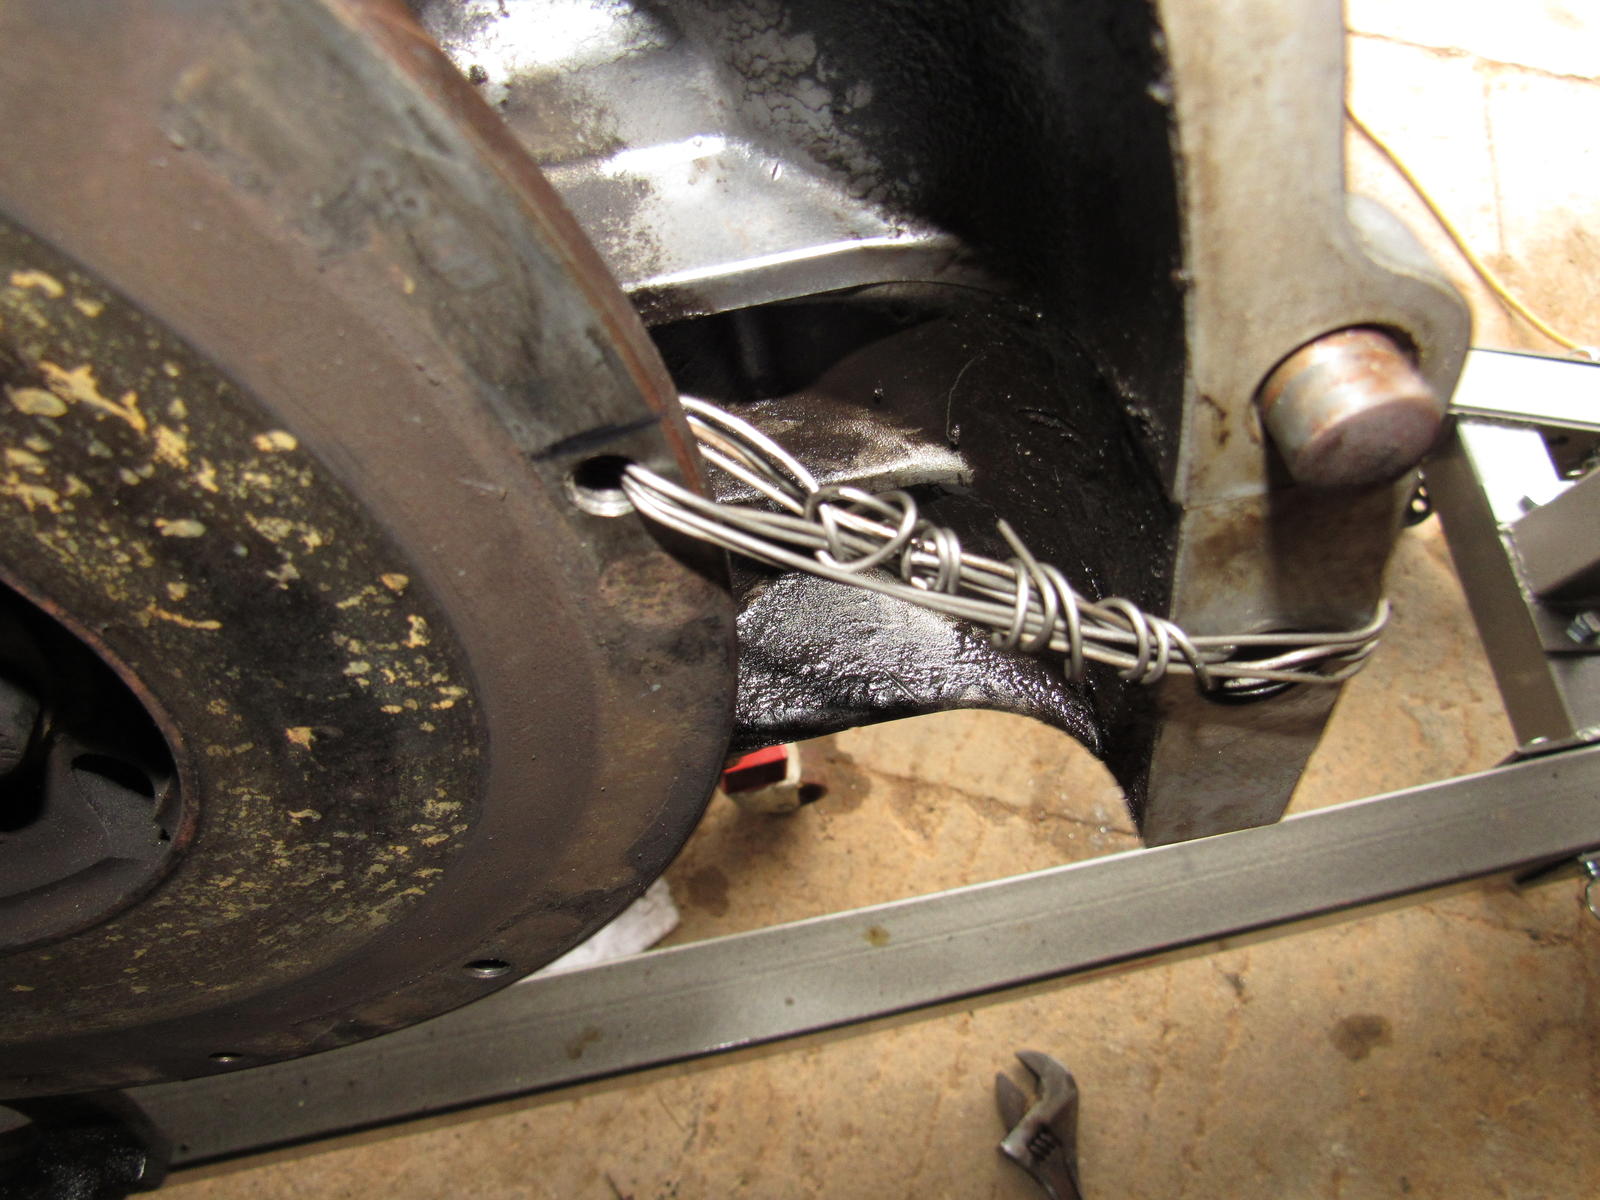
I had a goal to have the car back on four wheels by Independence day and as that date is getting near I took today off for a full day of wrenching. Things started pretty well, I supported the engine from my crane and removed the engine stand for access to the flywheel. Since there is no way to lock the engine from turning and I work alone, I wired the flywheel to the lower bolt hole for the bell housing, it worked great. Alternatively I could have removed a spark plug and fed some clean rope into a cylinder to jam it.
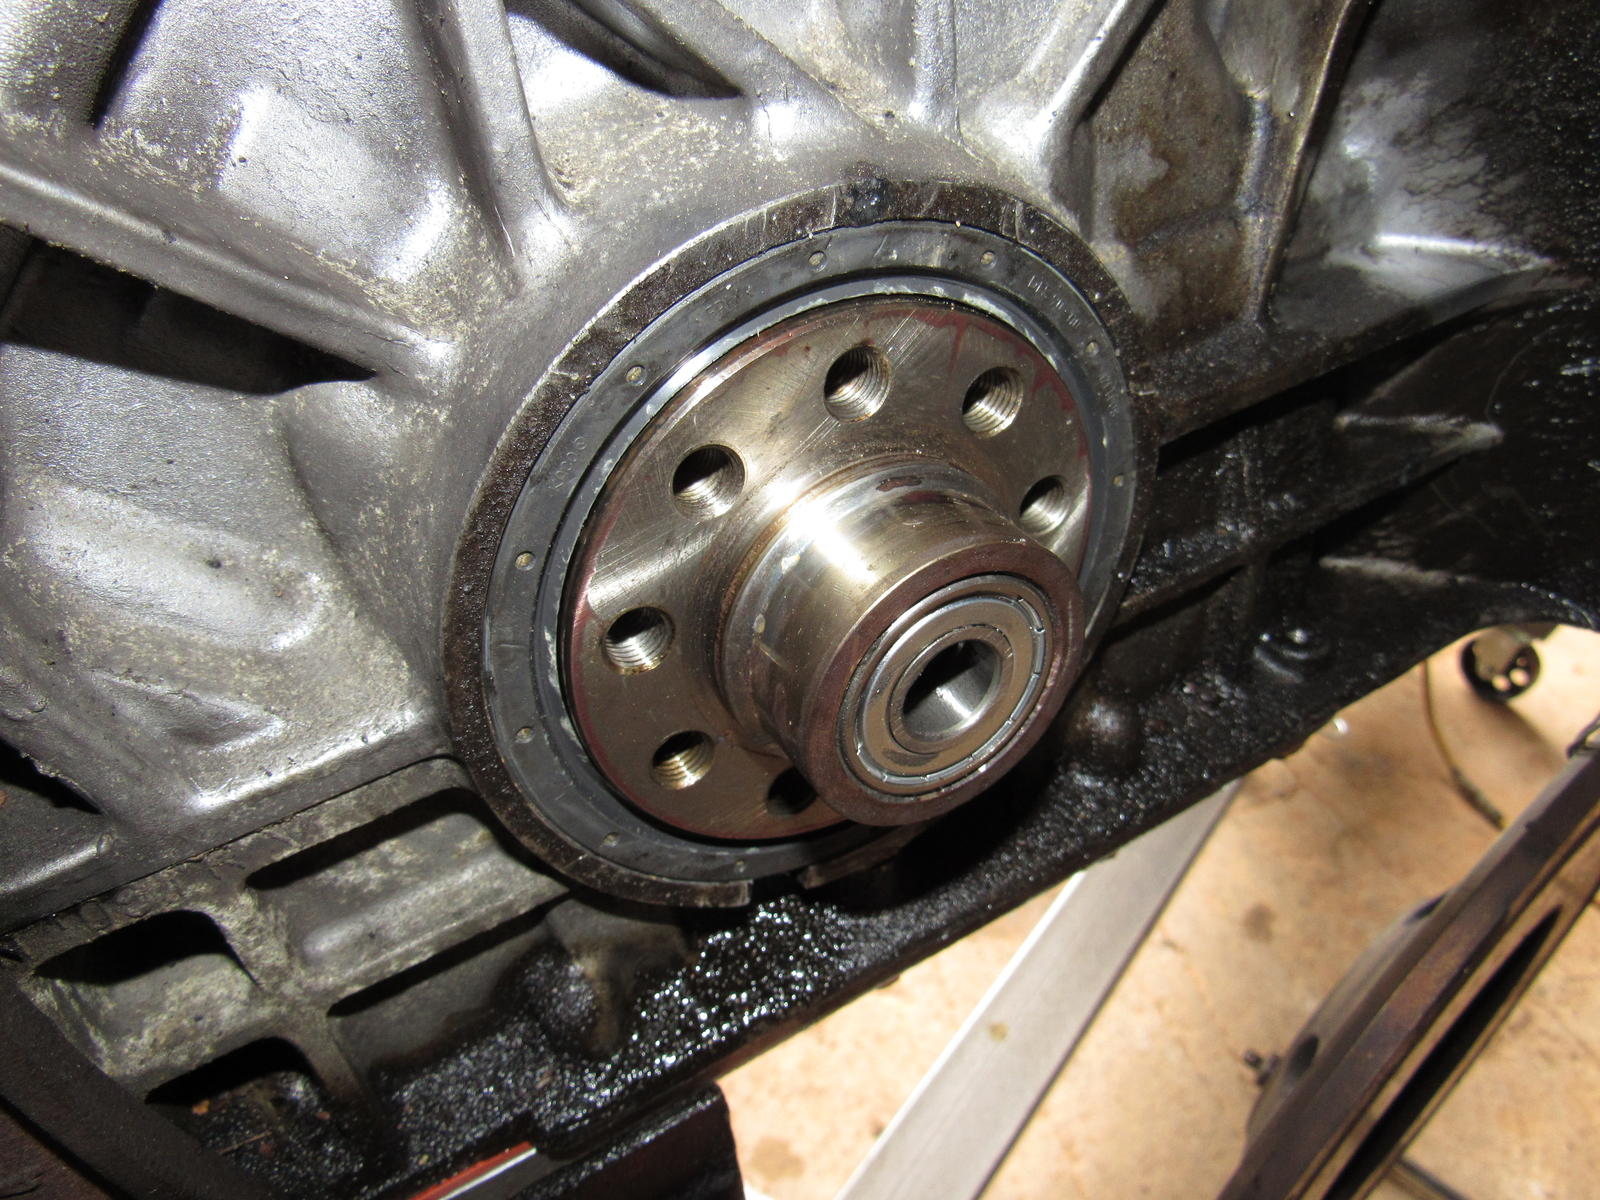
Then I replaced the rear main seal and pilot bearing, this is easy when you have the real tools for the job. The seal appeared to have been weeping oil and the bearing was a bit 'grindy' so well worth changing.
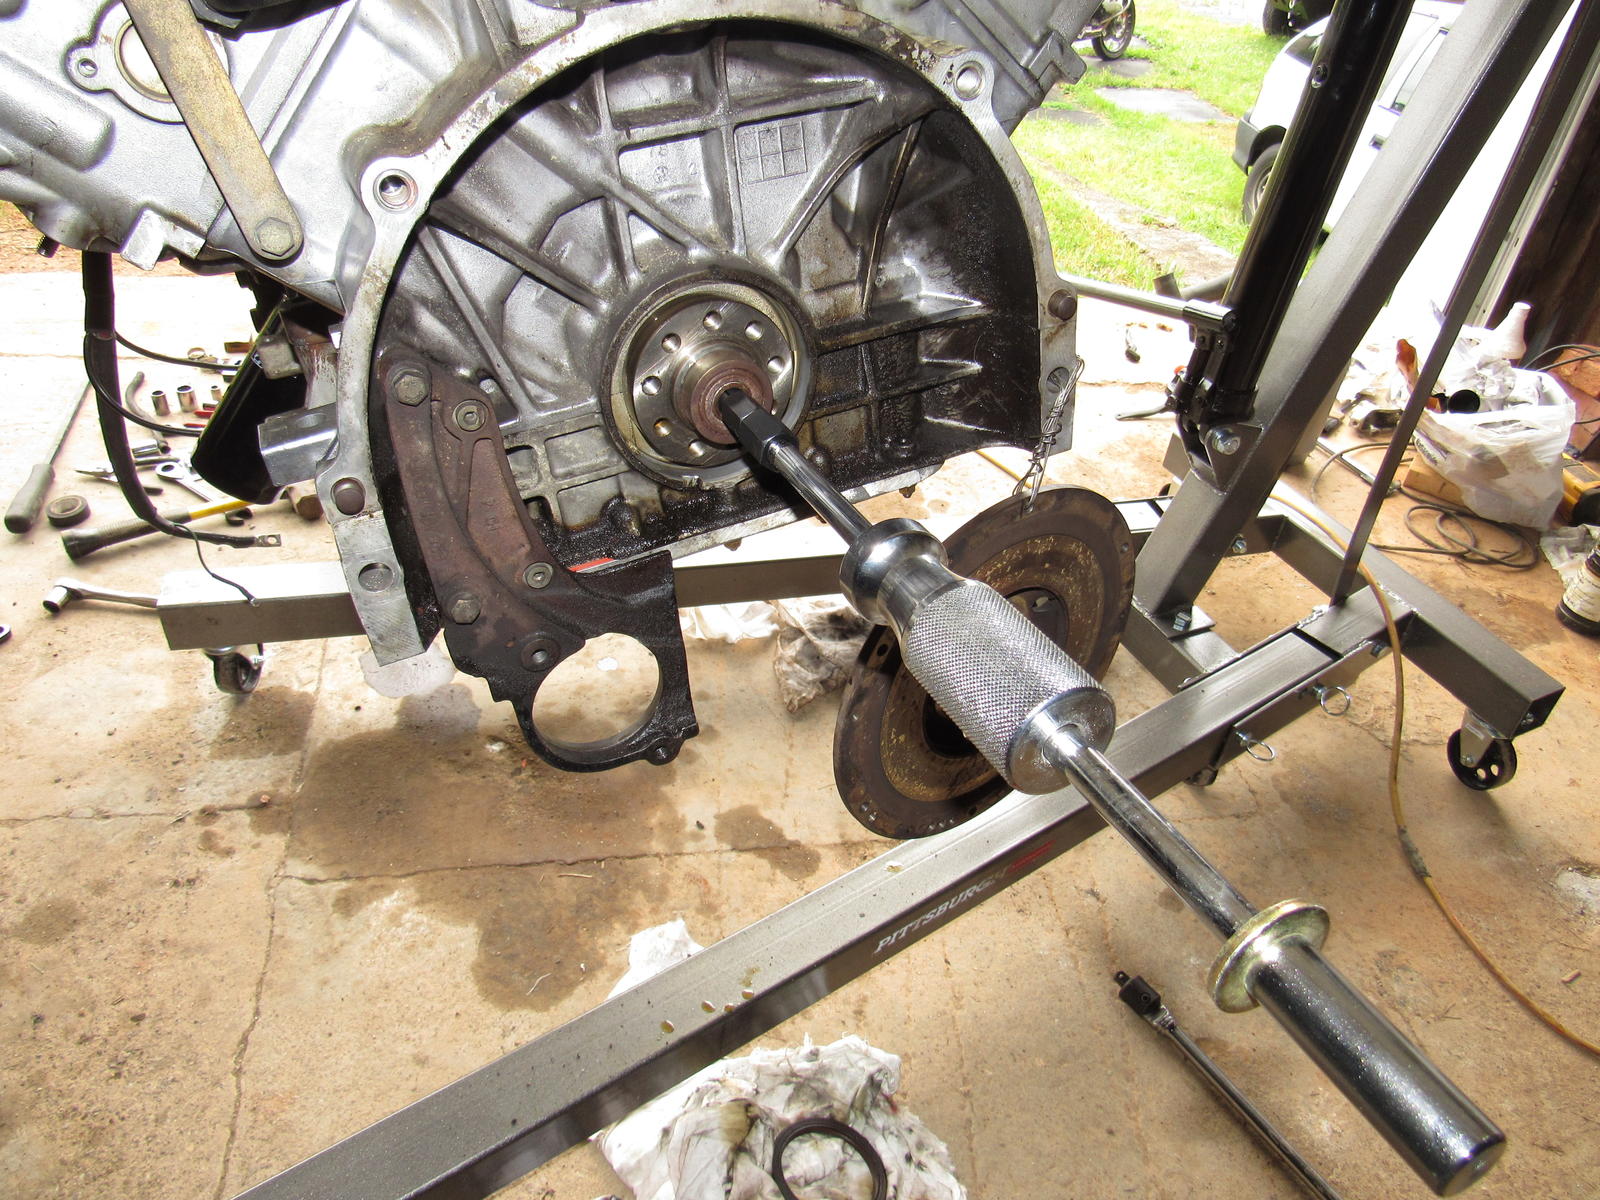
New seal and bearing:
Then I installed the headers but I had to grind down the second exhaust stud for clearance, I think they are longer than stock. As you may have read in the above earlier post I found that the headers interfere with the installation of the lower bell housing cover and as it turns out I mistakenly installed it.
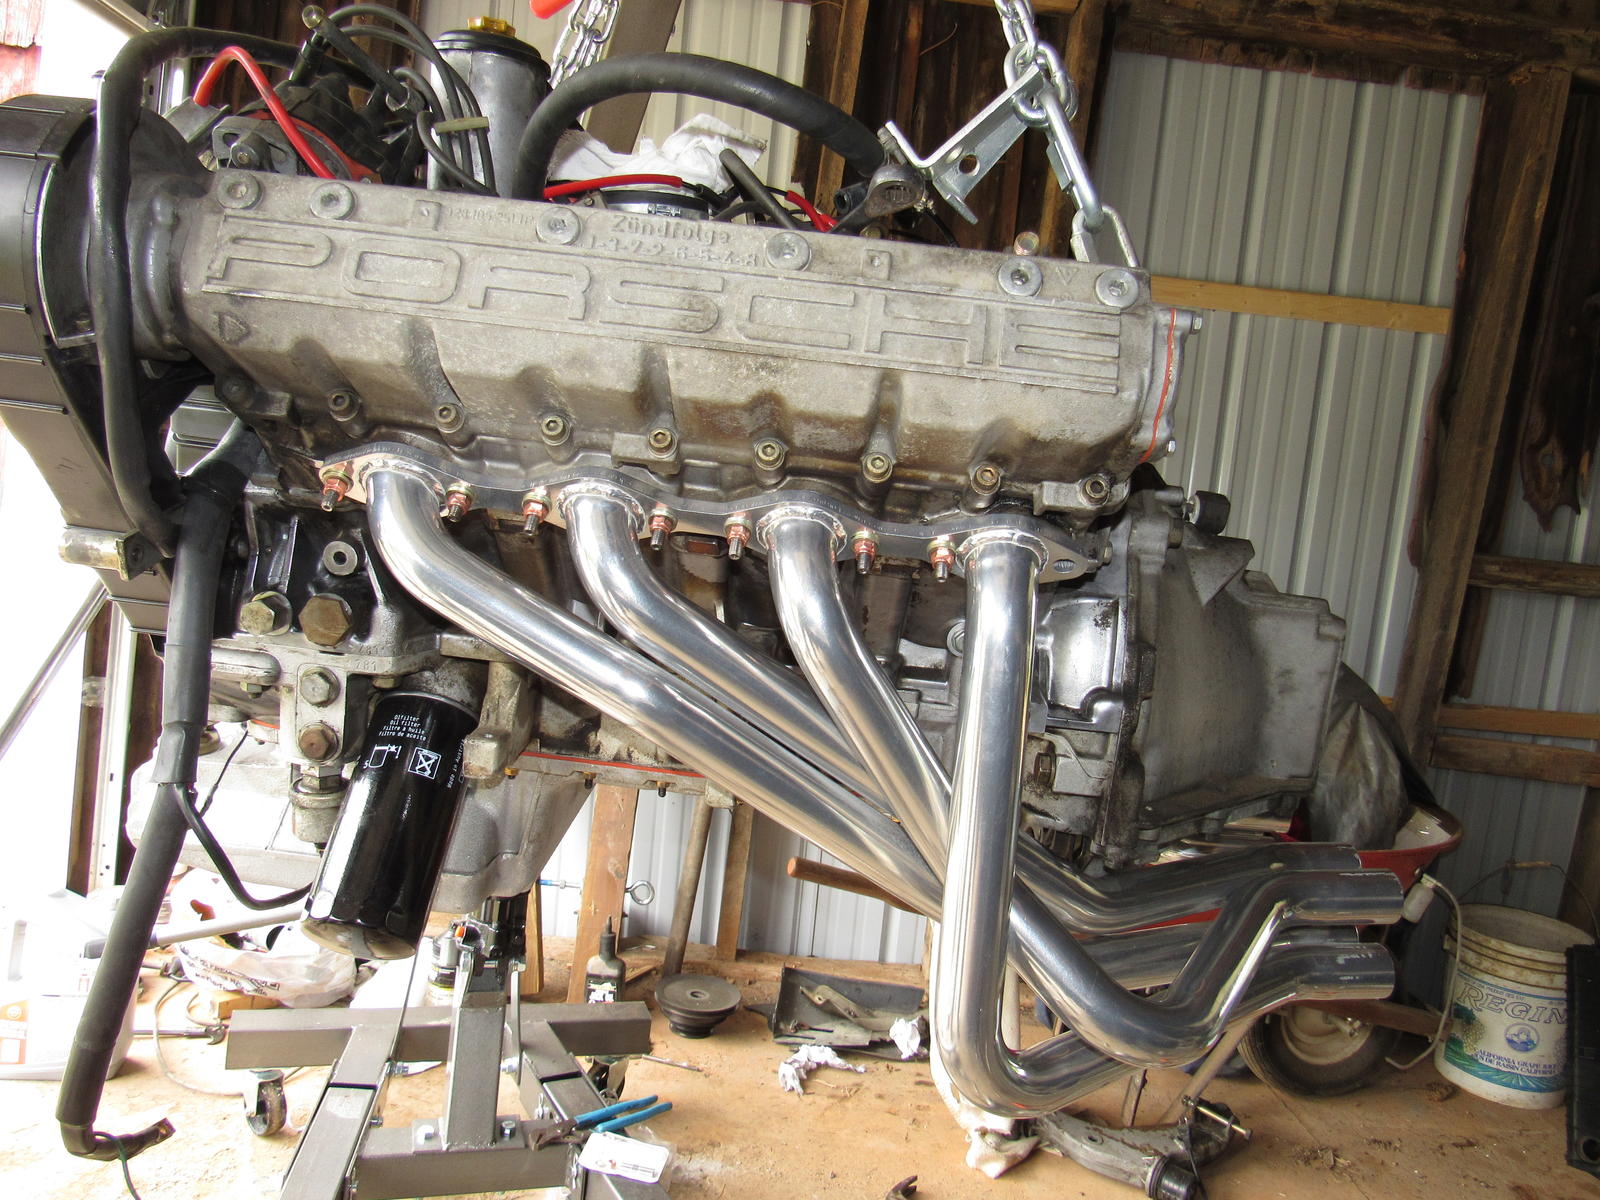
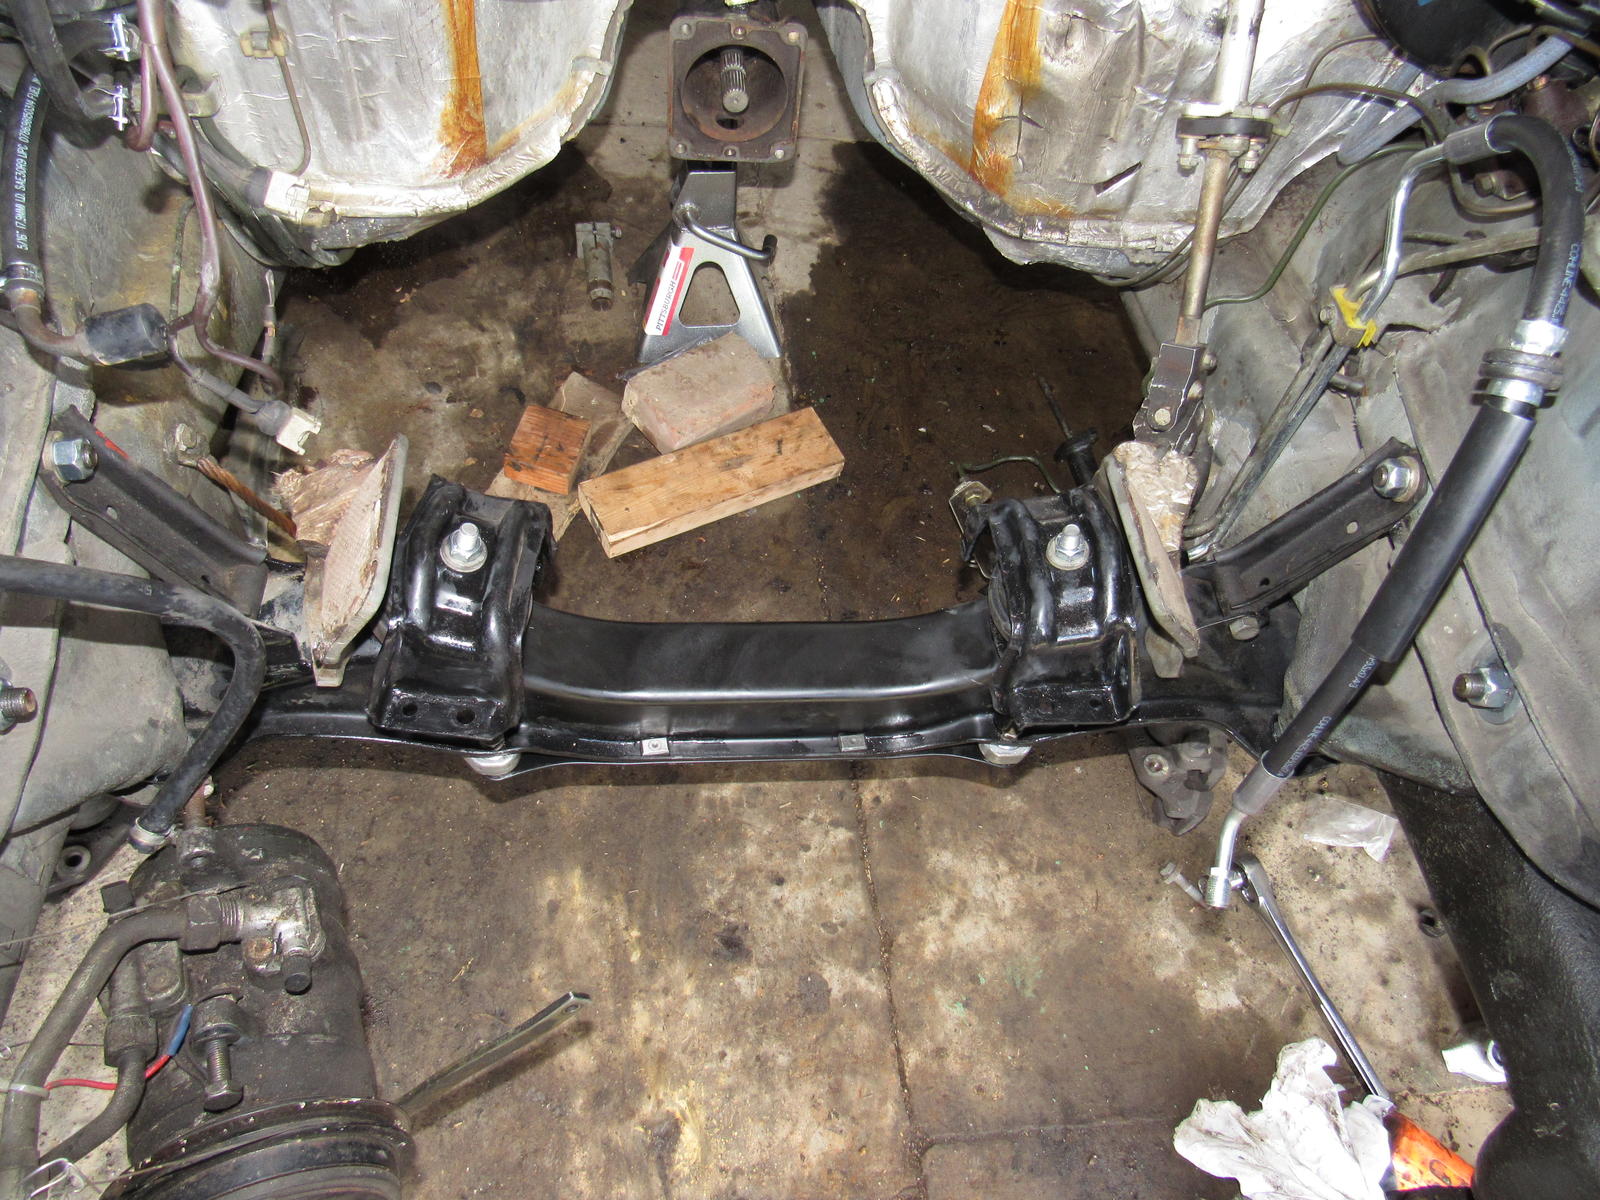
Now it was time to drop the engine in. I really should have bought a 2 ton shop crane for the extra reach, this one doesn't really cut it and I battled for hours trying to get the engine in till it dawned on me "how am I going to install the torque tube coupling with the lower bell housing on?" So the good news is that the headers have much more room to get at the exhaust studs with a wrench so it won't be a problem but a thunderstorm came through, it was getting dark and I don't have much for lighting so I called it a day.
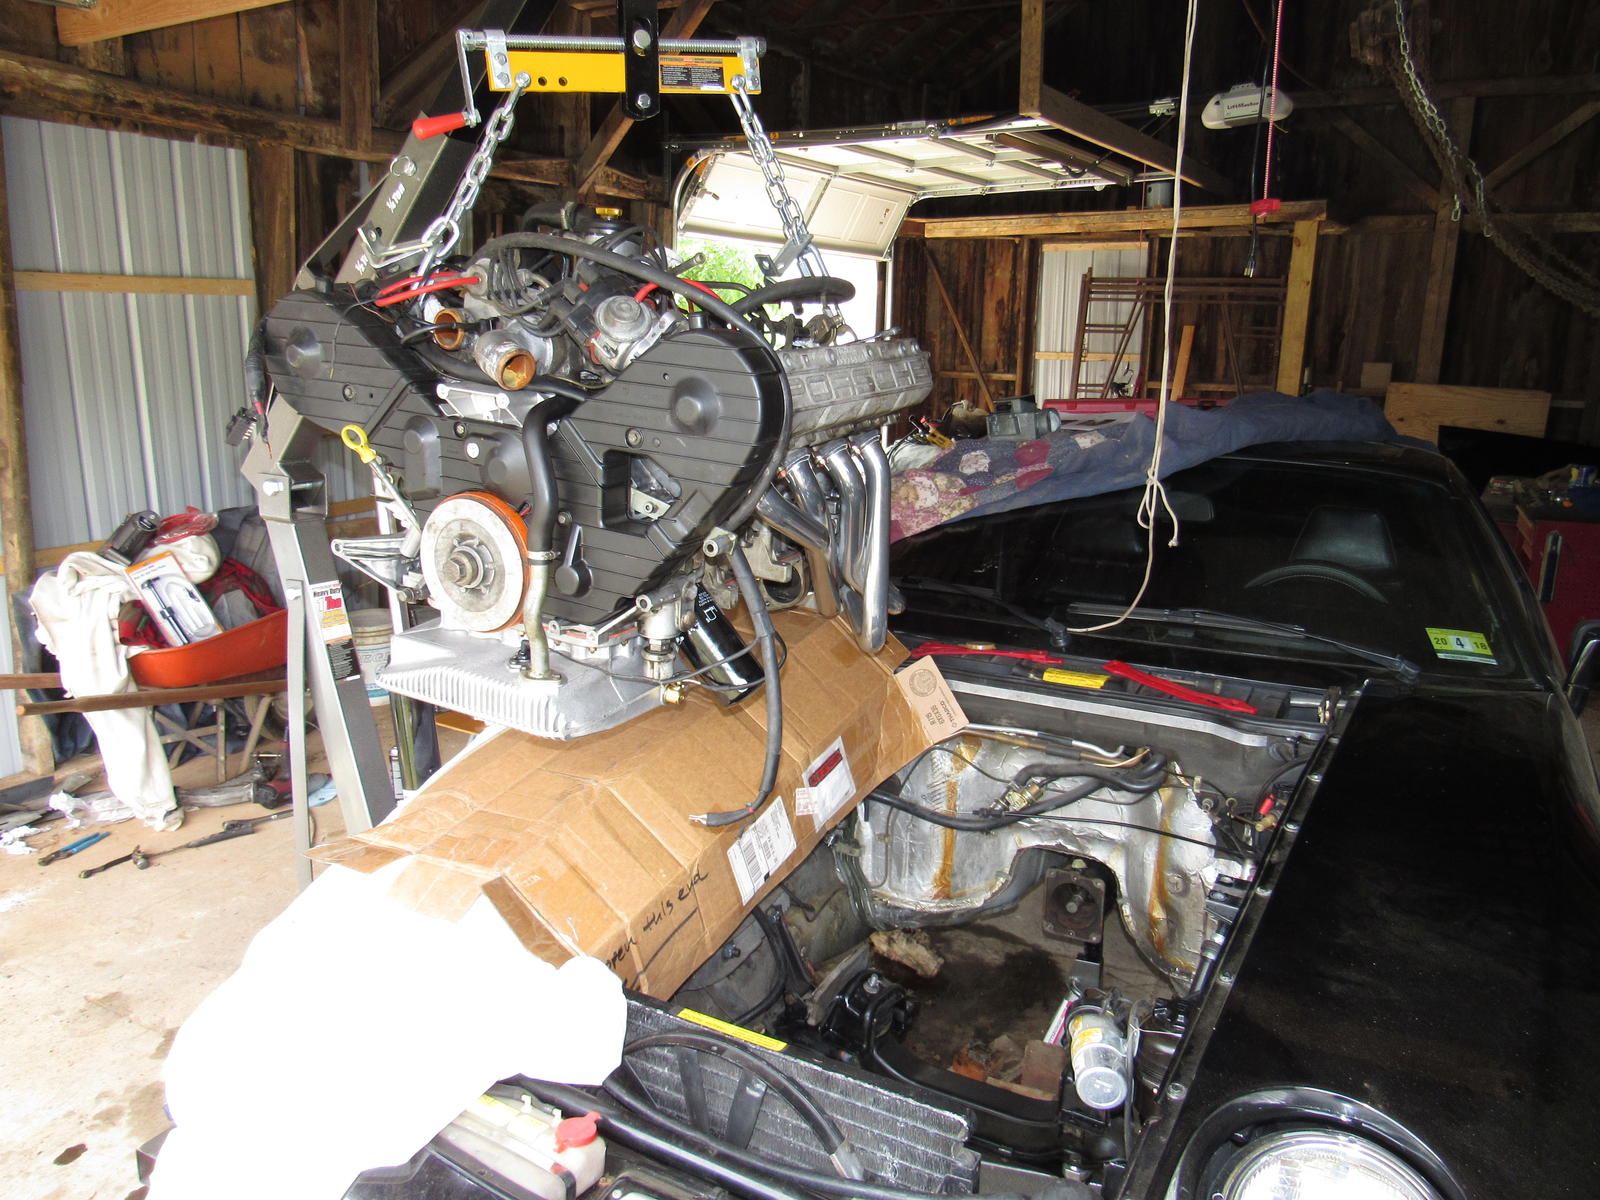
This is pretty much how I left it.
A few set backs but I would not learn anything if it was all easy
Then I replaced the rear main seal and pilot bearing, this is easy when you have the real tools for the job. The seal appeared to have been weeping oil and the bearing was a bit 'grindy' so well worth changing.
New seal and bearing:
Then I installed the headers but I had to grind down the second exhaust stud for clearance, I think they are longer than stock. As you may have read in the above earlier post I found that the headers interfere with the installation of the lower bell housing cover and as it turns out I mistakenly installed it.
Now it was time to drop the engine in. I really should have bought a 2 ton shop crane for the extra reach, this one doesn't really cut it and I battled for hours trying to get the engine in till it dawned on me "how am I going to install the torque tube coupling with the lower bell housing on?" So the good news is that the headers have much more room to get at the exhaust studs with a wrench so it won't be a problem but a thunderstorm came through, it was getting dark and I don't have much for lighting so I called it a day.
This is pretty much how I left it.
A few set backs but I would not learn anything if it was all easy
Last edited by Majestic Moose; 07-08-2017 at 12:34 AM.
06-28-2016, 11:05 PM
#56
Rennlist Member


For me it was electrical gremlins. First it was a never-ending dying battery story.
Love this thread. You're an inspiration.
Last edited by curtisr; 06-28-2016 at 11:24 PM.
06-29-2016, 10:58 AM
#57
Developer
When I'm installing headers, I shorten all the exhaust studs in the heads. Just makes it easier. But no matter - you are past that.
You only need to loosen the header on the right side (passenger side if LHD) to swing the header out a little at the bottom to get the lower bell housing in and out. Easily done from the bottom with no steering column on that side.
No need to remove it. Just about a 1/4" on all the nuts is enough.
You only need to loosen the header on the right side (passenger side if LHD) to swing the header out a little at the bottom to get the lower bell housing in and out. Easily done from the bottom with no steering column on that side.
No need to remove it. Just about a 1/4" on all the nuts is enough.
06-29-2016, 11:02 AM
#58
Developer
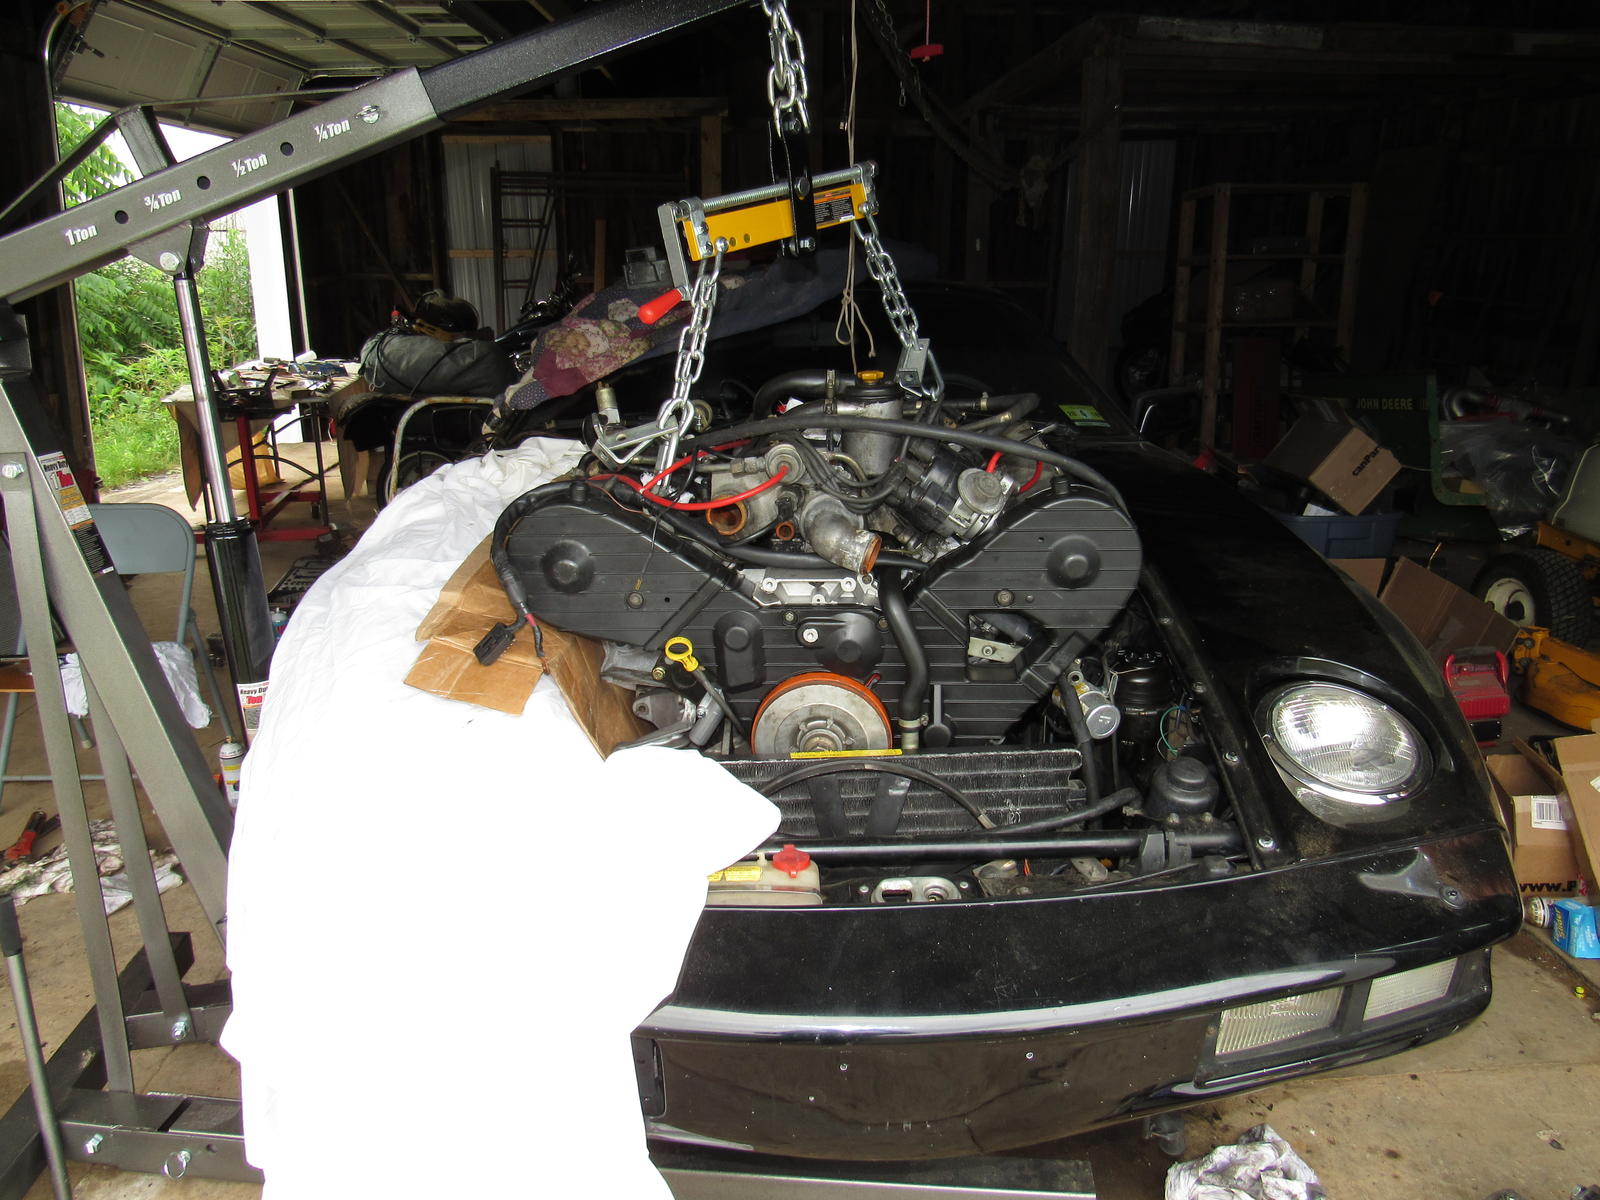
PS: When lifting the engine diagonally across the motor like that, the engine will have some yaw to it during installation as you can see, making alignment with the TT a bit of a bear.
Put a block of wood atop a floor jack and under the oil pan and you can easily level the motor out while you are under the car.
Put a block of wood atop a floor jack and under the oil pan and you can easily level the motor out while you are under the car.
 06-29-2016, 05:04 PM
#60
Burning Brakes
Thread Starter
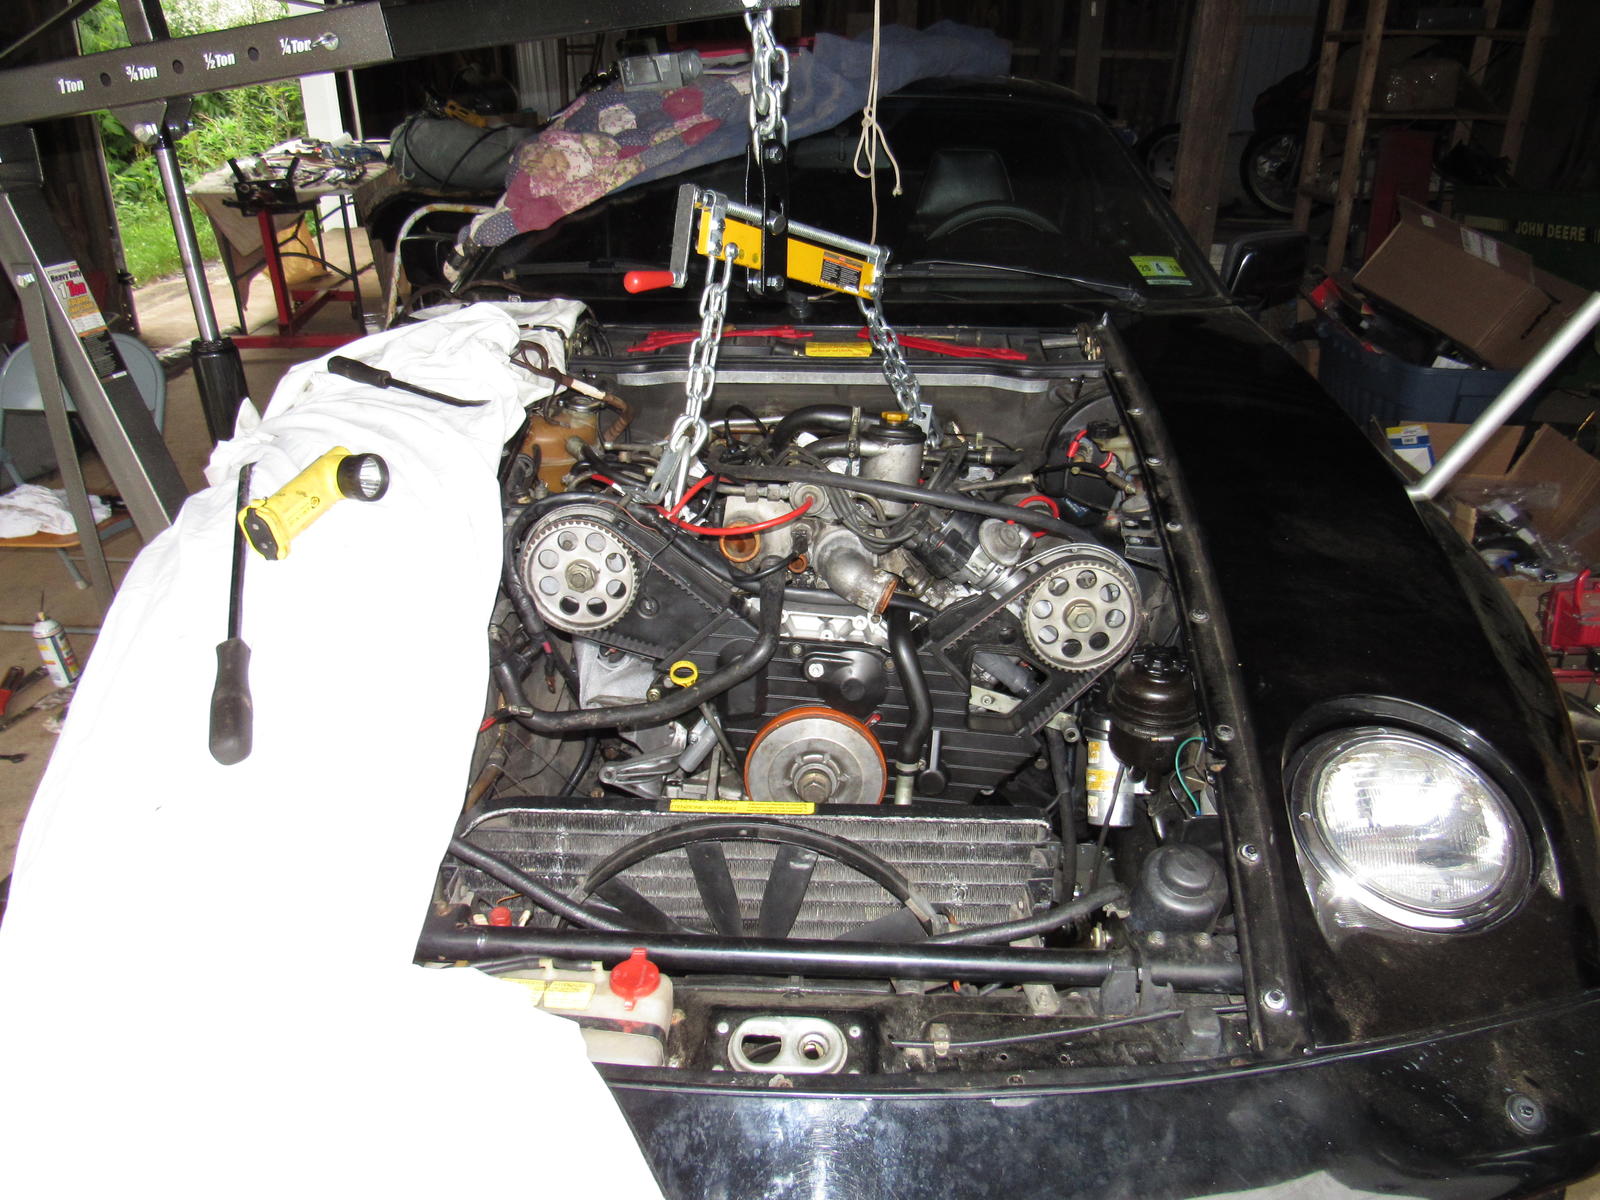
Carl Fausett you are 100% correct, I did loosen up the passenger side header before I quit for the day but I am glad to hear confirmation that I won't have to do the other side. The yaw and getting the angle front to back correct is a major headache. I did use a jack to try and level the engine on its descent but the oil pan was getting hung up on the engine mounts and the cam 'ears' on the cross brace mounting tabs. I did pass those hurdles though, literally mm by mm for fear of even scratching anything.
Mark R. that is why I removed the timing gear covers, its only one long 10mm bolt that holds them on each side and I did not want to risk cracking the plastic.
I have something wrong in my head because I can't wait for tomorrow night for round two
Mark R. that is why I removed the timing gear covers, its only one long 10mm bolt that holds them on each side and I did not want to risk cracking the plastic.
I have something wrong in my head because I can't wait for tomorrow night for round two

